Thankfully, nothing went wrong and I was able to do it myself fairly easily. I have only done one side as I spent most of Sunday sorting the garden and house exterior out, but will do the other side one evening this week now I know how easy it is.
For future reference, the main tools I used were a philips screw driver and a small flathead screwdriver. I have put a few steps below that others might find useful:
1. Door open, window down
2. Take off the screw on the door handle cover
3. Slide the cover forward a bit, it should then pull out fairly easily
4. Unplug the cable and rotate the clip on the door opening rod so you can unhook it
5. Take the speaker cover off, it just pulls off quite easily
6. Remove the 3 screws behind here that hold the cover to the door, but don't mistake these for the screws holding the speaker in
7. Remove the screw in the coin tray
8. Remove the wing mirror, it pops off but needs a bit more persuasion than the speaker cover
9. Undo the screws to the wing mirror, unplug the wires and remove wing mirror
10. There is a pull out clip just below the wing mirror cover as well, that needs to be pulled out also
11. Now you should be able to pull the door card off
12. Now you need to try and undo some of the clips starting at the wing mirror end
13. Using one of the screwdrivers put it underneath the trim from the inside of the car, next to clip and push up
14. Once you hear a pop, the clip is probably undone, repeat this process for 2 or 3 of the clips
15. Once you have done this many you should be able to grab the trim and pull it up to remove it, this may take a bit of force, mine removed ok but one of the clips did break in the process, no big deal as the new trims come with new clips
16. Grab the new trim and fitting it is an easy case of lining up the clips and pushing down
17. Now put everything back together
When I do the drivers side, I could take a picture of each stage, I might, we will see
The fact I did this without any problems, means anyone should be able to do it. I am really pleased that I managed to do this and it has given me confidence to try other things also.
I took a couple of pics as I went:
Everything in bits, I was a bit worried at this stage, in case I couldn't put it all back together haha

Tools and screws everywhere (in some kind of order so I knew what went where)

Finished result

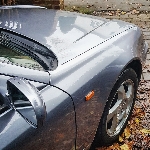
Shameless picture of the car before I put her back in the garage