
ufff I started to worry I'm geting blind. After your explanation I had to look again on pics and it really make a different. But at first time I just seen blue glass. I didn't even think about checking your van doors or sky.
It's a bit sh...ty you stick them on top of existing mirror glass. Are you sure you did install them like manufacturer said? If so are there available any other which will replace ori glass?
Congratulations to vtecmec for winning May/June's Lude Of The Month, with his DIY Turbo BB1 build.
>>> Click Here For Profile <<<

>>> Click Here For Profile <<<
Ratty's Type S...Jap Performance Magazine porno
-
RattyMcClelland

- Moderator
- Posts: 9208
- Joined: Wed Aug 04, 2010 10:02 pm
- My Generation: 5G
- PSN GamerTag: RattyMcClelland
- Location: Leicestershire
- Been thanked: 203 times
Re: Ratty's Thaipess - Paint protected shizzle
I agree, its a but iffy sticking ontop of glass.K30DPC wrote: It's a bit sh...ty you stick them on top of existing mirror glass. Are you sure you did install them like manufacturer said? If so are there available any other which will replace ori glass?
These arnt OEM and they are custom made bu ceaser at endless.
https://www.facebook.com/endlesspossibi ... go?fref=ts
I used 3m Automotive red tape. Its expensive but OEM companys use it to stick panels on. Its sticky stuff.

-
Donald

- Supporter 2015
- Posts: 9894
- Joined: Sun Jun 12, 2011 10:17 pm
- My Generation: 0G
- Location: Earth 3.0
- Been thanked: 7 times
Re: Ratty's Thaipess - Paint protected shizzle
Ah I didn't realise these stuck over the top. And obviously not less accurate in the sense of it changes what you're looking at unrecognisably, but it does distort the image - that's how it works. Like wideangle camera lenses etc. Still, nowhere near those horrendous bowl things caravan people have.
-
jjmartin349571
- Supporter 2016
- Posts: 3344
- Joined: Fri Feb 10, 2012 12:41 am
- My Generation: 4G
- XBOX GamerTag: jjm349571
- Location: Newhaven, East Sussex
- Contact:
My Accord had those clip on blind spot mirrors, I could see drokk all in themDonald wrote:Ah I didn't realise these stuck over the top. And obviously not less accurate in the sense of it changes what you're looking at unrecognisably, but it does distort the image - that's how it works. Like wideangle camera lenses etc. Still, nowhere near those horrendous bowl things caravan people have.
The new mirrors look sweet
Also, is there no way of separating the OEM glass from its holder and putting this in it's place?
-
RattyMcClelland
- Moderator
- Posts: 9208
- Joined: Wed Aug 04, 2010 10:02 pm
- My Generation: 5G
- PSN GamerTag: RattyMcClelland
- Location: Leicestershire
- Been thanked: 203 times
Re: Ratty's Type S - Positive Displacement pumped
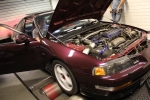
Let update this
With some supercharger goodness.
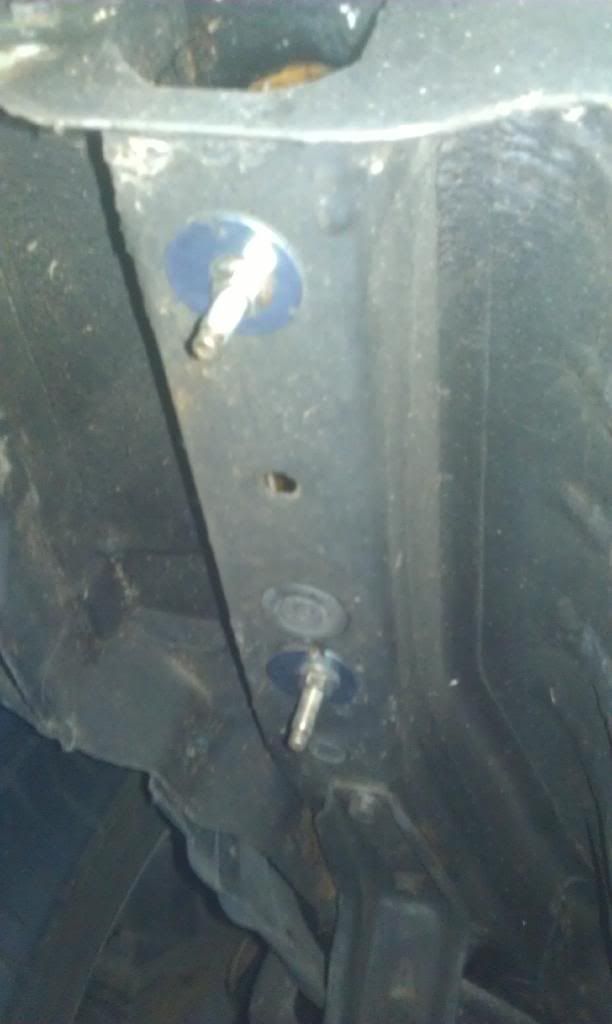
Battery Relocation
Take the battery tray and stick it in the boot. Can you see the 2 bolts?
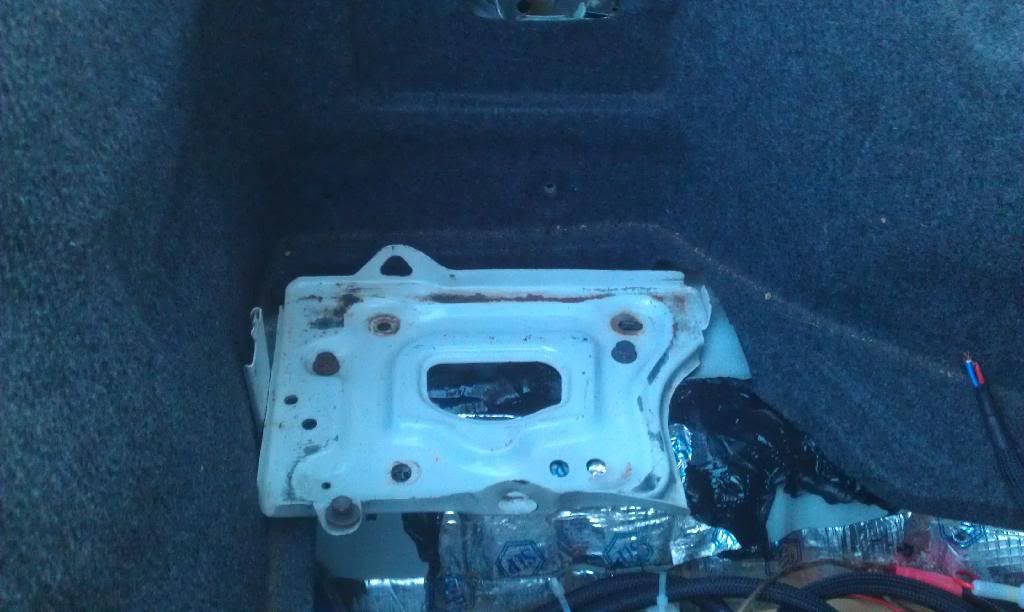
Big muffin Machine screws, some washers and big bolts through the chassis ready made holes. Honda knew the battery would be relocated in its life so they made it easy. Also i wanted the battery to the oppoiste side to myself in the drivers seat.
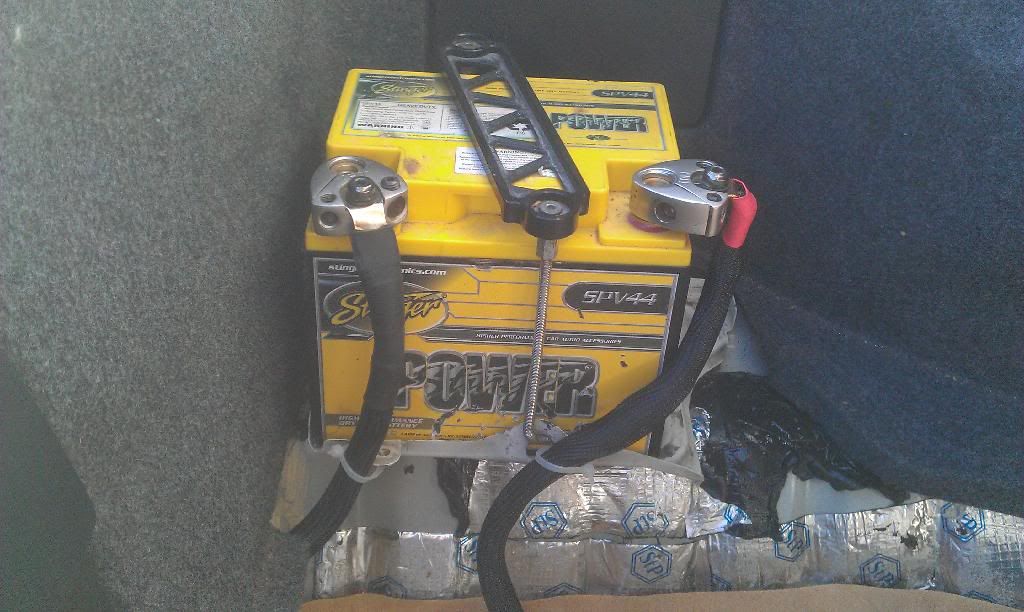
Battery
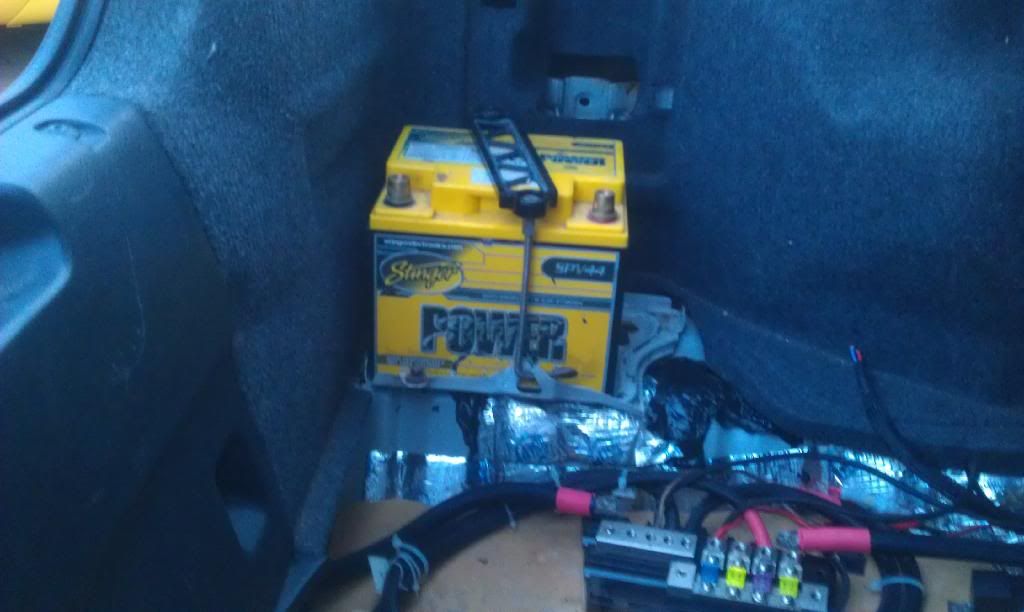
This is a battery cover from My VW T5. Nice fit. I need one with a fully enclosed lid etc.

Connected

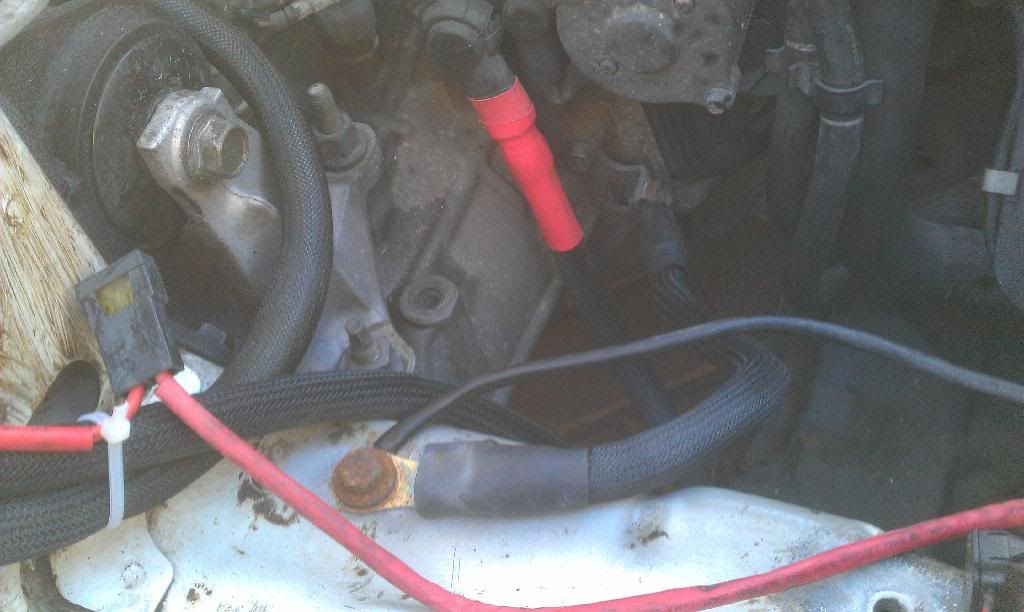
0awg cable runs through the amp distribution block to the main fuse then all the way to the engine bay.
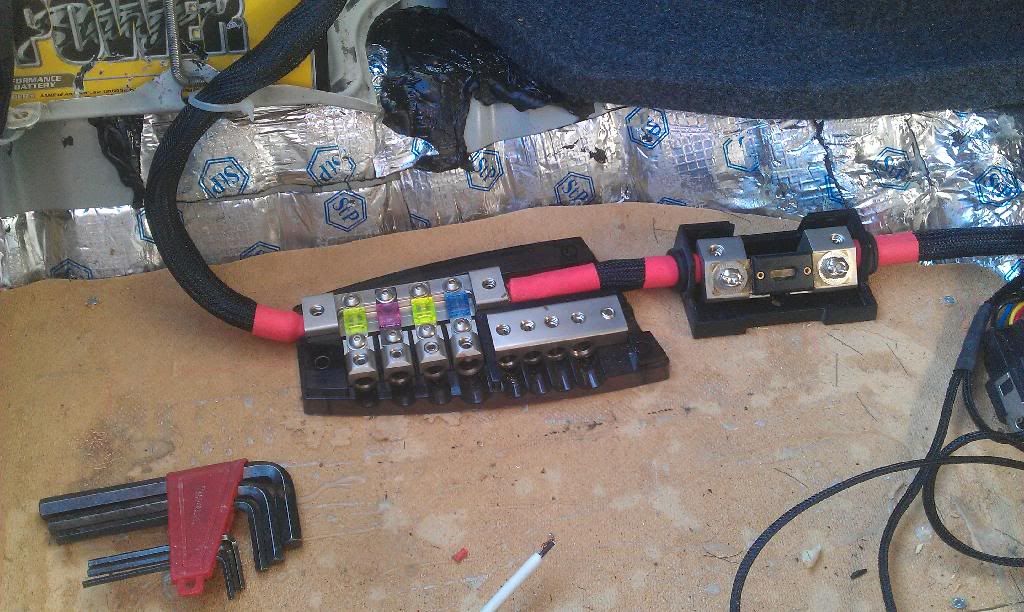

The other side in the engine bay is also fused. SO fused at both ends since current on the lude goes both ways. Then the cable is divided to the starter motor and the main fuse box. Also my HIDs are connect and fused.
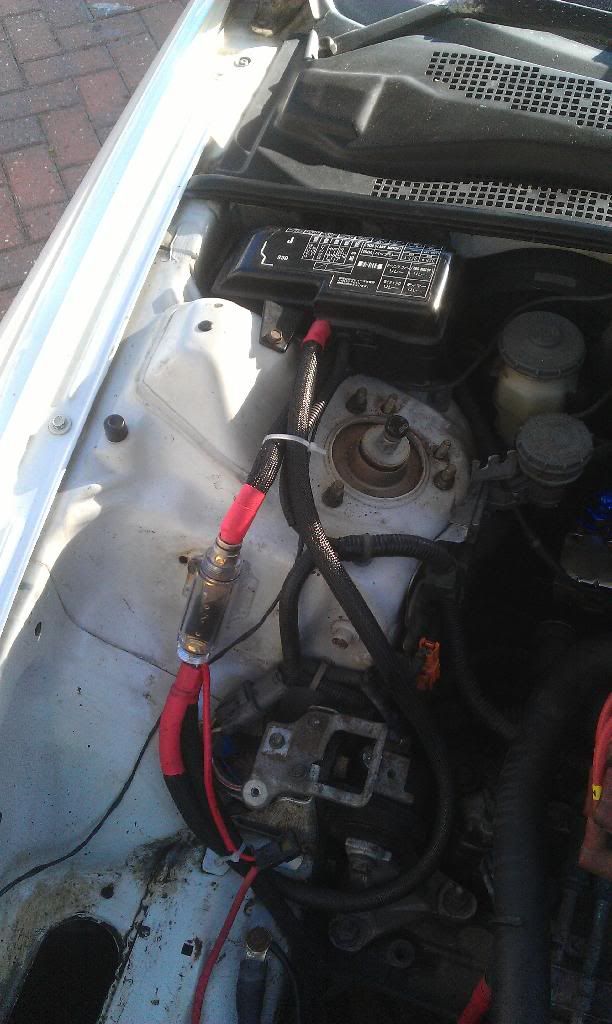

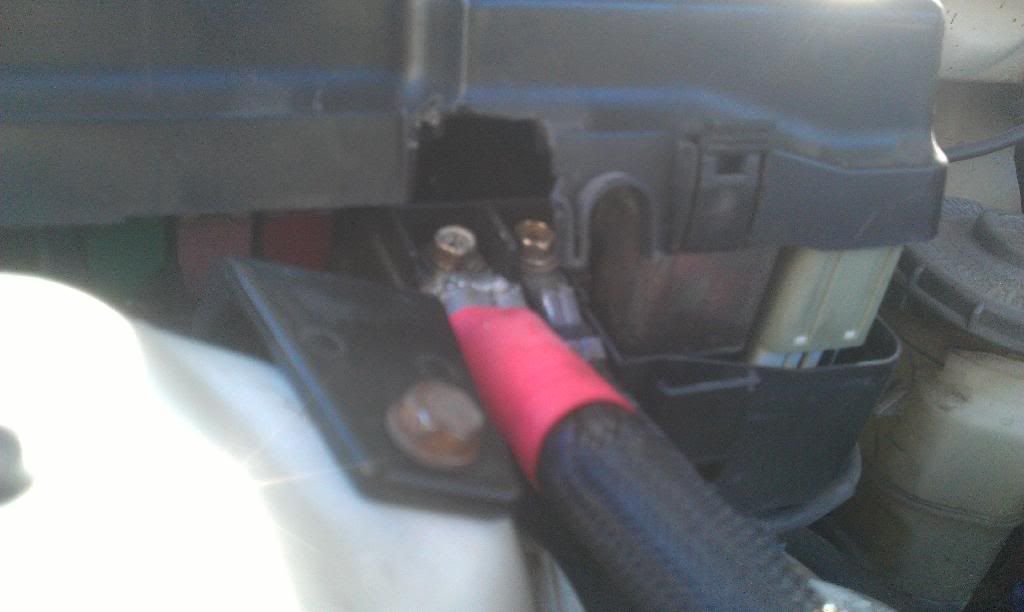
Engine block earth on sanded metal
With some supercharger goodness.
Battery Relocation
Take the battery tray and stick it in the boot. Can you see the 2 bolts?

Big muffin Machine screws, some washers and big bolts through the chassis ready made holes. Honda knew the battery would be relocated in its life so they made it easy. Also i wanted the battery to the oppoiste side to myself in the drivers seat.

Battery

This is a battery cover from My VW T5. Nice fit. I need one with a fully enclosed lid etc.

Connected


0awg cable runs through the amp distribution block to the main fuse then all the way to the engine bay.


The other side in the engine bay is also fused. SO fused at both ends since current on the lude goes both ways. Then the cable is divided to the starter motor and the main fuse box. Also my HIDs are connect and fused.


Engine block earth on sanded metal

-
RattyMcClelland
- Moderator
- Posts: 9208
- Joined: Wed Aug 04, 2010 10:02 pm
- My Generation: 5G
- PSN GamerTag: RattyMcClelland
- Location: Leicestershire
- Been thanked: 203 times
Re: Ratty's Type S - Positive Displacement pumped
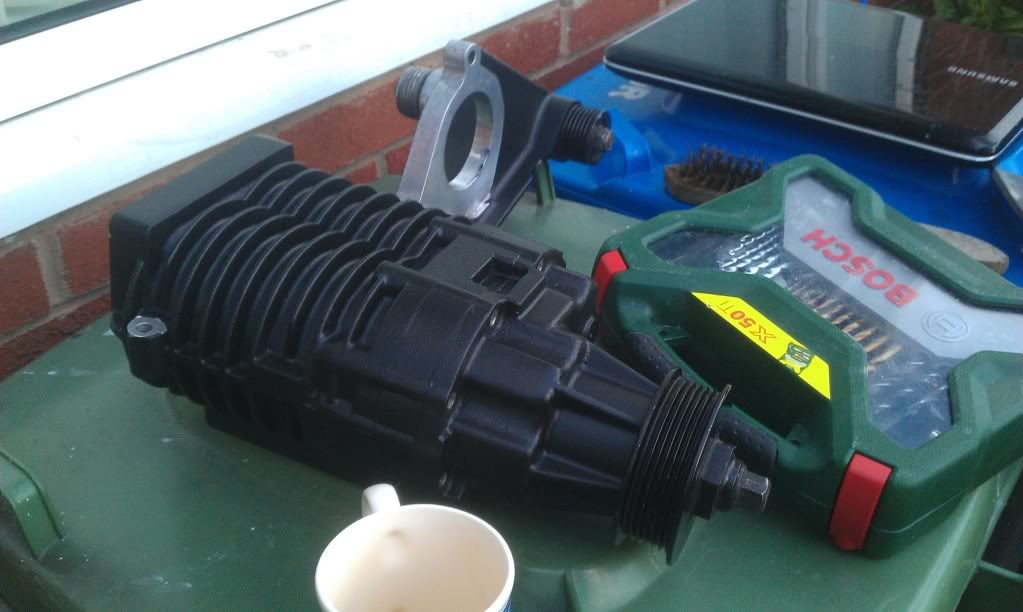
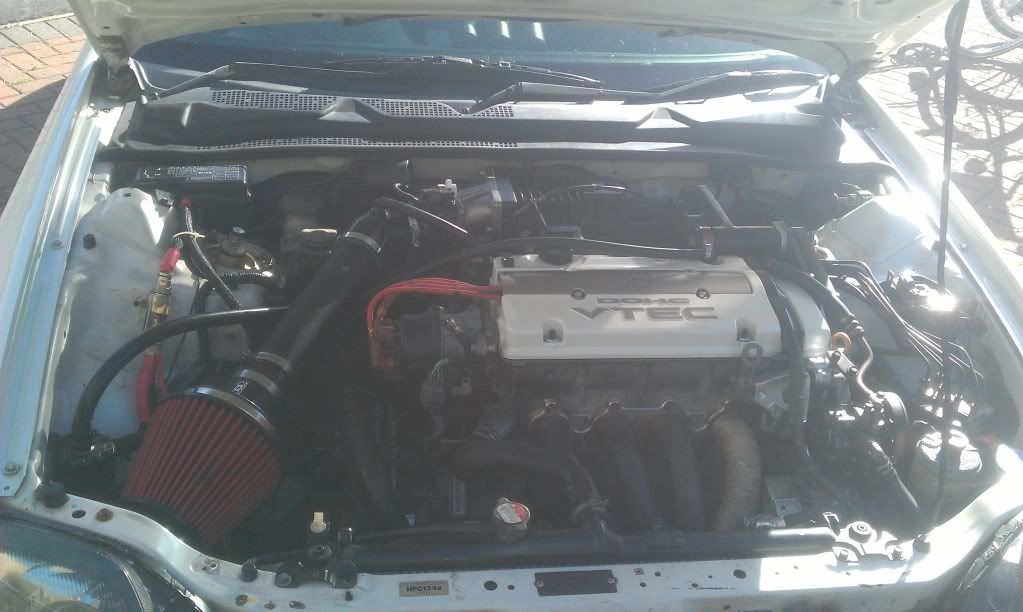
The Supercharger and related shizzelry
One stripped and etched charger
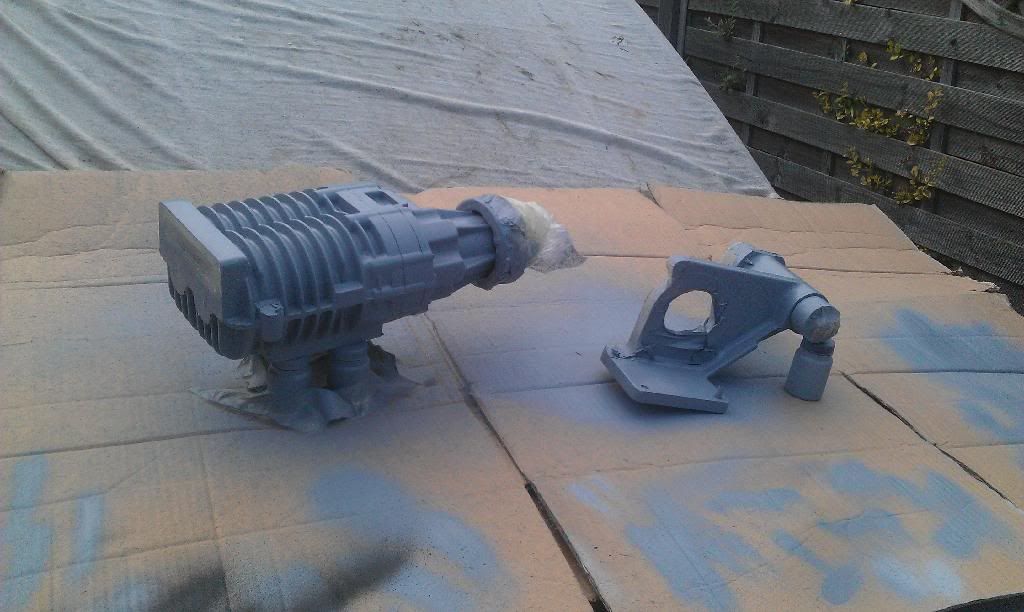
Texture painted
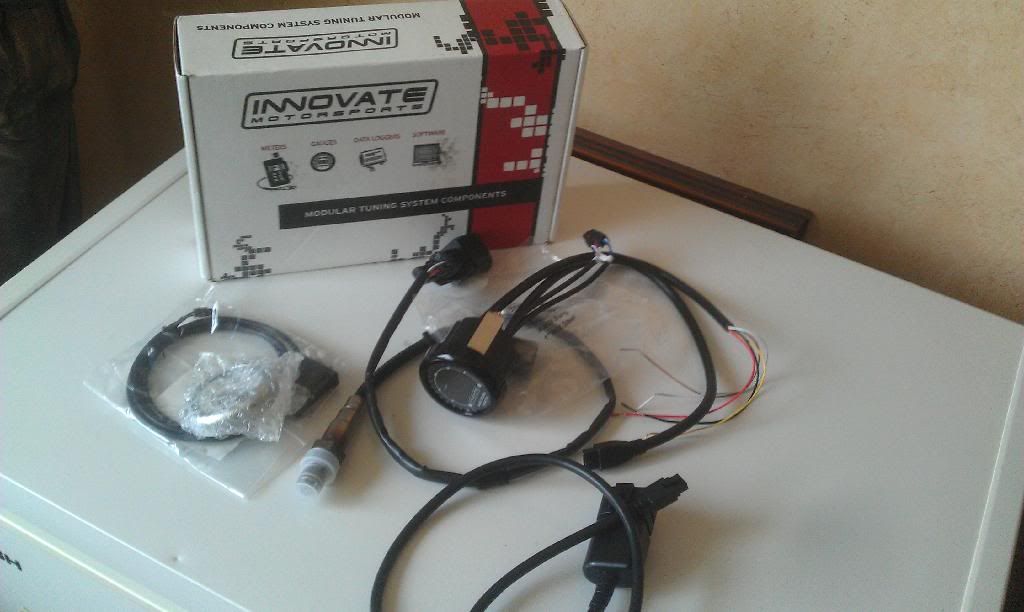
Innovate MTX-L wideband o2 sensor and innovate boost and oil gauges not pictures.
HRC fuel pump 290lph.

Greddy E manage Ultimate & Boomslang plug and play harness with air temp and coolant temp options
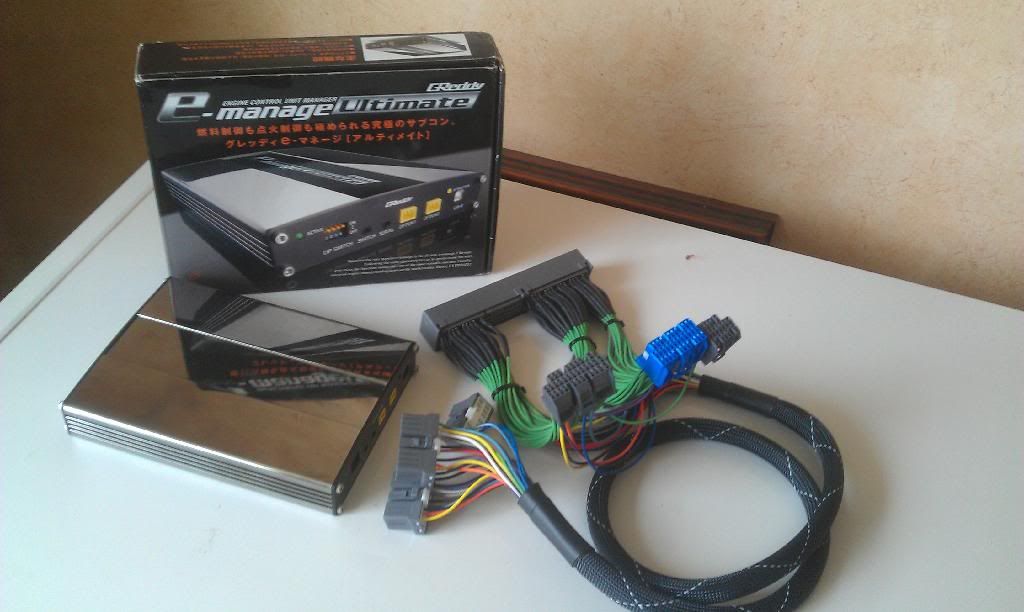
Greddy E-Manage boost sensor so the GEMU can see boost/vacuum & the A/F adapter to the GEMU can see the A/F.
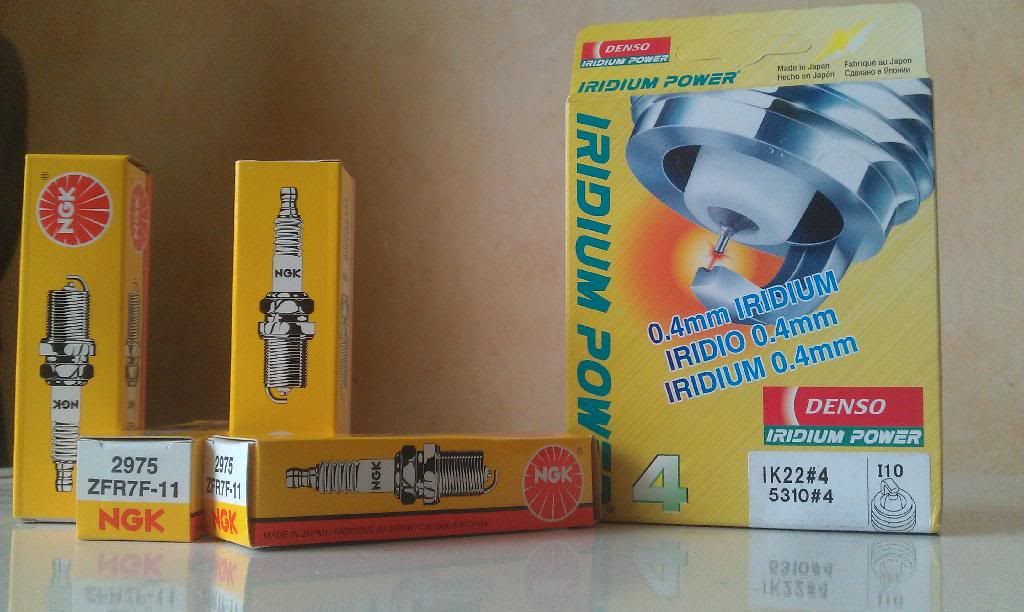
One step colder copper and iridium spark plugs.
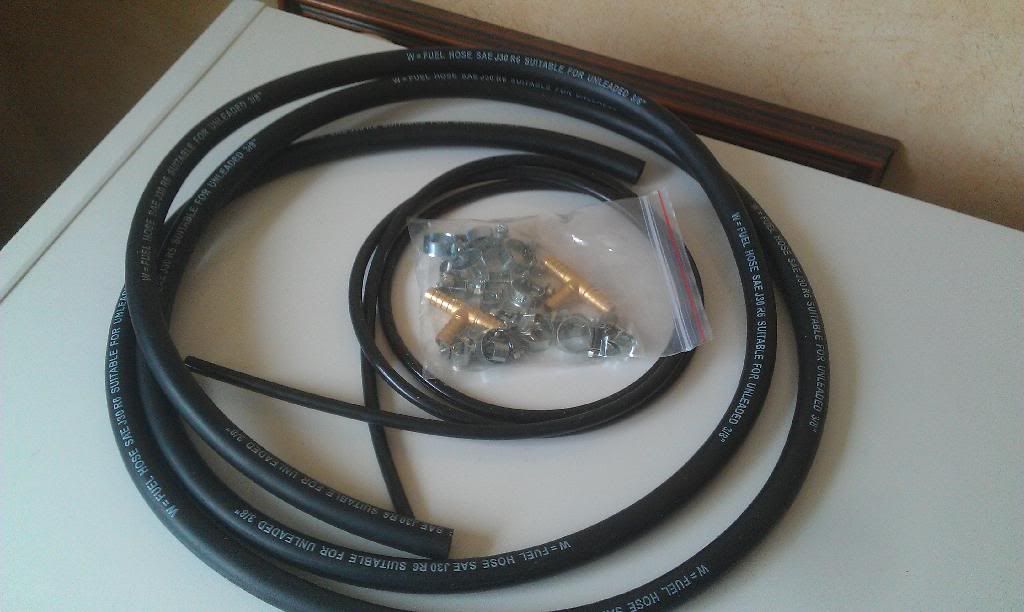
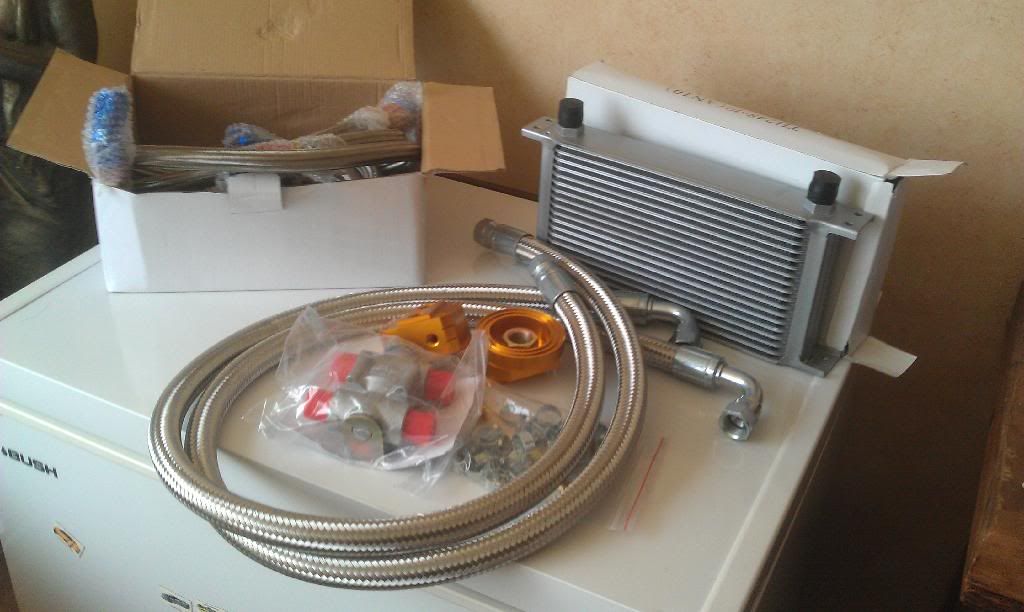
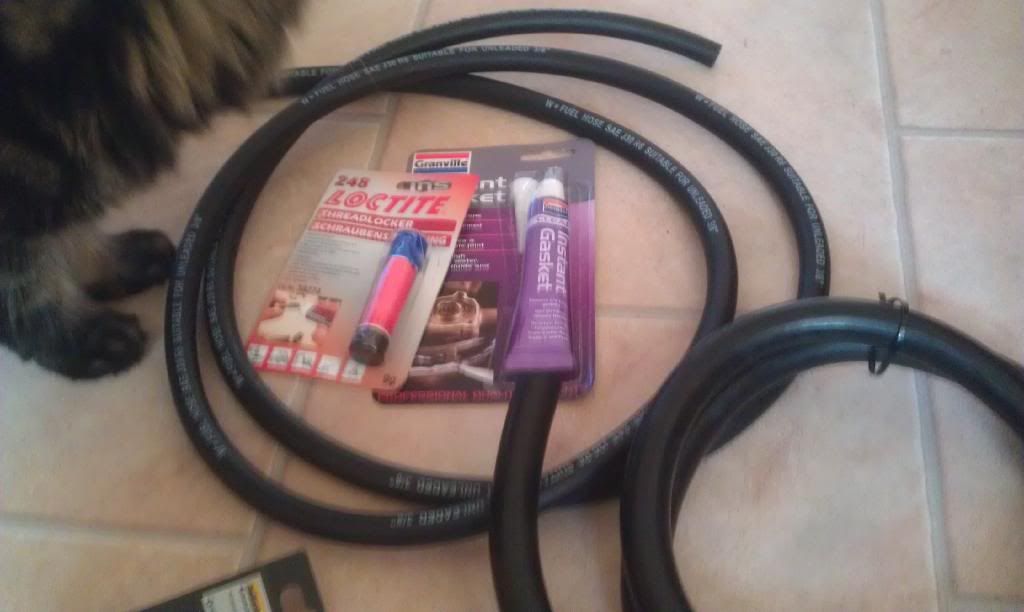
Various hoses and clamps etc
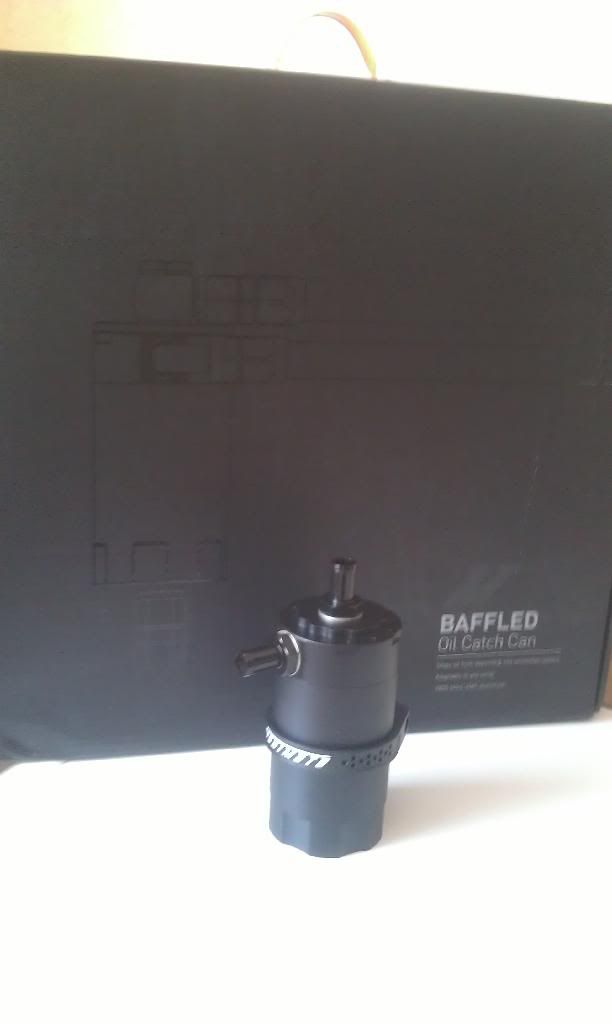
Mishimoto Baffeled catch tank. WELLL EXPENSIVE
Oil filter relocation and oil cooler. I have ended up not using this.
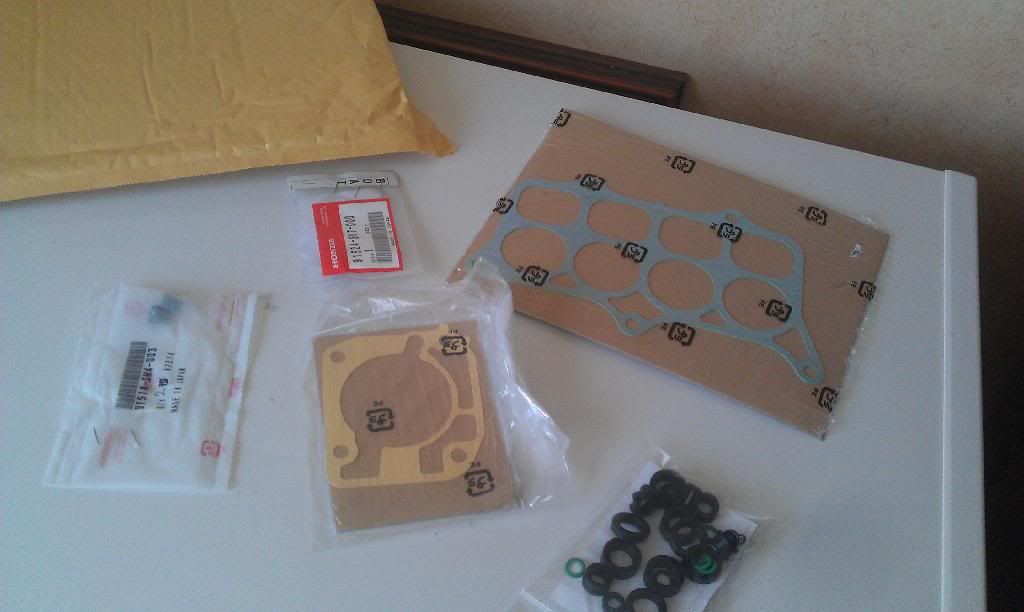
Gaskets etc
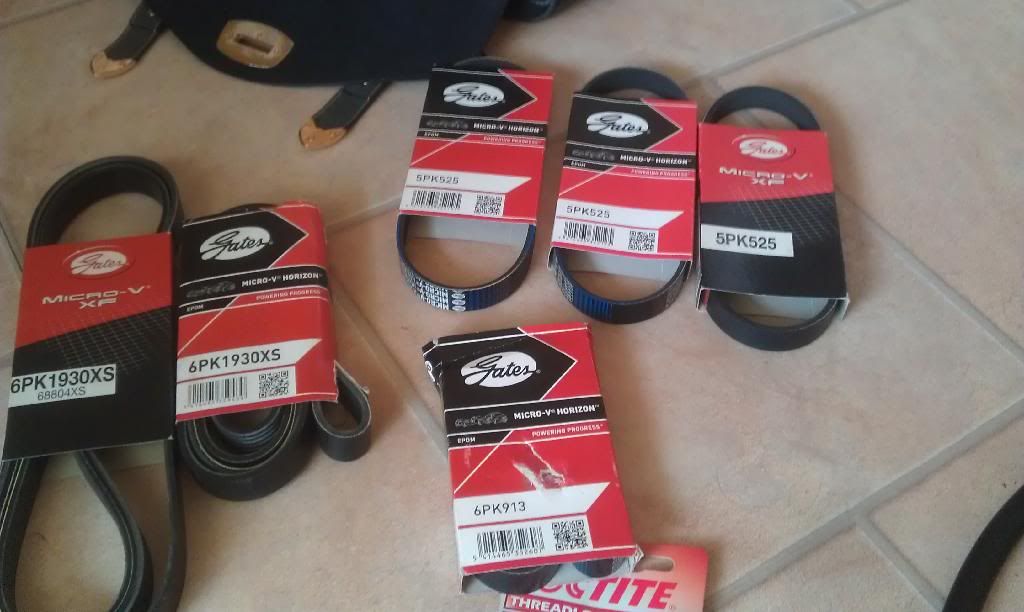
Various gates belts due to removing the A/C and not sure on what belt size to use. 1803 is the end belt required.
More hoses and thread lock & cat feet
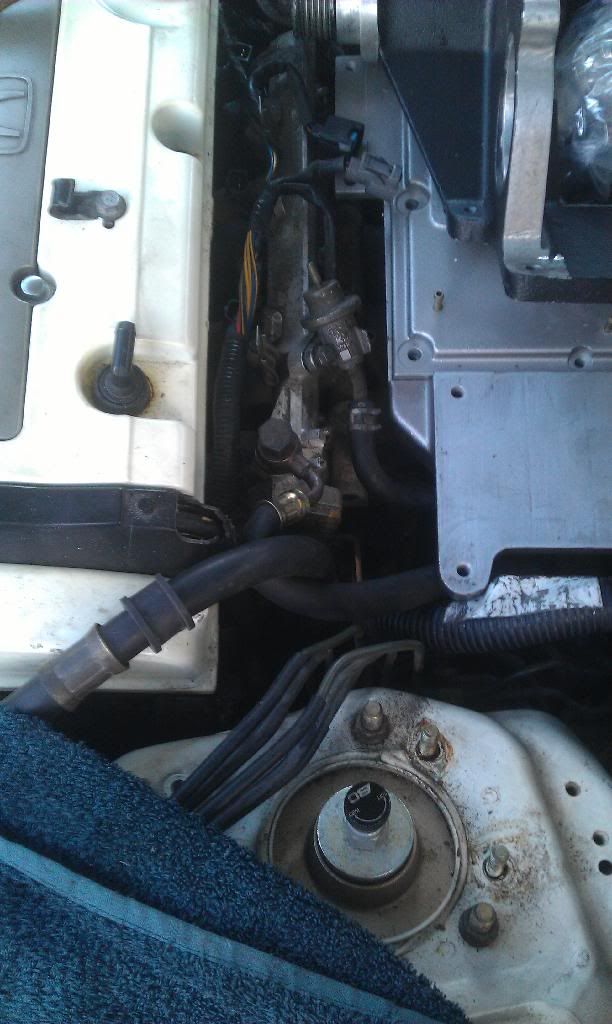
I 1st installed the fuel pump. Pretty easy but it isnt a direct fit. But its something you can retofit there and then with no additional tools but alot of swearing.
The fuel pump is pretty loud. You can definately hear it. To me thats reassuring since i always know the pump has primed. But you can hear it pumping during idle.
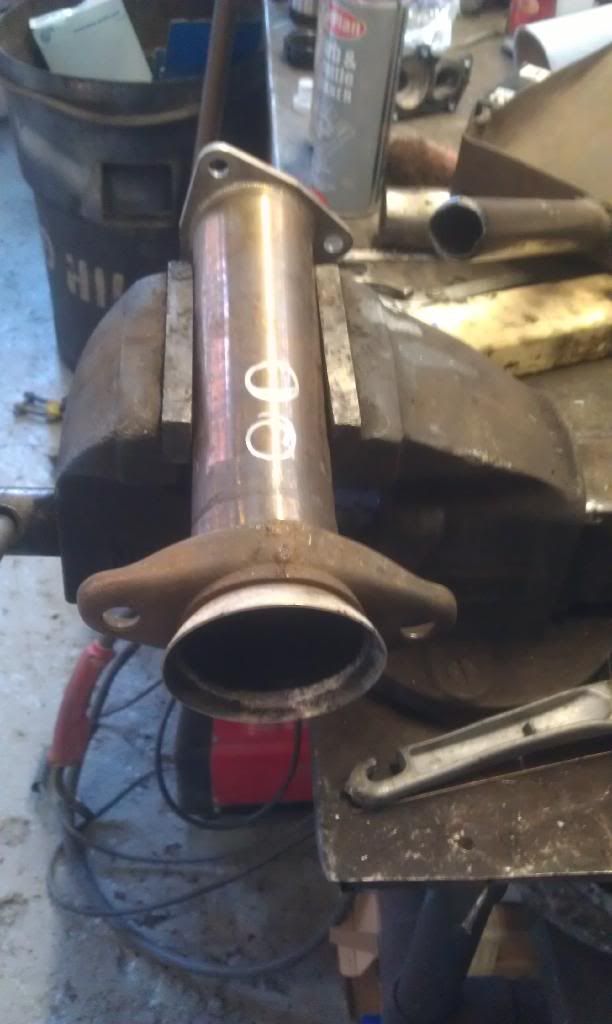
I took my decat to a mechanic who welded my MTX-L oxygen sensor bung and we installed the wideband.
One stripped and etched charger

Texture painted

Innovate MTX-L wideband o2 sensor and innovate boost and oil gauges not pictures.

HRC fuel pump 290lph.

Greddy E manage Ultimate & Boomslang plug and play harness with air temp and coolant temp options

Greddy E-Manage boost sensor so the GEMU can see boost/vacuum & the A/F adapter to the GEMU can see the A/F.
One step colder copper and iridium spark plugs.

Various hoses and clamps etc

Mishimoto Baffeled catch tank. WELLL EXPENSIVE

Oil filter relocation and oil cooler. I have ended up not using this.

Gaskets etc

Various gates belts due to removing the A/C and not sure on what belt size to use. 1803 is the end belt required.

More hoses and thread lock & cat feet

I 1st installed the fuel pump. Pretty easy but it isnt a direct fit. But its something you can retofit there and then with no additional tools but alot of swearing.
The fuel pump is pretty loud. You can definately hear it. To me thats reassuring since i always know the pump has primed. But you can hear it pumping during idle.
I took my decat to a mechanic who welded my MTX-L oxygen sensor bung and we installed the wideband.

-
RattyMcClelland
- Moderator
- Posts: 9208
- Joined: Wed Aug 04, 2010 10:02 pm
- My Generation: 5G
- PSN GamerTag: RattyMcClelland
- Location: Leicestershire
- Been thanked: 203 times
Re: Ratty's Type S - Positive Displacement pumped
Installing
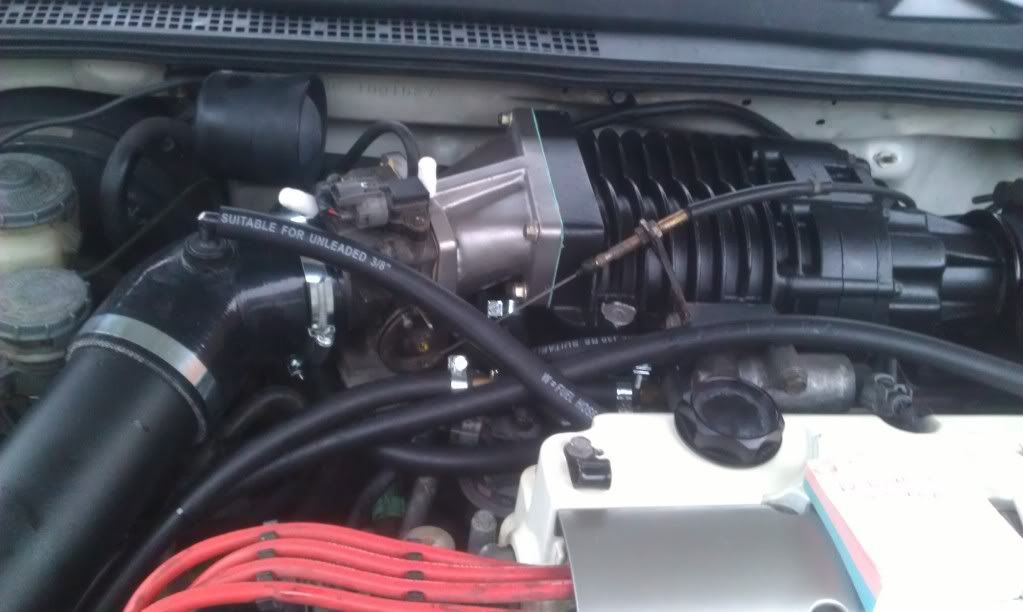
TB off
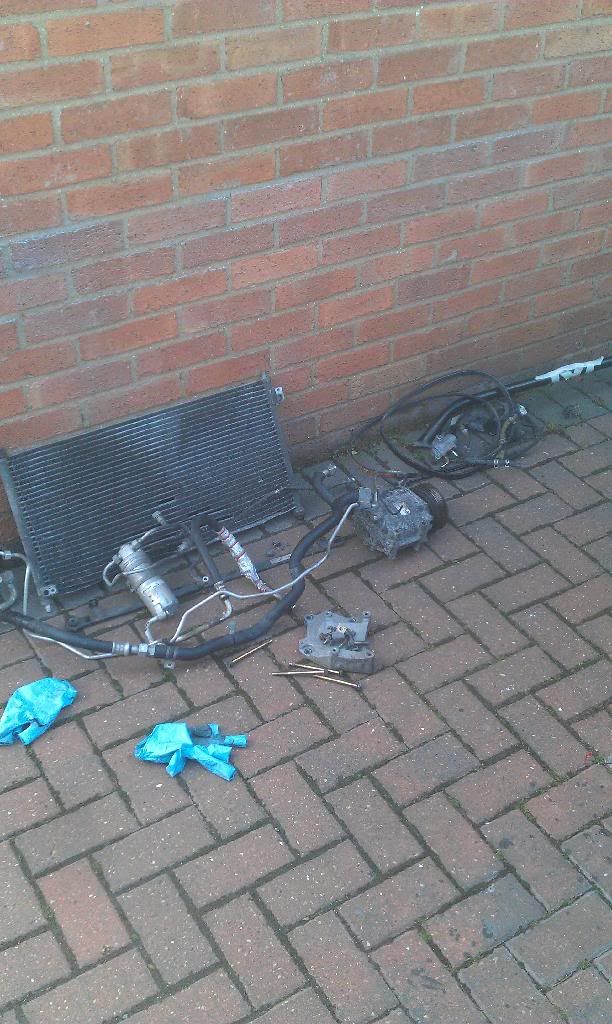
AC out. I even stripped out all the evapourater housing gubbings and sealed the holes through the firewall.
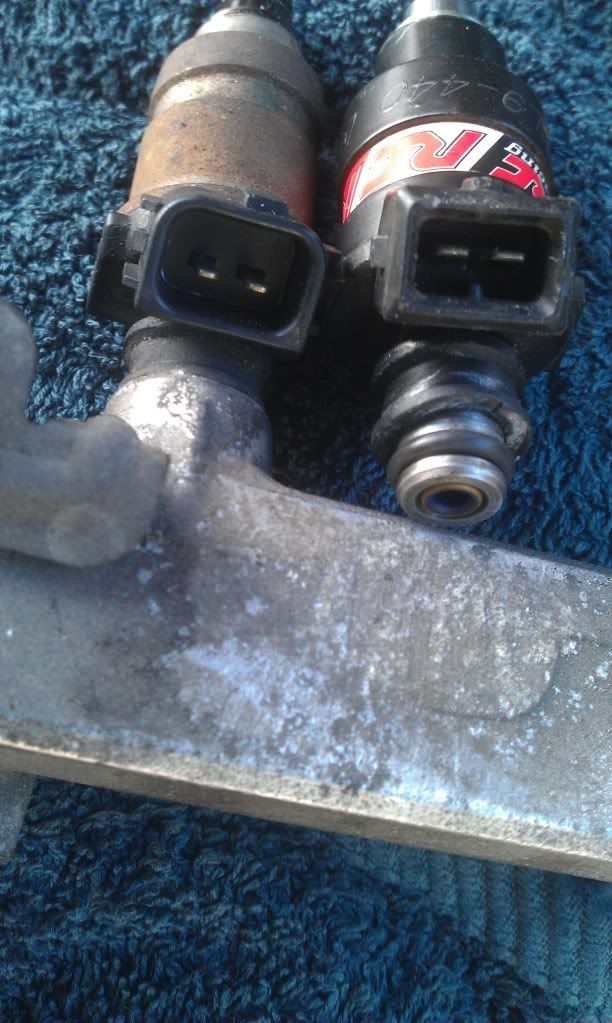
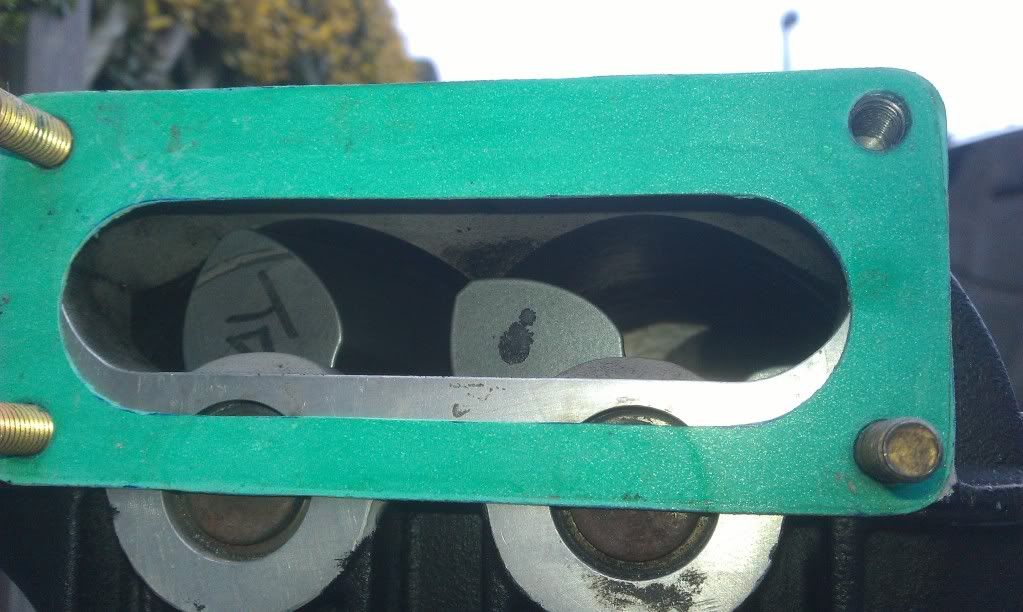
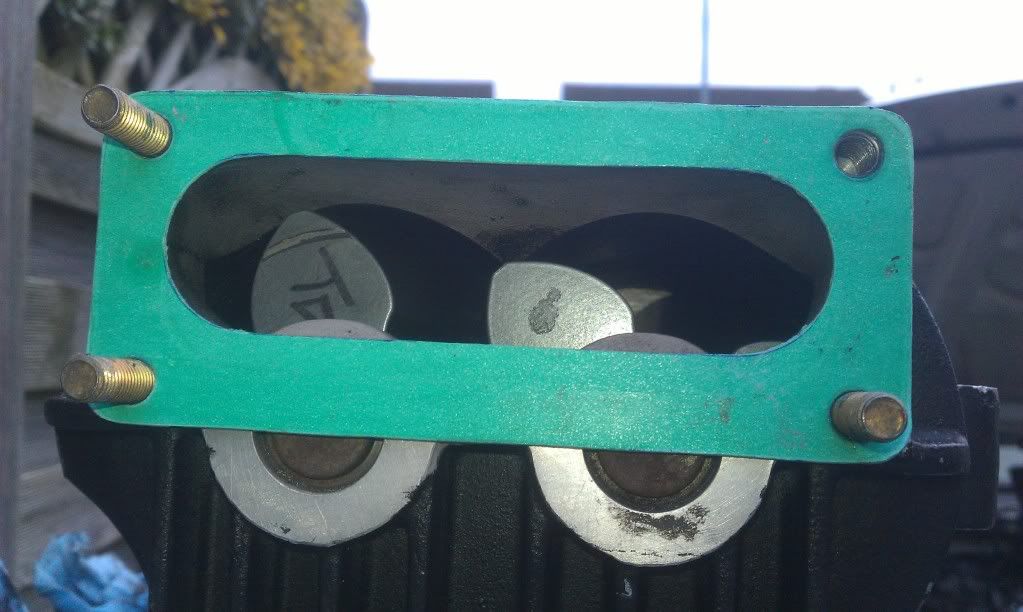
Injector plug differences
Upper intake plenum off and this is how i scrapped off the OEM gasket
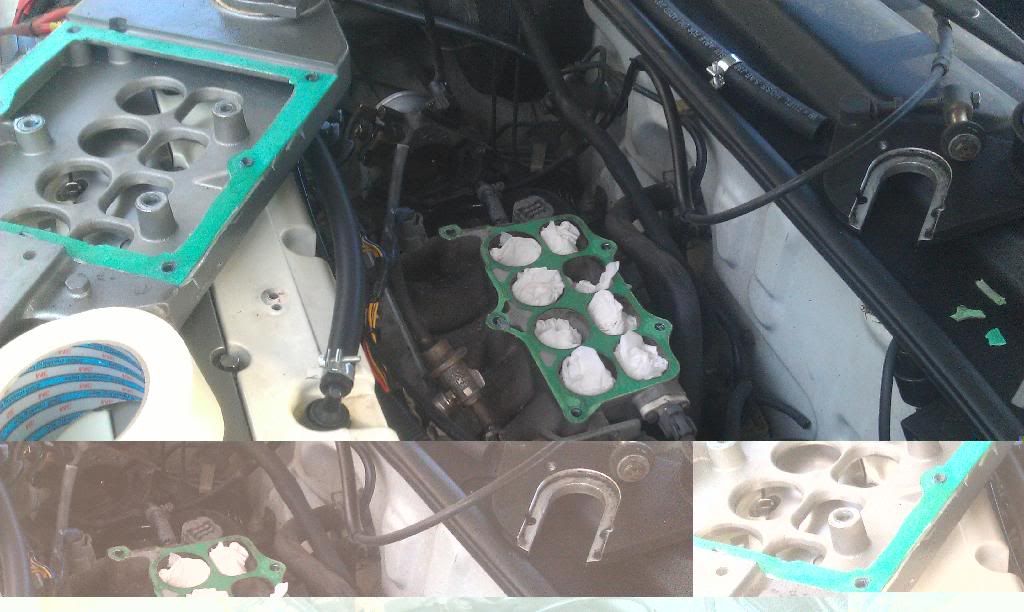
After
After alot of vacuum leaks this is how its finally sealed.
Klingerseal gasket and some instant gasket
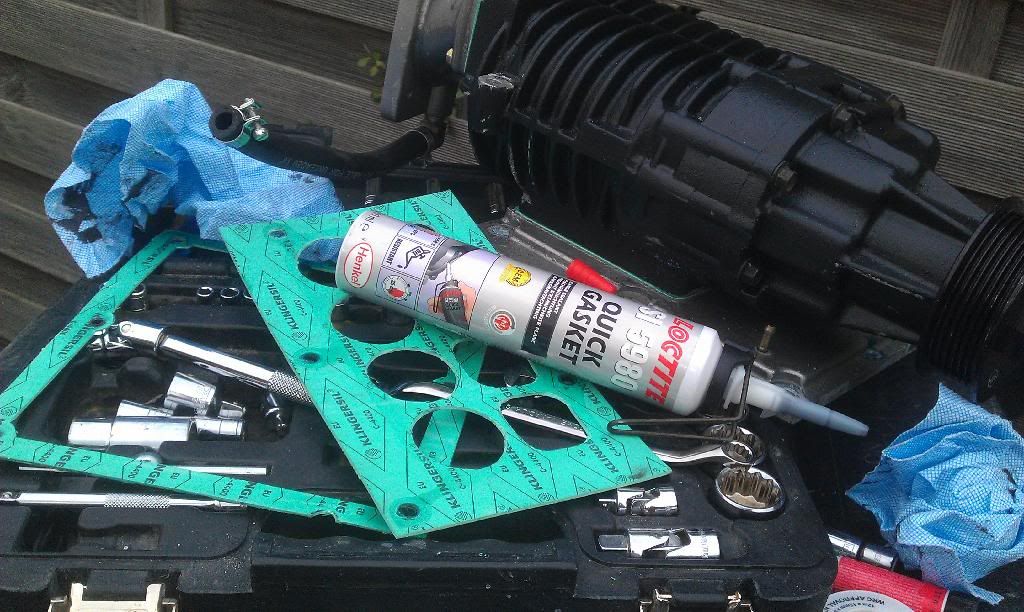
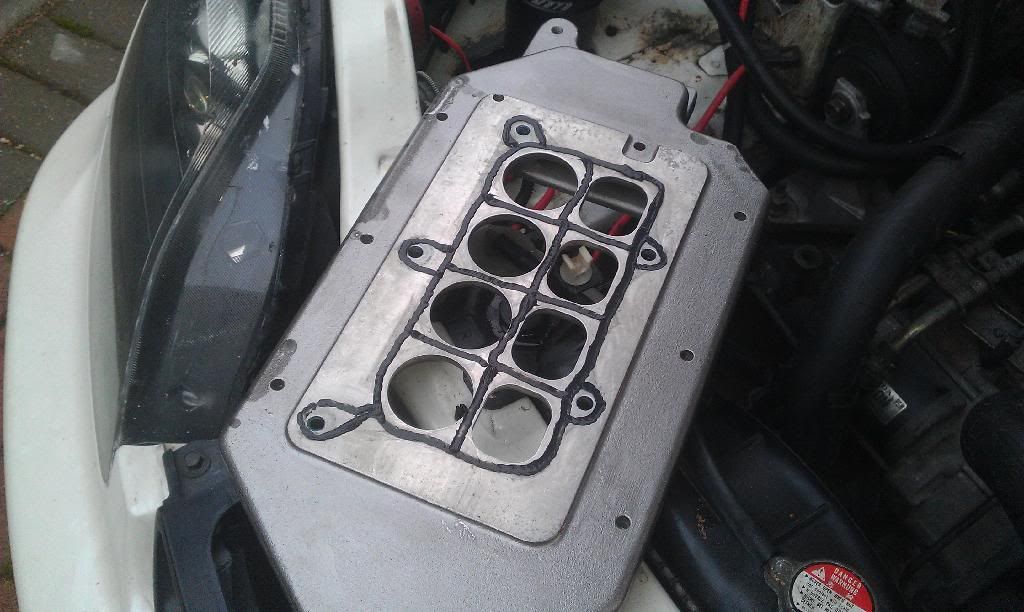
I initially had this gasket on upside down adding to the vacuum leaks.
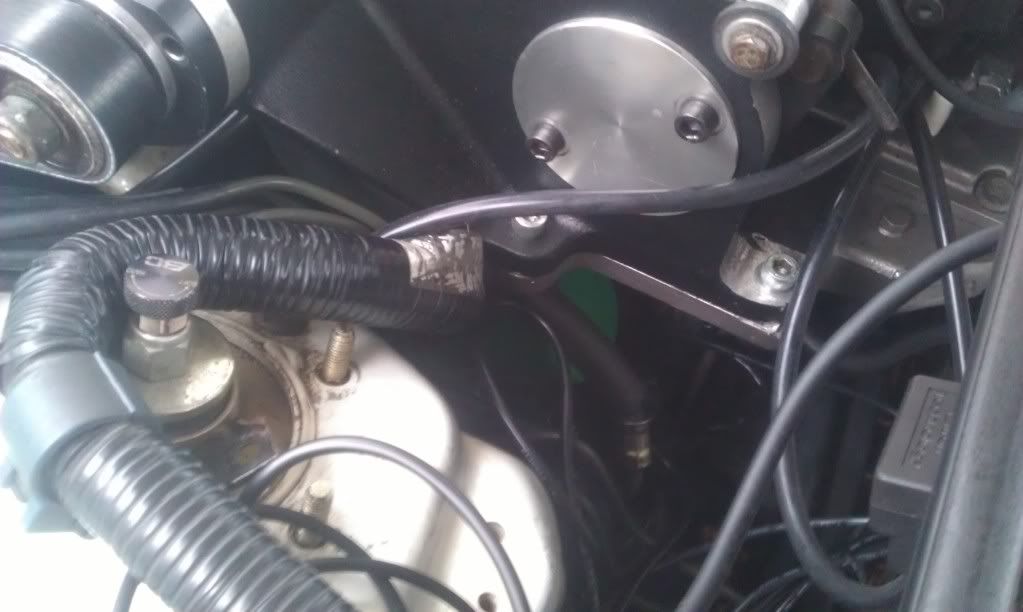
This is how the fuel line is twisted so the JRSC adapter plat fits.
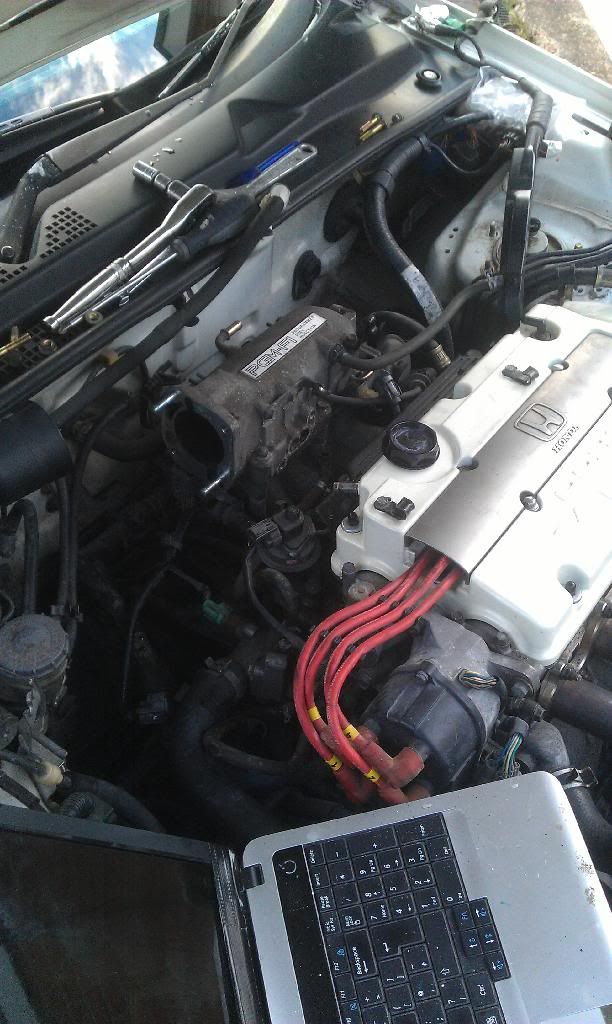
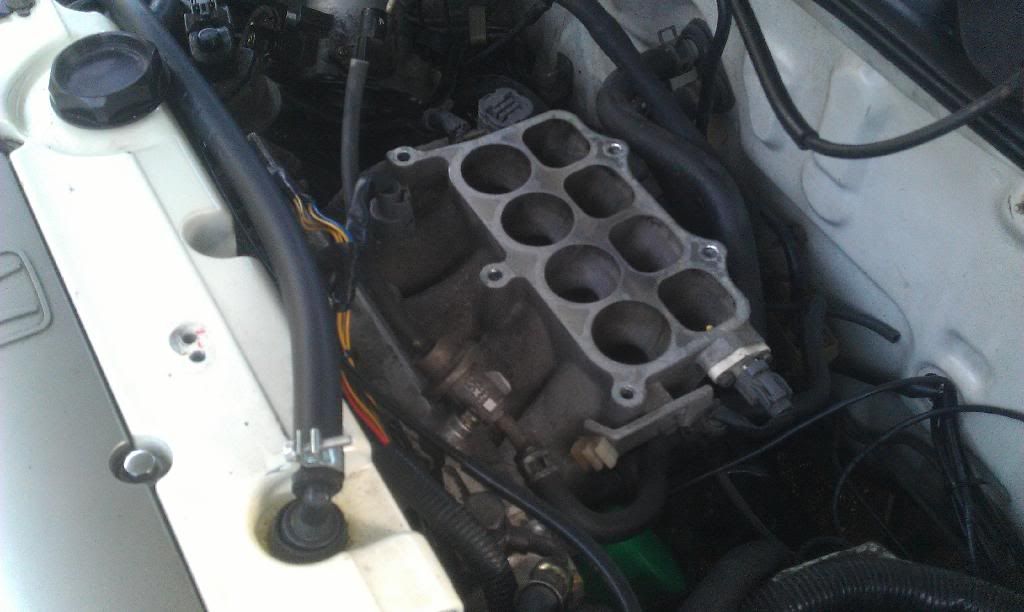
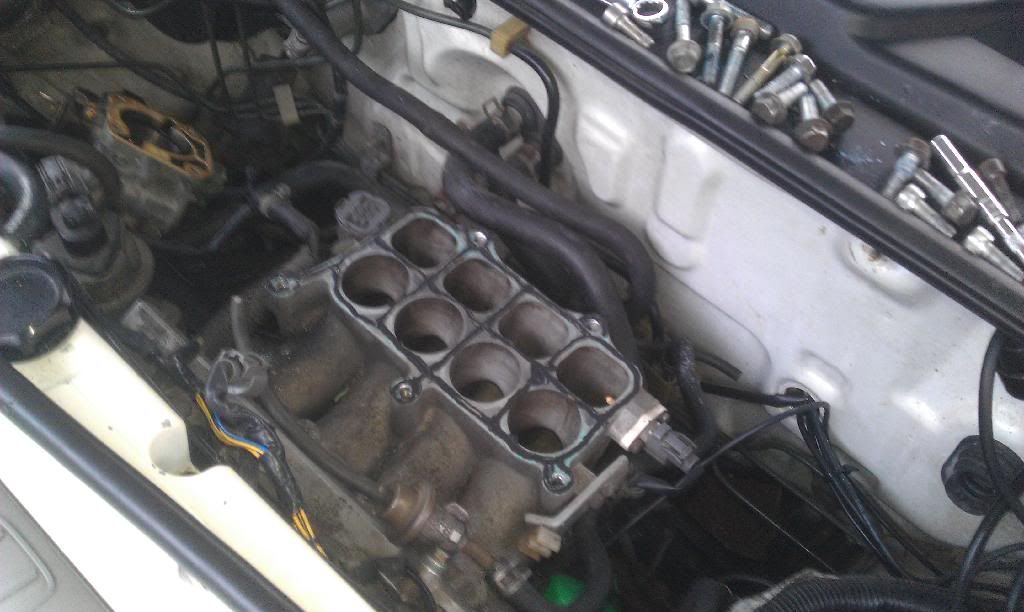
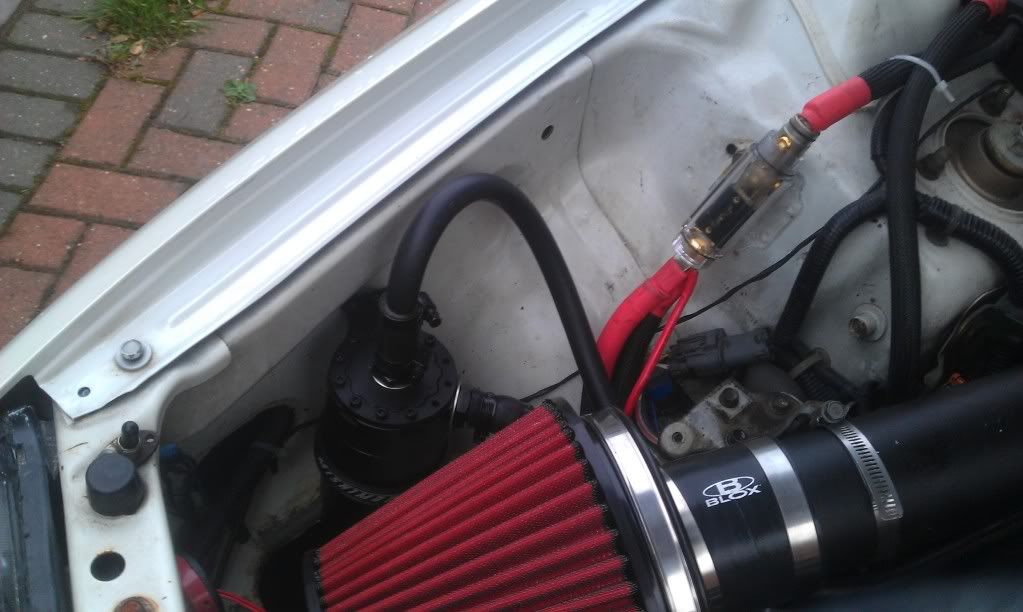
Owwww Thats a blox velocity stack intake on 400mm custome tubing.
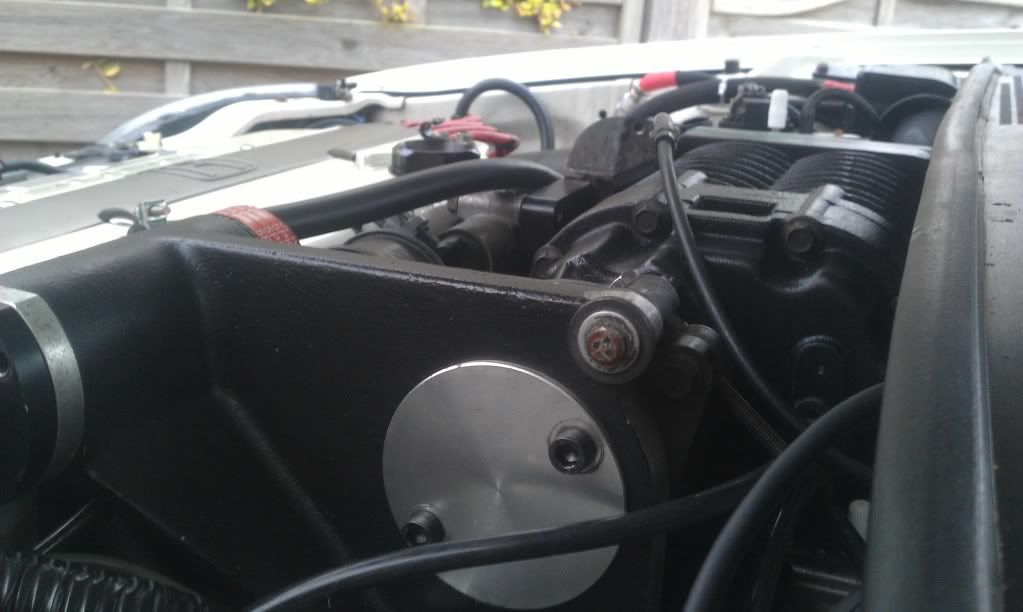
Here you can see my oil filter peaking though. JDM Type S dont need to filter relocating since the Right hand drive gubbins dont get in the way. ahahahahahahah yanks.
Gauge install.
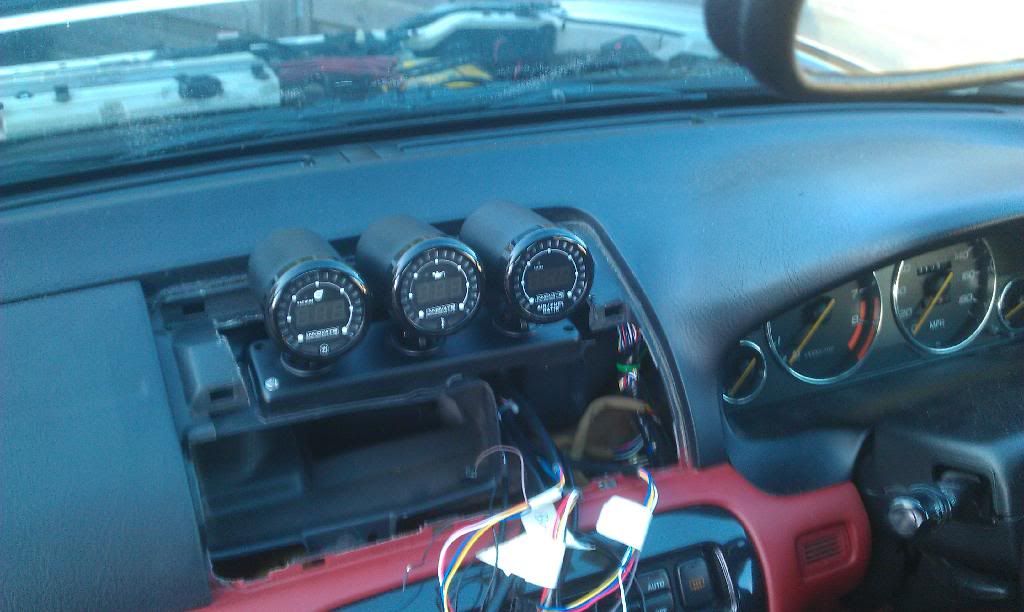
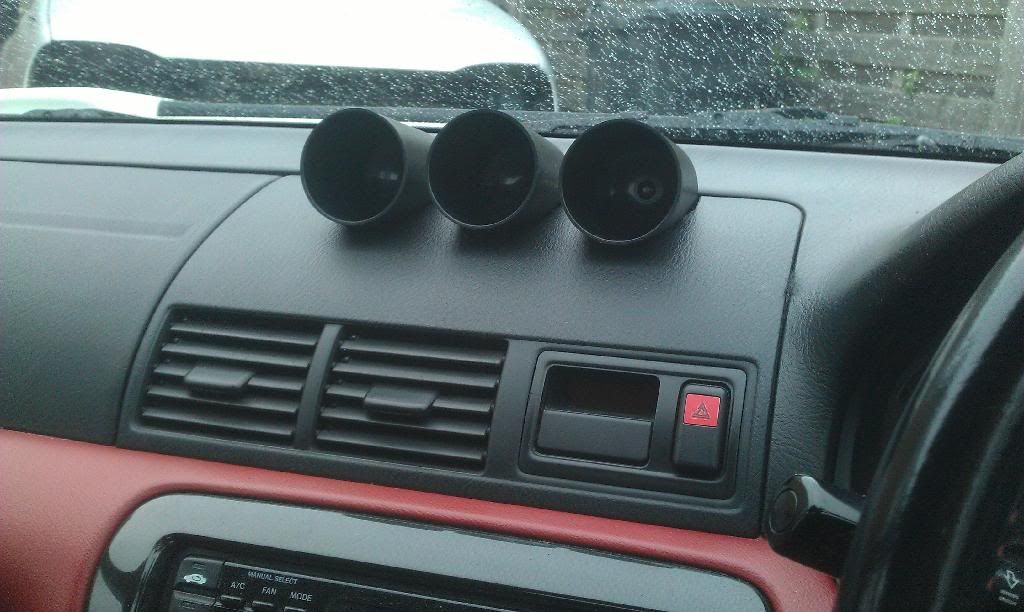
Ill get more pics up of the gauges installed.
TB off

AC out. I even stripped out all the evapourater housing gubbings and sealed the holes through the firewall.

Injector plug differences

Upper intake plenum off and this is how i scrapped off the OEM gasket

After

After alot of vacuum leaks this is how its finally sealed.
Klingerseal gasket and some instant gasket


I initially had this gasket on upside down adding to the vacuum leaks.


This is how the fuel line is twisted so the JRSC adapter plat fits.

Owwww Thats a blox velocity stack intake on 400mm custome tubing.


Here you can see my oil filter peaking though. JDM Type S dont need to filter relocating since the Right hand drive gubbins dont get in the way. ahahahahahahah yanks.

Gauge install.


Ill get more pics up of the gauges installed.
-
rob quilter

- Supporter 2014
- Posts: 5331
- Joined: Mon Aug 09, 2010 1:40 pm
- My Generation: 5G
- PSN GamerTag: robquilter
- Location: Derby
Someone's been a busy boy.
Nice work.

Nice work.
PERFORMANCE PARTS FOR JAPANESE CARS - http://WWW.TOKYOSQUAD.COM
FOLLOW US ON FACEBOOK - http://WWW.FACEBOOK.COM/TOKYOSQUAD
FOLLOW US ON FACEBOOK - http://WWW.FACEBOOK.COM/TOKYOSQUAD
-
cebul
- Supporter 2015
- Posts: 1089
- Joined: Wed Feb 01, 2012 2:59 pm
- My Generation: 5G
- Been thanked: 1 time
Re: Odp: Ratty's Type S - Positive Displacement pumped
Ohh yessss.. 
Btw, you removed AC because that was some fitting issue with JSRC or you just did not want it?
Btw, you removed AC because that was some fitting issue with JSRC or you just did not want it?
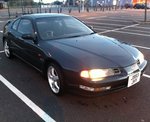
ludes are ment to be driven, not wanking around on a stand like a Civic.

-
RattyMcClelland
- Moderator
- Posts: 9208
- Joined: Wed Aug 04, 2010 10:02 pm
- My Generation: 5G
- PSN GamerTag: RattyMcClelland
- Location: Leicestershire
- Been thanked: 203 times
Re: Ratty's Type S - Positive Displacement pumped
The AC never worked. Needed a new rad, expansion valve, condensor and dryer. I thought sod it and removed it.
But you can still usr ac and a JRSC.
The supercharger itself weights around 20kg with all pulleys and belts so this counteracted the weight.
But you can still usr ac and a JRSC.
The supercharger itself weights around 20kg with all pulleys and belts so this counteracted the weight.