
Congratulations to vtecmec for winning May/June's Lude Of The Month, with his DIY Turbo BB1 build.
>>> Click Here For Profile <<<

>>> Click Here For Profile <<<
Supercharged Mugen Lude (03/06/14 Update!)


-
nucleustylzlude

- Moderator
- Posts: 4013
- Joined: Wed Aug 11, 2010 11:46 pm
- My Generation: 4G
- Location: Bristol, UK!
- Been thanked: 7 times
- Contact:
 BUILD PART 4) - Parts (Cont'd) - Brakes!
BUILD PART 4) - Parts (Cont'd) - Brakes
Hey all,
In true nuc style – long overdue update…or two…
Seeing as I have the one build thread here, I’ll combine the engine build with everything else. I’ll start with stuff I’ve bought from last year…
So what have I been buying since my last update and have I done any work?
Well I’ve picked up the following:
Brakes!!!
Major update to the Moog Lude will be some big improvements in the brake department to handle my extra power.
Well I’ve been a busy boy and collected lots of parts to help remove my ABS unit and install new lines, I’ll show step by step with lots of pics as usual!
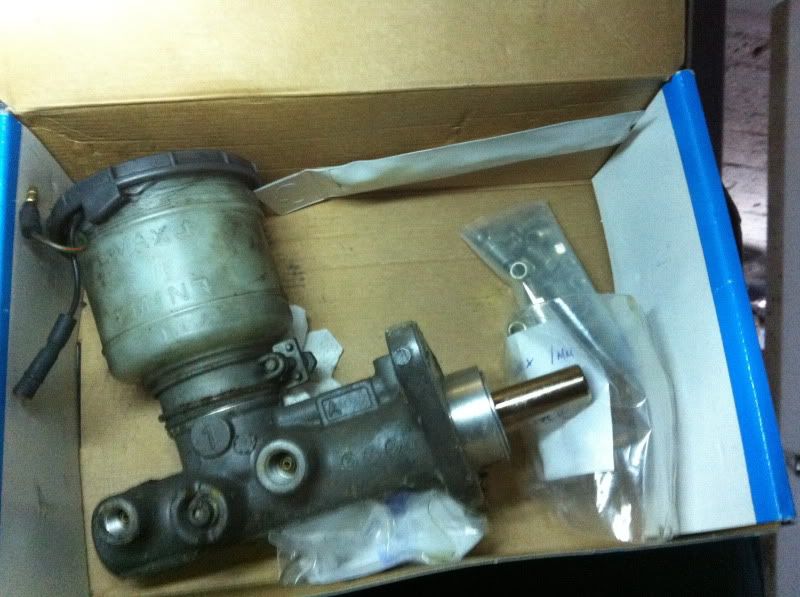
- Spare 1” ABS master cylinder (Probably won’t use, but was cheap!)
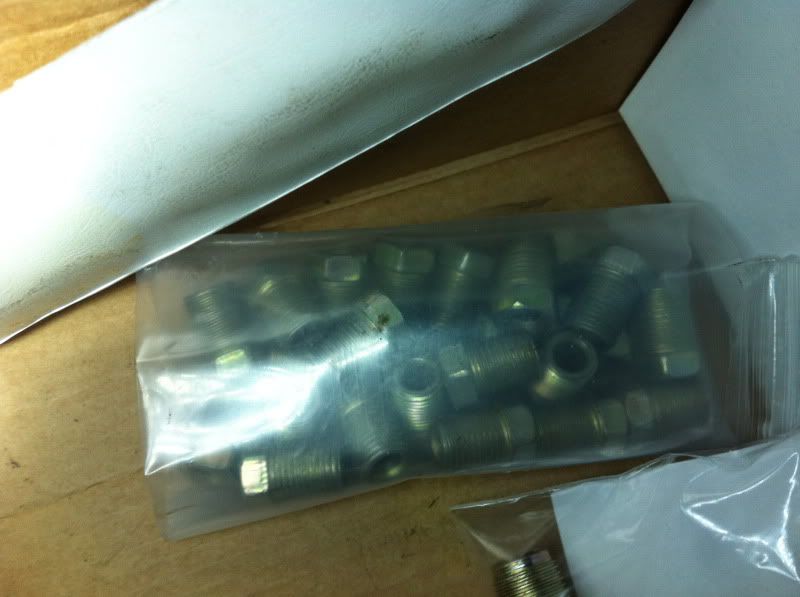
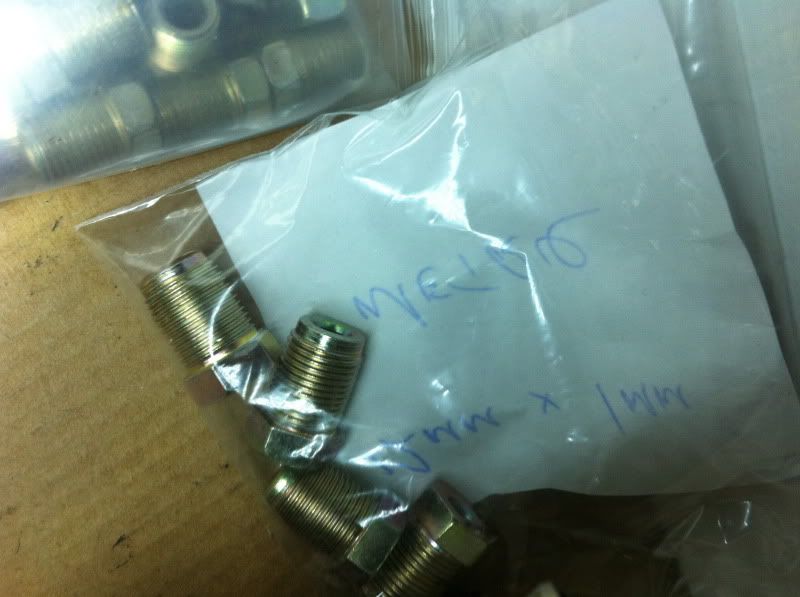
- All new brake flare nuts/unions – all items on the Preludes brake pipe fittings are 10mm apart from one fitting to the ABS m/c which is 12mm
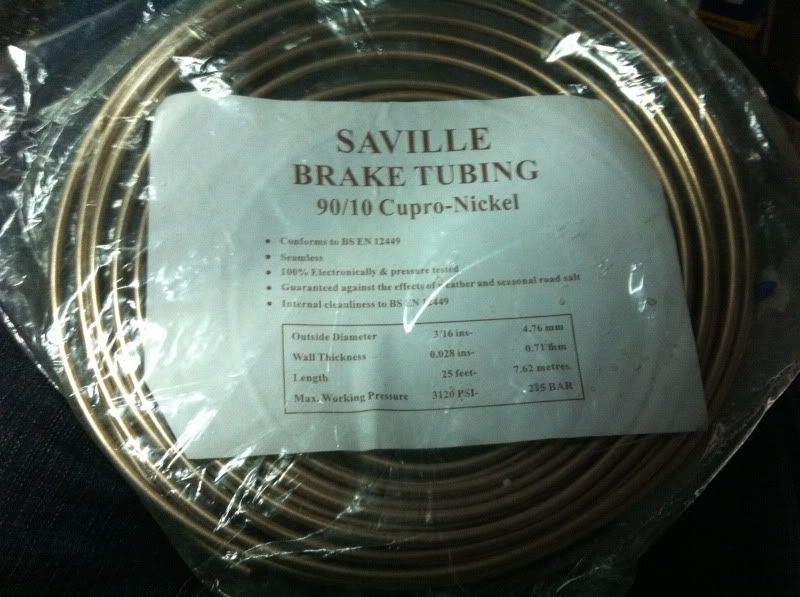
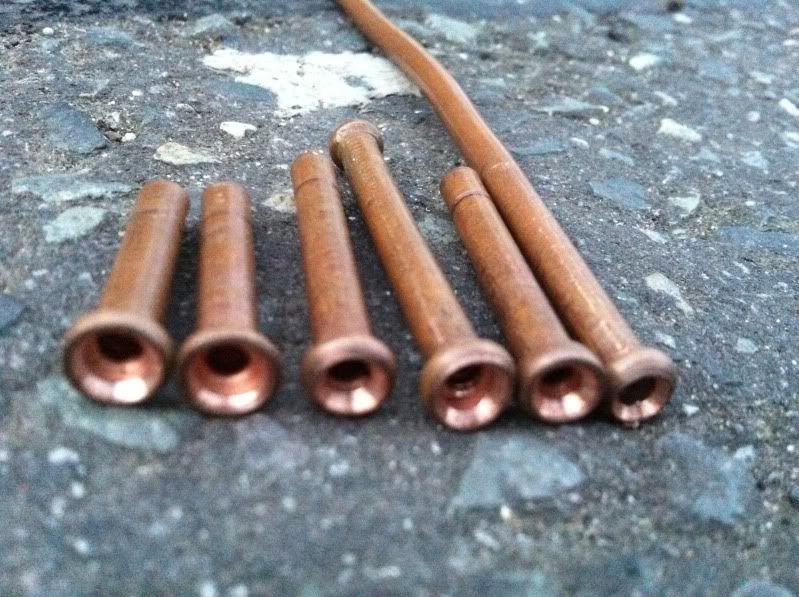
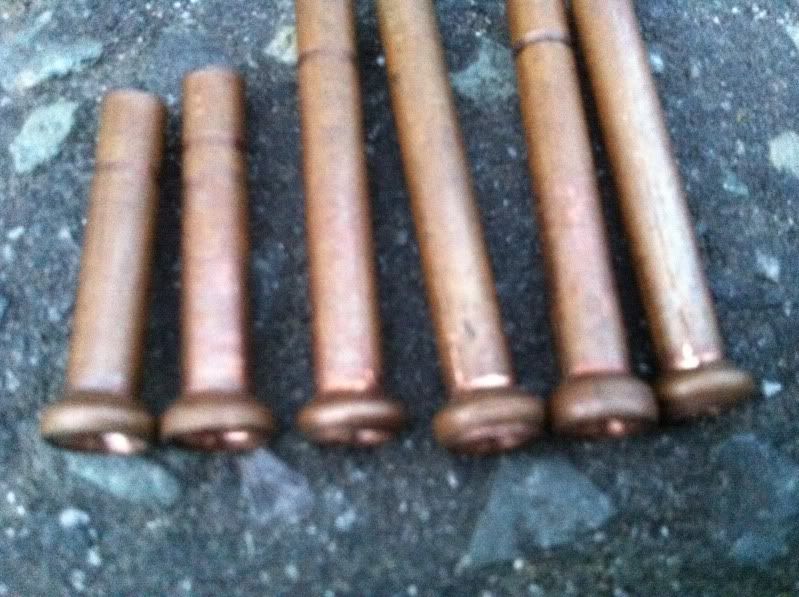
- New copper/nickel brake line – 25ft’s worth
This material is lighter and holds more pressure, plus is still reasonably priced and easy to bend and flare. Plus it looks a lot nicer than copper.
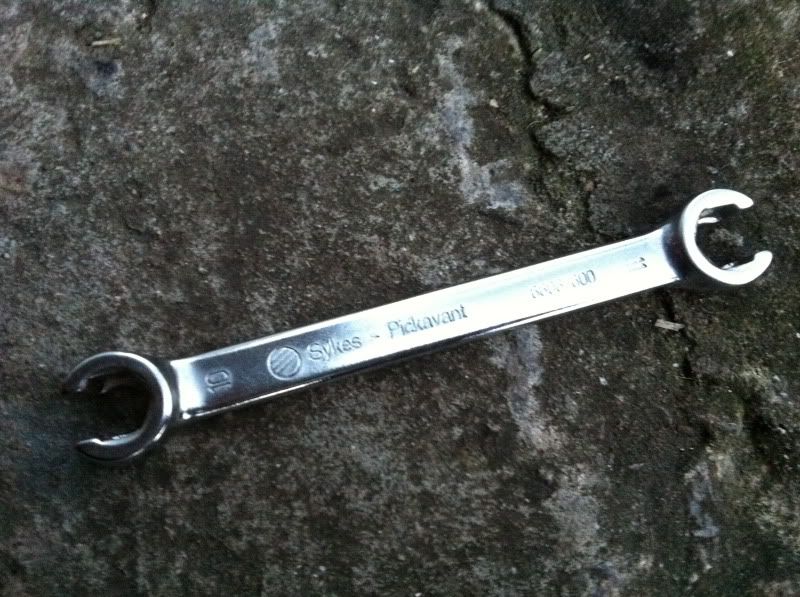
- Brake flare nut spanner – Sykes Pickavant – 11mm (for the 10mm nuts)
- Brake flare nut spanner – Torq brand from B&Q – 13mm, looks good quality (for the 12mm nut)

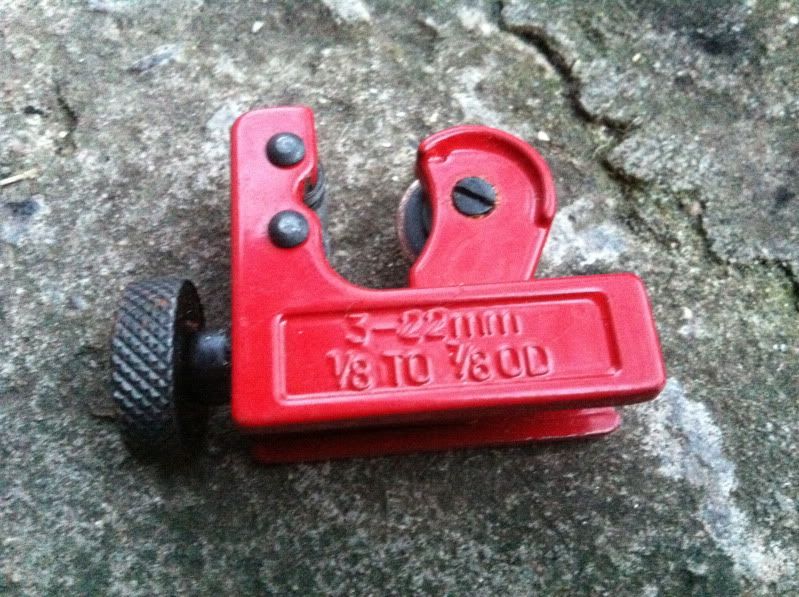
- Brake pipe circular cutter – adjustable size – cheap and cheerful
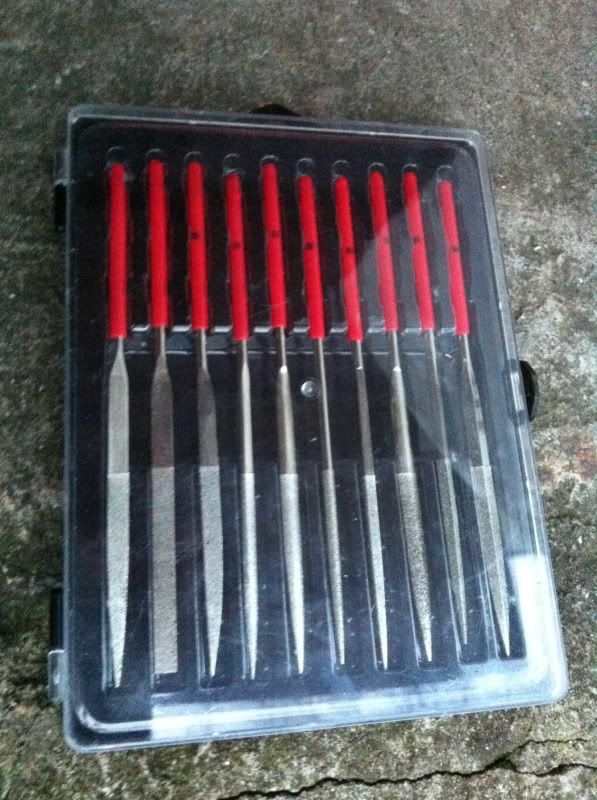
- Nail file set – needed a set generally but will help to debur the cuts of the pipe and add a slight chamfer to the edge to aid flaring. The prep really helps to get clean consistent flares.
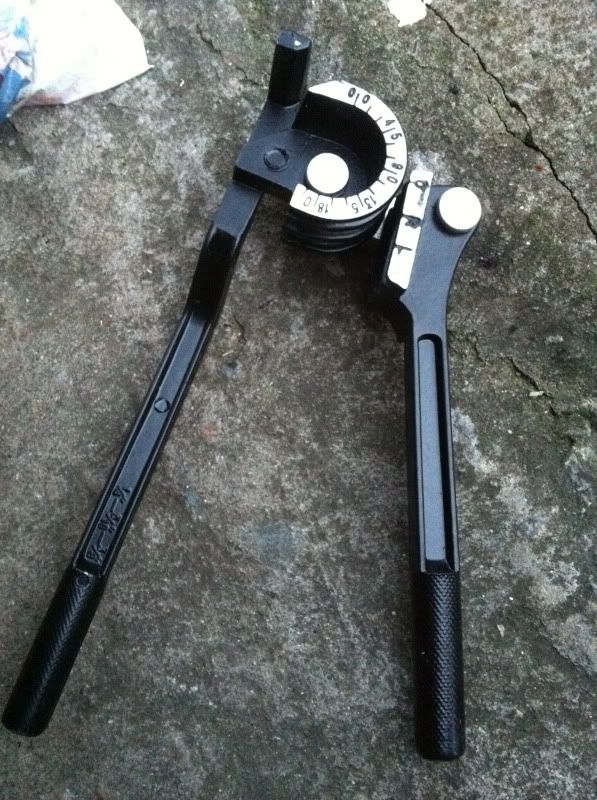
- Brake pipe bender – again cheap and cheerful but does the job fine. Can bend to 180 degrees to a good tight radius and has 3 sizes of grooves for different pipes – generally most 3/16” pipes are about 6mm.
I also of course need a brake flaring tool – I havn’t bought one as I’ve managed to borrow a very nice Bluepoint handheld or vice item from a friend (£££).
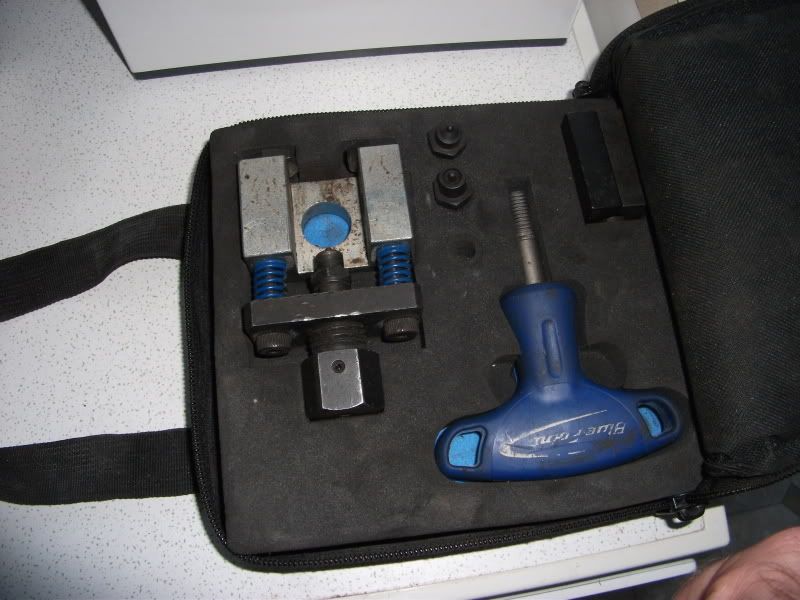
I’ve had some practice with some spare copper piping and have got them consistently how I want them, from right to left. They started off looking like bubble flares for some reason, then it was a case of refining the amount of tubing in the holder to get a nice double flare back on itself with a good amount and angle of cup for the flare nut to take to.
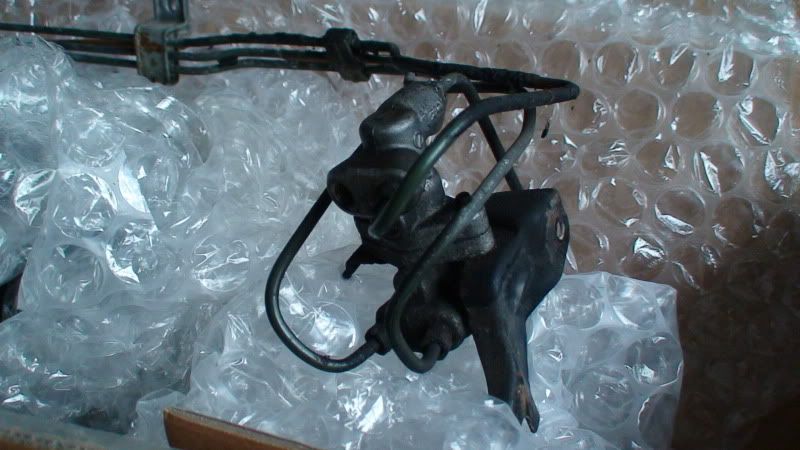
Final item, essential for an ABS system removal is a Prelude non ABS brake proportioning valve and mounting bracket – it’s a 60/40 split as far as I know:
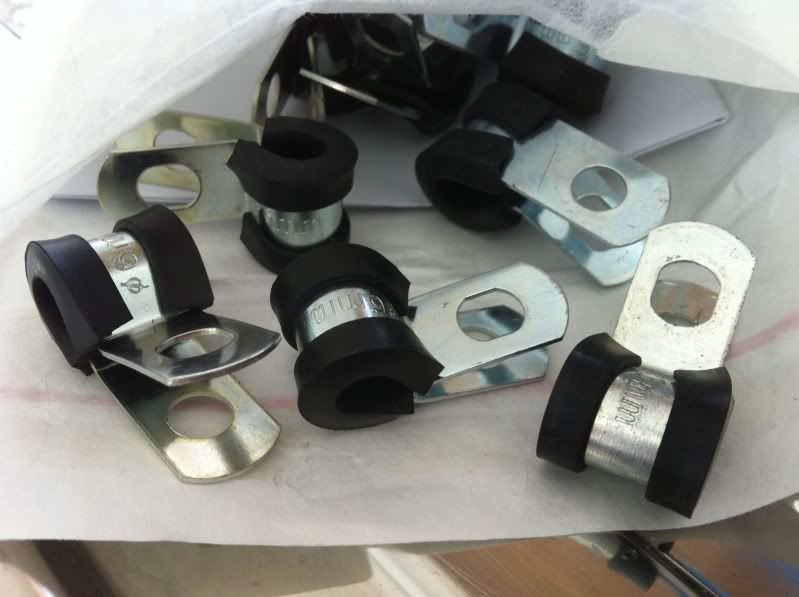
Also to mount the lines around the bay I bought a bag of P clips – aluminium with rubber liners.
That’s it on the ABS removal and lines install. I’ve been taking lots of pics so hopefully it should help people through it in the future. More on that later.
Now it’s time to beef up those brakes!
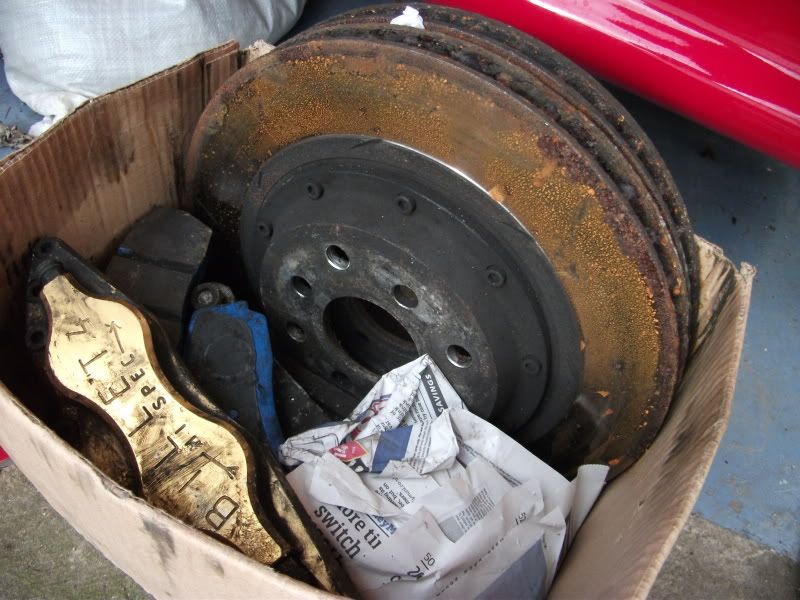
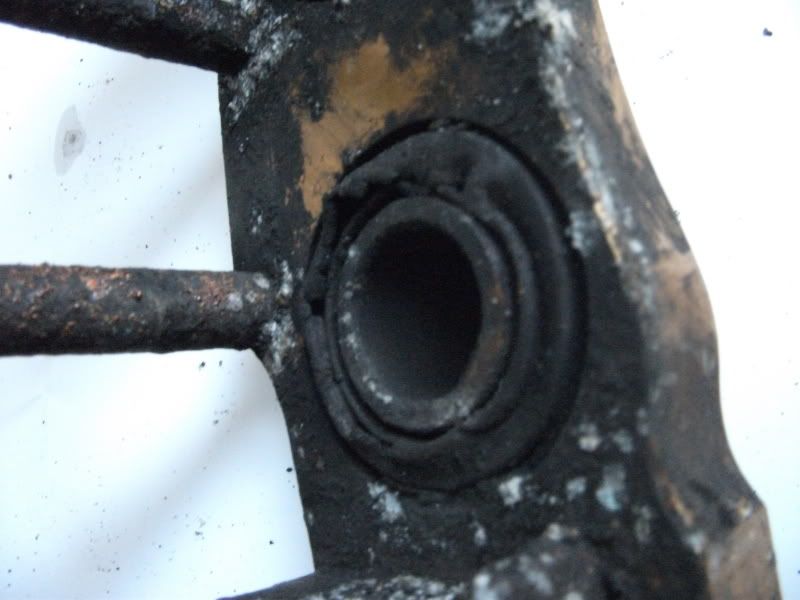
Well, I’ve had them for a long time now, but I happen to have bought the Hi-Spec Monster 4 big brake kit from Dino. These are off of Rich’s (Performance Autoworks) old ‘runabout’ lude and originally graced his track lude, now running the same but newer and in black.
They are a 4 Pot brake calliper which grab onto some 2 piece bell/discs that are 325mm x 30mm. Dino threw in some new front brakelines from Goodridge because the old ones did not want to come off (thanks Marc) + a set of EBC Bluestuff pads.
Here they are – looking dirty from the winter roads and then slightly, well mouldy from being left for a couple of months. They look worse than they are in all fairness:
After a little wipe down with a cloth:
Dust boots are torn in places.
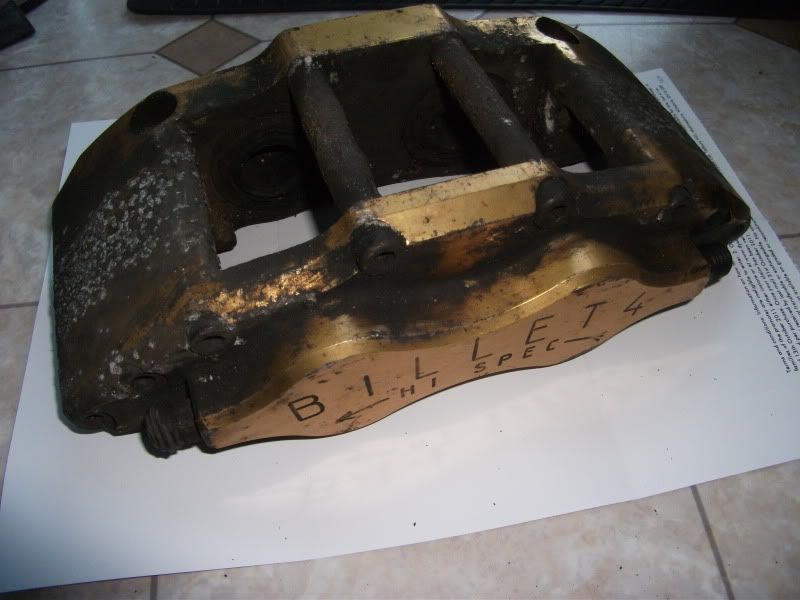
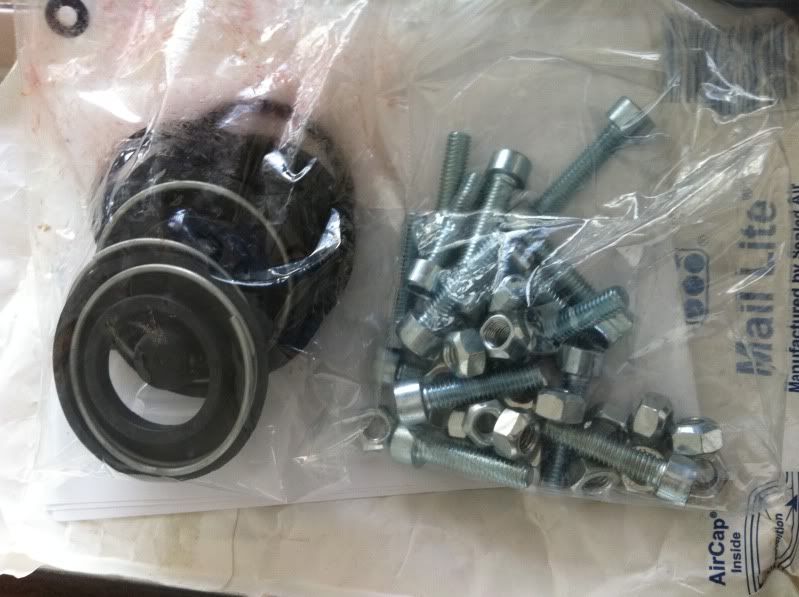
They have seen a few years now, so are in need of a refurb – done plenty of calipers now so this doesn’t phase me one bit. I’ve bought a new seals/boot kits + new bolts from Hi-Spec and a complete set of replacement bolts/nuts for the bells/discs.
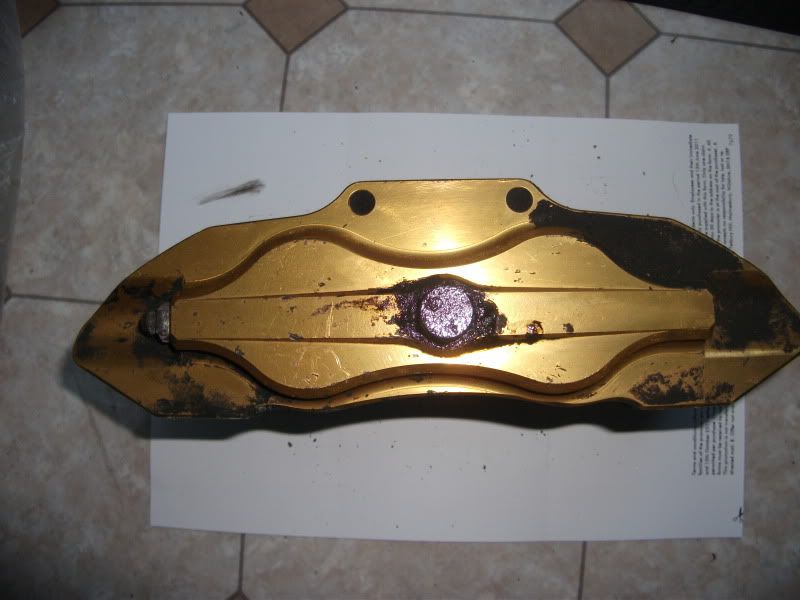
I’m giving them a rebuild with fresh paint, they are currently Gold anodised but faded and marked in places. Looking potentially at black or red, more likely red to be inkeeping with my new rear brakes (more on that later).
I started cleaning up one of the caliper mounting brackets.

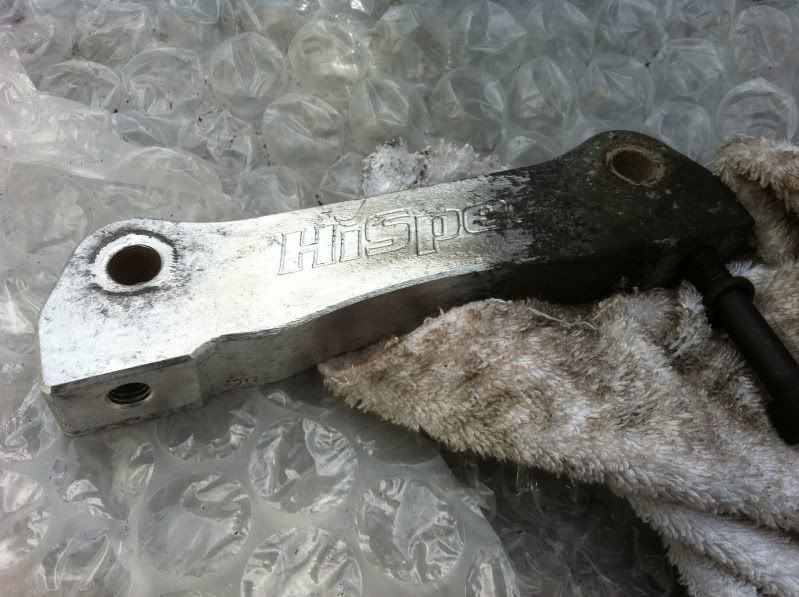
I didn’t even know there was a logo etched in there! Ha!
The discs are also running low. I may install as is for now, but will need to save up for some replacements very soon – not cheap though at over £300 a pair!
They have gathered some surface rust in the garage, so need a good rub down, before installing.
Can’t wait to see how it all feels when installed!
Rear Brakes
In addition to the fronts I have bought some fresh stuff for the rears too. Similar(ish) to Rich’s setup, I’ve sourced some freshly refurbished DC5 rear calipers and carriers. A little lighter than the ludes. Here they are:

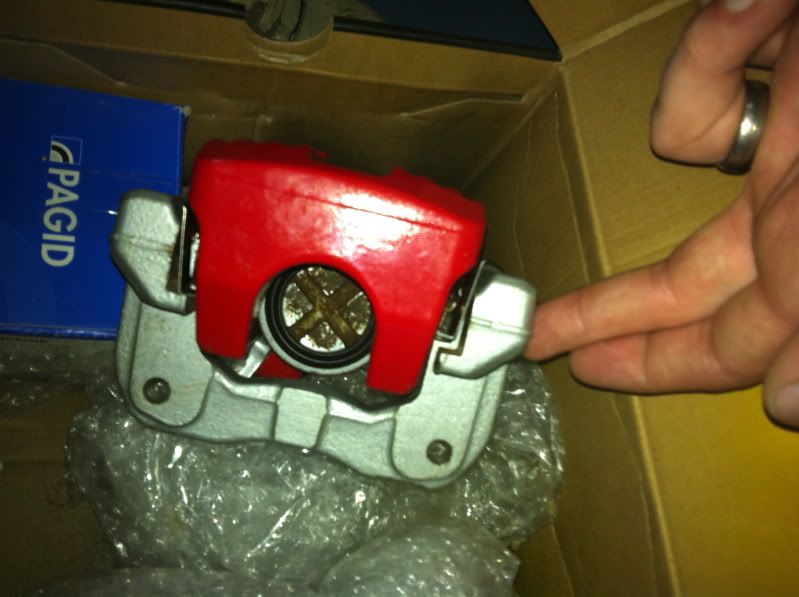
Along with these I have some Tarox G88 grooved discs and a choice of some nice Pagid pads or Ferrodo DS2500’s.
Just need to contact Goodridge or HEL to see if I can get some braided lines for the rear only to finish all the system up nicely.
I had wondered whether I could hook up my Legend calipers and 282mm discs to the rear, but the hassle to lose the cable handbrake and install more lines and hydraulic handbrake like Rich has is a little more than my time and plans at present. Plus, it’s not technically MOT legal.
Would be nice to run a brake bias valve – something for the future once I find out how good my upgrades are. Also be nice to get larger discs and space the DC5’s out like Rich’s track lude.
So I’ll have some good second hand brake parts up for sale in a few months.
Hey all,
In true nuc style – long overdue update…or two…
Seeing as I have the one build thread here, I’ll combine the engine build with everything else. I’ll start with stuff I’ve bought from last year…
So what have I been buying since my last update and have I done any work?
Well I’ve picked up the following:
Brakes!!!
Major update to the Moog Lude will be some big improvements in the brake department to handle my extra power.
Well I’ve been a busy boy and collected lots of parts to help remove my ABS unit and install new lines, I’ll show step by step with lots of pics as usual!
- Spare 1” ABS master cylinder (Probably won’t use, but was cheap!)
- All new brake flare nuts/unions – all items on the Preludes brake pipe fittings are 10mm apart from one fitting to the ABS m/c which is 12mm
- New copper/nickel brake line – 25ft’s worth
This material is lighter and holds more pressure, plus is still reasonably priced and easy to bend and flare. Plus it looks a lot nicer than copper.
- Brake flare nut spanner – Sykes Pickavant – 11mm (for the 10mm nuts)
- Brake flare nut spanner – Torq brand from B&Q – 13mm, looks good quality (for the 12mm nut)
- Brake pipe circular cutter – adjustable size – cheap and cheerful
- Nail file set – needed a set generally but will help to debur the cuts of the pipe and add a slight chamfer to the edge to aid flaring. The prep really helps to get clean consistent flares.
- Brake pipe bender – again cheap and cheerful but does the job fine. Can bend to 180 degrees to a good tight radius and has 3 sizes of grooves for different pipes – generally most 3/16” pipes are about 6mm.
I also of course need a brake flaring tool – I havn’t bought one as I’ve managed to borrow a very nice Bluepoint handheld or vice item from a friend (£££).
I’ve had some practice with some spare copper piping and have got them consistently how I want them, from right to left. They started off looking like bubble flares for some reason, then it was a case of refining the amount of tubing in the holder to get a nice double flare back on itself with a good amount and angle of cup for the flare nut to take to.
Final item, essential for an ABS system removal is a Prelude non ABS brake proportioning valve and mounting bracket – it’s a 60/40 split as far as I know:
Also to mount the lines around the bay I bought a bag of P clips – aluminium with rubber liners.
That’s it on the ABS removal and lines install. I’ve been taking lots of pics so hopefully it should help people through it in the future. More on that later.
Now it’s time to beef up those brakes!
Well, I’ve had them for a long time now, but I happen to have bought the Hi-Spec Monster 4 big brake kit from Dino. These are off of Rich’s (Performance Autoworks) old ‘runabout’ lude and originally graced his track lude, now running the same but newer and in black.
They are a 4 Pot brake calliper which grab onto some 2 piece bell/discs that are 325mm x 30mm. Dino threw in some new front brakelines from Goodridge because the old ones did not want to come off (thanks Marc) + a set of EBC Bluestuff pads.
Here they are – looking dirty from the winter roads and then slightly, well mouldy from being left for a couple of months. They look worse than they are in all fairness:
After a little wipe down with a cloth:
Dust boots are torn in places.
They have seen a few years now, so are in need of a refurb – done plenty of calipers now so this doesn’t phase me one bit. I’ve bought a new seals/boot kits + new bolts from Hi-Spec and a complete set of replacement bolts/nuts for the bells/discs.
I’m giving them a rebuild with fresh paint, they are currently Gold anodised but faded and marked in places. Looking potentially at black or red, more likely red to be inkeeping with my new rear brakes (more on that later).
I started cleaning up one of the caliper mounting brackets.
I didn’t even know there was a logo etched in there! Ha!
The discs are also running low. I may install as is for now, but will need to save up for some replacements very soon – not cheap though at over £300 a pair!
They have gathered some surface rust in the garage, so need a good rub down, before installing.
Can’t wait to see how it all feels when installed!
Rear Brakes
In addition to the fronts I have bought some fresh stuff for the rears too. Similar(ish) to Rich’s setup, I’ve sourced some freshly refurbished DC5 rear calipers and carriers. A little lighter than the ludes. Here they are:
Along with these I have some Tarox G88 grooved discs and a choice of some nice Pagid pads or Ferrodo DS2500’s.
Just need to contact Goodridge or HEL to see if I can get some braided lines for the rear only to finish all the system up nicely.
I had wondered whether I could hook up my Legend calipers and 282mm discs to the rear, but the hassle to lose the cable handbrake and install more lines and hydraulic handbrake like Rich has is a little more than my time and plans at present. Plus, it’s not technically MOT legal.
Would be nice to run a brake bias valve – something for the future once I find out how good my upgrades are. Also be nice to get larger discs and space the DC5’s out like Rich’s track lude.
So I’ll have some good second hand brake parts up for sale in a few months.

-
nucleustylzlude
- Moderator
- Posts: 4013
- Joined: Wed Aug 11, 2010 11:46 pm
- My Generation: 4G
- Location: Bristol, UK!
- Been thanked: 7 times
- Contact:
BUILD PART 4) - Parts (Cont'd) - Interior
BUILD PART 4) - Parts (Cont'd) - Interior
The next batch of goodies I’ve bought we go inside…
Interior
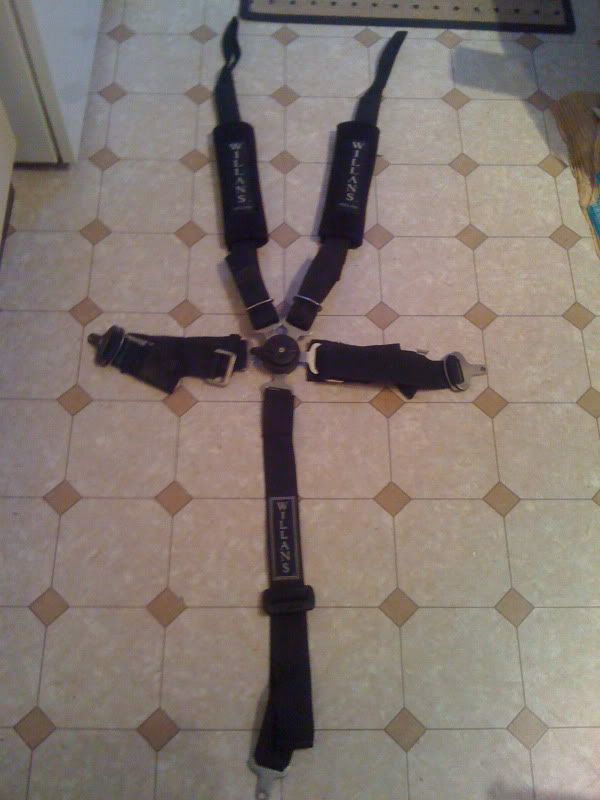
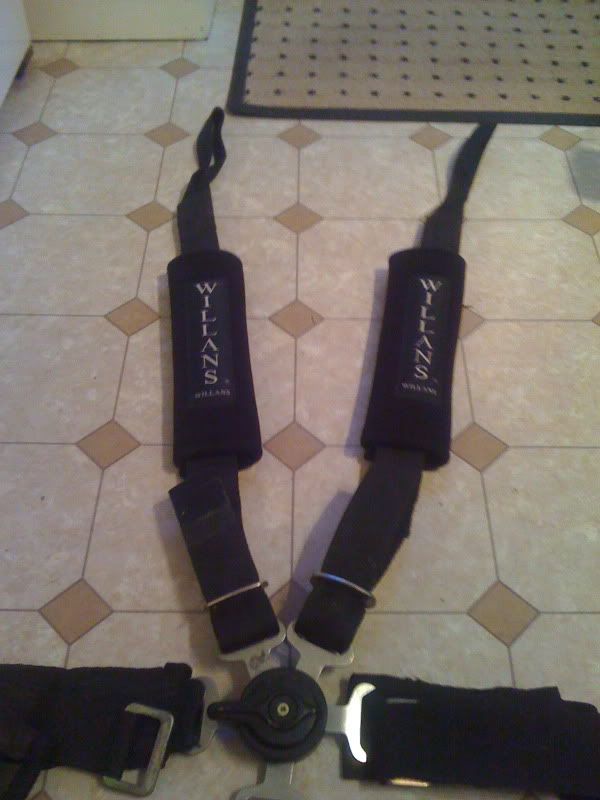
- Willans 5 point harnesses & shoulder pads.
I have bought a couple of items on ebay with the move to more performance goals and future track days.
I have a pair of black 2” wide Willans harnesses with short shoulder straps meant for a harness bar (came from a kit car). So a harness bar is now on the future shopping list! Will also add a little B pillar strength – think of it like a strut brace.
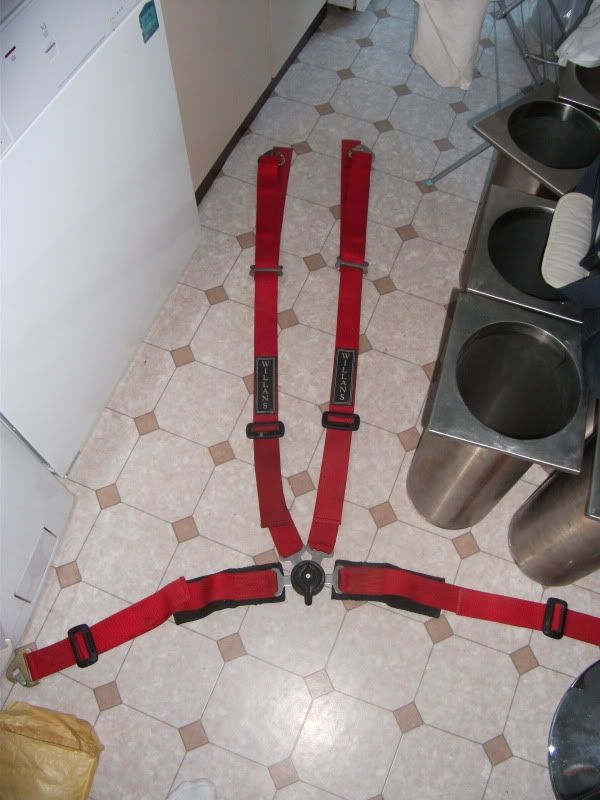
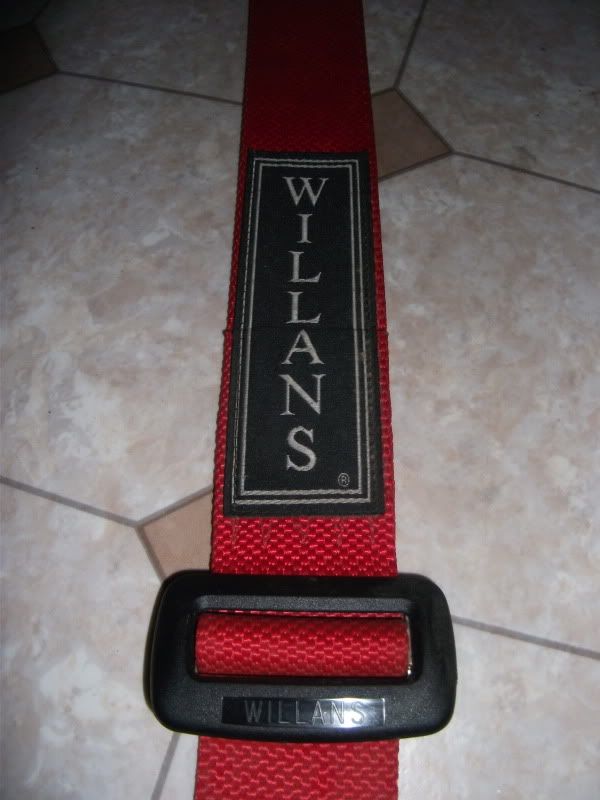
…in the meantime, before I buy a harness bar, which are about £150, I happened upon a single set of cheap and newer red 2” Willans 4 point harness with the longer shoulder straps to mount to some floor eyebolts. So I can mount this one straight away.
Here’s some pics of the red harness, just cleaning the strapping up at the moment, it’s come up like new.
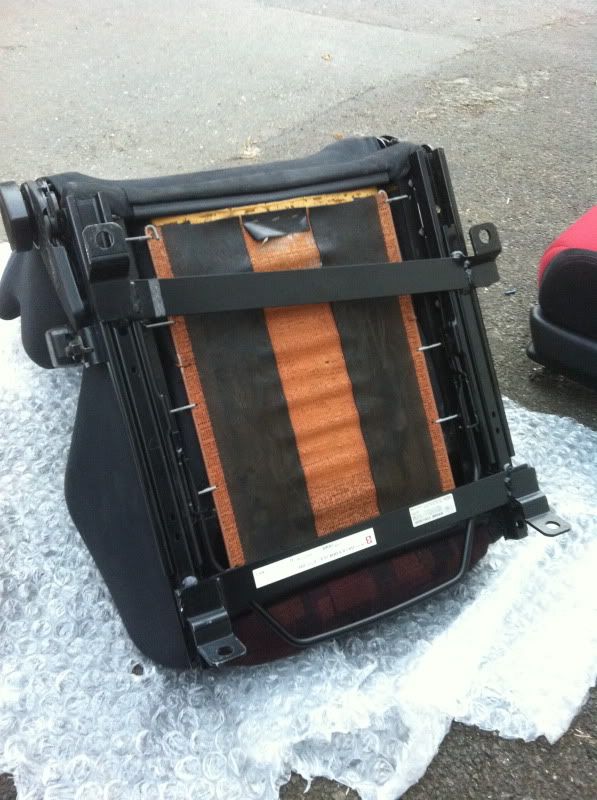
As most may have seen, my lovely EP3 Type R seats have found a new home in Bristol_bb4’s red lude (amongst other things!). So what the hell am I going to sit on?
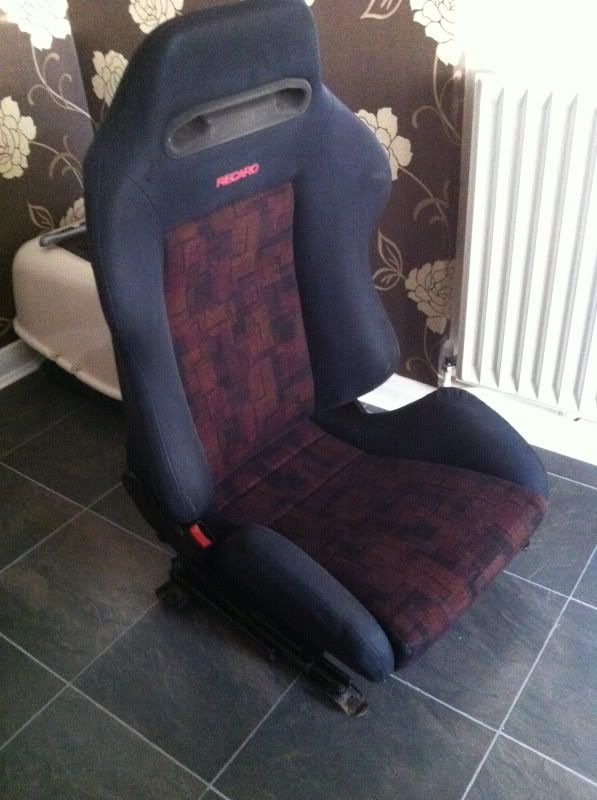
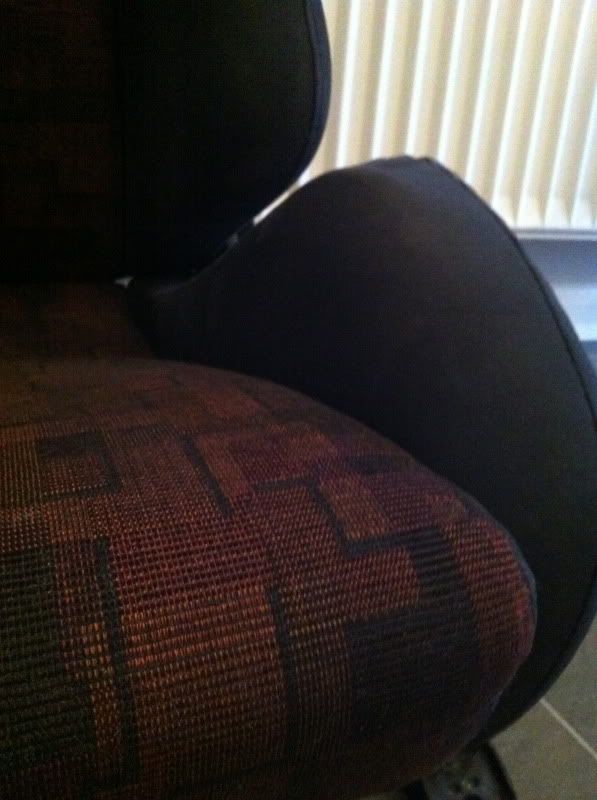
I’ve been after a decent set of bucket seats for a while now and while being outbid on numerous tasty seats – mainly because I didn’t want to pay too much, I happened upon these from the Skyline specialists The GTRShop:
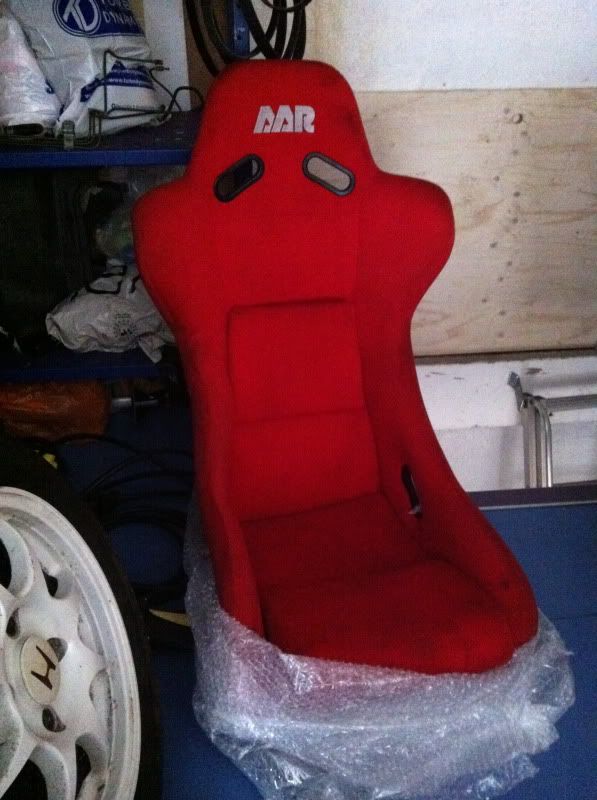
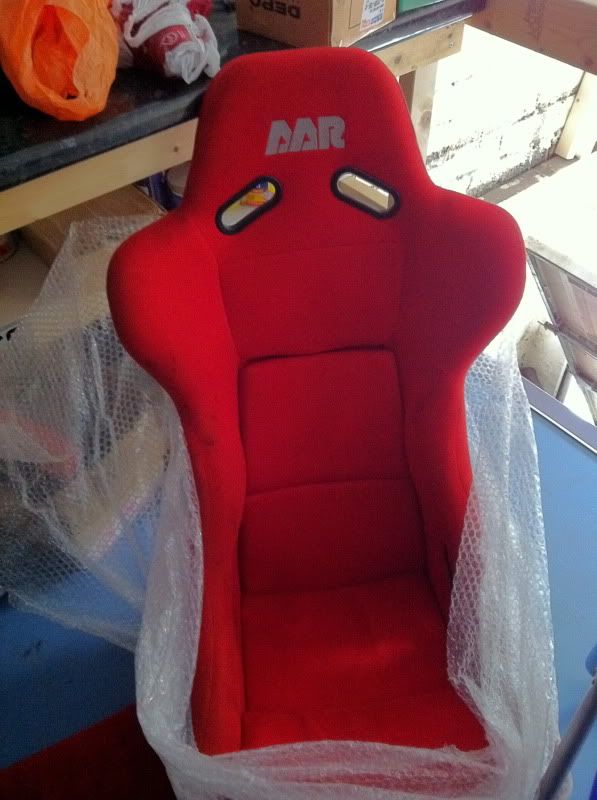
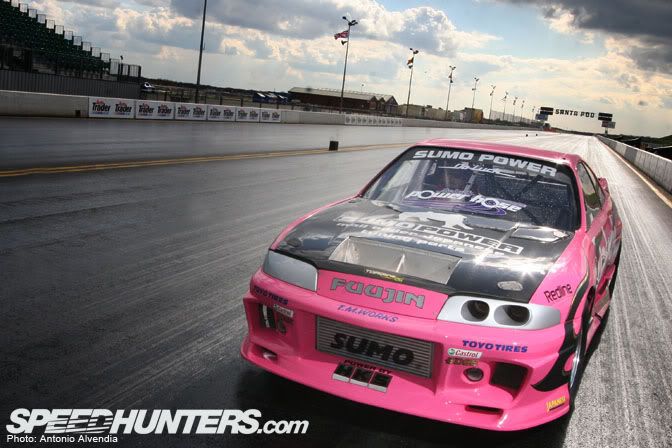
They are made by AAR or a company more commonly known as Araco. There is little information about them on the net, but it appears they are a main manufacturer of OEM factory seats for Toyotas and the like. They do commissions for various companies, including race seats. The likes of Do-Luck & Sumo Power have used them, so figured they would be good quality. I liked the fact they were styled similar to Recaro SPG’s (what I would have liked to have bought with some more £££). Plus they were red, in pretty good nick and were a decent enough price!
Here they are in some other tasty metal:
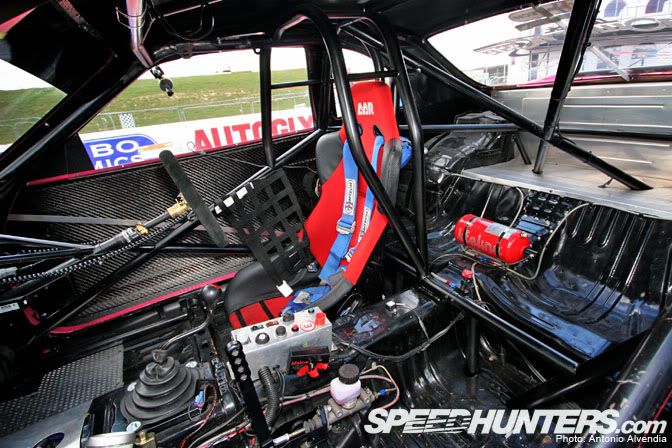
Interior of this badboy:


Good enough for them, good enough for me!
However, once they arrived I realised two things:
1) How snug these seats were, and
2) How big my arse is!
I do fit in them, don’t get me wrong, I’m not destined for fat camp just yet but I thought I’d pick up something else for the meantime and for the missus to come to shows – I know she’ll hate sitting in them!
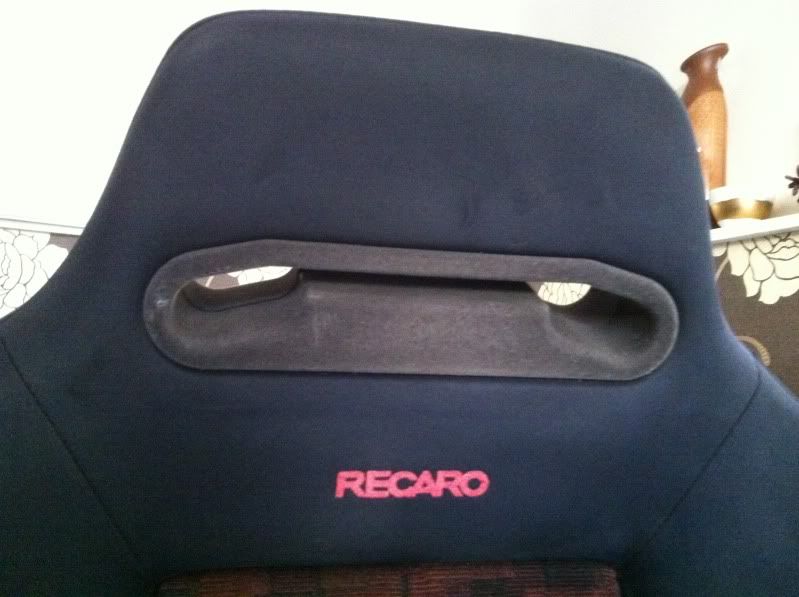
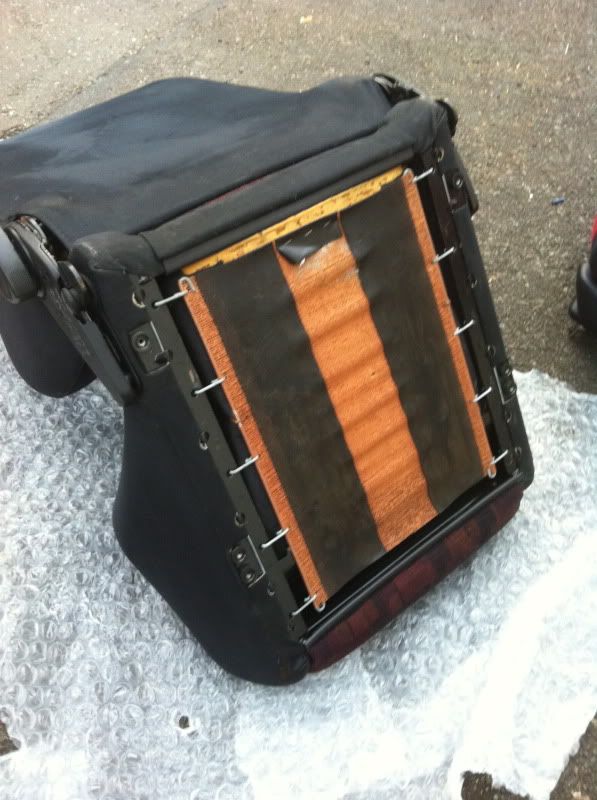
So I picked up one spare Evo 4 Recaro Speed seat from, you guessed it, EBAY! With a thorough clean it came up like new and being a passenger seat it was near perfect with the bolsters. These seats are universal fit to drivers or passengers with the reclining button on both sides.
Here it is:
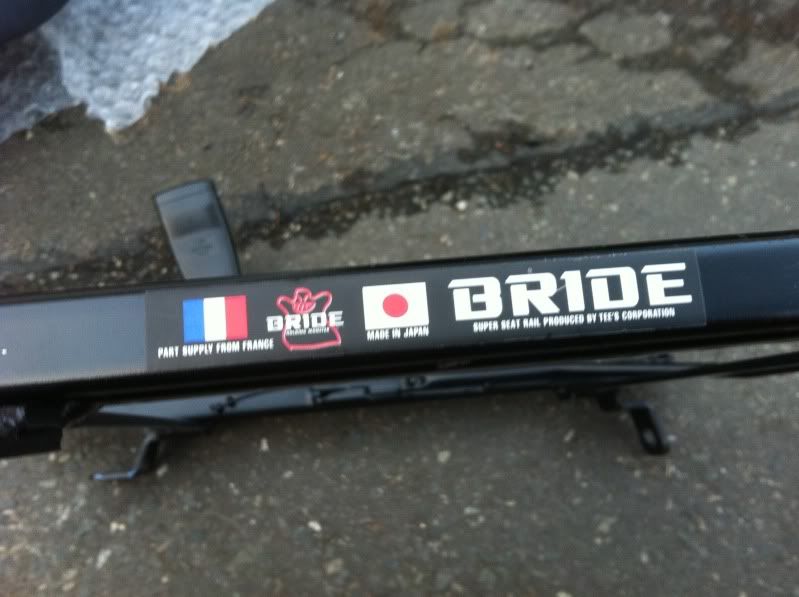
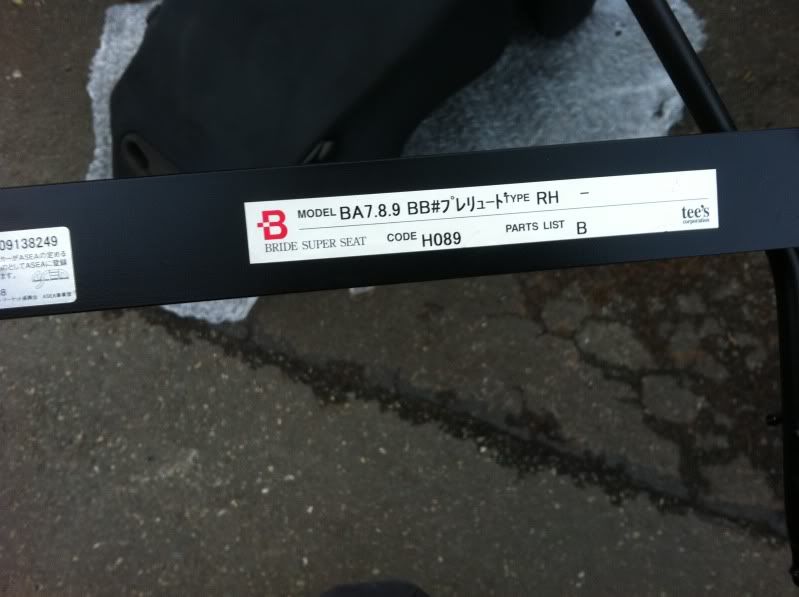
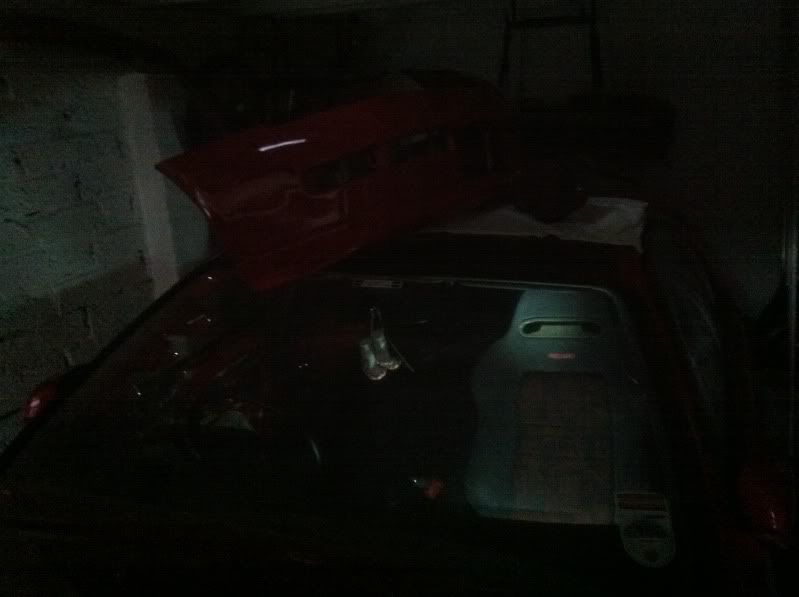
Next up was fitting the seats – I was going to get some brackets fabbed up by someone local, but then I stumbled across Dave (dlongmu) who was selling his old Bride MO low sliding seat rails (£££). I snapped these up and here they are:
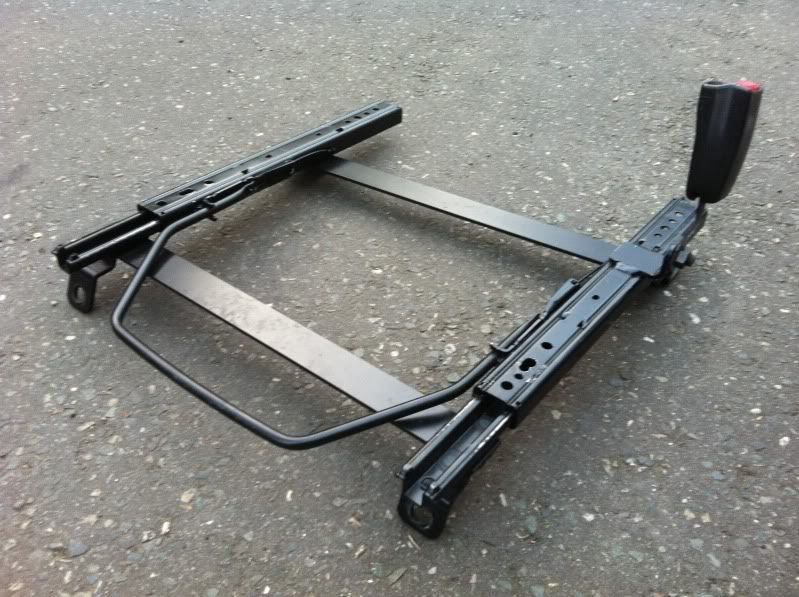
So plan for Japfest is to have these installed and the Red Willan’s Harness on the driver’s seat. The passenger (if I allow one!) can use the seatbelt for now. I also need another side mount for the buckets to fit on the sliding rails. The Recaro goes straight onto the Bride rails though and is currently in the car but not bolted down so I can get access to certain things.
Just about in the car when it got dark!
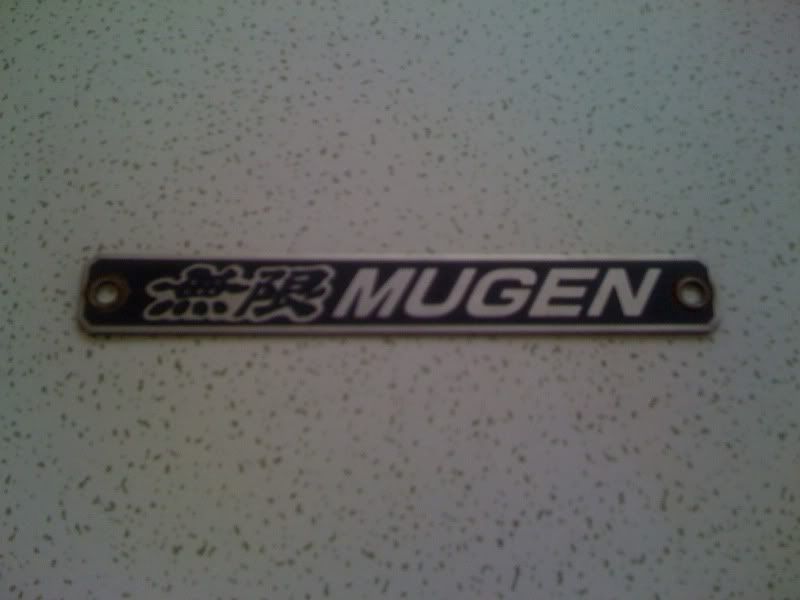
Also picked up a few Mugen goodies again!
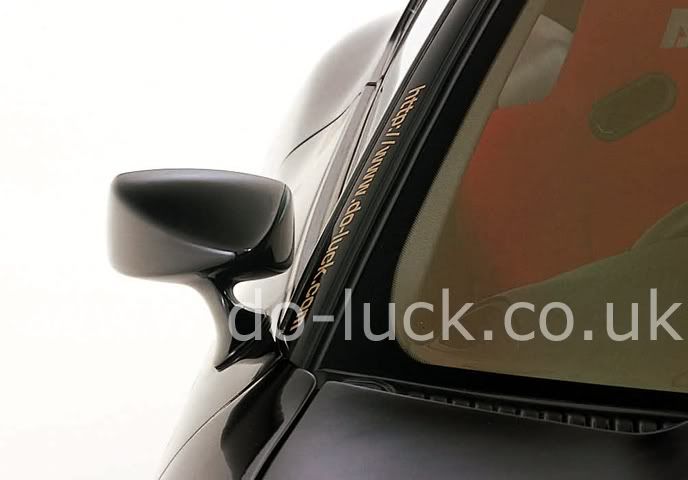
First up, some genuine Mugen door sill plates. Another little bargain and they didn’t come with the rears (meant for 4 doors like Jazz’s). The writing on them makes me laugh:
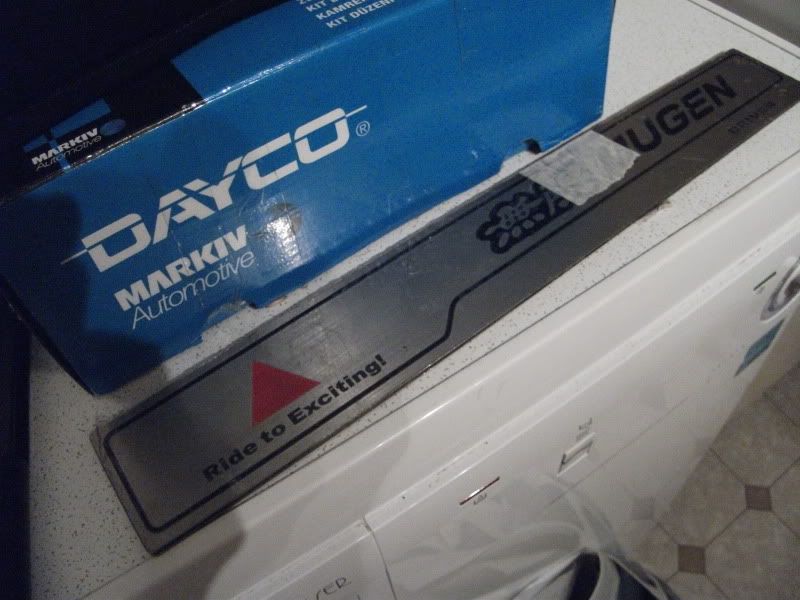
They look tatty, but that’s just dirt and peel back of the protective film that’s still on them. To be honest, I don’t even think they’ll fit, not even bothered to test them up against the sills yet but they look too deep to fit on the OEM plastic door sill. So if I can’t ‘mod’ them on they will probably just live in my Mugen hoard stash!
I also recently picked up a new gearknob – tis only a replica, but I couldn’t justify spending £50-100 on a gearknob. No pic of this sorry!
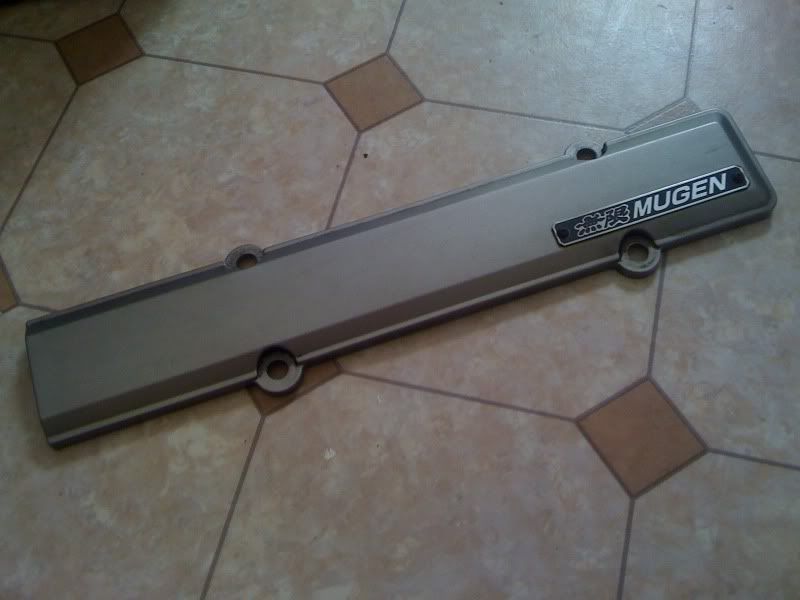
Not so much interior, but while we’re on the subject of Mugen I also picked up a spare genuine metal Mugen emblem badge for the front bumper. These are like rocking horse Mr. Whippy’s, so I snapped it up for a bargain. Some numpty had fitted it to a B16 spark plug cover and was selling it as a ‘Mugen spark plug cover’. You could hardly see the emblem in the pic on ebay, so no-one bid on it. I got it for £10!
Got some other Mugen stuff, but not directly for the car, I’ll show ya later.
The next batch of goodies I’ve bought we go inside…
Interior
- Willans 5 point harnesses & shoulder pads.
I have bought a couple of items on ebay with the move to more performance goals and future track days.
I have a pair of black 2” wide Willans harnesses with short shoulder straps meant for a harness bar (came from a kit car). So a harness bar is now on the future shopping list! Will also add a little B pillar strength – think of it like a strut brace.
…in the meantime, before I buy a harness bar, which are about £150, I happened upon a single set of cheap and newer red 2” Willans 4 point harness with the longer shoulder straps to mount to some floor eyebolts. So I can mount this one straight away.
Here’s some pics of the red harness, just cleaning the strapping up at the moment, it’s come up like new.
As most may have seen, my lovely EP3 Type R seats have found a new home in Bristol_bb4’s red lude (amongst other things!). So what the hell am I going to sit on?
I’ve been after a decent set of bucket seats for a while now and while being outbid on numerous tasty seats – mainly because I didn’t want to pay too much, I happened upon these from the Skyline specialists The GTRShop:
They are made by AAR or a company more commonly known as Araco. There is little information about them on the net, but it appears they are a main manufacturer of OEM factory seats for Toyotas and the like. They do commissions for various companies, including race seats. The likes of Do-Luck & Sumo Power have used them, so figured they would be good quality. I liked the fact they were styled similar to Recaro SPG’s (what I would have liked to have bought with some more £££). Plus they were red, in pretty good nick and were a decent enough price!
Here they are in some other tasty metal:
Interior of this badboy:
Good enough for them, good enough for me!
However, once they arrived I realised two things:
1) How snug these seats were, and
2) How big my arse is!
I do fit in them, don’t get me wrong, I’m not destined for fat camp just yet but I thought I’d pick up something else for the meantime and for the missus to come to shows – I know she’ll hate sitting in them!
So I picked up one spare Evo 4 Recaro Speed seat from, you guessed it, EBAY! With a thorough clean it came up like new and being a passenger seat it was near perfect with the bolsters. These seats are universal fit to drivers or passengers with the reclining button on both sides.
Here it is:
Next up was fitting the seats – I was going to get some brackets fabbed up by someone local, but then I stumbled across Dave (dlongmu) who was selling his old Bride MO low sliding seat rails (£££). I snapped these up and here they are:
So plan for Japfest is to have these installed and the Red Willan’s Harness on the driver’s seat. The passenger (if I allow one!) can use the seatbelt for now. I also need another side mount for the buckets to fit on the sliding rails. The Recaro goes straight onto the Bride rails though and is currently in the car but not bolted down so I can get access to certain things.
Just about in the car when it got dark!
Also picked up a few Mugen goodies again!
First up, some genuine Mugen door sill plates. Another little bargain and they didn’t come with the rears (meant for 4 doors like Jazz’s). The writing on them makes me laugh:
They look tatty, but that’s just dirt and peel back of the protective film that’s still on them. To be honest, I don’t even think they’ll fit, not even bothered to test them up against the sills yet but they look too deep to fit on the OEM plastic door sill. So if I can’t ‘mod’ them on they will probably just live in my Mugen hoard stash!
I also recently picked up a new gearknob – tis only a replica, but I couldn’t justify spending £50-100 on a gearknob. No pic of this sorry!
Not so much interior, but while we’re on the subject of Mugen I also picked up a spare genuine metal Mugen emblem badge for the front bumper. These are like rocking horse Mr. Whippy’s, so I snapped it up for a bargain. Some numpty had fitted it to a B16 spark plug cover and was selling it as a ‘Mugen spark plug cover’. You could hardly see the emblem in the pic on ebay, so no-one bid on it. I got it for £10!
Got some other Mugen stuff, but not directly for the car, I’ll show ya later.
-
mercutio

- LotM Winner
- Posts: 14958
- Joined: Sun Aug 08, 2010 8:45 pm
- My Generation: 5G
- Location: Sunny Manchester
- Has thanked: 1 time
- Been thanked: 4 times
- Contact:
cool nice stash when you gonna start work?
bristol_bb4 wrote:ahhh a 5th gen, i love 5th gens
Dino wrote:I loves the 5th gen really.... just dont quote me on it...
4thgenphil wrote:Mines 4 1/4 unches mate, sorry
http://www.ludegeneration.co.uk/profile ... -t618.html
-
nucleustylzlude
- Moderator
- Posts: 4013
- Joined: Wed Aug 11, 2010 11:46 pm
- My Generation: 4G
- Location: Bristol, UK!
- Been thanked: 7 times
- Contact:
Re: Supercharged Mugen Lude
Believe it or not - I've started. I've got 3 or 4 more updates I'm finishing uploading pics. Most of the stuff above is from last year!
More updates any day, so keep an eye out. But to keep you all drooling, some teaser pics...
...
...
...
...
...
...
...
...
...
...
...

More updates any day, so keep an eye out. But to keep you all drooling, some teaser pics...
...
...
...
...
...
...
...
...
...
...
...

-
rob quilter

- Supporter 2014
- Posts: 5331
- Joined: Mon Aug 09, 2010 1:40 pm
- My Generation: 5G
- PSN GamerTag: robquilter
- Location: Derby
PERFORMANCE PARTS FOR JAPANESE CARS - http://WWW.TOKYOSQUAD.COM
FOLLOW US ON FACEBOOK - http://WWW.FACEBOOK.COM/TOKYOSQUAD
FOLLOW US ON FACEBOOK - http://WWW.FACEBOOK.COM/TOKYOSQUAD

-
nucleustylzlude
- Moderator
- Posts: 4013
- Joined: Wed Aug 11, 2010 11:46 pm
- My Generation: 4G
- Location: Bristol, UK!
- Been thanked: 7 times
- Contact:
Re: Supercharged Mugen Lude
Cheers guys. More updates tomorrow night now I think.
I've not just been buying parts and taking pics of them - honestly!
Just thought I'd do another roundup of all the other parts I now have, which I hadn't considered when I wrote the earlier plans in the build. Just got, Fuelling additions / Wheels / Intake & Exhaust / Electrical bits / more Misc stuff to post and then two updates working on the removal of more things in the engine bay and working on the intake manifold / JRSC parts.
The more I keep doing is really spurring me on TBH.
Will Japfest be acheivable is still a big '?' though. I could put things back together fairly quickly and easily and skip some maintenance and tarting up of things to 100% be at the show - but overall I would just end up redoing stuff again = more time. So taking it all in my stride and doing as much as I can to avoid retrospective additions later is the best approach me thinks.
Cheers though everyone - the constant ribbing about not getting on with it has certainly helped!