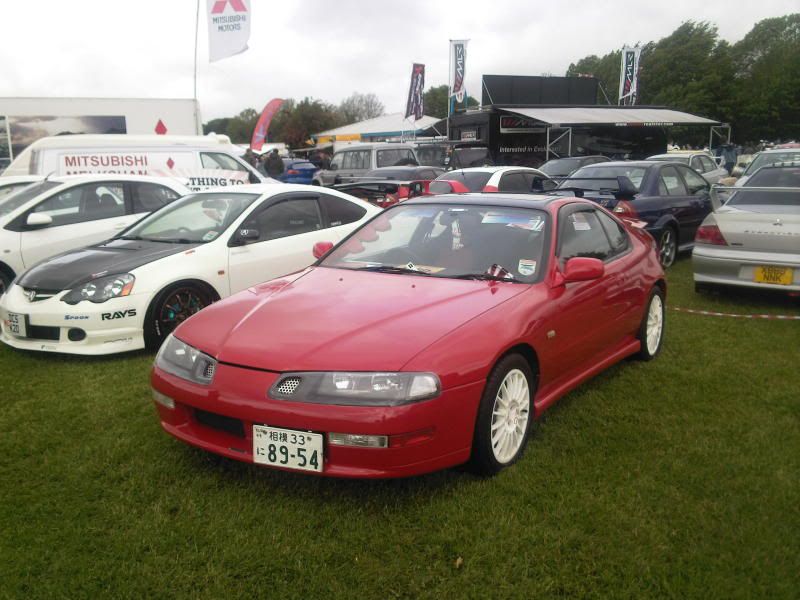
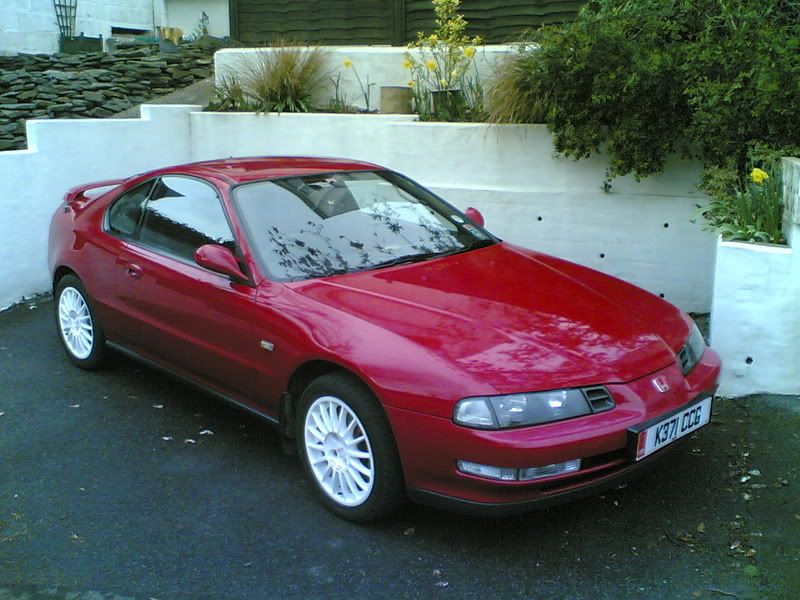
Supercharged Mugen Lude (03/06/14 Update!)
Posted: Tue Aug 24, 2010 11:47 pm
My Supercharged Mugen Lude
CONTENTS (with links to posts)
Page 1 = BUILD PART 0 – My Preludes History
Page 1 = BUILD PART 1 – Introduction
Page 1 = BUILD PART 3 – Does 5th gen Jackson Racing SC Fit the 4th gen
Page 1 = BUILD PART 3 – Build Parts – Jackson Racing Supercharger Kit
Page 1 = BUILD PART 4 – Build Parts (Cont’d) – Fuelling
Page 1 = BUILD PART 4 – Build Parts (Cont’d) – Tuning
Page 3 = BUILD PART 4 – Build Parts (Cont’d) – Transmission
Page 3 = BUILD PART 4 – Build Parts (Cont’d) – Cooling
Page 4 = BUILD PART 4 – Build Parts – Miscellaneous Parts
Page 4 = BUILD PART 5 – Build – Compression Test
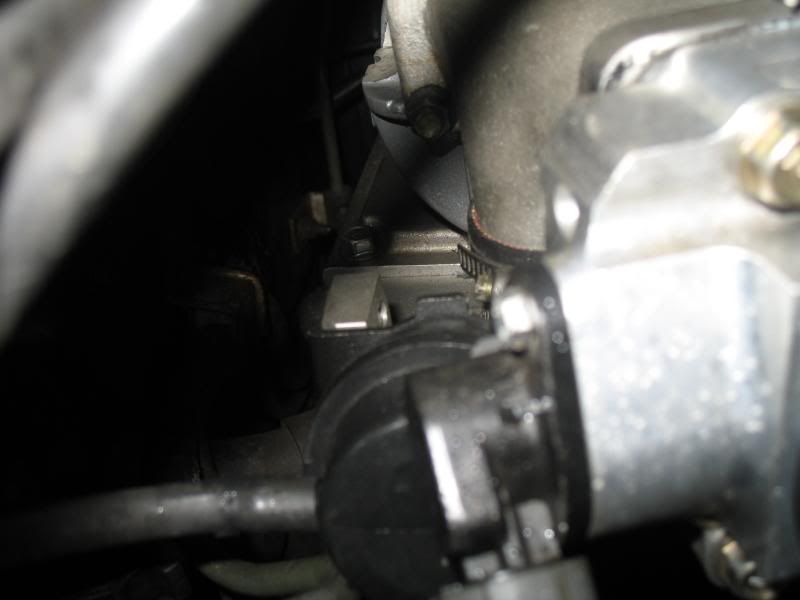
Page 4 = BUILD PART 5 – Build – Engine Parts Removal (A/C, EGR, C/C, Resonator Bypass)
Page 5 = BUILD PART 5 – Build – Engine Parts Removal (EGR)
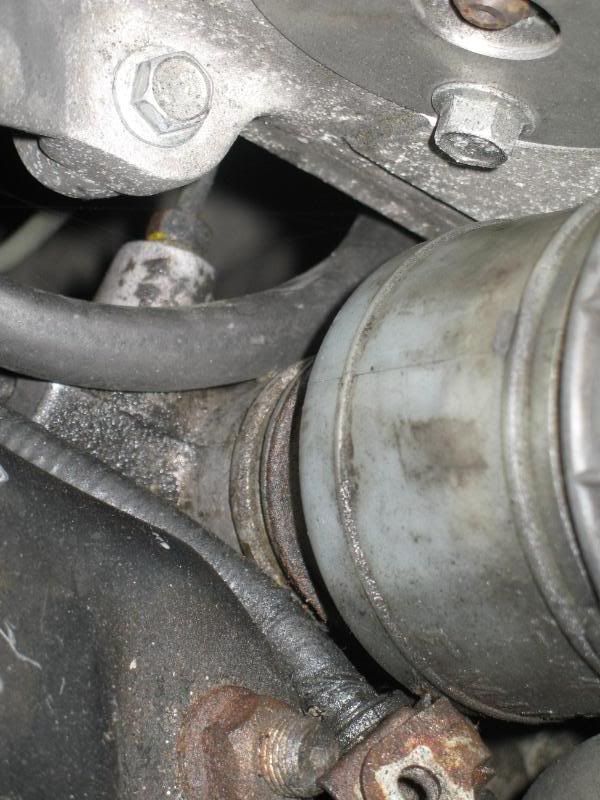
Page 5 = BUILD PART 5 – Build – Battery Relocation + PAS removal
Page 7 = BUILD PART 4 – Build Parts (Cont’d) – Brakes
Page 7 = BUILD PART 4 – Build Parts (Cont’d) – Interior
Page 10 = BUILD PART 4 – Build Parts (Cont’d) – Electrical and Misc
Page 11 = BUILD PART 4 – Build Parts (Cont’d) – Wheels
Page 12 = BUILD PART 4 – Build Parts (Cont’d) – Suspension
Page 12 = BUILD PART 4 – Build Parts (Cont’d) – Fuelling Again
Page 14 = BUILD PART 4 – Build Parts (Cont’d) – More Cooling
Page 14 = BUILD PART 4 – Build Parts (Cont’d) – Intake & Exhaust
Page 16 = BUILD PART 4 – Build Parts (Cont’d) – Intake & Evap system removal
Page 17 = BUILD PART 5 – Build (Cont’d) – JRSC parts / Intake refurb & more
Page 20 = BUILD PART 5 – Build (Cont’d) – More removals – Rad, PAS, Fuel system
Page 26 = BUILD PART 5 – Build (Cont’d) – Garage distractions & more
Page 28 = BUILD PART 5 – Build (Cont’d) – ABS removal
Page 30 = BUILD PART 5 – Build (Cont’d) – More things to remove!
Page 31 = BUILD PART 5 – Build (Cont’d) – Porting Parts
Page 32 = BUILD PART 4 – Parts (Cont’d) - Another Parts Roundup
Page 36 = BUILD PART 4 – Parts (Cont’d) - Seats, Brakes, Wheels
Page 36 = BUILD PART 4 – Parts (Cont’d) – More wheels…
Page 39 = BUILD PART 5 – Build (Cont'd) - Reality Check
Ongoing Spec:
Key
Fitted
Waiting to be fitted
Ordered
Not yet ordered
Not made yet – custom!
General
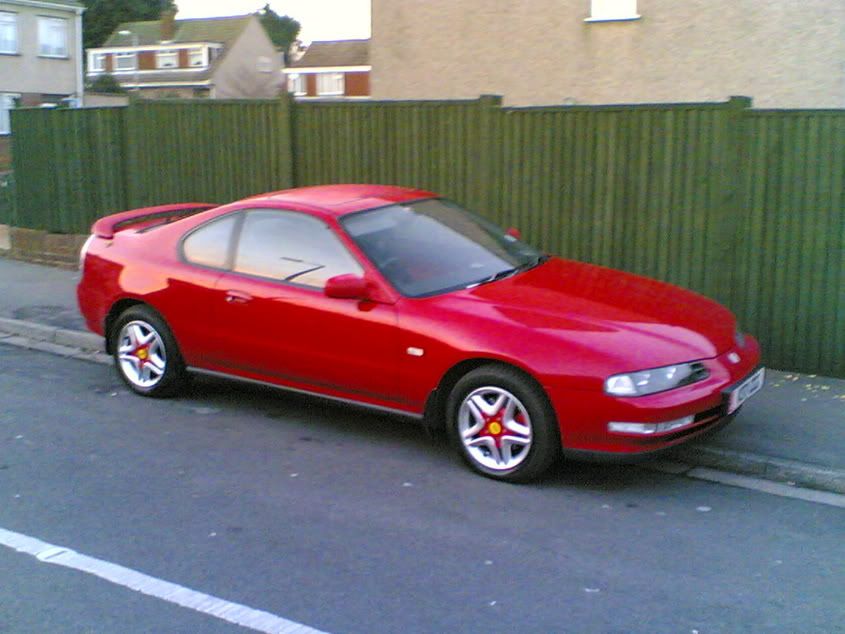
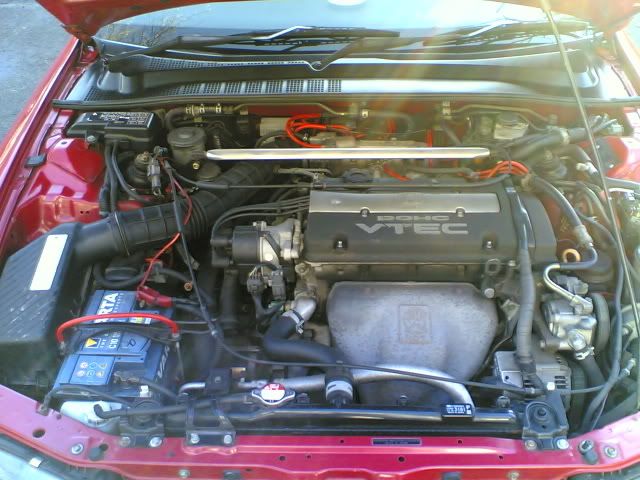
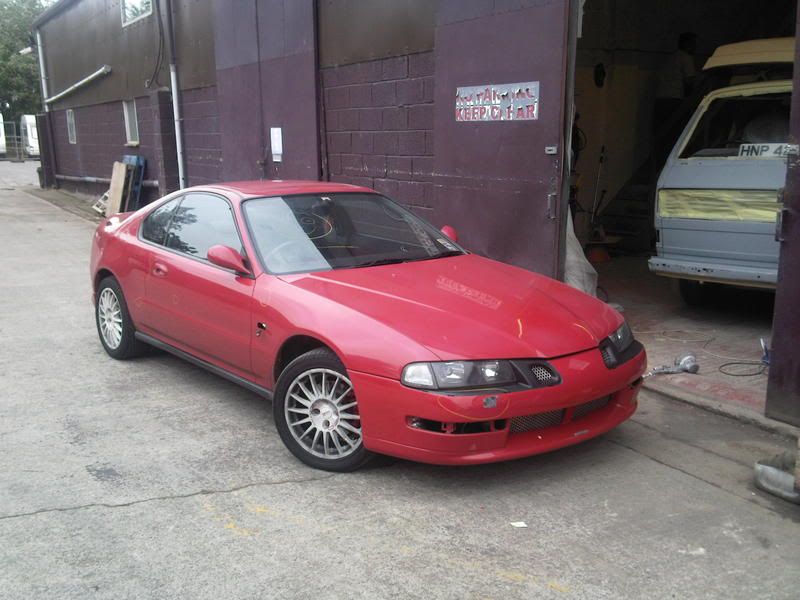
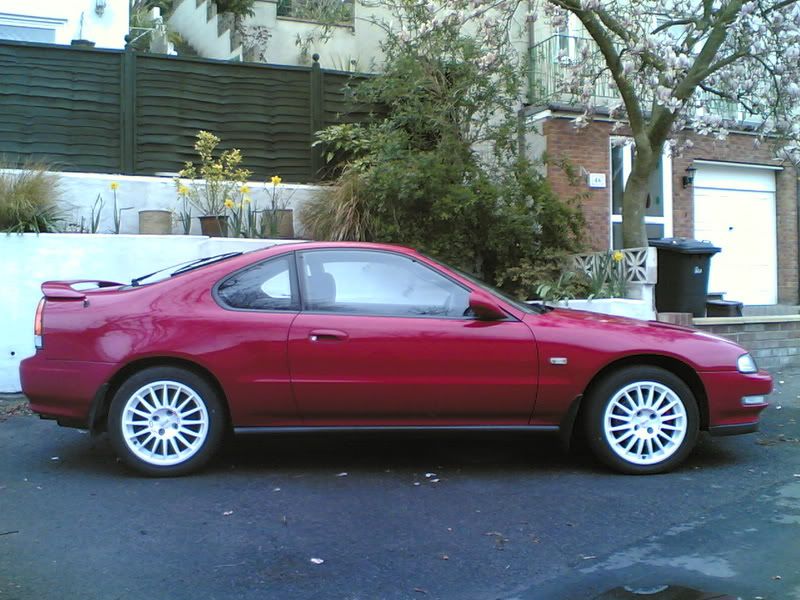
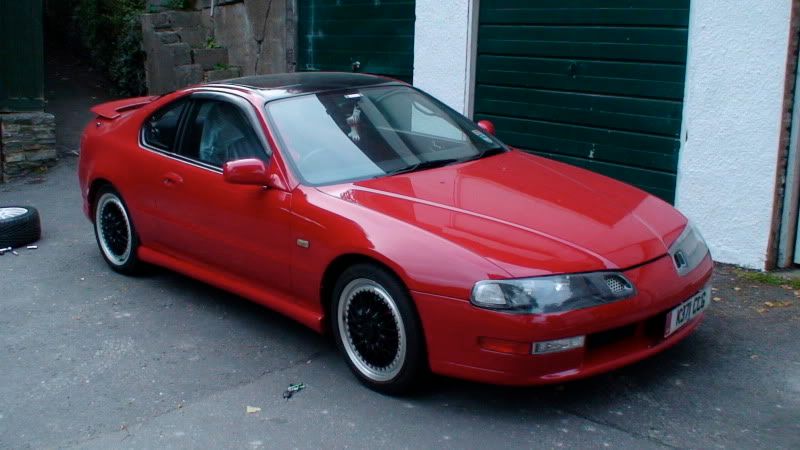
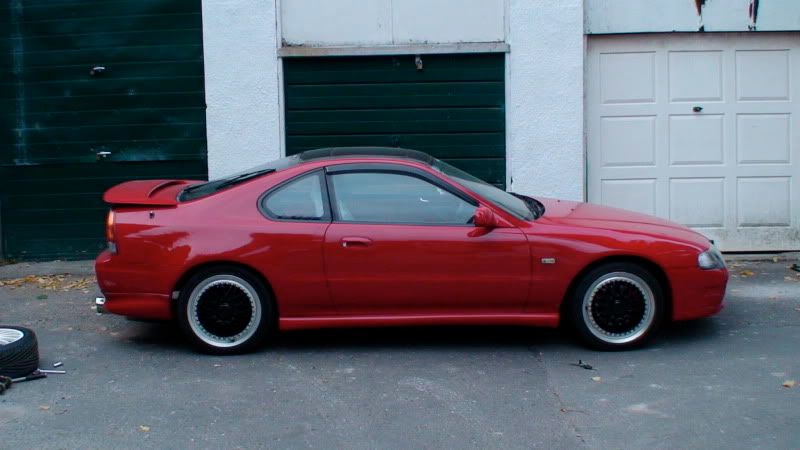
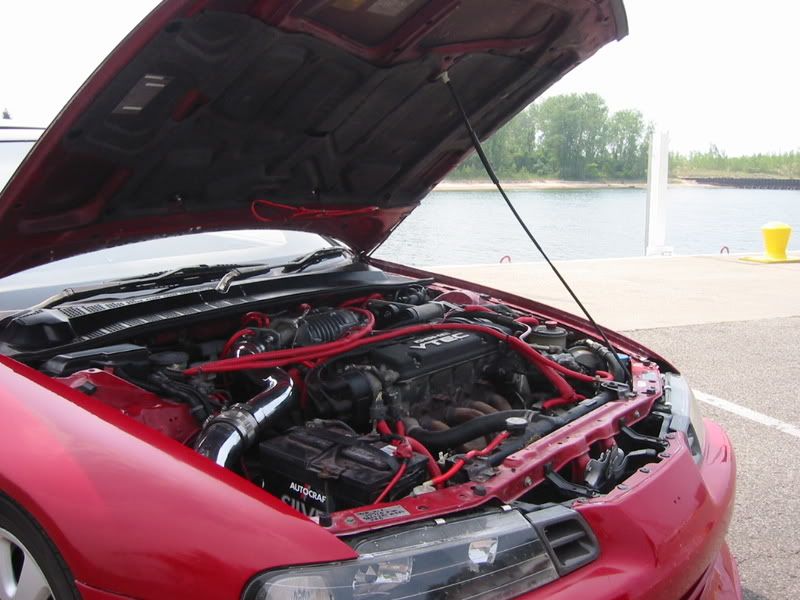
Base Car = UKDM BB1 Honda Prelude 2.2 VTEC 4ws
Date car was bought = August 2003
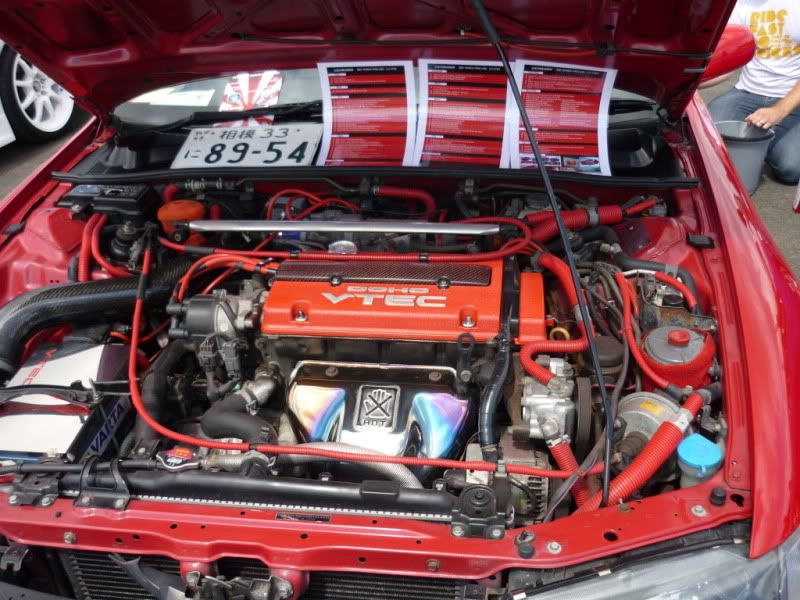
Engine
Mugen Version 1 Billet Oil Cap (Genuine)
Mugen Reservoir Covers (Genuine) – to brake and clutch reservoir
VTEC Rocker Cover Resprayed OEM
Red Kevlar / Carbon Weave Plug Cover
Samco Red Silicone Breather Pipes
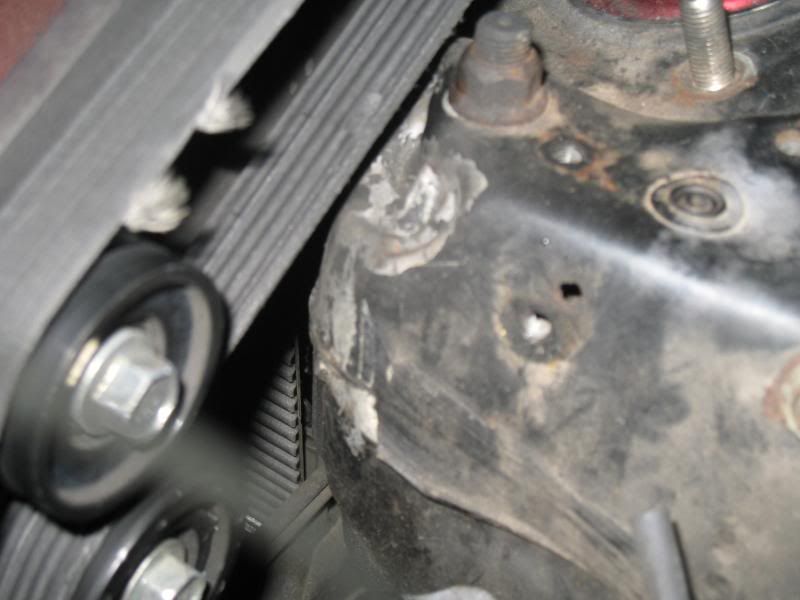
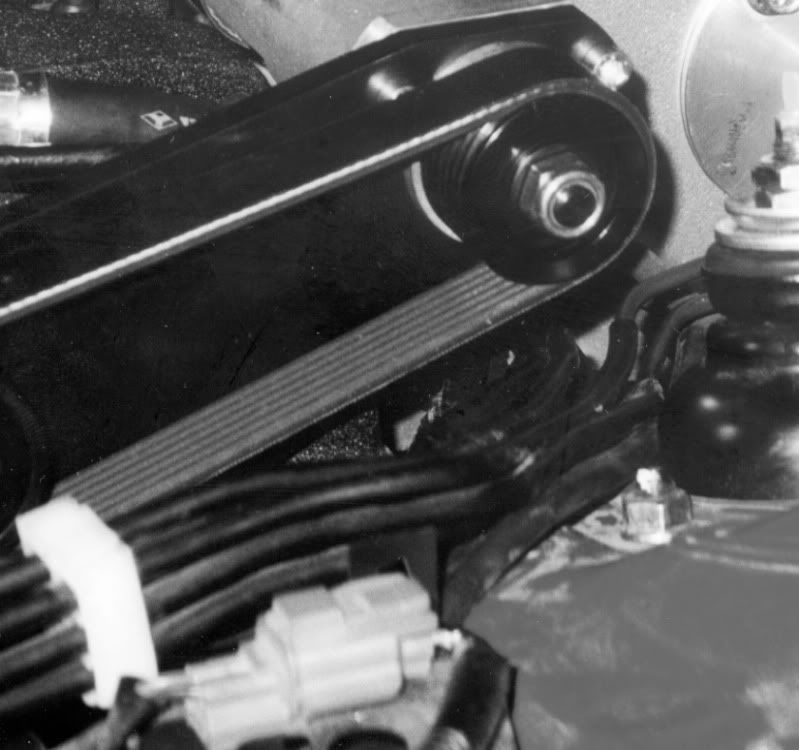
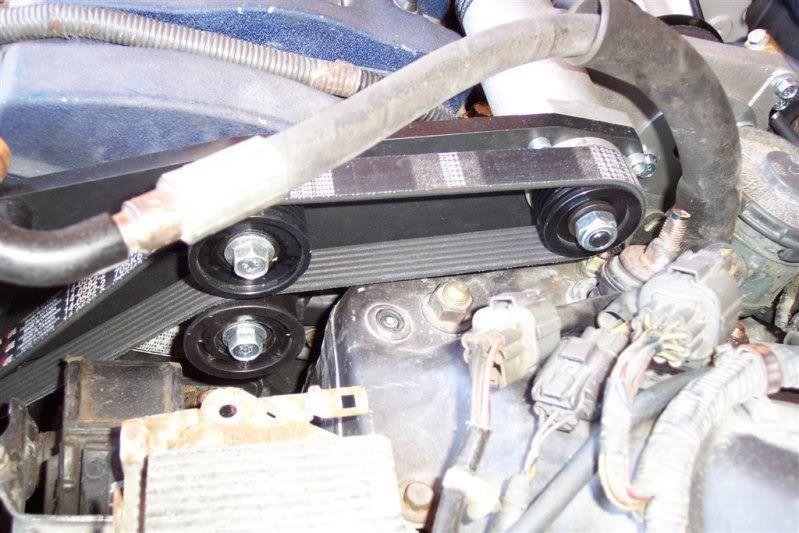
Airconditioning Removal – Gates Micro-V 6PK913 belt to bypass compressor
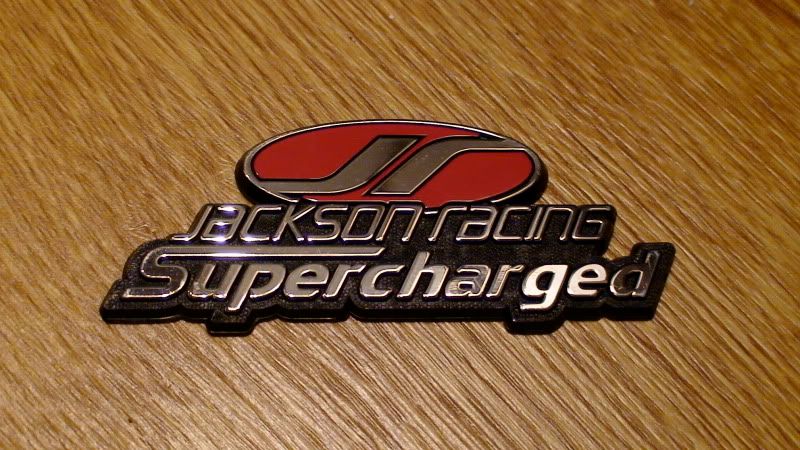
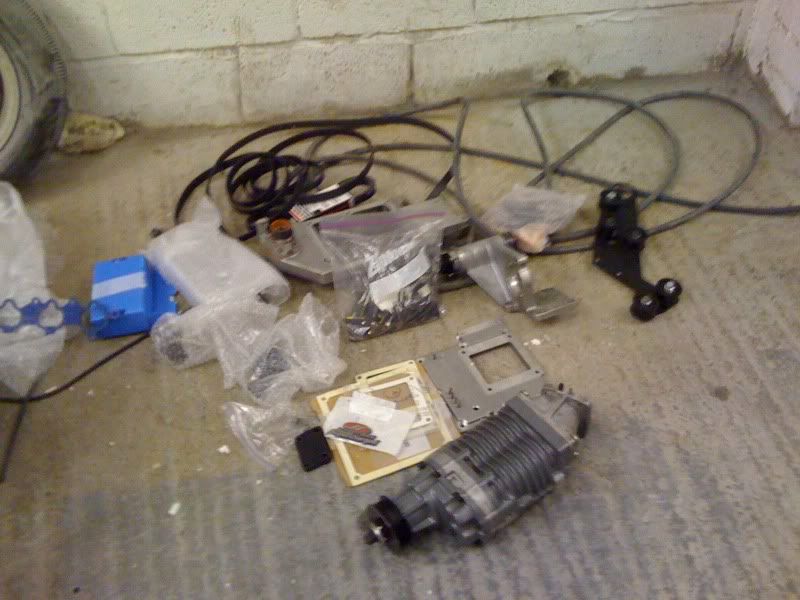
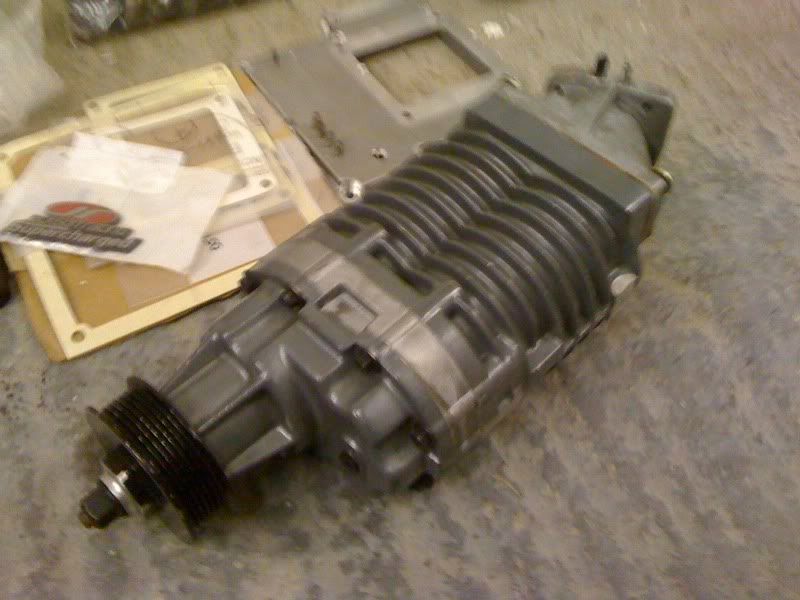
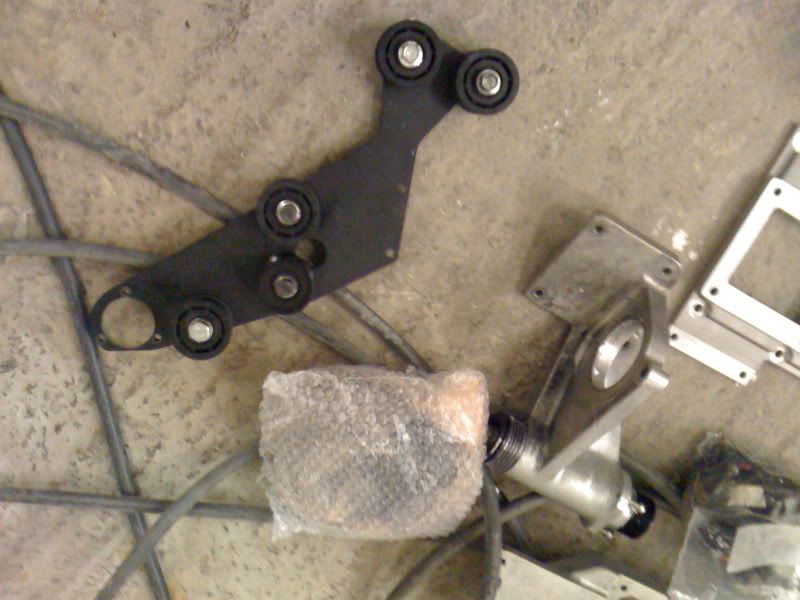
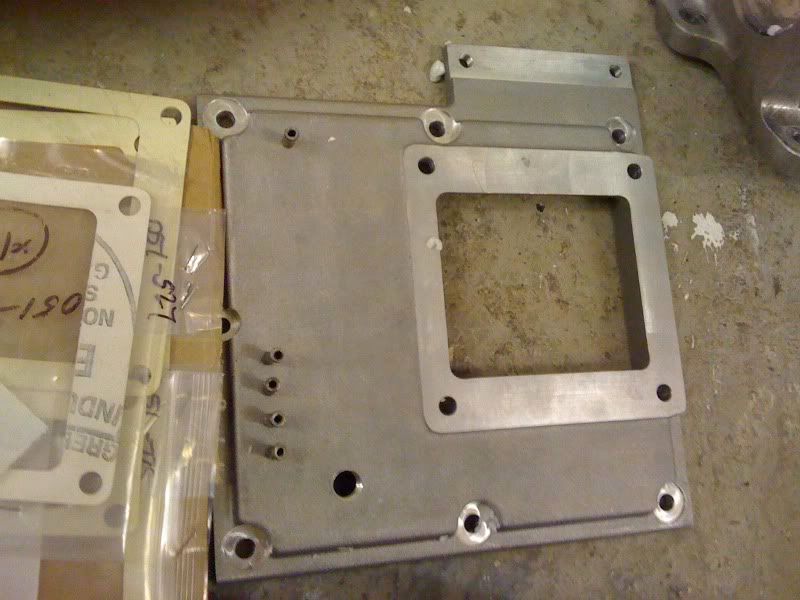
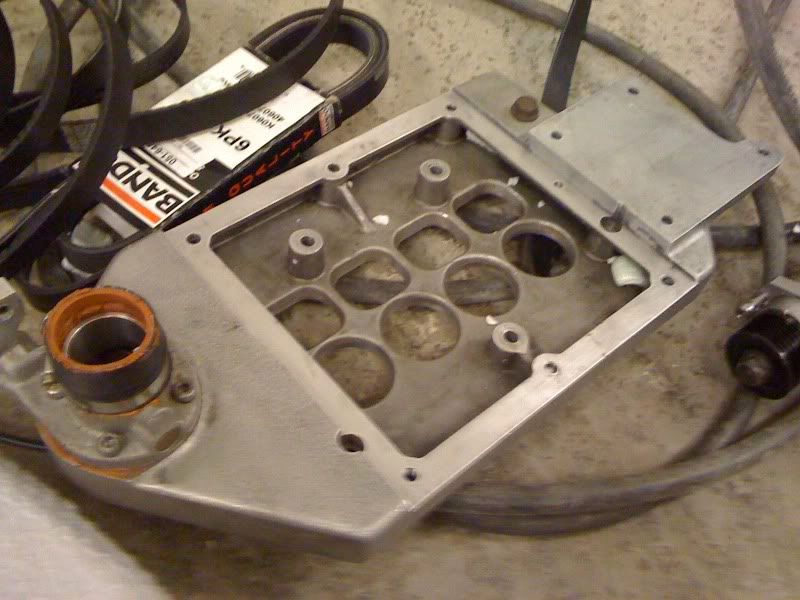
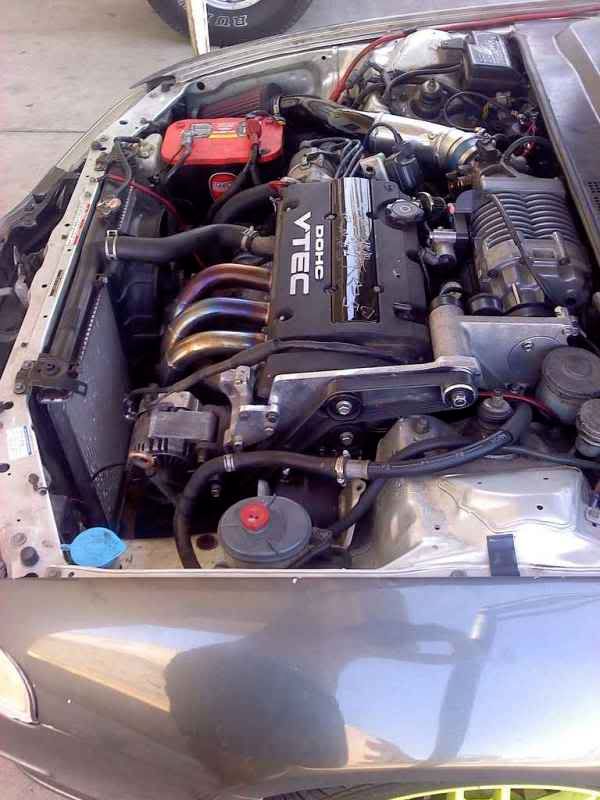
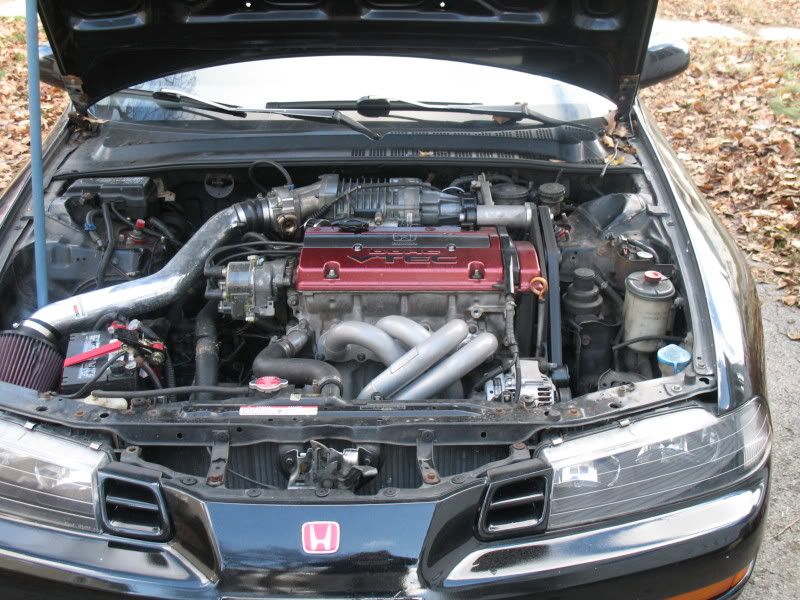
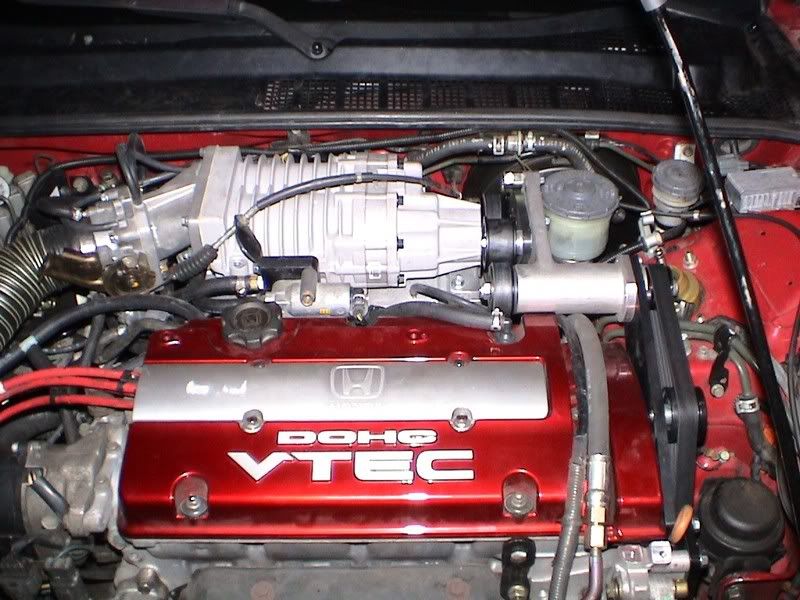
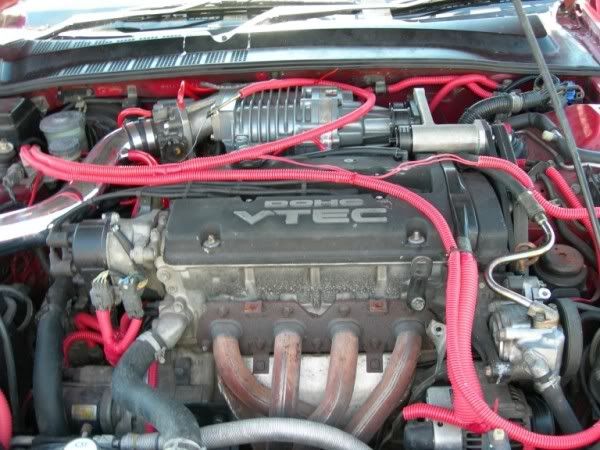
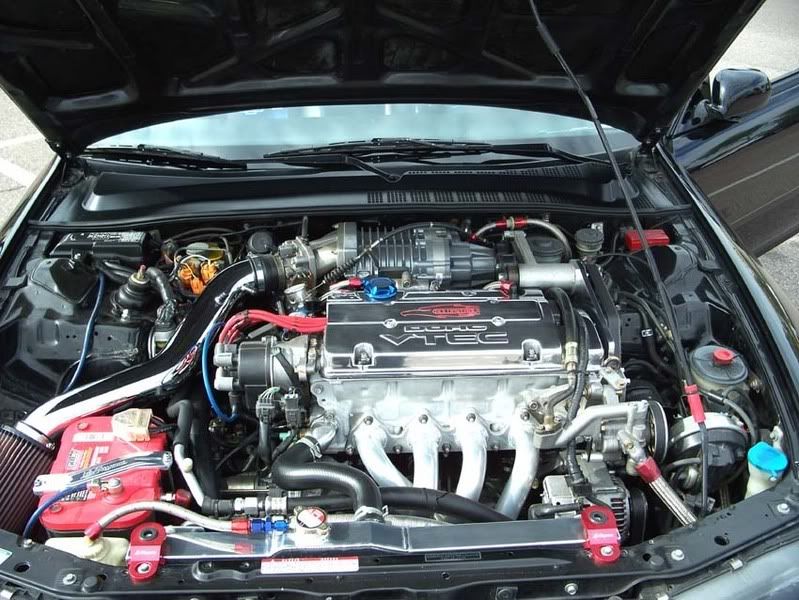
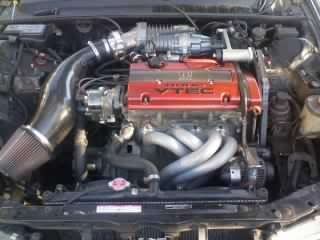
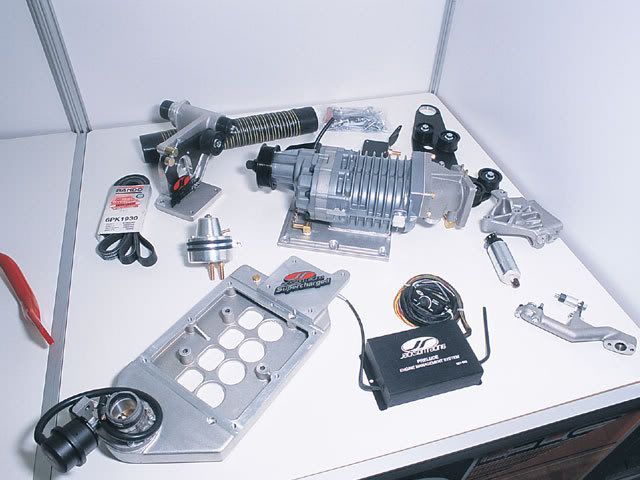
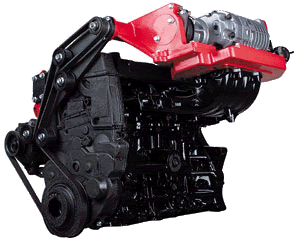
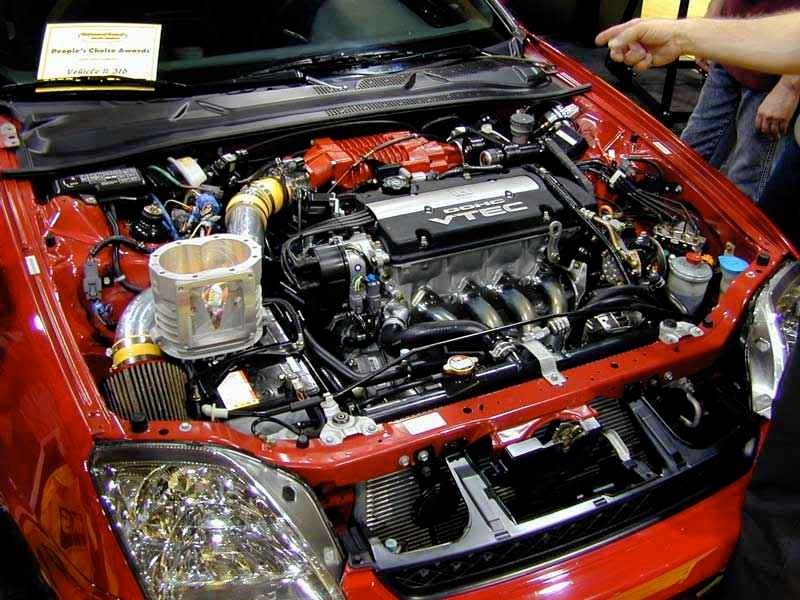
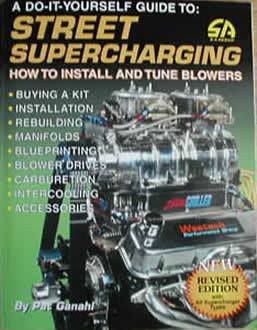
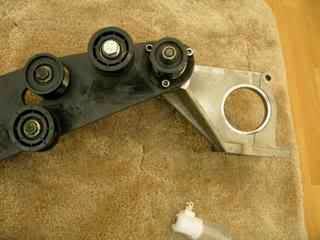
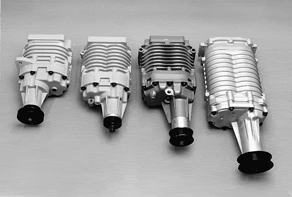
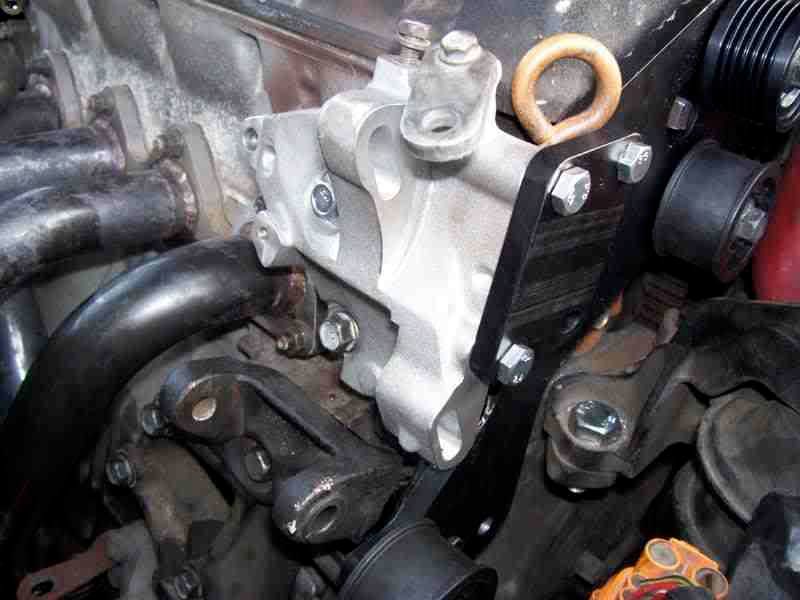
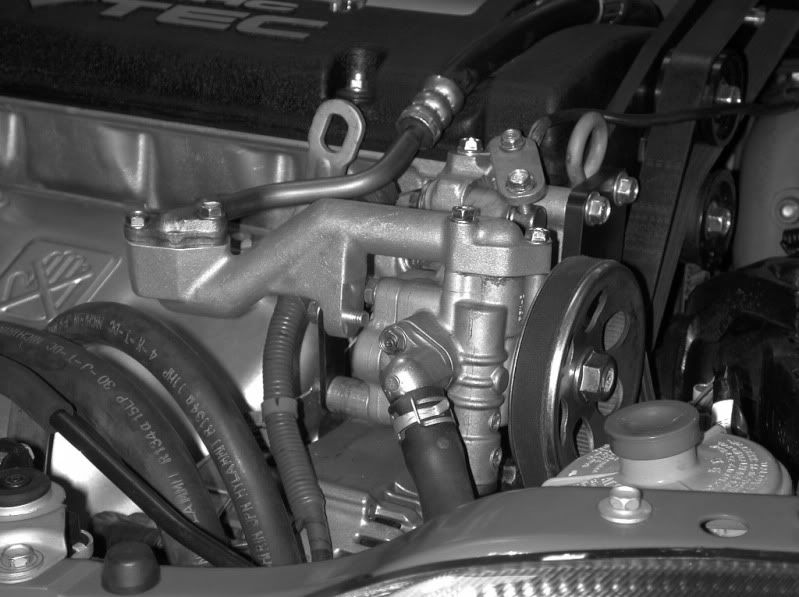
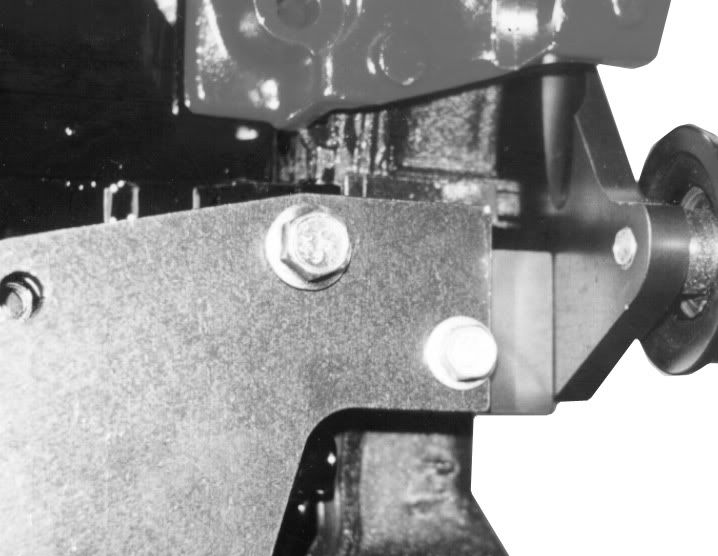
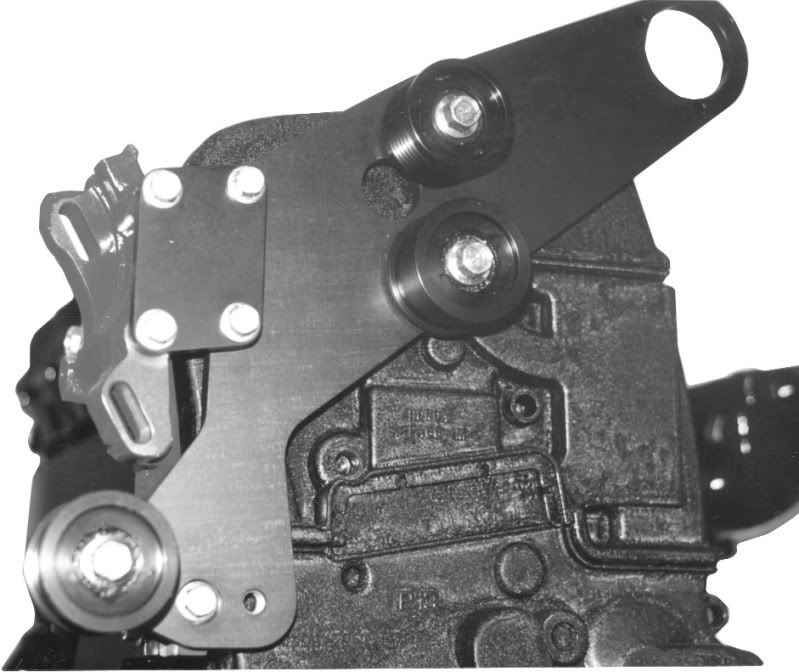
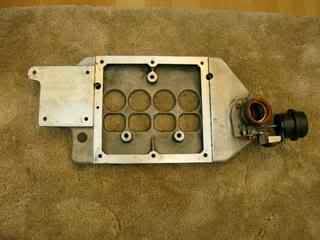
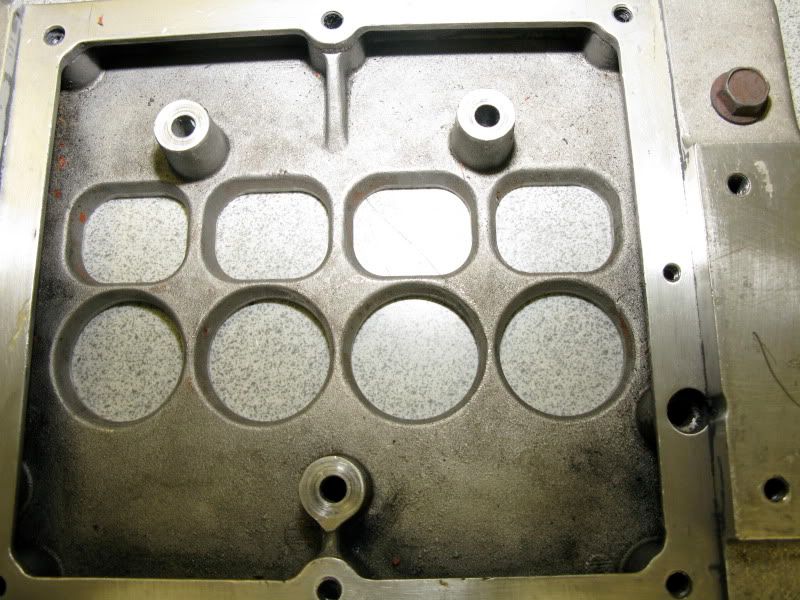
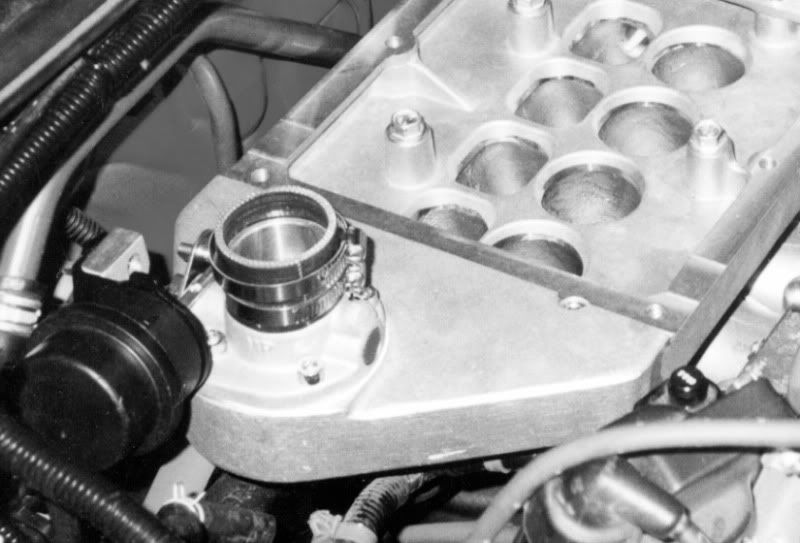
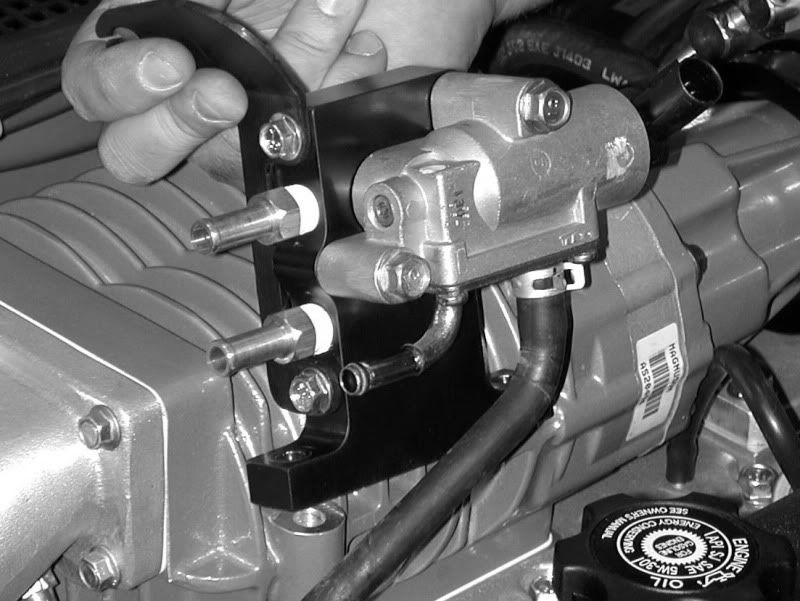
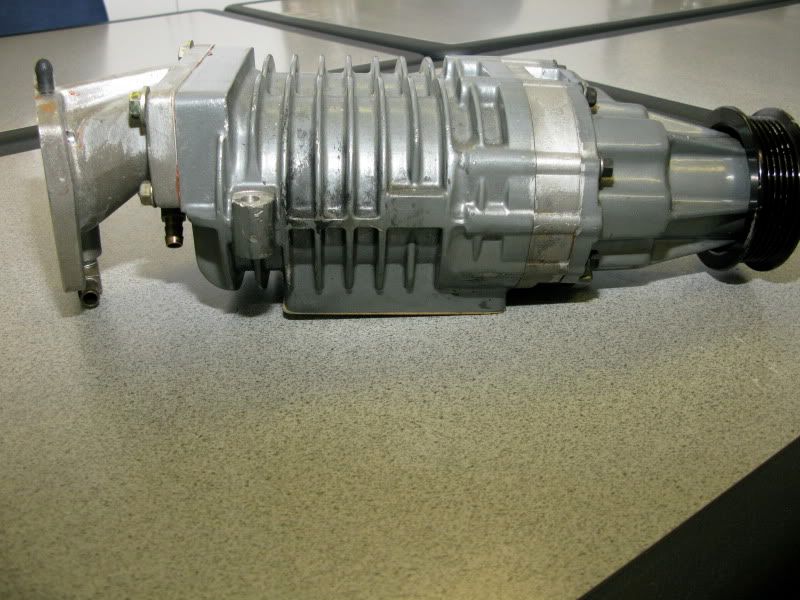
Jackson Racing Supercharger Kit!!!
Full Engine Gasket Set
Gates Powergrip Cambelt and Balancer Belt
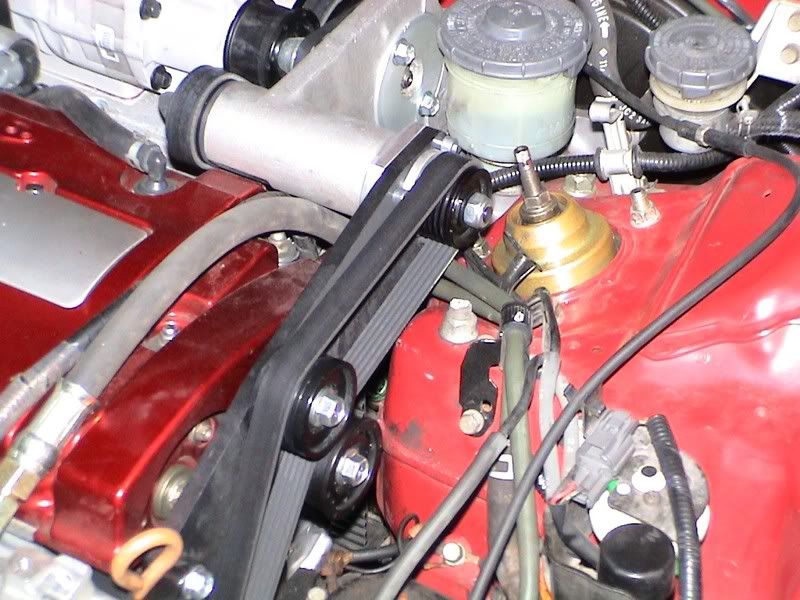
KS Tuned manual tensioner
Oil filter relocation and 19 row oil cooler + all black AN10 lines and fittings
Hamp Oil Filter
Motul 8100 X-Cess 10W-40 Semi-synthetic Oil
New Water Pump
Works Engineering Cam Seal (Triple O-ring seal)
Tegiwa Imports – Engine Dress Up Black Bolts & Black Washers (Pack of 5 x 3 = 15nr)
Tegiwa Imports – Rocker Cover Dress Up Black Dome Bolts (pack of
Silicone Vacuum Hosing in Black from SFS Hoses
Spare Engine Rocker Cover – Now Smoothed and AN10 breather fittings awaiting to be welded on
Spare Engine Rocker Cover Powder Coated Black (Temporary until above one is finished)
Spare Engine – H22A (for round 2 of my plans)
Innovative Motorsports Replacement Mount Kit – 95A race urethane
AN10 Braided Lines from Torques UK – for rocker cover venting to Catch Can
Performance Autoworks Baffled Sump
Custom Aluminium Ventilated Catch Can with AN10 ports
106pete special custom chargecooler
Transmission
UKDM standard M2A5 gearbox
ATR U2Q7 gearbox – LSD + better ratios + higher final drive
JUN 11lb ultralight flywheel
ACT Street Clutch and HD Pressure Plate
I-Tuned Goodridge Custom Braided Clutch Line (deletes damper)
Tegiwa Imports Magnetic Gearbox Sump Plug
Torco MTF Gearbox Oil – 2 litres from Nimbus Motorsports
New Clutch Slave Cylinder (Import Car Parts)
Forbidden Motorsports Short Shifter (or similar)
New Oil Seals
Intake & Exhaust
No exhaust or manifold currently fitted
Apexi Power Intake Induction Kit Filter and Modified Elbow
Tanabe Carbon Fibre Induction Kit Tubing (Short Ram)
Hondata Heatsheild Gasket
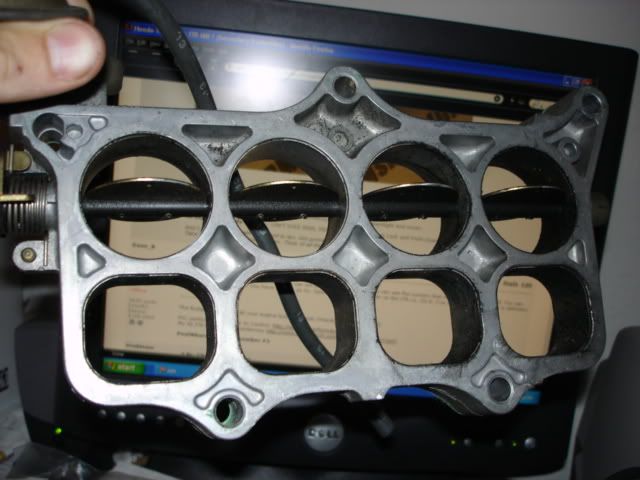
CNT 68mm throttle body (tapers out to 71mm) + new TPS sensor
Mikalor W2 Hose Clamps (for carbon intake tubing to throttle body) – 85mm+
Silicone Hose Joiner 3” to 3” in Black from SFS Hoses
New Stainless Steel Manifold Studs
3” Catback Exhaust System – tubing sourced by tonydpp & welded by Solid Fabs
3” Decat Pipe from a Mitsibushi Evo 4-6
Custom Solid Fabrications Manifold & Downpipe – 4-1 Design to a 3” Collector
BGA Manifold Gasket (Engine Block to Manifold) – three skin metal gasket
New 3” Evo Flange Exhaust Gaskets x 3 (3” collector and either side of decat)
New OEM Honda O2 Sensor (from a Civic 1.6 VTEC 5 door – same but slightly longer than the Prelude’s)
Used OEM Mitsibushi Evo 6 Catalyst Converter (For MOT emissions test)
Fuelling & Ignition
Denso Iridium Spark Plugs
Nology Hotwire Ignition Leads – Red colour
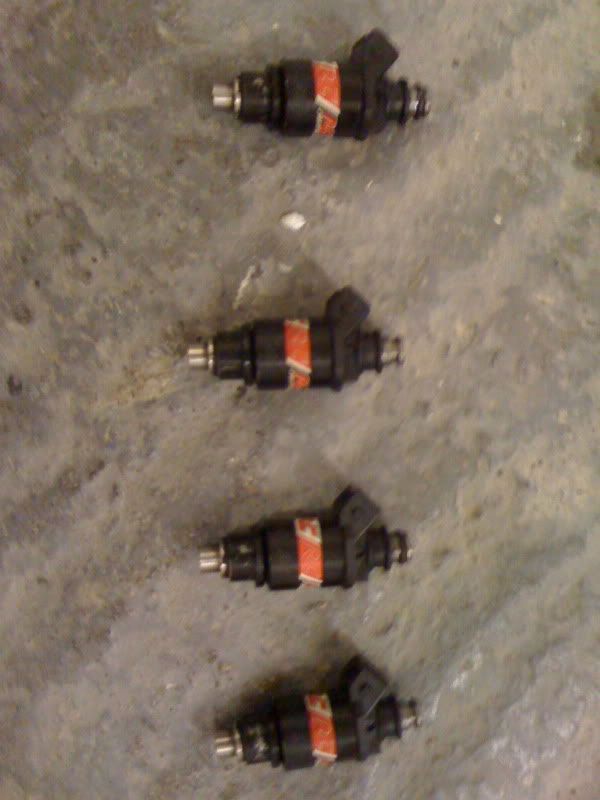
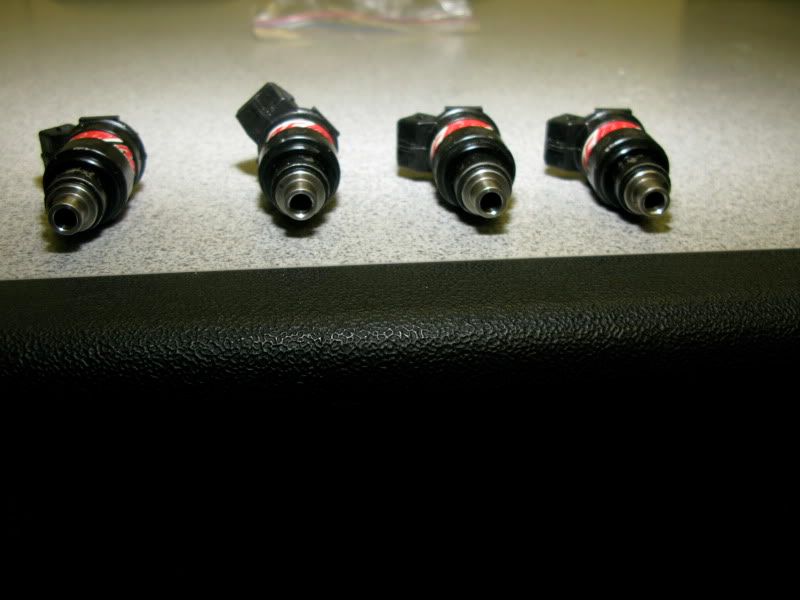
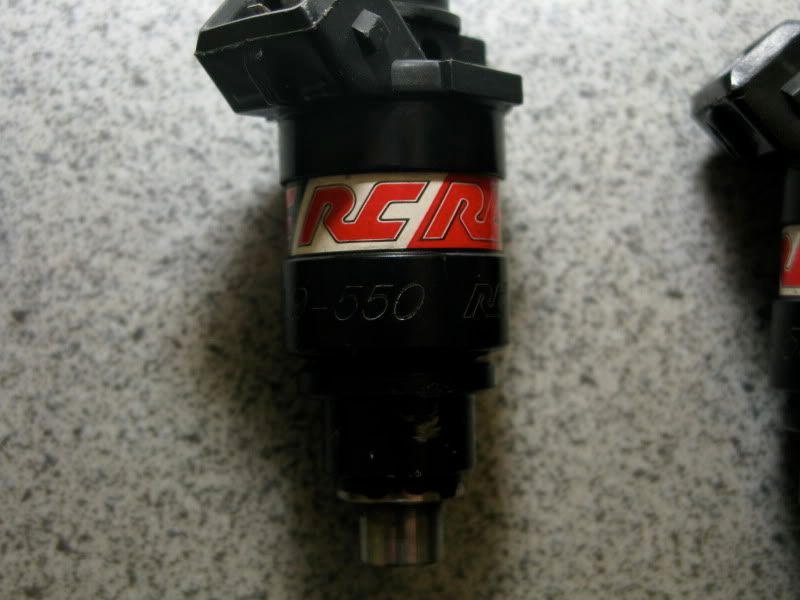
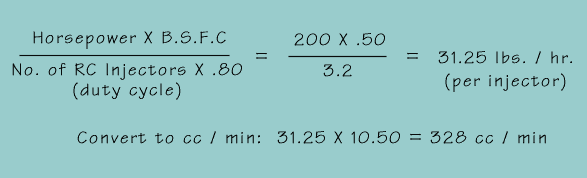
550cc RC Saturated Injectors
New Injector Seal Kit
AEM Fuel Rail – Silver
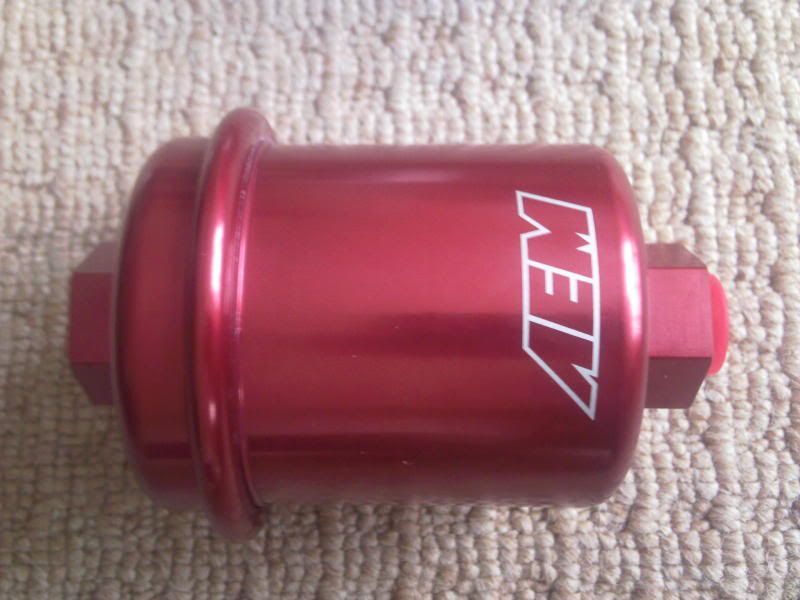
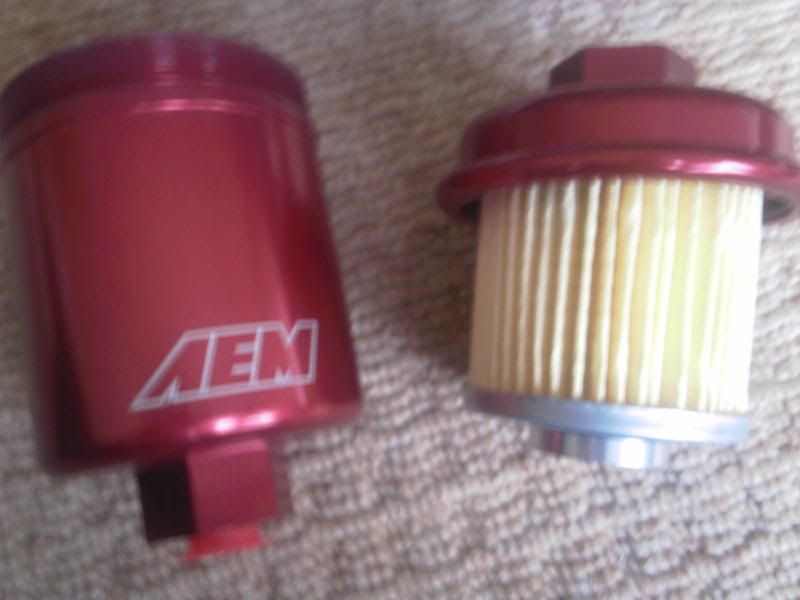
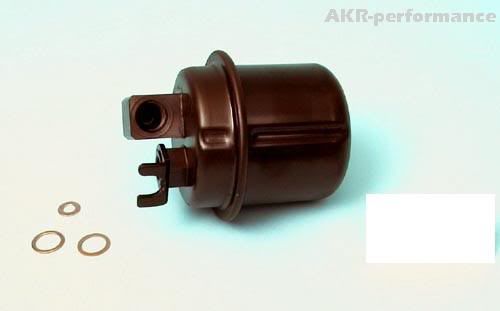
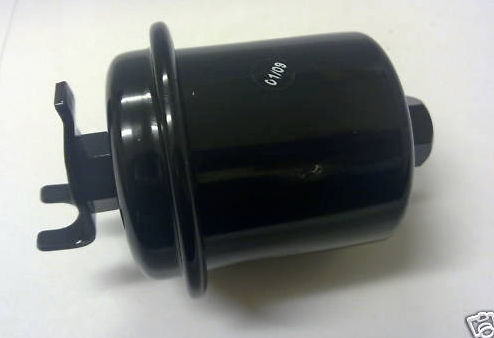
Torques UK – Custom AN6 Fuel Supply Line and Inline Fuel Filter
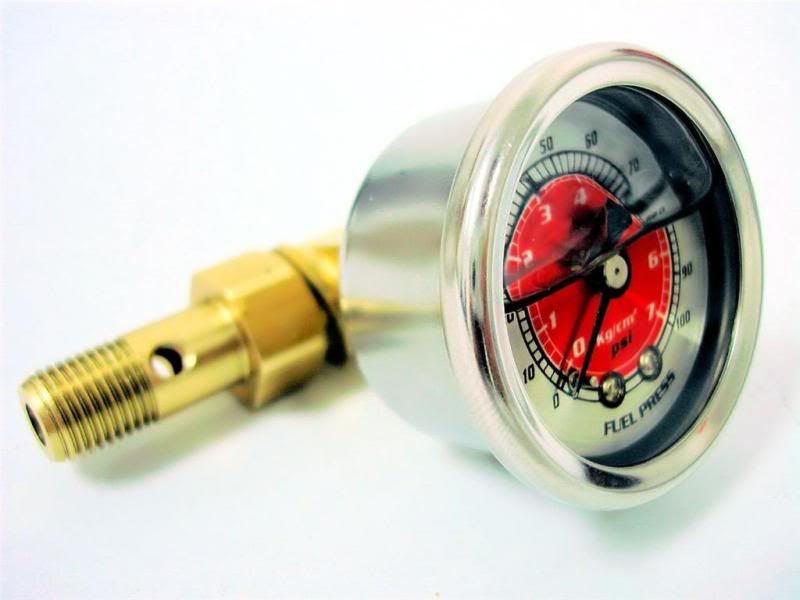
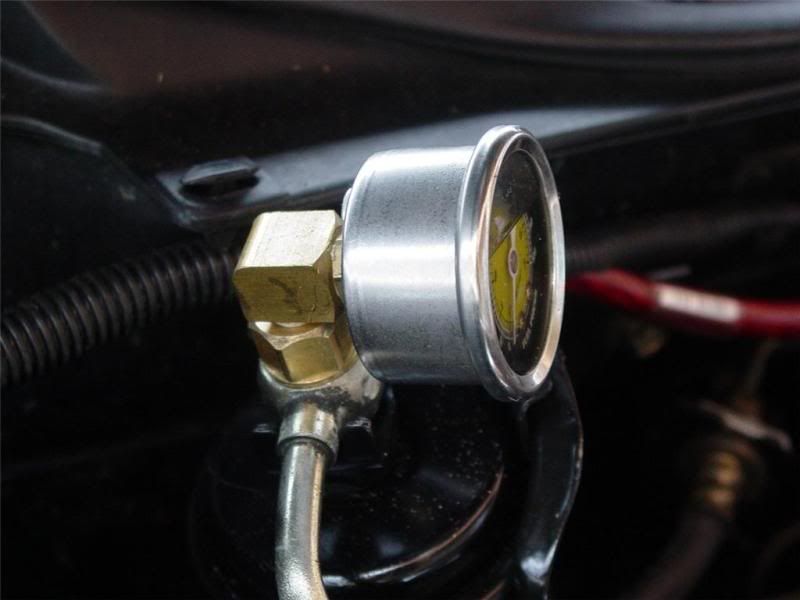
Fuel Pressure Gauge (1/18th NPT fitting to AN line fitting adaptor
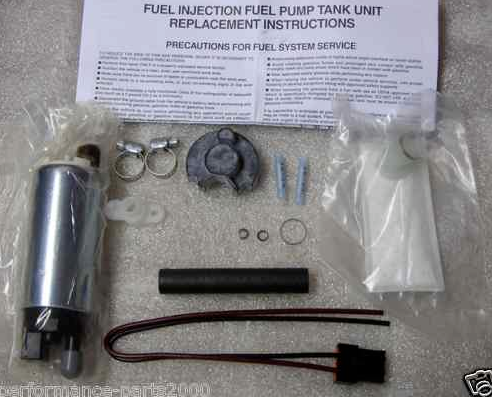
HRC 255lph Fuel Pump
Spark Plugs – 1 step colder, 2 sets = 1 x NGK Copper & 1 x Denso Iridiums
Tuning / Electrical
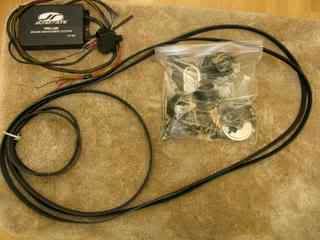
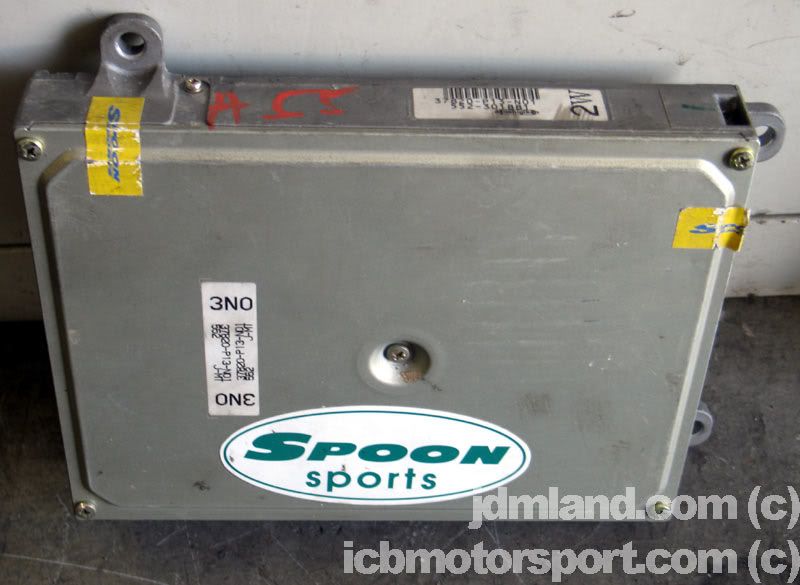
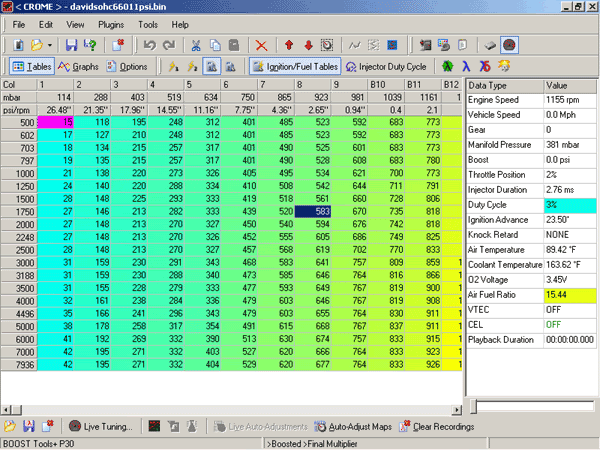
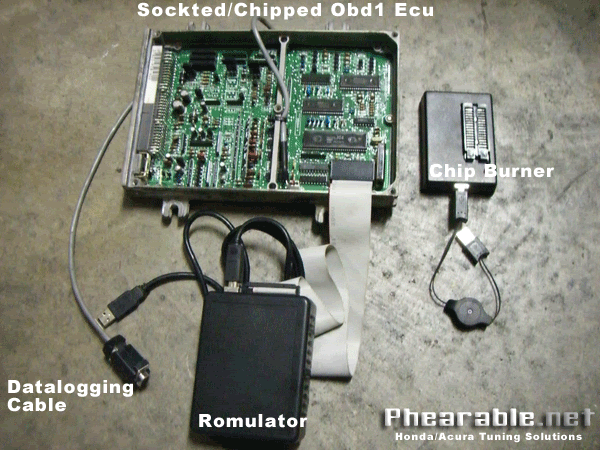
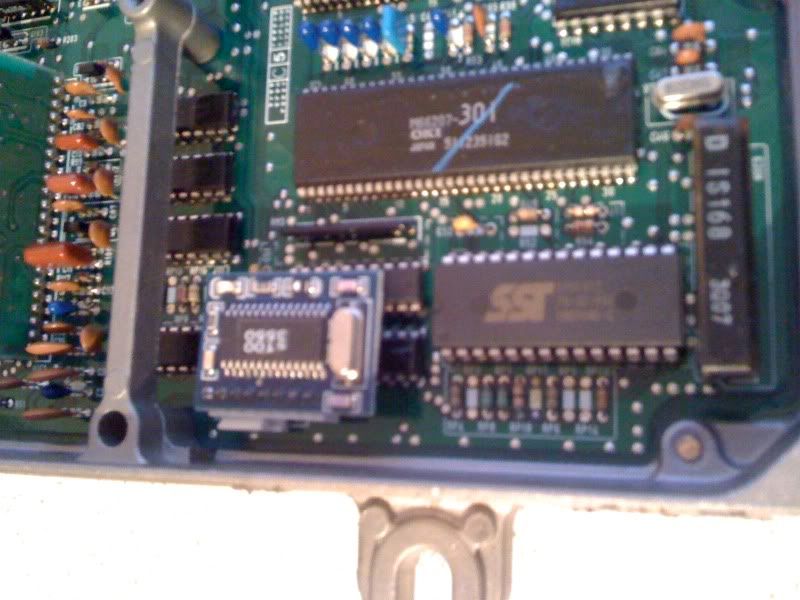
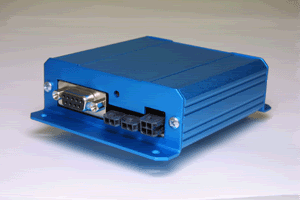
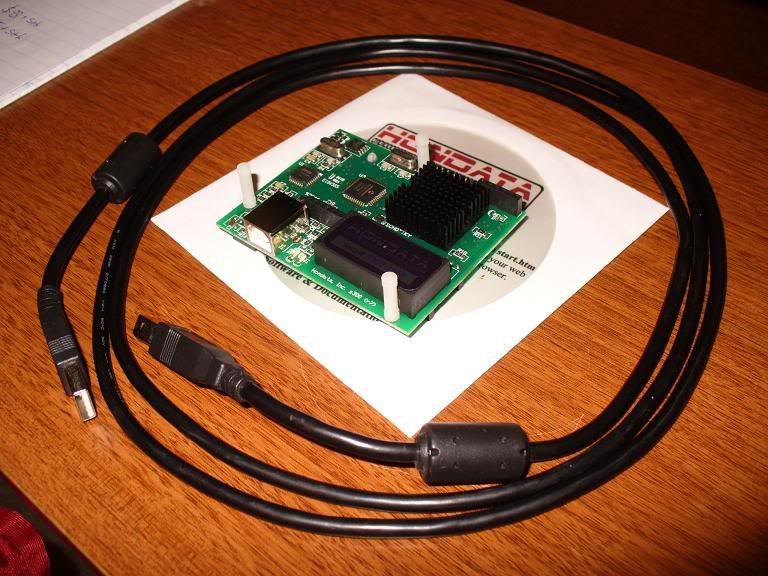
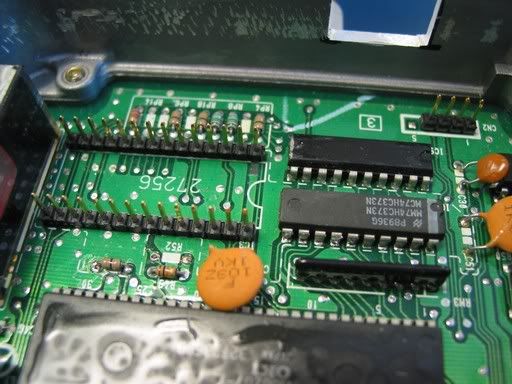
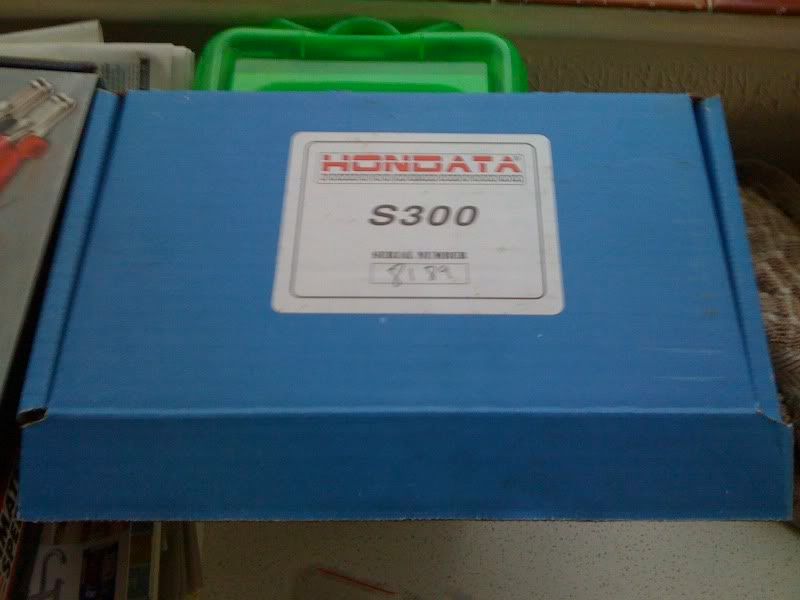
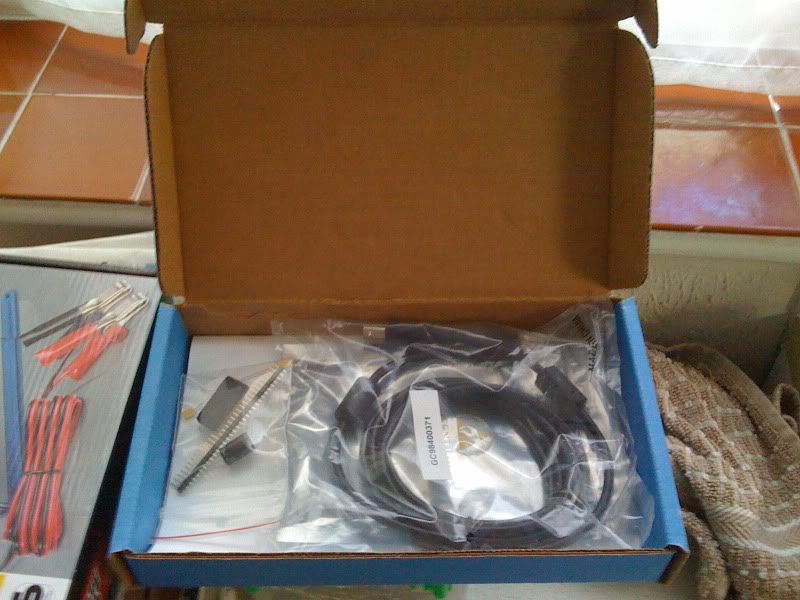
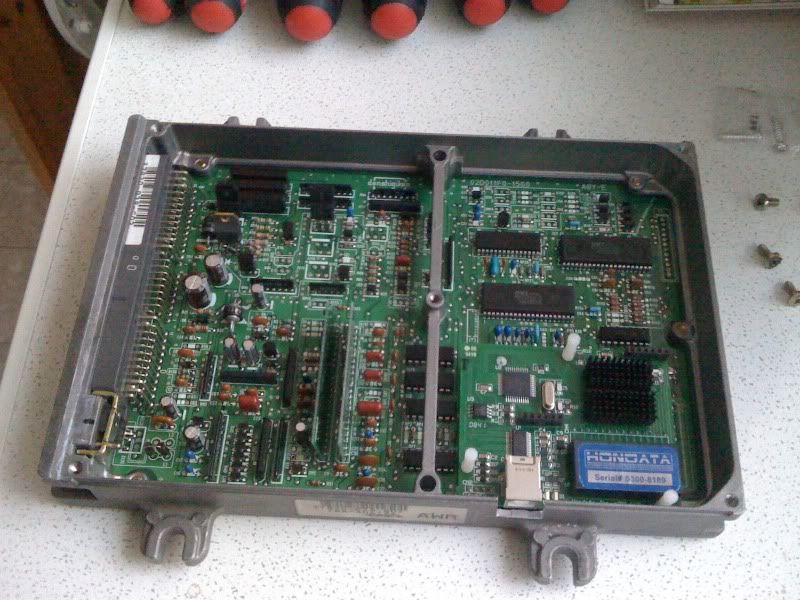
Hondata S300 / P28 (with PWM boost components installed)
Jackson Racing air/fuel ratio gauge (made by Auto Meter)
Jackson Racing Oil Temperature Gauge (made by Auto Meter)
Odyssey PC680 Race Battery (for boot mounting)
Aluminium Battery Mount / custom cut off, circuit breaker, voltage tester unit / 0 gauge wiring, fuses, etc
AEM UEGO Wideband Lambda Gauge
Dyno Tune Digital Boost Gauge (accurate to within 0.1psi boost)
OEM EL Gauges, Loom, Switch, Dimming Box, etc
Pivot Blue Engine Start Button
Autometer Oil Pressure Gauge
New high & low tone horns
Cooling
Mugen Type D 1.3 bar Radiator Cap (Genuine)
Aluminium Thicker Core Radiator (97-01 5th gen fitment)
Tegiwa Import – Aluminium Radiator Stays (for top mounts)
SPAL 2 x 11” Radiator Slimline Fans
Revotec Rad Fan Fitting Kit x 2
Mugen Type F 1.3 Bar Radiator Cap (Genuine)
Mishimoto black Radiator Hoses
QH Thermostat (with new gasket)
Mikalor W2 Hose Clamps (for rad hoses) – 42mm
Millers Rxtra Cool Coolant Additive (Like Redline Watter Wetter)
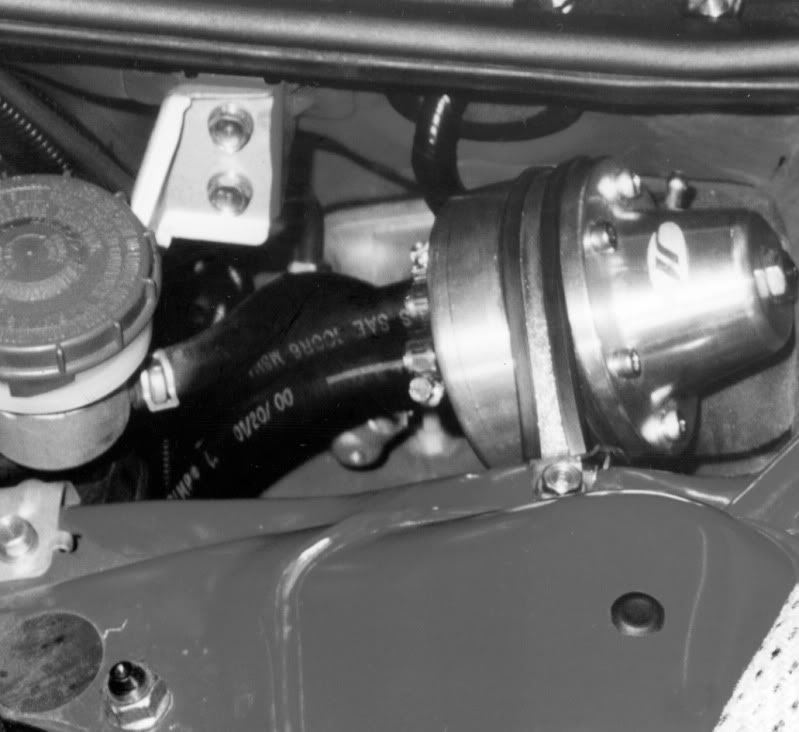
AEM Water Injection Kit – No AEM Tank
5 metres of extra 6mm O.D. / 4mm I.D. Nylon High Pressure Hose for Water Injection – In Red
6mm Nylon ‘P’ Clips (for routing water injection hose from boot to engine bay)
10 Litre Red Metal Jerry Can for Water Injection Fluid
5 Litres of Distilled Water (for 50/50 mix of Methanol/Water)
5 Litres of Methanol (for 50/50 mix of Methanol/Water)
(Might not need all of the water injection stuff if chargecooler works)
Suspension
D2 36 way Adjustable Coilovers
Fully working OEM Honda Four Wheel Steering System (4WS)
Suspension Techniques uprated 25mm Sway Bars / Anti Roll Bars – Front & Back
2WS Rear Sub Frame, Control Arms, etc
Energy Suspension Master Bushing Set Installed into a Spare Set of Arms, etc – Including Rear Trailing Arms
Spoon Rear Upper Strut Brace
New Wheel Bearings
Megan Racing Adjustable Rear Toe Arms
Innovative Motorsports Competition Bar (Traction Bar)
Ultra Racing front under brace
Ultra Racing rear under brace
Exterior / Body
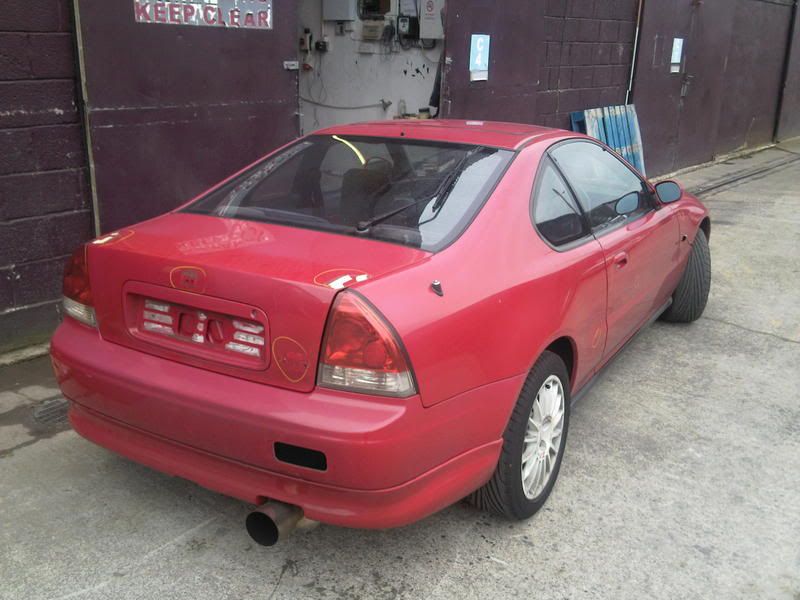
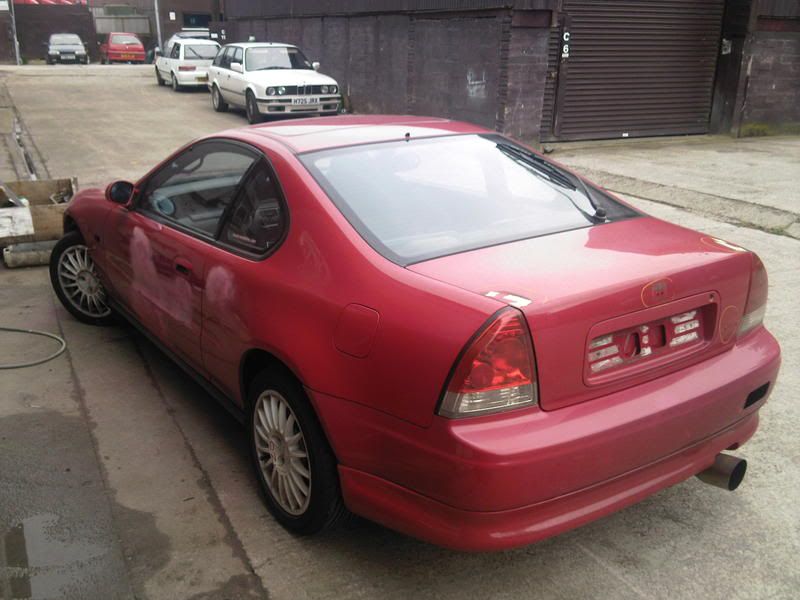
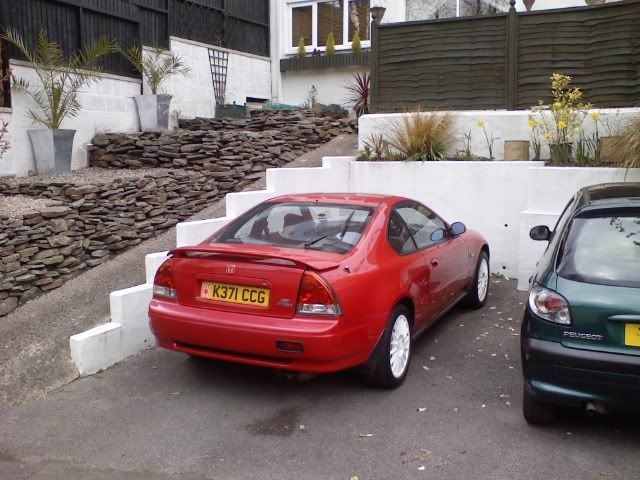
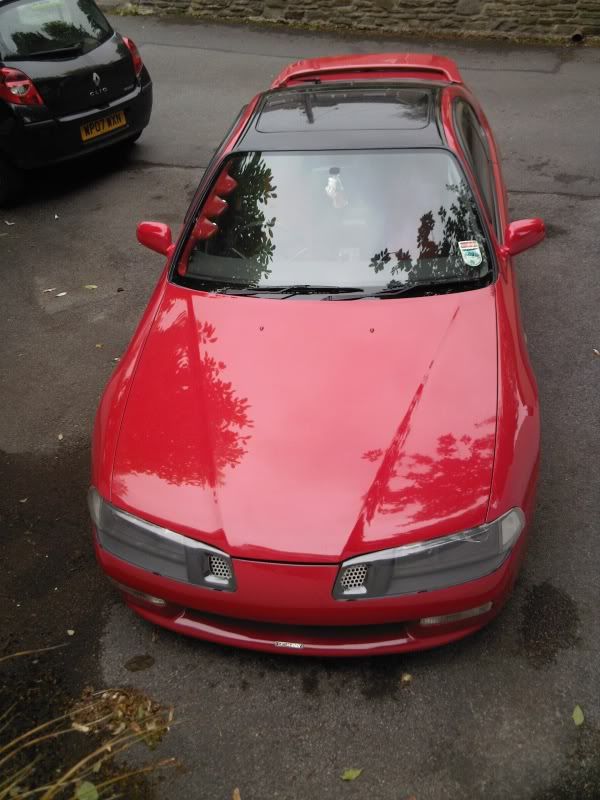
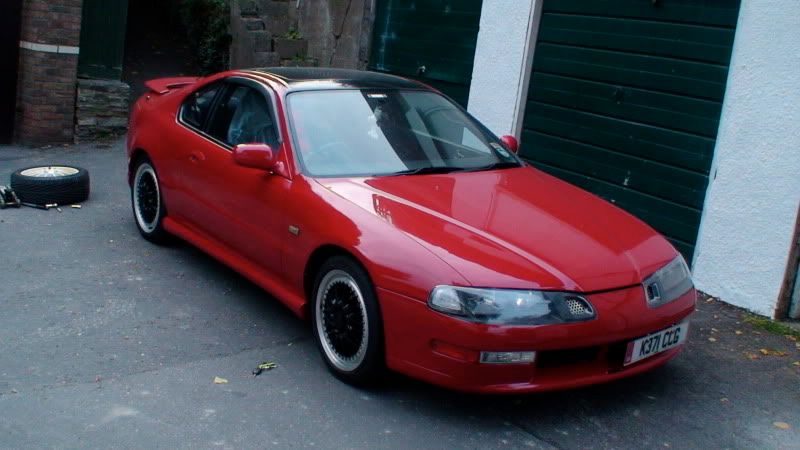
Full Restoration & Respray in OEM Milano Red Paint (Including Gloss Black Roof and Roof Rails, Boot OEM Spoiler & Bades Removed and Hole Smoothed, New Front Screen, Seals, Trims & Clips from Honda)
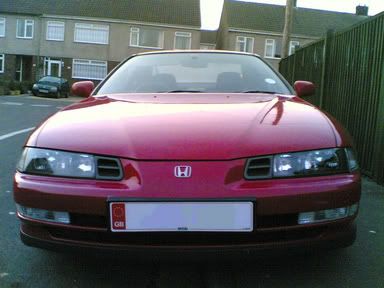
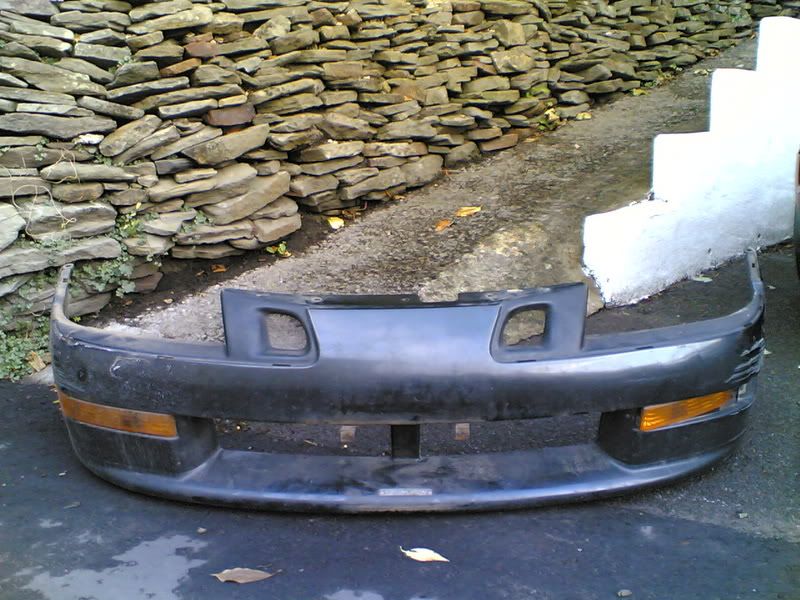
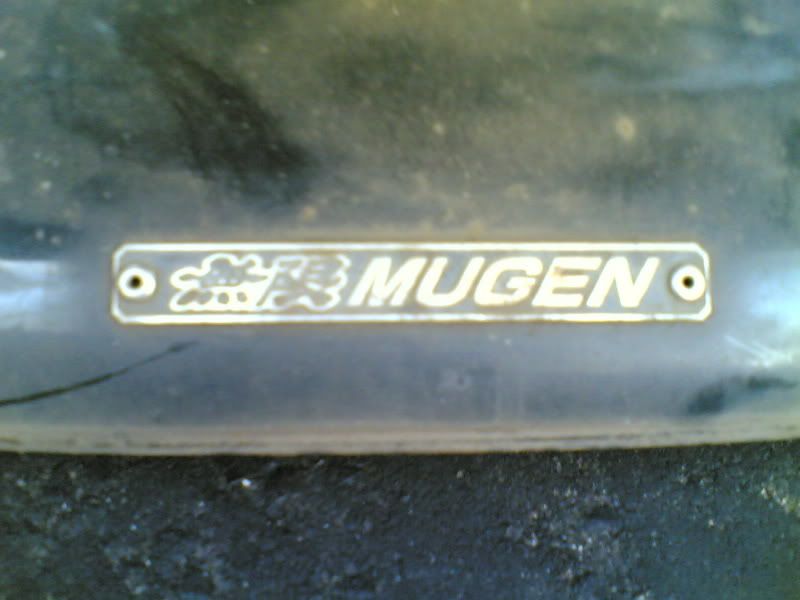
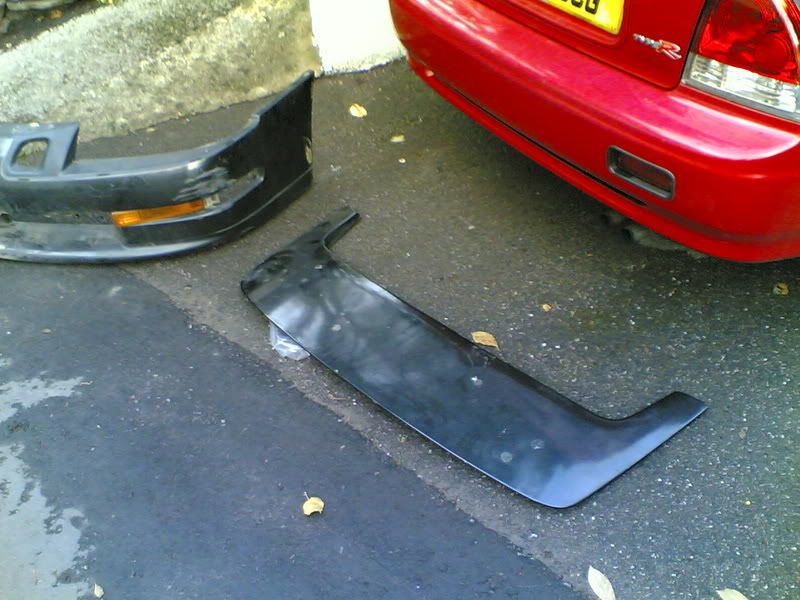
Mugen Front Bumper and Restored Mugen Emblem (Genuine)
Mugen Front Bumper / Headlight Plastic Covers (Copies)
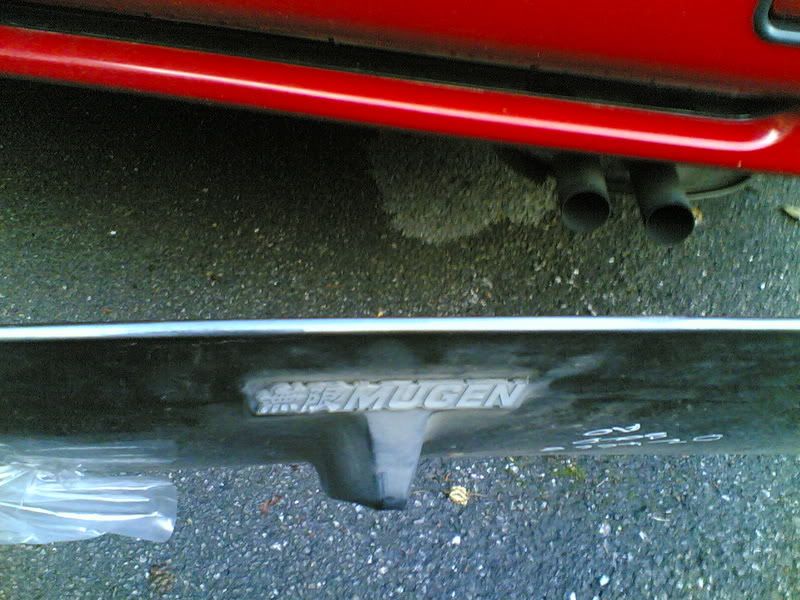
Mugen Rear Spoiler and Restored Mugen Fixings and Emblem (Genuine)
Mugen Number Plate Screws / Washers (Genuine) x 8 for number plates and bumper fixings
Mugen Fuel Filler Cap Cover (Genuine)
Carbon Creations Carbon Fibre Bonnet – OEM Style[color]
EP Racing Bonnet Spacers
Carbon Fibre Fuel Flap
JDM Number Plates (Originals from Japan – Show use only)
Honda OEM JDM Door Window Wind Deflectors
Honda OEM UKDM Bodykit – Side Skirts
Honda OEM UKDM Bodykit – Rear Lip Skirt
Crystal clear bumper inserts - lost one side and used amber repsrayed red
Crystal clear side repeaters
Front Wiper Arms Resprayed Satin Black
Rear Wiper and Motor Removed and Blanking Grommet Installed
Aerial and Blanking Grommet Installed
Mugen Side Skirts Resprayed in Milano Red (Genuine) – just need to fabricate the last couple of small brackets
Aerocatch Bonnet Pins (Lockable)
Detango’d OEM Lights
JDM OEM Boot Number Plate Recess Panel
Mugen Side Sill Aluminium Plates (Genuine)
Honda Jazz Washer Jets
OEM Side Repeaters sprayed black
Spoon Style Fibreglass Mirrors (+ Civic Baseplates)
Spare Prelude Wing Mirrors to Butcher and make custom baseplates
AeroDynamics Carbon Fibre Sunroof Panel
Seibon Carbon Fibre Boot / Trunk
Varis Mitsubishi Evo 4-6 rear lower diffuser and side vortex generators
Wheels
No wheels currently!
Tegiwa Imports – Red Anodized Aluminium Extended Wheel Nuts
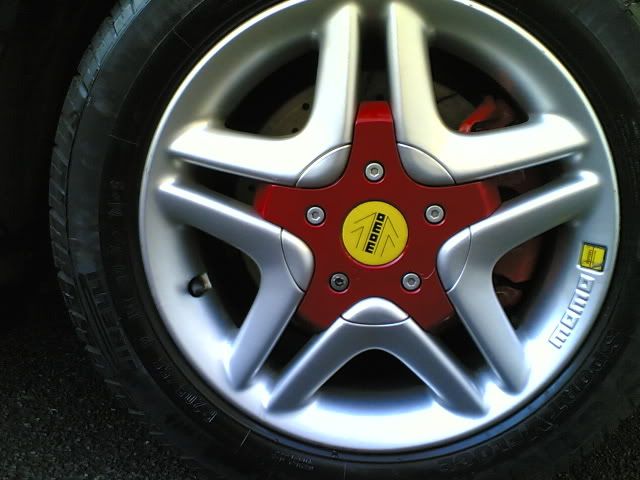
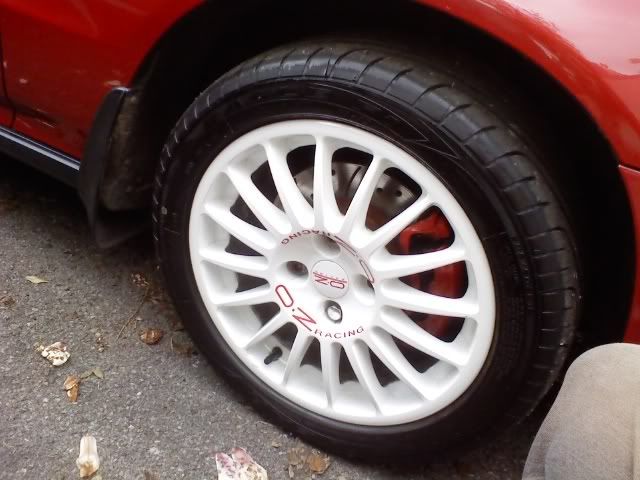
4 x 17” x 8” Volk Racing Group A Evolution 2 Alloys – 3 Piece Split Rims with Magnesium Baskets
1 x 17" x 7" Buddy Club SF Alloy Wheel (Spare Wheel)
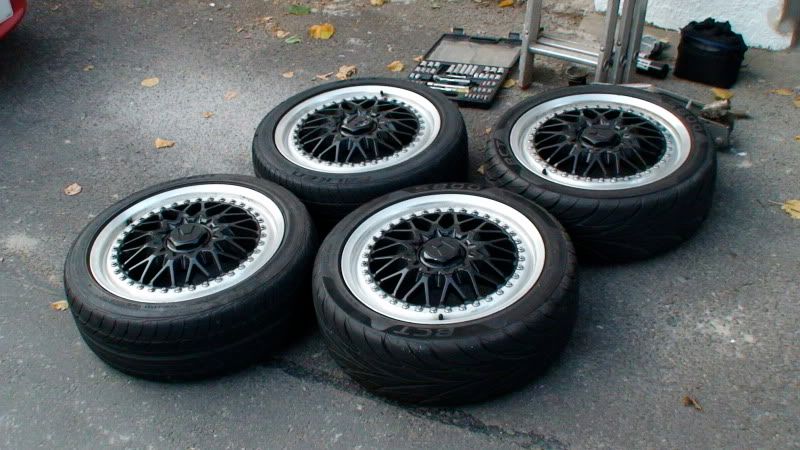
4 x 17” x 7.5J Offset 38 – Antera 301 Alloys - Finished in Powder Coated Black with red vinyl rim tape
2 x 225/45/17 Yokohama Advan A048 track tyres (need another two!)
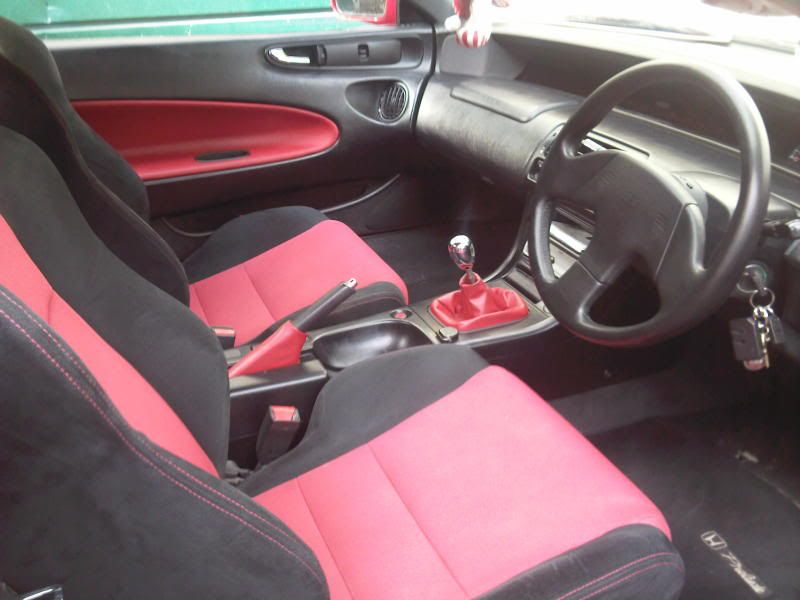
Interior
Mugen SW2 Steering Wheel with Integrated Cruise Control / Horn Pad (Genuine)
HKB Steering Boss with Integrated Cruise Control Buttons (Rare)
No seats currently!
Fidanza Short Throw Shift Adaptor
Custom Moulded 3 Gauge A-Pillar Pod Painted Milano Red
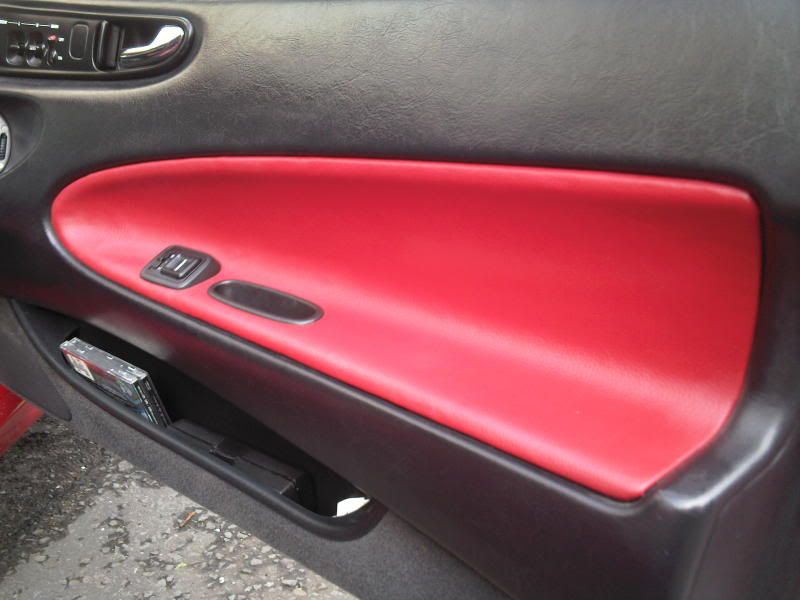
Front and Rear Door Card Inserts Retrimmed in Red Leathette
Handbrake Gaitor Retrimmed in Red Leatherette
Shifter Gaitor Retrimmed in Red Leatherette
JDM Flare & Holder to Passenger Side
Integra Type R Style Chrome Gearknob
Post-Facelift (94-) Chrome Door Handles
Pre-Post Facelift Transition Centre Console Conversion & Arm Rest (Rare)
Added Third Interior High Level Brake Light and Rear Roof Lining Panel
Rear interior part stripped
Centre Arm Rest - Finish Retrim
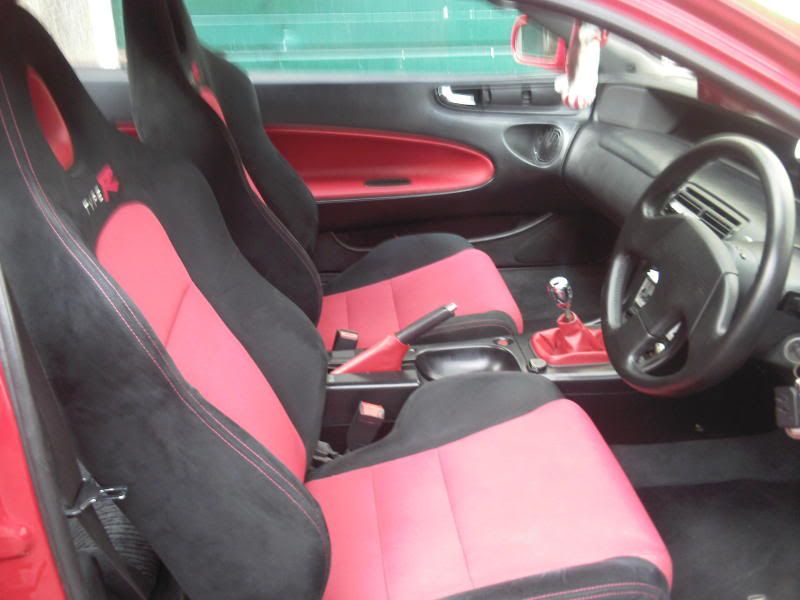
Recaro Sportline Top Fuel Specials - Grey/Black/Red
Recaro one-off 4th gen Prelude sliding seat rails (fitted to Top Fuel Recaros)
Recaro TS-G bucket seat (Japan only market seat) - Blue/Black
Recaro Japan bucket seat side mounts (Japan only market) - Black
Bride MO Sliding Seat Mounts (to fit the bucket seat to + spare)
Takata MPH-341 harness - 3" shoulder and lap straps (Genuine)
Takata 6 point V-style crotch strap (Genuine)
Tram Road Motors special Harness bar
FIA approved harness eyebolts & backing plates (4Nr for drivers 6 point harness)
Cargo Nets x 2
Brakes
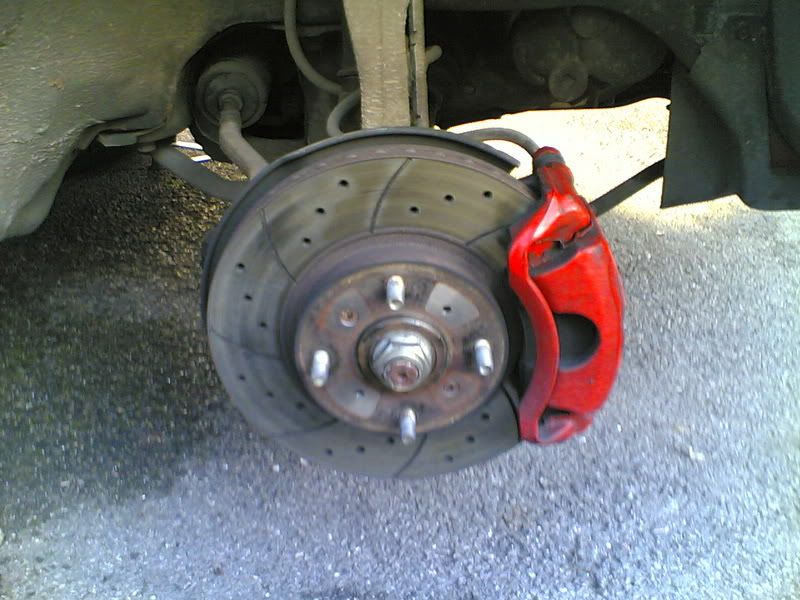
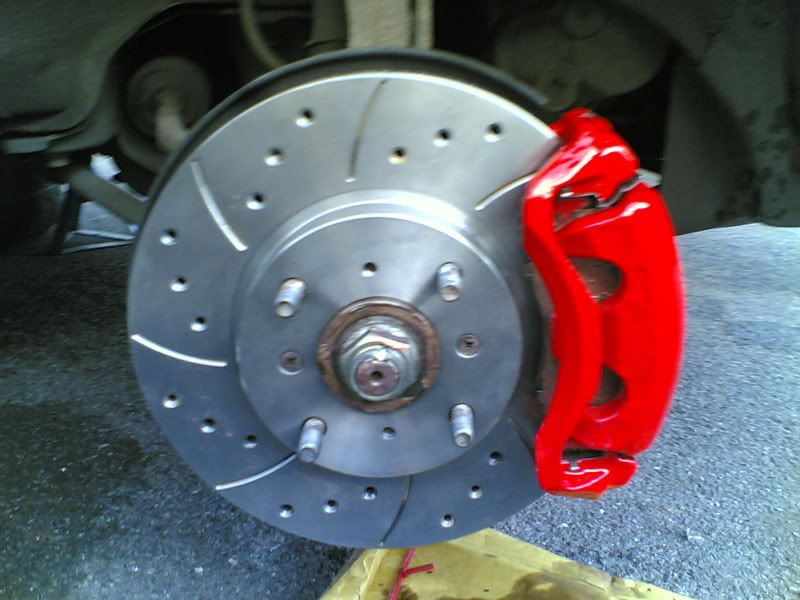
Legend Calipers – Refurbed with Brakesint Kits
EBC Redstuff Pads Front
Ebay Cheap Front Discs Drilled & Grooved
EBC Redstuff Pads Rear
Bremtech Rear Discs – Drilled & Grooved
ABS removed
K Sport 6 pot Calipers - 306mm discs + Ksport pads + braided brake lines
Integra DC5 Rear Brake Calipers – Fully Refurbished
Tarox G88Rear Discs
Ferrodo DS2000 Pads Rear
Willwood Brake Bias Valve
Goodridge braided brake lines
Copper/Nickel Brake Piping to install new lines – 25ft
Various Brake items – Flare Nuts, Cutter, Bender, Flare Wrenches
8mm Aluminium ‘P’ Clips with Rubber Protector
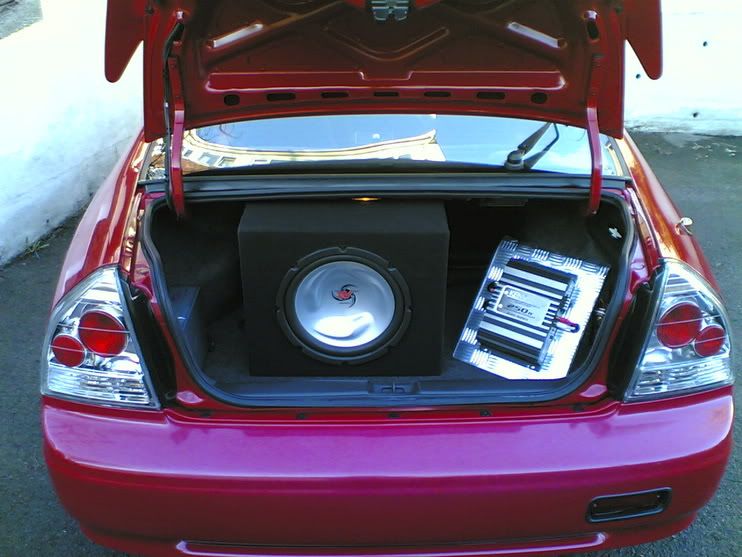
ICE
Ripspeed 7 inch widescreen Flip Out Monitor DVD Player
JVC 100 Watts 6 ¼” 2 Way Mid Speakers to Rear Shelf
Pioneer 120 Watt 6 x 9” 2 Way Speakers in Custom Mounts (orig. 6 ¼”) in Doors
Performance
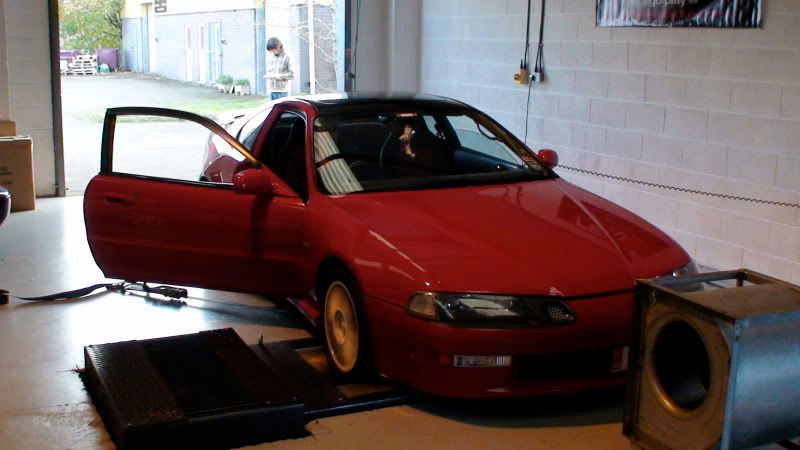
Previously dyno’d at 205.8 bhp & 152 lb/ft
¼ mile best = 15.5 seconds @ 90mph trap speed (not with a lot of mods and the weight saving I’ve done since)
Tracked as Castle Combe Circuit, Wiltshire UK
Hopeful target power after supercharger build = 300bhp+ & 210+ Torque
Hopeful target ¼ mile after supercharger build = below 13.5 Seconds
ENGINE BUILD FOR ANOTHER DAY
- Jackson Racing Supercharger kit + Motorvations 2" jackshaft pulley + Accord crank pulley = Approximately 12psi
- 106pete custom chargecooler from a Landrover SC V8 + heat exchanger rad, hoses, pump, reservoir, etc
- Benson sleeved H22A1 - 88mm bore + build up with spare H22A engine parts (50mm crank)
- Wiseco 11.5:1 88mm pistons + rings, sleeves
- Golden Eagle rods + ARP bolts
- ARP head stud kit
- Standard H22 head (unless I try a Type S / H22A7 head???)
- Full engine gasket set
- KS Tuned manual tensioner (transferred from old engine)
- Gates Powergrip belts
- ACL bearings

CONTENTS (with links to posts)
Page 1 = BUILD PART 0 – My Preludes History
Page 1 = BUILD PART 1 – Introduction
Page 1 = BUILD PART 3 – Does 5th gen Jackson Racing SC Fit the 4th gen
Page 1 = BUILD PART 3 – Build Parts – Jackson Racing Supercharger Kit
Page 1 = BUILD PART 4 – Build Parts (Cont’d) – Fuelling
Page 1 = BUILD PART 4 – Build Parts (Cont’d) – Tuning
Page 3 = BUILD PART 4 – Build Parts (Cont’d) – Transmission
Page 3 = BUILD PART 4 – Build Parts (Cont’d) – Cooling
Page 4 = BUILD PART 4 – Build Parts – Miscellaneous Parts
Page 4 = BUILD PART 5 – Build – Compression Test
Page 4 = BUILD PART 5 – Build – Engine Parts Removal (A/C, EGR, C/C, Resonator Bypass)
Page 5 = BUILD PART 5 – Build – Engine Parts Removal (EGR)
Page 5 = BUILD PART 5 – Build – Battery Relocation + PAS removal
Page 7 = BUILD PART 4 – Build Parts (Cont’d) – Brakes
Page 7 = BUILD PART 4 – Build Parts (Cont’d) – Interior
Page 10 = BUILD PART 4 – Build Parts (Cont’d) – Electrical and Misc
Page 11 = BUILD PART 4 – Build Parts (Cont’d) – Wheels
Page 12 = BUILD PART 4 – Build Parts (Cont’d) – Suspension
Page 12 = BUILD PART 4 – Build Parts (Cont’d) – Fuelling Again
Page 14 = BUILD PART 4 – Build Parts (Cont’d) – More Cooling
Page 14 = BUILD PART 4 – Build Parts (Cont’d) – Intake & Exhaust
Page 16 = BUILD PART 4 – Build Parts (Cont’d) – Intake & Evap system removal
Page 17 = BUILD PART 5 – Build (Cont’d) – JRSC parts / Intake refurb & more
Page 20 = BUILD PART 5 – Build (Cont’d) – More removals – Rad, PAS, Fuel system
Page 26 = BUILD PART 5 – Build (Cont’d) – Garage distractions & more
Page 28 = BUILD PART 5 – Build (Cont’d) – ABS removal
Page 30 = BUILD PART 5 – Build (Cont’d) – More things to remove!
Page 31 = BUILD PART 5 – Build (Cont’d) – Porting Parts
Page 32 = BUILD PART 4 – Parts (Cont’d) - Another Parts Roundup
Page 36 = BUILD PART 4 – Parts (Cont’d) - Seats, Brakes, Wheels
Page 36 = BUILD PART 4 – Parts (Cont’d) – More wheels…
Page 39 = BUILD PART 5 – Build (Cont'd) - Reality Check
Ongoing Spec:
Key
Fitted
Waiting to be fitted
Ordered
Not yet ordered
Not made yet – custom!
General
Base Car = UKDM BB1 Honda Prelude 2.2 VTEC 4ws
Date car was bought = August 2003
Engine
Mugen Version 1 Billet Oil Cap (Genuine)
Mugen Reservoir Covers (Genuine) – to brake and clutch reservoir
VTEC Rocker Cover Resprayed OEM
Red Kevlar / Carbon Weave Plug Cover
Samco Red Silicone Breather Pipes
Airconditioning Removal – Gates Micro-V 6PK913 belt to bypass compressor
Jackson Racing Supercharger Kit!!!
Full Engine Gasket Set
Gates Powergrip Cambelt and Balancer Belt
KS Tuned manual tensioner
Oil filter relocation and 19 row oil cooler + all black AN10 lines and fittings
Hamp Oil Filter
Motul 8100 X-Cess 10W-40 Semi-synthetic Oil
New Water Pump
Works Engineering Cam Seal (Triple O-ring seal)
Tegiwa Imports – Engine Dress Up Black Bolts & Black Washers (Pack of 5 x 3 = 15nr)
Tegiwa Imports – Rocker Cover Dress Up Black Dome Bolts (pack of
Silicone Vacuum Hosing in Black from SFS Hoses
Spare Engine Rocker Cover – Now Smoothed and AN10 breather fittings awaiting to be welded on
Spare Engine Rocker Cover Powder Coated Black (Temporary until above one is finished)
Spare Engine – H22A (for round 2 of my plans)
Innovative Motorsports Replacement Mount Kit – 95A race urethane
AN10 Braided Lines from Torques UK – for rocker cover venting to Catch Can
Performance Autoworks Baffled Sump
Custom Aluminium Ventilated Catch Can with AN10 ports
106pete special custom chargecooler
Transmission
UKDM standard M2A5 gearbox
ATR U2Q7 gearbox – LSD + better ratios + higher final drive
JUN 11lb ultralight flywheel
ACT Street Clutch and HD Pressure Plate
I-Tuned Goodridge Custom Braided Clutch Line (deletes damper)
Tegiwa Imports Magnetic Gearbox Sump Plug
Torco MTF Gearbox Oil – 2 litres from Nimbus Motorsports
New Clutch Slave Cylinder (Import Car Parts)
Forbidden Motorsports Short Shifter (or similar)
New Oil Seals
Intake & Exhaust
No exhaust or manifold currently fitted
Apexi Power Intake Induction Kit Filter and Modified Elbow
Tanabe Carbon Fibre Induction Kit Tubing (Short Ram)
Hondata Heatsheild Gasket
CNT 68mm throttle body (tapers out to 71mm) + new TPS sensor
Mikalor W2 Hose Clamps (for carbon intake tubing to throttle body) – 85mm+
Silicone Hose Joiner 3” to 3” in Black from SFS Hoses
New Stainless Steel Manifold Studs
3” Catback Exhaust System – tubing sourced by tonydpp & welded by Solid Fabs
3” Decat Pipe from a Mitsibushi Evo 4-6
Custom Solid Fabrications Manifold & Downpipe – 4-1 Design to a 3” Collector
BGA Manifold Gasket (Engine Block to Manifold) – three skin metal gasket
New 3” Evo Flange Exhaust Gaskets x 3 (3” collector and either side of decat)
New OEM Honda O2 Sensor (from a Civic 1.6 VTEC 5 door – same but slightly longer than the Prelude’s)
Used OEM Mitsibushi Evo 6 Catalyst Converter (For MOT emissions test)
Fuelling & Ignition
Denso Iridium Spark Plugs
Nology Hotwire Ignition Leads – Red colour
550cc RC Saturated Injectors
New Injector Seal Kit
AEM Fuel Rail – Silver
Torques UK – Custom AN6 Fuel Supply Line and Inline Fuel Filter
Fuel Pressure Gauge (1/18th NPT fitting to AN line fitting adaptor
HRC 255lph Fuel Pump
Spark Plugs – 1 step colder, 2 sets = 1 x NGK Copper & 1 x Denso Iridiums
Tuning / Electrical
Hondata S300 / P28 (with PWM boost components installed)
Jackson Racing air/fuel ratio gauge (made by Auto Meter)
Jackson Racing Oil Temperature Gauge (made by Auto Meter)
Odyssey PC680 Race Battery (for boot mounting)
Aluminium Battery Mount / custom cut off, circuit breaker, voltage tester unit / 0 gauge wiring, fuses, etc
AEM UEGO Wideband Lambda Gauge
Dyno Tune Digital Boost Gauge (accurate to within 0.1psi boost)
OEM EL Gauges, Loom, Switch, Dimming Box, etc
Pivot Blue Engine Start Button
Autometer Oil Pressure Gauge
New high & low tone horns
Cooling
Mugen Type D 1.3 bar Radiator Cap (Genuine)
Aluminium Thicker Core Radiator (97-01 5th gen fitment)
Tegiwa Import – Aluminium Radiator Stays (for top mounts)
SPAL 2 x 11” Radiator Slimline Fans
Revotec Rad Fan Fitting Kit x 2
Mugen Type F 1.3 Bar Radiator Cap (Genuine)
Mishimoto black Radiator Hoses
QH Thermostat (with new gasket)
Mikalor W2 Hose Clamps (for rad hoses) – 42mm
Millers Rxtra Cool Coolant Additive (Like Redline Watter Wetter)
AEM Water Injection Kit – No AEM Tank
5 metres of extra 6mm O.D. / 4mm I.D. Nylon High Pressure Hose for Water Injection – In Red
6mm Nylon ‘P’ Clips (for routing water injection hose from boot to engine bay)
10 Litre Red Metal Jerry Can for Water Injection Fluid
5 Litres of Distilled Water (for 50/50 mix of Methanol/Water)
5 Litres of Methanol (for 50/50 mix of Methanol/Water)
(Might not need all of the water injection stuff if chargecooler works)
Suspension
D2 36 way Adjustable Coilovers
Fully working OEM Honda Four Wheel Steering System (4WS)
Suspension Techniques uprated 25mm Sway Bars / Anti Roll Bars – Front & Back
2WS Rear Sub Frame, Control Arms, etc
Energy Suspension Master Bushing Set Installed into a Spare Set of Arms, etc – Including Rear Trailing Arms
Spoon Rear Upper Strut Brace
New Wheel Bearings
Megan Racing Adjustable Rear Toe Arms
Innovative Motorsports Competition Bar (Traction Bar)
Ultra Racing front under brace
Ultra Racing rear under brace
Exterior / Body
Full Restoration & Respray in OEM Milano Red Paint (Including Gloss Black Roof and Roof Rails, Boot OEM Spoiler & Bades Removed and Hole Smoothed, New Front Screen, Seals, Trims & Clips from Honda)
Mugen Front Bumper and Restored Mugen Emblem (Genuine)
Mugen Front Bumper / Headlight Plastic Covers (Copies)
Mugen Rear Spoiler and Restored Mugen Fixings and Emblem (Genuine)
Mugen Number Plate Screws / Washers (Genuine) x 8 for number plates and bumper fixings
Mugen Fuel Filler Cap Cover (Genuine)
Carbon Creations Carbon Fibre Bonnet – OEM Style[color]
EP Racing Bonnet Spacers
Carbon Fibre Fuel Flap
JDM Number Plates (Originals from Japan – Show use only)
Honda OEM JDM Door Window Wind Deflectors
Honda OEM UKDM Bodykit – Side Skirts
Honda OEM UKDM Bodykit – Rear Lip Skirt
Crystal clear bumper inserts - lost one side and used amber repsrayed red
Crystal clear side repeaters
Front Wiper Arms Resprayed Satin Black
Rear Wiper and Motor Removed and Blanking Grommet Installed
Aerial and Blanking Grommet Installed
Mugen Side Skirts Resprayed in Milano Red (Genuine) – just need to fabricate the last couple of small brackets
Aerocatch Bonnet Pins (Lockable)
Detango’d OEM Lights
JDM OEM Boot Number Plate Recess Panel
Mugen Side Sill Aluminium Plates (Genuine)
Honda Jazz Washer Jets
OEM Side Repeaters sprayed black
Spoon Style Fibreglass Mirrors (+ Civic Baseplates)
Spare Prelude Wing Mirrors to Butcher and make custom baseplates
AeroDynamics Carbon Fibre Sunroof Panel
Seibon Carbon Fibre Boot / Trunk
Varis Mitsubishi Evo 4-6 rear lower diffuser and side vortex generators
Wheels
No wheels currently!
Tegiwa Imports – Red Anodized Aluminium Extended Wheel Nuts
4 x 17” x 8” Volk Racing Group A Evolution 2 Alloys – 3 Piece Split Rims with Magnesium Baskets
1 x 17" x 7" Buddy Club SF Alloy Wheel (Spare Wheel)
4 x 17” x 7.5J Offset 38 – Antera 301 Alloys - Finished in Powder Coated Black with red vinyl rim tape
2 x 225/45/17 Yokohama Advan A048 track tyres (need another two!)
Interior
Mugen SW2 Steering Wheel with Integrated Cruise Control / Horn Pad (Genuine)
HKB Steering Boss with Integrated Cruise Control Buttons (Rare)
No seats currently!
Fidanza Short Throw Shift Adaptor
Custom Moulded 3 Gauge A-Pillar Pod Painted Milano Red
Front and Rear Door Card Inserts Retrimmed in Red Leathette
Handbrake Gaitor Retrimmed in Red Leatherette
Shifter Gaitor Retrimmed in Red Leatherette
JDM Flare & Holder to Passenger Side
Integra Type R Style Chrome Gearknob
Post-Facelift (94-) Chrome Door Handles
Pre-Post Facelift Transition Centre Console Conversion & Arm Rest (Rare)
Added Third Interior High Level Brake Light and Rear Roof Lining Panel
Rear interior part stripped
Centre Arm Rest - Finish Retrim
Recaro Sportline Top Fuel Specials - Grey/Black/Red
Recaro one-off 4th gen Prelude sliding seat rails (fitted to Top Fuel Recaros)
Recaro TS-G bucket seat (Japan only market seat) - Blue/Black
Recaro Japan bucket seat side mounts (Japan only market) - Black
Bride MO Sliding Seat Mounts (to fit the bucket seat to + spare)
Takata MPH-341 harness - 3" shoulder and lap straps (Genuine)
Takata 6 point V-style crotch strap (Genuine)
Tram Road Motors special Harness bar
FIA approved harness eyebolts & backing plates (4Nr for drivers 6 point harness)
Cargo Nets x 2
Brakes
Legend Calipers – Refurbed with Brakesint Kits
EBC Redstuff Pads Front
Ebay Cheap Front Discs Drilled & Grooved
EBC Redstuff Pads Rear
Bremtech Rear Discs – Drilled & Grooved
ABS removed
K Sport 6 pot Calipers - 306mm discs + Ksport pads + braided brake lines
Integra DC5 Rear Brake Calipers – Fully Refurbished
Tarox G88Rear Discs
Ferrodo DS2000 Pads Rear
Willwood Brake Bias Valve
Goodridge braided brake lines
Copper/Nickel Brake Piping to install new lines – 25ft
Various Brake items – Flare Nuts, Cutter, Bender, Flare Wrenches
8mm Aluminium ‘P’ Clips with Rubber Protector
ICE
Ripspeed 7 inch widescreen Flip Out Monitor DVD Player
JVC 100 Watts 6 ¼” 2 Way Mid Speakers to Rear Shelf
Pioneer 120 Watt 6 x 9” 2 Way Speakers in Custom Mounts (orig. 6 ¼”) in Doors
Performance
Previously dyno’d at 205.8 bhp & 152 lb/ft
¼ mile best = 15.5 seconds @ 90mph trap speed (not with a lot of mods and the weight saving I’ve done since)
Tracked as Castle Combe Circuit, Wiltshire UK
Hopeful target power after supercharger build = 300bhp+ & 210+ Torque
Hopeful target ¼ mile after supercharger build = below 13.5 Seconds
ENGINE BUILD FOR ANOTHER DAY
- Jackson Racing Supercharger kit + Motorvations 2" jackshaft pulley + Accord crank pulley = Approximately 12psi
- 106pete custom chargecooler from a Landrover SC V8 + heat exchanger rad, hoses, pump, reservoir, etc
- Benson sleeved H22A1 - 88mm bore + build up with spare H22A engine parts (50mm crank)
- Wiseco 11.5:1 88mm pistons + rings, sleeves
- Golden Eagle rods + ARP bolts
- ARP head stud kit
- Standard H22 head (unless I try a Type S / H22A7 head???)
- Full engine gasket set
- KS Tuned manual tensioner (transferred from old engine)
- Gates Powergrip belts
- ACL bearings