
Hi, Glad the fuel tank came out so good. Looks excellent, as well as all the other amazing stuff you are doing.
Good, good work. Love looking at resto pics.
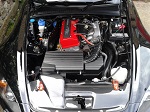
Congratulations to vtecmec for winning May/June's Lude Of The Month, with his DIY Turbo BB1 build.
>>> Click Here For Profile <<<

>>> Click Here For Profile <<<
Vtecmec's 4th Gen
-
h10ndr
- Posts: 819
- Joined: Mon Sep 13, 2010 7:07 pm
- My Generation: 4G
- Location: West Yorkshire
- Has thanked: 1 time
- Been thanked: 9 times
- Contact:
Re: Vtecmec's 4th Gen
Tim
2004 S2000 GT Berlina Black
SOLD 1992 JDM-BB1UKSPEC-B545P-H22A7-U2Q7-P72 NEPTUNE RTP
RIP 1995 UKDM-BB1-Pacific Blue Pearl
http://www.s2000-parts.com
Profile
2004 S2000 GT Berlina Black
SOLD 1992 JDM-BB1UKSPEC-B545P-H22A7-U2Q7-P72 NEPTUNE RTP
RIP 1995 UKDM-BB1-Pacific Blue Pearl
http://www.s2000-parts.com
Profile
-
bennyboy

- Art Mechanic
- Posts: 2825
- Joined: Sat Aug 20, 2011 11:59 am
- My Generation: 4G
- PSN GamerTag: OCbennyboy
- Location: St Albans, Herts.
- Has thanked: 7 times
- Been thanked: 21 times
- Contact:
Re: Vtecmec's 4th Gen
This is a great read, well done mate for all your efforts 
I agree with the others that it's great to see a car being 'valued' rather than scrapped/sold up, top, top work!
I agree with the others that it's great to see a car being 'valued' rather than scrapped/sold up, top, top work!
-
Vtecmec

- LotM Winner
- Posts: 5378
- Joined: Fri Aug 06, 2010 5:43 pm
- My Generation: 4G
- XBOX GamerTag: vtecmec
- Location: East Midlands
- Has thanked: 122 times
- Been thanked: 347 times
Fuel tank part 3, rear suspension bush removal and fit
Cheers Benny, and thanks for the fuel tank Tim; it has come up a treat, just need to pull my finger out and get to the point where I can put some fuel in it! Guess I now feel like I should be thanking everyone who has kindly fixed me up with parts, problem being I’ve bought that much stuff I can’t remember everyone!
Well, maybe I jumped the gun regarding getting on to the welding, it’s yet to happen. Currently I have been working away all week and don’t really have much time to attend to the car, so even slower progress than usual!
So, I finished the fuel tank off with another and final coat of dynax ub.

The last bit of the tank was the rubber strips that sit on the tank straps, I soaked them overnight and they scrubbed up pretty well.

Pics of the replacement suspension bits wallowing in some stuff. Even though I had already done one of the trailing arms, JDM BB4 sorted me out (amongst lots of other things) with 2 trailing arms with the bushes already removed.

Now onto the bushes, I never intended to replace the upper arm bushes and had already painted my old ones, but picked some poly ones up at a good price and decided to swap them out. Which meant after the mess of bush removal, I had to paint them all over again.
I found the easiest way to get the bushes out was to gently heat the central core, making the rubber soft and just press them out with a large socket and a long thin bolt.


Once this was done I just cut the outer ring with a hacksaw, and out they popped.

Once done I gave then a good going over with a wire wheel and a lick of fresh paint, before pushing the new bushes in place.

While I was at it I decided to paint some of the new parts that I had acquired, including the inner part of the poly bushes, they come with a zinc coating, which may as well be bare steel under a car.
Inner lower control arm bushes.

Drop links.

And other stuff.

Onto getting the bigger bushes out of the lower control arms, same method as the smaller upper bushes.
A burning bush.

Popping out.

And release.

Onto the outer shells.

Mission accomplished.

They’ll get a little while in the derust liquid, just to remove any last trace of rot, before I paint them up.
I picked up a lower ball joint removal set from Amazon.

One lower balljoint removed.

I was not too impressed with the stonechip I had used, it dried matte and marked if you so much as looked at it the wrong way, so I have also painted the floor with a fuel proof lacquer, to seal everything in and make cleaning in the future easier.

I’m supposed to be moving house in about a months’ time, so there should be better progress in the not too distant future
Well, maybe I jumped the gun regarding getting on to the welding, it’s yet to happen. Currently I have been working away all week and don’t really have much time to attend to the car, so even slower progress than usual!
So, I finished the fuel tank off with another and final coat of dynax ub.
The last bit of the tank was the rubber strips that sit on the tank straps, I soaked them overnight and they scrubbed up pretty well.
Pics of the replacement suspension bits wallowing in some stuff. Even though I had already done one of the trailing arms, JDM BB4 sorted me out (amongst lots of other things) with 2 trailing arms with the bushes already removed.
Now onto the bushes, I never intended to replace the upper arm bushes and had already painted my old ones, but picked some poly ones up at a good price and decided to swap them out. Which meant after the mess of bush removal, I had to paint them all over again.
I found the easiest way to get the bushes out was to gently heat the central core, making the rubber soft and just press them out with a large socket and a long thin bolt.
Once this was done I just cut the outer ring with a hacksaw, and out they popped.
Once done I gave then a good going over with a wire wheel and a lick of fresh paint, before pushing the new bushes in place.
While I was at it I decided to paint some of the new parts that I had acquired, including the inner part of the poly bushes, they come with a zinc coating, which may as well be bare steel under a car.
Inner lower control arm bushes.
Drop links.
And other stuff.
Onto getting the bigger bushes out of the lower control arms, same method as the smaller upper bushes.
A burning bush.
Popping out.
And release.
Onto the outer shells.
Mission accomplished.
They’ll get a little while in the derust liquid, just to remove any last trace of rot, before I paint them up.
I picked up a lower ball joint removal set from Amazon.
One lower balljoint removed.
I was not too impressed with the stonechip I had used, it dried matte and marked if you so much as looked at it the wrong way, so I have also painted the floor with a fuel proof lacquer, to seal everything in and make cleaning in the future easier.
I’m supposed to be moving house in about a months’ time, so there should be better progress in the not too distant future
Last edited by Vtecmec on Tue Mar 19, 2013 10:29 pm, edited 1 time in total.
-
Vtecmec
- LotM Winner
- Posts: 5378
- Joined: Fri Aug 06, 2010 5:43 pm
- My Generation: 4G
- XBOX GamerTag: vtecmec
- Location: East Midlands
- Has thanked: 122 times
- Been thanked: 347 times
Re: Vtecmec's 4th Gen
Oops, forgot something, here’s a sneaky pic of my replacement powder coated antiroll bars, I got these off Nathan at iTuned, about a year ago now. 

-
mercutio

- LotM Winner
- Posts: 14958
- Joined: Sun Aug 08, 2010 8:45 pm
- My Generation: 5G
- Location: Sunny Manchester
- Has thanked: 1 time
- Been thanked: 3 times
- Contact:
looks great matey are they standard roll bars? 
bristol_bb4 wrote:ahhh a 5th gen, i love 5th gens
Dino wrote:I loves the 5th gen really.... just dont quote me on it...
4thgenphil wrote:Mines 4 1/4 unches mate, sorry
http://www.ludegeneration.co.uk/profile ... -t618.html


-
Vtecmec
- LotM Winner
- Posts: 5378
- Joined: Fri Aug 06, 2010 5:43 pm
- My Generation: 4G
- XBOX GamerTag: vtecmec
- Location: East Midlands
- Has thanked: 122 times
- Been thanked: 347 times
Re: Vtecmec's 4th Gen
Cheers guys, yes Mercutio they are just standard roll bars, and I agree Merlin, the control arm shells are a real pain.
-
nucleustylzlude

- Moderator
- Posts: 4010
- Joined: Wed Aug 11, 2010 11:46 pm
- My Generation: 4G
- Location: Bristol, UK!
- Been thanked: 3 times
- Contact:
