
Pushki77 wrote:‘De-lemoned’ My Headlights
A common problem with cars that have plastic headlight covers, is that after a few years the lacquer they use to coat the headlight turns yellow and flakes off in places.
It brings down the whole look of the car.
This was what my headlights were like and it really bugged me.
I considered buying new headlights but couldn’t justify spending over £100, so there had to be another way. :-k
I searched the forum and found this;
jules.pollocks 'Restoring JDM Plastic Lights!' thread.
I’ve shamelessly stolen photos from Jules’ thread for illustration purposes only as I always forget to take ‘before & during’ pictures.
Cheers Jules, royalty cheque is in the post. :^o
The headlights start off looking like this.
Mine weren’t quite as bad, but the method is the same however bad they are.
I used slightly different products from Jules, but the trick is to use finer & finer abrasives until you have a crystal clear surface.
The first important step is to mask the surrounding paintwork.
Then using a fine wet’n’dry paper, sand the headlight evenly all over until all traces of the lacquer are gone.
This is the scary bit because you’ve made it look worse than before.
I used 3M Fine P600 wet’n’dry, and I kept it wet with car shampoo. This created a nice abrasive paste.
Your headlight should look something like this.
Notice the patch of lacquer still to be removed.
Once all trace of the lacquer is gone, wash off the residue.
The next step is to use a finer abrasive. I used Autosol chrome cleaner paste.
Work it in evenly all over, and you will notice the cloudyness disappearing.
Take your time, because the more scratches you remove now, the better the results later.
You headlight should be looking like this now.
Still a bit cloudy but a lot better.
Once you’re happy that you’ve gone as far as you can with the Autosol, it’s time to get granny's Brasso from the scullery. :-s
Do the same again with the Brasso. Work it into the corners and edges, and take your time. The more effort you put in, the better the results.
When you think you’ve done enough, do it some more. [smilie=hate-adolfsisi.gif]
For the final step, you will need a dedicated plastic polish.
I used Meguiar’s PlastX, with a microfibre cloth.
Same again, more rubbing……………Your arms will ache, you may ‘hit the wall’, but carry on and go for the ‘burn’. [smilie=hate-sonno.gif]
This is the stage where you remove the microscopic scratches to get that ‘crystal clear’ look.
When you’ve finished, stand back and admire your hard work. [smilie=hate-bravo2.gif]
No time for standing around for too long though, you’ve got the other one to do. [smilie=hate-mazzata.gif]
At a guess, I’d say it took me about 2-3 hours each headlight.
Here’s what mine looked like afterwards.
Credit to jules.pollock..............Cheers Jules [smilie=hate-king.gif]
Congratulations to vtecmec for winning May/June's Lude Of The Month, with his DIY Turbo BB1 build.
>>> Click Here For Profile <<<

>>> Click Here For Profile <<<
Refurbing headlights
-
Merlin

- Moderator
- Posts: 12397
- Joined: Fri Aug 06, 2010 9:04 am
- My Generation: 5G
- PSN GamerTag: Merlinbadman
- Location: Edinburgh
- Has thanked: 71 times
- Been thanked: 306 times
Refurbing headlights


-
Ted

- Posts: 2765
- Joined: Sat Jan 18, 2014 5:44 pm
- My Generation: 4G
- Location: about 26 miles away from where I was
- Been thanked: 3 times
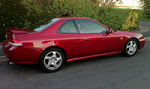
so the headlight in the silver car is yours right ?
and it used to look like the light in the black car yeah ?
fairplay pushki thats a top job it looks like new, does it make the headlight any brighter because my jdm and ukdm headlights were both appalling the jdm ones look like yours were but the ukdm are glass but still a real crap beam. insert thumbs up smilie here.
if it aint broke don't fix it https://www.facebook.com/pages/tram-roa ... 8502699270
-
indigolemon

- The Chaos Engine
- Posts: 6682
- Joined: Wed Jun 30, 2010 1:45 pm
- My Generation: 4G
- PSN GamerTag: M149YSL
- Location: Kelty, Fife
- Has thanked: 24 times
- Been thanked: 71 times
- Contact:
Slap some Osram Nightbreaker Plus in the UKDM ones man. Made a huge difference before I went down the projector route.tramroadmotors wrote:ukdm are glass but still a real crap beam.
'On two occasions I have been asked, 'Pray, Mr. Babbage, if you put into the machine wrong figures, will the right answers come out?' I am not able rightly to apprehend the kind of confusion of ideas that could provoke such a question.' - Charles Babbage
-
littlefeller

- Posts: 1646
- Joined: Sat Jan 28, 2012 6:19 am
- My Generation: 4G
- Location: evesham
mine look like that, but to make it easyer you just remove them, then i can pollish them while watching tv  doesnt seem so bad, i do this kind of thing while peeling spuds, somehow doesnt seem so boring, especialy during a grand prix
all 4gs have crap beams there crap headlights changing bulbs doesnt make that much difference as there is a wattage limmit, also a luminems limmit
oh yeh almost forgot - use a dremel, its easy then. you can also use t cut then toothpaste before brasso
all 4gs have crap beams
oh yeh almost forgot - use a dremel, its easy then. you can also use t cut then toothpaste before brasso
-
Gayno

- Lord Gayness
- Posts: 5479
- Joined: Sun Sep 19, 2010 4:41 pm
- My Generation: 4G
- Location: Stourport, Worcs
- Has thanked: 4 times
- Been thanked: 17 times
- Contact:
I need to do mine as well.
If doing it really properly though, you would use some of this as last step: http://www.elitecarcare.co.uk/carpro-ce ... -150ml.php
Don't forget though you need to give the plastic a UV protection coat otherwise they will just cloud up again before you know it.
I'll be using this: http://www.elitecarcare.co.uk/gtechniq- ... r-15ml.php
Yes those are very high end products, but I plan on doing these things only once!
-
Ted
- Posts: 2765
- Joined: Sat Jan 18, 2014 5:44 pm
- My Generation: 4G
- Location: about 26 miles away from where I was
- Been thanked: 3 times
i often peel spuds to liven up watching the grand prix
if it aint broke don't fix it https://www.facebook.com/pages/tram-roa ... 8502699270
-
Pushki

- Supporter 2015
- Posts: 2635
- Joined: Sat Aug 07, 2010 9:21 pm
- My Generation: 4G
- PSN GamerTag: Luigi_Black
- Location: Bluff Creek
- Has thanked: 2 times
- Been thanked: 10 times
Hey guys, I've just seen this.....
I did this write up a few years ago. I stupidly forgot to take some 'before' and 'during' photos, so I borrowed them from Jules' thread.
The only thing I will add, is that every now and then you'll have to give them a quick going over with the plastic polish. I use Meguiar’s PlastX.
Without the layer of lacquer, they seem to attract oxidation/contamination.
I usually do all my lights, front and back, when the car gets a good waxing.


-
RattyMcClelland

- Moderator
- Posts: 9208
- Joined: Wed Aug 04, 2010 10:02 pm
- My Generation: 5G
- PSN GamerTag: RattyMcClelland
- Location: Leicestershire
- Been thanked: 203 times
