How To Widebody A 5th Gen
Posted: Sun Feb 03, 2013 8:28 am
Ok guy's I was gonna do a complete build thread from start to finish on my right hand drive widebody lude but I wasn't sure what category to put it under so i'm gonna do it in sections, with that being said here is how I did my widebody, no fiberglass kit its all metal, done by me.
First thing you have to do is determine how wide you wanna go and that will let you know if you can get by with just rolling the fenders, in my case I am going with 19x11 -6 offset in the rears.
So let's get started. The first thing I had to do is mark my cut line of where i was going to cut the quarter panel, I wanted to cut it just a little over the body line, this makes it easier to do the bodywork after the welding is done.
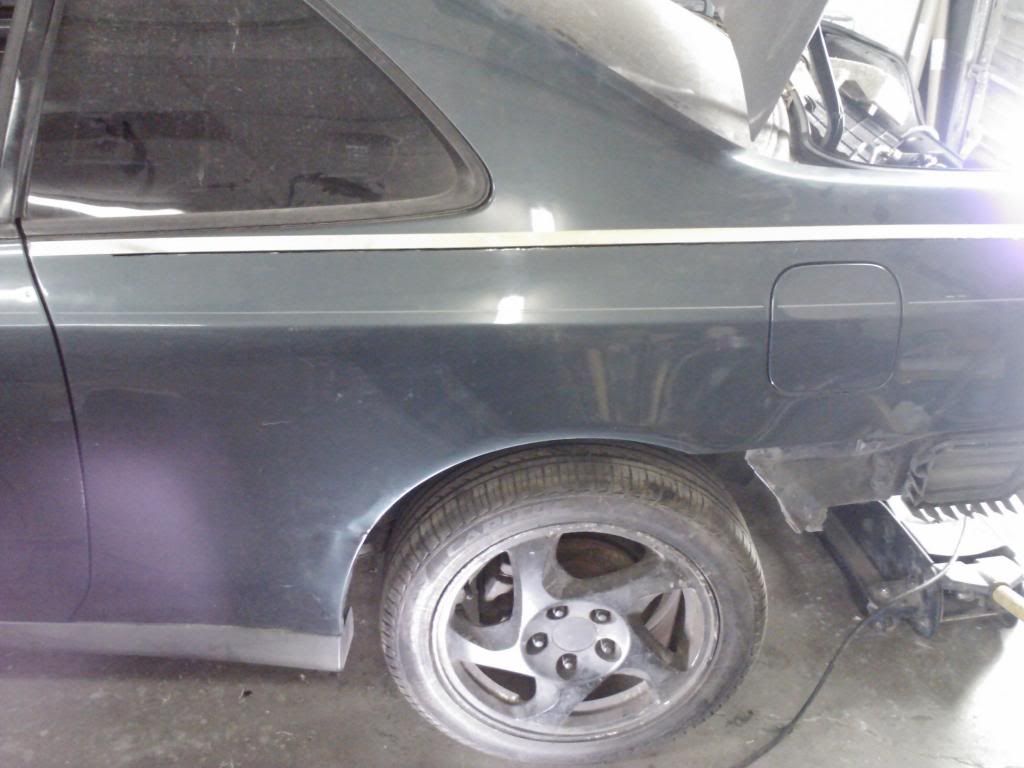
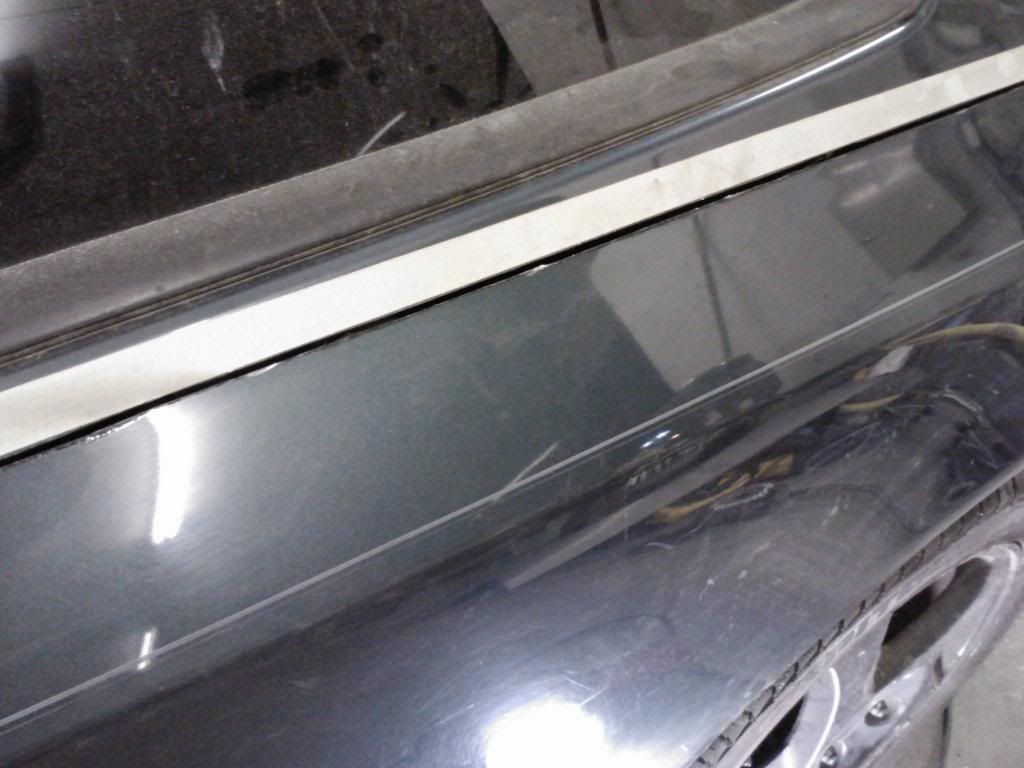
These cuts were done using a hand held cutoff wheel.
Now there's two ways to start the begining of the widebody, you can start from the door and start flaring out the quarters, this would be a more aggressive look because the widebody would look bigger. The second way is the way I chose because I wanted a mild widebody and didn't want it to aggressive. So I made a downward cut about 3" from the edge of the door seam.
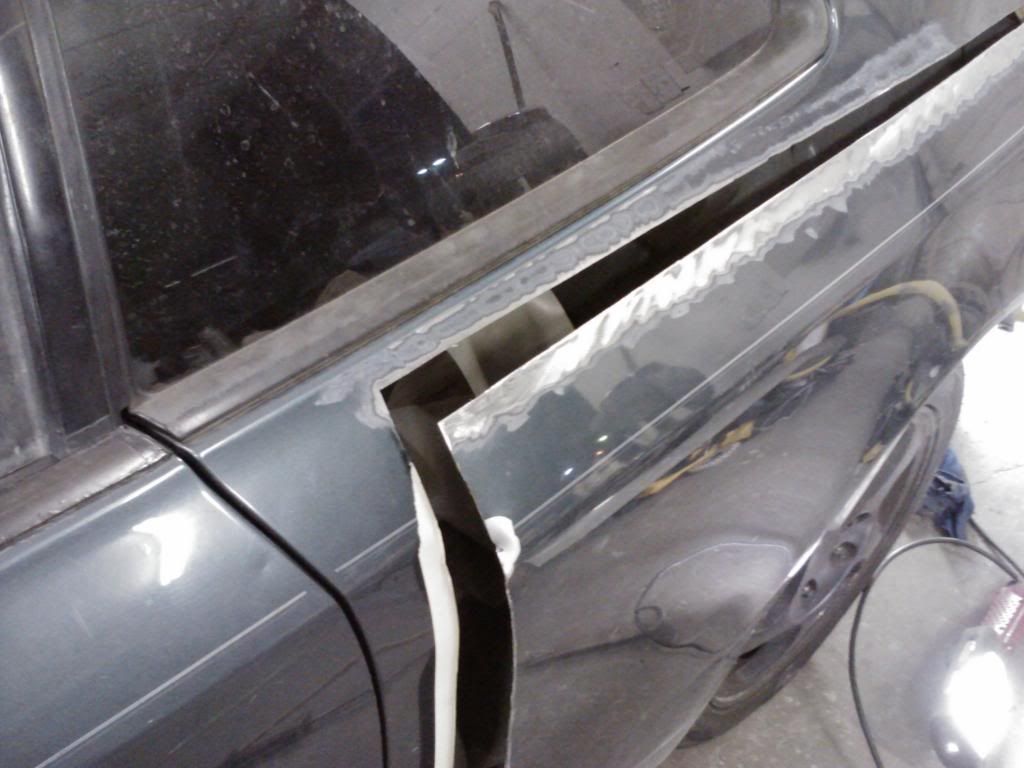
Now after this cut is made you have to cut the quarter panel loose from the wheel well, now to make these cuts you have to use a sawzall. Continue the cut all the way thru the wheel well ( you also need to remove the gas filler neck ) and stop the cut about 6" from the edge of the tail light.
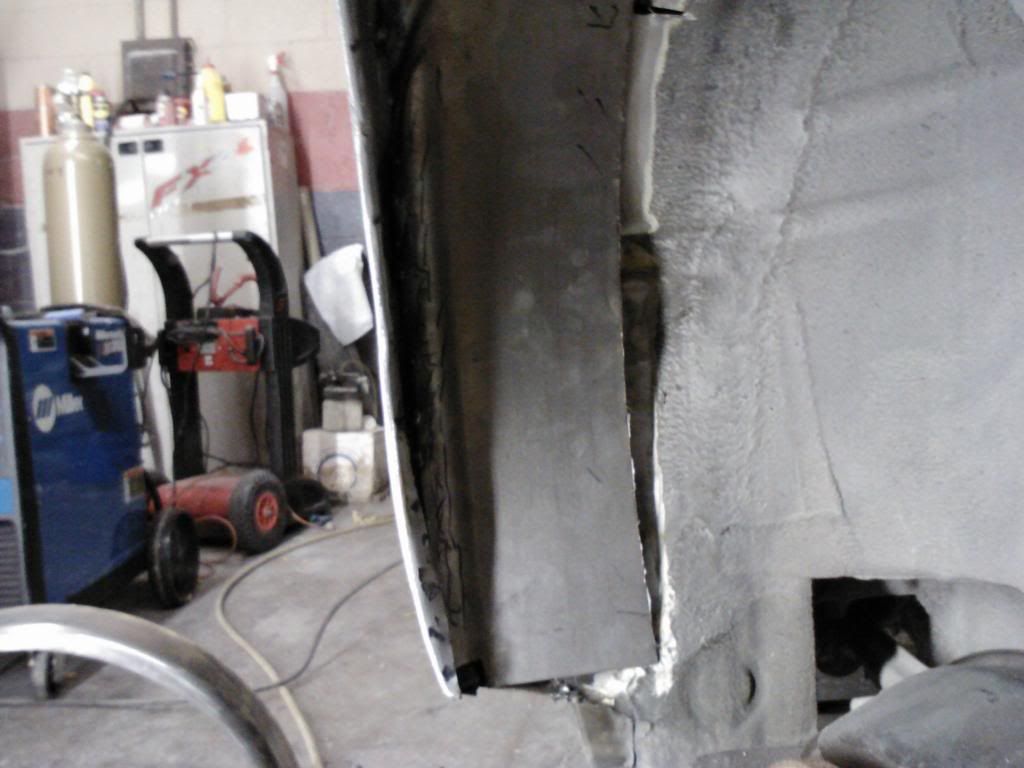
Next you have to determine how wide you wanna go, this will let you know how wide to cut the replacement panel that your gonna put in place of the old one. I am going 4" wider than factory, after you have your replacement panel ready; set it on the car and tack it in place, just tack it for now in case you have to remove it or do some adjustments you won't have a lot of welds to remove.
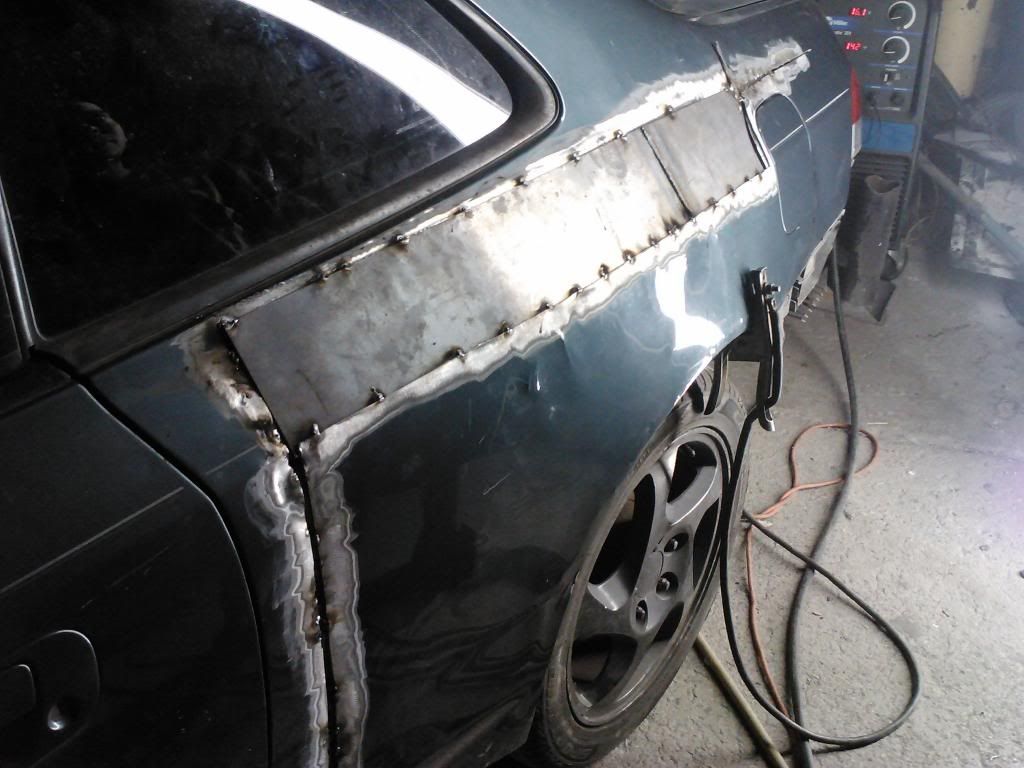
Once you've tacked in place mount you new rim and check for clearances.
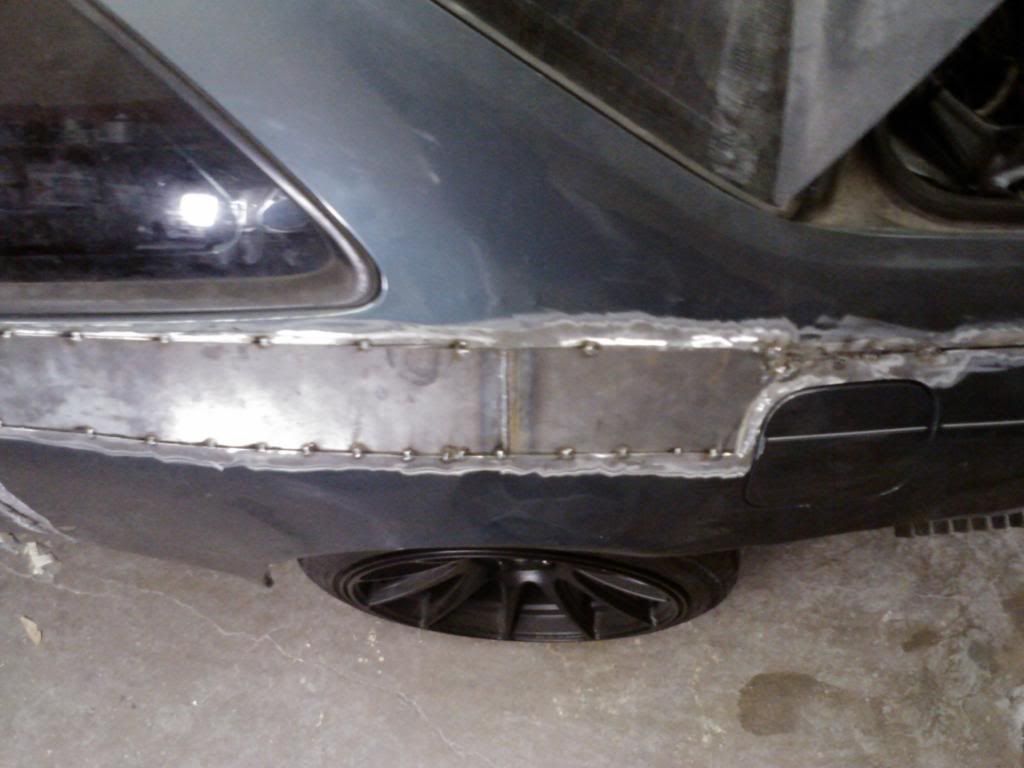
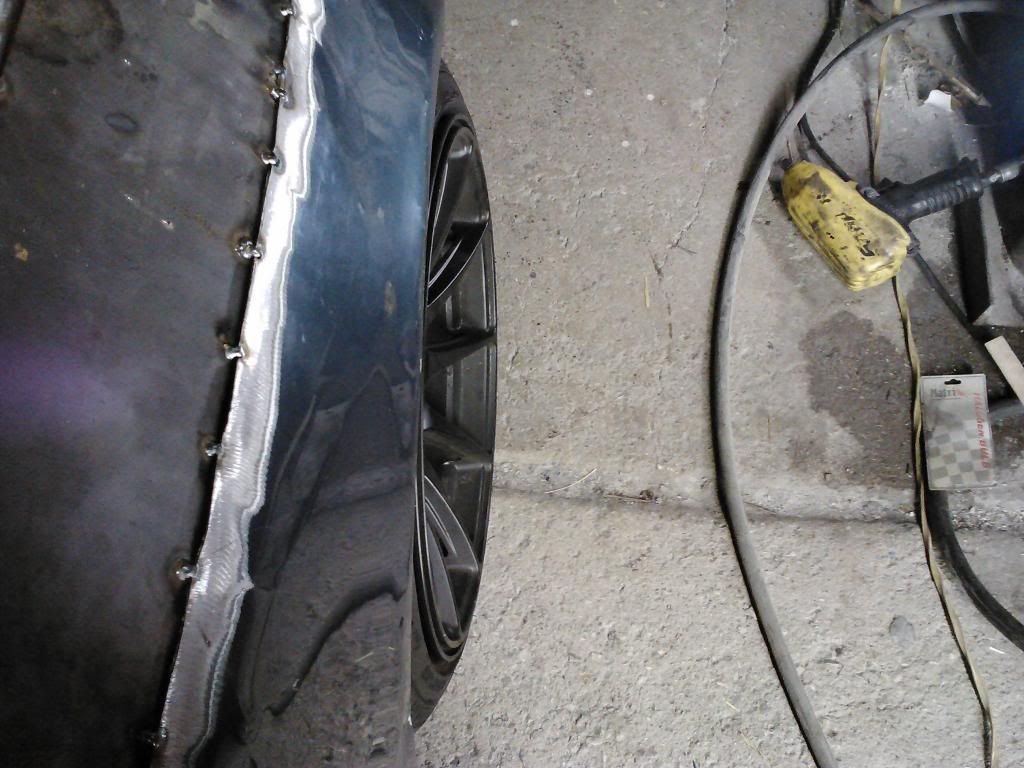
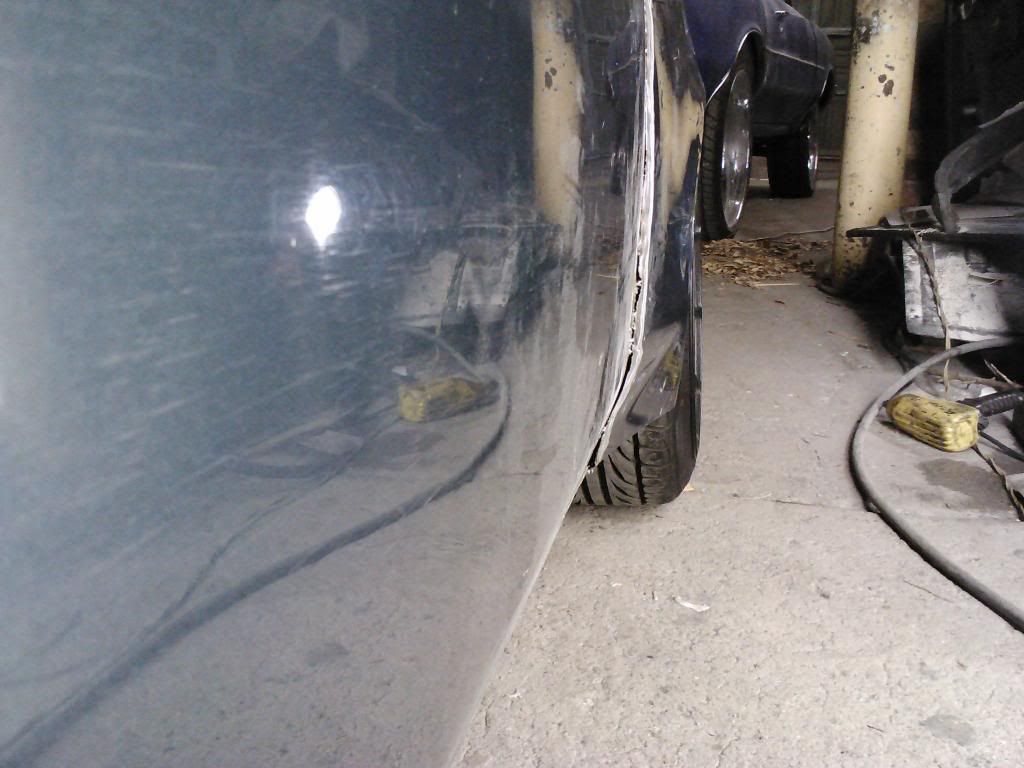
Now that you checked your clearance and everything is good go ahead and weld it up.
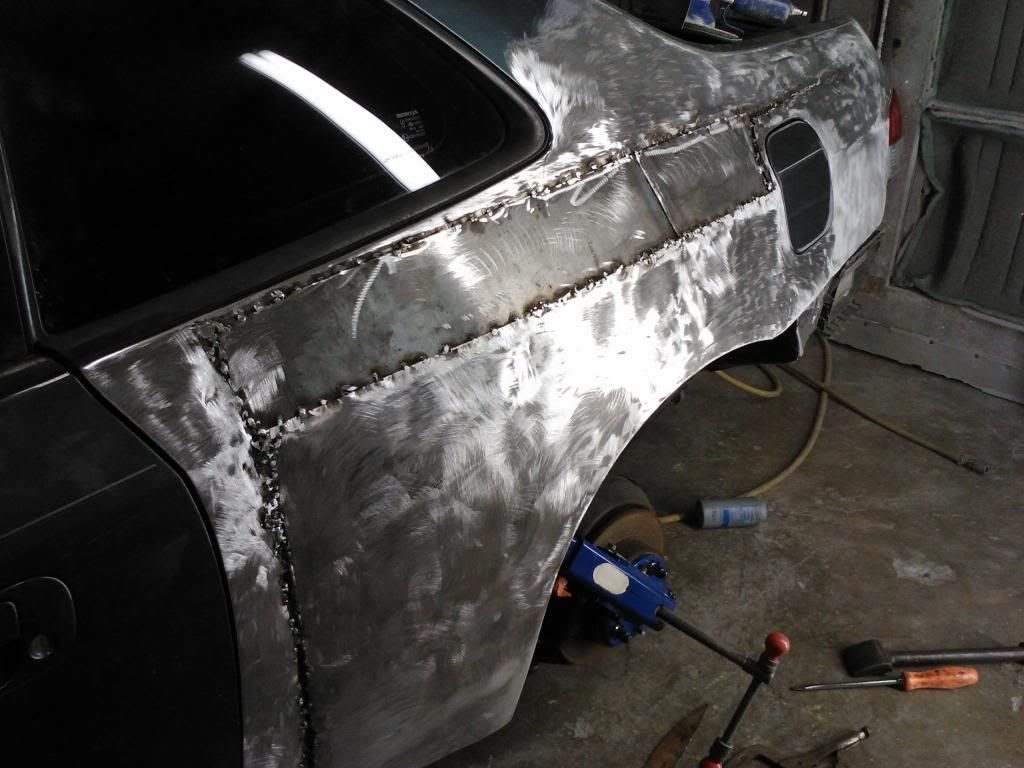
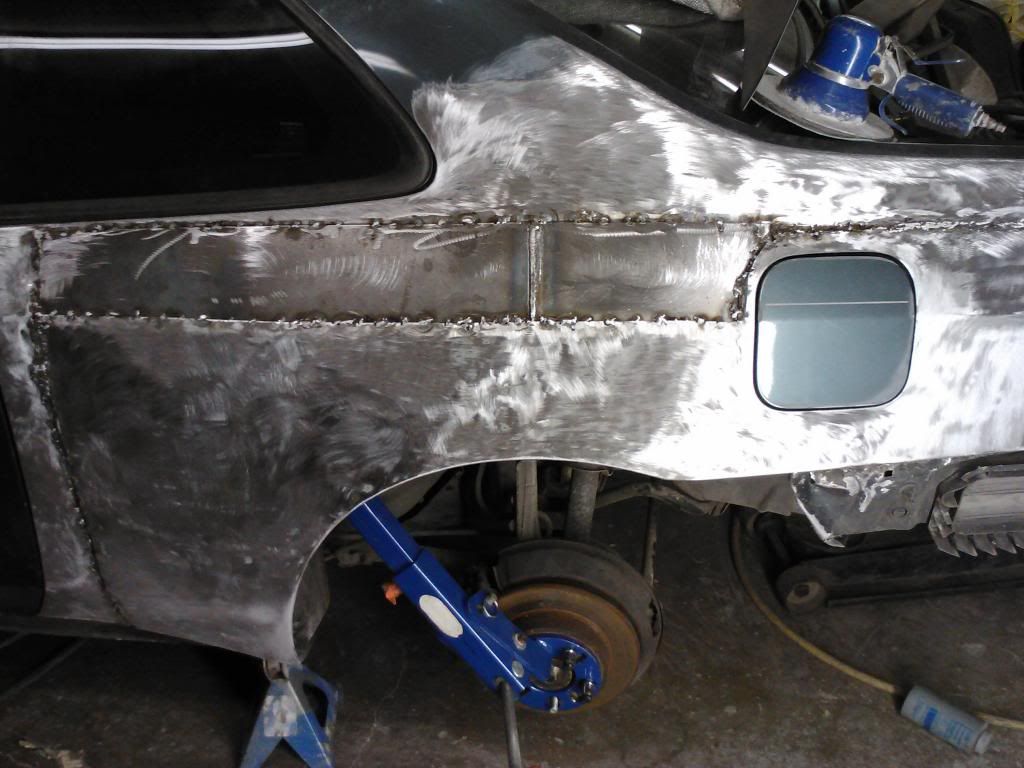
Since the quarter panel is welded in, now we move on to the inner fender well. For this you will either have to fabricate a fender liner out of metal to reinforce what you cut earlier and to fill in the gap from the wheel well being widened. I used a trailer replacement fender and cut it in half and that was enough for both sides.
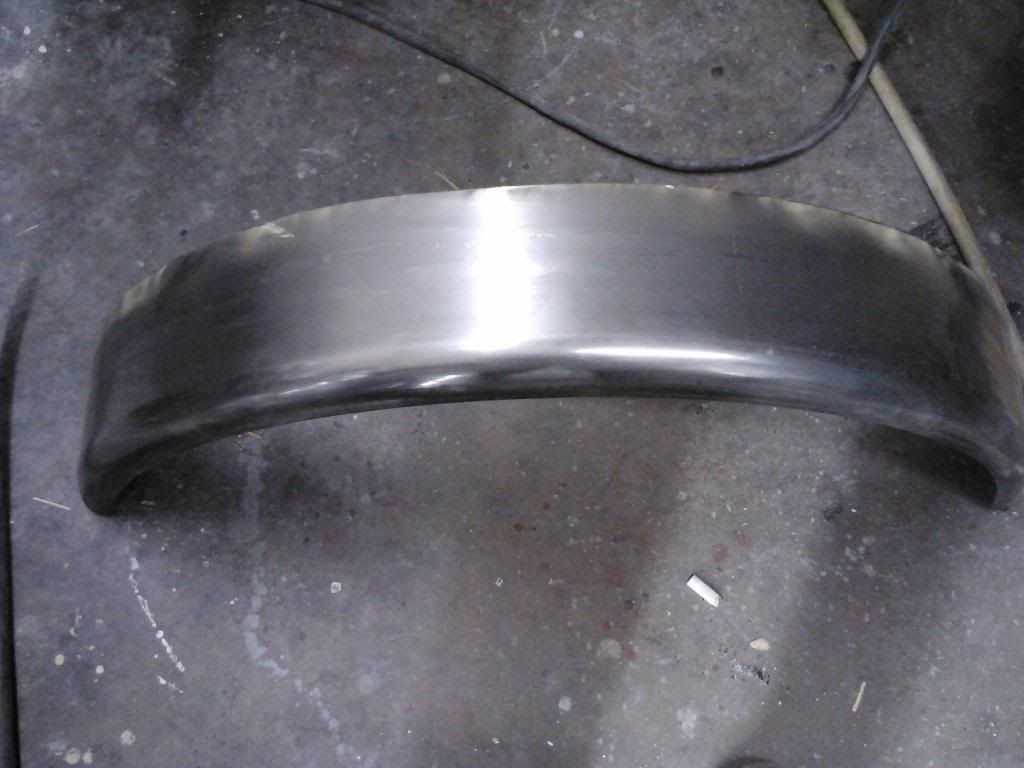
Once you've gotten it cut in half go ahead and place it in the fender well, now it almost fits in there perfectly but you'll have to beat the inner fender a bit to make it fit flush. Once its flush go ahead and weld it in it's place and once it's welded and done spray some undercoating to seal it up.
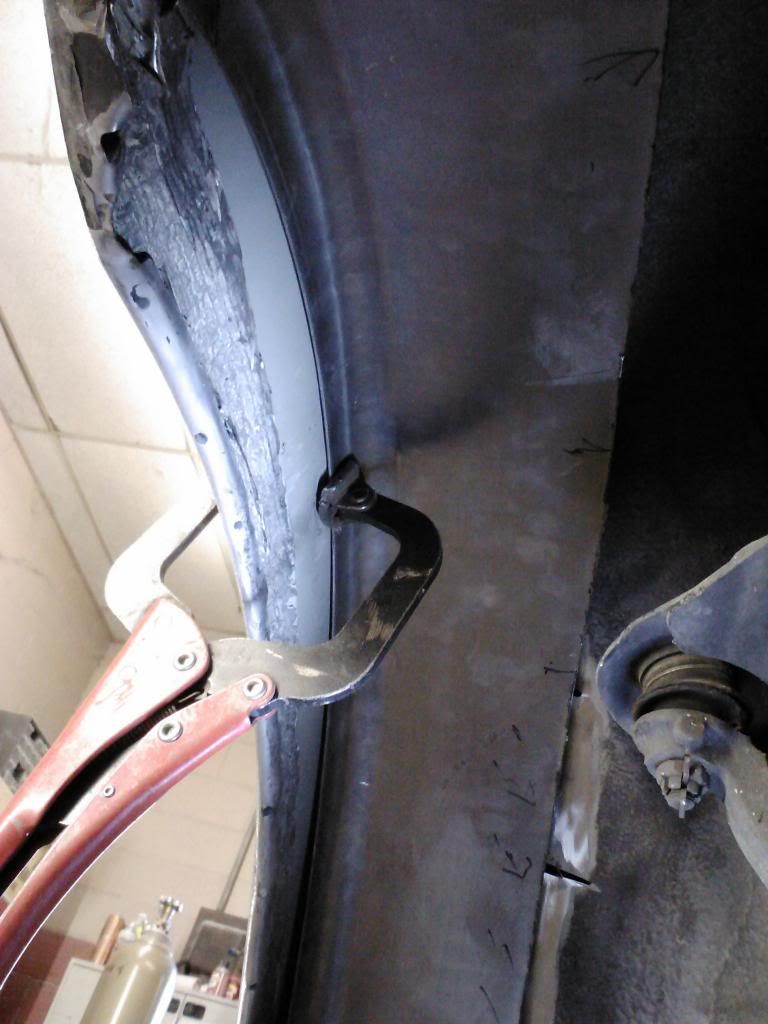
Now your ready for the body filler, start by marking your body line using tape.
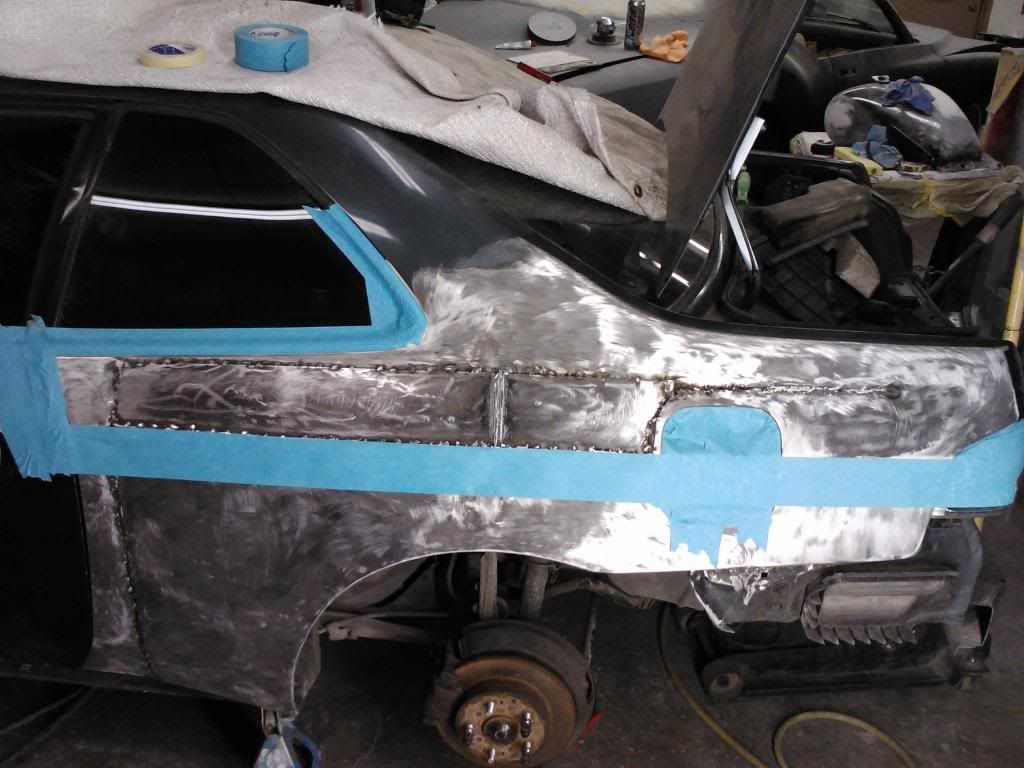
go ahead and place your body filler on and wait til the body filler is tacky and then remove it before it hardens, but only put the filler on the top portion.
Once you've done that you should have a nice straight line.
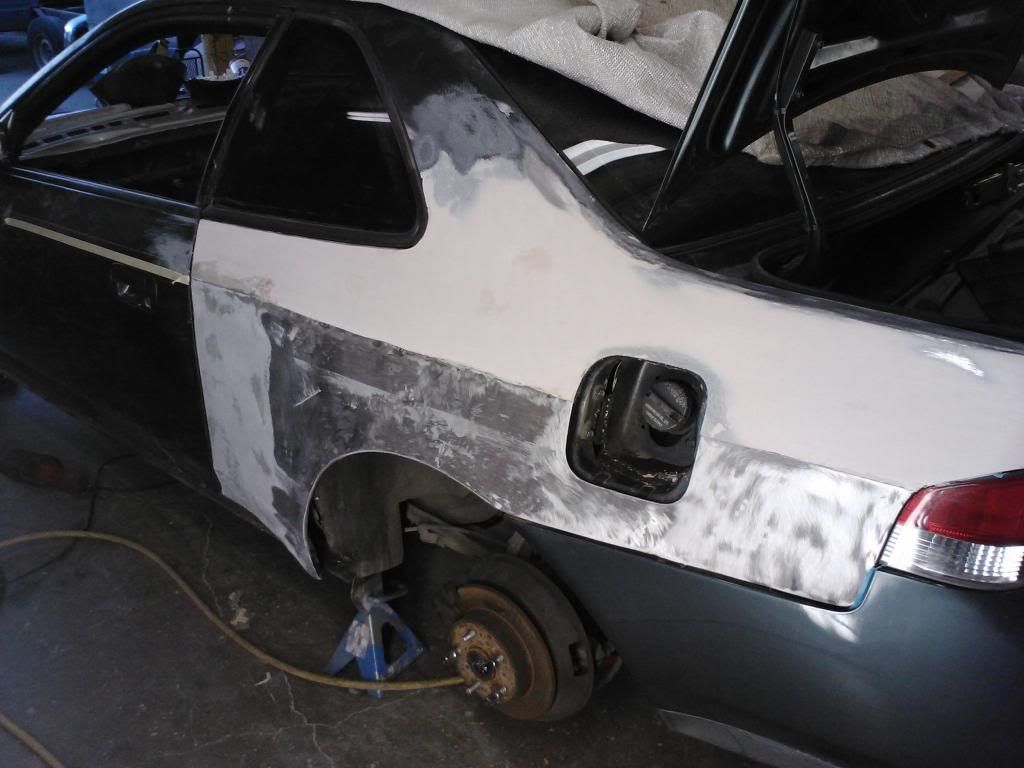
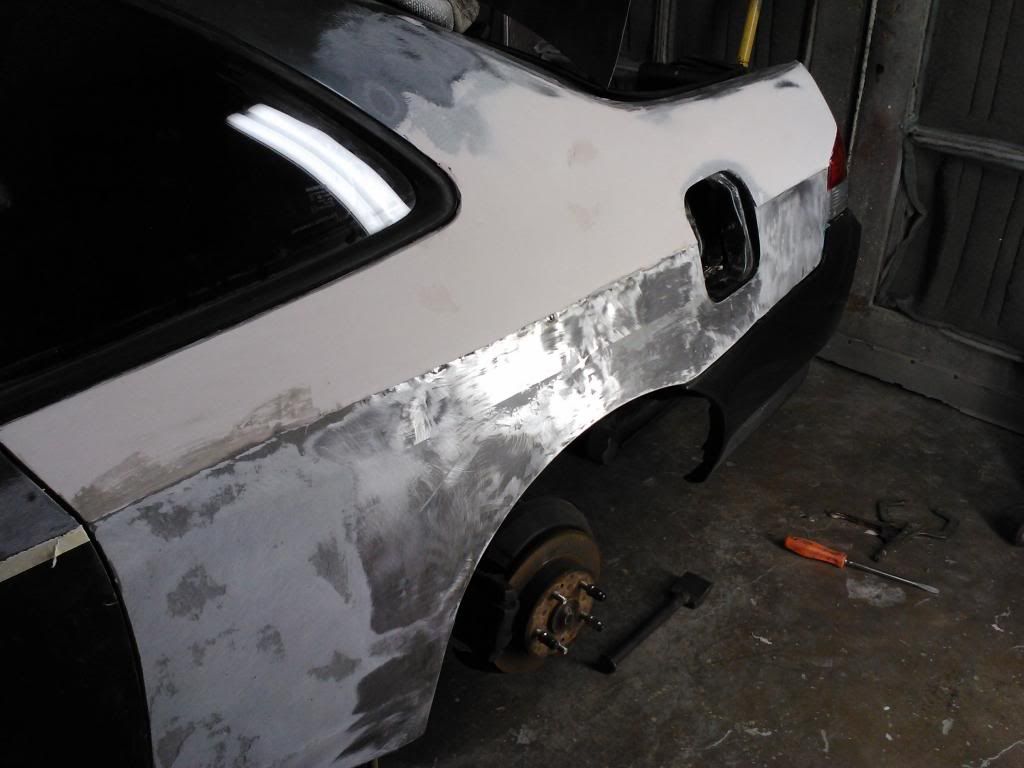
On these pictures the body filler has already been sanded using a file board with 36 grit paper, sorry I didn't have any pictures of that but if you have any questions I'll be more than happy to answer any questions.
Now re-tape the body line again but this time your taping it on the body filler side because you'll be putting the filler on the other half of the quarter panel and it should look like this,
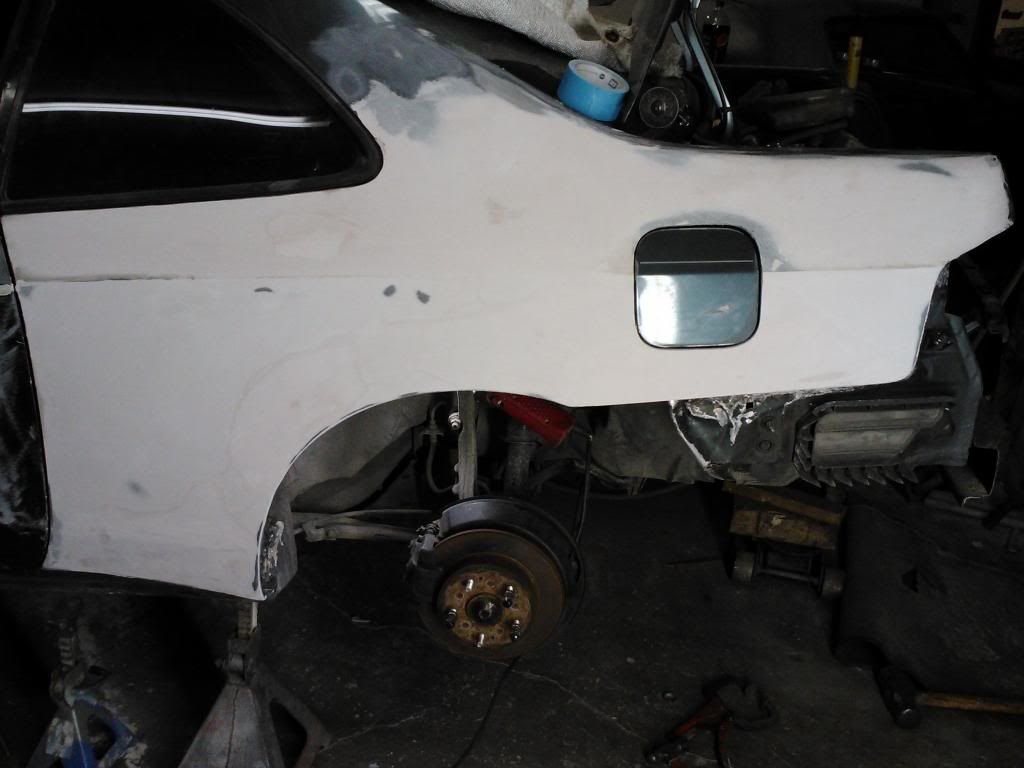
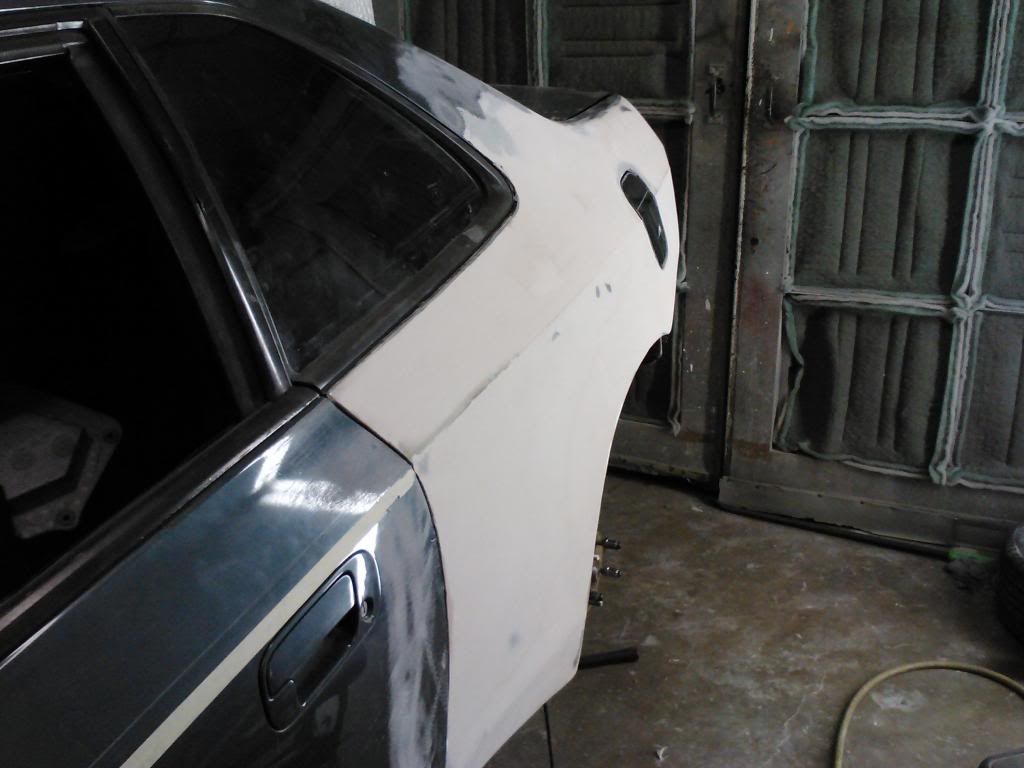
Now that your done with one side, repeat the same steps for the other side.
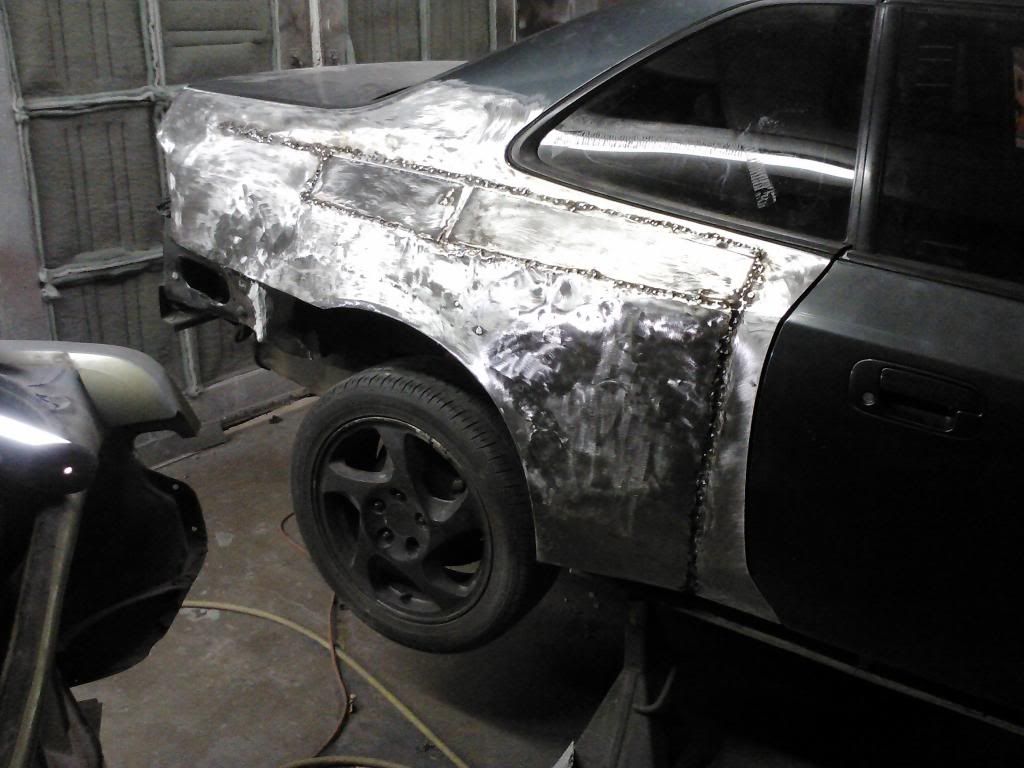
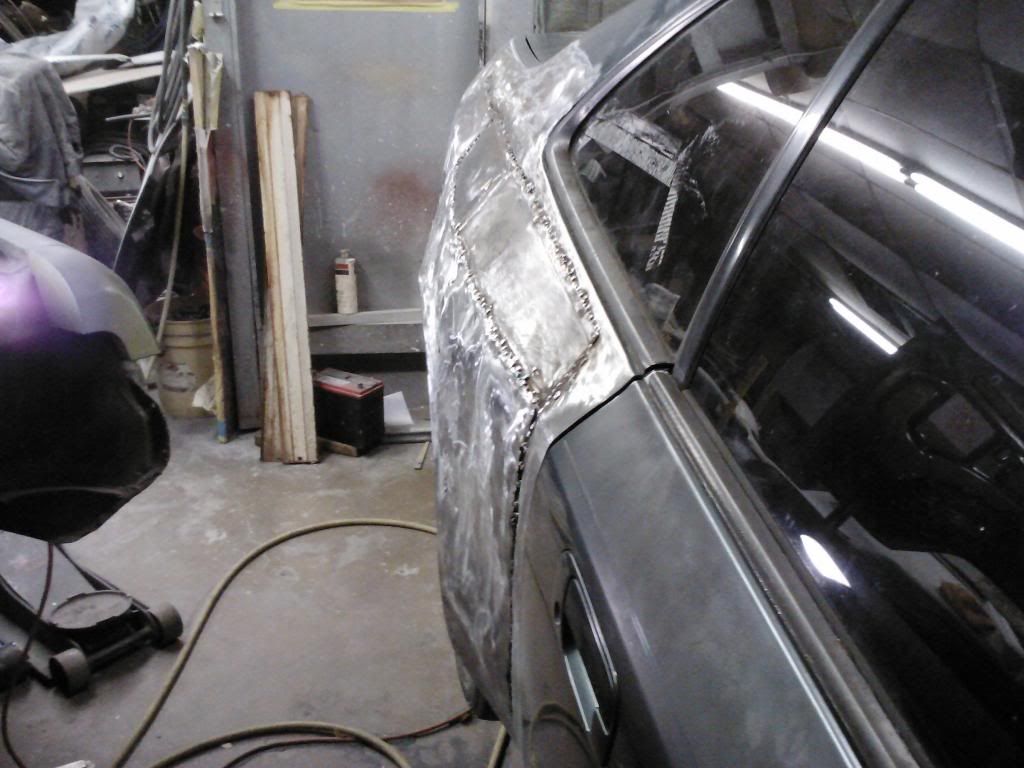
Now there will be a lot of bodywork that has to be done prior to priming the quarters and I apologize for not having those pics,
Sorry about not being more detailed and not having more pictures, I kinda did this quickly and really wasn't planning on doing a write up or else i would have, sorry.
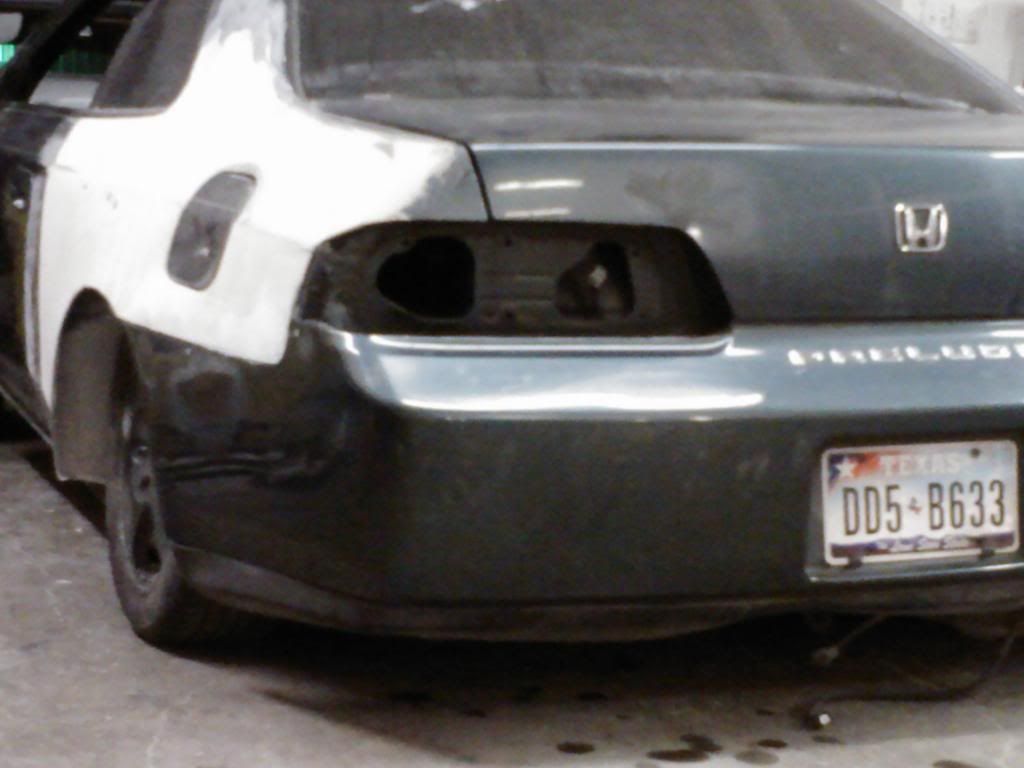
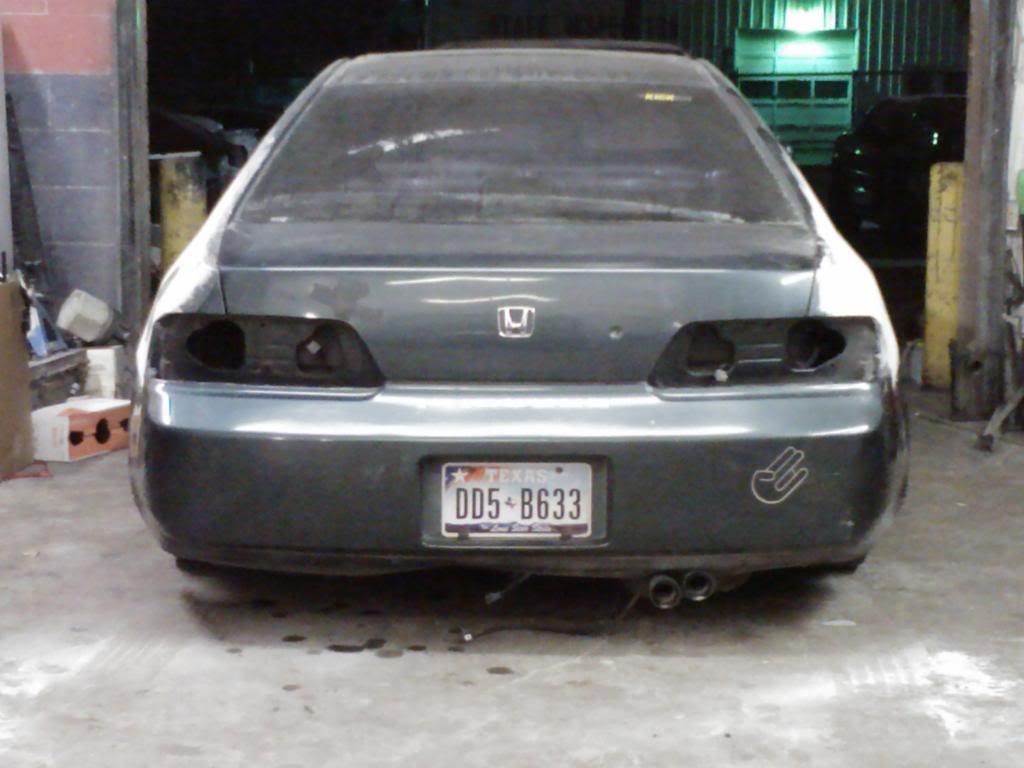
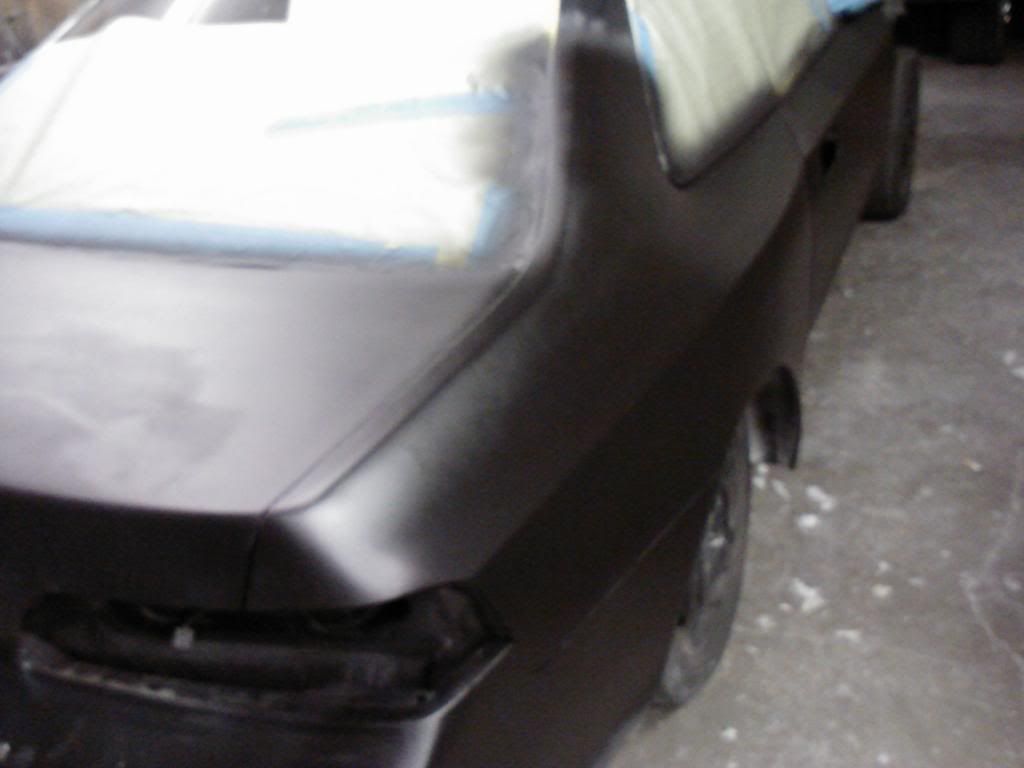
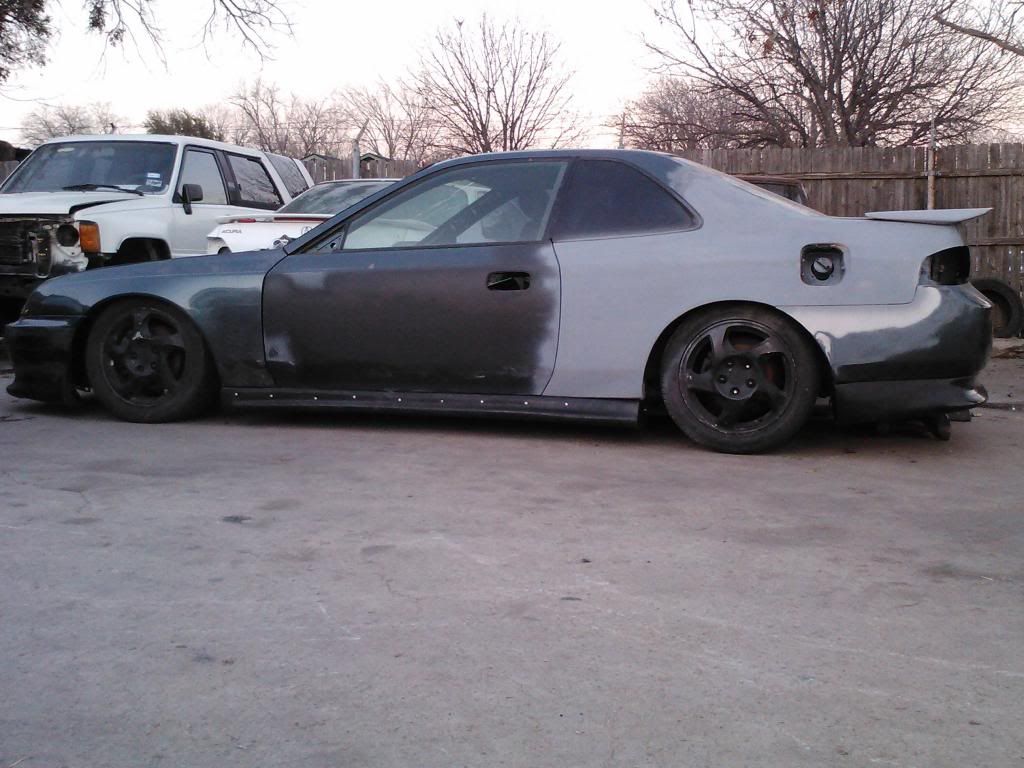
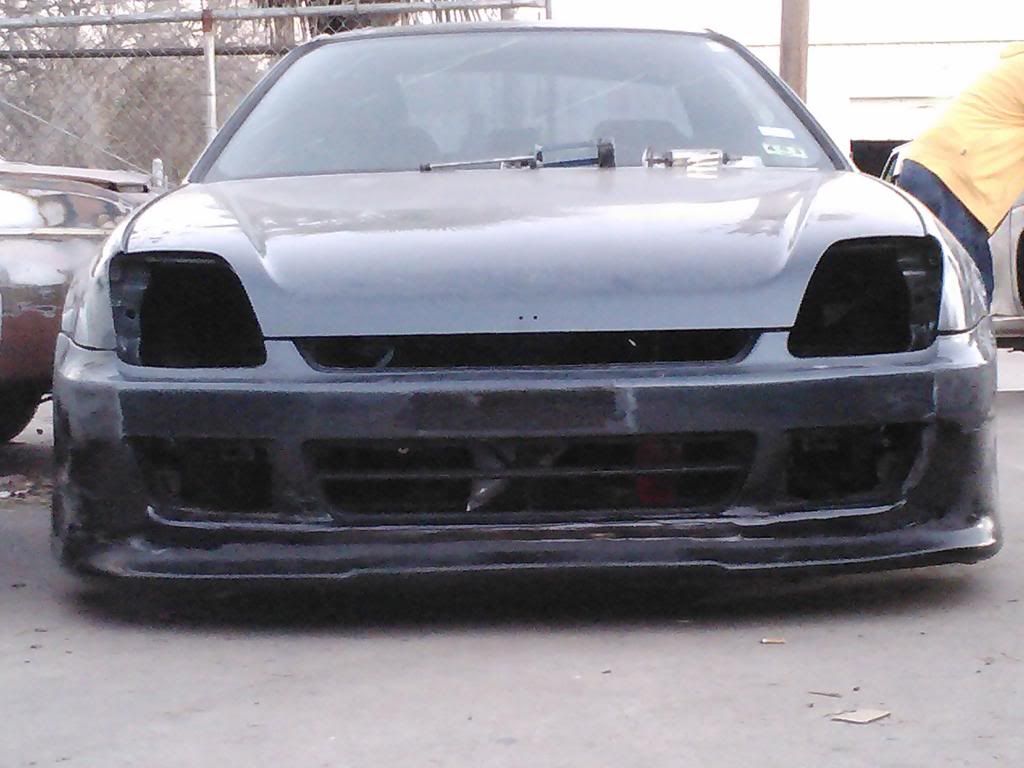
Here are some random pics of the widebody primed.
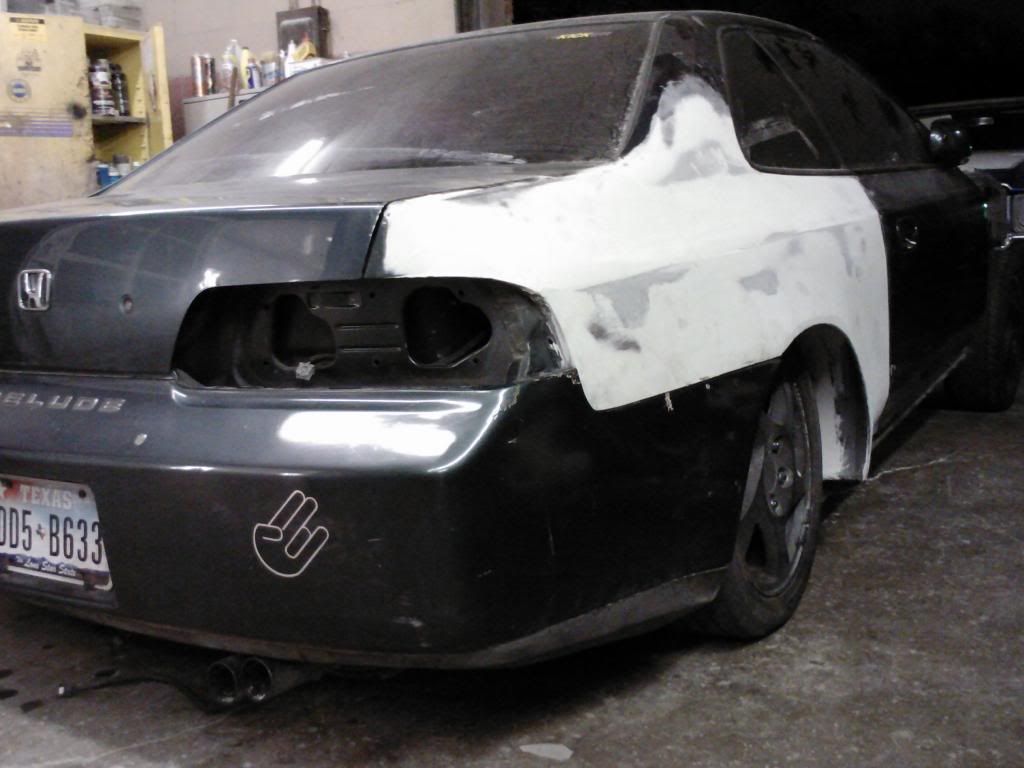

Here are some pics with me trying on some 20x10 +20 offset, just wanted to check the clearance.
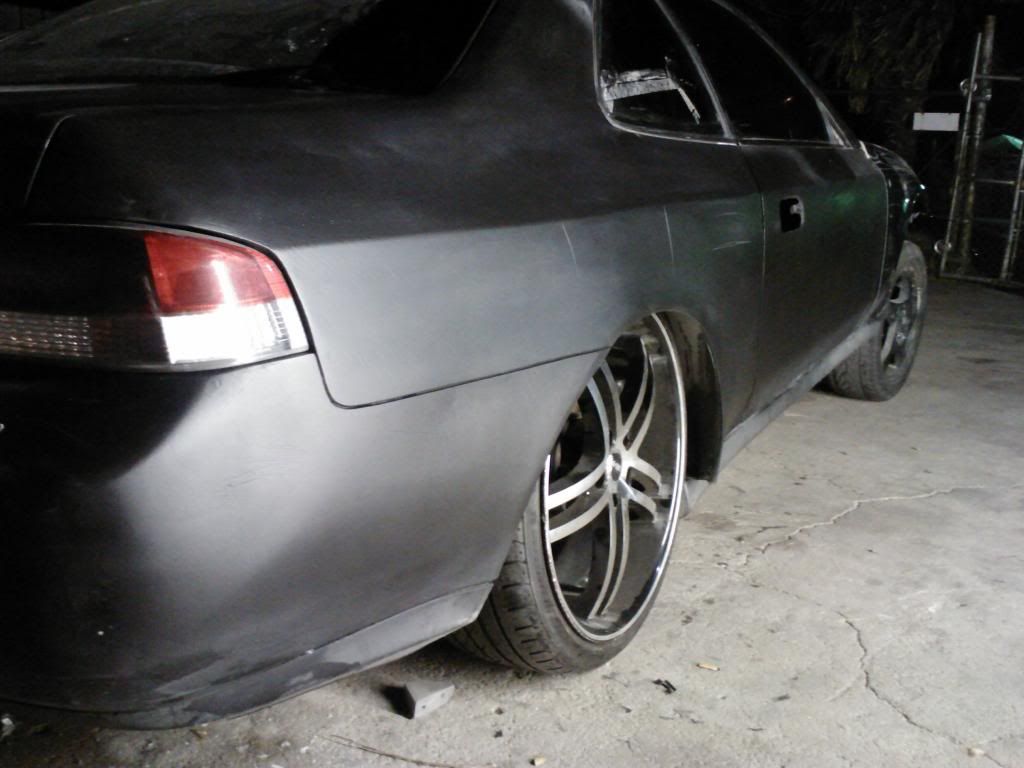
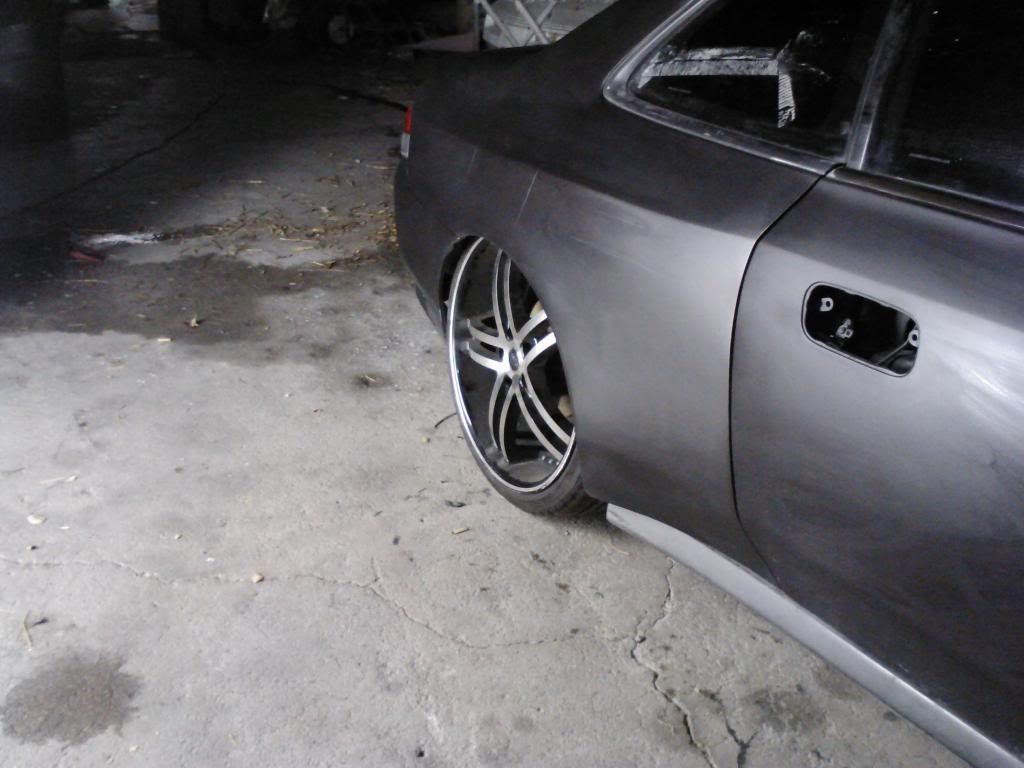
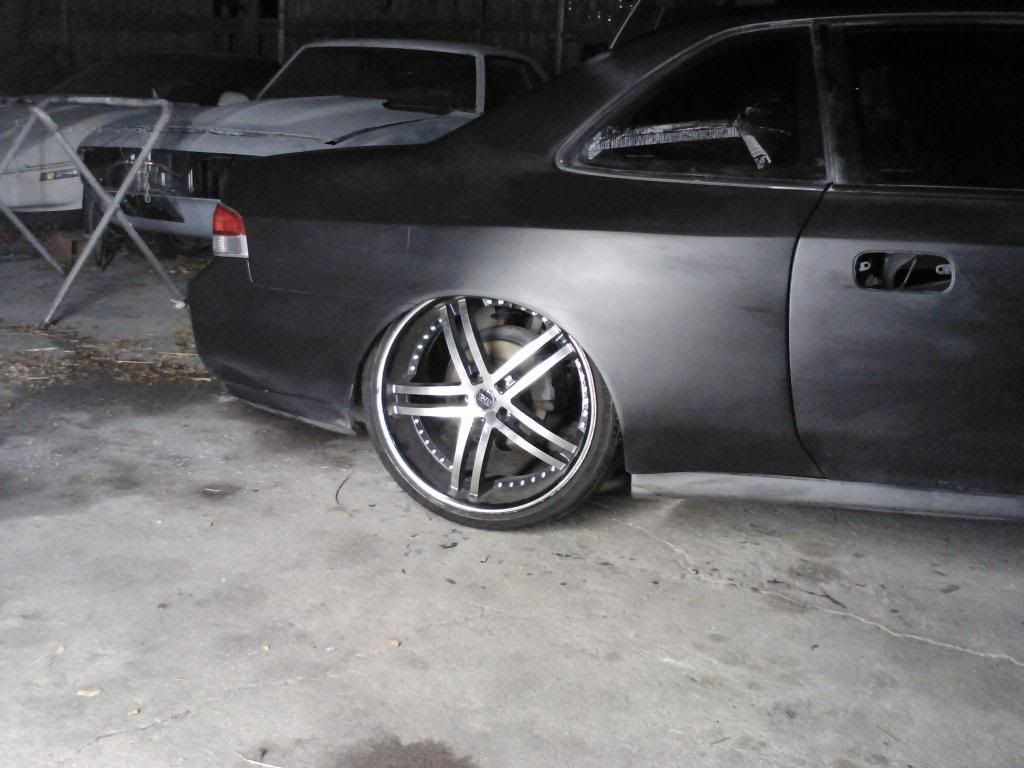
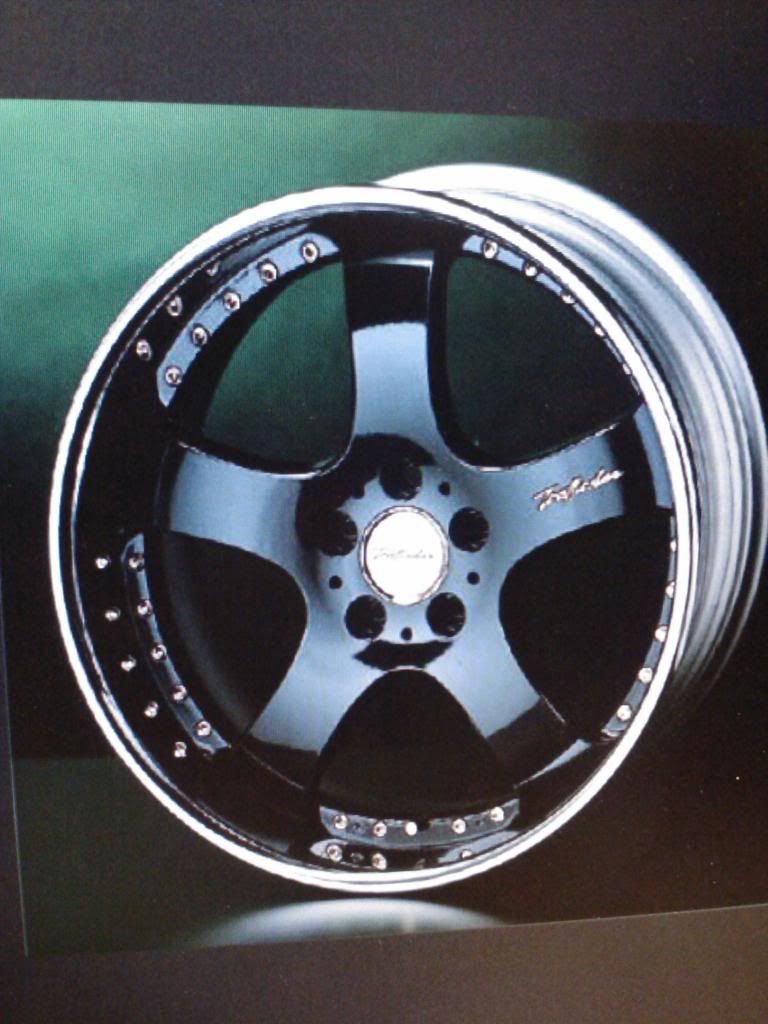
These are the rims that i'm going with, Trafficstars 19x9 +25 in the fronts and 19x11 -6 on the rears
This is how low the car is gonna sit with the 19"s
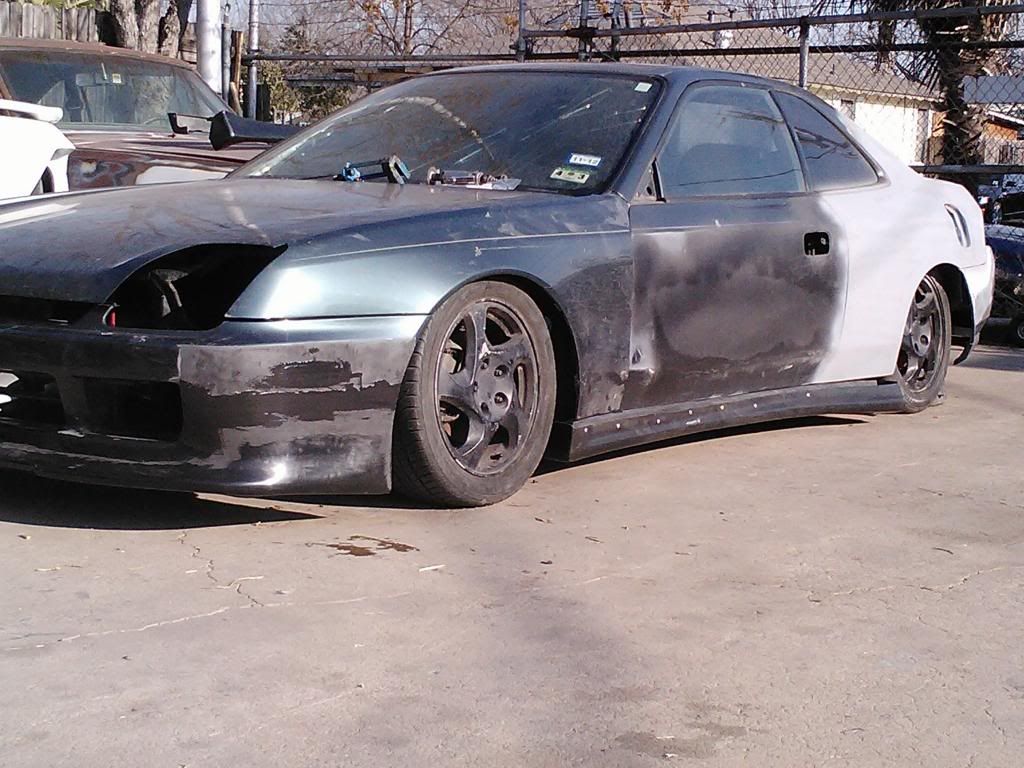
Well that's all I have for now and again I apologize for not being more in detail and having more pics but like I said I will be more than happy to answer y'alls questions, Thanks.
First thing you have to do is determine how wide you wanna go and that will let you know if you can get by with just rolling the fenders, in my case I am going with 19x11 -6 offset in the rears.
So let's get started. The first thing I had to do is mark my cut line of where i was going to cut the quarter panel, I wanted to cut it just a little over the body line, this makes it easier to do the bodywork after the welding is done.


These cuts were done using a hand held cutoff wheel.
Now there's two ways to start the begining of the widebody, you can start from the door and start flaring out the quarters, this would be a more aggressive look because the widebody would look bigger. The second way is the way I chose because I wanted a mild widebody and didn't want it to aggressive. So I made a downward cut about 3" from the edge of the door seam.

Now after this cut is made you have to cut the quarter panel loose from the wheel well, now to make these cuts you have to use a sawzall. Continue the cut all the way thru the wheel well ( you also need to remove the gas filler neck ) and stop the cut about 6" from the edge of the tail light.

Next you have to determine how wide you wanna go, this will let you know how wide to cut the replacement panel that your gonna put in place of the old one. I am going 4" wider than factory, after you have your replacement panel ready; set it on the car and tack it in place, just tack it for now in case you have to remove it or do some adjustments you won't have a lot of welds to remove.

Once you've tacked in place mount you new rim and check for clearances.


Now that you checked your clearance and everything is good go ahead and weld it up.


Since the quarter panel is welded in, now we move on to the inner fender well. For this you will either have to fabricate a fender liner out of metal to reinforce what you cut earlier and to fill in the gap from the wheel well being widened. I used a trailer replacement fender and cut it in half and that was enough for both sides.

Once you've gotten it cut in half go ahead and place it in the fender well, now it almost fits in there perfectly but you'll have to beat the inner fender a bit to make it fit flush. Once its flush go ahead and weld it in it's place and once it's welded and done spray some undercoating to seal it up.

Now your ready for the body filler, start by marking your body line using tape.

go ahead and place your body filler on and wait til the body filler is tacky and then remove it before it hardens, but only put the filler on the top portion.
Once you've done that you should have a nice straight line.


On these pictures the body filler has already been sanded using a file board with 36 grit paper, sorry I didn't have any pictures of that but if you have any questions I'll be more than happy to answer any questions.
Now re-tape the body line again but this time your taping it on the body filler side because you'll be putting the filler on the other half of the quarter panel and it should look like this,


Now that your done with one side, repeat the same steps for the other side.


Now there will be a lot of bodywork that has to be done prior to priming the quarters and I apologize for not having those pics,
Sorry about not being more detailed and not having more pictures, I kinda did this quickly and really wasn't planning on doing a write up or else i would have, sorry.
Here are some random pics of the widebody primed.


Here are some pics with me trying on some 20x10 +20 offset, just wanted to check the clearance.


These are the rims that i'm going with, Trafficstars 19x9 +25 in the fronts and 19x11 -6 on the rears

This is how low the car is gonna sit with the 19"s


Well that's all I have for now and again I apologize for not being more in detail and having more pics but like I said I will be more than happy to answer y'alls questions, Thanks.