Ok, a few updates to this from doing this job at the weekend.
The guide above is really good but a few tips/observations from my experience and it includes a few pics hosted by ourselves as well rather than us potentially losing everything above.
It's a pretty quick job really and isn't rocket-science by any means.
Firstly, make sure the car is up nice and high on stands/blocks to make access easy when lying underneath from the front.
I had mine so the front tyres were just off the ground and found that was a comfortable height and sat the blocks under the front lower suspension arm mounts of the front subframe.
I did the job without draining any oil or coolant - neither are necessary or make any difference to how clean/messy the job is, but I would advise to do it when the car is cold for obvious reasons (not burning yourself

) and less obvious reasons (the oil is thicker so won't run as much and you can be sure it's properly drained down to the bottom of the engine).
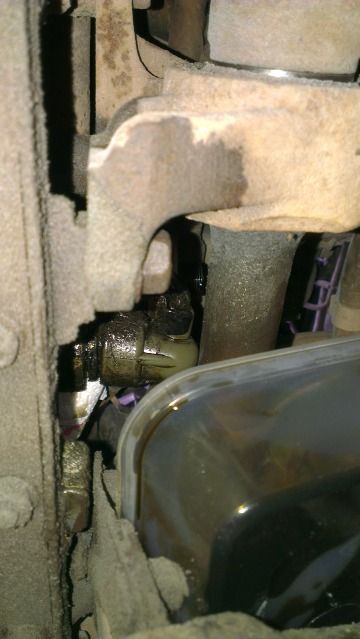
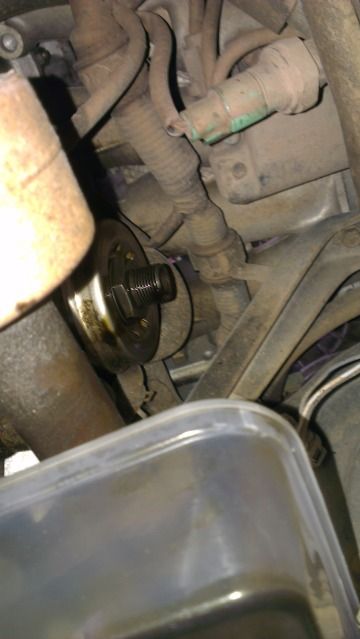
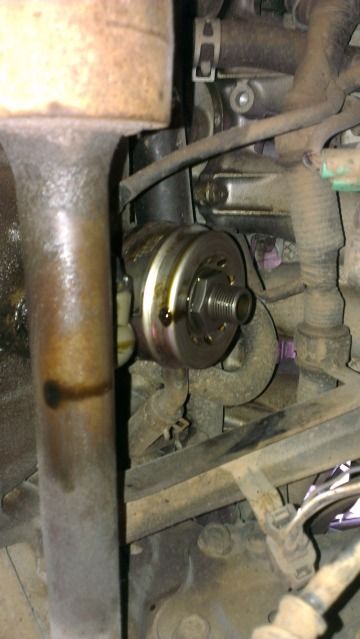
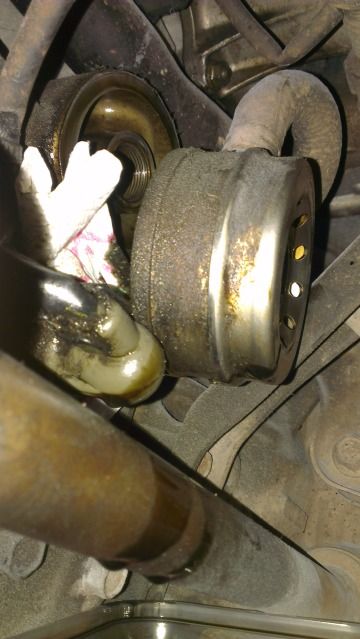
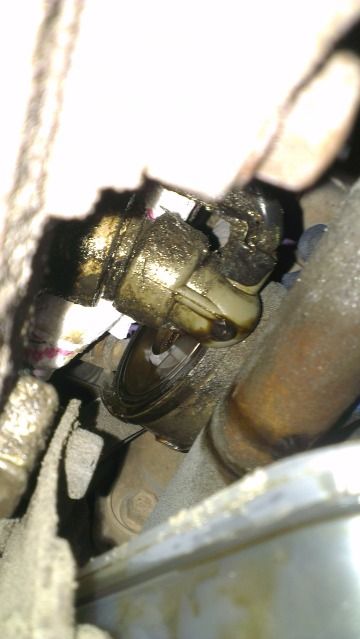
Here's some pics of what mine looked like before;
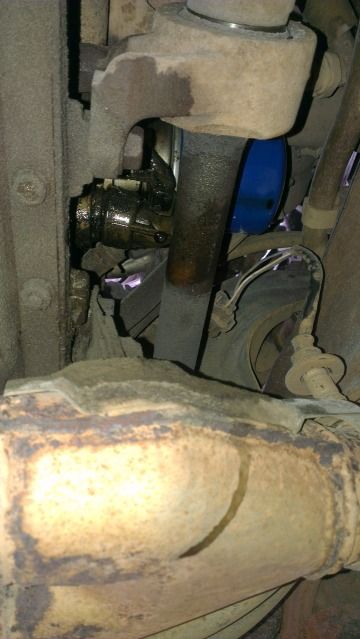
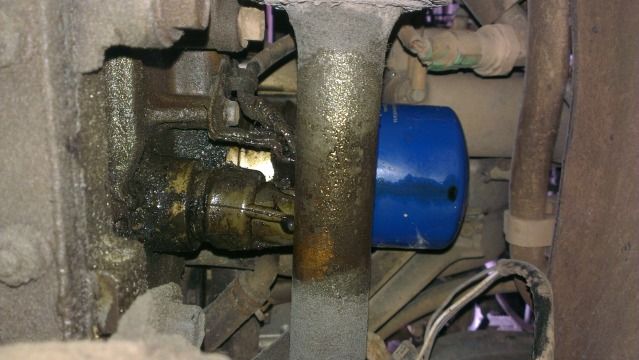
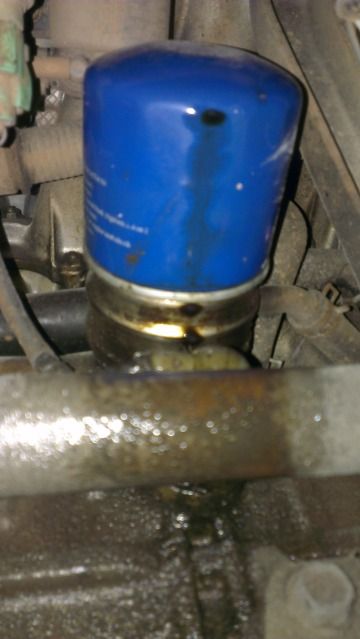
From what I've read, that's classic examples of an oil cooler leak. It runs down the filter then drips off onto the driveshaft and header pipe.
To help keep the job as clean as possible I wiped up all the loose oil first and folded up a piece of kitchen roll and wedged it underneath the bottom of the oil cooler. Then I loosened the filter with a strap wrench (but didn't undo it yet) and then placed a plastic takeaway tray on top of the exhaust header pipe - I found this sat there perfectly and was positioned right underneath where any oil would drip out (I also had a bowl on the ground underneath that just in case).
Then I reached up with my hand and undid the filter and removed it and all the oil was caught. I let that run dry and then removed the tray and wiped the back of the oil cooler dry.
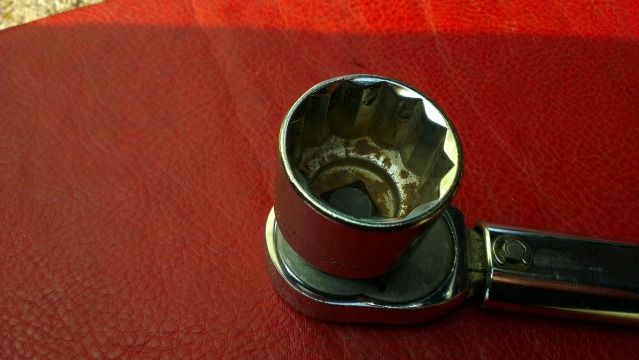
The guide above makes a big deal about using the right tools. This is true to a point. The centre bolt on the cooler is recessed inside it slightly and is pretty tightly done up and slippery, so don't try to use an open ended spanner at all, or a ring spanner unless it has enough angle on it that you can be sure to get full onto/around the nut. However, I found you don't need a long reach socket. A normal depth socket fitted mine fine;
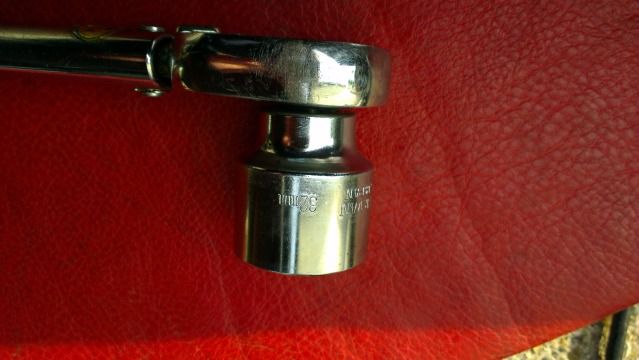
Where a long reach socket would help is in getting the ratchet clear of the driveshaft underneath (there isn't room to use an extension bar without hitting the back of the subframe) but you can do it ok with a socket.
I say again, just make sure the socket is properly located on the nut, because the flanges are shallow and it will be slippery.
Again, I just loosened the bolt with the socket and then put the takeaway tray back on the downpipe and undid the rest of the bolt by hand so all the oil was caught. Once the bolt is out, the coil cooler will remain stuck to the back of the engine. Put the bowl back underneath far enough forward so it covers underneath the oil pressure switch and keep the takeaway tray in place. Then give the oil cooler a gentle tap on the bottom/side until it comes clear (alternatively you could grab the coolant pipes where the hose is clipped onto them with your hand and pull on them). Pull it backwards enough so the oil runs into the takeaway tray until it stops dripping.
Once it's stopped dripping, remove the tray/bowl and wipe everything clean then you can remove the old seal. A stanley knife is the right thing to use here (I tried a bradawl too but that was no good and it is the blade ftw)
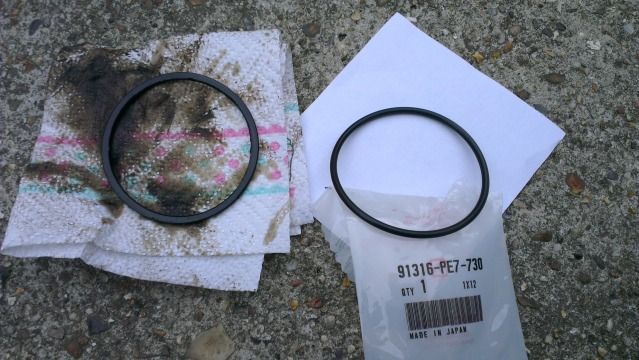
You'll find that the old seal is quite hard and is flatter compared to the new one;
Give the cooler and back of the block another really good clean, lightly oil up the new seal and put it in place on the cooler. I didn't have any problems getting it to stick (I didn't oil the cooler, just the seal).
Clean up the centre bolt (worth leaving a bit of oil on the threads), remove the kitchen roll from above the pressure switch, move the oil cooler back into location on the back of the engine and hold it steady with one hand while you use the other one to do it up hand tight. Then use your socket and torque wrench to do it up to the correct torque - same rules apply, make sure the socket is properly seated to avoid damaging the flats. I couldn't find the torque setting in the 4th gen Service manual (original release or the supplements) so just went on the figure in the write-up above and it worked fine.
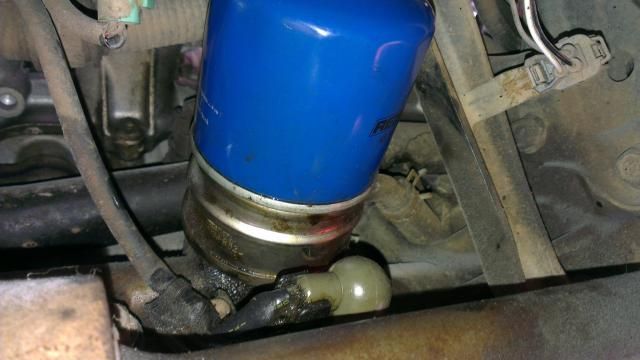
Fit the filter, job done!
Using the tray and kitchen roll above above meant I didn't get any oil all over my hand/running down my arm.