
Congratulations to vtecmec for winning May/June's Lude Of The Month, with his DIY Turbo BB1 build.
>>> Click Here For Profile <<<

>>> Click Here For Profile <<<
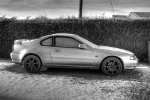
Merlin's 4G Time Attack Lude

-
Ammo
- Admin | Spammer Assassin
- Posts: 2945
- Joined: Sun Jun 20, 2010 10:35 pm
- My Generation: 4G
- Location: Boston
- Been thanked: 6 times
- Contact:
Water does help (well water with a drop of washing up liquid in it) it means you have 2 or 3 goes to get a sticker in the right place, but if you don't squeegee it right you end up with the same effect as doing it dry, just it's water bubbles not air.
Heat is handy for fixing if you've messed up, the vinyl will go back to as it was, but if you use too much it sticks in it's new form, and i'm not sure how these printed vinyls would fair under heat
There's loads of "how to's" on youtube deffo worth a look.
Last car i did dry, it was a bit hit or miss, but the stickers were over 16" high, a wing should be ok done dry if it's done indoors or in the summer
Next car i'm gonna test wet application, see if I get better results, might be better for me as i'm applying large graphics on my own so once it sticks it's stuck, wet app will give me some correction
-
Merlin

- Moderator
- Posts: 12397
- Joined: Fri Aug 06, 2010 9:04 am
- My Generation: 5G
- PSN GamerTag: Merlinbadman
- Location: Edinburgh
- Has thanked: 71 times
- Been thanked: 306 times
Re: Merlin's 4G Track Lude
I have had no problems getting it to stick. I was doing it in a warm room and using a bit of cardboard to help get the bubbles out. After the first go I got the hang of it. Im planning on putting a few layers of clear coat on it when im finished.

-
Merlin
- Moderator
- Posts: 12397
- Joined: Fri Aug 06, 2010 9:04 am
- My Generation: 5G
- PSN GamerTag: Merlinbadman
- Location: Edinburgh
- Has thanked: 71 times
- Been thanked: 306 times
Sticker bombed wing
Several hours and a load of stickers later:
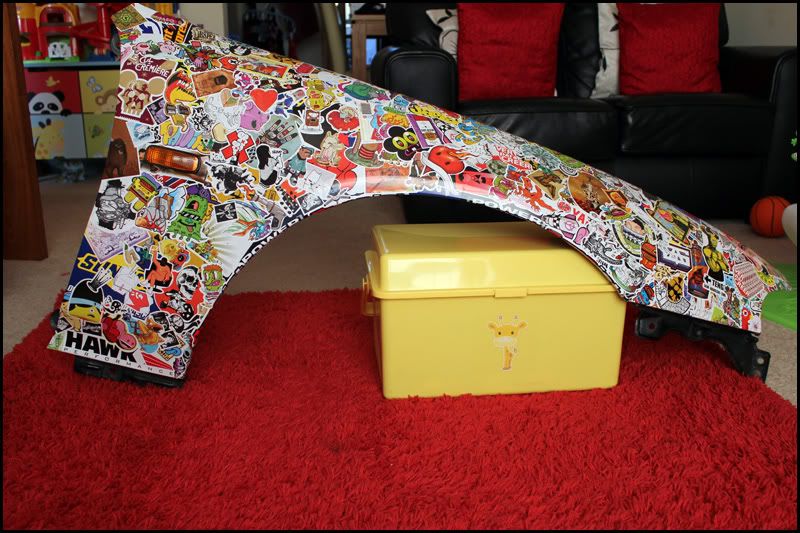
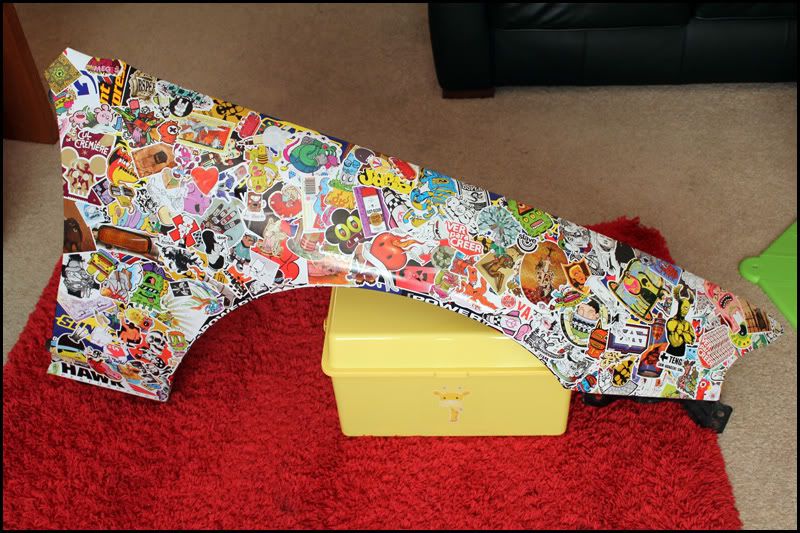
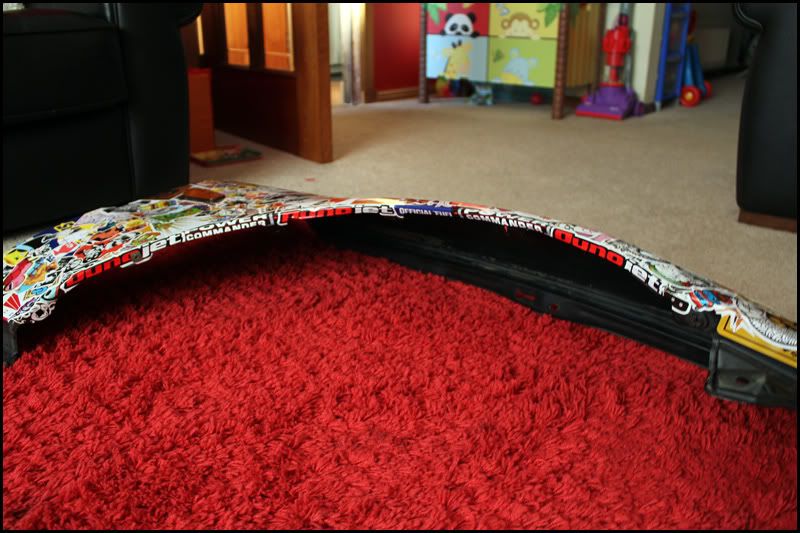
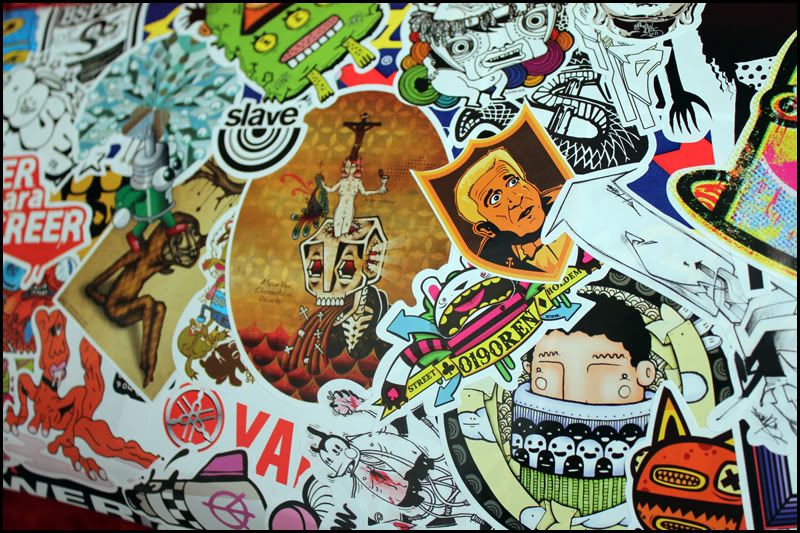
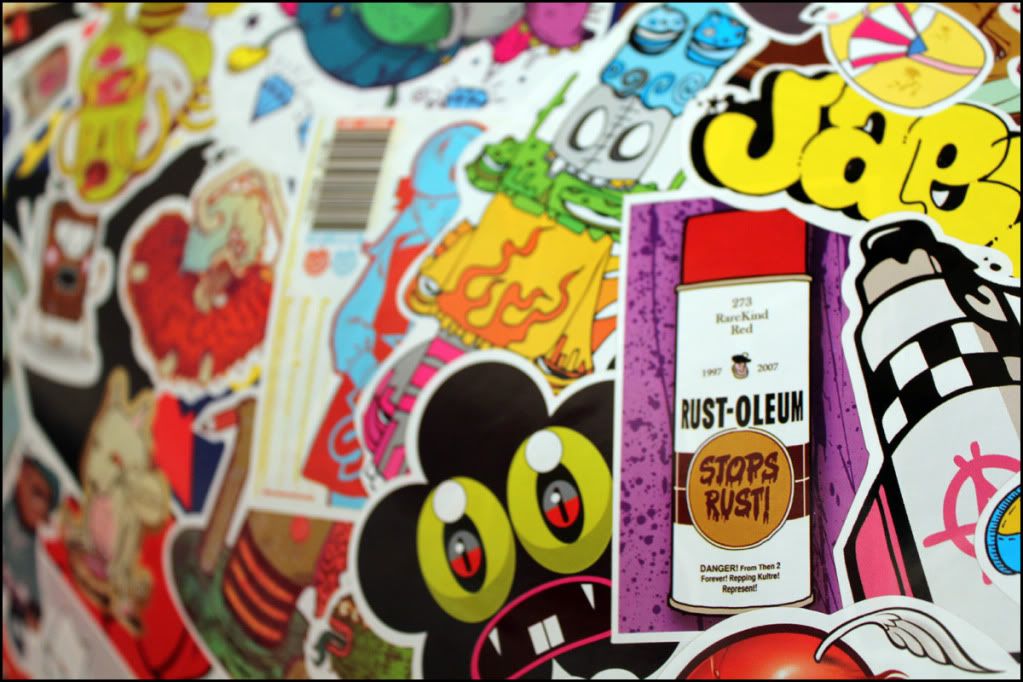
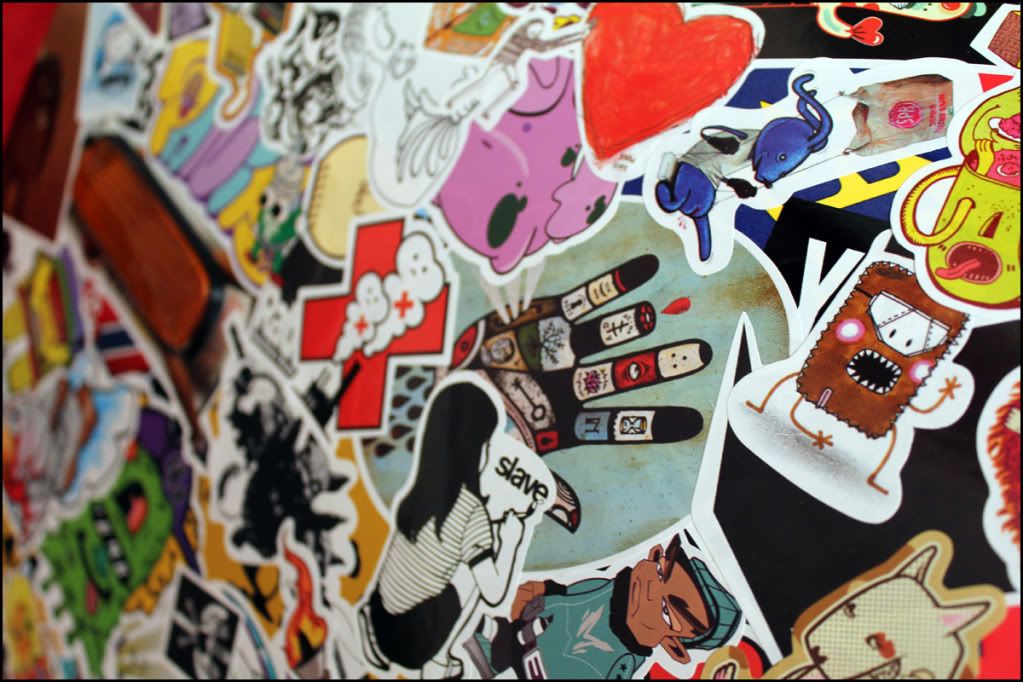
Its going to get a few layers of clearcoat before it goes on the car.
Its going to get a few layers of clearcoat before it goes on the car.
-
indigolemon

- The Chaos Engine
- Posts: 6682
- Joined: Wed Jun 30, 2010 1:45 pm
- My Generation: 4G
- PSN GamerTag: M149YSL
- Location: Kelty, Fife
- Has thanked: 24 times
- Been thanked: 71 times
- Contact:


-
Merlin
- Moderator
- Posts: 12397
- Joined: Fri Aug 06, 2010 9:04 am
- My Generation: 5G
- PSN GamerTag: Merlinbadman
- Location: Edinburgh
- Has thanked: 71 times
- Been thanked: 306 times
Re: Merlin's 4G Track Lude
Many thanks. It should look good once its on the car, especially now that it has lowered suspension, a new front lip, and OEM Euro/Bubble side skirts 
-
Merlin
- Moderator
- Posts: 12397
- Joined: Fri Aug 06, 2010 9:04 am
- My Generation: 5G
- PSN GamerTag: Merlinbadman
- Location: Edinburgh
- Has thanked: 71 times
- Been thanked: 306 times
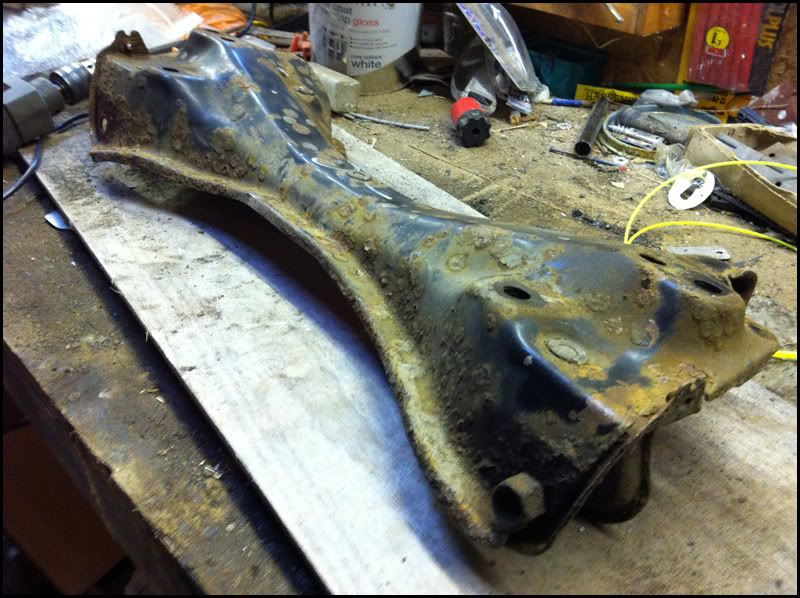
Starting the polybushing
Me and 3rdGenSteve are back on the case of the bushings  Here is how we are getting on. To remove the bushes we used a little heat and a bench vice. We heated the metal a little, really its more to break the rubber/rust seal on the edge of the bush:
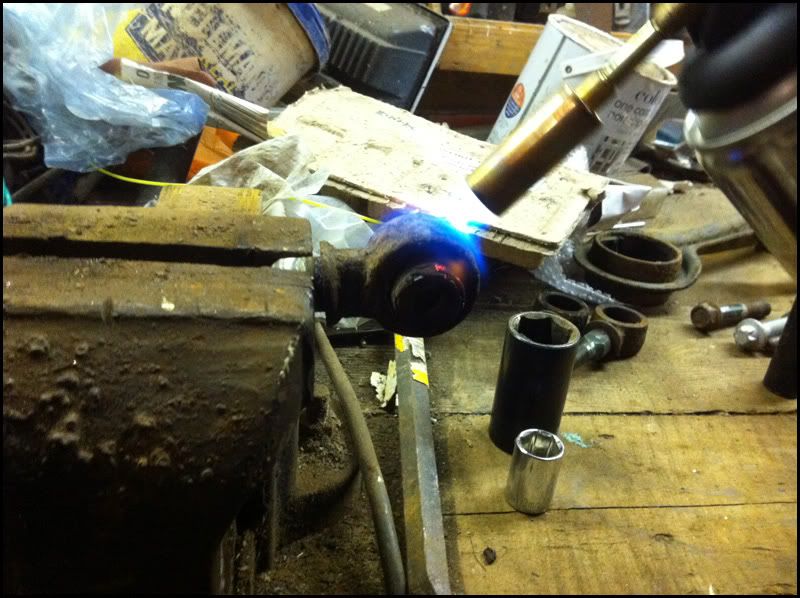
Using a big socket on one side and smaller socket on the other its possible to push the bushing out. Dispite my car being 18 years old and still having the original bushings, they came out quite easily See vis below for a demonstration.
[hdyt]pqnh7BnpaTM[/hdyt]
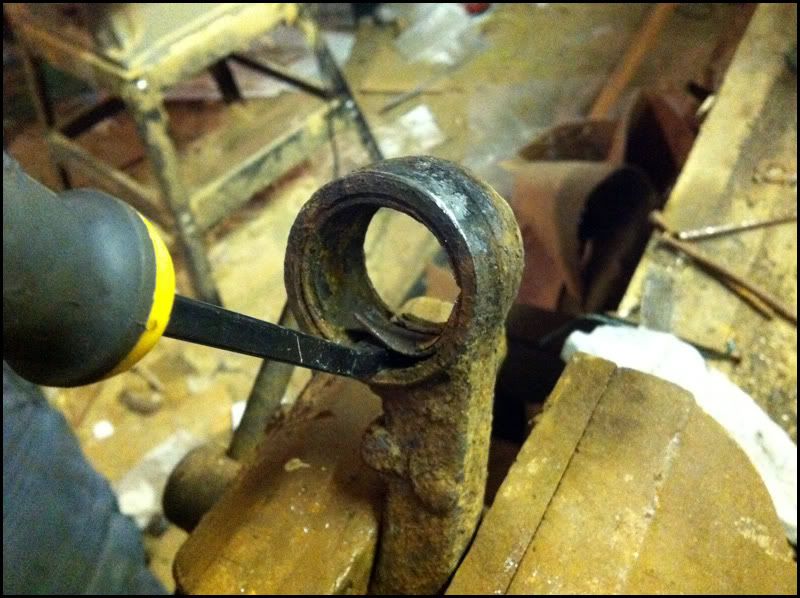
Once the bush is out you need to remove the bushing shells. The easiest way is to take a hack saw and cut through the shell. Make one cut all the way though and a second cut further round (it only needs to go though a quarter or half of the thickness of the shell) to act a place there the shell can bend so it comes out easily. Then take a chizel or similar and hack it out
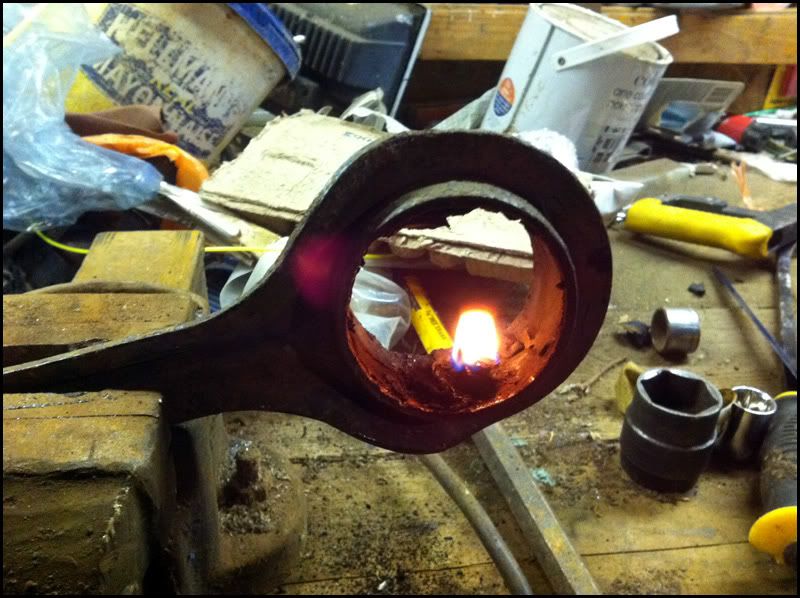
The hardest of all the arms IMO is the rear trailing arm. While the main part of the bush is very easy to remove:
The bush is glued in place and getting that glue fused rubber off the arm is a pain in the ass. Burn the remainder out!
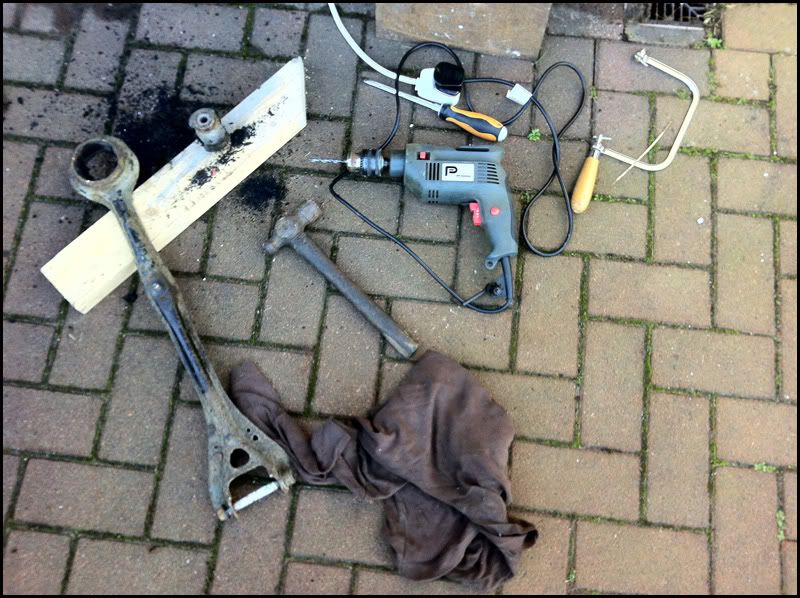
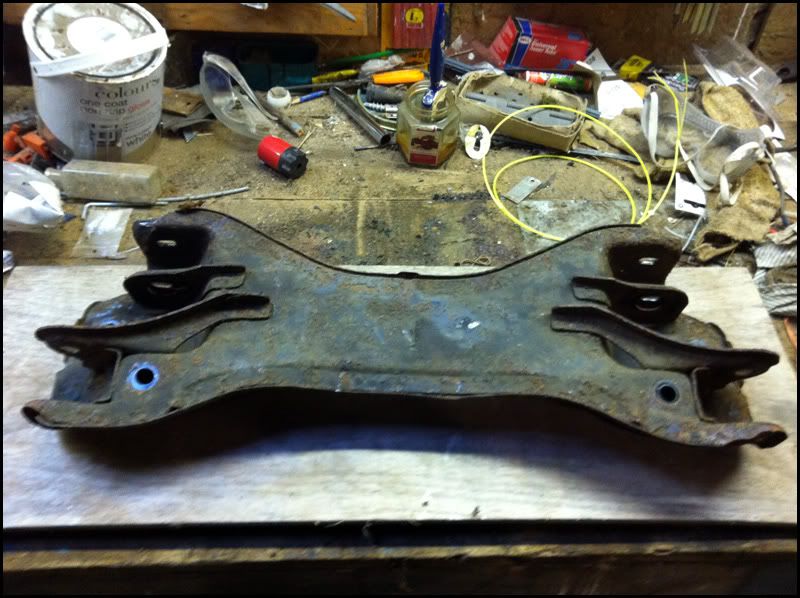
Just a pic of my rear sub frame before I sanded and painted it:
Using a big socket on one side and smaller socket on the other its possible to push the bushing out. Dispite my car being 18 years old and still having the original bushings, they came out quite easily
[hdyt]pqnh7BnpaTM[/hdyt]
Once the bush is out you need to remove the bushing shells. The easiest way is to take a hack saw and cut through the shell. Make one cut all the way though and a second cut further round (it only needs to go though a quarter or half of the thickness of the shell) to act a place there the shell can bend so it comes out easily. Then take a chizel or similar and hack it out
The hardest of all the arms IMO is the rear trailing arm. While the main part of the bush is very easy to remove:
The bush is glued in place and getting that glue fused rubber off the arm is a pain in the ass. Burn the remainder out!
Just a pic of my rear sub frame before I sanded and painted it: