Congratulations to vtecmec for winning May/June's Lude Of The Month, with his DIY Turbo BB1 build.

>>> Click Here For Profile <<<

Image

Confused's Long-Term Anglia Project

Got a car that isn't a Lude? There's no condemnation here. Tell us about it!
User avatar
Confused
Posts: 749
Joined: Fri Jan 27, 2012 11:44 am
My Generation: 4G
Location: Notts / Essex
Has thanked: 3 times
Been thanked: 11 times
Contact:

Re: Confused's Long-Term Anglia Project

Post by Confused » Fri Apr 26, 2013 10:23 pm

Gayno wrote:
Confused wrote:So - grab yourself a copy of the June 2013 edition of Classic Ford and check out page 8.
Or you could just scan us the page in ;)
Or you could support the magazine and buy a copy? I don't want to scupper any further chances of being featured, so until the magazine is no longer available, I won't even consider posting it up online.
mercutio wrote:great work buddy why not a jag rear end ?
Too wide.
mercutio wrote:all this work and you havnt even looked at making a rwd lude?
Yet...

User avatar
mercutio
LotM Winner
Posts: 14958
Joined: Sun Aug 08, 2010 8:45 pm
My Generation: 5G
Location: Sunny Manchester
Has thanked: 1 time
Been thanked: 4 times
Contact:

Post by mercutio » Fri Apr 26, 2013 10:37 pm

not too wide you can buy narrowed axles the cobra boys use them so they can have dished alloys
bristol_bb4 wrote:ahhh a 5th gen, i love 5th gens :D :lol:
Dino wrote:I loves the 5th gen really.... just dont quote me on it... ;)
4thgenphil wrote:Mines 4 1/4 unches mate, sorry

http://www.ludegeneration.co.uk/profile ... -t618.html

User avatar
Confused
Posts: 749
Joined: Fri Jan 27, 2012 11:44 am
My Generation: 4G
Location: Notts / Essex
Has thanked: 3 times
Been thanked: 11 times
Contact:

Re: Confused's Long-Term Anglia Project

Post by Confused » Fri Apr 26, 2013 10:51 pm

At probably about 10x the cost of what I'll have spent :)

This isn't a "throw money at people and buy things" project :)

User avatar
mercutio
LotM Winner
Posts: 14958
Joined: Sun Aug 08, 2010 8:45 pm
My Generation: 5G
Location: Sunny Manchester
Has thanked: 1 time
Been thanked: 4 times
Contact:

Post by mercutio » Sat Apr 27, 2013 12:12 am

lol i know buddy but sometimes a little spent pays off in the end but i can see what you mean
bristol_bb4 wrote:ahhh a 5th gen, i love 5th gens :D :lol:
Dino wrote:I loves the 5th gen really.... just dont quote me on it... ;)
4thgenphil wrote:Mines 4 1/4 unches mate, sorry

http://www.ludegeneration.co.uk/profile ... -t618.html

User avatar
Confused
Posts: 749
Joined: Fri Jan 27, 2012 11:44 am
My Generation: 4G
Location: Notts / Essex
Has thanked: 3 times
Been thanked: 11 times
Contact:

Rear Axle: Part 2

Post by Confused » Mon Apr 29, 2013 2:17 pm

Next up on the axle, is the trailing arms. There will be 2 trailing arms on each side, which will prevent the axle from twisting under braking or acceleration.

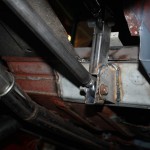
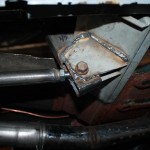
First up, is to fabricate the mounts on the axle. Utilising some heavy box section, a mount is added to the top and bottom on each side, and fitted with heavy duty M14 rose joints.

Image Image Image Image Image

With the axle end done and offered up to the car, the body end of the trailing arms take shape. The original rotten spring hangers are removed, and another bit of heavy box section is tacked into place, as well as the trailing arms fabricated at the correct length. The trailing arms are made equal in length, and have one left-handed and one right-handed thread rose joint attached - this will allow infinitely fine adjustment to the positioning of the axle within the wheel arch without having to remove it from the car.

Image Image

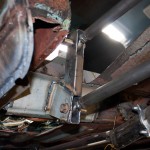
Additional bracing begins being added to the mounts and the floor/box section. There is still more to be finished.

Image Image Image

In order to set the ride height and calculate length of shocks/springs needed, a temporary solution is tacked into place - a length of box section and couple of temporary brackets.

Image Image


The trailing arms will prevent the axle from moving forwards/backwards, but will not prevent it from moving left/right. To prevent this movement, a panhard bar is added. This attaches to the axle on one side, and to the body on the other.

A heavy duty bracket is fabricated and attached to the floor - this wraps around the chassis rail for additional strength.

Image

The panhard, like the trailing arms, is fitted with a left-hand and a right-hand threaded heavy duty rose joint, which will allow fine adjustment of the left/right position of the axle without removing anything from the car.

Image Image

The diff was also lifted back into the rough location, a length of angle has been added to the mount to move the load closer to the edge of the boot floor, closer to the chassis rails where there is more strength.


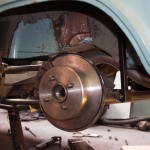
Finally - a wheel with tyre (currently 185/60/13) is fitted to see what it would look like.

Image

User avatar
Confused
Posts: 749
Joined: Fri Jan 27, 2012 11:44 am
My Generation: 4G
Location: Notts / Essex
Has thanked: 3 times
Been thanked: 11 times
Contact:

Propped up and shafted

Post by Confused » Sun May 26, 2013 11:06 pm

Having worked out the rough ride height with our temporary bracketry and solid bar, I ordered some adjustable shocks and springs, and we re-did the lower mount, and reinforced the top mount. The lower mount will have some additional bracing and welding completed the next time the axle is removed from the car and we can get to it all more easily.
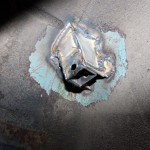
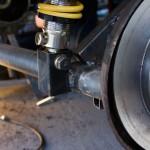
Image Image Image

With the de-dion now moving up and down like it should, we need to get some drive to the wheels.

The Nissan diff is about 50mm longer than the Anglia diff, so the Nissan propshaft, which bolted straight up to the Anglia diff, is now 50mm too long to bolt up to the Nissan diff.

Being a two piece propshaft, we pulled the rear part off, and set about removing 50mm from the length. By clamping it in the vice and utilising a spirit level, we were able to get a clean cut to reposition as necessary.
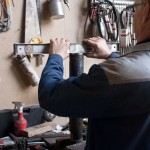
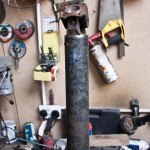
Image Image


With the propshaft cut to length, next to tackle is the driveshafts. The Anglia is a lot narrower than the Nissan, so a touch more than 50mm needs to be removed from the overall width.

We cut the driveshaft down, and with the use of a lathe and an angle grinder, we V'd the ends to provide a large surface area to weld the two ends back together.
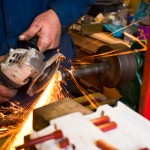
Image

Once welded together, the driveshafts were checked for straightness on the lathe, and the boots were refitted, albeit much closer than previously, and the new driveshafts are attached to the car.
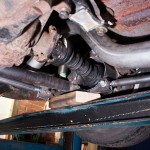
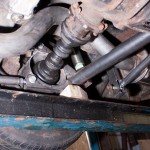
Image Image

The propshaft and driveshaft modifications done here may not be the final parts used on the car. What they will do, however, is allow me to put something together, which will be at least enough to move the vehicle under its own power, and prove the concept. They may stay on the car, they may fail spectacularly the first time any serious power is applied to them - if they work, brilliant, if they don't, all I've lost is a couple of hours of time, and I'll get some made up elsewhere.


A couple of shots of the diff mountings now. These are rubber bushes within a length of tube, with a long bolt going through into the body. Should absorb some of the vibrations/noise coming from the diff...
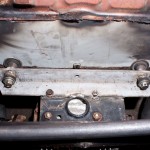
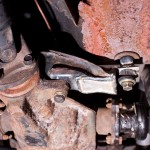
Image Image Image


And finally, the completed article. One completely home-made, custom rear axle, to my exact specifications, and should be strong enough to take whatever power the engine can throw at it.
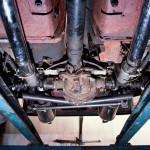
Image


We then couldn't resist driving it outside for its first little photoshoot outside of the confines of the garage, and to enjoy the surprisingly good weather.

[youtube]Vxhb3TRLMN4[/youtube]

Image Image Image

User avatar
honda-hardy
Club Cartographer
Posts: 6268
Joined: Sat Jan 28, 2012 7:35 pm
My Generation: 5G
Location: chippenham
Been thanked: 1 time

Post by honda-hardy » Sun May 26, 2013 11:17 pm

great vid bud. i like the way that when you went to reverse you got into your normal habit of lifting your arm up and over to hold on to the passenger seat that was not there... twice. :lol: :oops: :roll: :lol:

User avatar
mercutio
LotM Winner
Posts: 14958
Joined: Sun Aug 08, 2010 8:45 pm
My Generation: 5G
Location: Sunny Manchester
Has thanked: 1 time
Been thanked: 4 times
Contact:

Post by mercutio » Sun May 26, 2013 11:28 pm

:lol: :lol:
bristol_bb4 wrote:ahhh a 5th gen, i love 5th gens :D :lol:
Dino wrote:I loves the 5th gen really.... just dont quote me on it... ;)
4thgenphil wrote:Mines 4 1/4 unches mate, sorry

http://www.ludegeneration.co.uk/profile ... -t618.html

User avatar
RattyMcClelland
Moderator
Posts: 9208
Joined: Wed Aug 04, 2010 10:02 pm
My Generation: 5G
PSN GamerTag: RattyMcClelland
Location: Leicestershire
Been thanked: 203 times

Post by RattyMcClelland » Sun May 26, 2013 11:49 pm

I like how you reversed the car out and walked out of the garage. Thought you were twins. :lol:
Image

User avatar
Confused
Posts: 749
Joined: Fri Jan 27, 2012 11:44 am
My Generation: 4G
Location: Notts / Essex
Has thanked: 3 times
Been thanked: 11 times
Contact:

Re: Confused's Long-Term Anglia Project

Post by Confused » Mon May 27, 2013 8:11 am

honda-hardy wrote:great vid bud. i like the way that when you went to reverse you got into your normal habit of lifting your arm up and over to hold on to the passenger seat that was not there... twice. :lol: :oops: :roll: :lol:

I know! I read realised that too!


When it jolted back, I was just losing the vacuum assistance of the servo, typically when my dad then got in, it was just fine!

I did drive it later on after taking it off the ramp and putting it back in that side of the garage on the floor, so I've now driven it outside too! :)

Post Reply

Return to “Non-Lude Profiles”