Congratulations to vtecmec for winning May/June's Lude Of The Month, with his DIY Turbo BB1 build.
>>> Click Here For Profile <<<

>>> Click Here For Profile <<<
Confused's Long-Term Anglia Project
-
RattyMcClelland

- Moderator
- Posts: 9195
- Joined: Wed Aug 04, 2010 10:02 pm
- My Generation: 5G
- PSN GamerTag: RattyMcClelland
- Location: Leicestershire
- Been thanked: 183 times

-
Confused

- Posts: 749
- Joined: Fri Jan 27, 2012 11:44 am
- My Generation: 4G
- Location: Notts / Essex
- Has thanked: 3 times
- Been thanked: 11 times
- Contact:
A Little Squirt
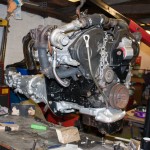
With the engine & gearbox out and on the bench, it's time to do some of the bits that are easiest done whilst the engine isn't in the car.
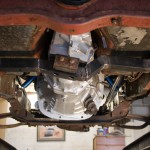
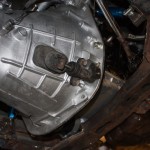
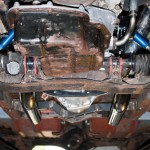
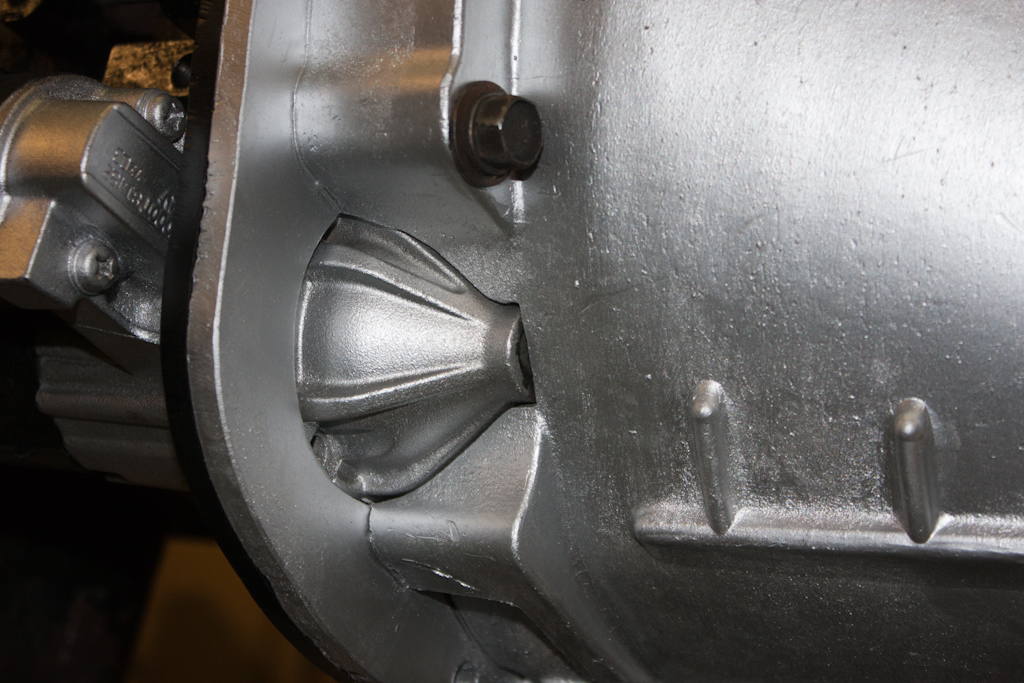
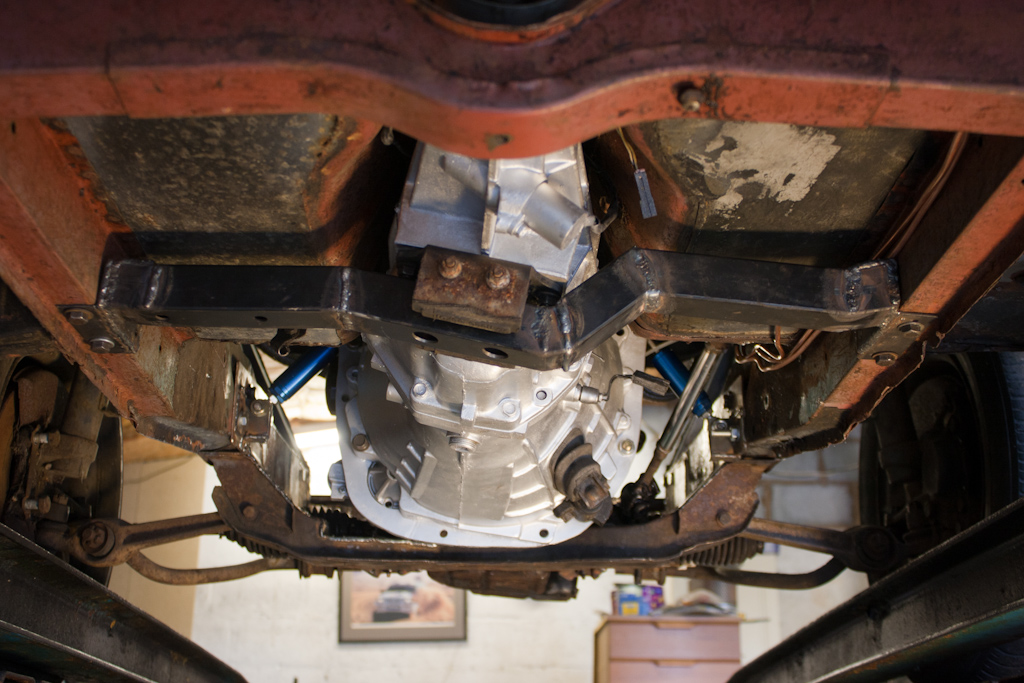
When I removed the engine from the Galant, it was late one evening and I had limited tools, and I was unable to separate the gearbox and transfer box, or remove the torque converter! So, in the limited time I had, I decided the easiest thing was to remove the sump - so this needs to be sealed up properly again. Whilst the sump was off being cleaned, why not give it all a little squirt of paint to tidy it up a little?
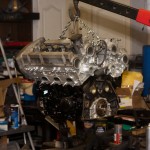
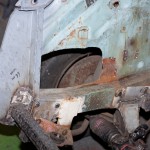
The very bottom sump pan isn't in great condition, so I'll be looking for a replacement - hence why it's not been painted yet!
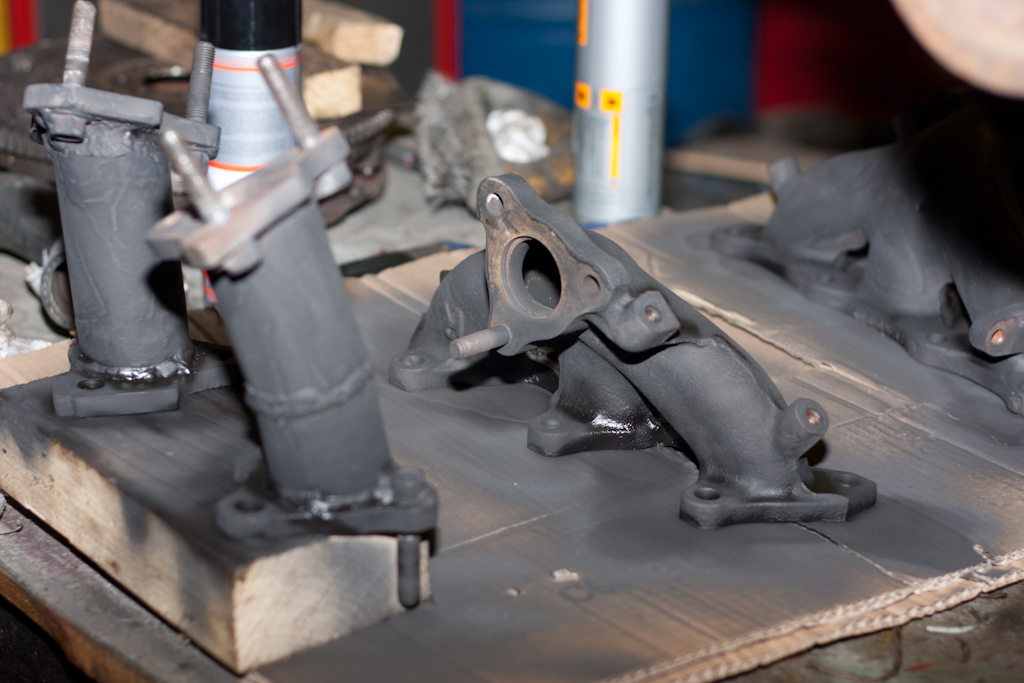
Also gave the exhaust bits a lick of high temperature paint to cover the bare welds.
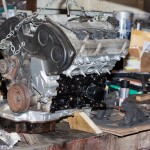
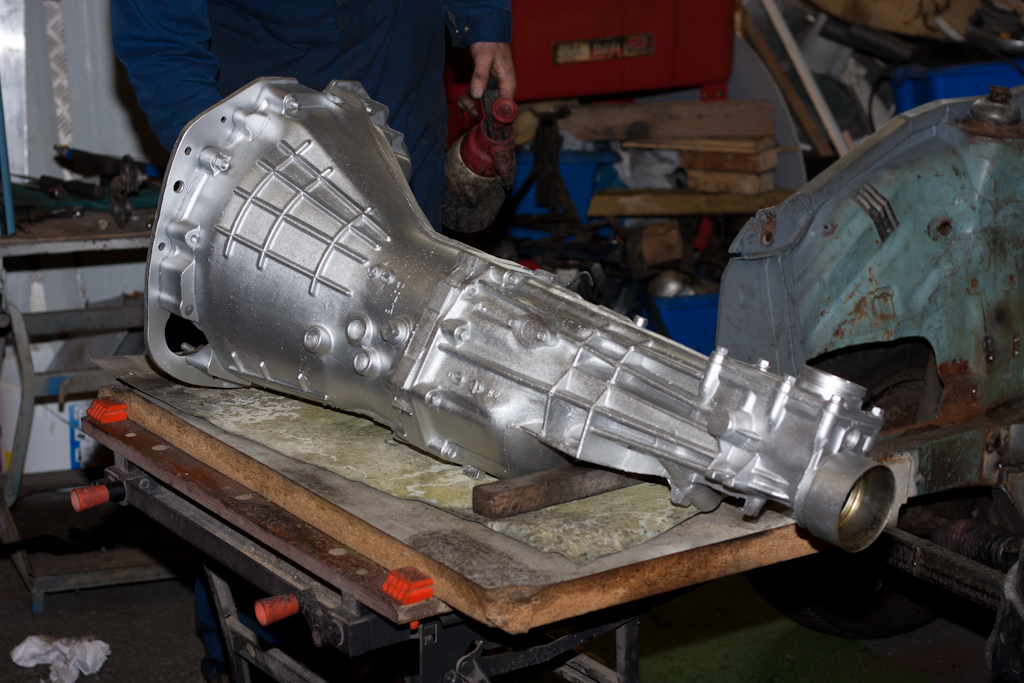
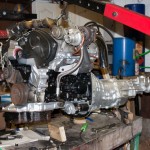
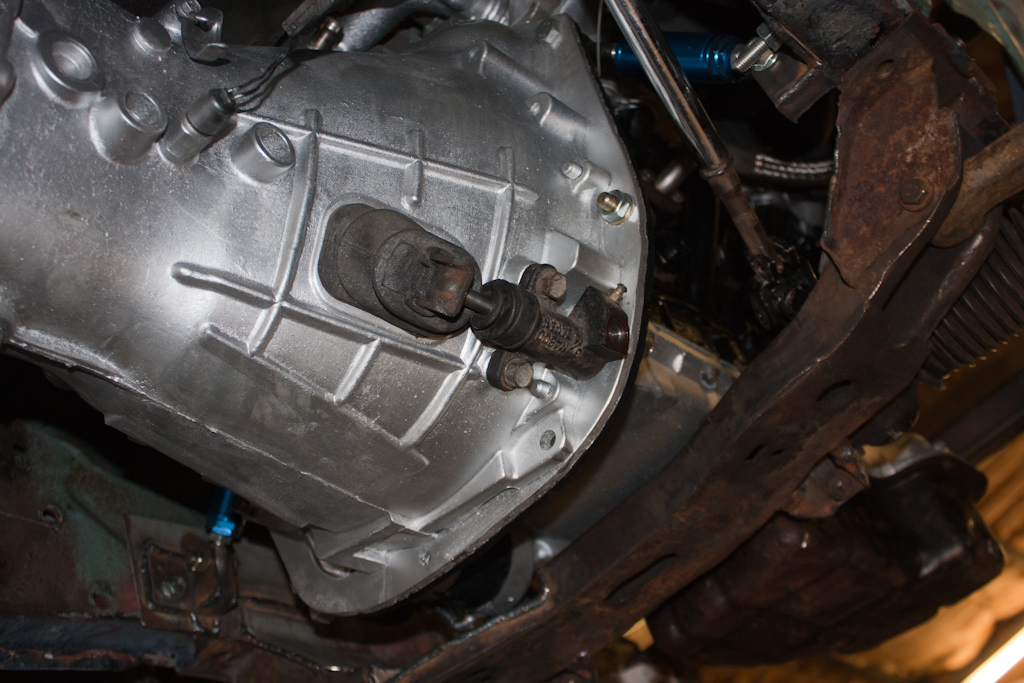
During storage, the original 200SX gearbox got slightly waterlogged, and it's no longer particularly smooth. I managed to pick up another gearbox in good condition, doing a swap for the 200SX engine. This then needed modding as the original did to fit the starter motor and the water manifold to the engine. As it was originally modded in the car, the cuts weren't the neatest, so with the new gearbox on the bench, the modifications were made again, neater, and with a closer fit. It then had a good clean down, and a squirt with some paint as well.
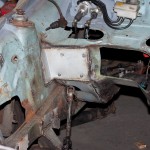
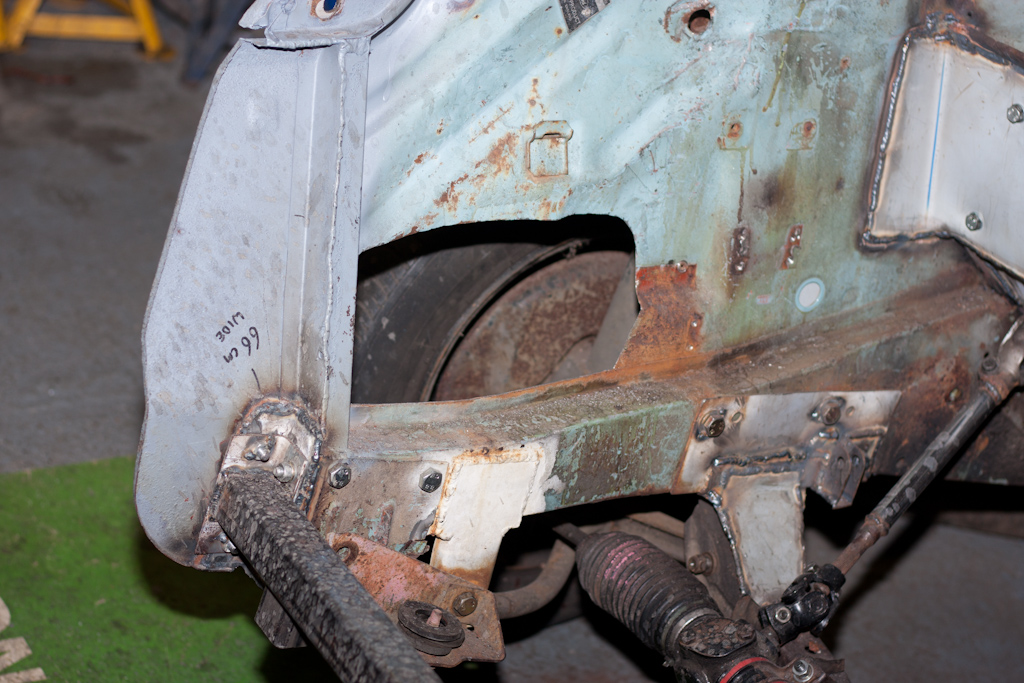
Whilst the paint was drying, another small patch on the chassis, this one to cover over the original holes for the pedals, and cleaned up and slightly enlarged the holes cut out for access to the coolant pipes in the bulkhead, and for ease of fitting the alternator in the inner wing. These holes will have small ridges welded around them for screw-in panels at a later date.
When I removed the engine from the Galant, it was late one evening and I had limited tools, and I was unable to separate the gearbox and transfer box, or remove the torque converter! So, in the limited time I had, I decided the easiest thing was to remove the sump - so this needs to be sealed up properly again. Whilst the sump was off being cleaned, why not give it all a little squirt of paint to tidy it up a little?

The very bottom sump pan isn't in great condition, so I'll be looking for a replacement - hence why it's not been painted yet!
Also gave the exhaust bits a lick of high temperature paint to cover the bare welds.
During storage, the original 200SX gearbox got slightly waterlogged, and it's no longer particularly smooth. I managed to pick up another gearbox in good condition, doing a swap for the 200SX engine. This then needed modding as the original did to fit the starter motor and the water manifold to the engine. As it was originally modded in the car, the cuts weren't the neatest, so with the new gearbox on the bench, the modifications were made again, neater, and with a closer fit. It then had a good clean down, and a squirt with some paint as well.
Whilst the paint was drying, another small patch on the chassis, this one to cover over the original holes for the pedals, and cleaned up and slightly enlarged the holes cut out for access to the coolant pipes in the bulkhead, and for ease of fitting the alternator in the inner wing. These holes will have small ridges welded around them for screw-in panels at a later date.


Last edited by Confused on Mon May 20, 2013 2:14 pm, edited 2 times in total.

-
Confused
- Posts: 749
- Joined: Fri Jan 27, 2012 11:44 am
- My Generation: 4G
- Location: Notts / Essex
- Has thanked: 3 times
- Been thanked: 11 times
- Contact:
An exhausting time
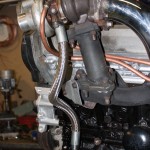
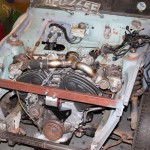
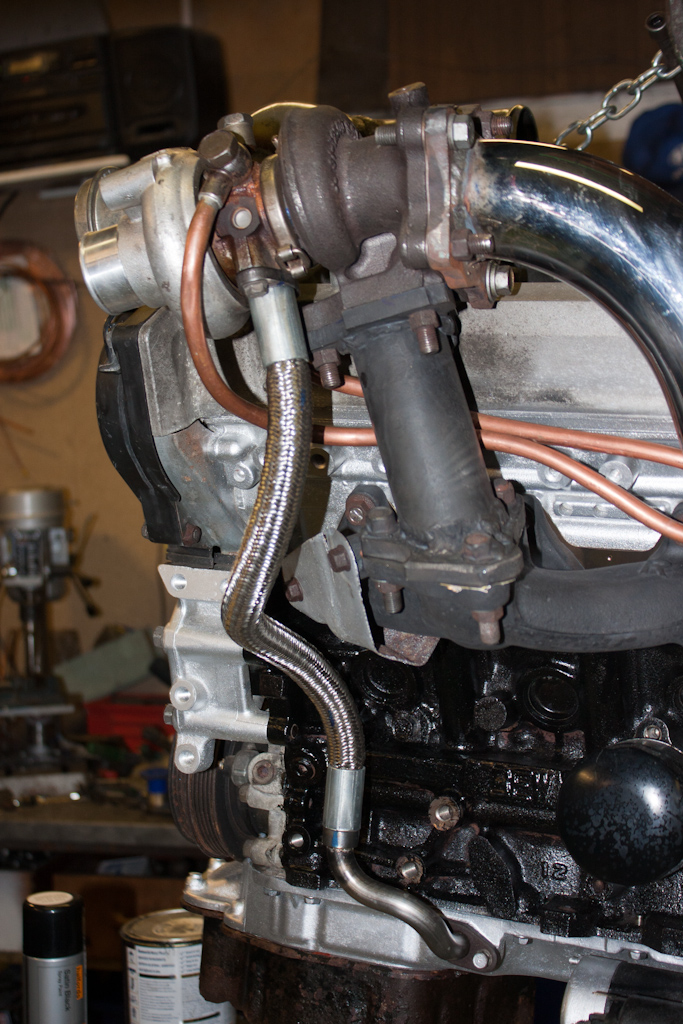
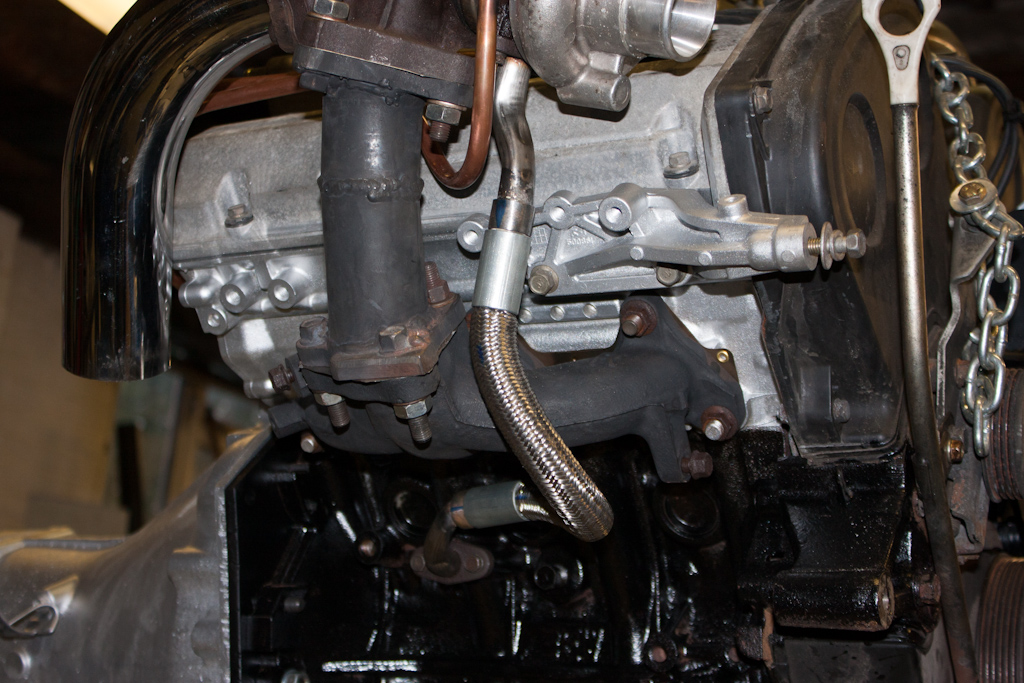
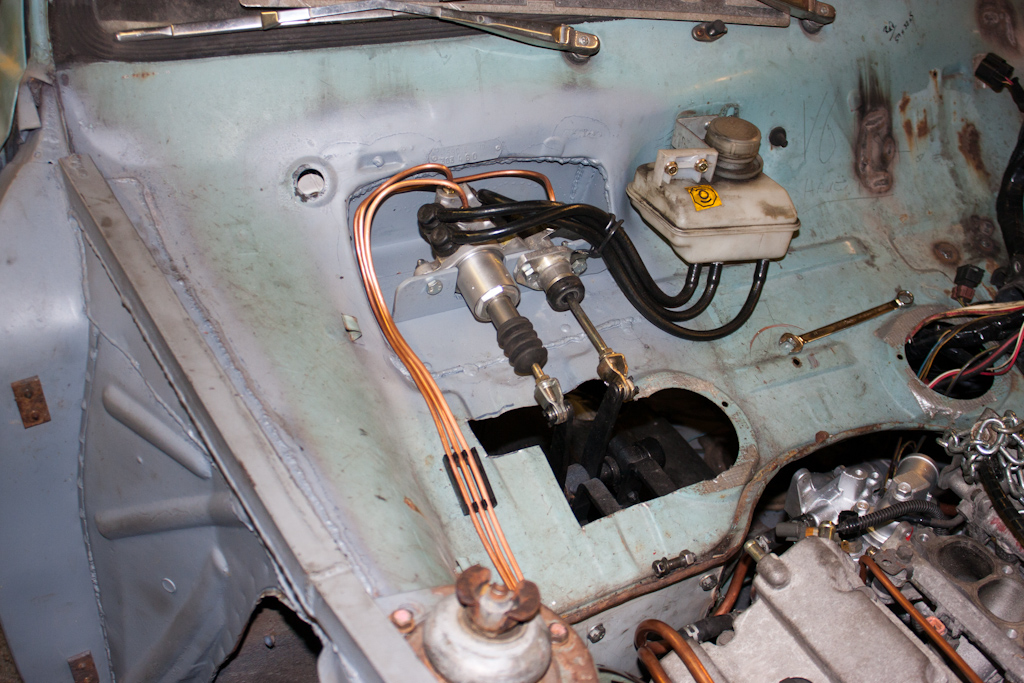
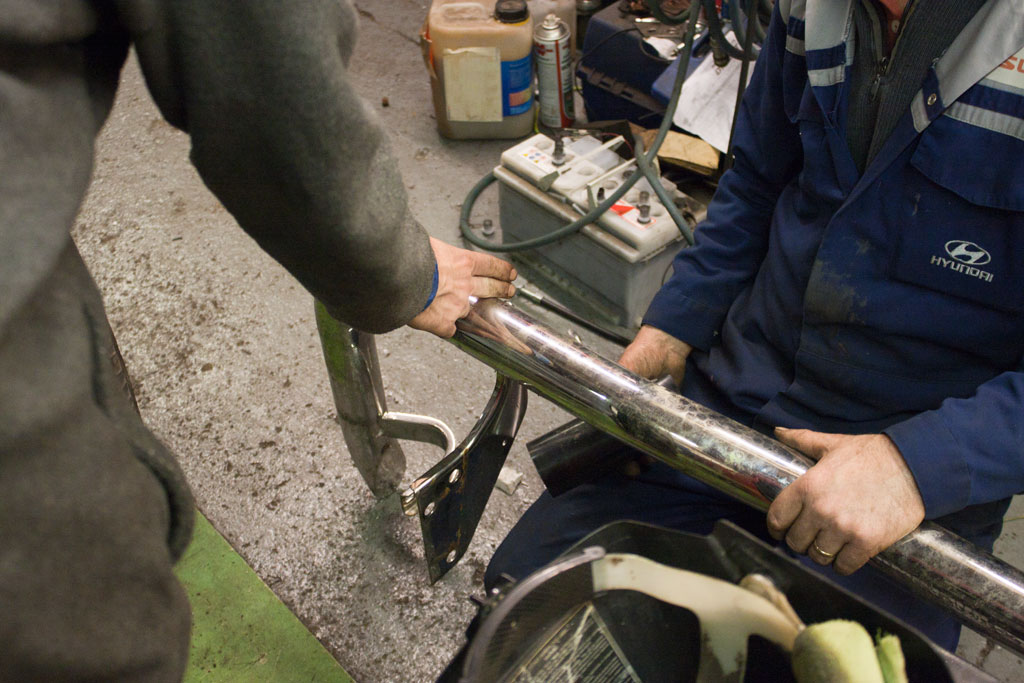
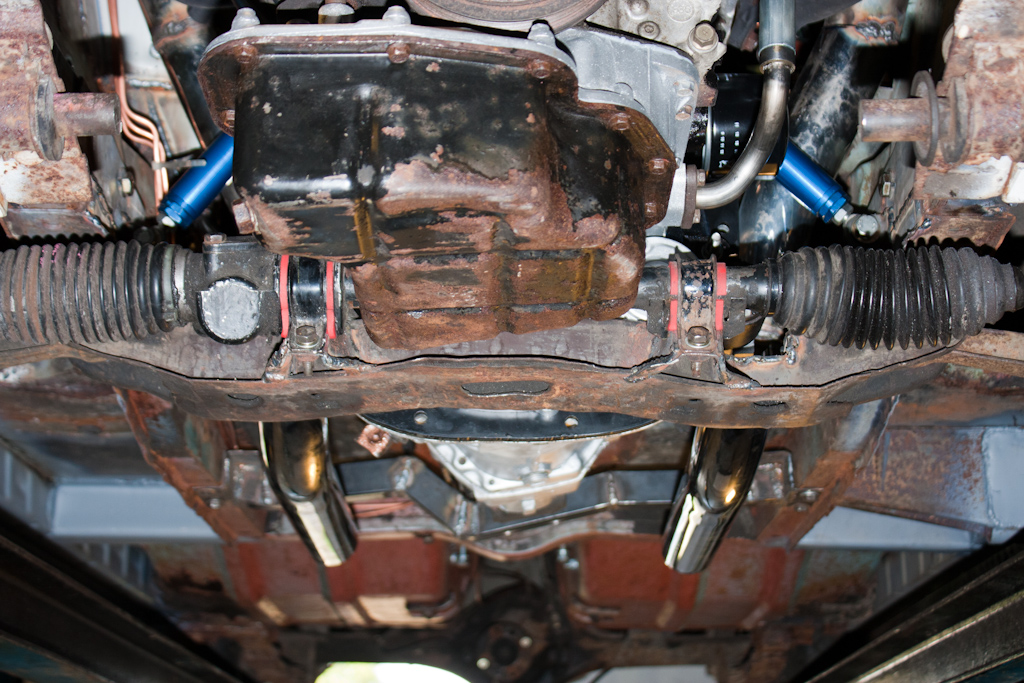
By moving the turbos from their natural home, the original oil and water feed & return pipes were no longer suitable. The water pipes have already been done, but the oil pipes required a bit of external help to ensure we had pipework suitable for the temperature and pressure of the oil. We contacted Hosequip who are based not far down the road, and talked to John who has made up some wonderful braided hoses.
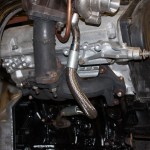
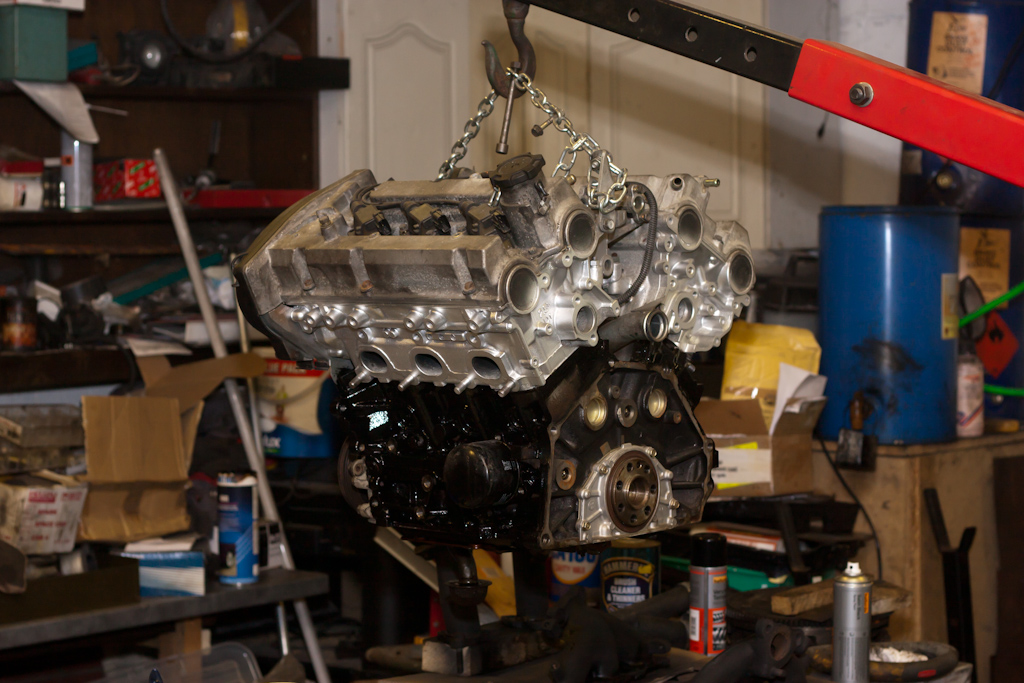
With these in place, and the oil feed coming from the back of the block, we reassembled the rest of the engine and gearbox, and checked the fit of the starter motor with the new gearbox.
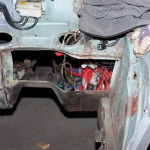
Before fitting this back into the car, we started to run the brake and clutch lines down the corner of the engine bay - access is a little tricky with the engine in place!
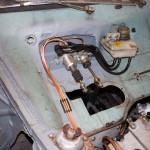
The new oil lines look great through the front.
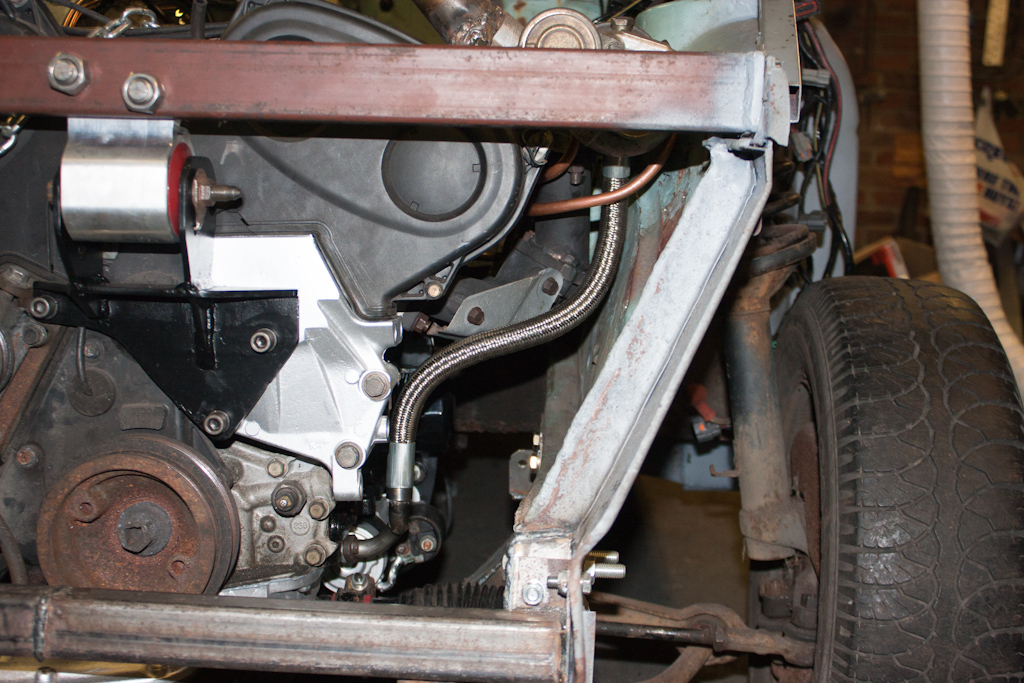
We'd identified that the original gearbox mount we made was not quite correctly aligned, and was putting some twist into the mount - but it was done before the engine & gearbox were properly mounted, so it's not too surprising that it needed a small tweak. Once this was done, and the rubber mount sitting correctly, we attached the clutch slave cylinder to the side of the gearbox.
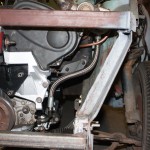
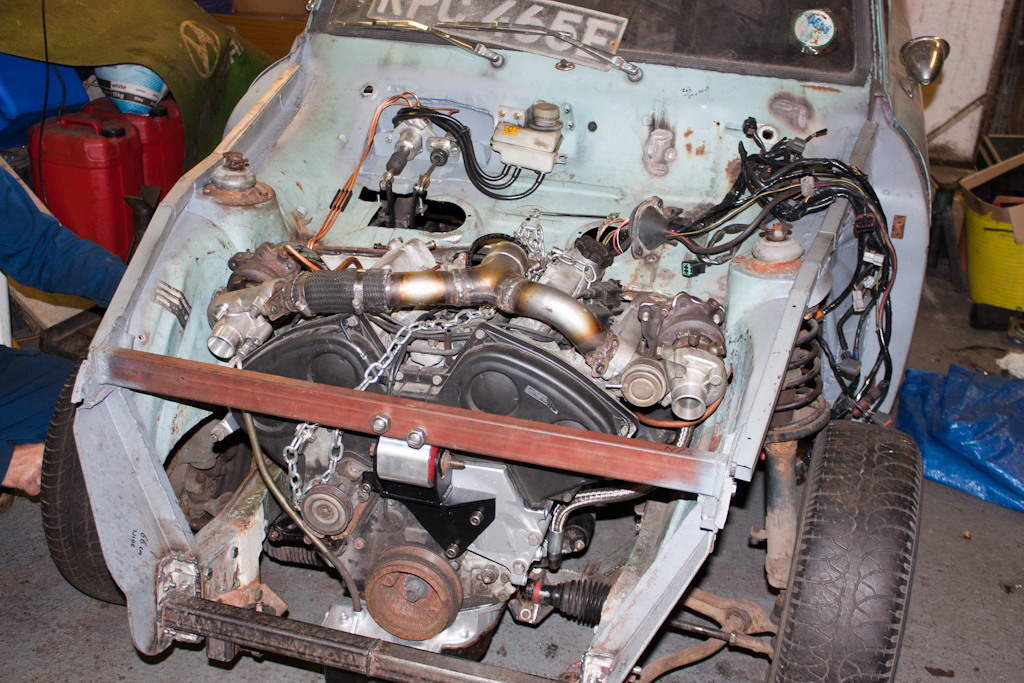
Taking some more of the stainless bumper bars, we continued working on the exhaust.
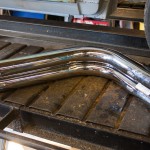
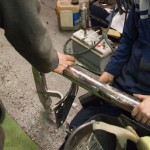
Using two corner pieces, and the centre section of the bit used for the bits directly off the turbos, we brought the pipes towards the gearbox, away from the steering column, and turned towards the back of the car.
]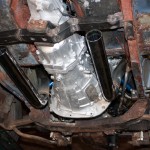
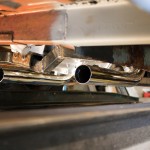
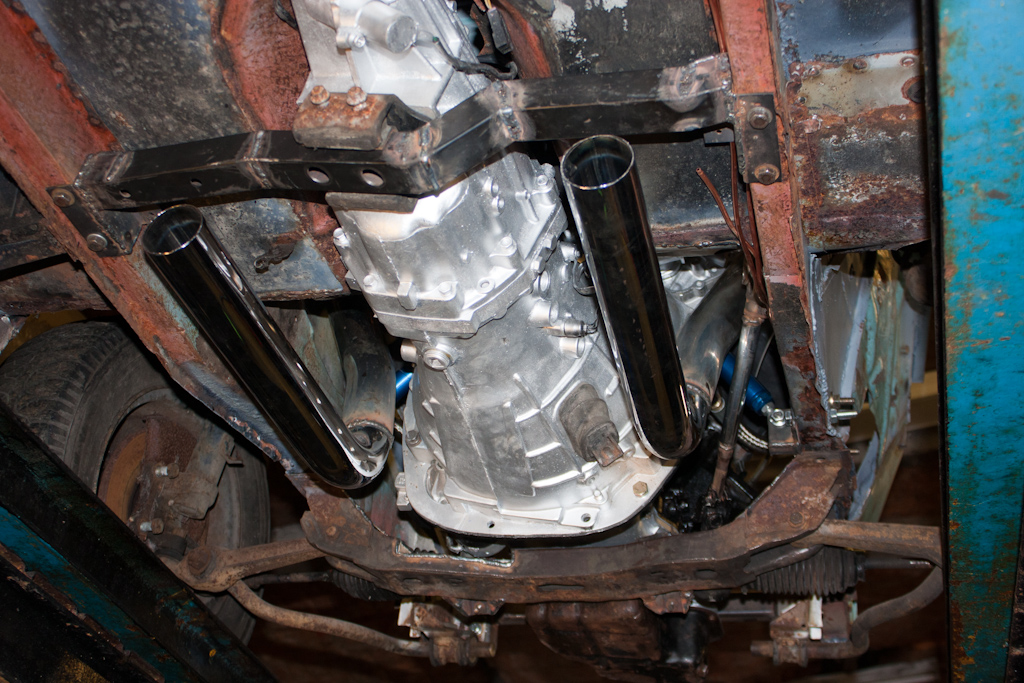
From the side it looks a little low, but none of it is any lower than the front crossmember, which is the lowest point of the car - there's still plenty of ground clearance so speedbumps shouldn't be an issue I hope!
With these in place, and the oil feed coming from the back of the block, we reassembled the rest of the engine and gearbox, and checked the fit of the starter motor with the new gearbox.


Before fitting this back into the car, we started to run the brake and clutch lines down the corner of the engine bay - access is a little tricky with the engine in place!
The new oil lines look great through the front.
We'd identified that the original gearbox mount we made was not quite correctly aligned, and was putting some twist into the mount - but it was done before the engine & gearbox were properly mounted, so it's not too surprising that it needed a small tweak. Once this was done, and the rubber mount sitting correctly, we attached the clutch slave cylinder to the side of the gearbox.
Taking some more of the stainless bumper bars, we continued working on the exhaust.

Using two corner pieces, and the centre section of the bit used for the bits directly off the turbos, we brought the pipes towards the gearbox, away from the steering column, and turned towards the back of the car.
]

From the side it looks a little low, but none of it is any lower than the front crossmember, which is the lowest point of the car - there's still plenty of ground clearance so speedbumps shouldn't be an issue I hope!
Last edited by Confused on Mon May 20, 2013 2:14 pm, edited 2 times in total.
-
toadster

- Posts: 1858
- Joined: Thu Feb 16, 2012 5:21 pm
- My Generation: 5G
- Location: Norfolk
- Has thanked: 57 times
- Been thanked: 136 times
Re: Confused's Long-Term Anglia Project
LO
This really is an awsome effort by you both
Can't wait to see the finished project on the road and at shows
Cheers for posting
Toadster
This really is an awsome effort by you both
Can't wait to see the finished project on the road and at shows
Cheers for posting
Toadster


-
rob quilter

- Supporter 2014
- Posts: 5331
- Joined: Mon Aug 09, 2010 1:40 pm
- My Generation: 5G
- PSN GamerTag: robquilter
- Location: Derby
Epic work!
PERFORMANCE PARTS FOR JAPANESE CARS - http://WWW.TOKYOSQUAD.COM
FOLLOW US ON FACEBOOK - http://WWW.FACEBOOK.COM/TOKYOSQUAD
FOLLOW US ON FACEBOOK - http://WWW.FACEBOOK.COM/TOKYOSQUAD
-
Confused
- Posts: 749
- Joined: Fri Jan 27, 2012 11:44 am
- My Generation: 4G
- Location: Notts / Essex
- Has thanked: 3 times
- Been thanked: 11 times
- Contact:
Re: Confused's Long-Term Anglia Project
I probably won't bother doing much paint on the chassis (other than some Zinc 182 primer over the freshly welded bits) as I'll more than likely be getting the whole shell acid dipped then zinc dipped to remove all the rust and protect it for the future.

-
stk prelude

- Posts: 743
- Joined: Sun Jan 29, 2012 10:17 pm
- My Generation: 5G