The plastic surround isn't connected to the fog light, it's clipped in either side. You have to remove the indicater first, it has 1 screw on the inside of it (where you grill and license plate are, on the sides there) next, open the bonnet and get your hand down behind the bumper to where the fog is, and squeeze the clips either side of the plastic surround inwards, and the plastic will just pop out.
Once that's removed the fog light is just fixed to the bumper with 4 screws.
Congratulations to vtecmec for winning May/June's Lude Of The Month, with his DIY Turbo BB1 build.
>>> Click Here For Profile <<<

>>> Click Here For Profile <<<
Rob's BB9 Prelude - small update 27/05/2012
-
rob quilter

- Supporter 2014
- Posts: 5331
- Joined: Mon Aug 09, 2010 1:40 pm
- My Generation: 5G
- PSN GamerTag: robquilter
- Location: Derby
Re: Rob's BB9 Prelude - small update 08/05/2012
PERFORMANCE PARTS FOR JAPANESE CARS - http://WWW.TOKYOSQUAD.COM
FOLLOW US ON FACEBOOK - http://WWW.FACEBOOK.COM/TOKYOSQUAD
FOLLOW US ON FACEBOOK - http://WWW.FACEBOOK.COM/TOKYOSQUAD

-
rob quilter
- Supporter 2014
- Posts: 5331
- Joined: Mon Aug 09, 2010 1:40 pm
- My Generation: 5G
- PSN GamerTag: robquilter
- Location: Derby
Re: Rob's BB9 Prelude - small update 08/05/2012
no worries dude, its dead easy to do. It'll only take you 5 mins 
PERFORMANCE PARTS FOR JAPANESE CARS - http://WWW.TOKYOSQUAD.COM
FOLLOW US ON FACEBOOK - http://WWW.FACEBOOK.COM/TOKYOSQUAD
FOLLOW US ON FACEBOOK - http://WWW.FACEBOOK.COM/TOKYOSQUAD
-
rob quilter
- Supporter 2014
- Posts: 5331
- Joined: Mon Aug 09, 2010 1:40 pm
- My Generation: 5G
- PSN GamerTag: robquilter
- Location: Derby
Re: Rob's BB9 Prelude - small update 08/05/2012
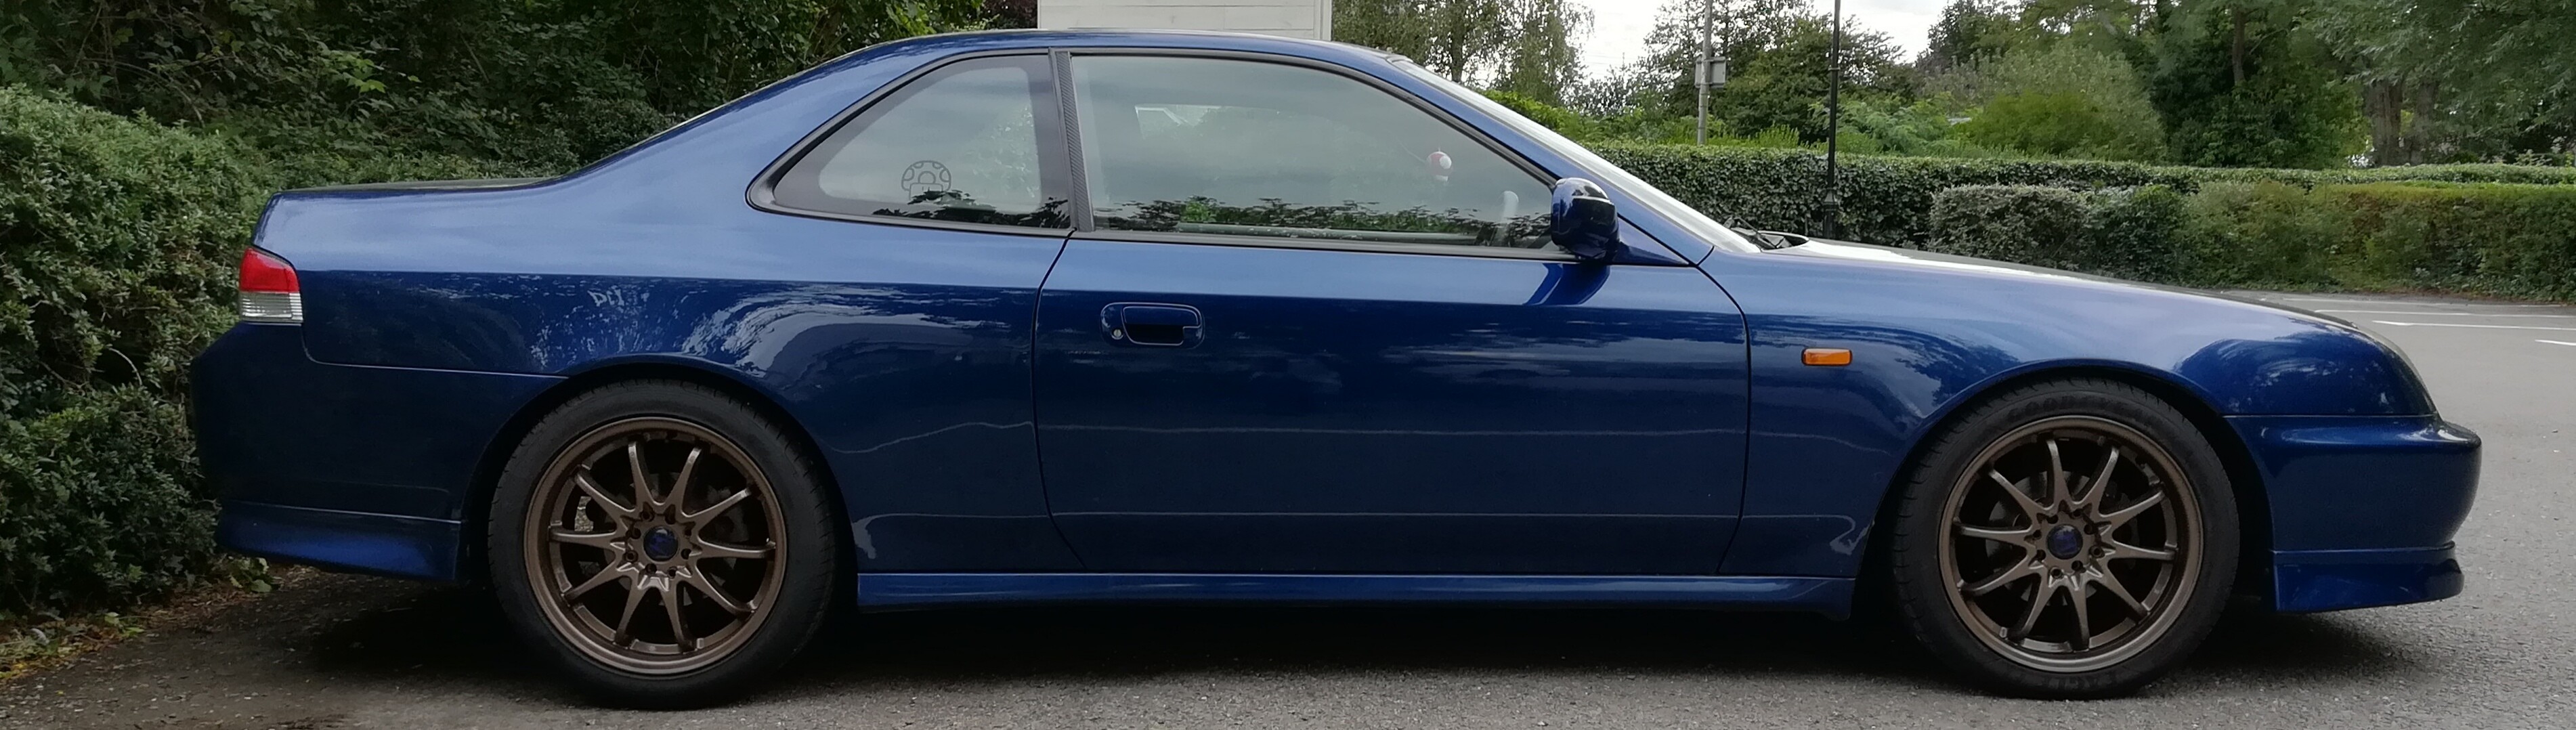
Small update.
With the Prelude suffering from a bit of rear bumper sag, I decided to get it sorted this weekend. I didn't take many pics as I had a million and one things to do this weekend.
First job was to remove the rear lights and bumper, whipped all of that off and noticed a few bits of rust. I removed the bumper bar, then I grabbed my dremmel and started grinding back the rust spots. Once I'd finished removing the rust patches I cleaned everything up, then slapped on a coat of underseal. I then started working on the bumper bar, I drilled where the holes are on the bar, and basically made the the whole larger - so the bar can be fixed slightly higher (As per CARRisma's write up: http://www.ludegeneration.co.uk/honda-p ... t2101.html) it was also slighty bent, so I straightened that out.
I cleaned of a few rust spots on the bumper bar and then re-fiitted it, I then slapped some underseal on the bumper bar. Things were now looking like this:


I left it as is overnight, then today I cleaned out the inside of the bumper, and then refitted the bumper and then the lights.
Only got one pic of it done, as I had to help my mate do some work to his R34

I didn't grab a picture of before, but basically I could get my finger in the gap between the bumper and tail light. No its a nice snug fit
With the Prelude suffering from a bit of rear bumper sag, I decided to get it sorted this weekend. I didn't take many pics as I had a million and one things to do this weekend.
First job was to remove the rear lights and bumper, whipped all of that off and noticed a few bits of rust. I removed the bumper bar, then I grabbed my dremmel and started grinding back the rust spots. Once I'd finished removing the rust patches I cleaned everything up, then slapped on a coat of underseal. I then started working on the bumper bar, I drilled where the holes are on the bar, and basically made the the whole larger - so the bar can be fixed slightly higher (As per CARRisma's write up: http://www.ludegeneration.co.uk/honda-p ... t2101.html) it was also slighty bent, so I straightened that out.
I cleaned of a few rust spots on the bumper bar and then re-fiitted it, I then slapped some underseal on the bumper bar. Things were now looking like this:
I left it as is overnight, then today I cleaned out the inside of the bumper, and then refitted the bumper and then the lights.
Only got one pic of it done, as I had to help my mate do some work to his R34
I didn't grab a picture of before, but basically I could get my finger in the gap between the bumper and tail light. No its a nice snug fit
PERFORMANCE PARTS FOR JAPANESE CARS - http://WWW.TOKYOSQUAD.COM
FOLLOW US ON FACEBOOK - http://WWW.FACEBOOK.COM/TOKYOSQUAD
FOLLOW US ON FACEBOOK - http://WWW.FACEBOOK.COM/TOKYOSQUAD