
Congratulations to vtecmec for winning May/June's Lude Of The Month, with his DIY Turbo BB1 build.
>>> Click Here For Profile <<<

>>> Click Here For Profile <<<
Vtecmec's 4th Gen
-
indigolemon

- The Chaos Engine
- Posts: 6682
- Joined: Wed Jun 30, 2010 1:45 pm
- My Generation: 4G
- PSN GamerTag: M149YSL
- Location: Kelty, Fife
- Has thanked: 24 times
- Been thanked: 71 times
- Contact:
Vtecmec's 4th Gen
Top work man 
'On two occasions I have been asked, 'Pray, Mr. Babbage, if you put into the machine wrong figures, will the right answers come out?' I am not able rightly to apprehend the kind of confusion of ideas that could provoke such a question.' - Charles Babbage


-
Vtecmec

- LotM Winner
- Posts: 5501
- Joined: Fri Aug 06, 2010 5:43 pm
- My Generation: 4G
- XBOX GamerTag: vtecmec
- Location: East Midlands
- Has thanked: 154 times
- Been thanked: 443 times
-
Vtecmec
- LotM Winner
- Posts: 5501
- Joined: Fri Aug 06, 2010 5:43 pm
- My Generation: 4G
- XBOX GamerTag: vtecmec
- Location: East Midlands
- Has thanked: 154 times
- Been thanked: 443 times
Vtecmec's 4th Gen
About time I updated this…….
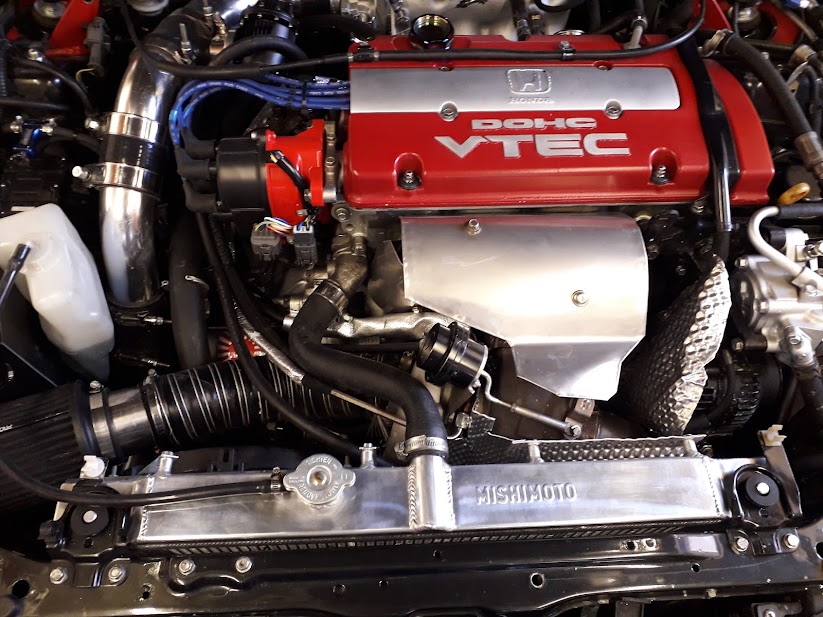
So, with the new turbo and manifold, I took the car along to get it mapped, unfortunately there were a few problems, I was not sure if it was just how it was due to the turbo choice, the manifold I’d made, or if there was something else amiss.
It made 300bhp on a gentle run.
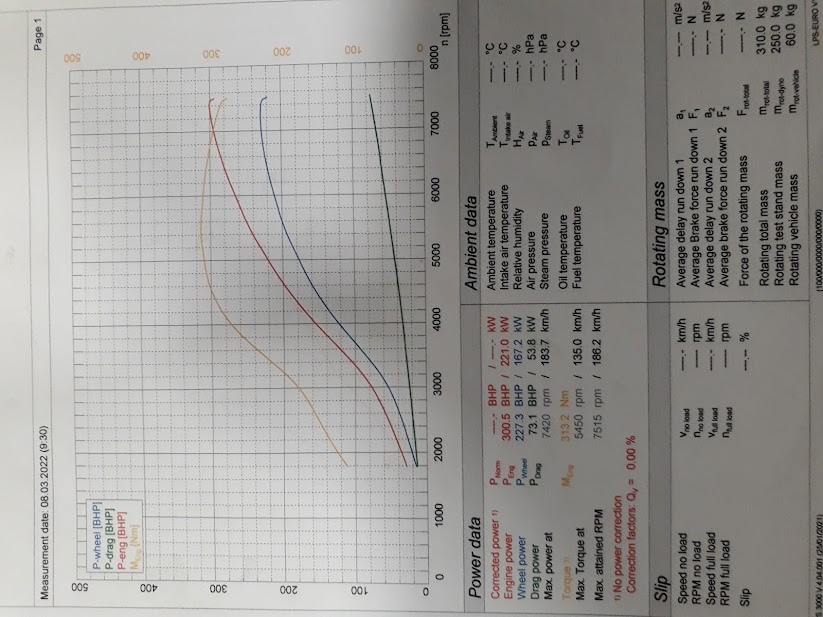
and 290 on a proper run.
Compared to the previous map, there is much more area under the graph, particularly torque.
But in the higher rpm's it just seem to drop off.
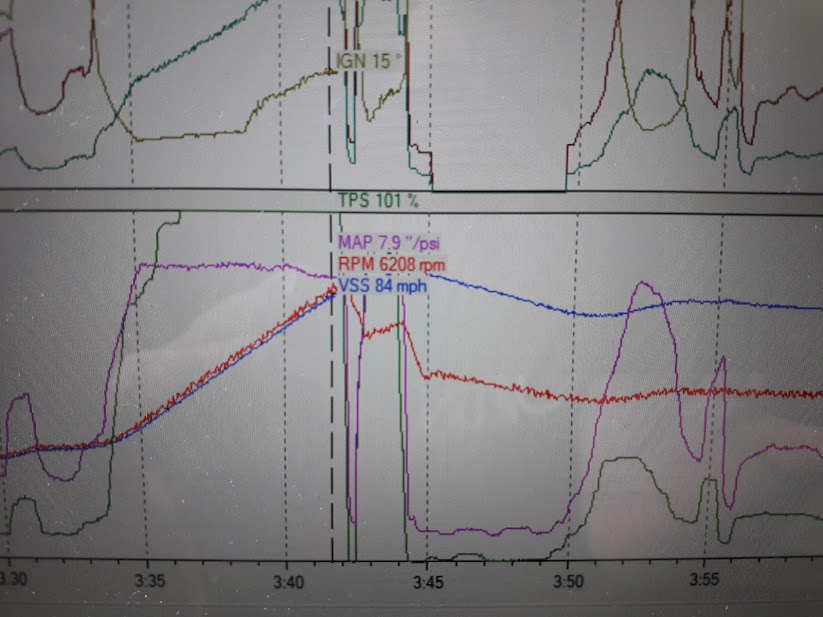
Effectively I had the boost set at 9 PSI (previous was 11), which wound up really early (about 3,000 rpm) but appeared to start trailing off from 5,000 rpm onwards, effectively reducing down to 5 PSI by 7,000 rpm.
The car still made fairly good numbers and the torque curve was better that it had been previously, though power delivery 3,000 rpm to 4,000 rpm felt wobbly as the spool up appeared erratic and it did not seem to stretch its legs out in vtec as previously.
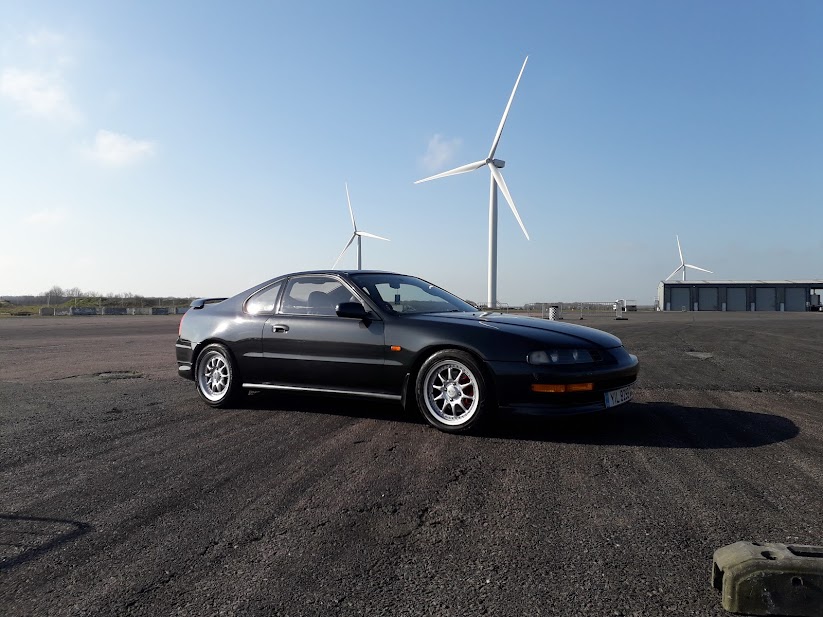
Anyway, a week later I took the car along to Mimms Honda day at Santa Pod, took some photos and had a grand day out generally.
I did some runs along the strip, as things are not quite right, I had reduced the boost beforehand (let’s not break it!). I did 3 runs at 5 PSI and some at 6 PSI.
The 5 PSI runs resulted in a 14.6 second runs, which is about a second quicker than stock.
The 6 PSI runs resulted in slower times as I could not get the power down without wheel spinning.
Here are the times and results, the last 3 runs are next to a stock lude (wurlycorner’s). He beat me twice (run nr 4 had us mixed up)
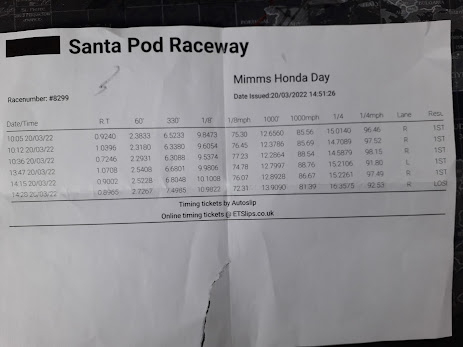

The car was stuck in a zone at 6 PSI where there was just about enough power to affect grip, but due to the boost drop off, not enough to make amends later down the strip.
Not great really for the strip, though pretty good on the roads.
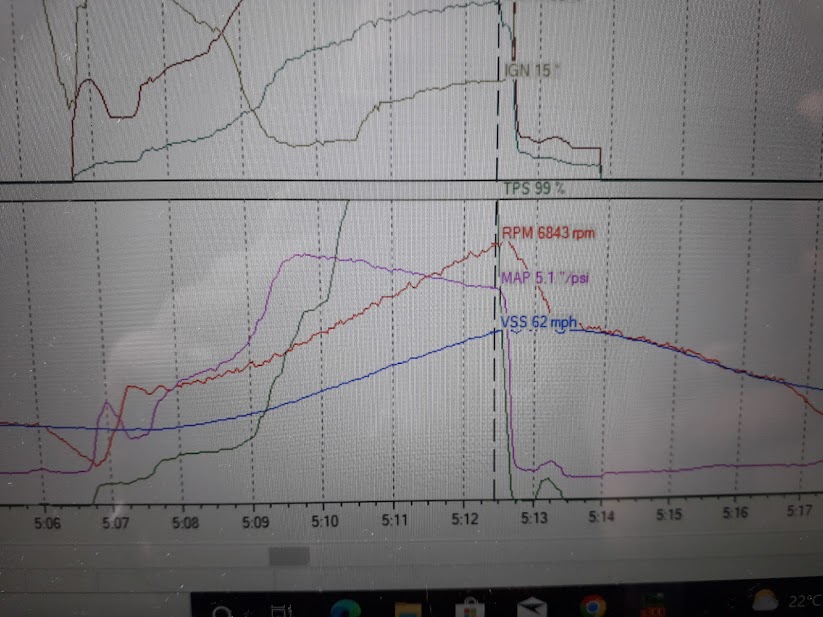
After this I did some data logging with Hondata:

Staring at this the RPM signal looked really noisy, bouncing =/- 400 rpm at any point.
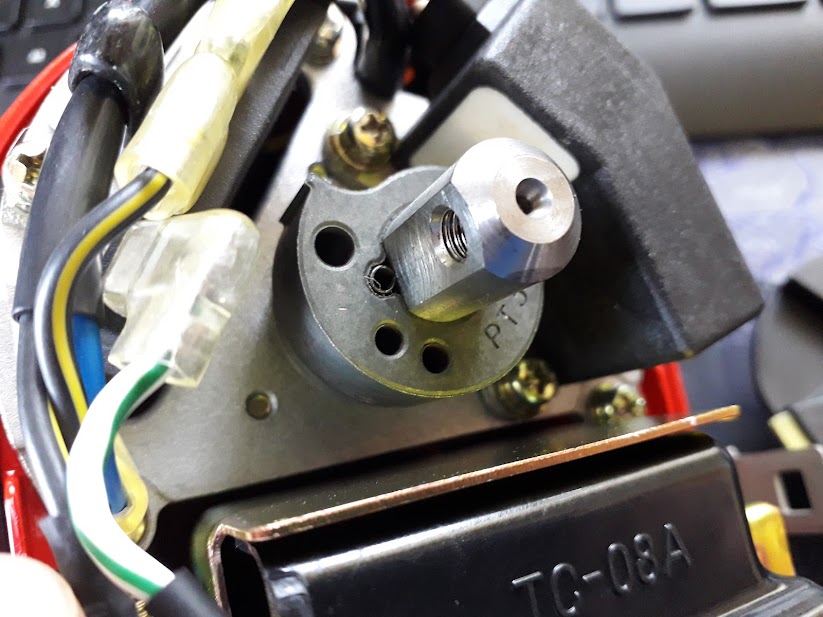
This prompted me to crack open the dizzy and take a look. Seems like the little bobbin that informs the crank sensor was loose, throwing variable signals to the ECU. Ah ha!

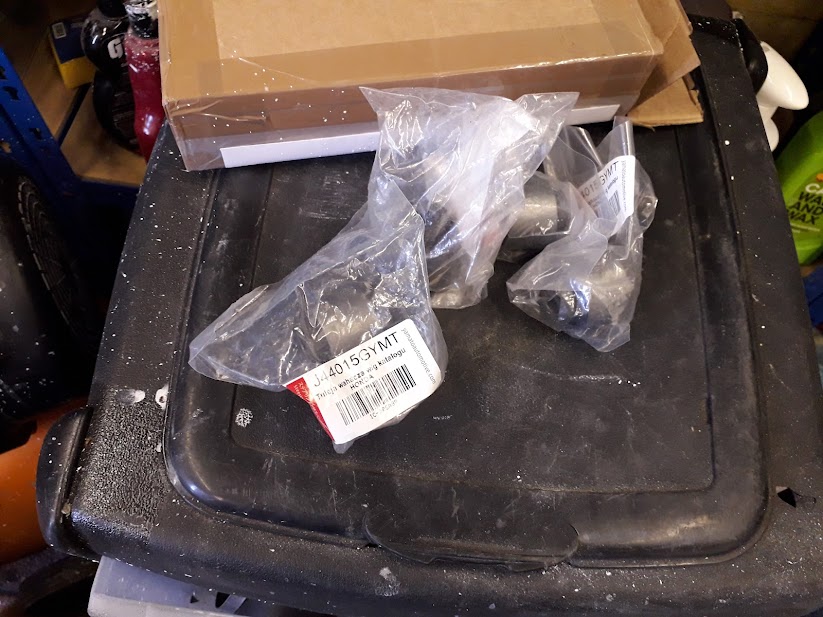
So, after ordering a brand new dizzy from Amayama, waiting 3 weeks to be told there were none in stock, I searched for something better than ebay quality. I found one made by ‘Dragon Racing Performance’
Their blurb states it’s uprated, though something that’s reliable would be a win.
I took a punt and it arrived in the post and I cracked it open to take a look, it seems ok inside, all the screws are glued to prevent unwinding (which is better than ebay already) and the crank bobbin looked cleaner cut than the ebay/china replicas too.

And on it went.
The rpm signal was now much cleaner.
It made a slight difference, but minimal really.
Sigh.
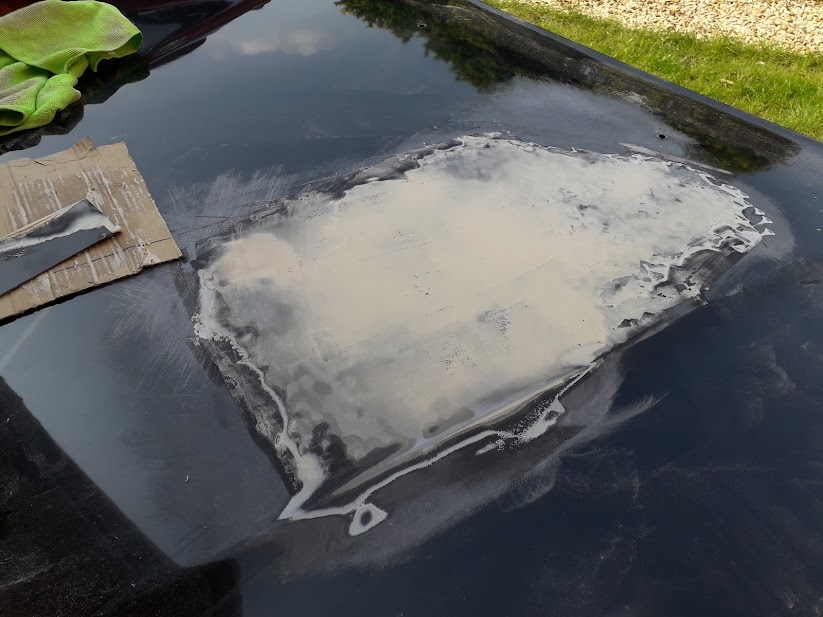
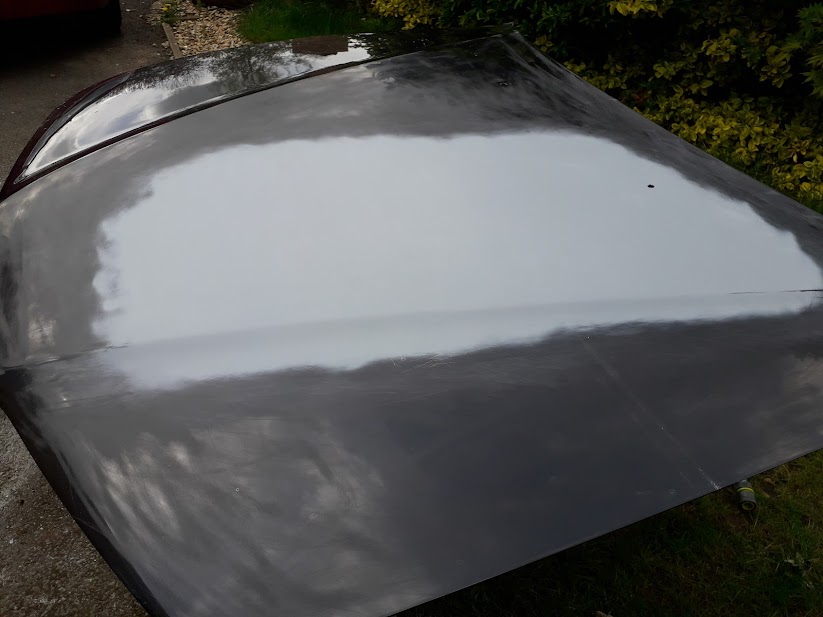
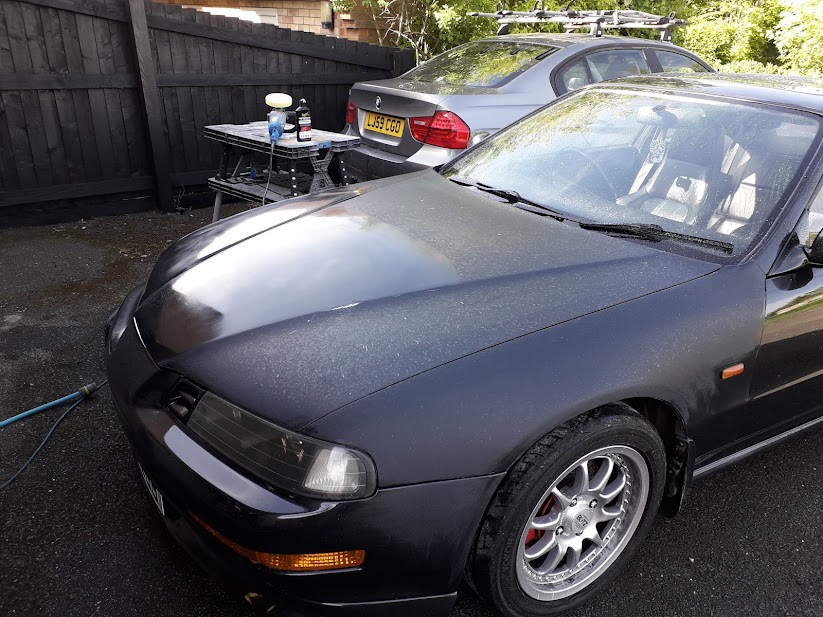
Anyway, I put that aside for a while as my insurance was due for renewal. As it’s a classic agreed policy, they require detailed photos for appraisal. This meant I had to sort the fire damaged bonnet out quickly.
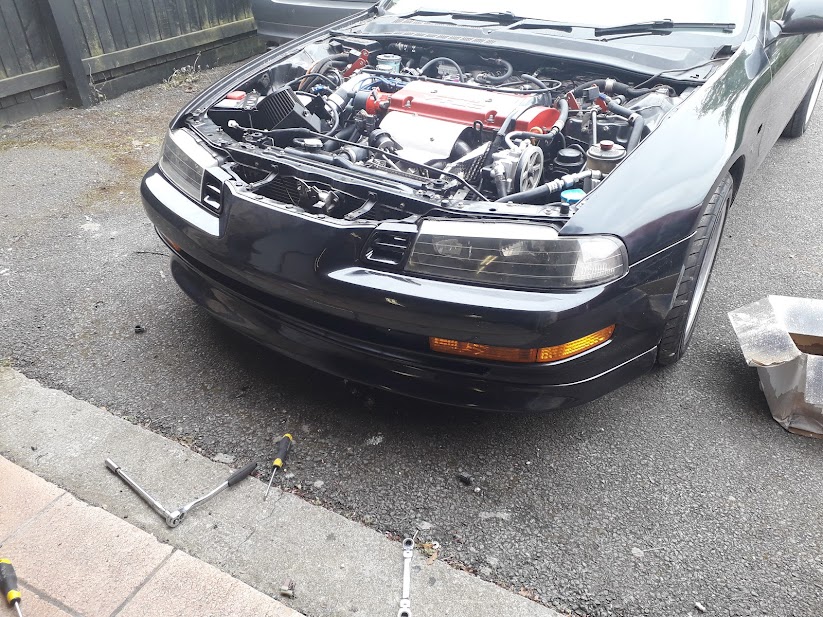
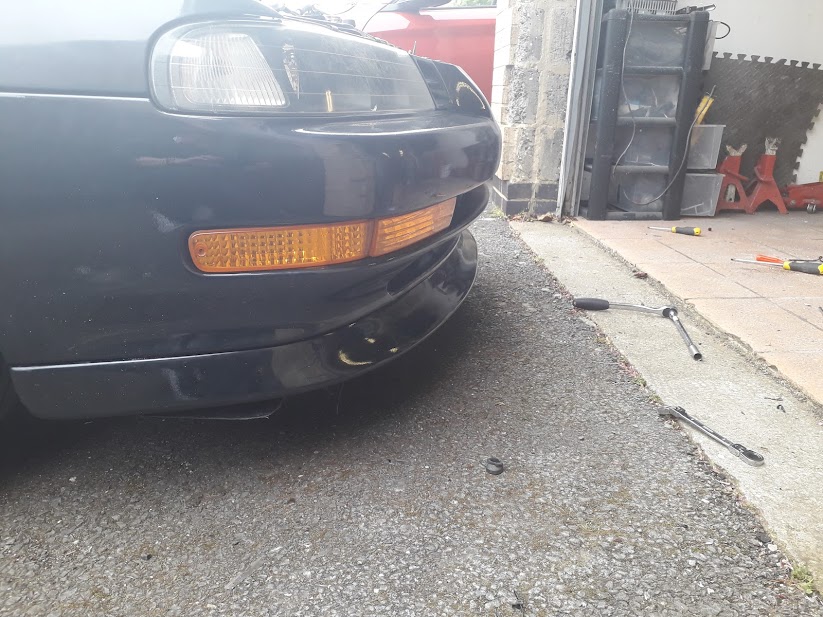
Going full retard as usual, I also decided to refresh the front bumper, wings and fit a new front lip that I’d picked up last year.
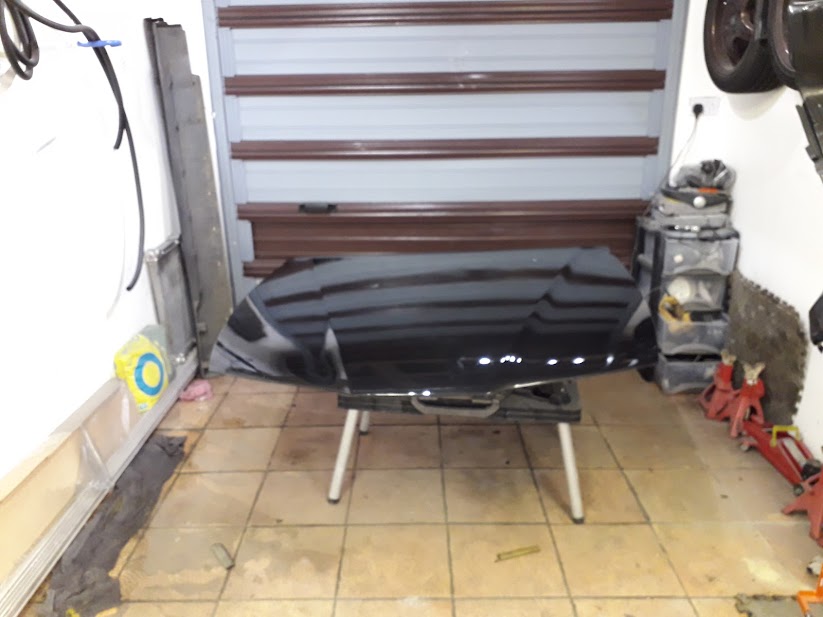
Holy massive bonnet repair batman.
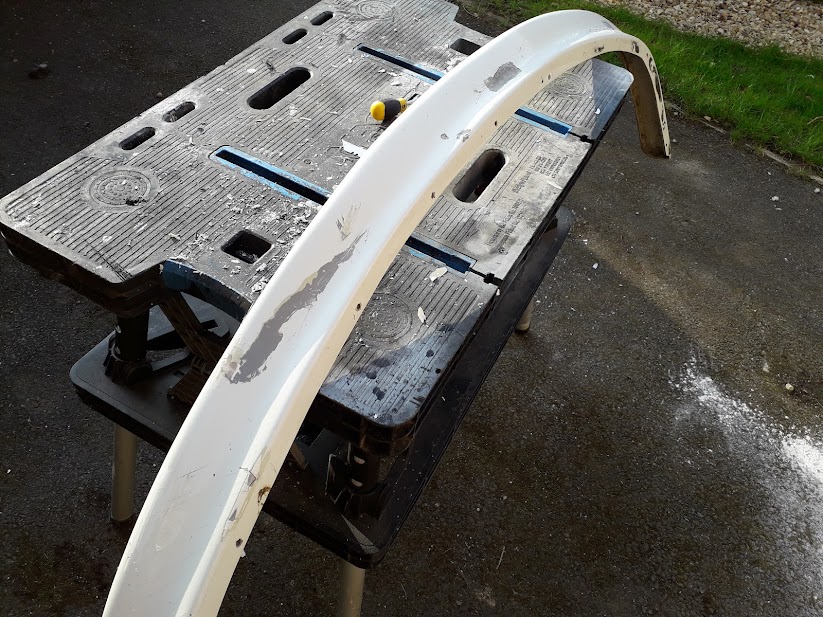
Some painting shots.
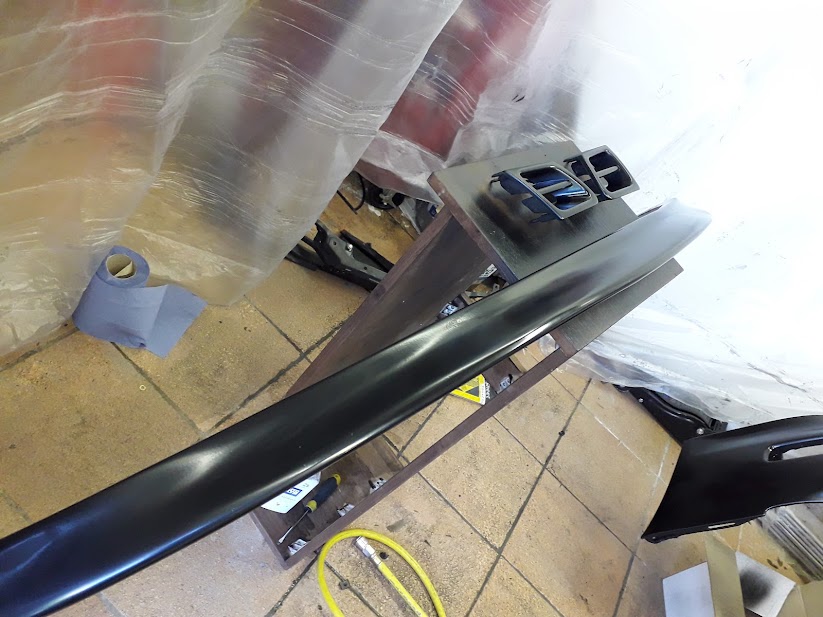
Assembley.
What’s next? Well, I found the front suspension a little hard at low speeds. Nothing too bad but enough to annoy around crappy town roads. I run the TEIN Street Advance Z and fortunately you can get replacement springs direct from TEIN UK.
So I ordered some 8kg springs, opposed to the 10kg ones that come with the kit. I also run the suspension higher than recommended (too much lows for my liking) so took the opportunity to get slightly longer ones too. This means that the spring adjuster now sits in the middle of the adjustment collar rather than near the top.
The suspension is now really nice, as comfortable as my daily around town, but nice and stable at higher speeds.
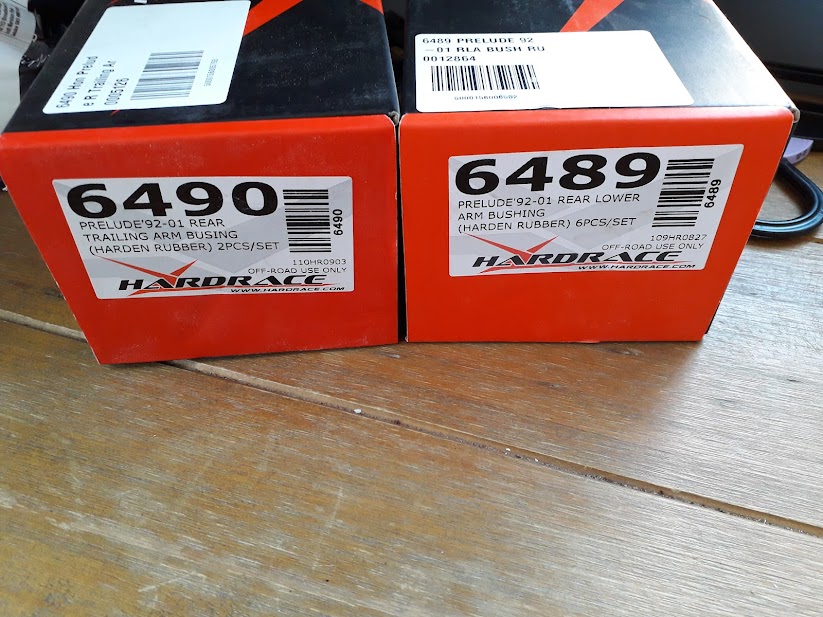
Ive also swapped out the front poly bushes for OEM style rubber (uprated).
I still to do the rear, but that can wait till the winter.
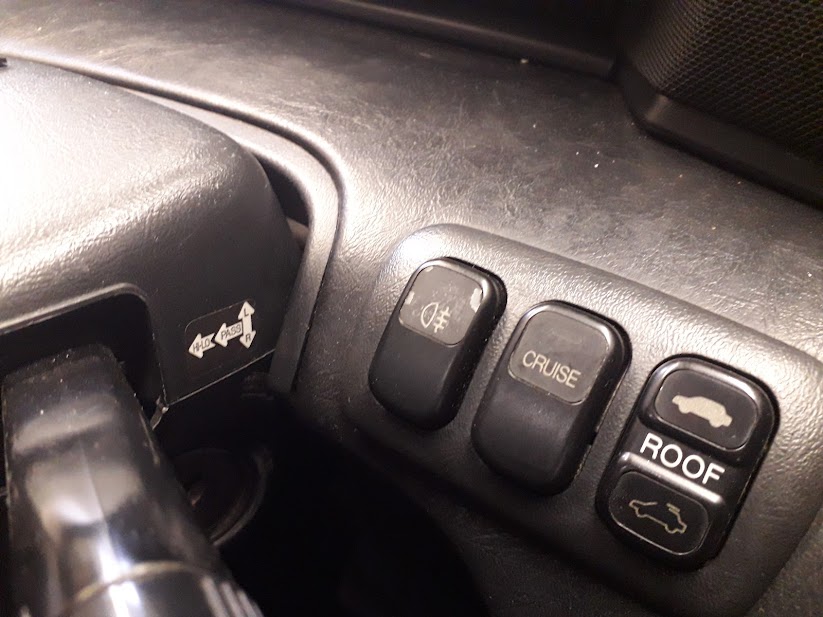
Any more, yes actually, I’d reworked the front intercooler location after the fire so that I could fit front fogs, I’d previously removed them for the turbo bits but knew I could make it work. So, I set about refreshing the brackets and had some spare parts which I used to make a decent set, then got those fitted.
I flicked the switch and nothing…….bugger.
Some probing around the car told me that the fuses and switch were all working fine, and a test on the relay proved it was the problem, fortunately I have a ton of spare parts and had a replacement ready, which did the trick, so now I have working fog lights for the first time in 10 years.
I’m on a roll now, so what’s next, cruise control, that’s something else that got lost in the turbo upgrade, let’s make this work too.
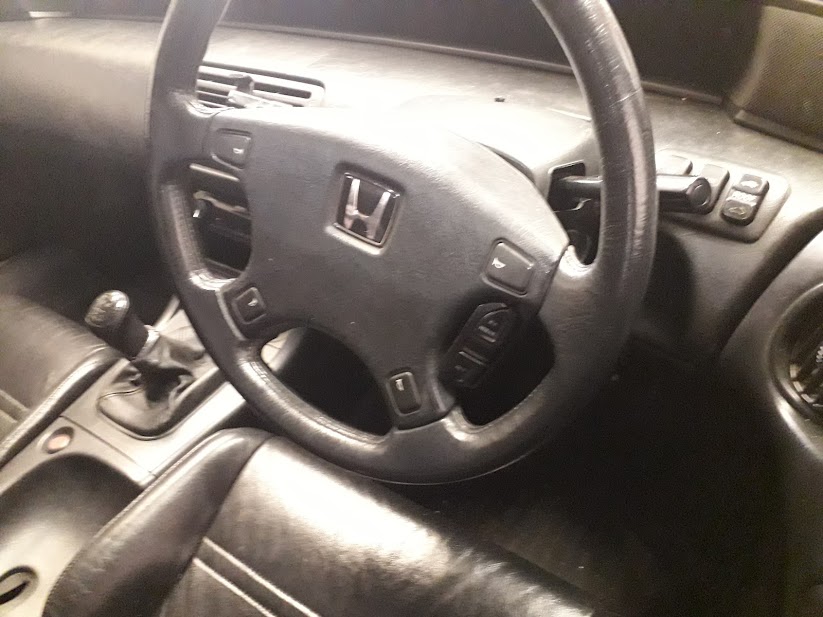
So, I refitted the actuator in the engine bay, needing to also sort out some vacuum hosing to make it work. Then I had to fit a cruise control button setup on a steering wheel that never had it in the first place. It’s a bit of a bodge until I can obtain an OEM bracket, but it’ll do till I prove the concept.
Once that was done, I turned my attention to the cruise control ECU and switch. Did you know that some 4th gens have a totally different cruise setup than most the others, and that it is not detailed in any of the wiring diagrams? Of course, mine is one of those fuckers.
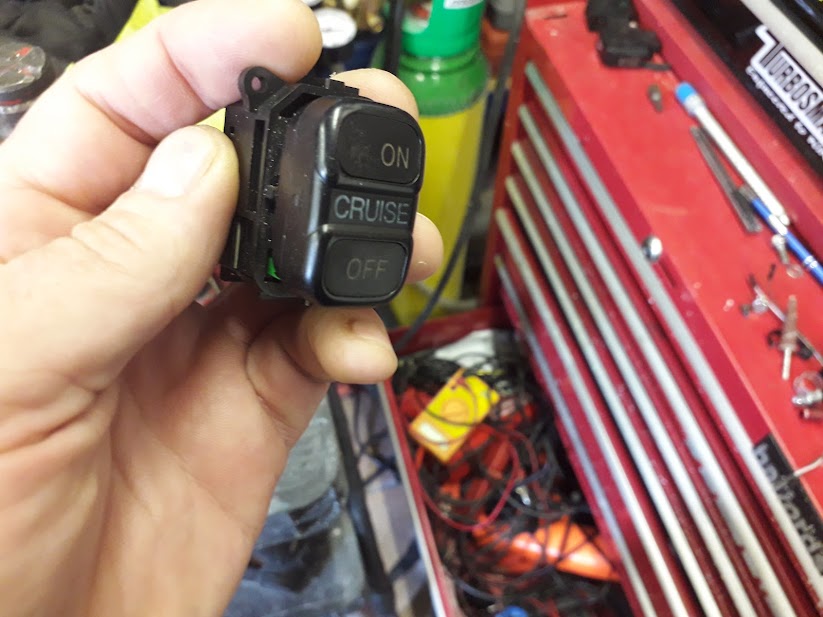
The cruise control switch is a 6 pin type, opposed to a normal 5 pin. Typically, the cruise switch is a physical binary on or off, but on this special type, it’s a microswitch’d rocker style. This is either an early JDM thing or possibly an auto thing.
Normal:
Mine:
Either way it would not play ball, so I went out and bought a ‘typical’ physical switch and spent a little time rewiring the cables to the ECU and to a new clutch pedal switch (remember the car was an auto once).
After all this, including switching out the P13 CC ECU (speed limited to 60mph) for a P14 CC ECU (unrestricted) I had a fully working cruise control setup. The last time it worked was in 2006!
The exhaust I had made for me a few years back was causing me some ground clearance issues. It is a super silent setup, but this is because there are a mass of silencers, the centre one of which hangs really low. Unfortunately, I had been scraping it every time I traversed a speed bump and every time I pulled onto the driveway.
So, I decided to cut it out and weld a smaller diameter piece in there.
I’ve welded a new one in there, but have no pics, but clearance is now great and the car is not much louder actually, definitely acceptable.
I did not like the location of the air intake previously, it was a bit too convoluted, so decided to move things around slightly. I set about fitting a slightly smaller battery, rotating it slightly and using the space created to get an air filter right at the front of the engine bay.

I also made some shrouding to prevent as much heat soak as possible. I used polypropylene sheeting, which is easy to work with and is also the same material OEM’s use to make their airboxes.

At the same time I also tweaked the boost piping for neatness and fitted a coolant overflow bottle from another model Honda, it fits pretty good too.

Somewhere around this time I also upgraded the radiator from a stock model to a Mishimoto ally setup. It was a bit of a squeeze getting it in there, but it does sit nicely now. The coolant temps are managed well now, I even tested it in standing traffic on a (the) 40-degree day.
Right, running out of distractions, it was time to take a look at the boost spool wobble and drop off issue. I’d had the issue in the back of my mind for months, was it exhaust back pressure on the IWG? Pre turbo exhaust leaks? Boost leak? Dunno.
So I did a boost leak test and found one of the clamps leaking at around 6PSI and beyond. drokking hell, that must be it. So repaired that and went for a spin……
No drokking different.
Then I thought why not try a different source for the actuator boost control. Can’t hurt to try can it?
So, I hooked the source away from the compressor housing and moved it to just before the throttle plate, taken off the throttle body.
drokking hell. Fixed.
Both the early spool wobble and the drop off were sorted.
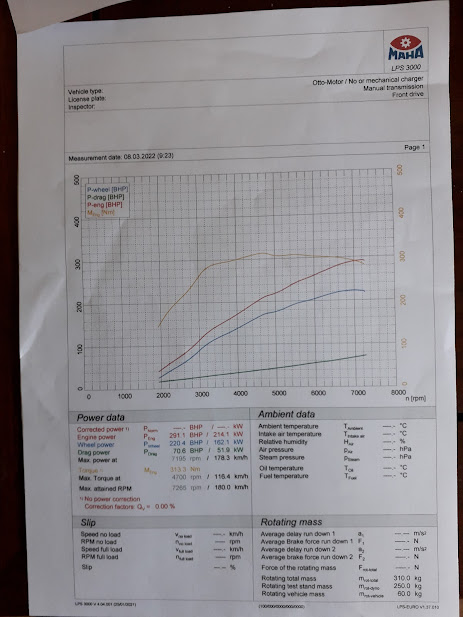
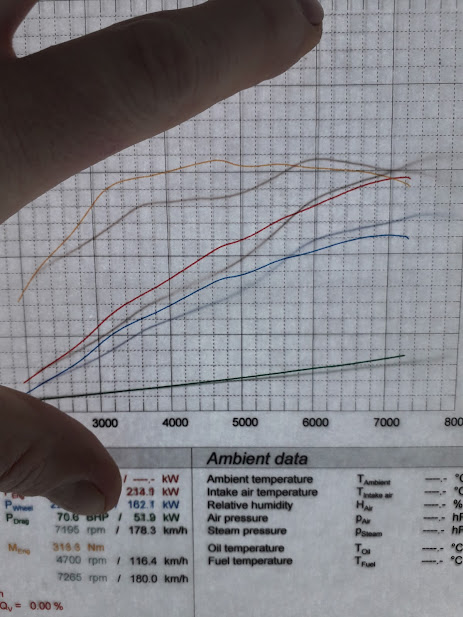
Before:
After:
That’s where it’s at really, I’m off to get a final remap.
So, with the new turbo and manifold, I took the car along to get it mapped, unfortunately there were a few problems, I was not sure if it was just how it was due to the turbo choice, the manifold I’d made, or if there was something else amiss.
It made 300bhp on a gentle run.
and 290 on a proper run.
Compared to the previous map, there is much more area under the graph, particularly torque.
But in the higher rpm's it just seem to drop off.
Effectively I had the boost set at 9 PSI (previous was 11), which wound up really early (about 3,000 rpm) but appeared to start trailing off from 5,000 rpm onwards, effectively reducing down to 5 PSI by 7,000 rpm.
The car still made fairly good numbers and the torque curve was better that it had been previously, though power delivery 3,000 rpm to 4,000 rpm felt wobbly as the spool up appeared erratic and it did not seem to stretch its legs out in vtec as previously.
Anyway, a week later I took the car along to Mimms Honda day at Santa Pod, took some photos and had a grand day out generally.
I did some runs along the strip, as things are not quite right, I had reduced the boost beforehand (let’s not break it!). I did 3 runs at 5 PSI and some at 6 PSI.
The 5 PSI runs resulted in a 14.6 second runs, which is about a second quicker than stock.
The 6 PSI runs resulted in slower times as I could not get the power down without wheel spinning.
Here are the times and results, the last 3 runs are next to a stock lude (wurlycorner’s). He beat me twice (run nr 4 had us mixed up)
The car was stuck in a zone at 6 PSI where there was just about enough power to affect grip, but due to the boost drop off, not enough to make amends later down the strip.
Not great really for the strip, though pretty good on the roads.
After this I did some data logging with Hondata:
Staring at this the RPM signal looked really noisy, bouncing =/- 400 rpm at any point.
This prompted me to crack open the dizzy and take a look. Seems like the little bobbin that informs the crank sensor was loose, throwing variable signals to the ECU. Ah ha!
So, after ordering a brand new dizzy from Amayama, waiting 3 weeks to be told there were none in stock, I searched for something better than ebay quality. I found one made by ‘Dragon Racing Performance’
Their blurb states it’s uprated, though something that’s reliable would be a win.
I took a punt and it arrived in the post and I cracked it open to take a look, it seems ok inside, all the screws are glued to prevent unwinding (which is better than ebay already) and the crank bobbin looked cleaner cut than the ebay/china replicas too.
And on it went.
The rpm signal was now much cleaner.
It made a slight difference, but minimal really.
Sigh.
Anyway, I put that aside for a while as my insurance was due for renewal. As it’s a classic agreed policy, they require detailed photos for appraisal. This meant I had to sort the fire damaged bonnet out quickly.
Going full retard as usual, I also decided to refresh the front bumper, wings and fit a new front lip that I’d picked up last year.
Holy massive bonnet repair batman.
Some painting shots.
Assembley.
What’s next? Well, I found the front suspension a little hard at low speeds. Nothing too bad but enough to annoy around crappy town roads. I run the TEIN Street Advance Z and fortunately you can get replacement springs direct from TEIN UK.
So I ordered some 8kg springs, opposed to the 10kg ones that come with the kit. I also run the suspension higher than recommended (too much lows for my liking) so took the opportunity to get slightly longer ones too. This means that the spring adjuster now sits in the middle of the adjustment collar rather than near the top.
The suspension is now really nice, as comfortable as my daily around town, but nice and stable at higher speeds.
Ive also swapped out the front poly bushes for OEM style rubber (uprated).
I still to do the rear, but that can wait till the winter.
Any more, yes actually, I’d reworked the front intercooler location after the fire so that I could fit front fogs, I’d previously removed them for the turbo bits but knew I could make it work. So, I set about refreshing the brackets and had some spare parts which I used to make a decent set, then got those fitted.
I flicked the switch and nothing…….bugger.
Some probing around the car told me that the fuses and switch were all working fine, and a test on the relay proved it was the problem, fortunately I have a ton of spare parts and had a replacement ready, which did the trick, so now I have working fog lights for the first time in 10 years.
I’m on a roll now, so what’s next, cruise control, that’s something else that got lost in the turbo upgrade, let’s make this work too.
So, I refitted the actuator in the engine bay, needing to also sort out some vacuum hosing to make it work. Then I had to fit a cruise control button setup on a steering wheel that never had it in the first place. It’s a bit of a bodge until I can obtain an OEM bracket, but it’ll do till I prove the concept.
Once that was done, I turned my attention to the cruise control ECU and switch. Did you know that some 4th gens have a totally different cruise setup than most the others, and that it is not detailed in any of the wiring diagrams? Of course, mine is one of those fuckers.
The cruise control switch is a 6 pin type, opposed to a normal 5 pin. Typically, the cruise switch is a physical binary on or off, but on this special type, it’s a microswitch’d rocker style. This is either an early JDM thing or possibly an auto thing.
Normal:
Mine:
Either way it would not play ball, so I went out and bought a ‘typical’ physical switch and spent a little time rewiring the cables to the ECU and to a new clutch pedal switch (remember the car was an auto once).
After all this, including switching out the P13 CC ECU (speed limited to 60mph) for a P14 CC ECU (unrestricted) I had a fully working cruise control setup. The last time it worked was in 2006!
The exhaust I had made for me a few years back was causing me some ground clearance issues. It is a super silent setup, but this is because there are a mass of silencers, the centre one of which hangs really low. Unfortunately, I had been scraping it every time I traversed a speed bump and every time I pulled onto the driveway.
So, I decided to cut it out and weld a smaller diameter piece in there.
I’ve welded a new one in there, but have no pics, but clearance is now great and the car is not much louder actually, definitely acceptable.
I did not like the location of the air intake previously, it was a bit too convoluted, so decided to move things around slightly. I set about fitting a slightly smaller battery, rotating it slightly and using the space created to get an air filter right at the front of the engine bay.
I also made some shrouding to prevent as much heat soak as possible. I used polypropylene sheeting, which is easy to work with and is also the same material OEM’s use to make their airboxes.
At the same time I also tweaked the boost piping for neatness and fitted a coolant overflow bottle from another model Honda, it fits pretty good too.
Somewhere around this time I also upgraded the radiator from a stock model to a Mishimoto ally setup. It was a bit of a squeeze getting it in there, but it does sit nicely now. The coolant temps are managed well now, I even tested it in standing traffic on a (the) 40-degree day.
Right, running out of distractions, it was time to take a look at the boost spool wobble and drop off issue. I’d had the issue in the back of my mind for months, was it exhaust back pressure on the IWG? Pre turbo exhaust leaks? Boost leak? Dunno.
So I did a boost leak test and found one of the clamps leaking at around 6PSI and beyond. drokking hell, that must be it. So repaired that and went for a spin……
No drokking different.
Then I thought why not try a different source for the actuator boost control. Can’t hurt to try can it?
So, I hooked the source away from the compressor housing and moved it to just before the throttle plate, taken off the throttle body.
drokking hell. Fixed.
Both the early spool wobble and the drop off were sorted.
Before:
After:
That’s where it’s at really, I’m off to get a final remap.
-
vanzep
- Supporter 2016
- Posts: 7171
- Joined: Sun Jan 29, 2012 6:38 pm
- My Generation: 4G
- Location: Edinburgh
- Has thanked: 314 times
- Been thanked: 520 times
Vtecmec's 4th Gen
Brilliant update 
plenty of inspiration to draw on - im going to test out the cruise control on my BB1 this weekend.....in reading your write up you say the cc is limited to 60mph..hmmm might need to look for a p14 cc ecu
plenty of inspiration to draw on - im going to test out the cruise control on my BB1 this weekend.....in reading your write up you say the cc is limited to 60mph..hmmm might need to look for a p14 cc ecu
1996-2000 1993 EG9 Blue Civic 1.6 Vti - Traded in against the BB4
2000-2019 1994 2WS BB4 Milano Red JDM Prelude Si VTEC LSD
2015 on > 1991 4WS BB1 Phantom Pearl Grey JDM Prelude Si VTEC LSD
2021 ON > 1998 2WS BB6 White Pearl JDM Prelude Si VTEC
2000-2019 1994 2WS BB4 Milano Red JDM Prelude Si VTEC LSD
2015 on > 1991 4WS BB1 Phantom Pearl Grey JDM Prelude Si VTEC LSD
2021 ON > 1998 2WS BB6 White Pearl JDM Prelude Si VTEC
-
4thgenphil

- Supporter 2016
- Posts: 6661
- Joined: Tue Aug 03, 2010 4:15 pm
- My Generation: 4G
- Location: filming two girls one cup 2
- Has thanked: 5 times
- Been thanked: 29 times
Vtecmec's 4th Gen
I genuinely thought the cruise ecu was what did the 60mph limit, in fact I'm pretty sure I swapped mine out and it removed the restriction.
Great update though mate, desperately trying to resist the urge to turbo the black on right now!
Great update though mate, desperately trying to resist the urge to turbo the black on right now!
-
Merlin

- Moderator
- Posts: 12397
- Joined: Fri Aug 06, 2010 9:04 am
- My Generation: 5G
- PSN GamerTag: Merlinbadman
- Location: Edinburgh
- Has thanked: 71 times
- Been thanked: 306 times

-
Vtecmec
- LotM Winner
- Posts: 5501
- Joined: Fri Aug 06, 2010 5:43 pm
- My Generation: 4G
- XBOX GamerTag: vtecmec
- Location: East Midlands
- Has thanked: 154 times
- Been thanked: 443 times
Vtecmec's 4th Gen
That's right Phil, its the cruise control ECU that I swapped out, they just follow a similar nomenclature as the engine ECU's P12, P13, etc. I removed a P13 cruise ECU and swapped in a P14 cruise ECU.4thgenphil wrote: ↑Sat Jul 30, 2022 9:23 pmI genuinely thought the cruise ecu was what did the 60mph limit, in fact I'm pretty sure I swapped mine out and it removed the restriction.
Thought I'd wrap the year up with a post on progress over the last few months.
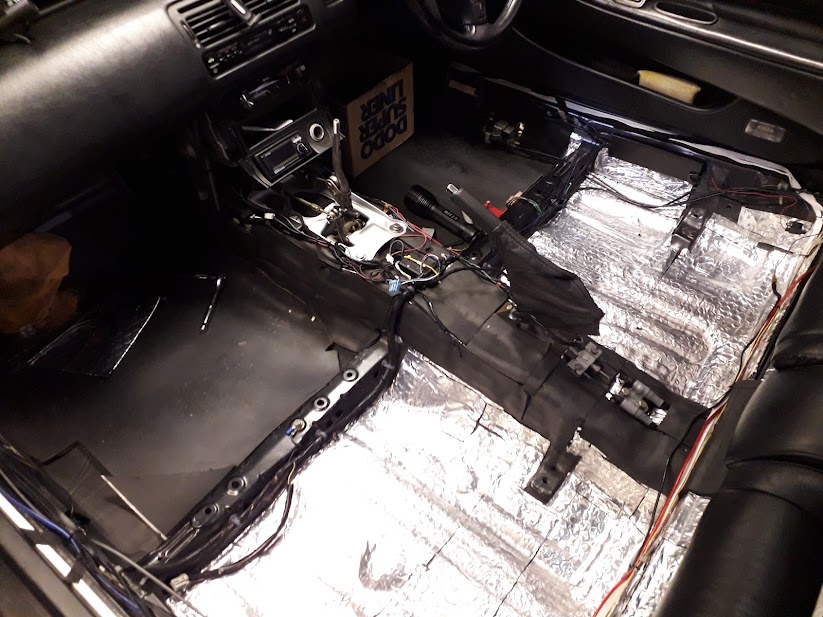
I set about fully sound proofing the interior, floor, doors, boot and all.
I stripped out the inside first.

And laid a foil backed bitumen layer first.


Before then covering that with a dense foam to complete the package.
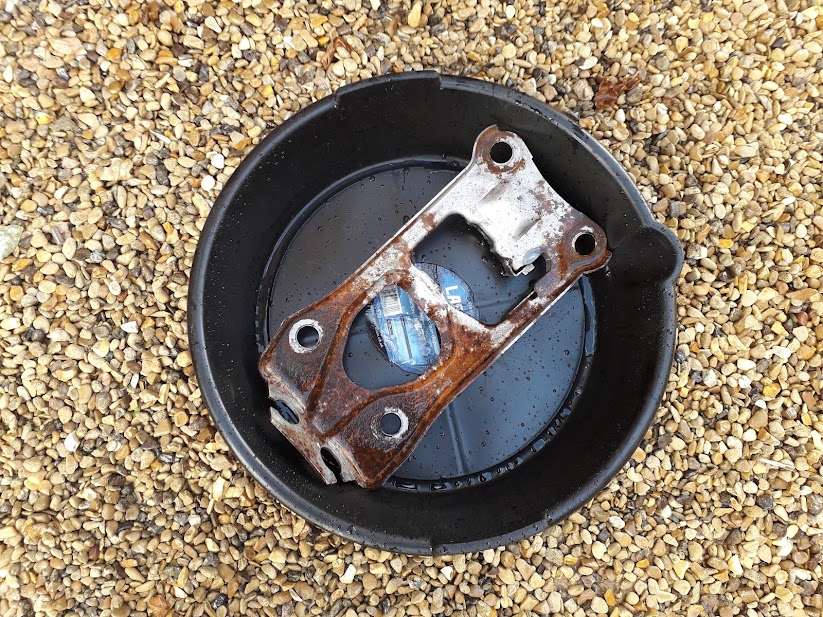
Whilst this went on I also thought I'd derust the gear lever bracket:

And gave the carpet a full 'out of car' clean.

Pulled a lot of muck out of it.

I'd also been trying to trackdown an annoying vibration which only occurs between 70 and 80 and only under light load, which is flats and downhills. I'd been thinking that this is related to the steering rack somehow, as I've effectively either swapped or tested eveything else that I think it could be.
So I managed to source some replacement steering rack mount rubbers, these we not easy to find.

There are 4 of these to mount the rack, the bottom 2 just pop out, but there are 2 which fit from the top, I tried to cut a corner and dropped the rack still attached to the car and tried to wedge the mounts loose, after half an hour I gave up and left the old rubbers in place.
No problem, except that about a week later I noticed a loss of power steering fluid, seems I have disturbed one of the seals and it's now leaking at one end behind the boot. Lesson not to cut corners I suppose.
So I went out and sourced a spare rack, a rebuild kit and set about getting that ready to fix the problem I had created.


It is now ready to go on the car, though I did notice that whilst I was putting it back together, initially utilising the inner tie rods that were on the car, well, that there is a bit of play in the threads that connect them to the outer tie rods. Almost like they have been cut too small and quite possibly could be the source of the vibration. I'll take that as a silver lining.
Fortunately the (OEM) inner rods that came with the rack are in good shape and when mated to the same outer rods tested before, show no sign of play between the two.
The old rack is almost ready to come off the car and then I'll extract the 4WS angle sensor and add it to the rebuilt rack.
You also might also spot the shiny gearbox on the bench. Its a U2Q7 with an extended 5th gear for the motorway.
I have had it on the car previously, but swapped it for another temporarily for test purposes, so the car is being prepped to refit it.
I've cleaned it up and also uprated the detent springs to give a slightly firmer gear change.
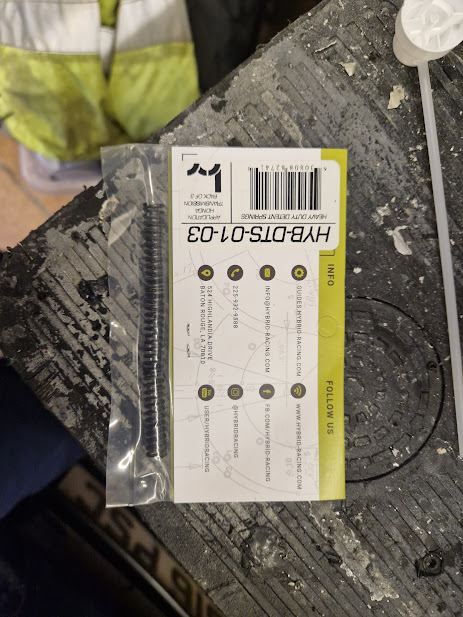
You can see they are longer than stock:

And really simple to fit:

Ready for the car.

Some other bits done were to reintroduce 2 catch cans into the engine bay. They are not really necessary (as they don't fill with any oil really), but fill a bit of a empty space in the engine bay. I made a bracket to fit them but only have a shot of one in its place at the moment.

Another thing I've been working on was to design a helm holtz resonator for the exhasut. I did this as there is a slighly annoying frequeny given off by the exhaust under 3/4 throttle at certain engine speeds. I was able to determine the exact frequency by using a sound analyser app on my phone:

You can see it is about 100hz, so I found an online calculator and made a chamber that would resonate at that same frequency:


I've yet to mate it to the exhaust, but will do so before the spring.