Officially Sold: 11th June 2016 - Will be Missed

Hi Guys
I have moved this thread over from Prelude UK. I initially started this thread on Wednesday April 14th 2010
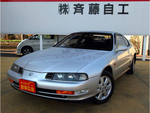
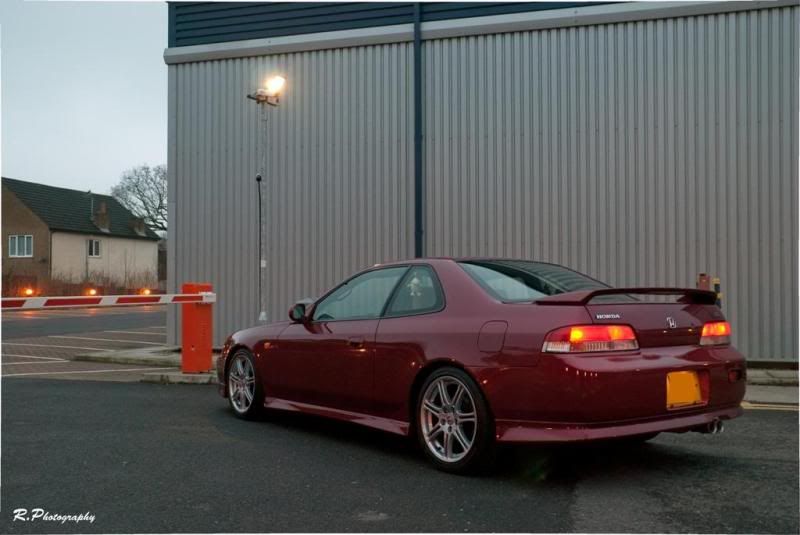
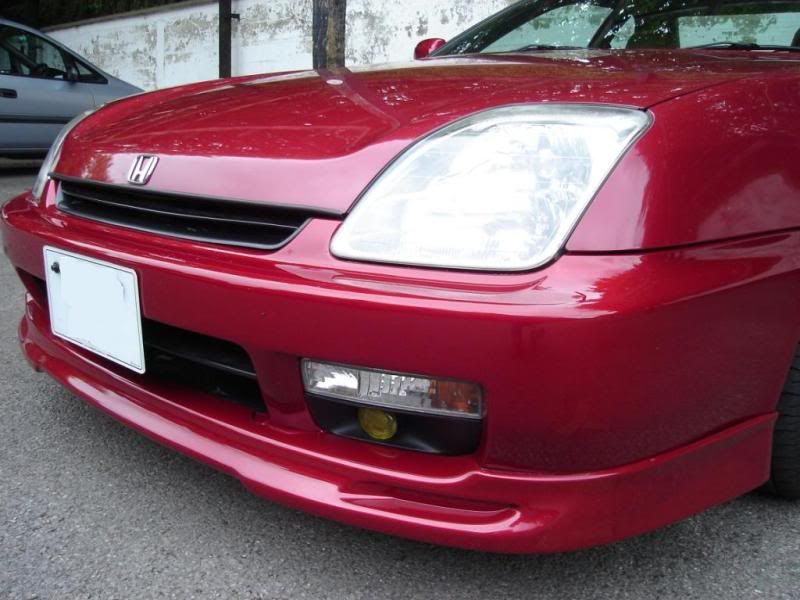
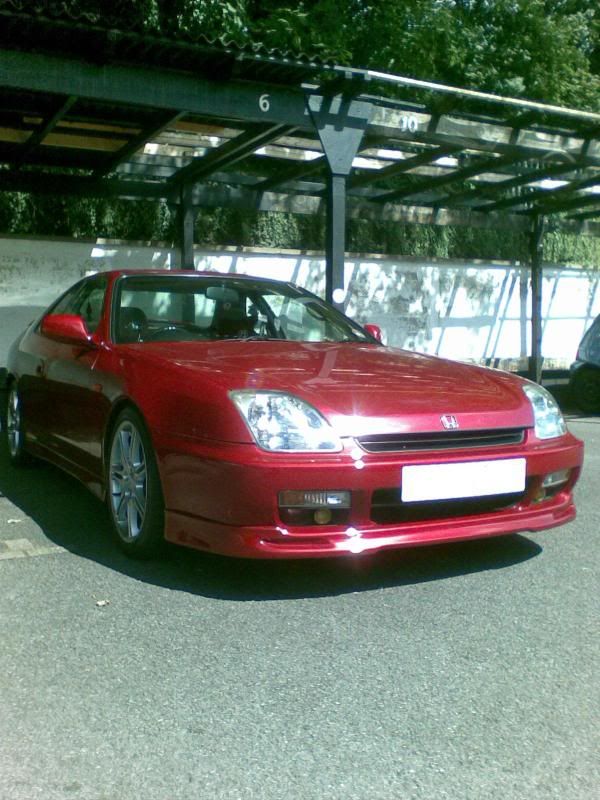
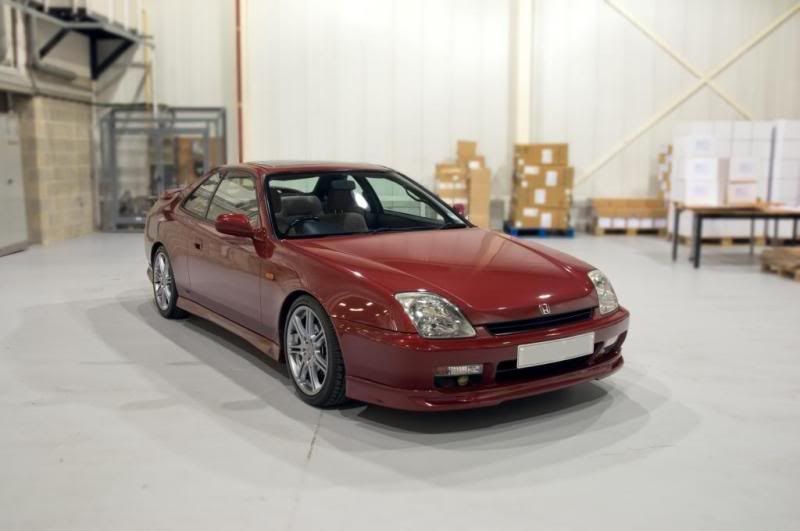
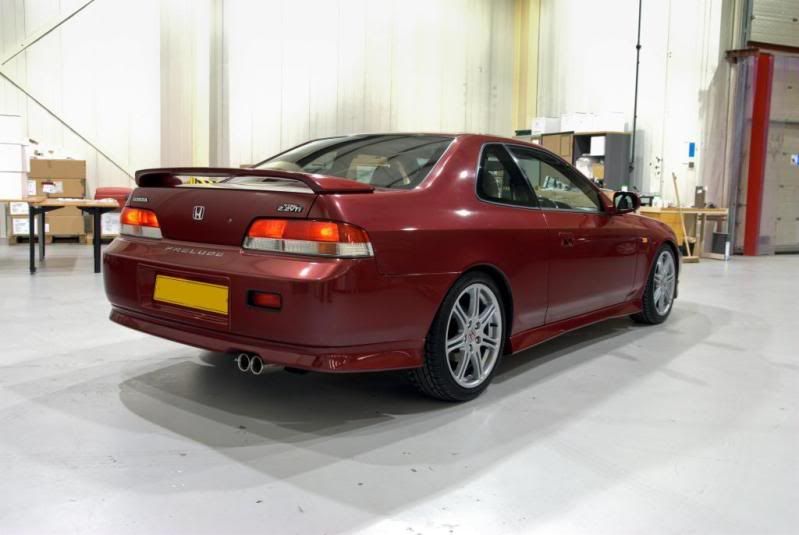
I have just purchased a Honda Prelude 2.2VTI in ruby red last Saturday. It’s my first taster in what vtec is all about and what a way to enter. I have been driving a Honda civic EJ6 2000 coupe for the past 5 years and a EG3 (that carb version 1.3 civic) for 2 years before that and now I’ am old enough with lots of NCB to own a prelude being it group 18 insurance.
This will be my weekend car so the civic at the moment is my commuter until I can sell it and get a small diesel to help save on fuel costs going to work.
This is what I am driving currently. It is a Honda Civic Coupe 2000 model EJ6 with a 1.6 SOHC D16Y7 engine.

The prelude is a standard 2.2 UK version (I really wanted a black one with the motegi kit on it) but they are like gold dust and I’ am very picky - I love my cars to have low mileage and the engine condition is the upmost priority
The prelude has 42k on the clock currently backed with all mot's and 10 stamps in the book with the last service being done on March this year which included 4 brand new Bridgestone RE04 tyres and a new exhaust system (OEM) also the cam belt has been done at Honda with genuine receipt to prove
I am really chuffed having found such a low mileage prelude - paint work is very good with a slight dent on the rear boot lid which isn’t noticeable but that’s basically it.
Few other bits are - Passenger wing mirror has been glued on (I think it was knocked as it doesn’t fold in) electric movement and heaters work. A second hand assembly will be purchased in due course
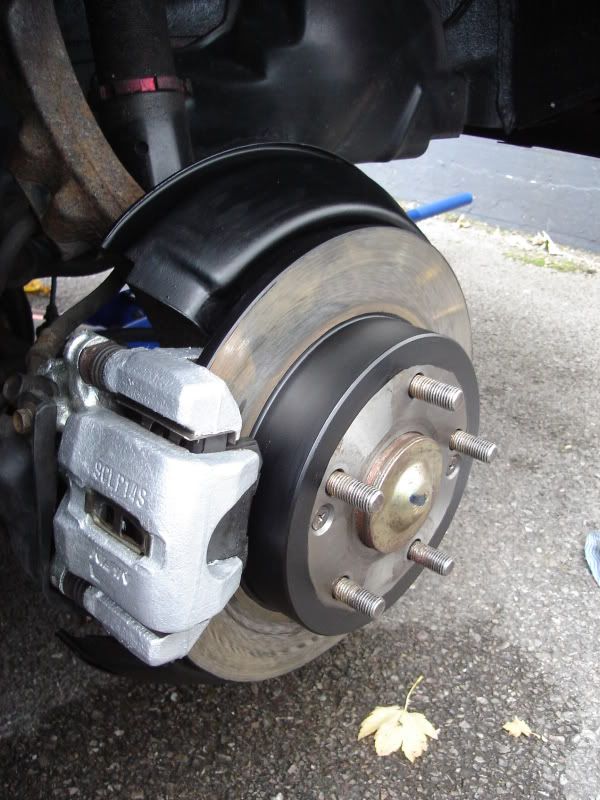
Really there is nothing I need to do mechanical wise - it drives spot on. Maybe a gearbox oil change as the gears are quite stiff to go in (was owned my a woman for the past 6 years) I think the rear callipers are slightly seized and sticks but I hear these are common on Honda preludes and the woman owner before me didn’t drive the car very much and left it in her driveway with the handbrake up on all occasions.
I’ am really not keen on the 4ws but it could be something I have to get used to – it is rather weird! Ill give it a chance though
Plans at the moment
-Good deep clean with autoglym interior shampoo
-Autoglym body polish
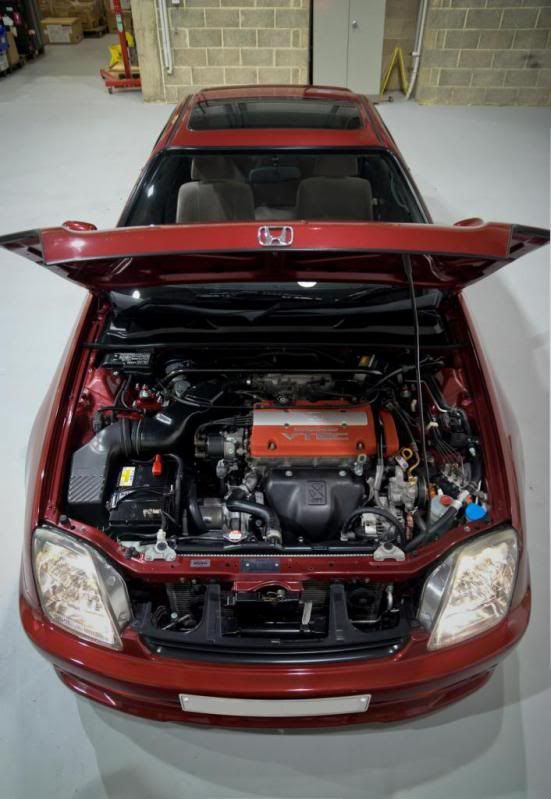
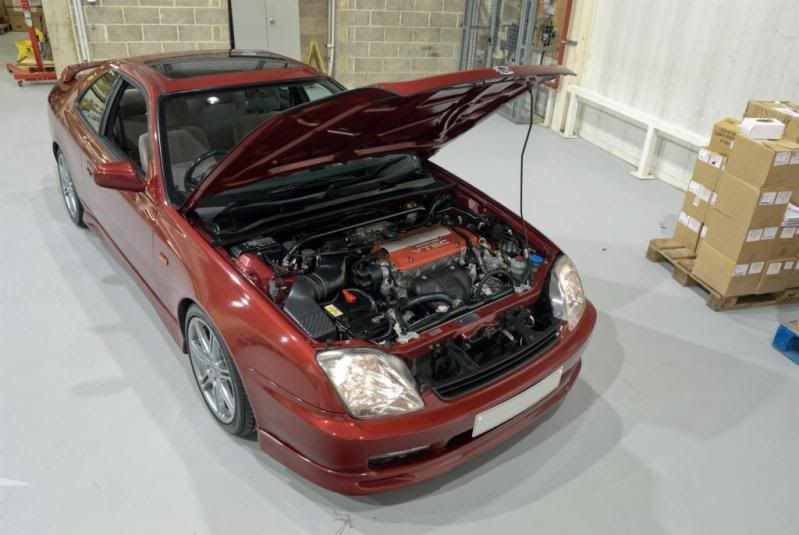
-Clean further the engine bay! I want it spotless with no dirt - lol (I love clean engine bays)
-Front Jap plate - not keen on the UK plate on the front
-Service Rear callipers
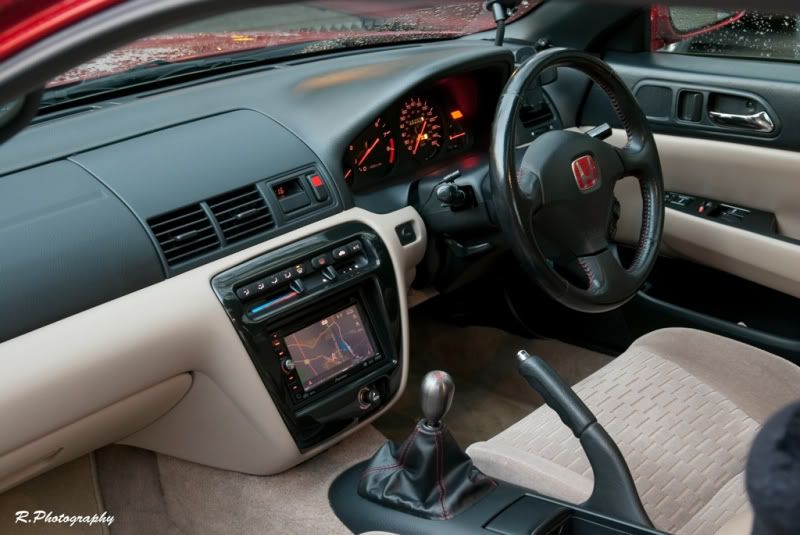
-Double din unit - Pioneer AVIC - D3 with sat nav (second hand)
Future upgrades possibly next year
-Motegi kit full front, sides and rear valances (if I can find one)
-Front yellow bar or spot fog lights
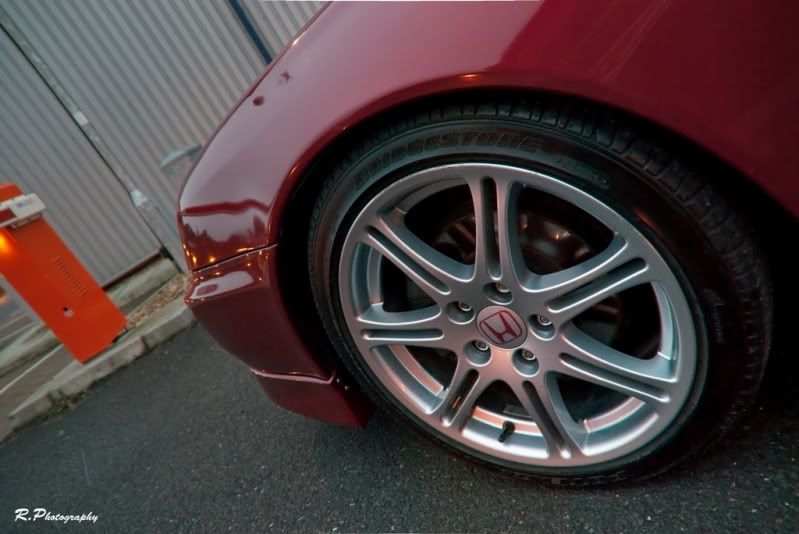
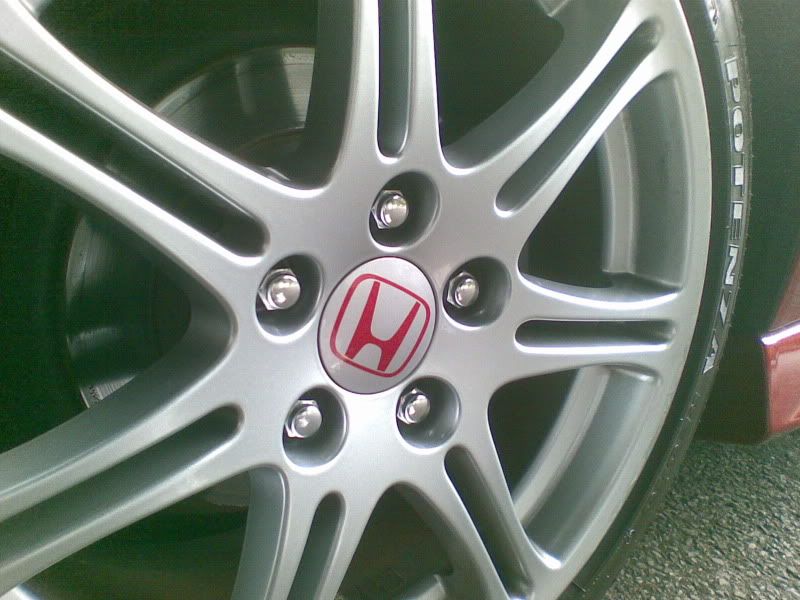
-EP3 type R alloys wheels
-OEM strut Brace
-Refurbish the rocker cover
-Disable 4WS by converting to 2WS subframe – If I don’t get along with the 4WS
-Lower it on eibachs (had these on my civic coupe - fab springs) or Coilovers
Once the above is achieved I think I would be happy with it – I’ am not looking to enhance any more power as its more power than ill ever need in stock form and by not increasing its power it will still be kind on my pocket to run.
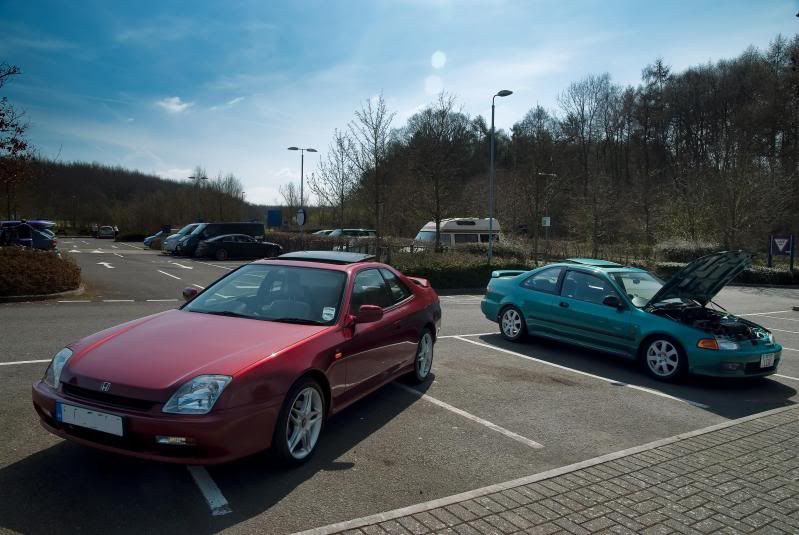
A brilliant upgrade from the civic - so much more comfortable and road noise has been reduced - such a well put together car - no interior rattle shakes like the civic has. Although a big difference in quality, the prelude was manufactured in Japan where as my EK 2000 civic was manufactured in America.
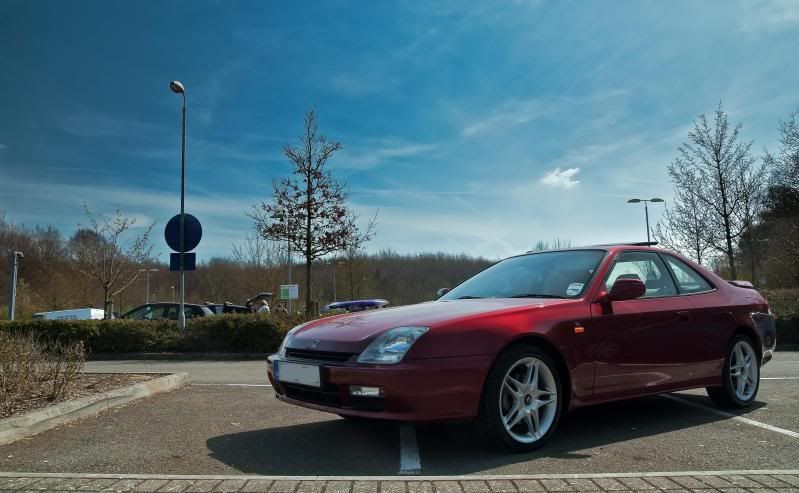
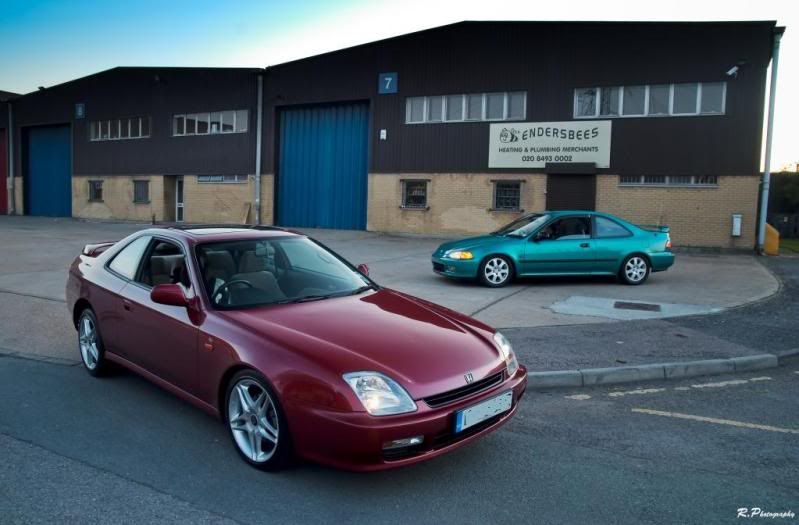
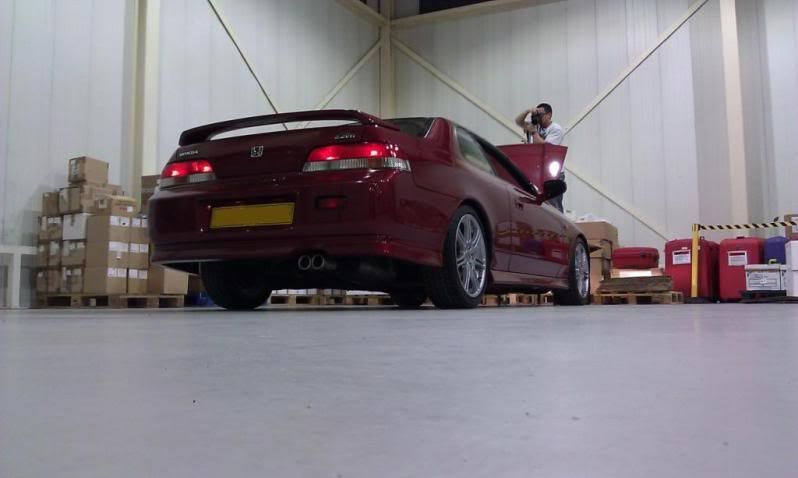
Pictures were taken by my brother with his Nikon D3000 SLR – Most pictures on my thread will be taken by him
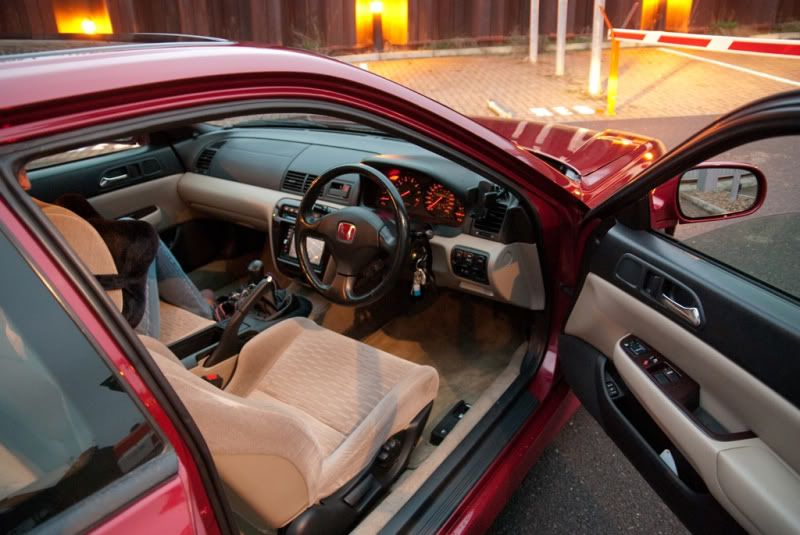
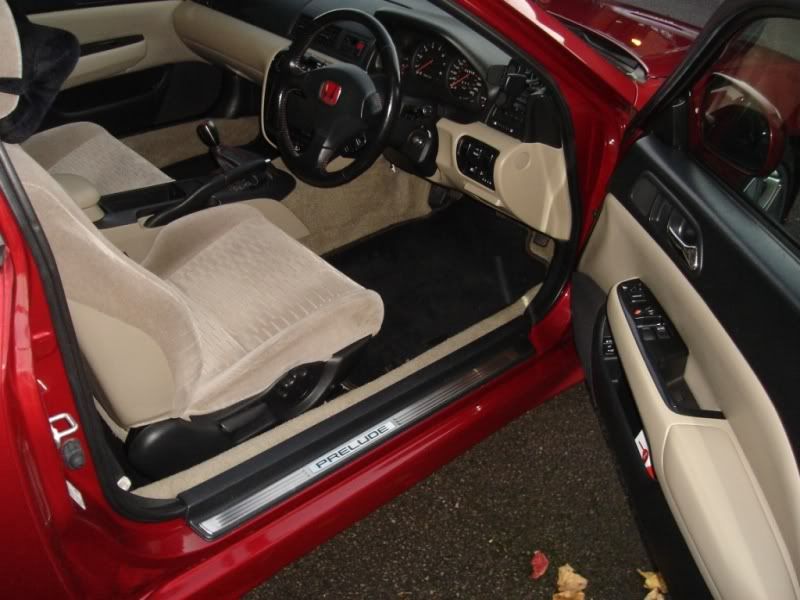
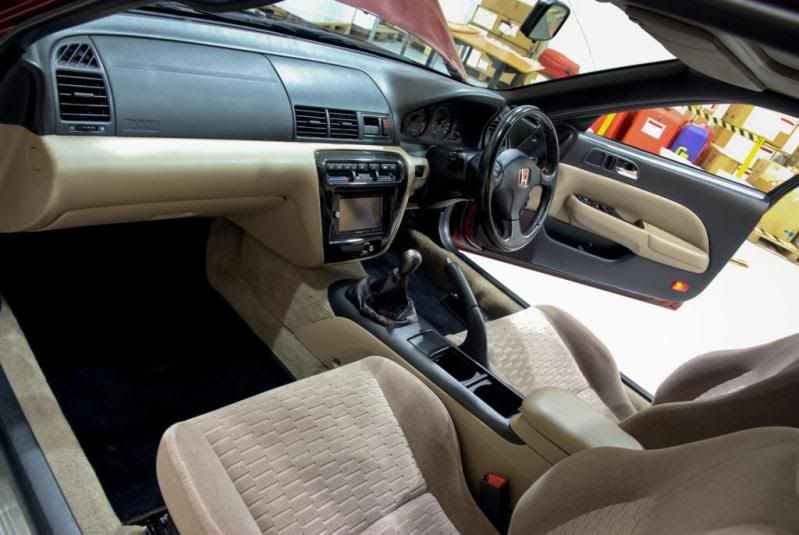
(The interior picture was taken from the original advert as I didn’t take any pictures of the interior at the time)
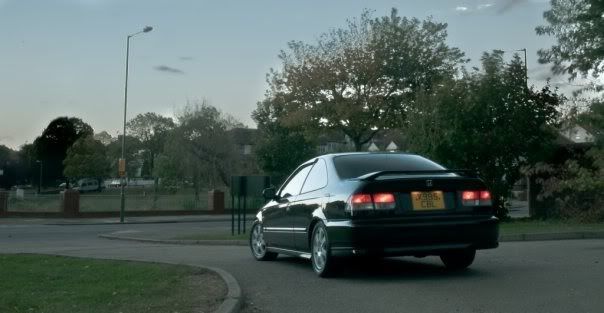
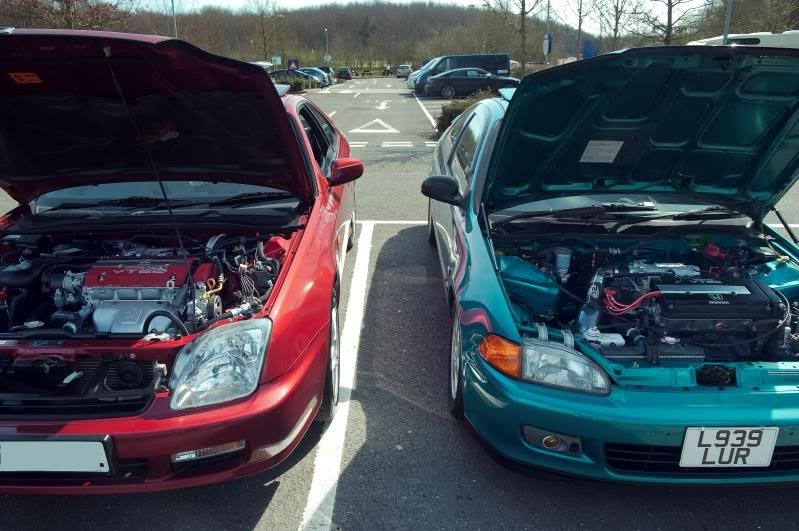
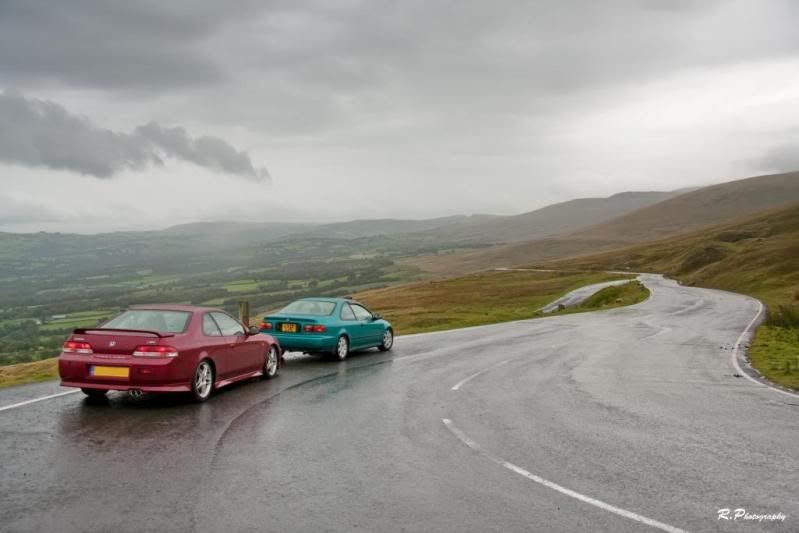
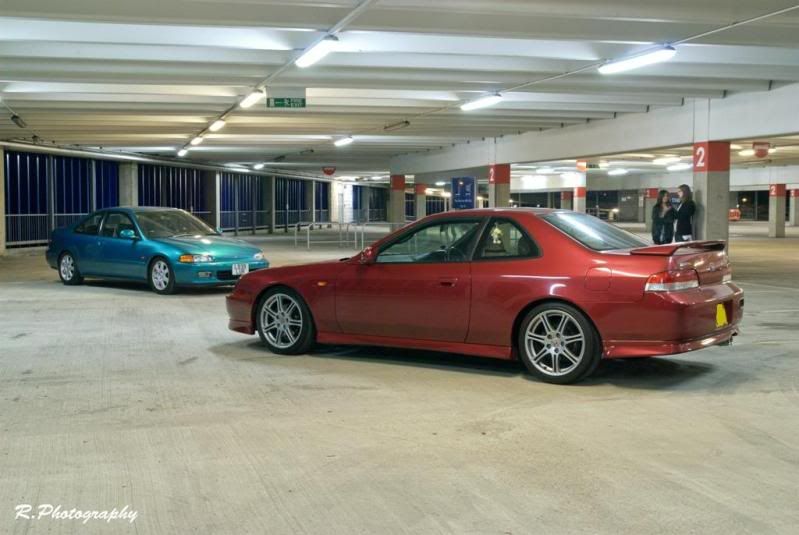
The green EG coupe is my brothers who did a b16A2 engine conversion after removing the standard D15B7 engine his project is on going.

Originally posted on Tuesday October 26th 2010
Hi guys
I haven’t posted in a while so I thought I would update my profile, I have been quite busy with the prelude since it was purchased in April 2010 but along side that, me and the missus have just sorted out a mortgage on a two bedroom flat so spending has been minimal.
With that running in the background I have managed to fulfil most of my wish list for the prelude with only a few other things outstanding.
Since April I have:
-Given it a full service (including oil, sparkplugs, oil filter, air filter and fuel filter)
-Replaced the transmission fluid (Honda MTF)
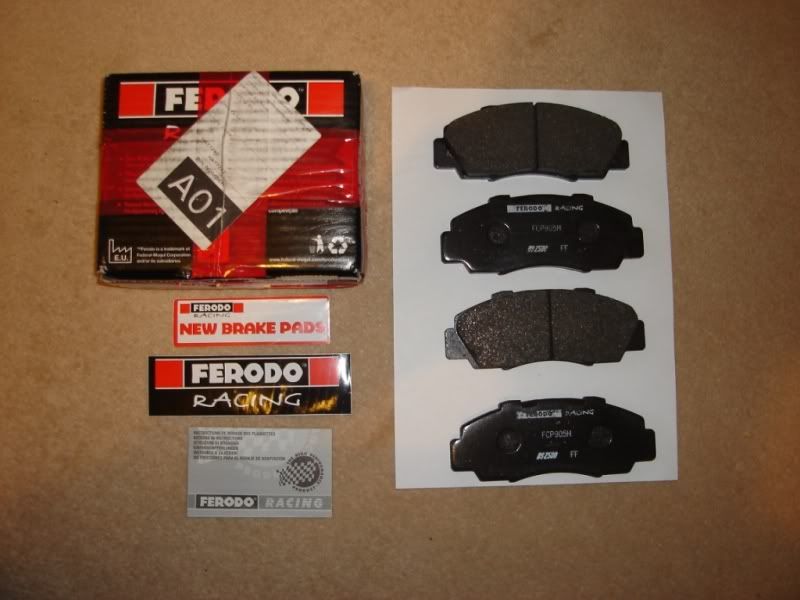
-Replace front and rear Brake pads
-Tracked / aligned the wheels (thanks to mart609 in selling me a 4WS locking pin)
-Replaced the 1 x bolt that connects the CAT to the mid section (as there was missing a bolt)
-Replaced Rear Near SIDE Bridgestone tyre (As the previous one had a nail in its side wall) not amused to say the least (Really was a waste of a brand new tyre)
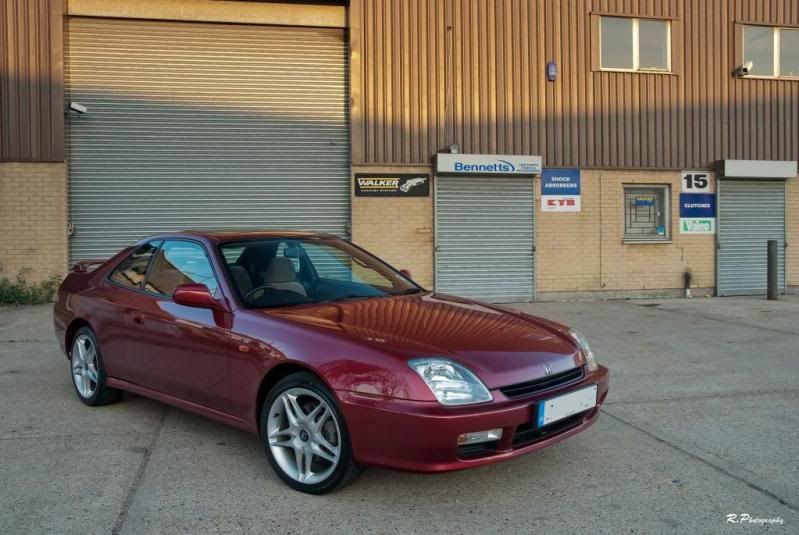
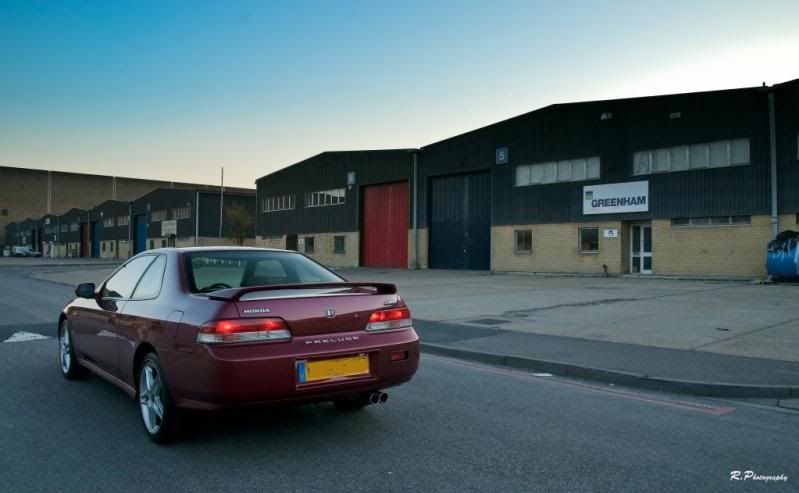
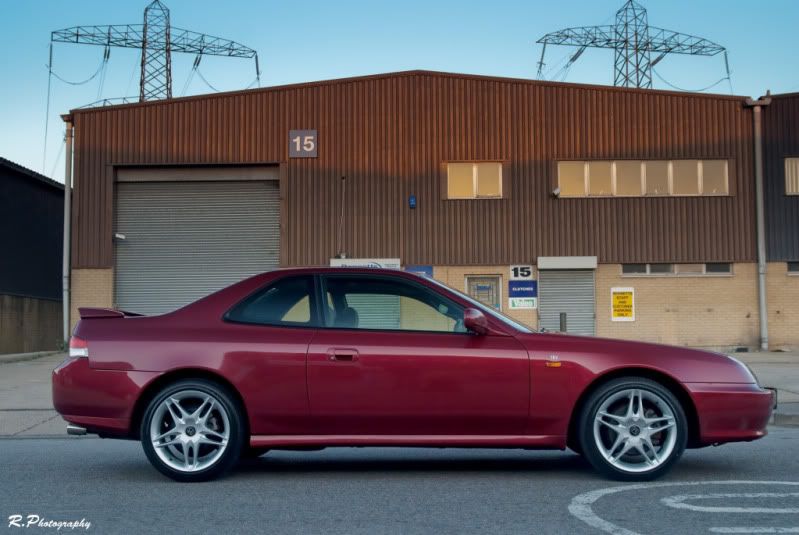
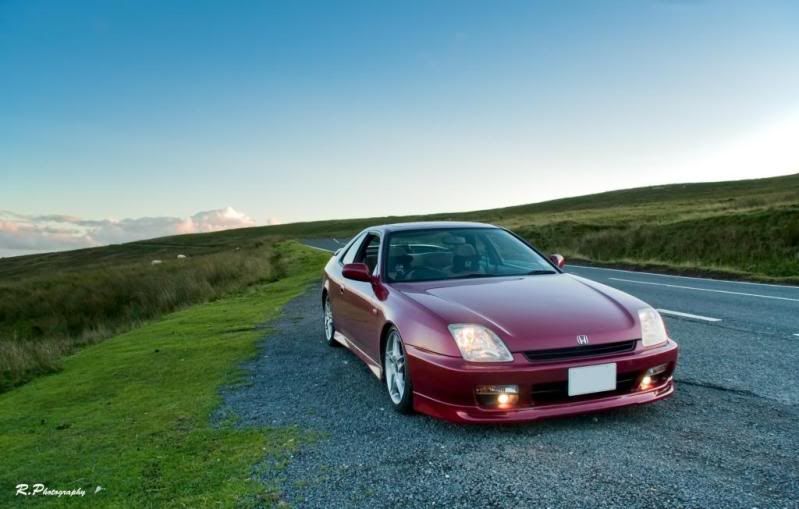
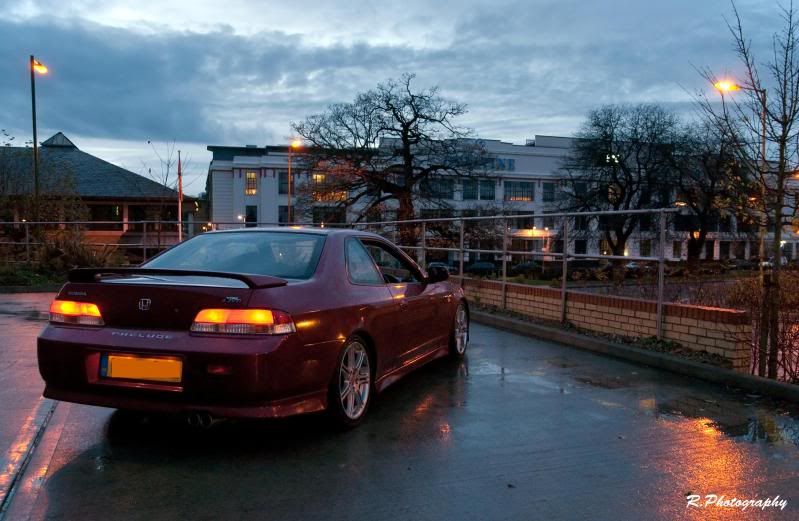
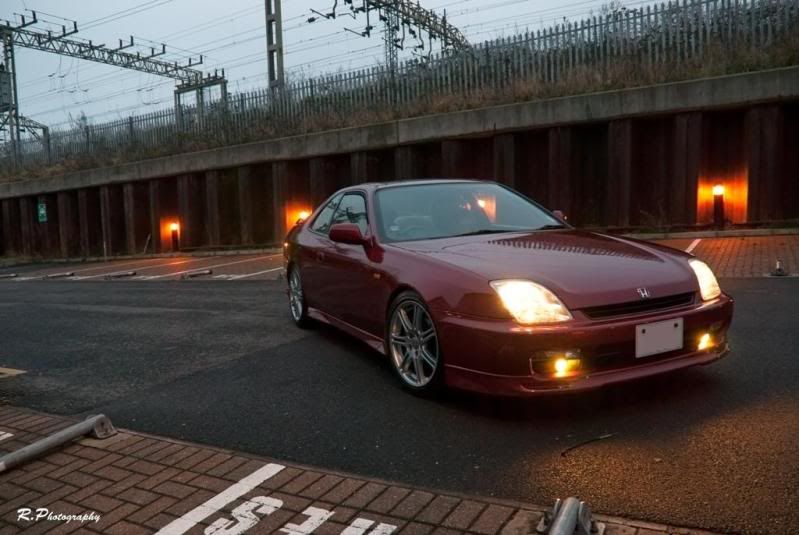
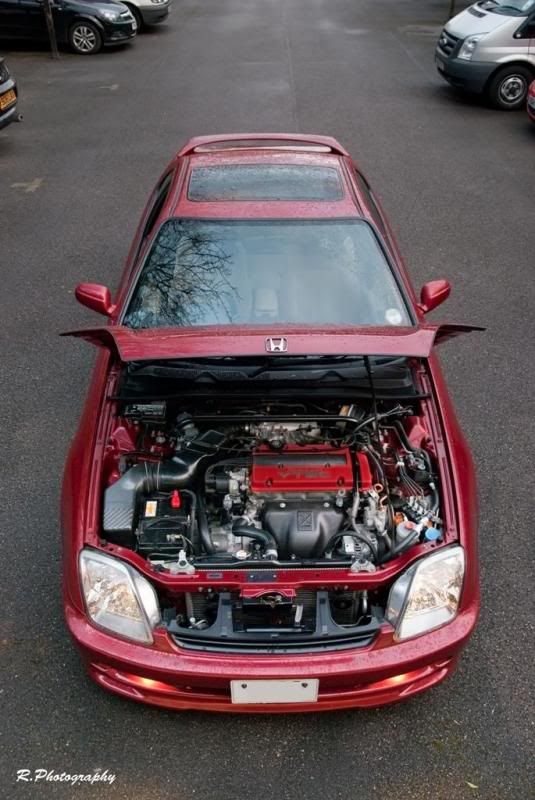
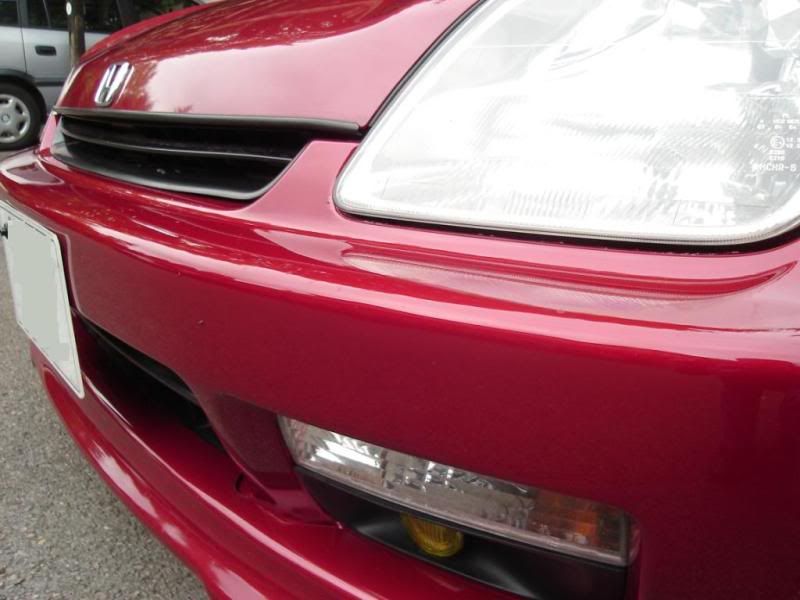
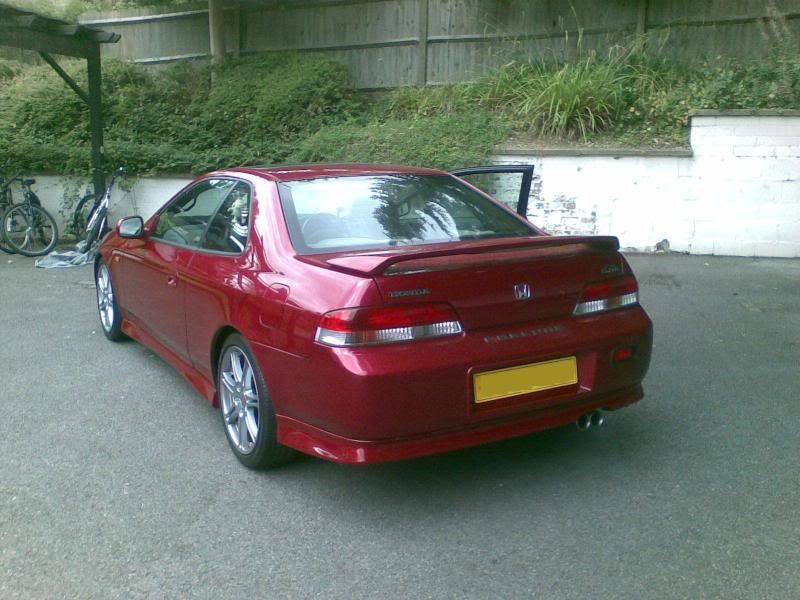
After all this basic maintenance work, I, my brother & the missus did a photo shoot on the prelude and to reveal what I had actually bought. (Photo shoot took place on 06-06-10)
Once the base was running like a dream and there were no known issues with the prelude the mission to upgrade a few parts began.
First of I wanted to upgrade the OEM standard cassette pioneer player, the prelude’s standard speakers were already pretty good and I didn’t think they needed upgrading so I plodded on with the search of a new head unit. Unsure on how to remove the panels of the centre console I turned to the forum for abit of help. Thanks guys!
With the knowledge of how to remove the console and the old unit to hand I set about finding a new unit. I’ve always wanted a double din unit and having owned a single pioneer motorized monitor sat nav unit
(Model: Pioneer AVIC X1) I thought I would like to stick with this brand as it has a very good user interface.
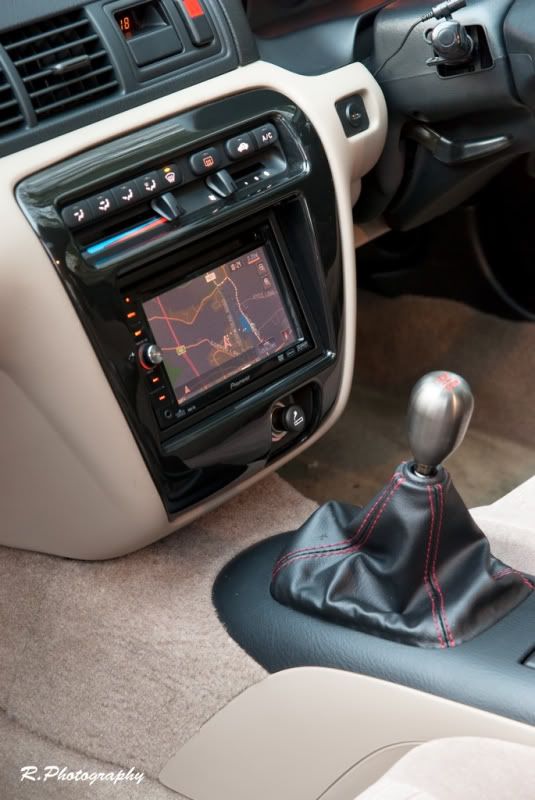
The search began and not long I won a bid on ebay for a pioneer AVIC D3 double din unit
It came with all Sat nav 2010 map discs, the GPS antenna a Bluetooth adapter unit with microphone (allowing the use of hands free through the cars speakers) and an IPOD cable which will control my ipod through the touch screen as if you were controlling the IPOD (the iPod is safely tucked in the glove box)
Superb bit of kit and looks the part when it’s installed – I wanted that OEM look and a unit to fill the space in the centre unit and the pioneer does just that.


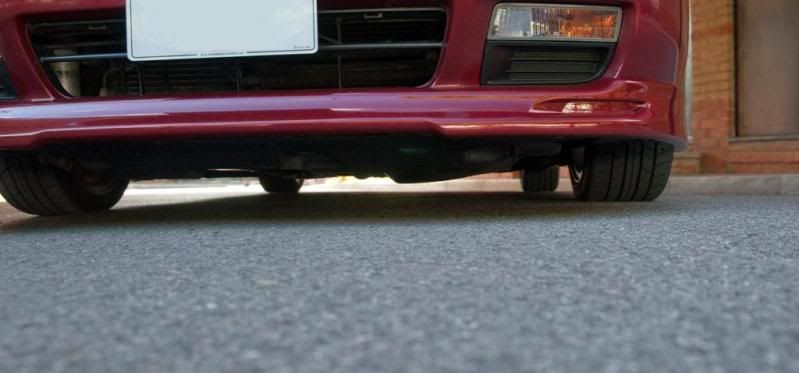
With the audio side of things done I wanted to get the motegi lip kit, generally known as a very hard kit to find I searched the forums and ebay until one evening one popped up on ebay and with no hesitation I emailed the guy. Many email correspondences followed and a deal being struck at the end of it. Very excited at this point he even offered to deliver it for £40 being from Bristol.
When I took ownership of the kit it was originally painted in light skyblue and needed a respray to match my colour. The missus knew a friend of a friend who used to do car body repairs and he agreed to paint the kit for me as he now does it in his spare time. I gave him £200 for the work which I thought was a reasonable amount. The finish was stunning.
Complete with all the fixings (well almost all of them, a few missing underneath the side skirt) I installed in taking up one Saturday afternoon bright sunshine which then turned to heavy showers.
(with the rear bumper off I plodded on in the pouring rain)
By this time the motegi kit installed and I was really pleased with the result
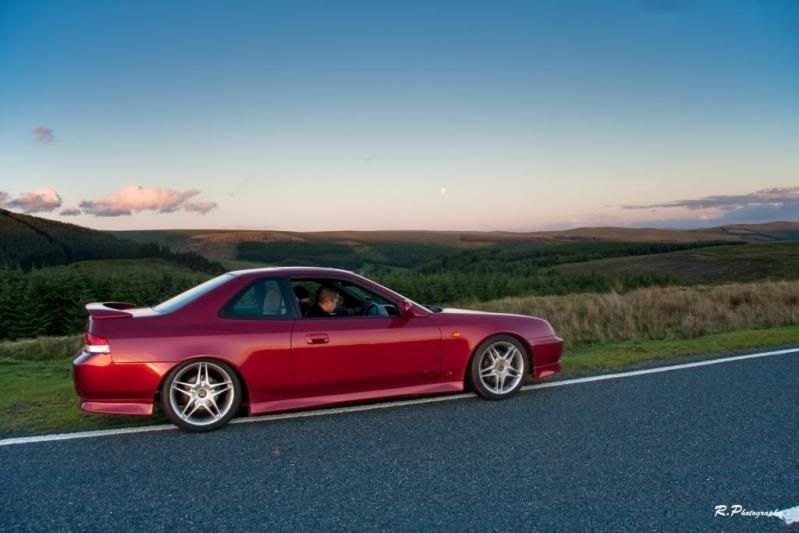
With the motegi kit finally done I really wanted to get the car lowered – Having previously had eibach springs on my 2000 EK coupe and having known how good they are I was tempted at buying a set of these. I really wanted a comfortable ride whilst having a low car. Retaining the comfort is extremely difficult to find in a suspension kit.
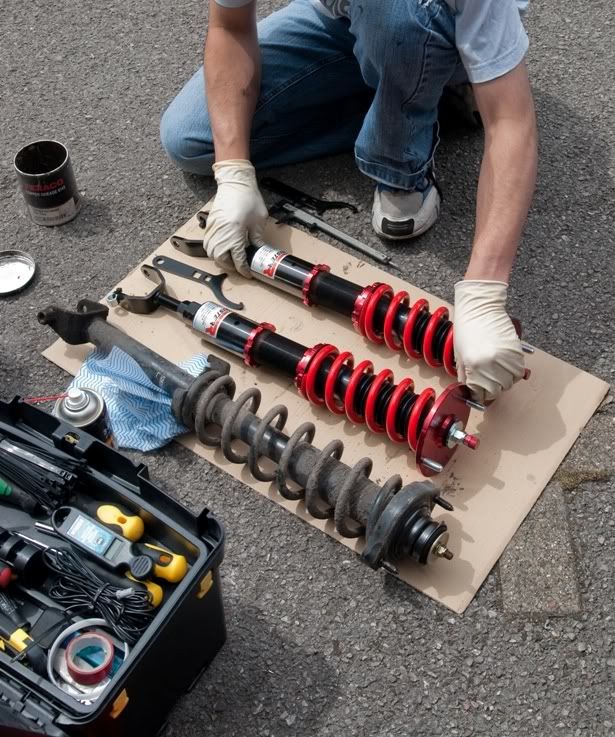
Just the other week my brother purchased a set of MIESTER R suspension, and once I felt the ride and handling of these I was sold. I saw Jerrick (owner of MIESTER R) a few times at Jap show, JAE and a couple of other meets in Ace Café and asked for advice and tech talk about these. He eventually gave me a good price on the ZETA S model of the miester R coilover set. With not being as popular as the civic the prelude miester R kit was a lot more but he gave me a good discount and free delivery too.
The bolts on the prelude came loose pretty nicely and with no stubborn seized ones that I was expecting. With the help of my brother the old suspension was off and the new set was in with around 5 hours taking our time and copper greasing all threads and bolts so they can be easily removed or adjusted at a later date if required.
The suspension provides superb adjustability and a comfortable ride even at the height shown in the pictures.
Very pleased with the results.


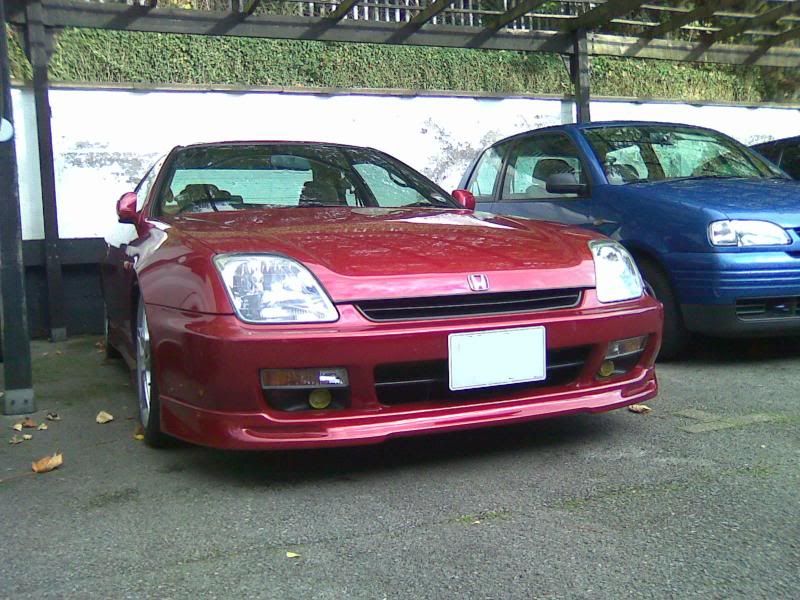
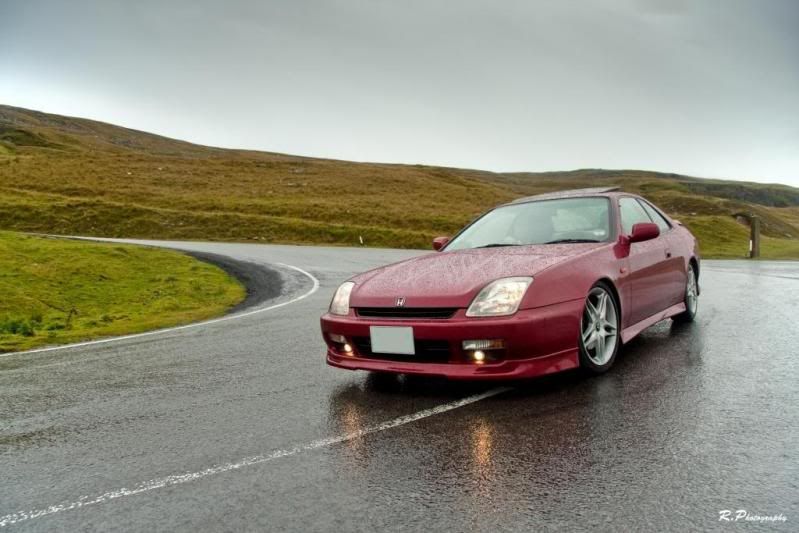
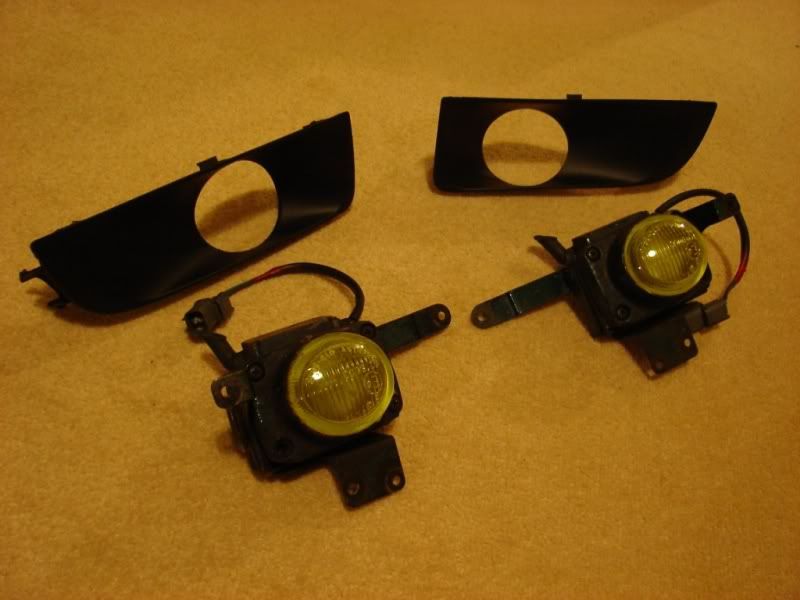
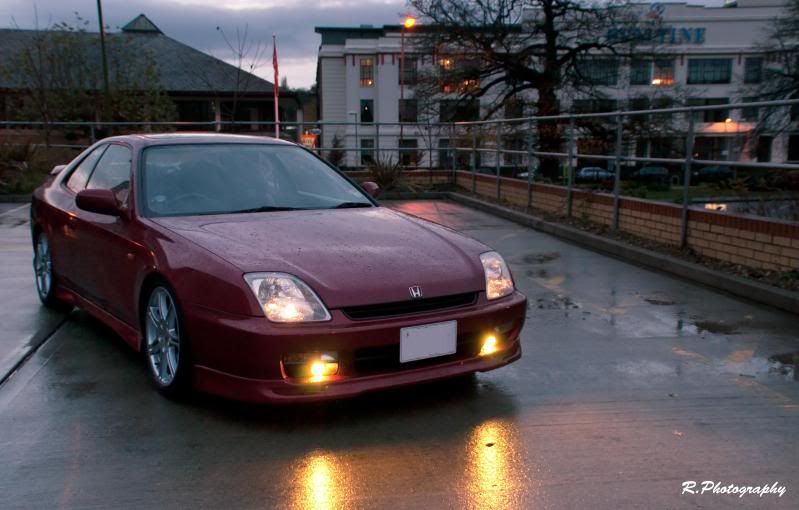
The urge to upgrade kept on coming. I really wanted a set of fog lamps and whilst browsing ebay I came across a set of UK type OEM fog lights. All complete with ukdm switch and oem wiring harness – I thought id snap them up as they are quite rare. Being OEM and original Stanley I felt it was a good choice being plug and play with no messing around with cutting wires etc.
(I originally was thinking of buying a set from America - bar type foglights but I thought being after market the wiring would be cheap, a hassle to wire up and there would be a risk of poor quality connectors and wiring resulting in cables melting due to the large current that fog lights draw)
Fitted with freshly sprayed fog light housing in matt black
At this point me, the missus and my brother (in his B16’d EG coupe) decided to go on a road trip to the south of Wales (Brecon beacons) to discover the superb roads and of course see the sights too.
Roads were stunning and the prelude handles so well taking the mountain route with ease. It gave me confidence to push the car around the mountain route. The only factor that let the prelude down I think were the brakes although this side of things can be upgraded at a later date. Overall a brilliant road trip and a place where I would love to take the prelude again.
We also visited the Brecon mountain railway and discovered WATERFALL walk in the brecons
The A4059 was the highlight of the troad trip and highly recommended mountain roads


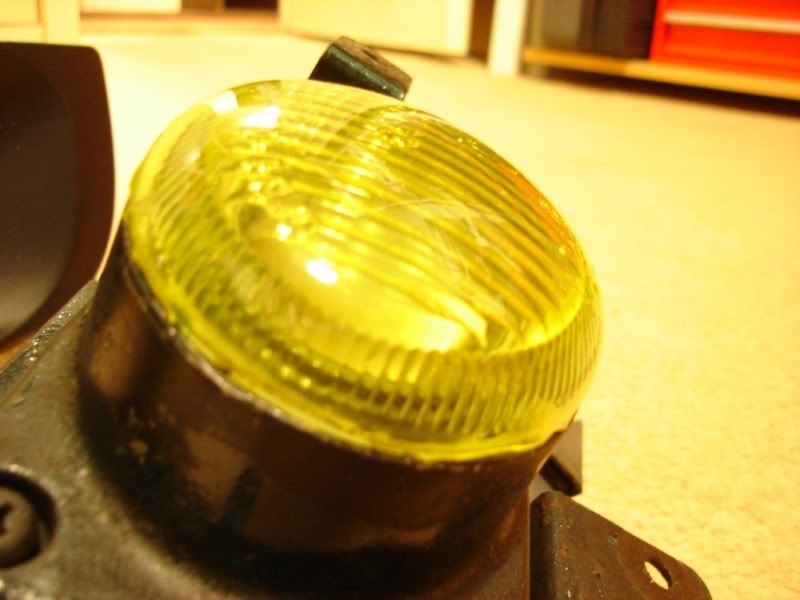
With the summer drawing to a close I thought I wanted a few more bits doing to the car, I really wanted yellow foglights and after buying a set of UK OEM spot lamps I decided to buy some yellow film from LAMIN-X
It was very difficult but I managed to apply the film to the curved surface using a heat gun – the results aren’t too bad and I’ am pretty happy with it.
Quickly installed last weekend before it started to pour down with rain
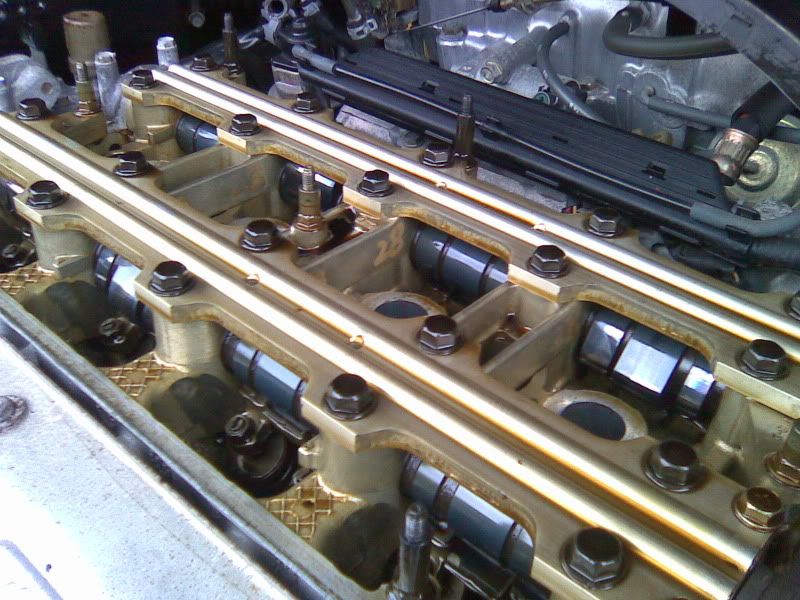
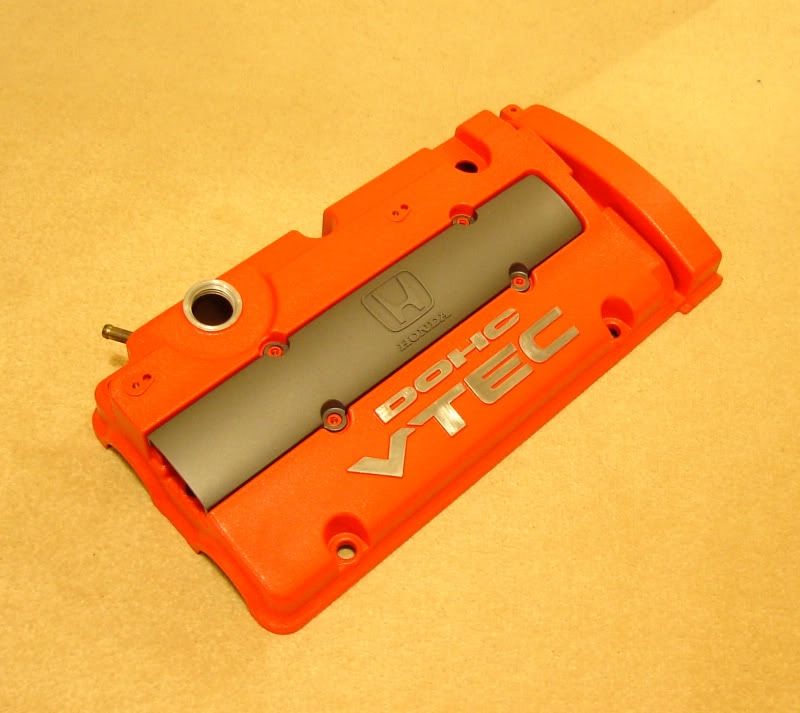
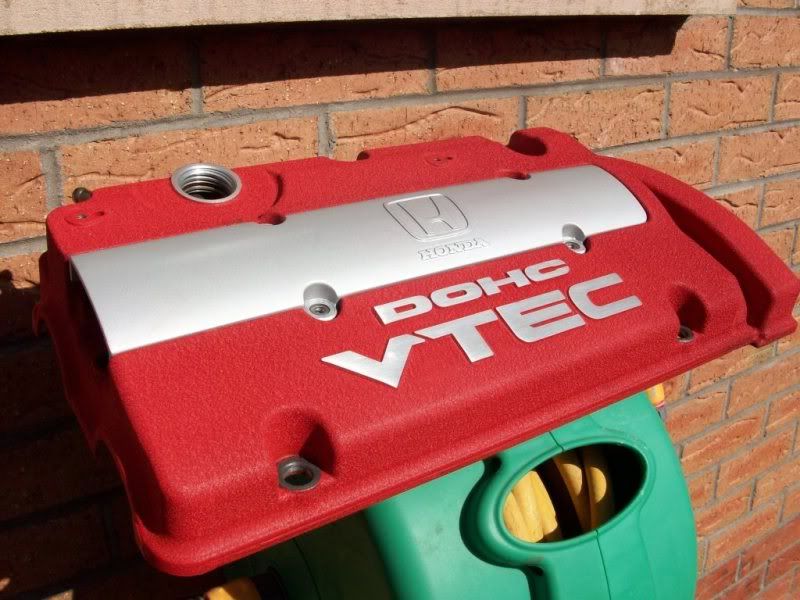
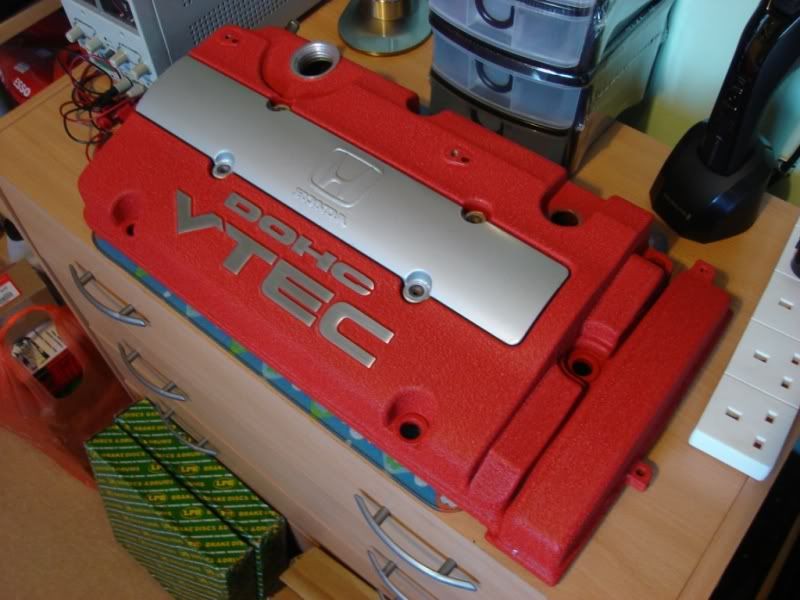
I also wanted to refurb my rocker cover as the current one is flaking, I was tempted to just buy a ready refurbed one but my brother offered to do the work for me. I took up his offer and gave him the cover to work on. A couple of weeks later the finished article – but with the weather being wet and cold the finish didn’t come out as matt as I would have liked and the wrinkle finish was rather poor but for a first attempt my brother has done well.
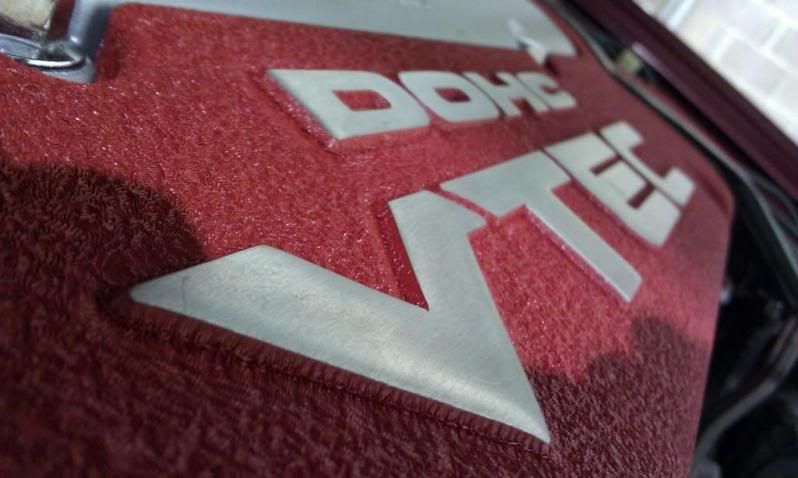
I finished the rocker cover off by scrapping and gently peeling the paint of the VTEC and DOHC, I have yet to install the cover yet
The DOHC and VTEC signs still need to be polished further
A few pictures of when the rocker cover first came off and with the rocker cover completed. All gaskets were intact and all parts seem in very good condition. The cams and valve train condition really shows that the engine has covered such low mileage


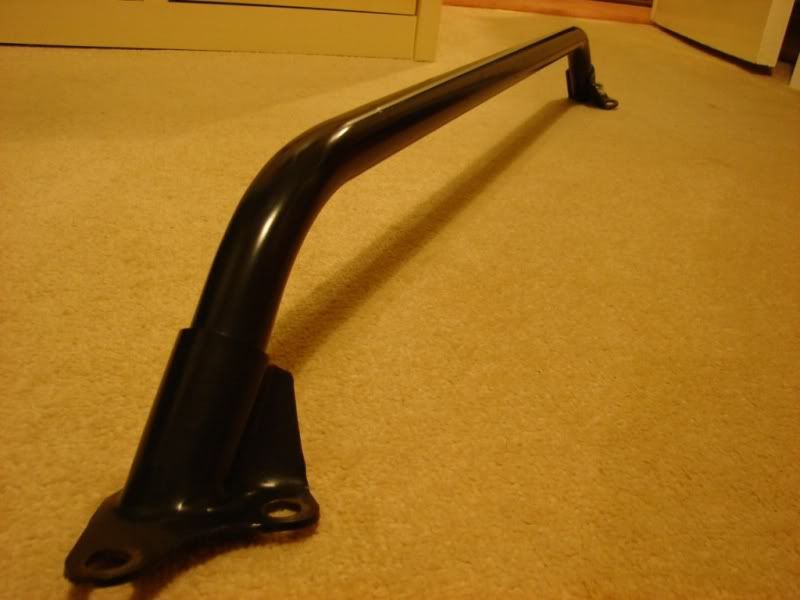
Another recent purchase was an OEM strut bar from a JDM prelude – Thanks to JKK on the forum who gave me a good price – cheers dude!
Yet to be installed due to very busy weekend at the moment
This brings it up to date. There are just a few more things I want to do to the prelude, these include:
-EP3 Type R wheels (not having much luck finding a set at the moment)
-Under seal the chassis (may have to wait until next summer now)
-Increase the ride height 5mm to enable ease of driving in my area
-DC5 or EP3 steering wheel (if budget allows)
I think it would have to be left there as being a home owner very soon and wedding plans are very expensive. But I am glad I have managed to get to where I am now in such a short period of time and just in time before the mortgage all gets approved. I shall keep everyone posted!
Originally posted on Sunday December 5th 2010
Just a quick update
I have finally sold the tyres and motegi wheels today so I thought I’d post up some recent pictures of how the car stands at present.
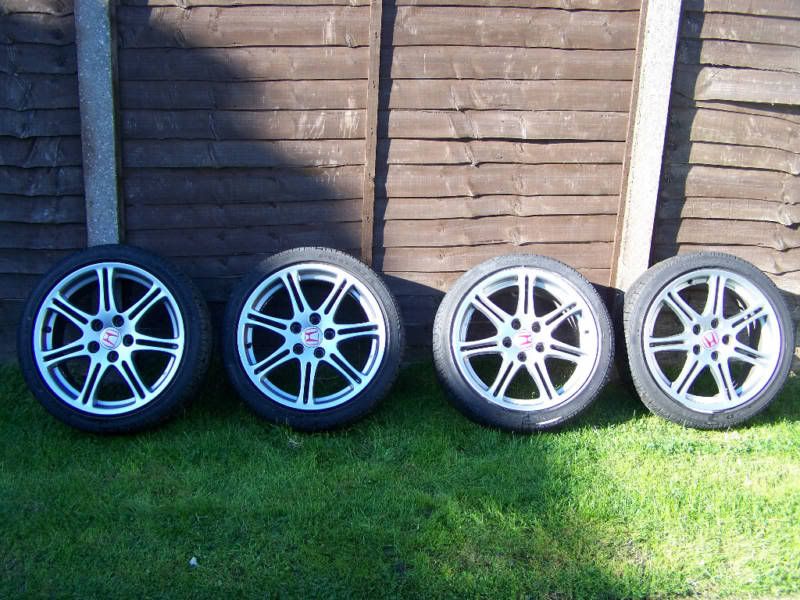
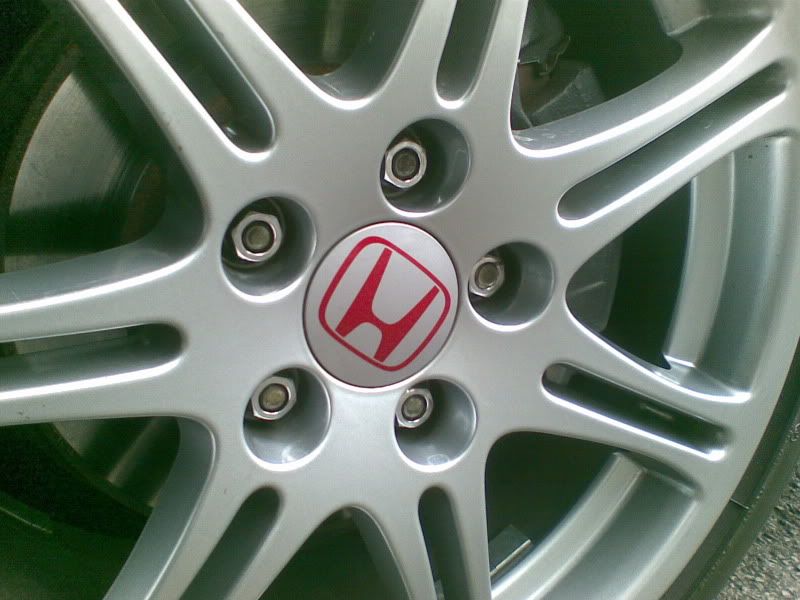
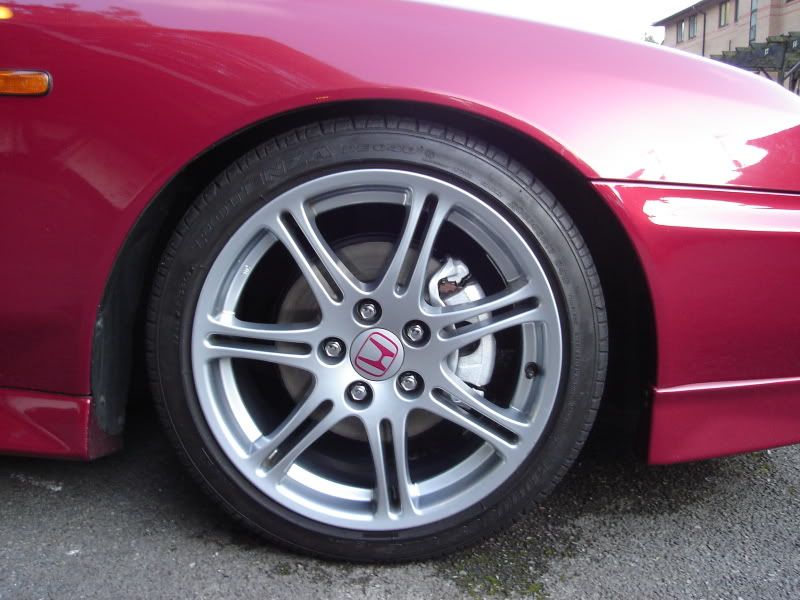
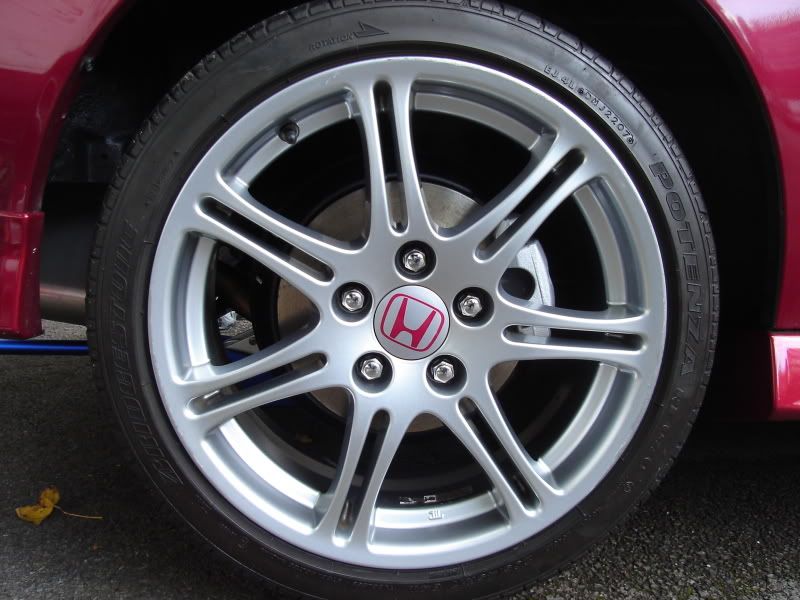
I managed to get some EP3 type r wheels about a month ago and finally installed them before the snow fell around 3 weeks ago.
I really wanted to keep the original motegi wheels but due to my flat not having much storage space they had to go.
What has been done:
- My brand new Bridgestone tyres swapped over from the motegis to the EP3 wheels
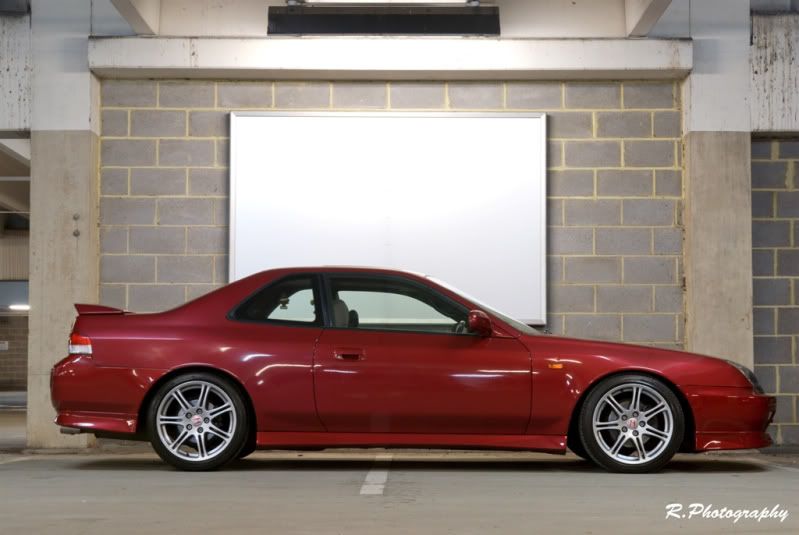
- Suspension height increased by 7mm (and by two clicks softer)
- EP3 wheels polished on the inside and installed with original Honda locking nuts
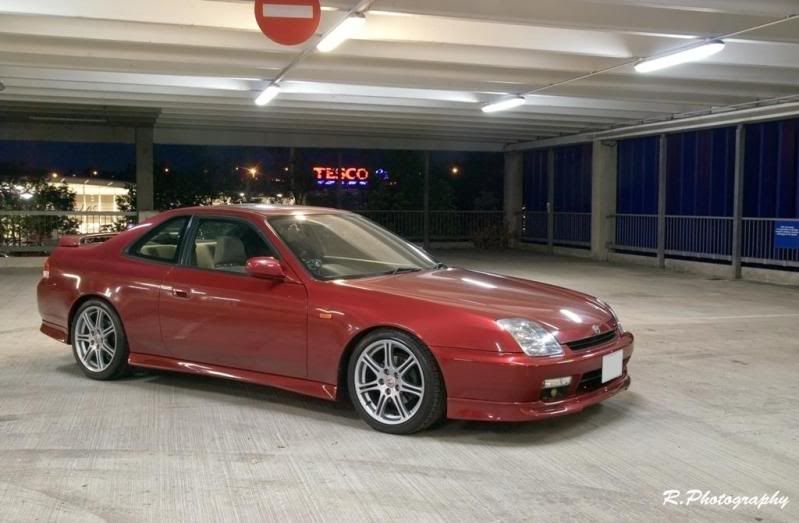
Here is how she stands at the moment

I am looking to do a few things if I can find them
- S2000 or DC5 / EP3 steering wheel
- Purchase new rear callipers and bleed/refill brake fluid
Thanks guys!
Originall posted on Monday March 7th 2011
Hi All
Just a quick update on the progress of the prelude (07-03-11)
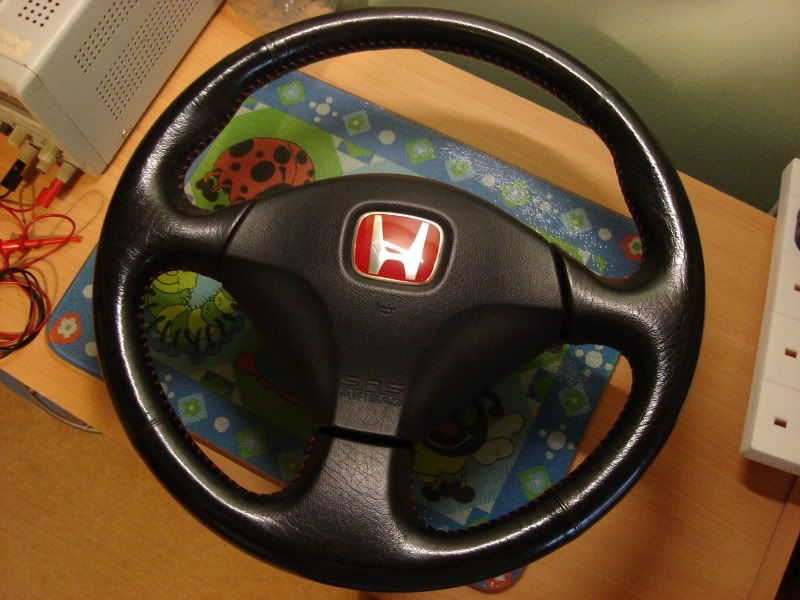
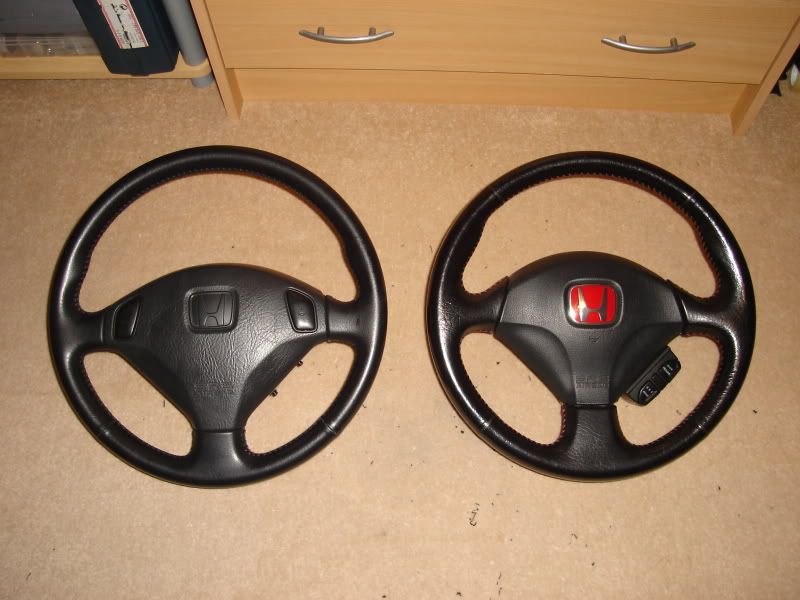
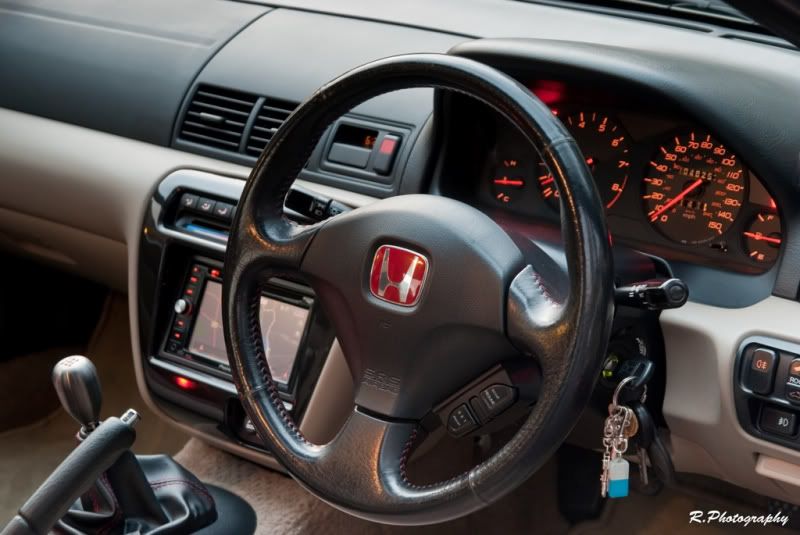
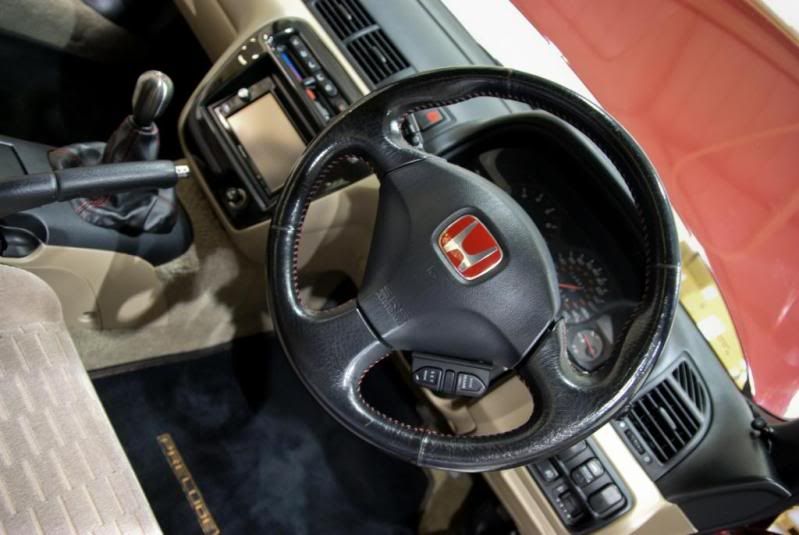
One of the items I wanted to upgrade on the prelude was the steering wheel. I wanted to keep the wheel as OEM as possible so it would either have to be an S2000 AP1 wheel or an EP3/DC5 wheel. I almost purchased an S2000 AP1 wheel from the civic life website but the seller became very quiet and didn’t return any of my emails/ PM’s so the search continued. After a lot of searching approx 4 months later an EP3 one came up. So I decided to go with an EP3 wheel. Knowing from the forum that it would be a direct fit the cruise controls was a question mark. I really wanted to retain the cruise control features so I went about into trying to retro-fit the controls to the steering itself.
The steering wheel was purchased from a breakers yard from a crashed EP3 and most of the communications were done over Ebay. The wheel was in very good condition and was very pleased with the result. Having searched high and low for an EP3 wheel most of them were either badly damaged or badly worn.
I firstly went about creating the notch for the 4WS sensor using a dremel tool and finished it in around 15 mins making minor tweaks comparing it to the stock wheel.

Then I started to retro-fit the cruise control unit to the side of the steering wheel, there were faint markings on the side which matched the housing of the cruise control unit to I used this as a guide. I made the necessary holes for the cruise control to be securely attached.
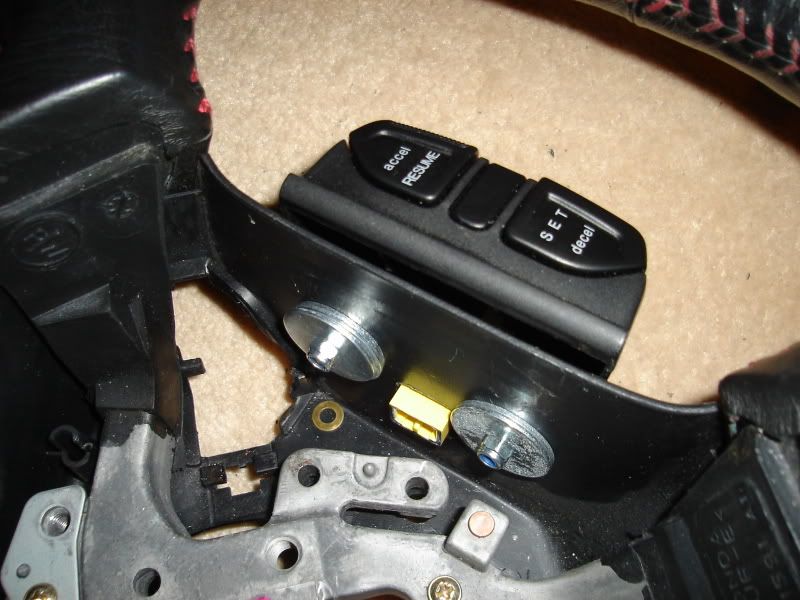
With everything going really well, the OEM stock wheel came off really easily and with the airbag and horn all connected up with no problems. I was really pleased with the result. A well recommended upgrade to any prelude. It now feels so much nicer to drive providing a smaller radius and better grip, the cruise controls buttons look like they were part of the EP3 wheel and very sturdy and secure.

After having completed the steering wheel upgrade I then thought about what I wanted to do next. Having installed an import plate up front the back end looked rather odd having a UK plate. I didn’t like the way the back end looked with a UK plate so I went about looking for a JDM rear bumper. I came across a guy breaking his JDM prelude on the forum but I think spoon_civic got there before me. Then Spoon_civic pulled out due to logistics reasons and I snapped up the deal being only in Enfield it was a quick pickup from my parents place.
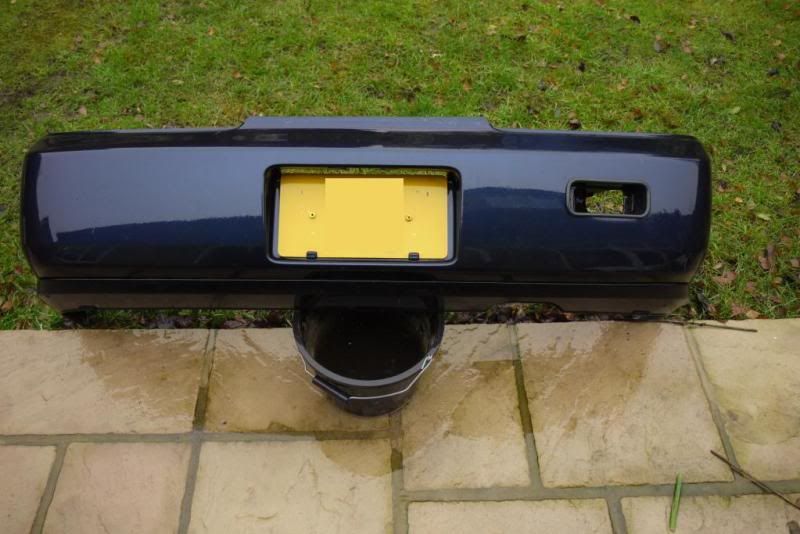
An import plate was purchased for around £8.00 posted and was a perfect fit
The rear fog light on the jdm bumper was already installed in the UK position rather annoyed about that but it does save me the hassle of drilling in a new position and purchasing another lamp so its not to bad I guess, it was installed near perfect and it was basically plug and play.
I then went to the same guy whom painted my motegi skirts, his lead time was around 3 days so it was ready by the following weekend. Due to bad whether on the weekends that followed it delayed me installing the bumper.
Finally at the end of January the whether cleared and I was able to install it.
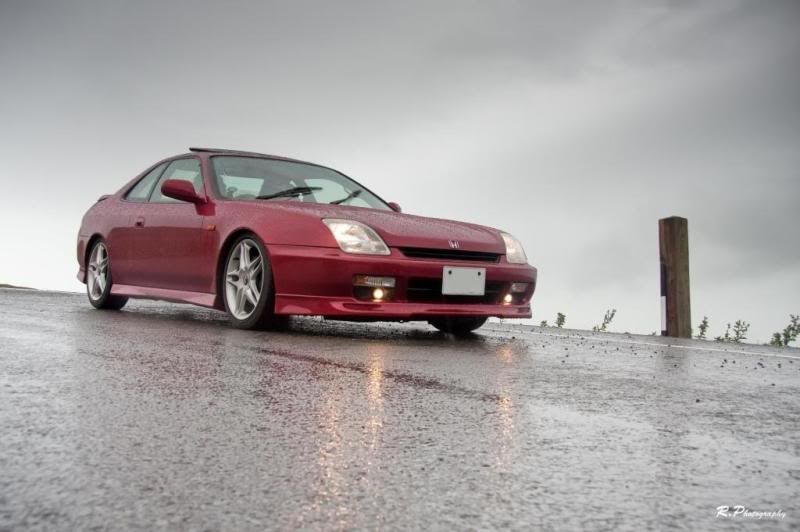
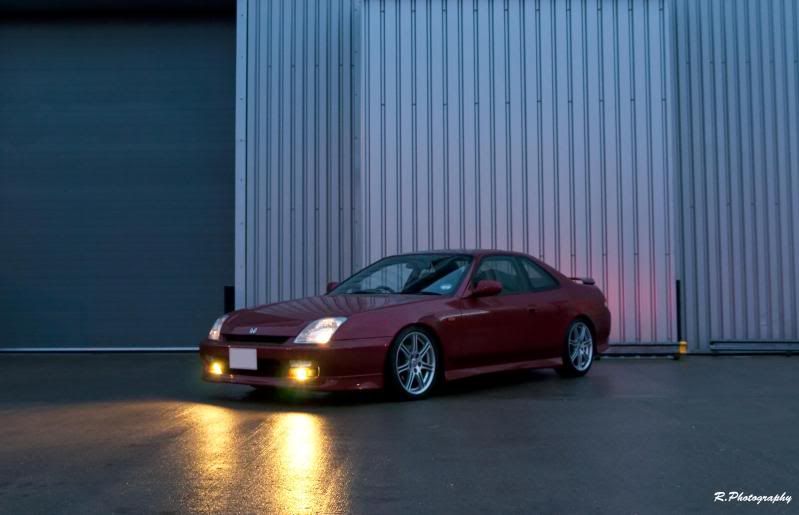
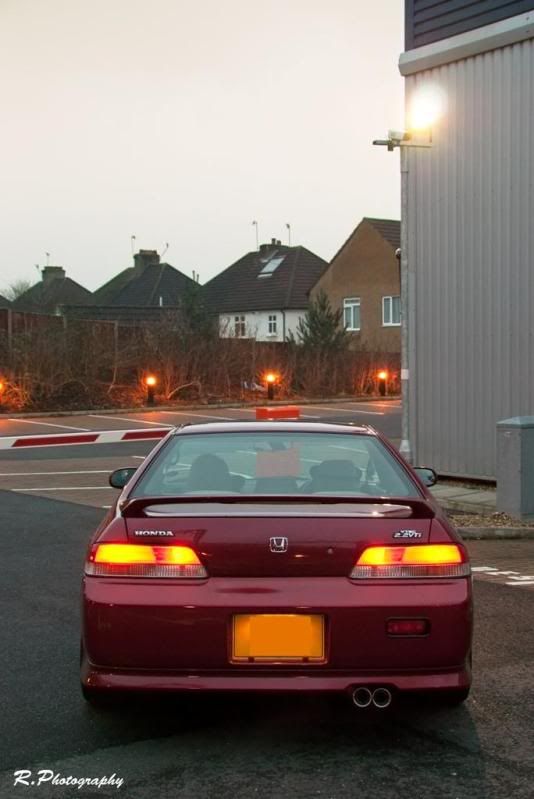
Just a couple weeks ago I managed to have a photoshoot with my brother and here are the results.

My next upgrades should be as follows:
- Red Stitched EK9 gaitor (OEM) (already ordered)
- Skunk2 Gearknob (already ordered)
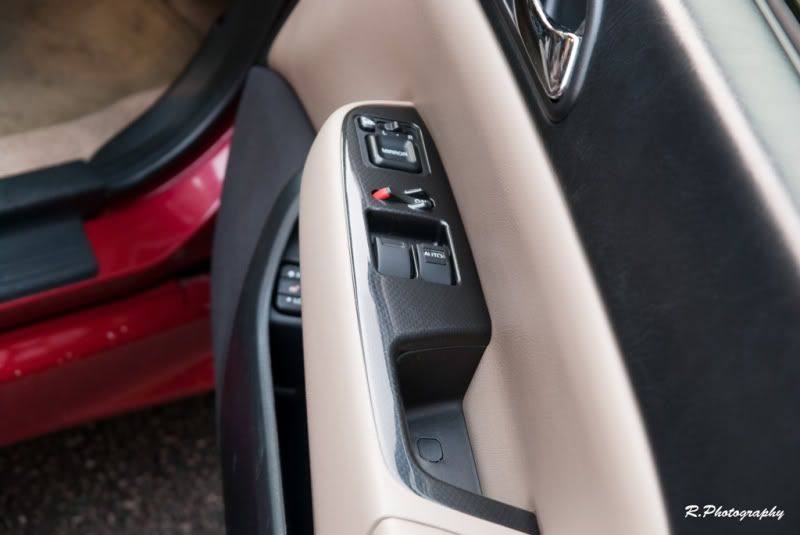
- Carbon Console and window switch fascias (if I can find them)
- Undersealing in the summer
- New rear Calipers
- Front and Rear OEM Honda Brake Discs
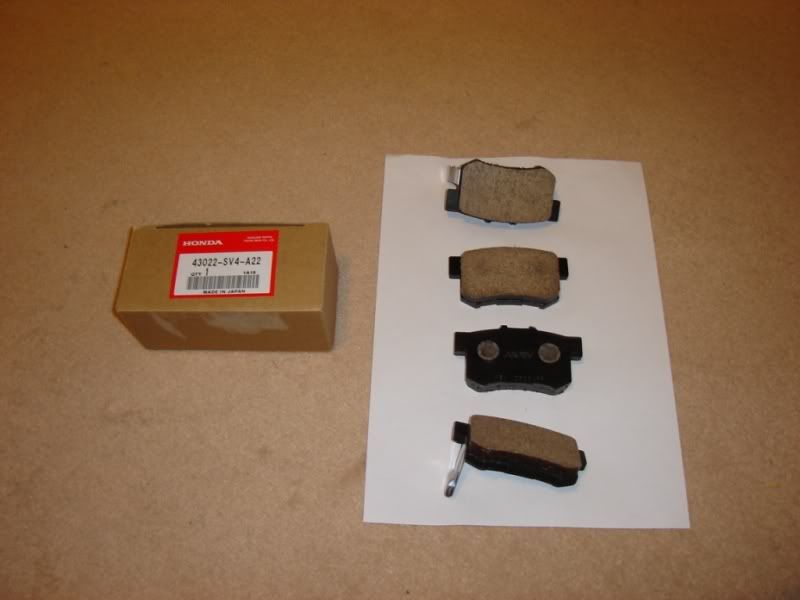
- Honda OEM rear Brake Pads
- DS2500 or Hawks HP+ front brake pads (still deciding)
- New brake fluid (Honda OEM or Castrol)
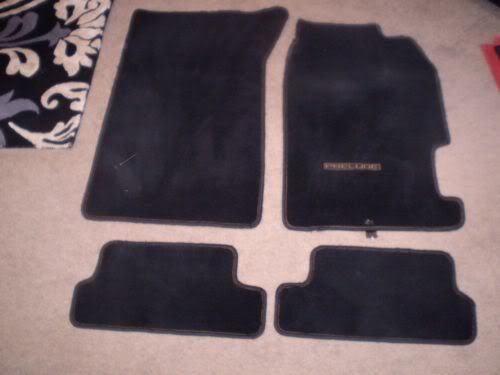
- Maybe OEM black mats (but not important)
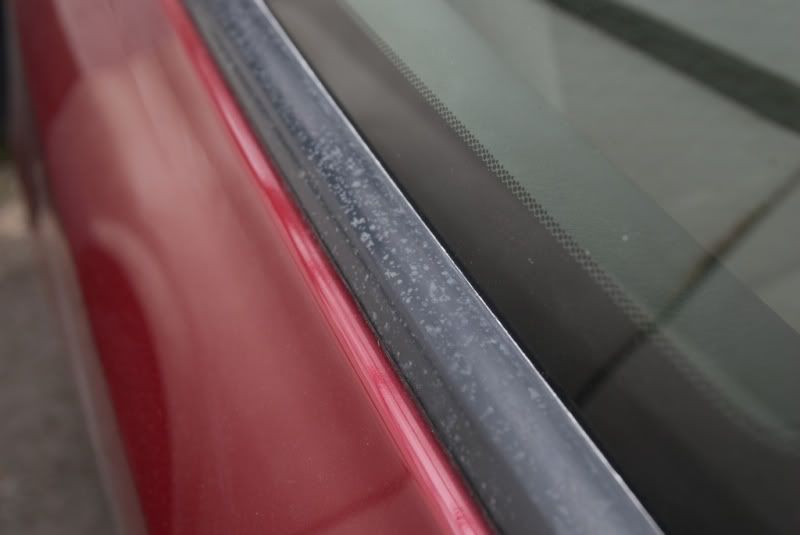
- Sand down and clean up rear quarter window seals
(currently mouldy - common problem)
The brakes are ok at the moment but I really want to completely overhaul the braking system which will probably be my biggest expense on the car.
Thanks guys, Comments welcome
Originally posted on Saturday March 12th 2011
Hi All
Thought I would give a little update. I have added a few additions to the prelude and thought I would post up a few more photos of my progress.
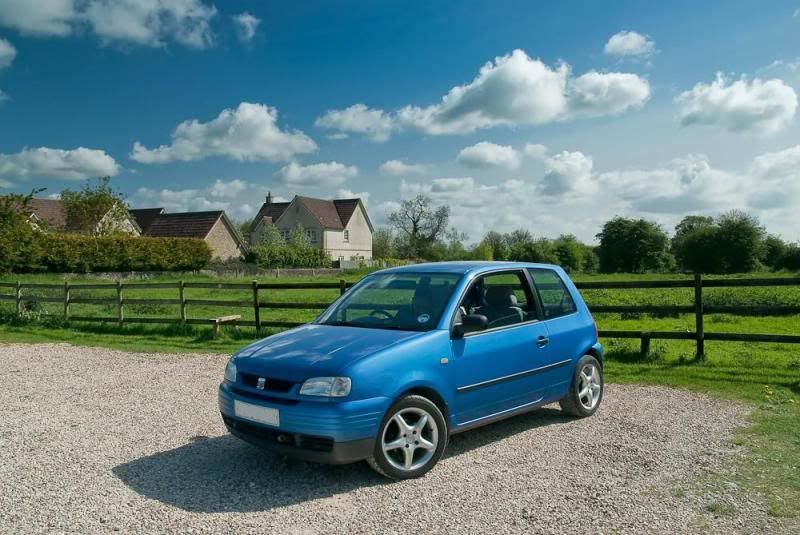
I have also purchased my runabout for work and managed to sell my Honda Civic Coupe. It was really sad letting her go after 7 years or ownership.
The aim for this car was cheap cheap cheap. In order for me to own the prelude as well this car had to be cheap to insure, cheap to run and cheap to repair and if it did get stolen or hit by anyone it would be a great loss.
I decided to go for the Seat Arosa. I really wanted to get another Honda but funds wouldn’t allow.
It can do 600 miles on its full tank (35 litres) and only costs £220 to insure. Terrible to drive though but so worth it just to own a prelude.
Anyways back to the Prelude
It’s nearing its completion now and it seems I have only the brake overhaul left to do
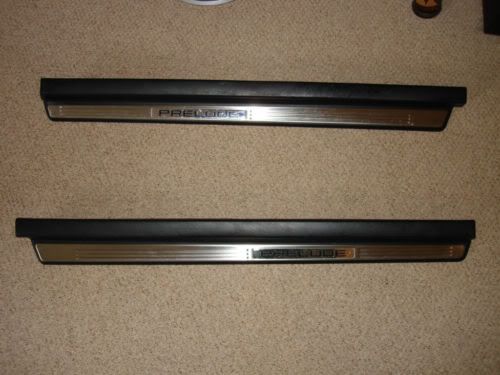
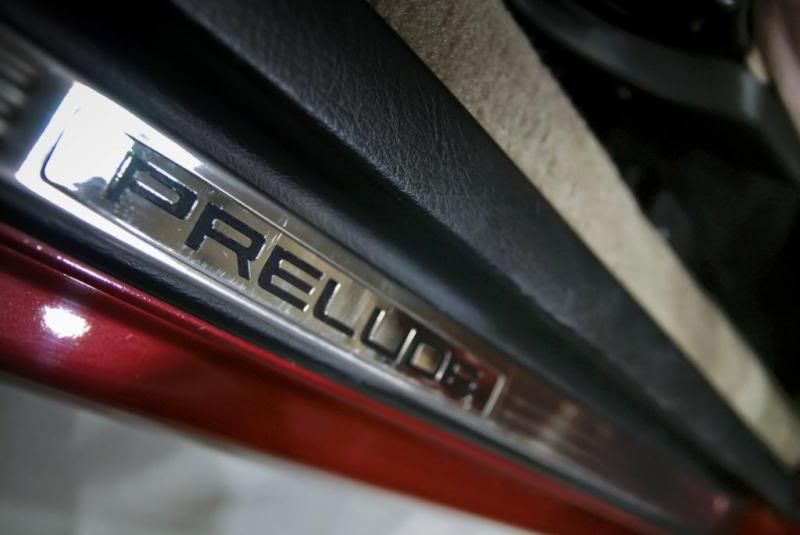
(and maybe a few more accessory upgrades like that uber rare scuff plates)
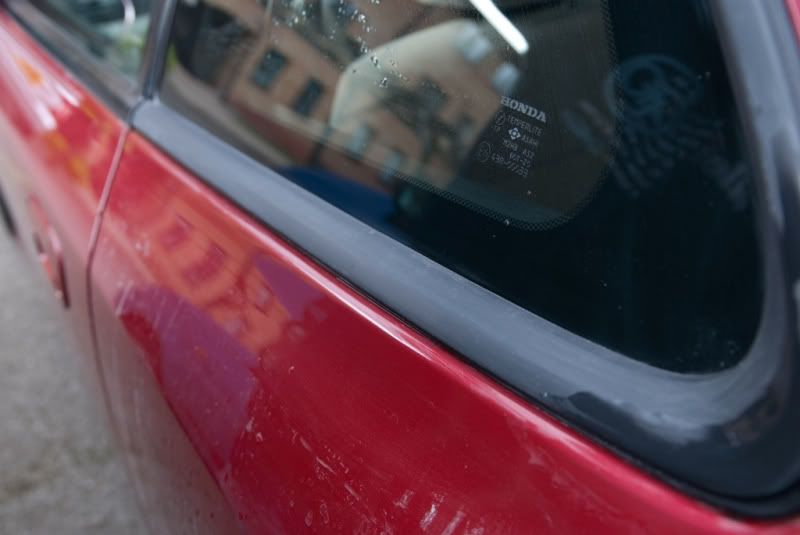
First thing was first, I needed to clean up the mouldy window trims which were present when I got the car and it didn’t look good at all. Caused by sun damage it seemed that the previous owner neglected the car somewhat.
With help and advice from the guys on the forums I thought the best way was to use fine wet and dry paper. Other suggestions were to sand it down and paint it but my spray painting and masking skills aren’t up to scratch and it would be difficult to use spray paint round my flats car park
I used a fine grade of 1600 wet and dry and after 3 hours I moved to an 1800 grade. Lots of sanding resulted in a cleaner look. Not perfect but so much better than the mould.
Before
After
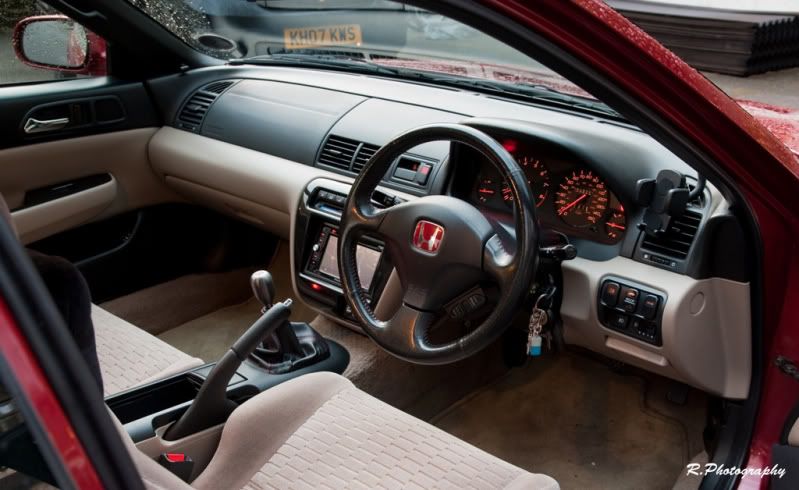
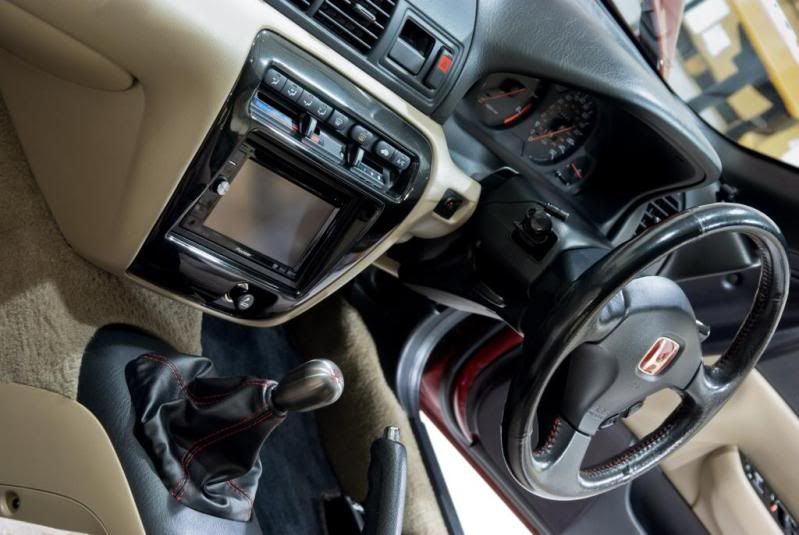
After searching high and low for around 6 months I managed to track down a set of carbon console interior inserts. These consisted of the centre console and both window switches. The set was in pretty much mint condition and I was very happy with the purchase. A few guys mentioned about carbon wrapping but it didn’t look the same and I wanted everything genuine Honda and OEM
With the help of forum members and that service manual I removed the door card and managed to change over the inserts. They are very nicely installed but I managed not to break any clips. The door card came out wonderfully (brilliant Honda quality) unlike some other manufacturers.
I really wanted to upgrade the gaiter to a red stitched version so I snapped up an ITR one on ebay and fitted it along with a skunk2 gear knob. Very nicely weighted and a lovely gear shift feel.
Initially I wanted a type S red stitch gear knob but none were available in mint condition.
Both fitted with ease although some of the staples broke while fitting the new red stitched gaiter but it wasn’t really an issue.
I think the final touches for the interior is a set of OEM mint black mats to complement and add contrast to the black half of the dash board and also provide ease of cleaning. The crème mats get dirty very quickly. Also I would love a set of those scuff plates but as and when they do pop up I will grab them.
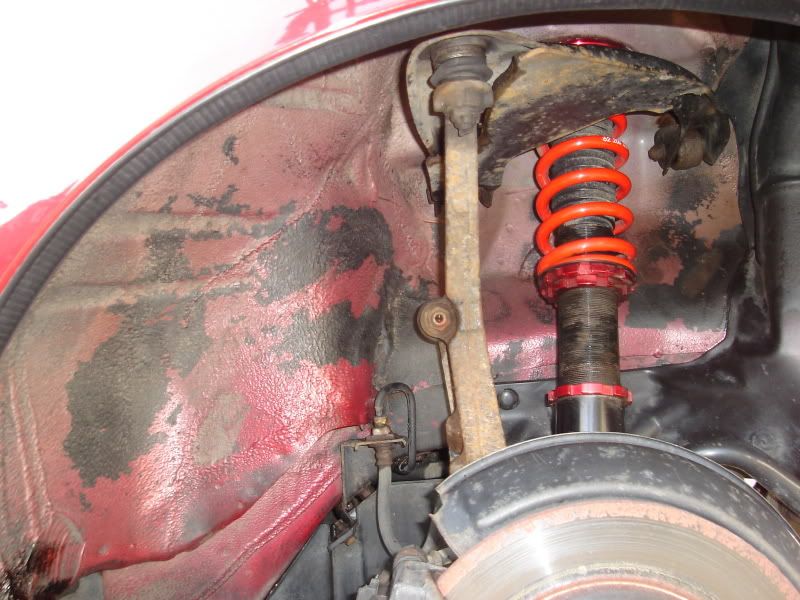
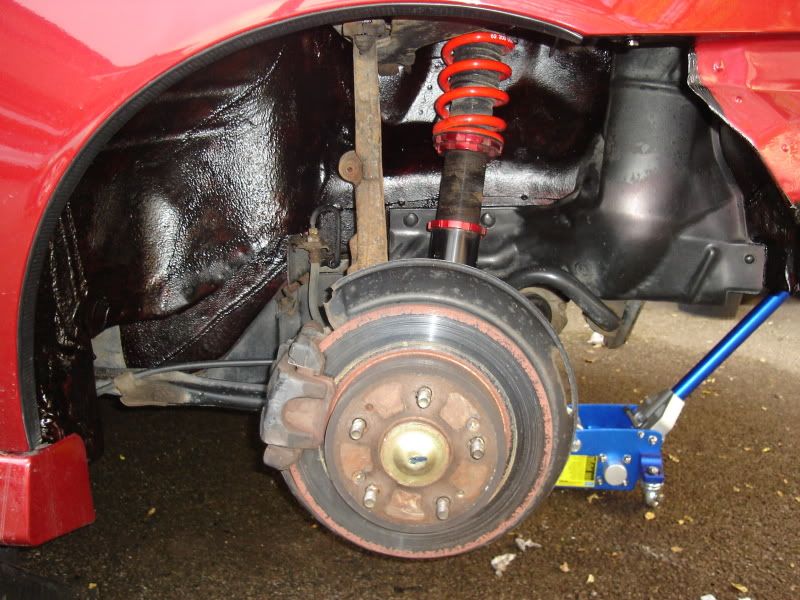
The next stage I had in mind was to try and under seal the chassis and arches. Knowing it won’t be easy I waited for a lovely hot day and set to work
Firstly I had to ensure the areas in which under seal was to be applied were clean so I scrubbed most of the dirt and grime away using simple fairly liquid and water. My portable battery mobi v17 jetwash came in handy and was perfect to get those hard to reach places.
The areas included all four arches and the rear boot underside. This meant the rear bumper had to come off for easy access. The rear was done first so I propped the car on my trolley jack (supported on both sides).

With the areas as clean as possible I set to work. Only 2 coats were needed as I didn’t want it to be too thick and the risk of it flaking off to easily
Rear Arches and lower boot well before

Rear Arches After (after first coat)
My hands really got in a mess with lots of under seal so I couldn’t touch the camera to take pics after the second coat
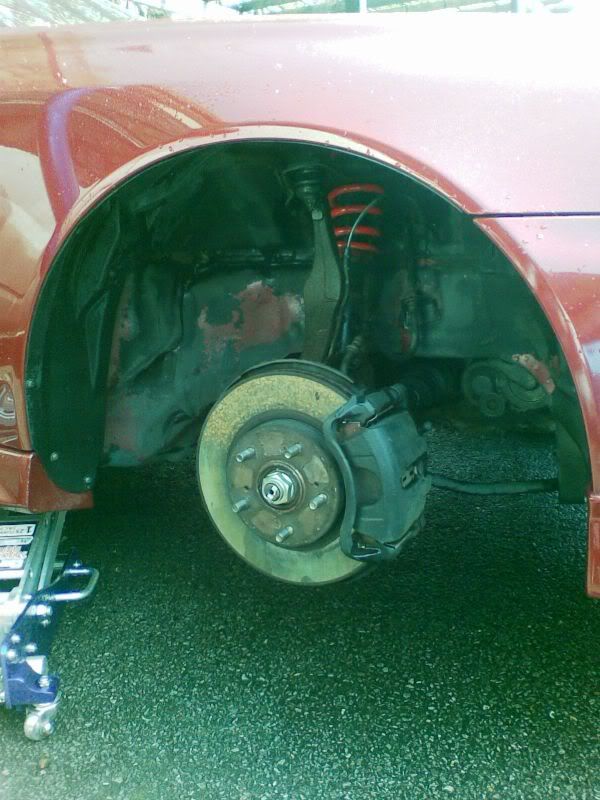
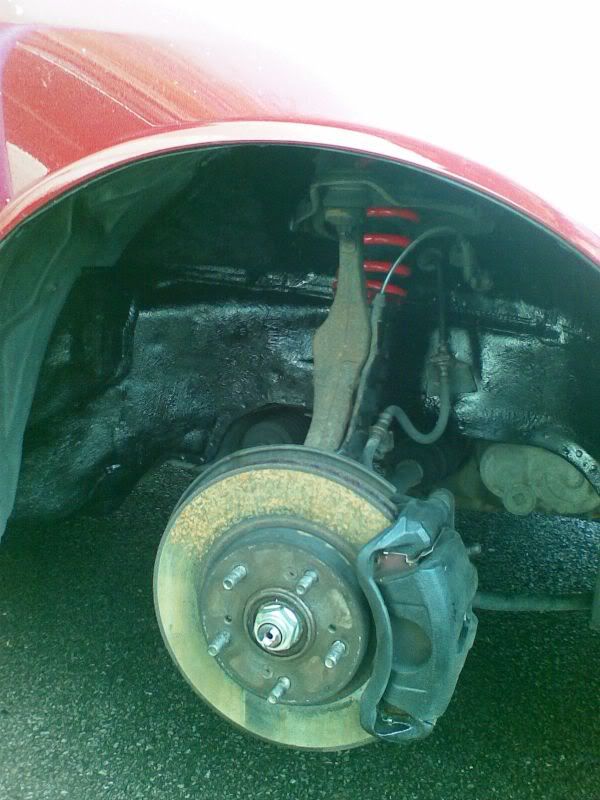
The fronts were done the following weekend
(Apologies for poor picture quality on this one I only had my phone camera on me at the time)
Front Arches before
Front Arches After
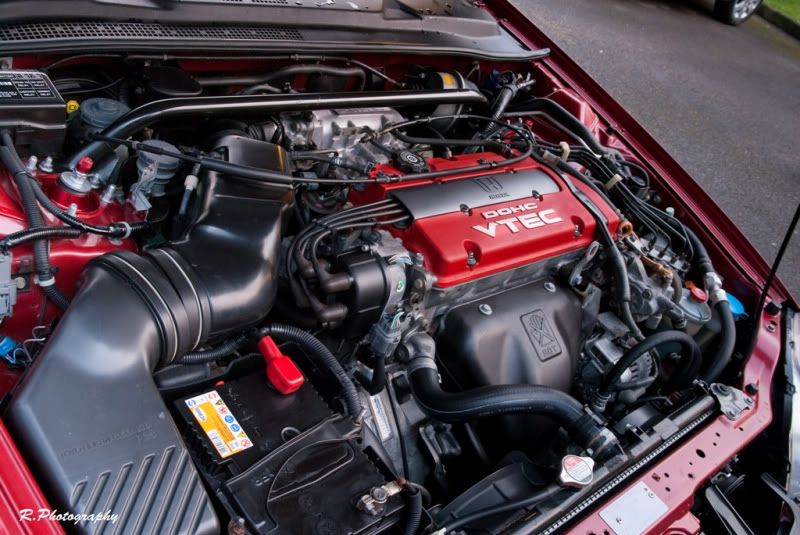
I have yet to complete the belly of the car due to lack of time but it will be done in due course.
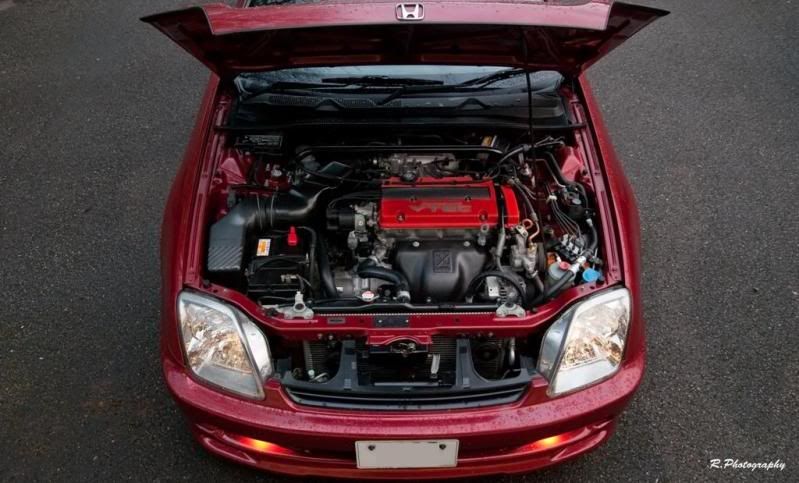
Here is an update shot of the engine bay and a shot I love looking down on the car
Future plans to date
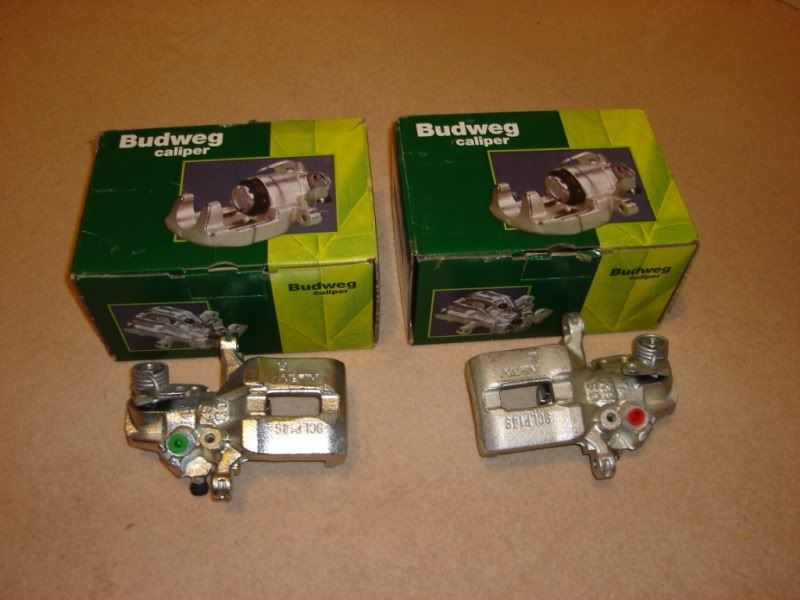
- 2 x new rear callipers
- Castrol React brake Fluid (3litres) already ordered
- Front Ds2500 brake pads
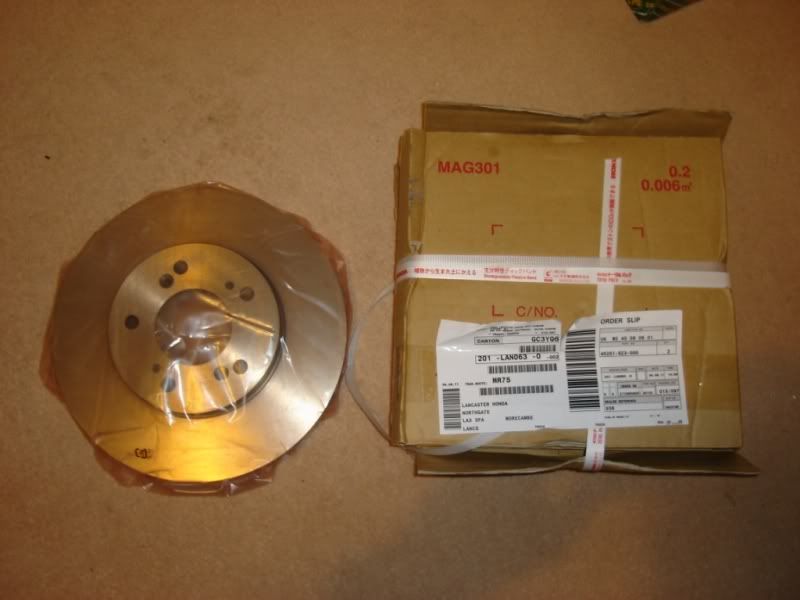
- Front OEM Honda discs
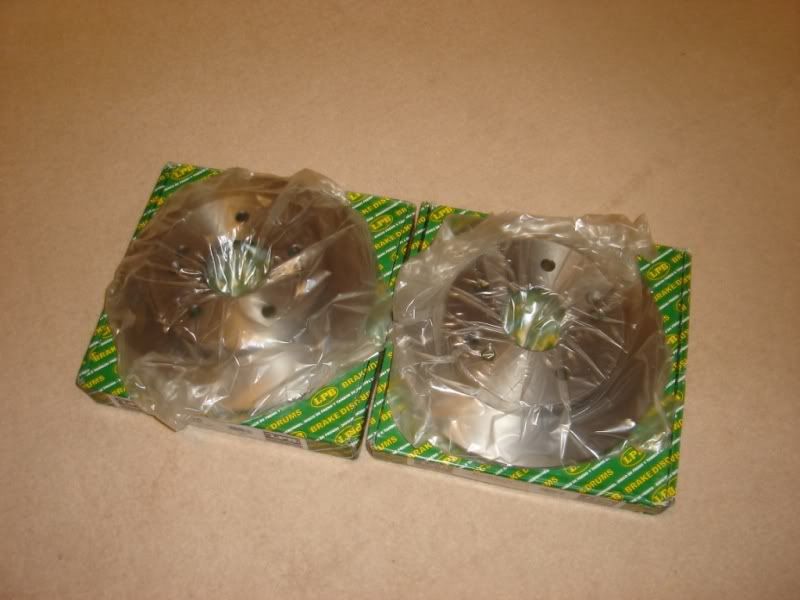
- Rear OEM equivalent discs (to save on costs)
- Rear OEM Honda pads
Items not essential but would like to purchase if I come across them
- Genuine OEM black mats (mint)
- Uber rare scuff door sill plates
- Maybe headlight protectors
Oil Service (due in August)
- Eneos 5w/40 Premium Hyper Oil
- Genuine OEM Honda Filter
- Genuine OEM air filter
- (Spark plugs are still ok they have only had 7000 mile use)
Thanks for looking guys
Originally posted on Saturday September 17th 2011
Hi All
It has been a while since I have updated my thread and from that time a lot has been going on.
Since my last update I have now got married and have a 2 bedroom flat. This meant that expenditure on the prelude will be minimal after the brake overhaul is complete.
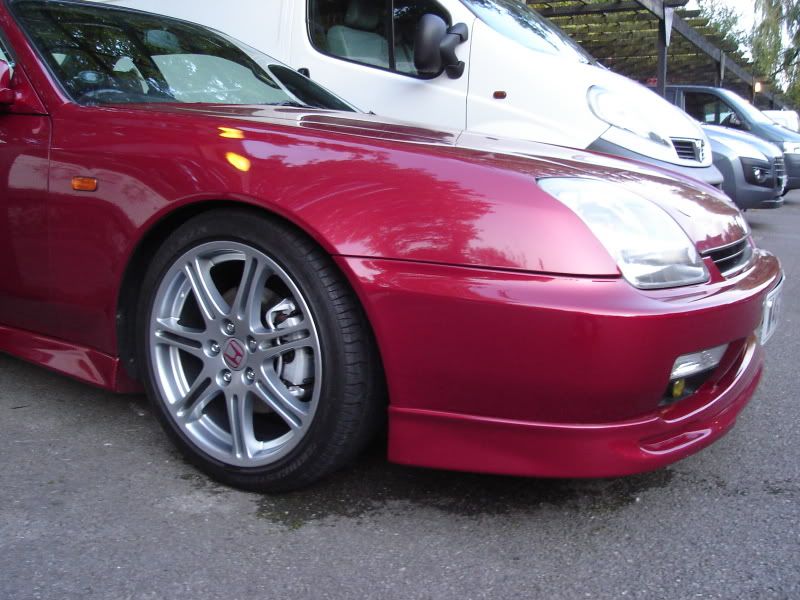
The week before I was due to get married someone in our flat’s car park scraped the front of my bumper. Most of you already know this due to posting up a separate thread.
I was really annoyed by this but luckily the guy left a note on my windshield saying he was sorry and to contact him.
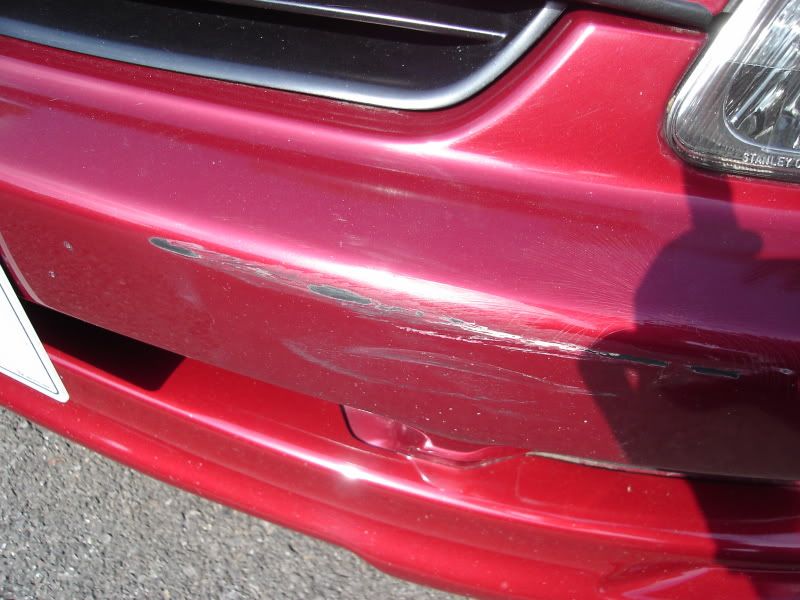
The guy was a nice bloke and offered to pay for the damages and accept all liability. He said he would like to go through his insurance. I said fair enough and luckily he was with the same insurance company as me so everything happened really fast.
The prelude was picked up the next day via admiral’s approved body repair specialists. The approved company was brilliant. Excellent communications via email and kept me up to date throughout the process.
Repair Company that the Insurance Used
http://www.5staraccidentrepair.co.uk/
It was a 2 day turn around and the car was delivered back to me in the evening.
The paint finish and result was excellent, it was understandable that they couldn’t match the 12 year old original paint finish but they blended it the best they could.
---------------------------------------------------------------------------------------------------------------
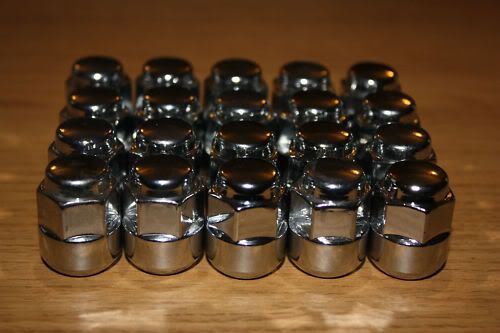
After this incident I decided to change over the wheel nuts. The original wheels were the motegi’s and after selling them a short while a go the EP3 wheels were using the original open ended style nuts.
I wanted to go for a closed end type of nut to suit the EP3 wheel better. So I purchased a set of 30mm height original OEM Honda nuts from ebay.
One Saturday afternoon they were installed
Before
After
Purchases
20 x original Honda wheel nuts
-------------------------------------------------------------------------------------------------------------------
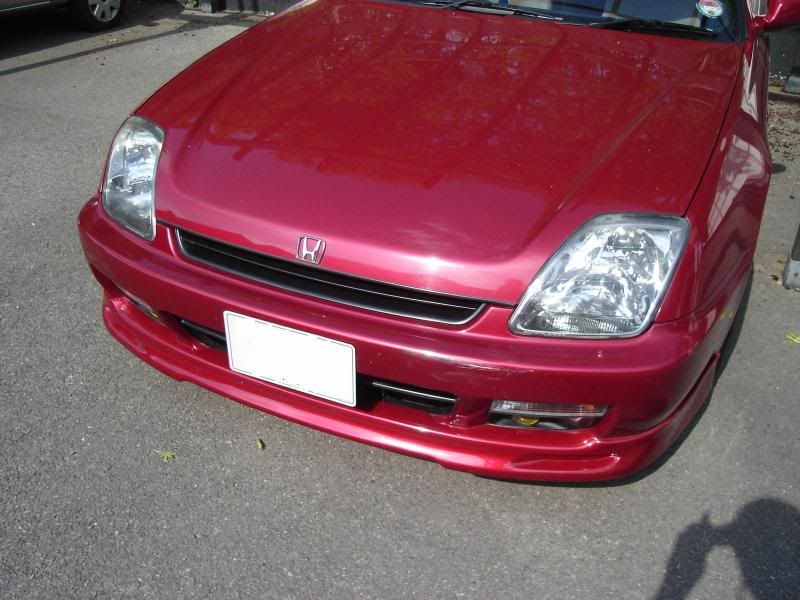
I then had a thought. After looking at the prelude the rear JDM bumper began to bug me. I had the rear bumper resprayed separately and I think that was my mistake as the colour difference really annoyed me. If the car was fully cleaned and polished the colour difference would show clearly.
So I decided to remove the JDM bumper and re-fit the original UK bumper. I fitted new UK number plates as I didn’t like the GB badged original ones.
(If anyone is interested in purchasing the JDM bumper – it is available (but pick up only I’ am afraid) (PM me for details)
Purchases
Front & Rear UK Registration plates (EBAY)
-------------------------------------------------------------------------------------------------------------------
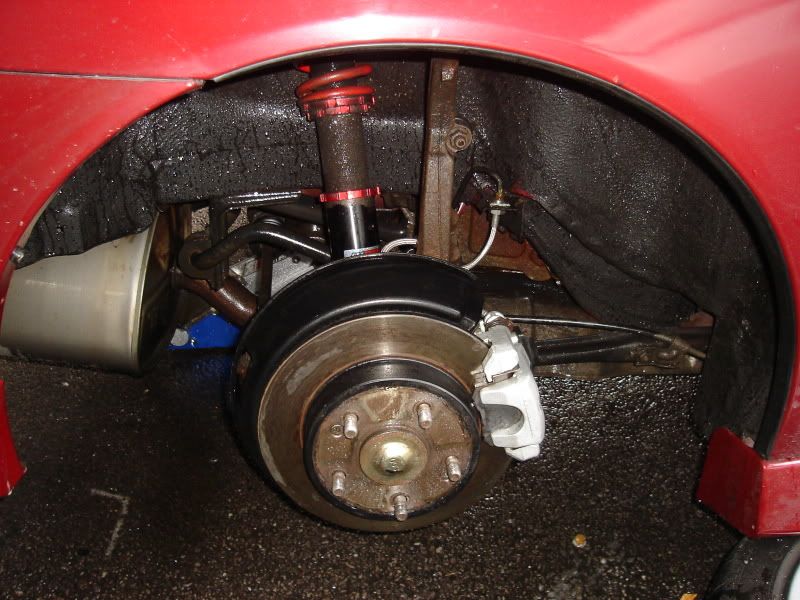
One of my last “to do’s” on my project and probably one of the most costly was to overhaul the braking system. The reason for this was mainly due to the rear callipers seizing and the rear discs and pads had seen better days.
The Overhaul consisted of:
Purchases
-Front OEM Honda brake discs (http://www.coxmotorparts.co.uk/)
-Rear OEM Equivalent brake discs (EBay item Number: 330387617331)
-Rear OEM Honda brake pads (http://www.coxmotorparts.co.uk/)
-Front DS2500 Ferrodo Brake Pads (http://www.vtecdirect.com)
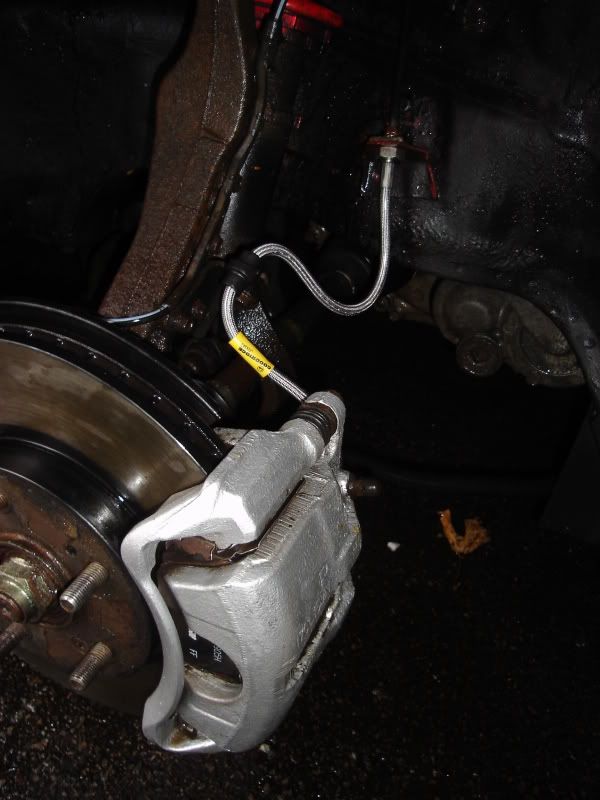
-New rear callipers (http://www.brakesint.co.uk/)
-Castrol React Dot4 brake fluid (http://www.opieoils.co.uk/)
---------------------------------------------------------------------------------------------------------------
A couple weeks after all the above purchases, events took a turn for the worse
(Most of you guys already know due to a separate thread)
The brake overhaul now had to wait
After booting it home from visiting my parents we came off the M25 and drove normally home and deciding suddenly to take a de-tour to Sainsbury’s to do the weekly shop. As soon as we pulled into the car park a loud rattle occurred.
Really scared I immediately stopped the car and parked up and had a look round the engine bay with nothing obvious exposing itself of what the problem could be.
Then I risked it and drove it slowly back home (only 5 minutes away) and parked it up.
I recorded a video of the engine noise and never started it up again.
Very hard to diagnose an engine sound via a video but I thought I would get some ideas and post it up. Various members said it could be bottom end knock or piston bearing that had given up or even a spun crack shaft bearing.
Quite worried at this point I started to email several Honda specialist to enquire about their services and costs on what they could do to help resolve my issue.
While that was occurring in the background I really wanted to find the cause of the issue so several members said to check the pulleys, belts, power steering belts & pump, exhaust manifold & heat shields and also to remove the rocker cover.
After checking all those points I finally removed the rocker cover and immediately found the problem.
The falling edge of the timing belt was really lose and I suspected the noise was the belt slapping against the plastic housing.
From reading up on H22 engines the auto tensioner (a device which automatically tensions the belt) is a common failure on these engines.
Apparently Honda never rectified the problem as the problems started appearing after 10 years from when the first H22 was made in 1991 and when production ended of the H22 in 2001 (correct me if I am wrong). I am not sure if the auto tensioner was revised but I decided I didn’t want to take the risk again as it would prove really costly if happened twice.
Thankfully there is a solution and after doing a lot of research on the issue most of if not all recommended doing a manual tensioner conversion. This meant that the hydraulic tensioner is replaced by a tensioned bracket so you can manually tense the belt in place. So this was the way forward. The manual tensioner components were taken from the H23 engine.
Highly recommended for people tuning h22’s or generally drive them hard.
http://www.accordinglydone.com/forum/sh ... hp?t=10082
Of course I still didn’t know if anything else was wrong and if the belt jumped a tooth and bent any valves etc but from the first video the car still idled perfectly meaning that the valves were still ok. Well that was the theory anyways. Also with the H22 being a non interference engine the valves would not be bent providing I was not in Vtec at the time it came loose.
Then I thought who to take the car too. My mobile mechanic wont know how to do the manual conversion so thought it be best to take it to a Honda tuning specialist.
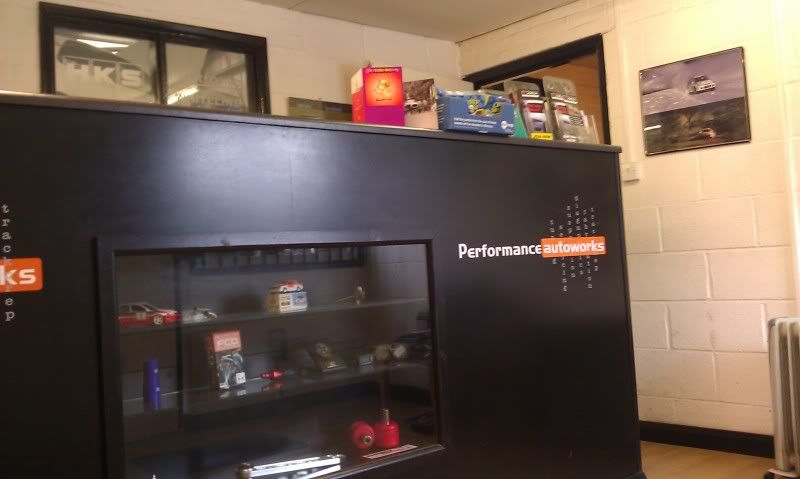
Performance Autoworks were the most helpful. They provided excellent support and options throughout the enquiry process and through email.
So I decided to go with them and booked the car in on Monday 5th. I had to get the car transported up there so I used shiply.com to get a quote and the cheapest I got was £95 to Guildford. So I went with that. Rich will be at the garage on sat 3rd in the morning so ideal to drop it off then.
Then the transporter dude cancelled on me the night before and said his truck broke down. You can imagine how annoyed I was. But luckily I made a lot of enquiries previously and the second best quote was £125 from a guy advertising on ebay. His website is below:
http://www.connectrecovery.co.uk/
Highly recommended, very friendly and reliable service
So I gave him a ring and he said he was free on the Sunday (next day) I rang the garage and they said you can just leave the car outside the garage and post keys through the letterbox. I paid the transporter no deposit and agreed on a meeting time. He requested cash upon delivery.
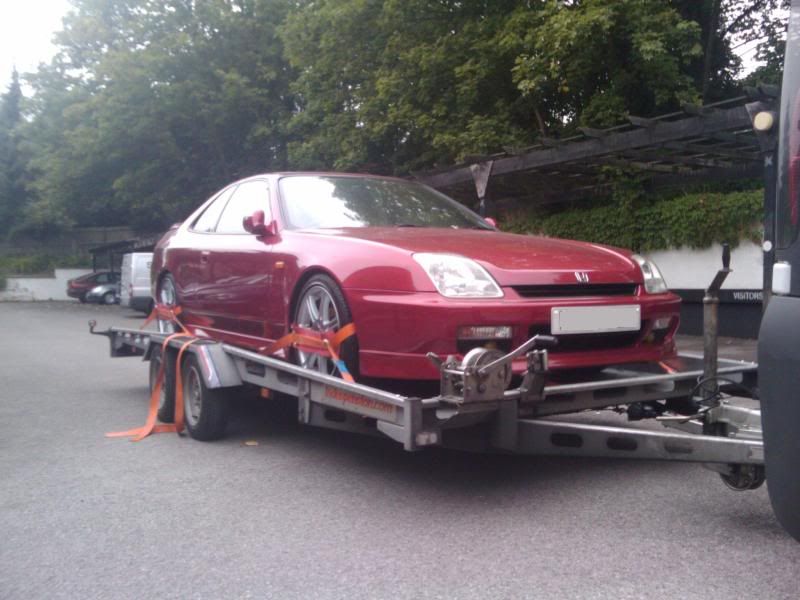
That was the plan and it all went through smoothly on Sunday 4th Sept. The dude was a really nice guy and probably should have gone with him first time round. The car was quite difficult to load up onto the trailer due to having seized on brakes but the winch managed it with no sweat. His winch can pull cars up to 5 tonnes even with their handbrake on and it being in gear.
The prelude strapped in ready for a ride
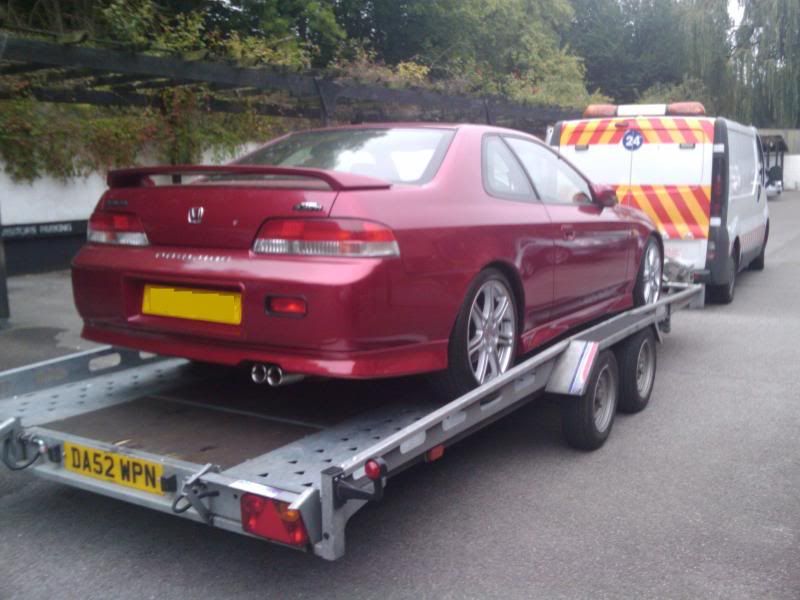
On the road

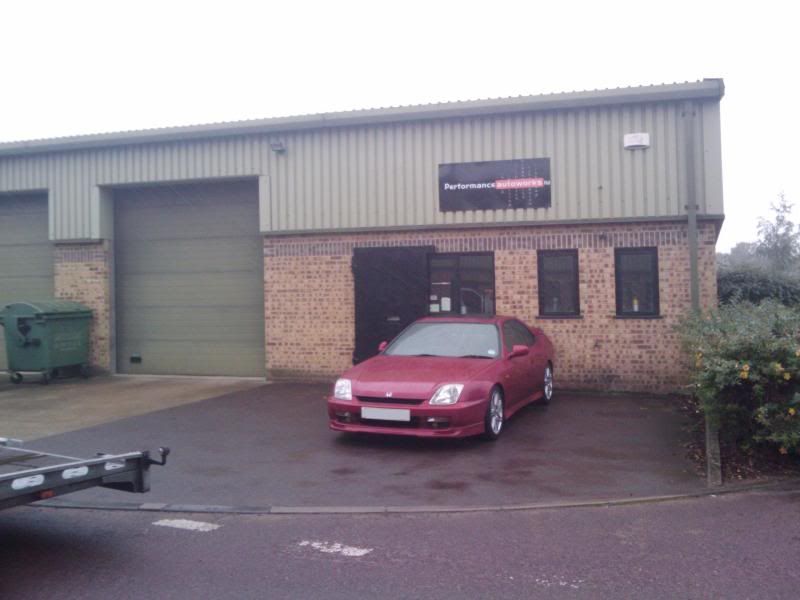
Arrived safely outside performance Autoworks
I now have to get my deposit back from shiply.com and that’s proving difficult. I wouldn’t recommend that website at all.
The following day I felt really anxious and couldn’t do any work. Rich then confirmed via email at around lunch time that it was indeed the auto tensioner that had collapsed and no further damage was done and that I was extremely lucky the belt didn’t jump or fail while I was booting the car at the time it occurred. Miracles do happen or it could be that Honda engines are extremely well built. Either way I very happy and relieved.
Very happy indeed and after receiving a reasonable quote to perform the overhaul of the braking system I decided to get all the work done in one go and said to go ahead with the brake work and also do the valve clearances on the engine.
Work Done
Complete new timing belt change,
Manual tensioner conversion
Valve clearances
Aux belts
Water pump with coolant.
Brake overhaul
All completed without a hitch, we picked up the car on Tuesday evening and raced up to Guildford straight after work and made it there in good time. The missus drove up so grateful to her for her support throughout this whole ordeal.
Massive thanks to Rich for waiting until 8pm
The drive back was awesome. Super smooth and handbrake is nice and tight. Acceleration has a noticeable improvement due to the rear calipers not being seized on anymore and the ferrodo pads up front gives an excellent braking feel although it does need more bedding in.
What a mission though. I so nearly decided to break the prelude but I am so relieved It didn’t come to that
---------------------------------------------------------------------------------------------------------------
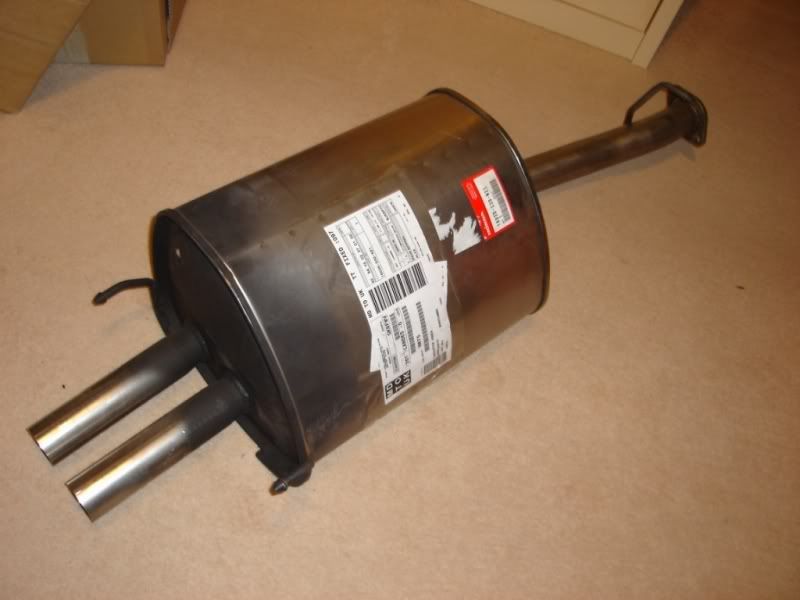
Just last week after the engine ordeal I decided to purchase a new standard backbox. There was nothing wrong with the current one that was installed but I wanted everything to be original Honda standard.
The current one was an OEM equivalent type.
I got it at a good price and my friend at Northway tyres fitted it for me for £10.00
Purchases
1 x 18030-S30-N21 - SILENCER SET, EX. Item 2
2 x 90212-671-005 - NUT, SELF-LOCK, 10MM Item 25
2 x 18176-P08-003 - BOLT, CONVERTER Item 24
1 x 18303-SP0-003 - GASKET, SILENCER Item 14
----------------------------------------------------------------------------------------------------------------
On the same weekend I installed a refurbished rocker cover. The cover was refurbished by JDM-BB4.
I initially purchased the rocker cover just before the engine problem occurred
I always wanted to change mine as the red didn’t quite match the OEM colour.
My brother tried to refurbish it last year but due to a lack of an oven or a heat source the wrinkle effect and red colour shade failed to show through. A good attempt nonetheless.
Purchased through JDM-BB4 using his rocker cover exchange scheme I was impressed by his refurbishment finish. I re-used my existing gaskets as they were still in good condition. I also exchanged my spark plug cover with a freshly sprayed silver coloured one too.
Not a great picture of it installed as I used my phone camera (will hope to get better pictures soon)

---------------------------------------------------------------------------------------------------
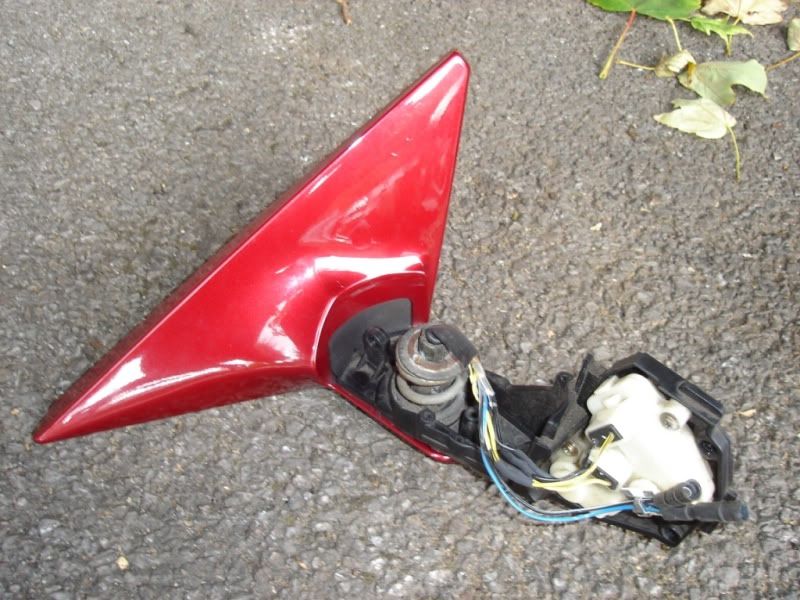
My last task was to repair my wing mirror. The passenger side wing mirror had always been loose ever since I purchased the car and the housing would always flap in the wind and the mirror would shake quite rapidly. The wing mirror couldn’t fold in which was an issue as I needed this feature due to the prelude being parked up for most of the week
Not wanting to involve respraying another 5th gen mirror I searched and searched for a facelift 5th gen mirror assembly in my R504P colour code but to no avail. Until Carisma pm’d me out of the blue and asked me if I wanted to buy his surplus wing mirror after replacing his wing mirror with an excellent condition one he found at a breakers.
His surplus wing mirror was from a 97-98 prelude and did not have the heater function but with the housing and base in good condition with only slight lacquer damage to the outer housing shell I took up his offer and purchased it
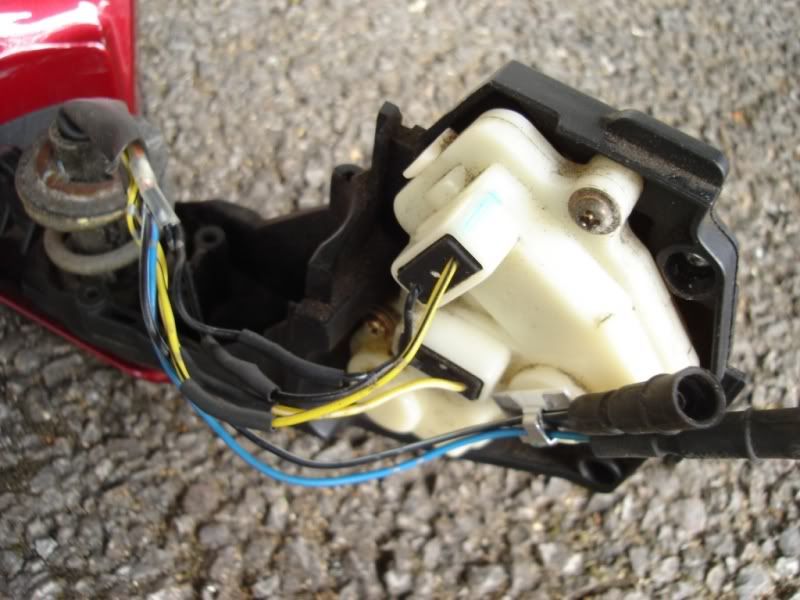
I took apart my mirror and the previous owner seemed to have glued the mirror shell to the base using epoxy type adhesive as I assumed it must have been hit quite badly. All electrics and heater function still worked ok. With the loom being different on the 99-00 mirror I had to salvage that from my damaged wing mirror and install it to the 97-98 mirror base. The rubber internal seal came apart well and I snipped of the wires leading to the mirror adjustment mechanism and transferred over the wire loom. I then re-soldered the wires back to the mirror mechanism; all wires had colour codes or stripes so were easily matched up. Heat shrink wrapping was used to insulate the bare wires for a neat finish.
The housings were re-assembled back together and it all worked
I now have a secure wing mirror that I can now fold in
The mirror itself was tricky to pop back into its mechanism though
This now brings me up to date. I performed a basic oil service on the Saturday 10th Sept 2011
-Enoes 5w/40 fully synthetic oil
-Genuine Honda oil filter and sump washer
-Genuine Honda Air filter
-A blast of carb cleaner in the inlet manifold
My project is pretty much finished now and ready for a track day which was my first intentions since I bought the car. A few minor tweaks that I would like to do are:
-Genuine OEM black mats
-OEM Chrome Door Sills
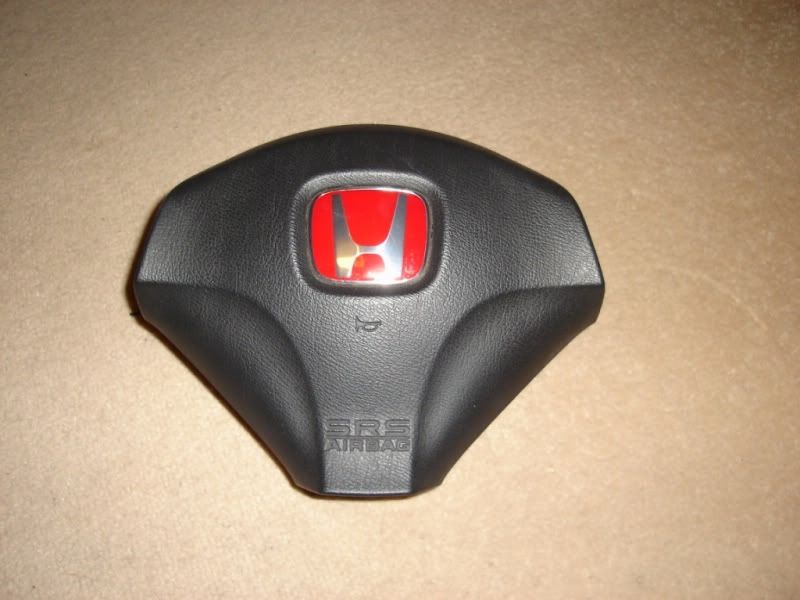
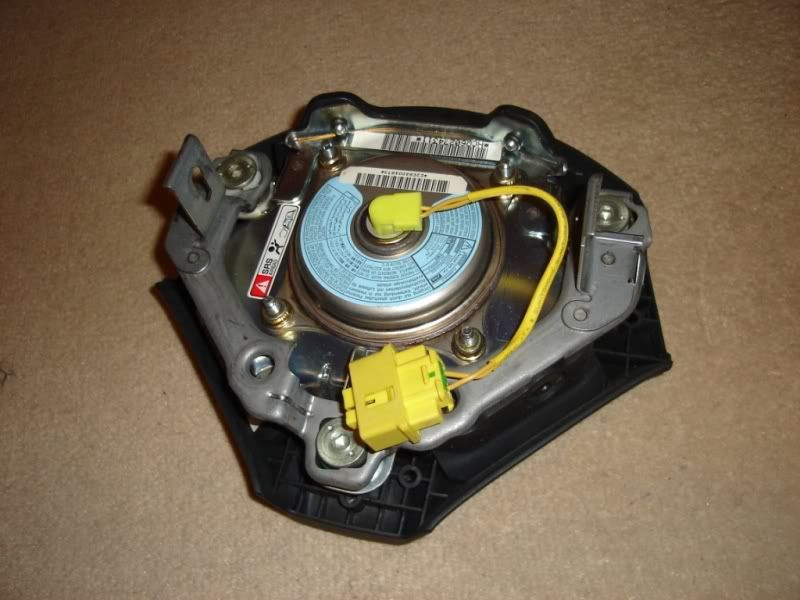
-Repair airbag wire on EP3 wheel (currently Airbag disabled)(connector on airbag damaged)
-Re paint the callipers satin black for a refresh look
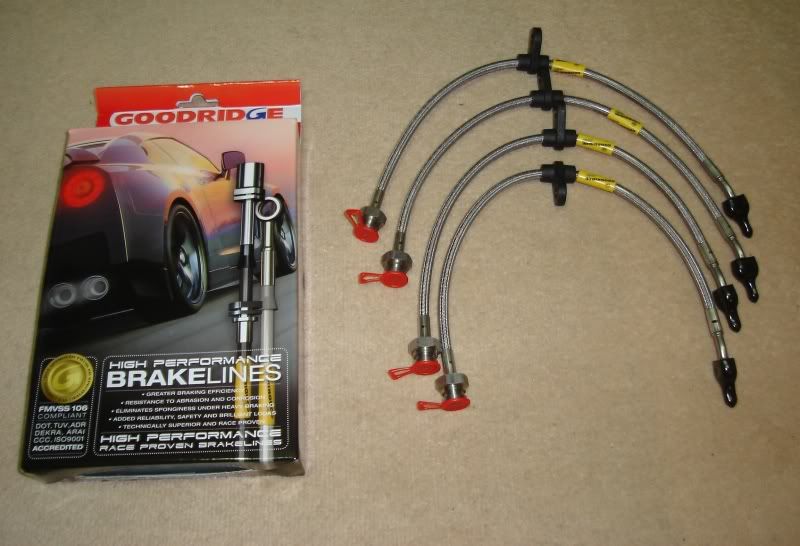
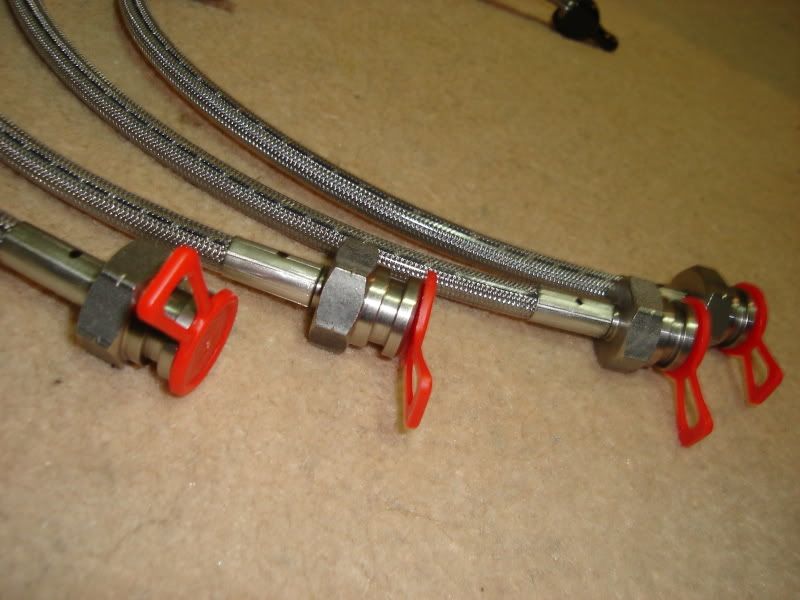
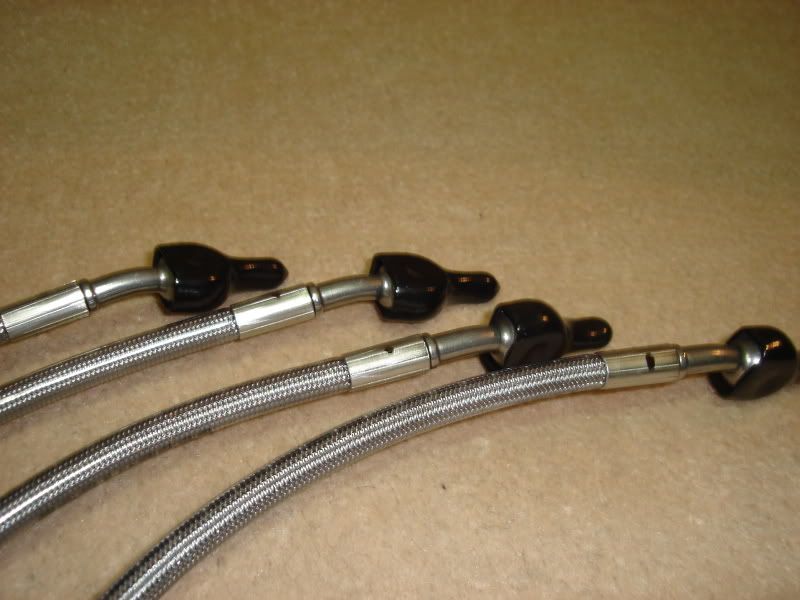
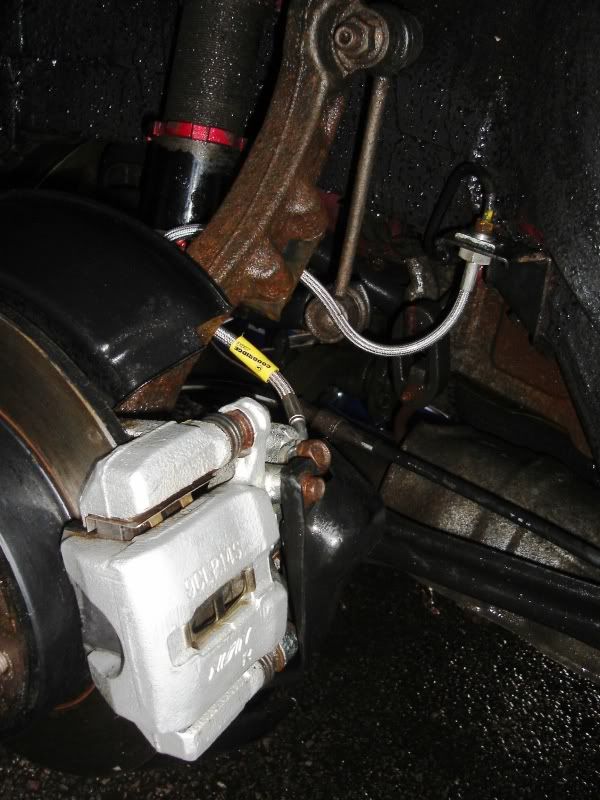
-HEL brake lines (I initially bought these but cancelled the order when the engine problem occurred fearing the worse)
-Novice Track Day
Thanks guys all comment welcome
Originally posted on Sunday October 2nd 2011
Hi all
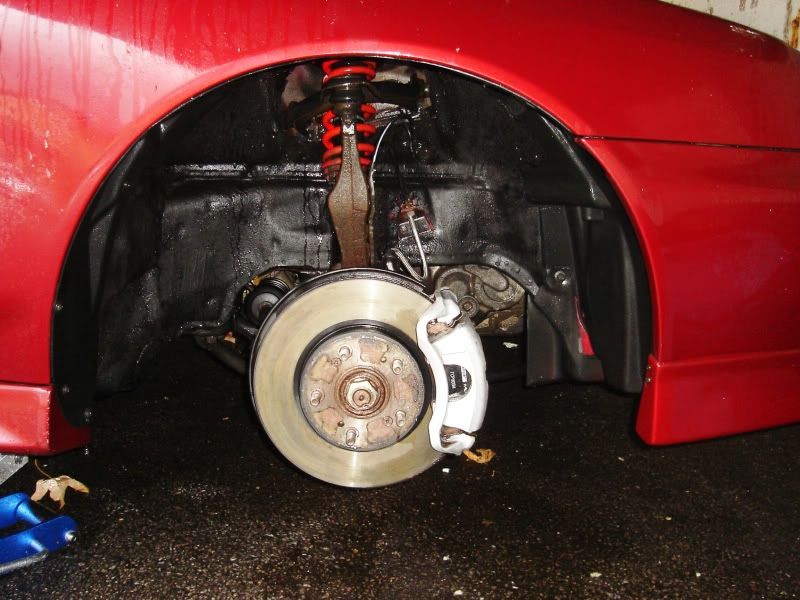
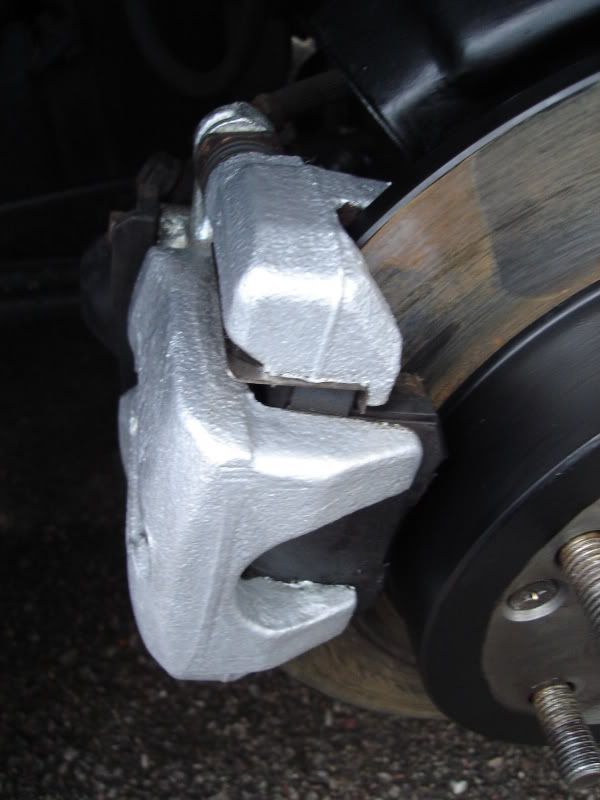
Another quick update. With all major work now complete the final touches to the prelude were to clean up and refresh the brake callipers.
This job was performed last Sunday where I decided to coat the callipers in smooth silver and the brake disc edge and hub in satin black. The brake dust shield was also refreshed and painted satin black due to it being rather rusty.
Hammerite smooth silver for the callipers
Halfords Satin black high temperature paint for the Disc Hub, Edges and Dust Shield
The rears were done first with one coat applied to the callipers and two coats of satin black to the disc edge and hub sections.
The alloy wheels were cleaned inside and out and a coat of polish applied to the inside of the wheel.

One of the last additions was a set of genuine Honda black mats. A lot of searching for a set in good condition was tricky as most were ripped and faded.
Fortunately my brother stumbled across a set and purchased it for me for my birthday.
With the black mats installed it does improved the look and gives an excellent contrast between the cream and black colours. It will also help in maintenance as the black mats don’t get dirty as quickly as the cream ones.
“Picture to follow”
With one final photo shoot before the summer comes to an end this is pretty much how she stands today.
(photo shoot was taken before any of the recent updates)
It’s a brilliant feeling knowing all aspects of the car are up to standard and in working condition. The car feels absolutely spot on to drive and the brake overhaul despite being the biggest expense was a job that really made a difference and definitely recommended.
Final “to dos”s
- Chrome OEM Door Sills
- Repair Airbag wire on steering wheel (no urgency)
- Dyno Run
- Track Day
Originally posted on Tuesday December 27th 2011
Hi All
With the year coming to an end I thought I would give everyone a final update of the year.
I have positively achieved most of my ambitions to the car this year and very happy with the outcome.
With the help of a fellow member on prelude UK (CARRisma) I managed to get my hands on a set of OEM chrome door sills. A member “Simonmcf” was breaking his car and the sills were up for grabs. Sent from Ireland they seem to be in very good condition with a few scratches but nothing major. With a thorough clean it was an easy swap over from the originals. They clipped off very easy so the swap over was smooth and painless.
Having searched for over 15months I was so relieved to get my hands on them, special thanks for CARRisma for making it happen.
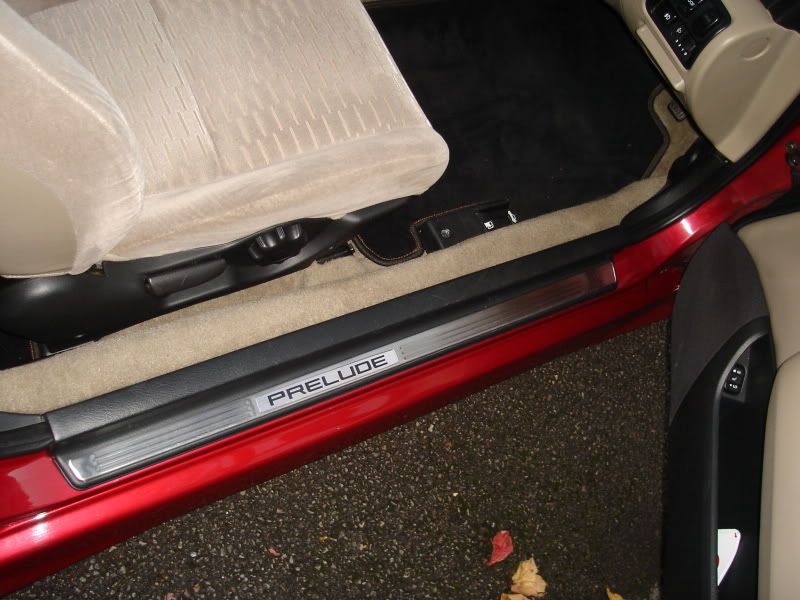
The sills is definitely a lovely upgrade, Its rarely seen due to being hidden by the door but when you do open the car door of the prelude it really does look very smart indeed.
A highly recommended upgrade if you can stretch to its budget and can find a set.
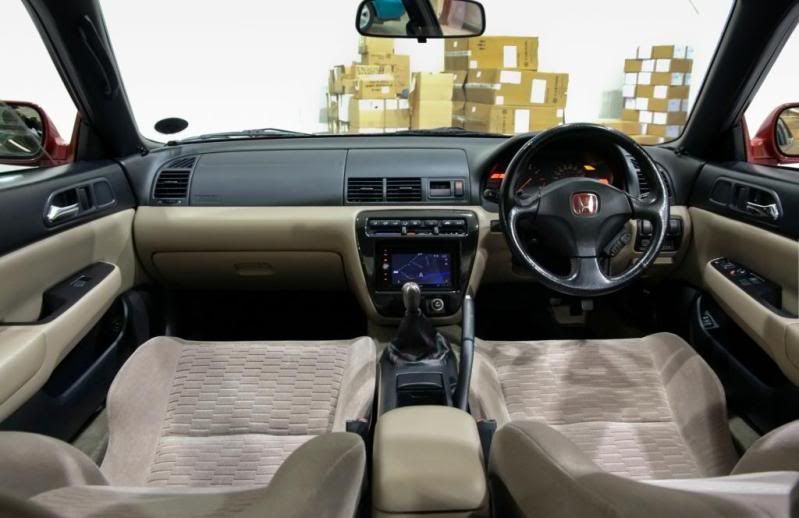
As promised images included of the OEM black mat set purchased by my brother for my birthday back in September.
The black mats gives a striking contrast between the dash board, seats and door cards it gently uplifts the general look and gives it a more modern feeling.
OEM Black Mats
The Chrome OEM Door Sills
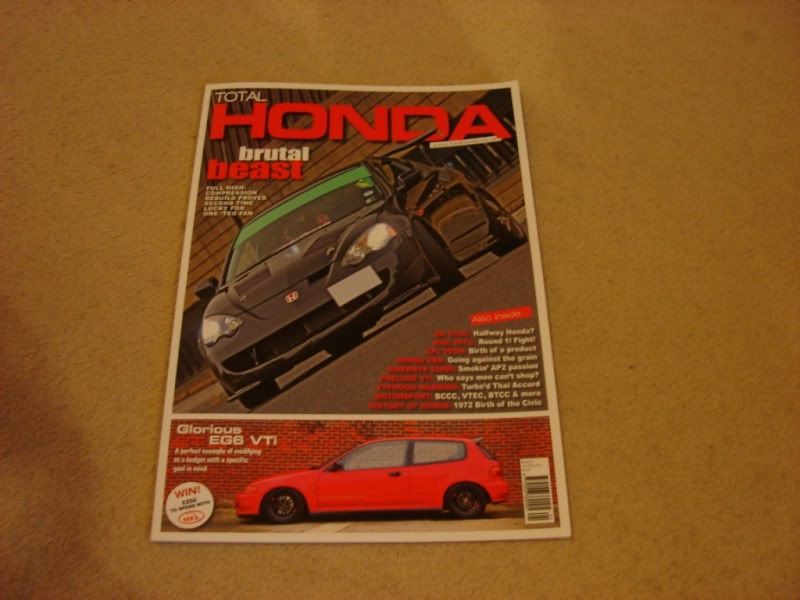
Then out of the blue on the 13th October 2011 I received a message on Prelude UK from Les at Total Honda Mag
He said:
“HI
Lesley from Total Honda mag here - would like to get your lude in the club car section in the next issue, had a good look through your project thread - nice! - running short of time - can you get back to me asap and Ill tell you whats involved?
Cheers
Lesley”
Very excited by the thought of this I jumped at it and immediately replied back asking what was involved etc. Les wanted 4 to 6 Hi-Res photos together with a questionnaire with details of car history, details, progression of mods and any future work. He wanted it by the following evening, due to work and other commitments I couldn’t meet his deadline so we agreed on inserting the feature in the Jan/Feb Issue of Total Honda Mag.
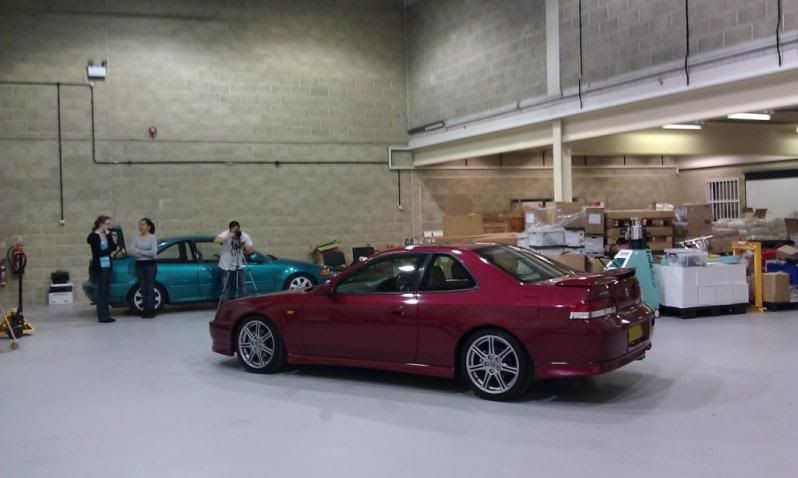
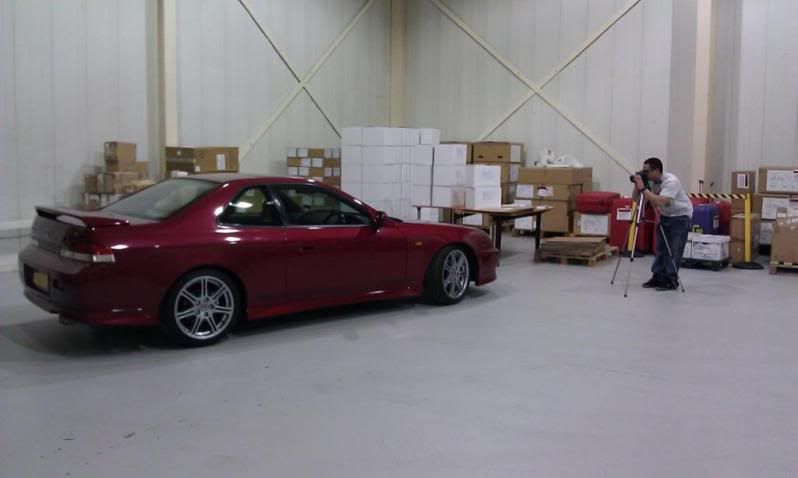
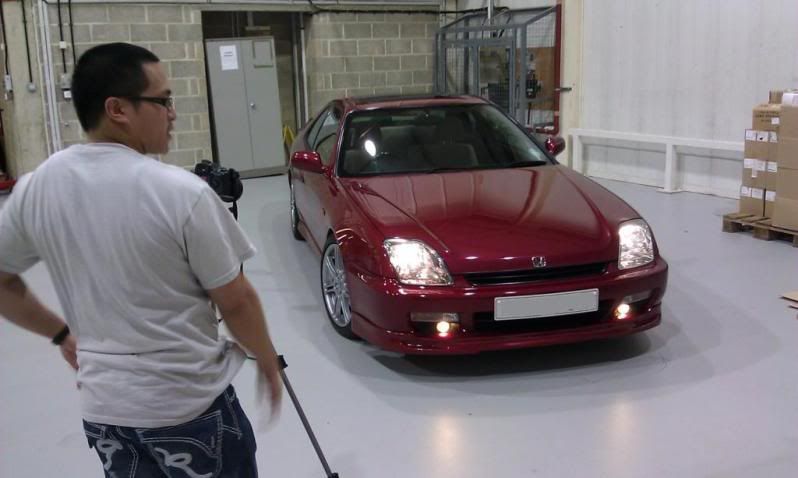
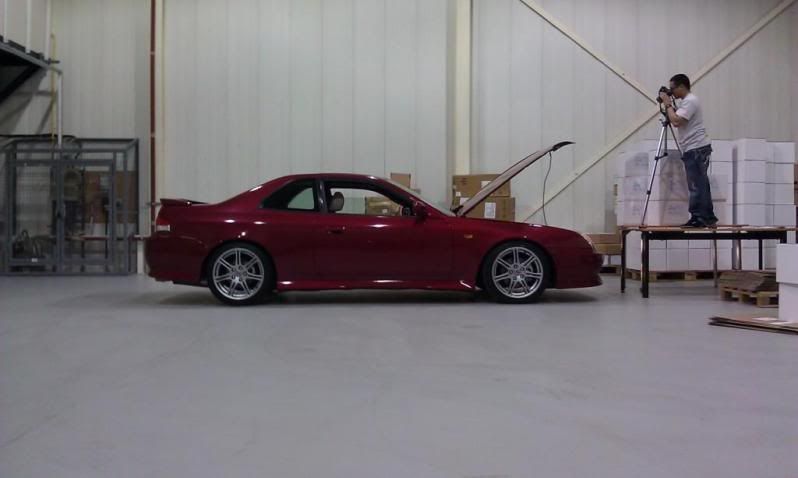
With the deadline agreed I immediately discussed it with my brother in order to arrange a suitable date to do a photo shoot for some immediate up to date images of my prelude. My brother kindly asked his manager to use their warehouse out of hours. By using their ware house it would provide warmth from the winter cold, excellent lighting, clean environment and a place we can take our time.
With the date set it fell on a Sunday evening where I spent most of the day cleaning the car in preparation for the shoot.
My brother used his Nikon SLR D60 with 17mm – 70mm F2.8 – 4.5 Sigma Lens
Here are some of the unofficial shoots taken from my camera phone (it wouldn’t be for another week or so until my brother finished editing the final photos)
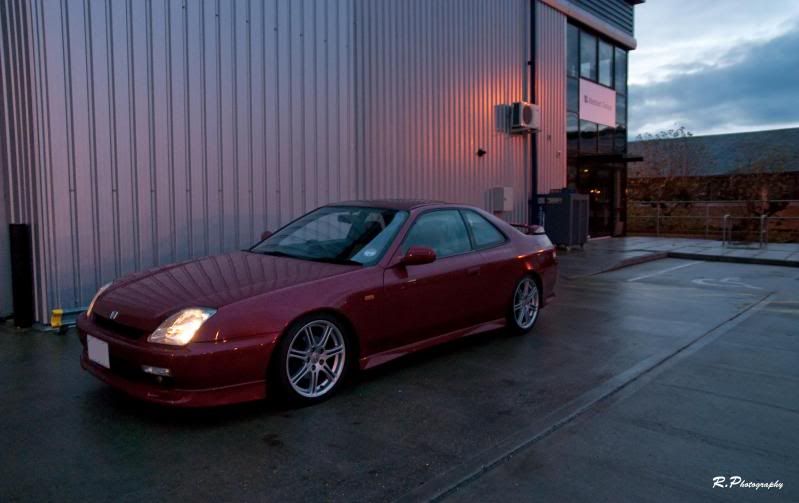
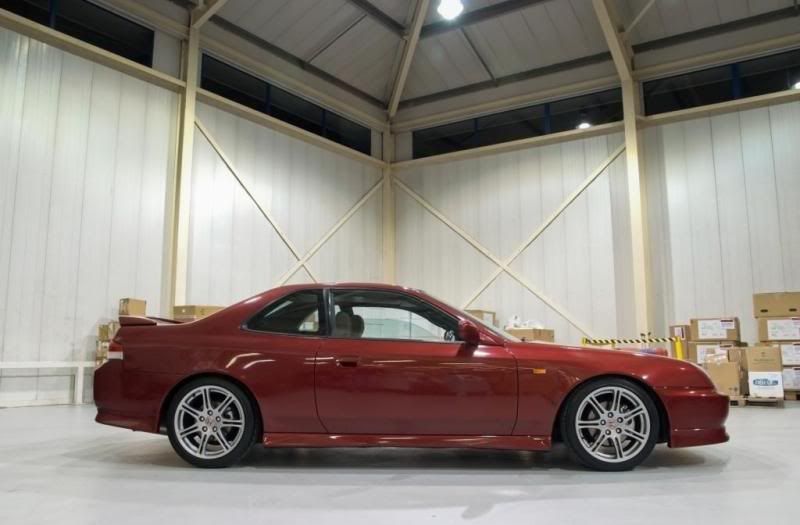
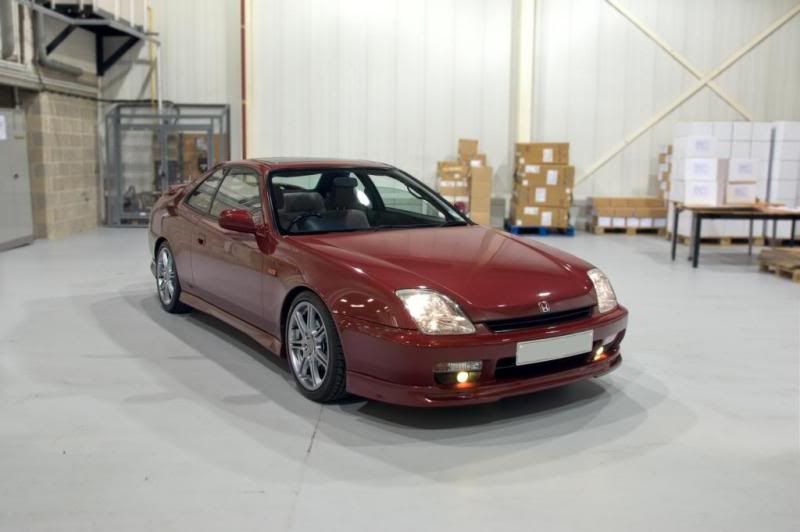
Finally after a long wait my brother manages to finish the final versions of the photos and showed me the results. I was really impressed as to how the car came out, the car looked so clean and almost like new.
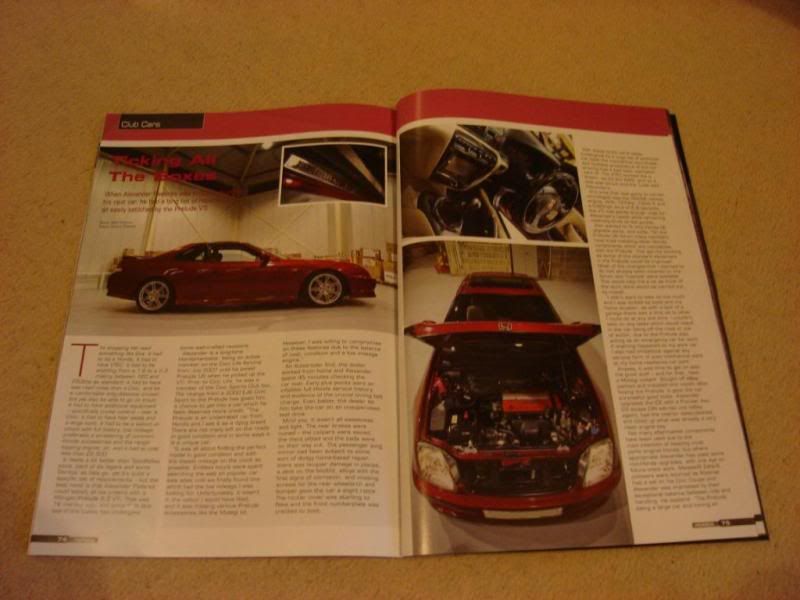
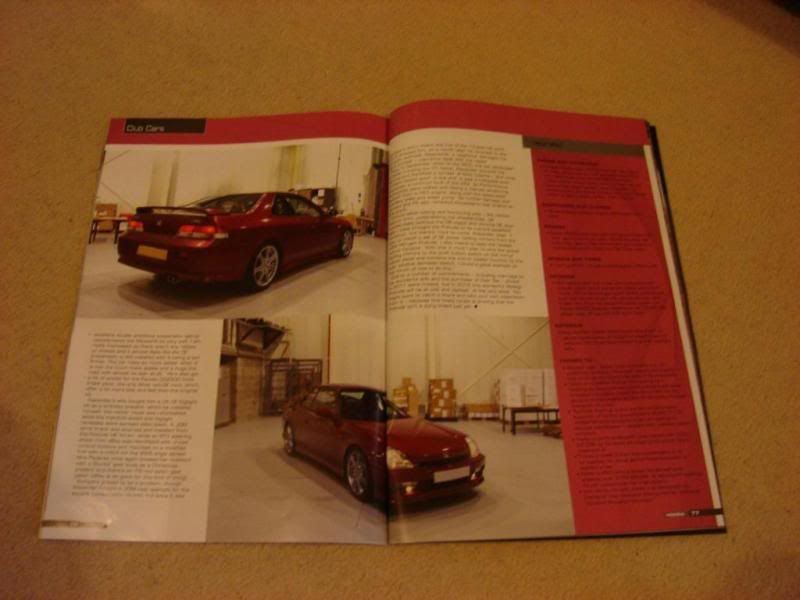
The images really does show the beauty of the prelude and how good it can look
The final images
During this time I worked on the article details, story and finally handed in the images and questionnaire to Les at Total Honda on the 10th November 2011. Eight days before the deadline.
A Patient wait then followed to see the end result and finally just last week I saw the new Jan/Feb issue of Total Honda at our local WHsmiths.
The results were excellent, the article is brilliant and sometimes I can’t believe my prelude is actually in a magazine.
I hope my feature gives all prelude owners out there some inspiration and what can be done with a small budget.
Buy this months issue and see for your self
Many thanks to my wife and brother for support and to Les for reading my thread and making it all happen.
With the year now coming to an end I can safely say that I had accomplished most of what I wanted to do but as with any car project it never ends. I do have a few new intentions planned for 2012, however my original intention was to keep the car OEM and the 2012 changes will not breach this specification.
Initial Wish List
- Repair airbag wire on EP3 wheel (currently Airbag disabled)(connector on airbag damaged)
- Novice Track Day
- Dyno Run
- Finish under sealing the belly of the car (summer time)
New Intentions
- Install a Set of OEM 5th Gen power folding wing mirrors whilst retaining the heated mirror option
- Lighter flywheel (for improved response)
- Stage 1 clutch kit (still thinking)
- HEL brake lines (part of brake overhaul but held back due to tensioner issue so kit was returned at the time)
Thanks Guys (all comments welcome)