Congratulations to vtecmec for winning May/June's Lude Of The Month, with his DIY Turbo BB1 build.

>>> Click Here For Profile <<<

Image

Bodywork repairs - Advice, Guides, suggestions?

Oooooo .... shiny!
User avatar
Ammo
Admin | Spammer Assassin
Posts: 2945
Joined: Sun Jun 20, 2010 10:35 pm
My Generation: 4G
Location: Boston
Been thanked: 6 times
Contact:

Bodywork repairs - Advice, Guides, suggestions?

Post by Ammo » Wed Jan 09, 2013 10:53 pm

Long story short, I've stuck my UKDM in the garage to have a crack at fixing the bodywork. The car isn't going to be painted as i can't afford that but vinyl wrapped, but this requires the same level of prep as paint else it shows through.

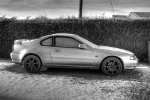
Few pics of the car as i got it

Image
Image
Image
Image

Tonight I got bored and not really know what was under the filler and due to the car being outside for at least a couple of years with the filler exposed I took a sander to it so the drivers side now looks like this

Image

The filler was pretty thick, 5-6mm in places to build it back up

Idea is to make it good, same with the other side. I have a silver front bumper I can use to get round having to prep one bumper

But basically after advise etc on where to go from here and the best way to do it (I've never welded nor do I have a welder)

User avatar
JDM-BB4
Posts: 667
Joined: Mon Jan 30, 2012 1:03 am
My Generation: 4G
PSN GamerTag: JDM-BB4
Location: Stirling, Scotland

Post by JDM-BB4 » Wed Jan 09, 2013 11:10 pm

Quite a task ahead of you!
If your doing it yourself and don't have a welder why not get practicing with some fibreglass and filler.
At least with that your not going to get it rusting under the vinyl, once applied.
Image
Prelude history: black bb4, silver bb4, green bb8, project eX, JRSC 5th gen Motegi.

Current rides: Honda s2000 GT & Honda Accord type R Honda Civic FD2 Type R !! :twisted:

Online
User avatar
Vtecmec
LotM Winner
Posts: 5490
Joined: Fri Aug 06, 2010 5:43 pm
My Generation: 4G
XBOX GamerTag: vtecmec
Location: East Midlands
Has thanked: 149 times
Been thanked: 441 times

Post by Vtecmec » Wed Jan 09, 2013 11:12 pm

There's some good tips for mig welding on this site.

http://www.mig-welding.co.uk/

Don't go gasless as it's pretty messy and use 0.6mm wire for the thin sheet stuff.

secla
Posts: 404
Joined: Tue Apr 17, 2012 12:30 am
My Generation: 5G

Post by secla » Wed Jan 09, 2013 11:15 pm

filler absorbs moisture if left unsealed. laying it on 5-6mm thick is a bad idea the metal needs to be somewhere close with just a thin skim of filler !

User avatar
Ammo
Admin | Spammer Assassin
Posts: 2945
Joined: Sun Jun 20, 2010 10:35 pm
My Generation: 4G
Location: Boston
Been thanked: 6 times
Contact:

Post by Ammo » Wed Jan 09, 2013 11:17 pm

That's why I took it off, to start a fresh, but I didn't expect it to be quite so out of shape

secla
Posts: 404
Joined: Tue Apr 17, 2012 12:30 am
My Generation: 5G

Post by secla » Wed Jan 09, 2013 11:21 pm

its hard to tell from the photos ! it doesnt look rusty ? i assume its just badly dented ?

Grab some panel beating tools of ebay cheap and read some online tutorials, If you can get good access behind the panel you could get it a bit closer into shape. fabbing up and welding in a panel is the only other real option and if you have never done that before then it may take quite a bit of practice to get it right

User avatar
Ammo
Admin | Spammer Assassin
Posts: 2945
Joined: Sun Jun 20, 2010 10:35 pm
My Generation: 4G
Location: Boston
Been thanked: 6 times
Contact:

Post by Ammo » Wed Jan 09, 2013 11:25 pm

It's had 2 plates welded in previously, you can just make out the rectangle shapes

It's not rusty, well it was where there was bare metal but I've ground that off

Panel beating hammers is a good call, I'll look into them, will always come in handy

User avatar
Ammo
Admin | Spammer Assassin
Posts: 2945
Joined: Sun Jun 20, 2010 10:35 pm
My Generation: 4G
Location: Boston
Been thanked: 6 times
Contact:

Post by Ammo » Thu Jan 10, 2013 5:22 pm

Got some better pics today

Image
Image

Sill has started to go too

Image

The passenger side

Image

Not got the side skirt off to see what that's like yet though

Car has also had a respray down the passenger side from the corner of the bonnet to just before where the rust is on the rear arch. It's meant to be Phantom Grey :roll:

Image

How could a body shop even let that leave the workshop lol

secla
Posts: 404
Joined: Tue Apr 17, 2012 12:30 am
My Generation: 5G

Post by secla » Thu Jan 10, 2013 6:04 pm

Weird place to have a patch. Your not going to be able to knock that into shape as it was never he original shape to begin with. I would try and find a welder get lots of practice and find a repair panel and do the whole section.

Any idea what the damage was to need a patch that big smacking right in he middle of a panel ?

User avatar
Ammo
Admin | Spammer Assassin
Posts: 2945
Joined: Sun Jun 20, 2010 10:35 pm
My Generation: 4G
Location: Boston
Been thanked: 6 times
Contact:

Post by Ammo » Thu Jan 10, 2013 6:28 pm

Rust apparently according the the previous owner, real odd place for it though

Post Reply

Return to “Body Work / Detailing”