
I'd never do that... I get enough of that as it is from Philnucleustylzlude wrote:You'll be asking me to actually finish this damn things next!
Congratulations to vtecmec for winning May/June's Lude Of The Month, with his DIY Turbo BB1 build.
>>> Click Here For Profile <<<

>>> Click Here For Profile <<<
Supercharged Mugen Lude (03/06/14 Update!)
-
NafemanNathan

- LotM Winner
- Posts: 20144
- Joined: Sun Aug 08, 2010 9:37 pm
- My Generation: 0G
- Location: Yeovil, Somerset
- Has thanked: 8 times
- Been thanked: 124 times

-
nucleustylzlude

- Moderator
- Posts: 4013
- Joined: Wed Aug 11, 2010 11:46 pm
- My Generation: 4G
- Location: Bristol, UK!
- Been thanked: 7 times
- Contact:

-
nucleustylzlude
- Moderator
- Posts: 4013
- Joined: Wed Aug 11, 2010 11:46 pm
- My Generation: 4G
- Location: Bristol, UK!
- Been thanked: 7 times
- Contact:
 Re: Supercharged Mugen Lude
Holy cr@p! I've just noticed how many views this thread has! 5k mark, that's beat me even getting to 1k posts! You guys have waaaay too much time on your hands! 
-
NafemanNathan
- LotM Winner
- Posts: 20144
- Joined: Sun Aug 08, 2010 9:37 pm
- My Generation: 0G
- Location: Yeovil, Somerset
- Has thanked: 8 times
- Been thanked: 124 times
-
nucleustylzlude
- Moderator
- Posts: 4013
- Joined: Wed Aug 11, 2010 11:46 pm
- My Generation: 4G
- Location: Bristol, UK!
- Been thanked: 7 times
- Contact:
Re: Supercharged Mugen Lude
Not just you I'd imagine. *Open thread* 'What the F~#k!' Screw that! *Close thread*
-
NafemanNathan
- LotM Winner
- Posts: 20144
- Joined: Sun Aug 08, 2010 9:37 pm
- My Generation: 0G
- Location: Yeovil, Somerset
- Has thanked: 8 times
- Been thanked: 124 times
-
nucleustylzlude
- Moderator
- Posts: 4013
- Joined: Wed Aug 11, 2010 11:46 pm
- My Generation: 4G
- Location: Bristol, UK!
- Been thanked: 7 times
- Contact:
BUILD PART 5) - Build (Cont'd) – Intake & Evap system remova
Intake Manifold removal / Evap Emssions Removal / More PAS Removal
Sorry this one is a mix of parts to remove but they all coincide with one another. Right, going for a more pics, less writing approach from now on, here goes…
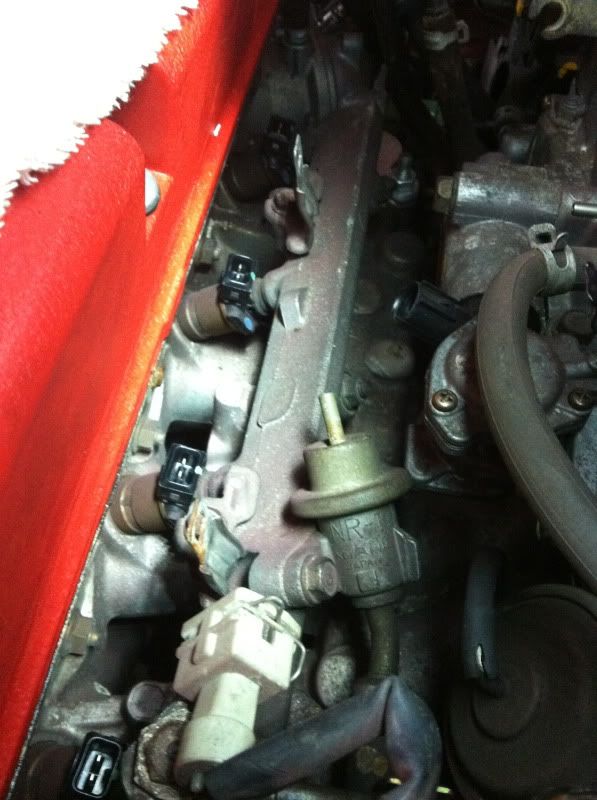
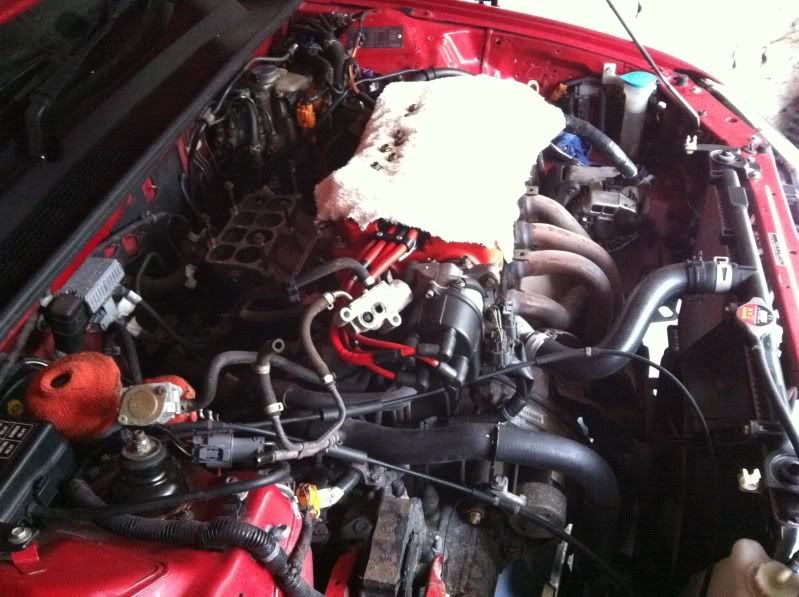
Area to focus on:
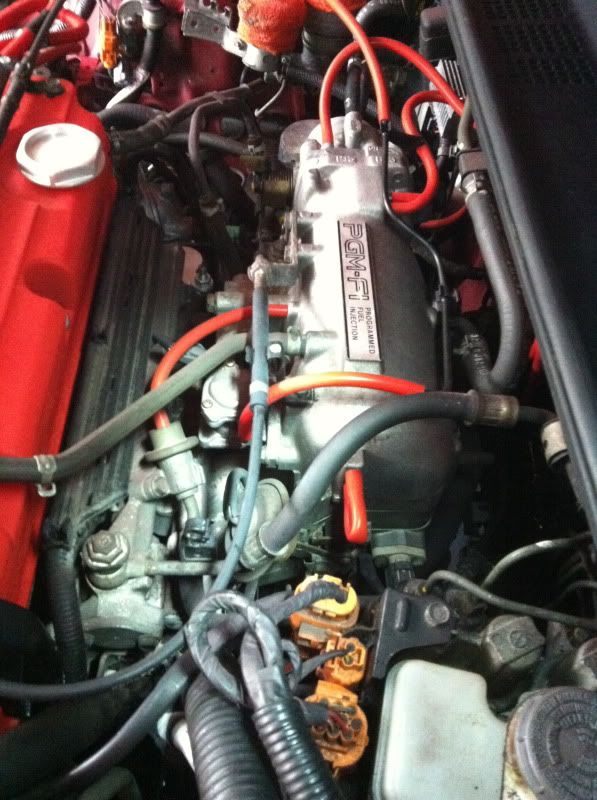
At this point I had already removed the intake tubing / induction kit. Next thing is to remove the throttle cable (two locking nuts on retainer part and then unhook the ball on the end of the cable on the Throttle body plate:
I think I spy a couple of vacuum lines removed also to the air boost valve (more on this later – UKDM only item) and later to the fuel pressure regulator.
Next item I would remove, which I didn’t for some odd reason at this point, is the PCV hose that runs from the 90 degree black valve that sticks out of the passenger side of the rocker cover and connects to the intake manifold.
Then prise off the injector wiring harness cover top open – it’s like a long closed clamshell design. With the top open you can see the two tabs where it connects to the fuel rail. These can be stiff, don’t be afraid to really put some elbow into prising them free, you won’t break it (he says! ). Then you can pull the cover away, in my case – bin it!
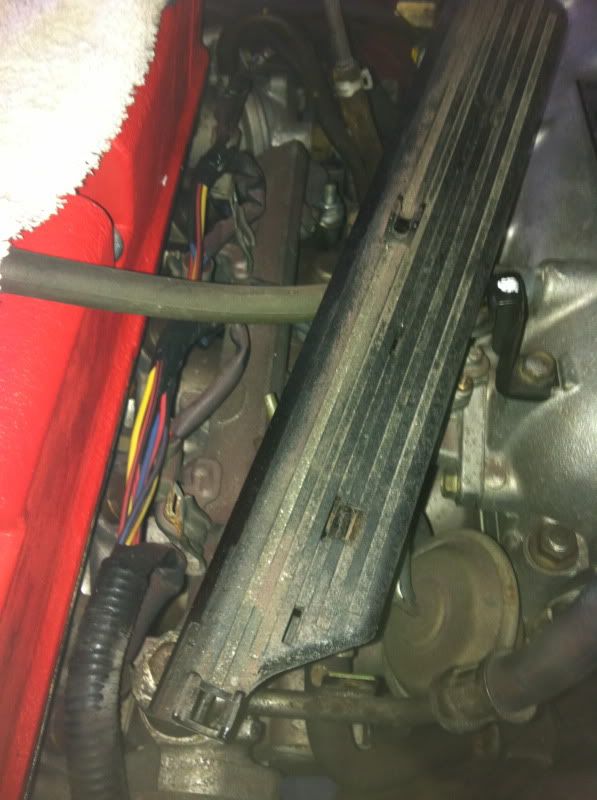
Now unclip all four connectors from the injectors – here is a close up pic of the metal retaining clip you need to prise out to release them:
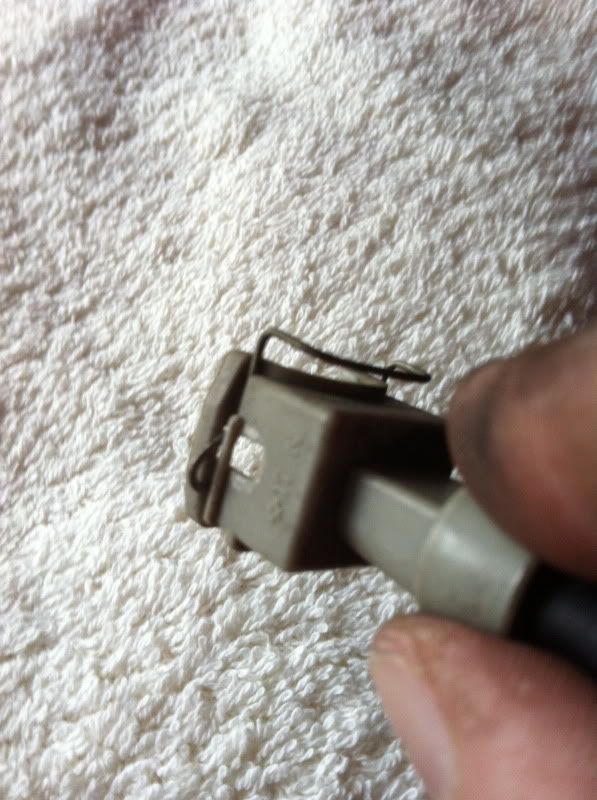
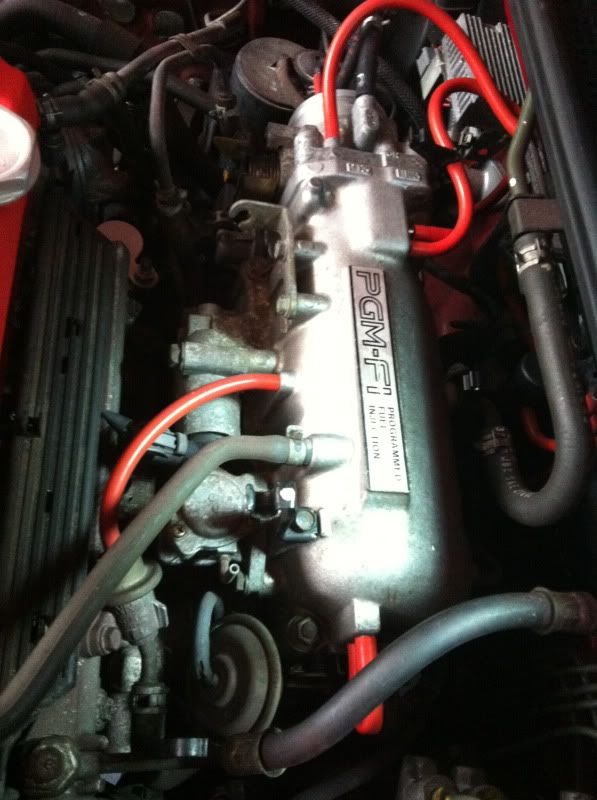
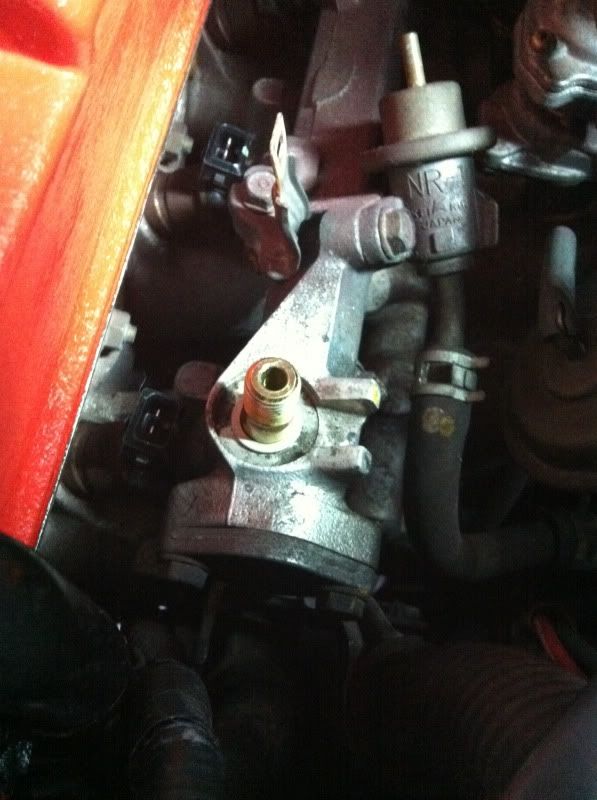
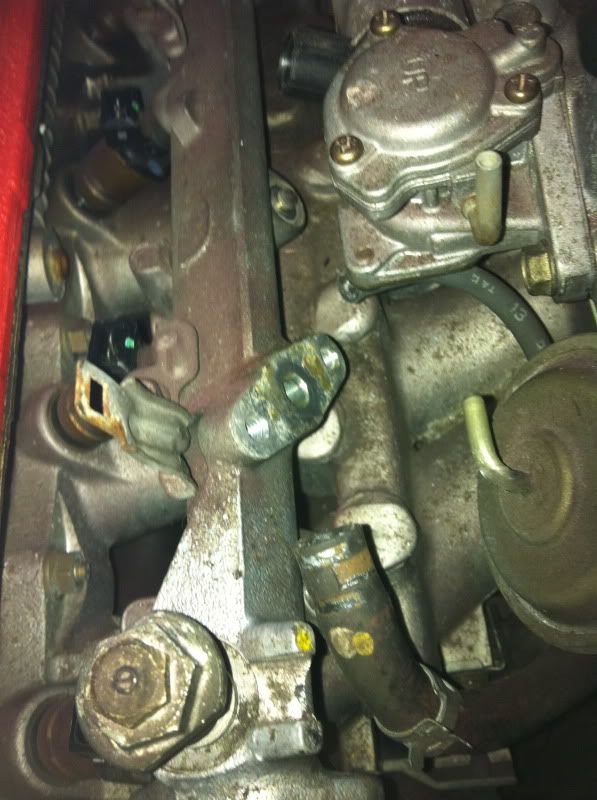
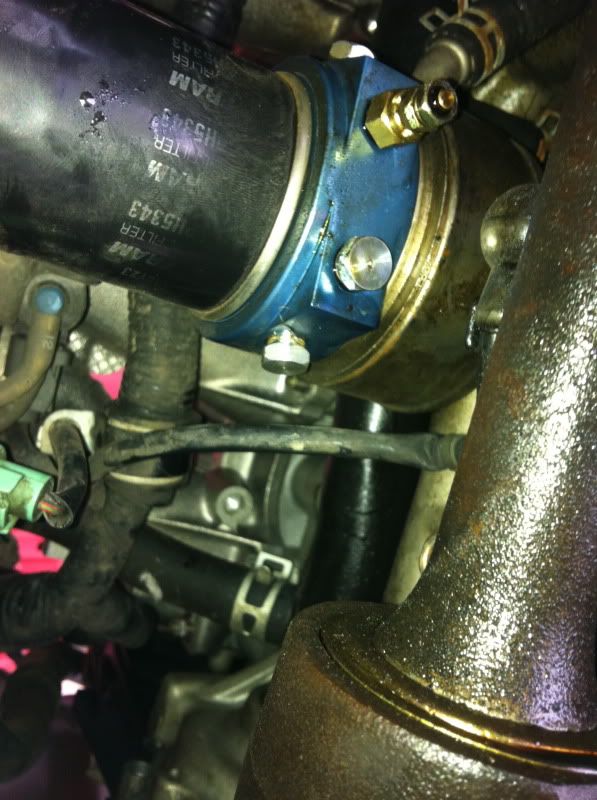
Now to to de-pressurise the fuel rail and remove the supply line / banjo. Looking back at this pic, you undo the top small bolt first with a rag around it to release the pressure and catch any excess fuel. Then you can proceed to undo the larger banjo bolt below.

And remove! Careful not to lose the two crush washers top and bottom of the banjo bolt.
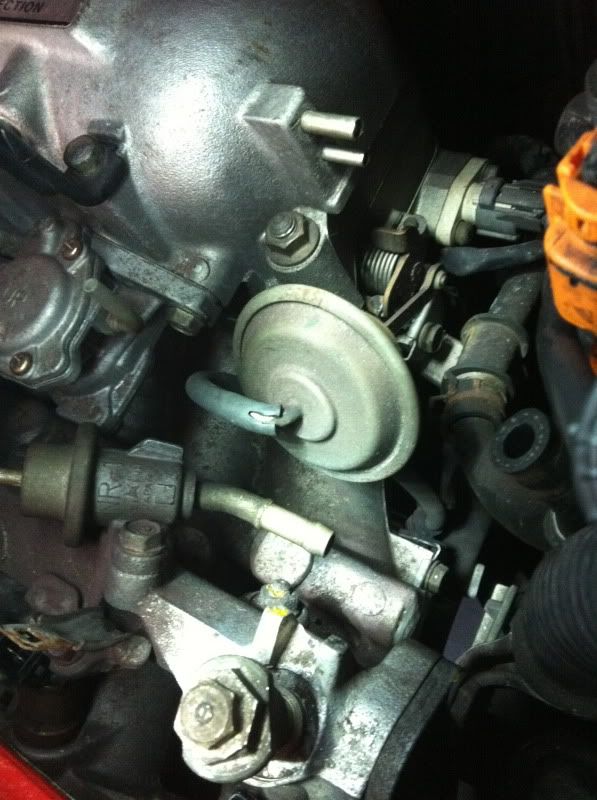
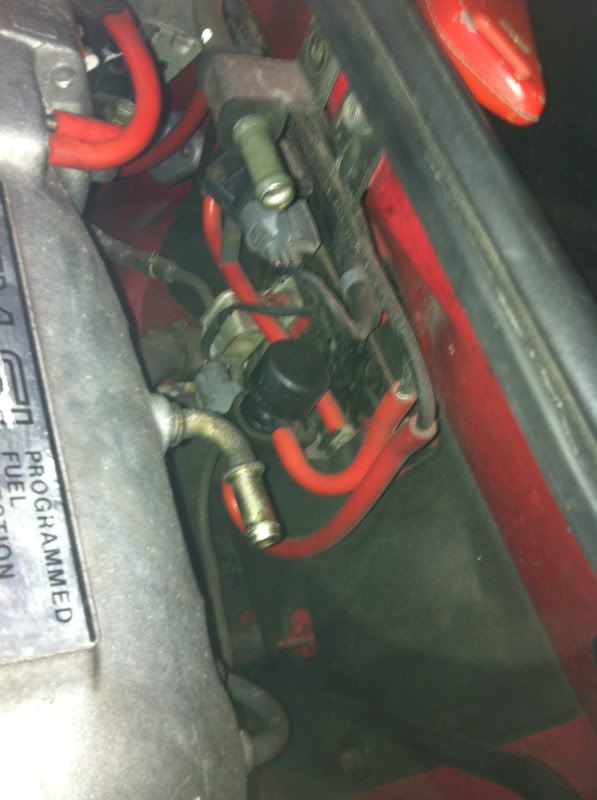
Now remove the rubber hose connected to the end of the fuel pressure regulator.
Now to the back of the intake, remove the rubber hose that goes to the brake booster.
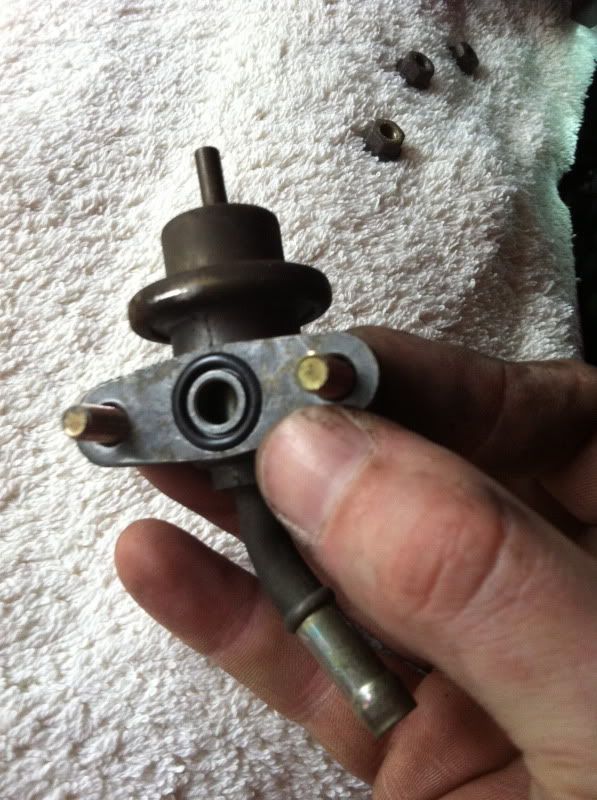
Unbolt the fuel pressure regulator, two 10mm bolts. Make sure not to lose the rubber O-ring that seals it against the fuel rail (unless you’re replacing it!).
Now undo the three 10mm nuts and remove the fuel rail and injectors, just gently prise them out.
Most can skip some of these if they want to remove the intake as a whole, but I need everything apart, so dismantled piece by piece. Next up I unbolted the IACV (idle air control valve), two 10mm bolts again.
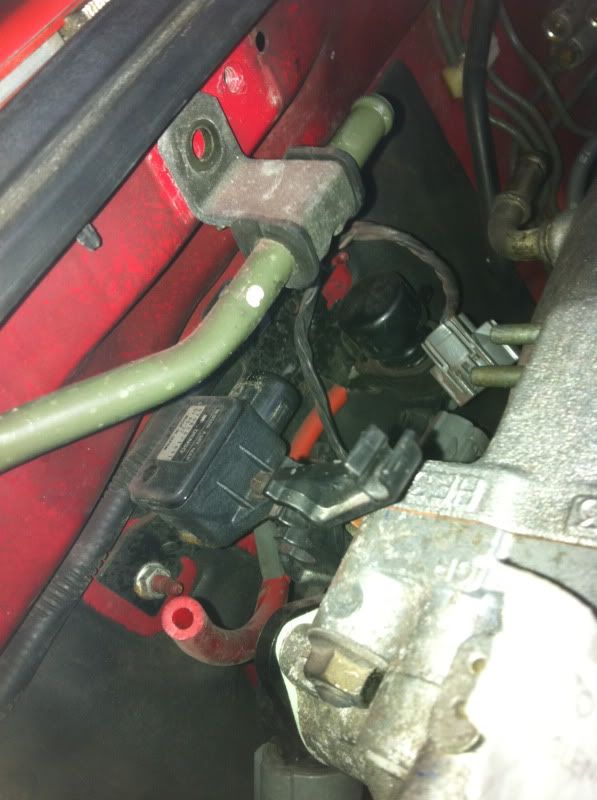
At this point I removed a couple of vacuum lines that go to the MAP sensor and the Evap emissions solenoid, which sit on the firewall just behind the intake. I’m binning all the Evap stuff and the MAP sensor is being relocated, it’ll also needs a different supply as it needs to read air pressure after the supercharger.
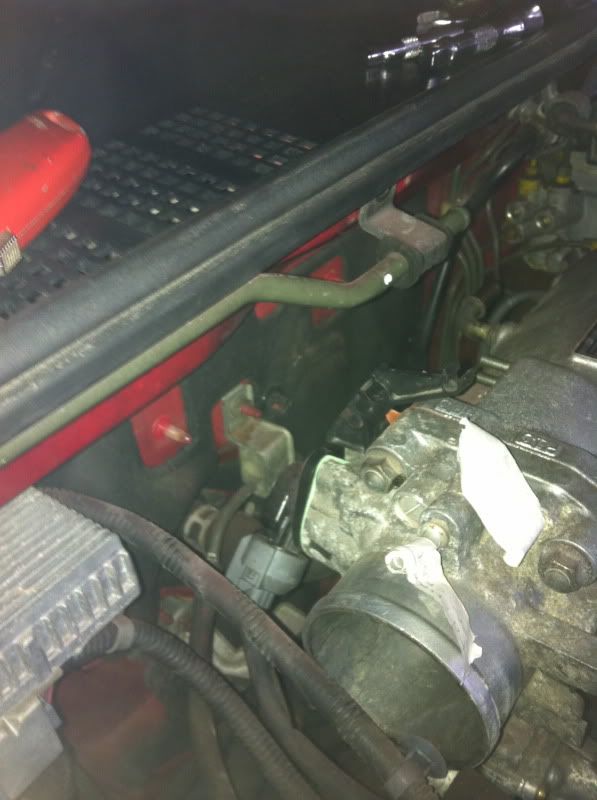
All gone:
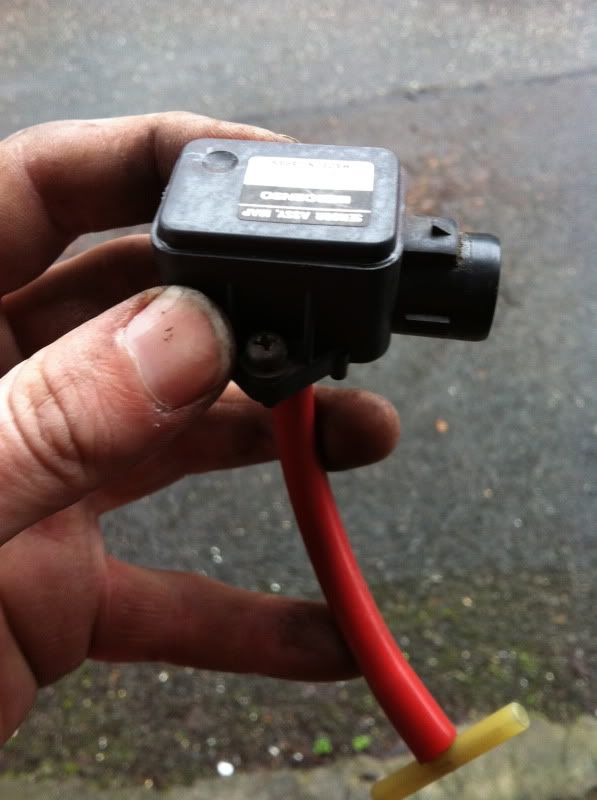
MAP sensor removed from bracket:
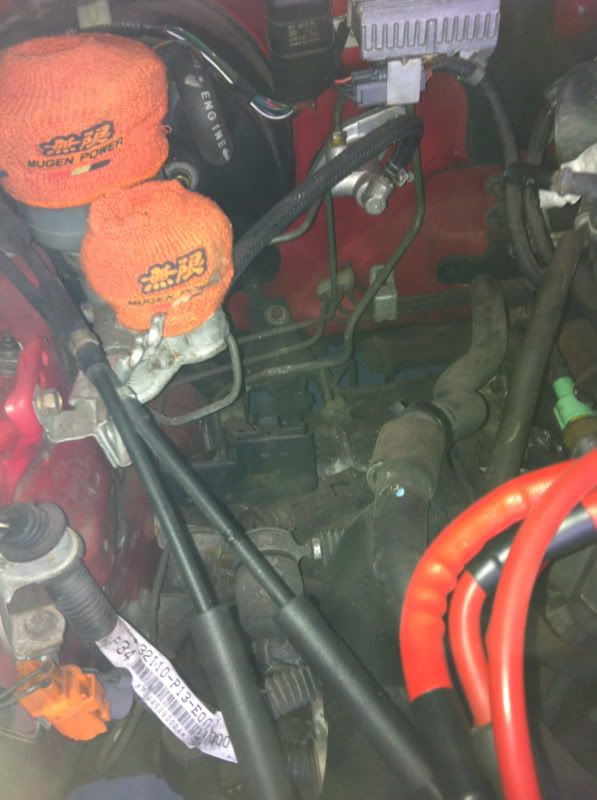
There are a number of small brackets holding various parts of the wiring loom to the intake manifold. You can see the main harness bracket removed here:
This is the place it attaches to (square protruding bit):
I could then move this over enough to get at quite an awkward 10mm bolt which is holding some of the last lines of the power steering removal:
Before:
After:

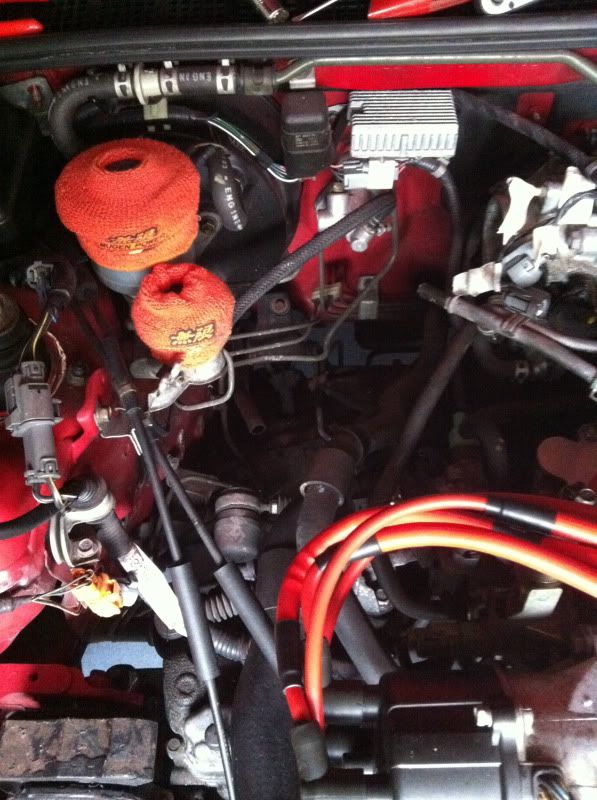
I mentioned about an Air Boost Valve earlier, this item is found on UKDM cars only, not on JDM’s. It apparently gives a little extra air when firing up the engine. I think just another bypass of air route for starting. There’s not a lot of info on it, but like most things it’s being binned!
Here it is again, thing stuck to the side of the top plenum, next to the IACV (top right in this pic):
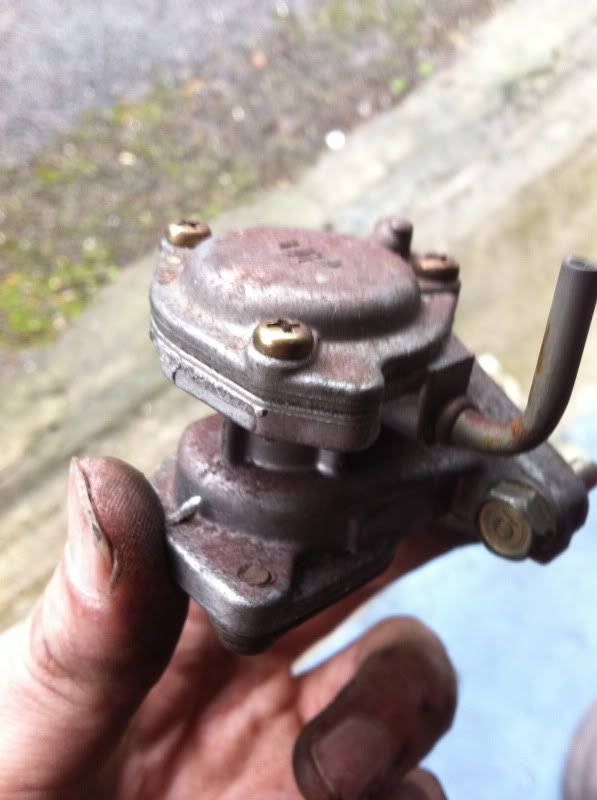
And removed:
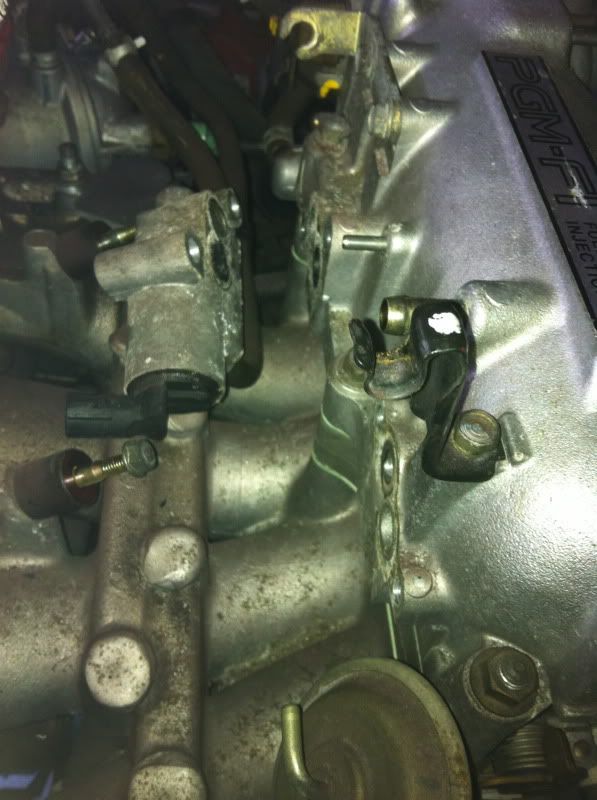
The little blighter:
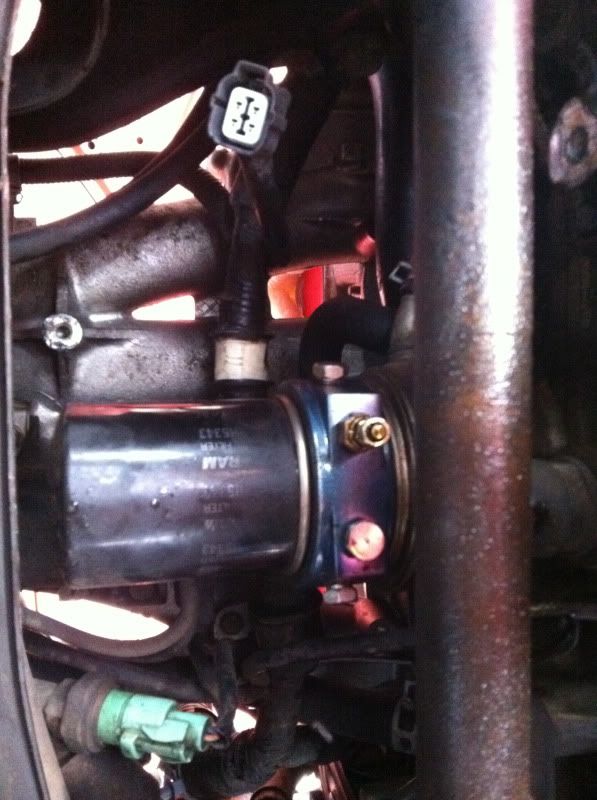
Not necessarily to do with the intake manifold as such, but there is a vacuum line to remove which routes over to the Charcoal canister, this is a storage plenum for fuel vapours off the tank to re-use back into the system to improve emissions. BIN IT!
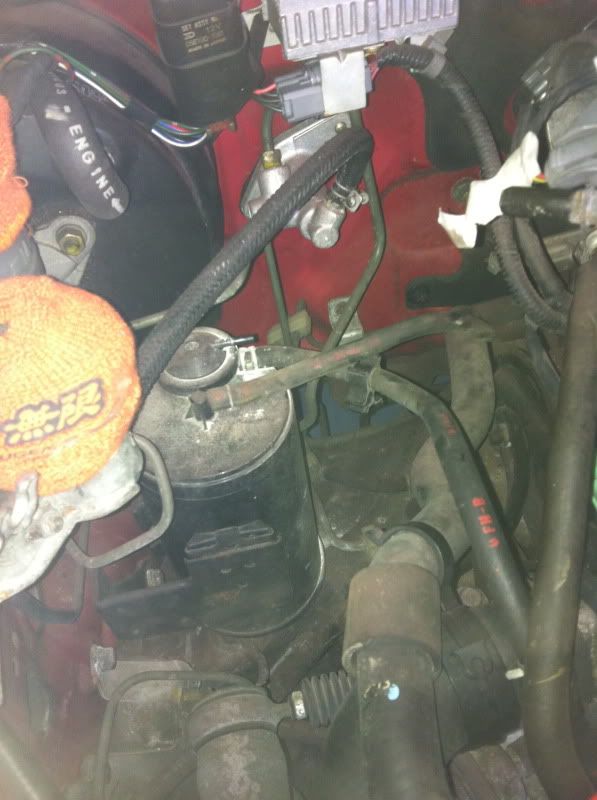
So I proceeded to remove the canister:
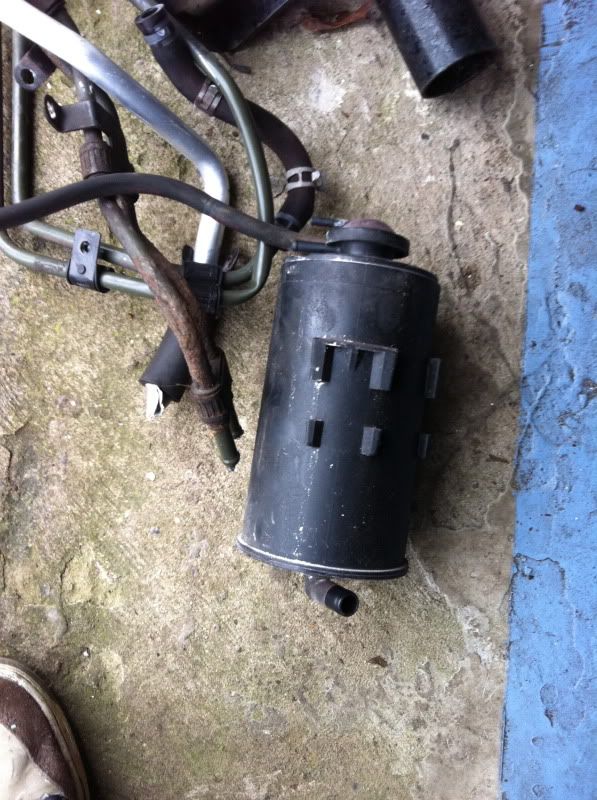
Now to remove this bracket:
Two 10mm bolts later, and:
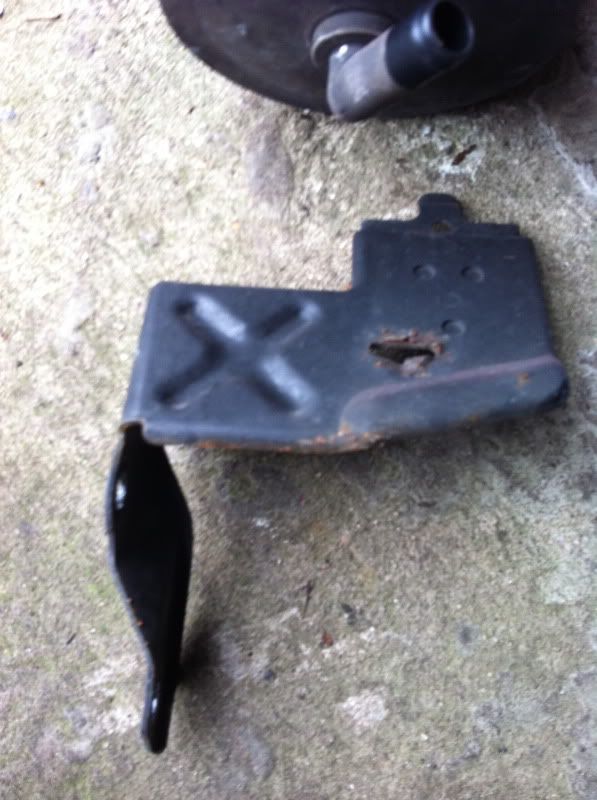
Space left:
There is also a discharge pipe for fuel sludge which disconnects from the bottom, I’ll remove this pipe later as it goes down near the steering rack.
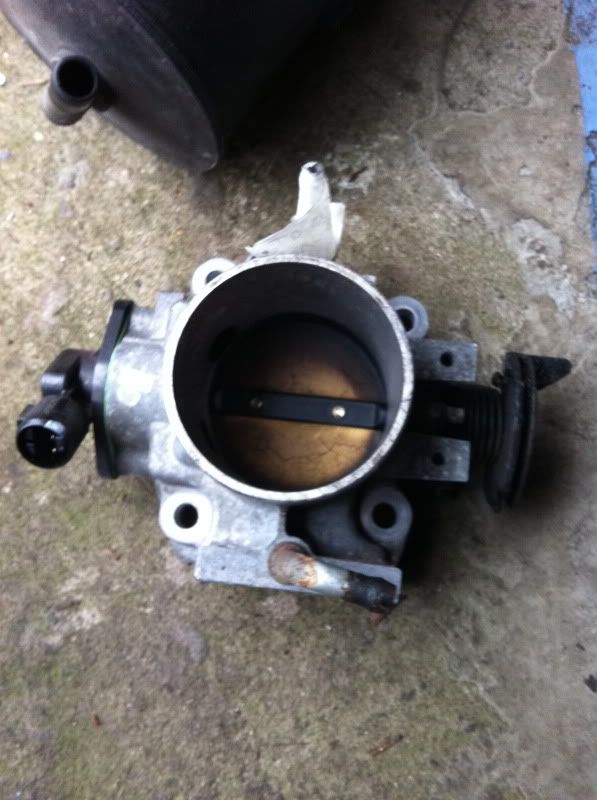
Now onto removing the throttle body (with FITV), unless you’ve drained the coolant like me, be ready to catch some when removing the FITV, throttle body & IACV:
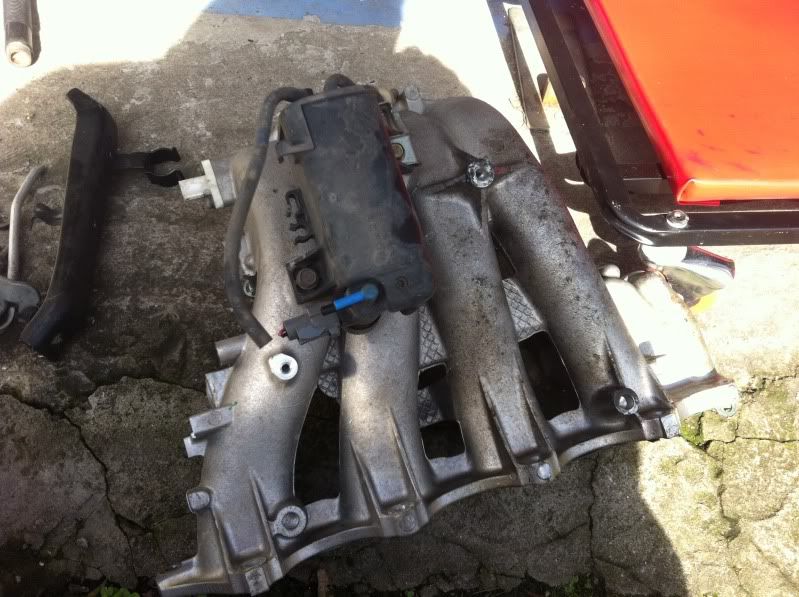
Getting very bare now (but it get’s loads worse…well better!):
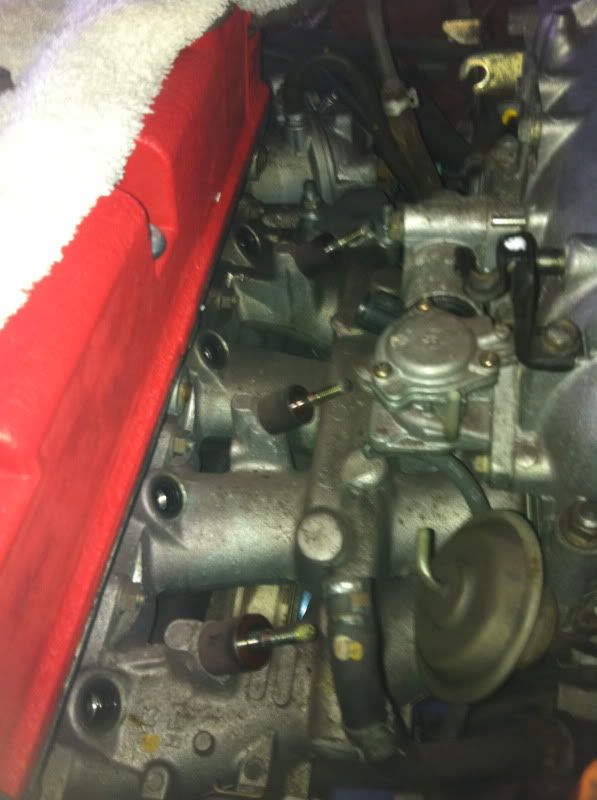
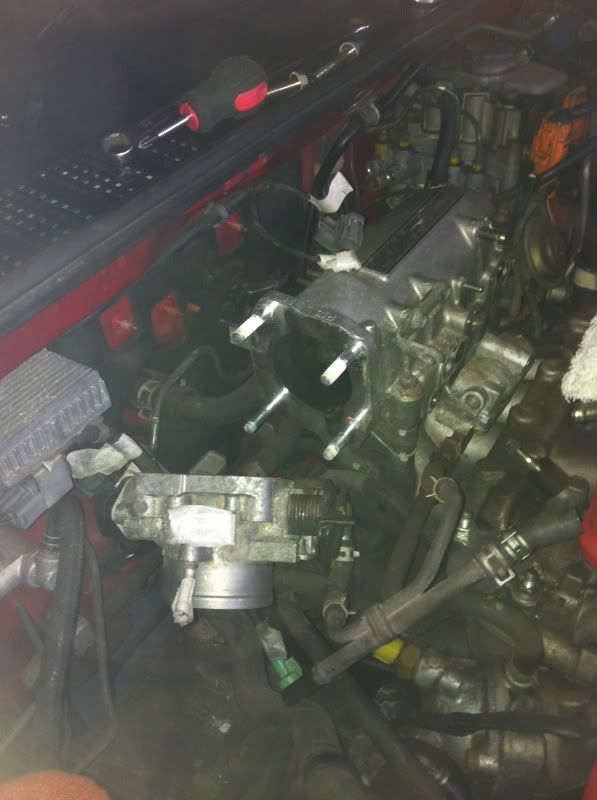
From here, you can now proceed to remove the three long bolts and two nuts that hold the top plenum of the intake and the IAB (Intake Air Bypass) valve plate:
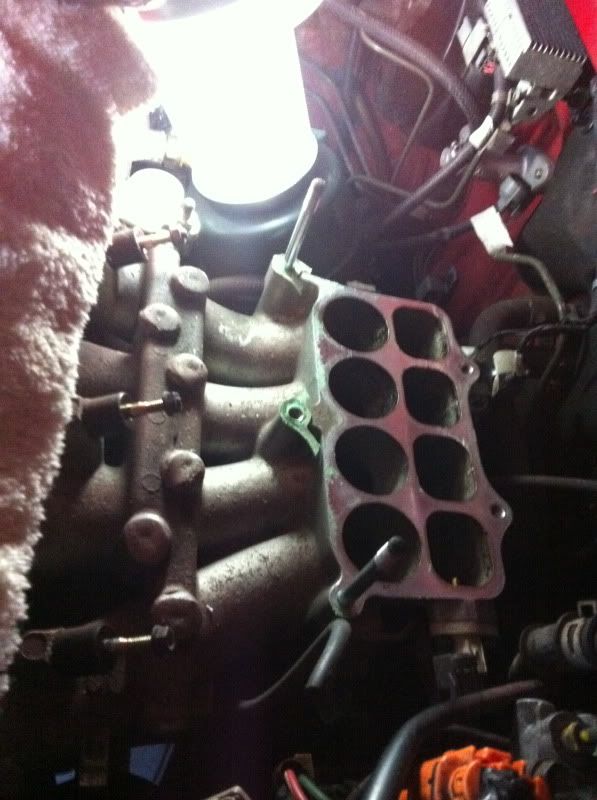
From here, there is just the electrical connector plugged into the IAB solenoid which is attached to the bottom of the lower intake manifold and then you can undo the 9 nuts that hold the intake onto the engine studs. The top ones were easy enough, then proceeded to do the lower ones first 1 or 2 reaching under from the top:
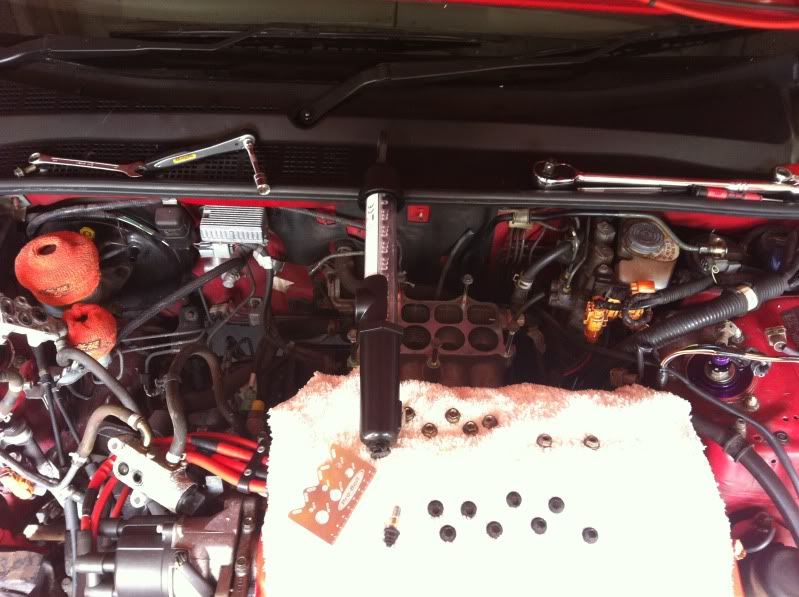
But the remainder you need to go under the car, unless it’s just me and my fat arms and hands! Even from under it’s a pain to access them:
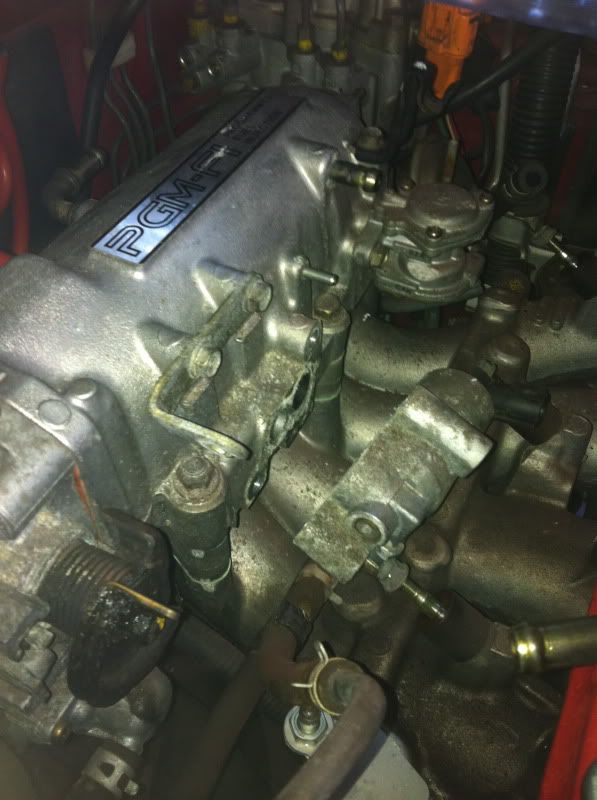
Persist and you will be rewarded! Wahoo!
At this point I decided to lose the IAB box, seeing as the JRSC setup doesn’t use them:
Then I also decided to remove the two studs at the front that the IAB plate and top intake plenum slot into. The JRSC plenum bolts into all 5 holes:
And I’ve had my EGR block off plate on for a while, but want to lose the studs and have some flatter bolts to clean it up, so removed these too:

Then it was time to sneak some parts into the house! Dum, dum, DUUUUM! Missus of course was fully behind me in this decision!
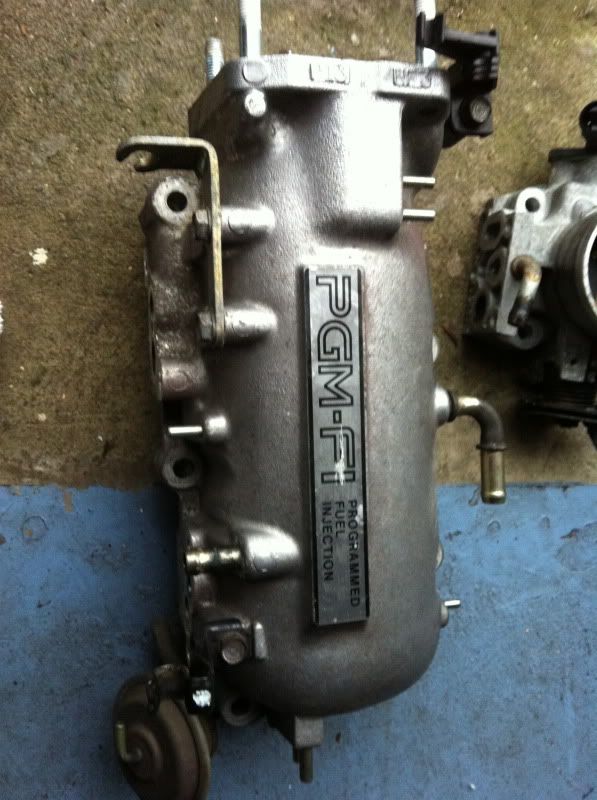
Then I unboxed some parts out of the garage which hadn’t seen the light of day for quite a while – the JRSC kit!
More on that next time folks!
Cheers,
Rob
Sorry this one is a mix of parts to remove but they all coincide with one another. Right, going for a more pics, less writing approach from now on, here goes…
Area to focus on:
At this point I had already removed the intake tubing / induction kit. Next thing is to remove the throttle cable (two locking nuts on retainer part and then unhook the ball on the end of the cable on the Throttle body plate:
I think I spy a couple of vacuum lines removed also to the air boost valve (more on this later – UKDM only item) and later to the fuel pressure regulator.
Next item I would remove, which I didn’t for some odd reason at this point, is the PCV hose that runs from the 90 degree black valve that sticks out of the passenger side of the rocker cover and connects to the intake manifold.
Then prise off the injector wiring harness cover top open – it’s like a long closed clamshell design. With the top open you can see the two tabs where it connects to the fuel rail. These can be stiff, don’t be afraid to really put some elbow into prising them free, you won’t break it (he says!
Now unclip all four connectors from the injectors – here is a close up pic of the metal retaining clip you need to prise out to release them:
Now to to de-pressurise the fuel rail and remove the supply line / banjo. Looking back at this pic, you undo the top small bolt first with a rag around it to release the pressure and catch any excess fuel. Then you can proceed to undo the larger banjo bolt below.
And remove! Careful not to lose the two crush washers top and bottom of the banjo bolt.
Now remove the rubber hose connected to the end of the fuel pressure regulator.
Now to the back of the intake, remove the rubber hose that goes to the brake booster.
Unbolt the fuel pressure regulator, two 10mm bolts. Make sure not to lose the rubber O-ring that seals it against the fuel rail (unless you’re replacing it!).
Now undo the three 10mm nuts and remove the fuel rail and injectors, just gently prise them out.
Most can skip some of these if they want to remove the intake as a whole, but I need everything apart, so dismantled piece by piece. Next up I unbolted the IACV (idle air control valve), two 10mm bolts again.
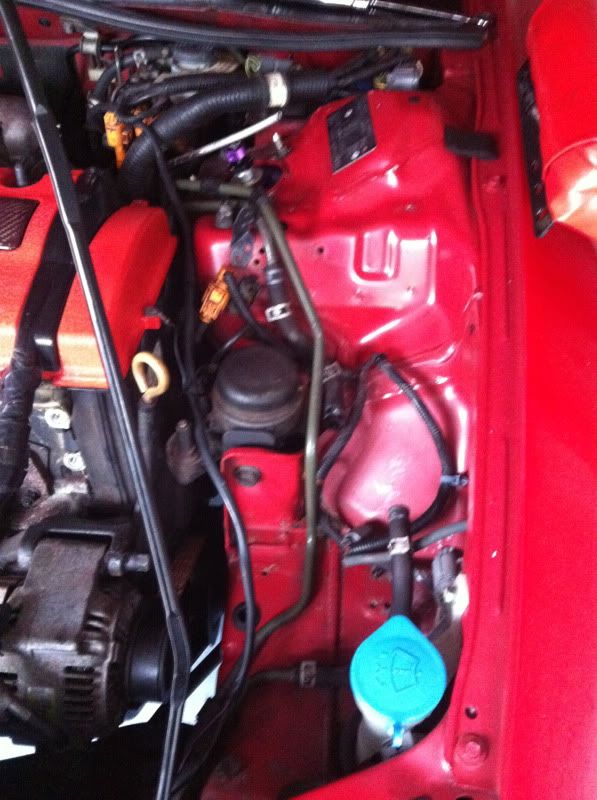
At this point I removed a couple of vacuum lines that go to the MAP sensor and the Evap emissions solenoid, which sit on the firewall just behind the intake. I’m binning all the Evap stuff and the MAP sensor is being relocated, it’ll also needs a different supply as it needs to read air pressure after the supercharger.
All gone:
MAP sensor removed from bracket:
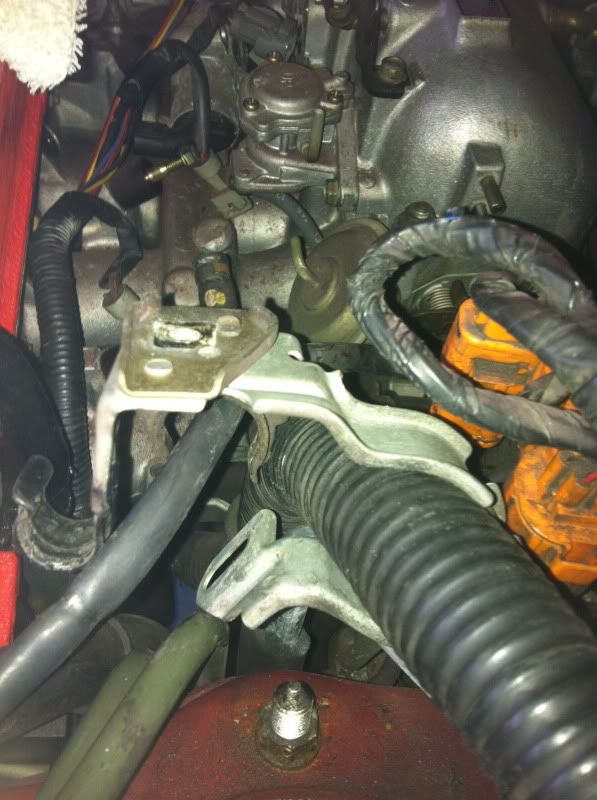
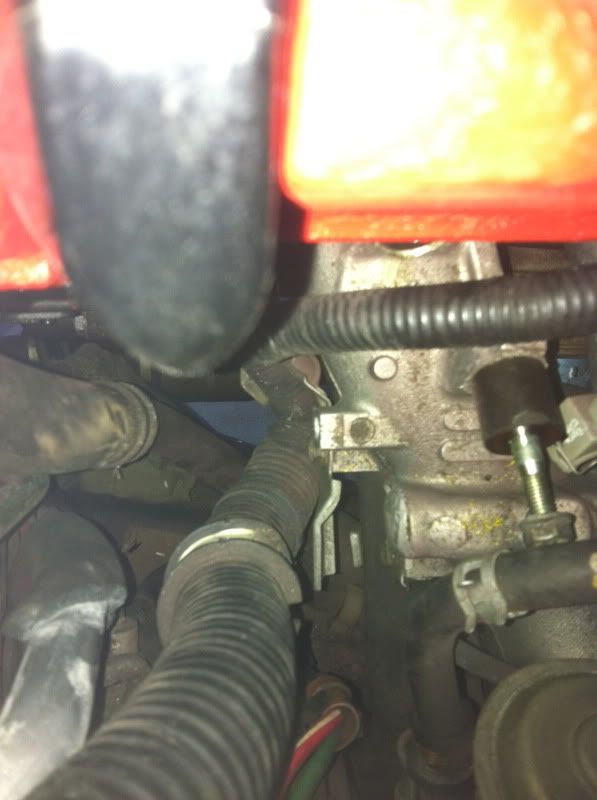
There are a number of small brackets holding various parts of the wiring loom to the intake manifold. You can see the main harness bracket removed here:
This is the place it attaches to (square protruding bit):
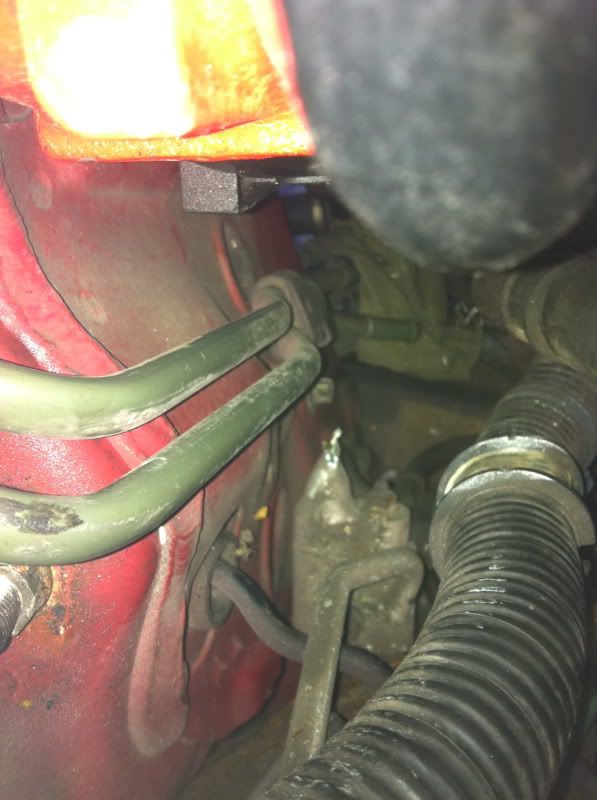
I could then move this over enough to get at quite an awkward 10mm bolt which is holding some of the last lines of the power steering removal:
Before:
After:
I mentioned about an Air Boost Valve earlier, this item is found on UKDM cars only, not on JDM’s. It apparently gives a little extra air when firing up the engine. I think just another bypass of air route for starting. There’s not a lot of info on it, but like most things it’s being binned!
Here it is again, thing stuck to the side of the top plenum, next to the IACV (top right in this pic):
And removed:
The little blighter:
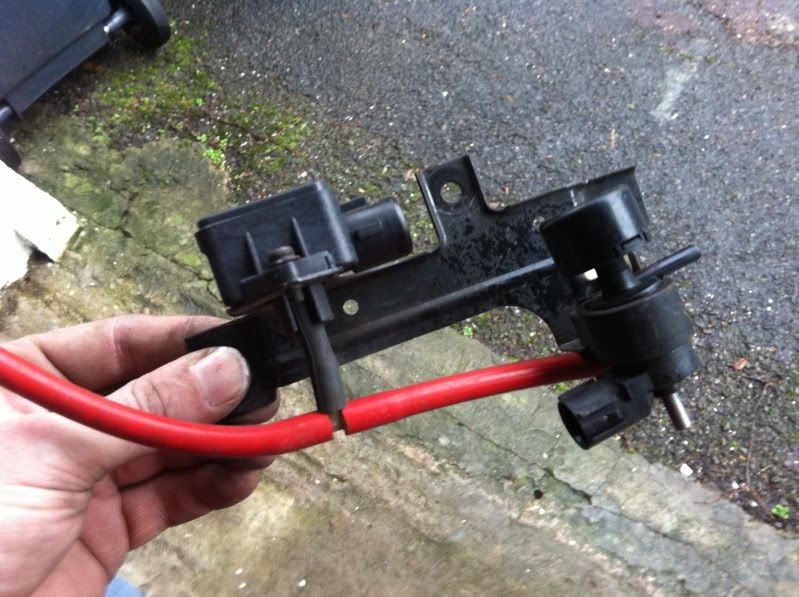
Not necessarily to do with the intake manifold as such, but there is a vacuum line to remove which routes over to the Charcoal canister, this is a storage plenum for fuel vapours off the tank to re-use back into the system to improve emissions. BIN IT!
So I proceeded to remove the canister:
Now to remove this bracket:
Two 10mm bolts later, and:
Space left:
There is also a discharge pipe for fuel sludge which disconnects from the bottom, I’ll remove this pipe later as it goes down near the steering rack.
Now onto removing the throttle body (with FITV), unless you’ve drained the coolant like me, be ready to catch some when removing the FITV, throttle body & IACV:
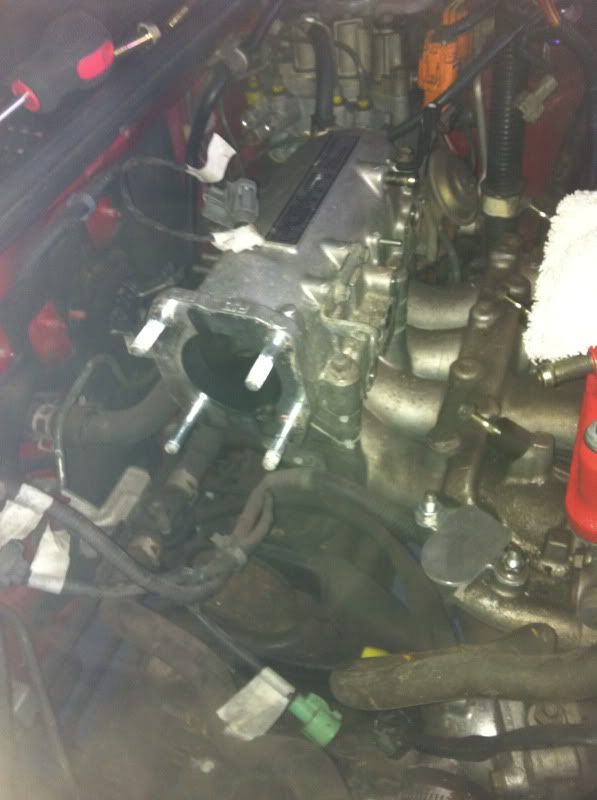
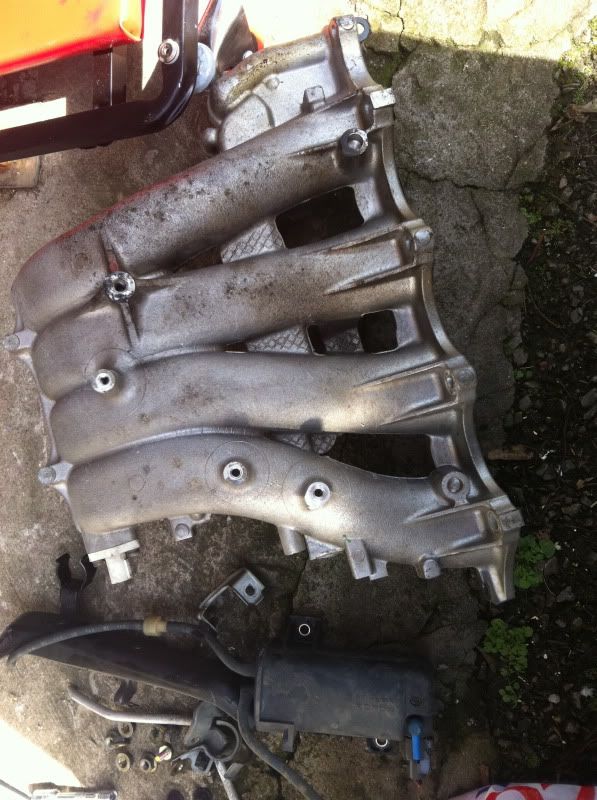
Getting very bare now (but it get’s loads worse…well better!):
From here, you can now proceed to remove the three long bolts and two nuts that hold the top plenum of the intake and the IAB (Intake Air Bypass) valve plate:
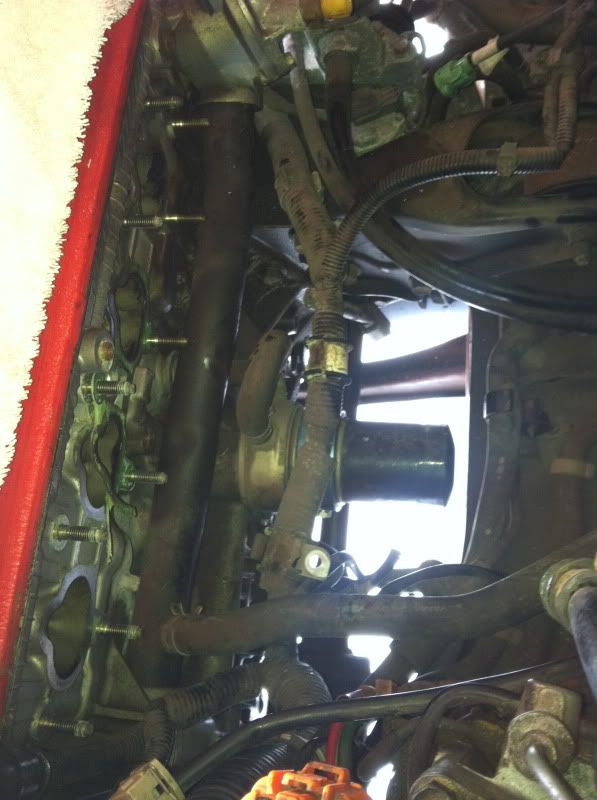
From here, there is just the electrical connector plugged into the IAB solenoid which is attached to the bottom of the lower intake manifold and then you can undo the 9 nuts that hold the intake onto the engine studs. The top ones were easy enough, then proceeded to do the lower ones first 1 or 2 reaching under from the top:
But the remainder you need to go under the car, unless it’s just me and my fat arms and hands! Even from under it’s a pain to access them:
Persist and you will be rewarded! Wahoo!
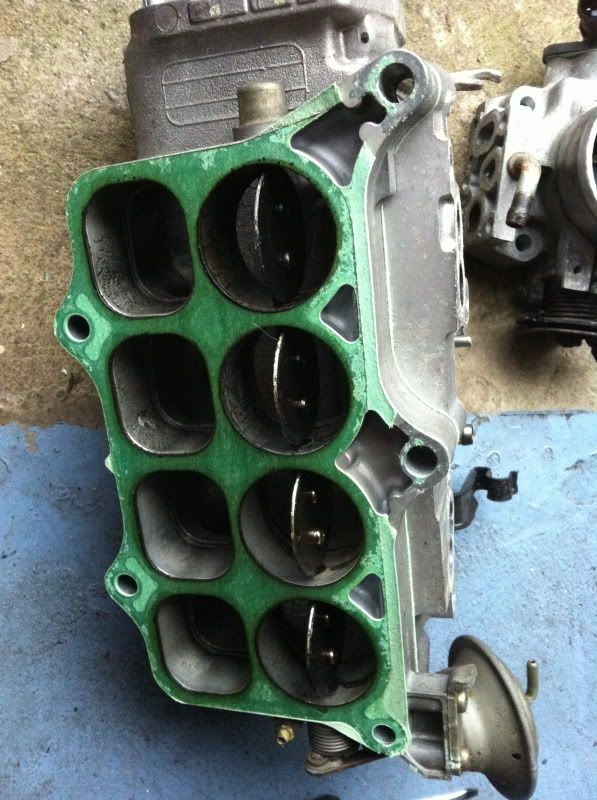
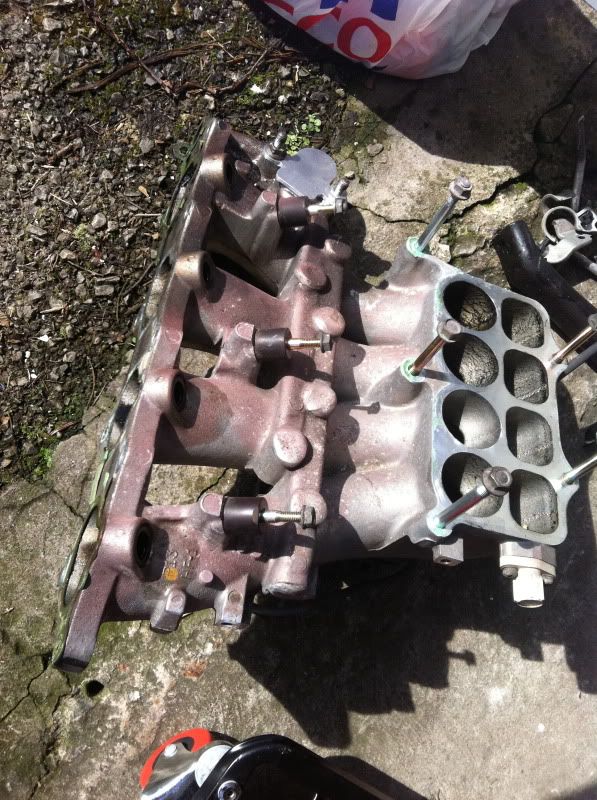
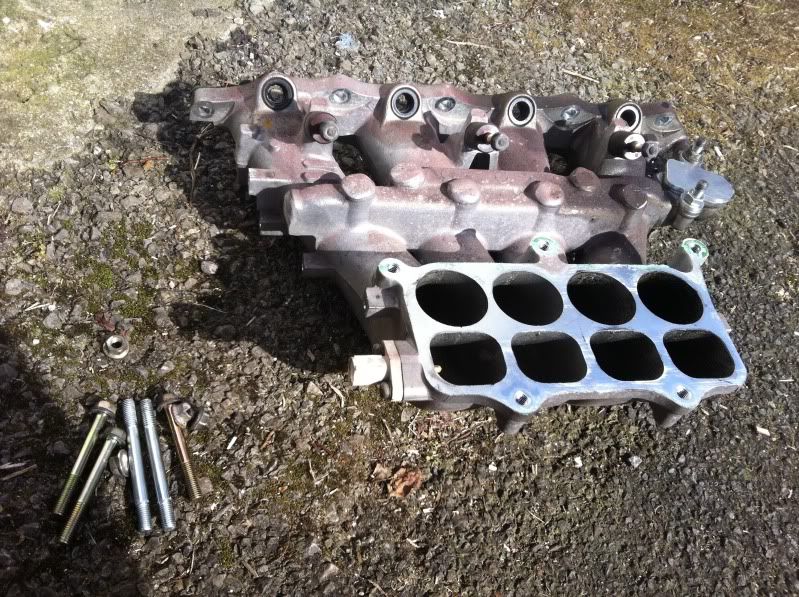
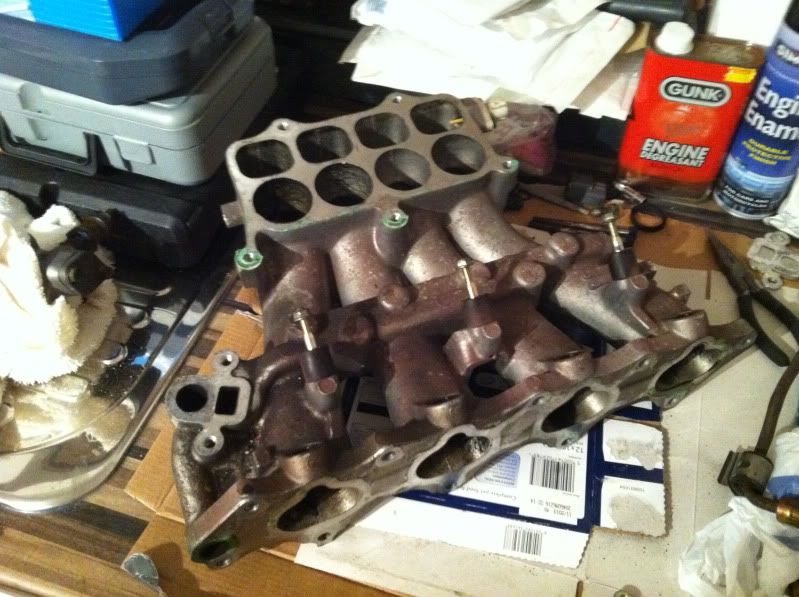
At this point I decided to lose the IAB box, seeing as the JRSC setup doesn’t use them:
Then I also decided to remove the two studs at the front that the IAB plate and top intake plenum slot into. The JRSC plenum bolts into all 5 holes:
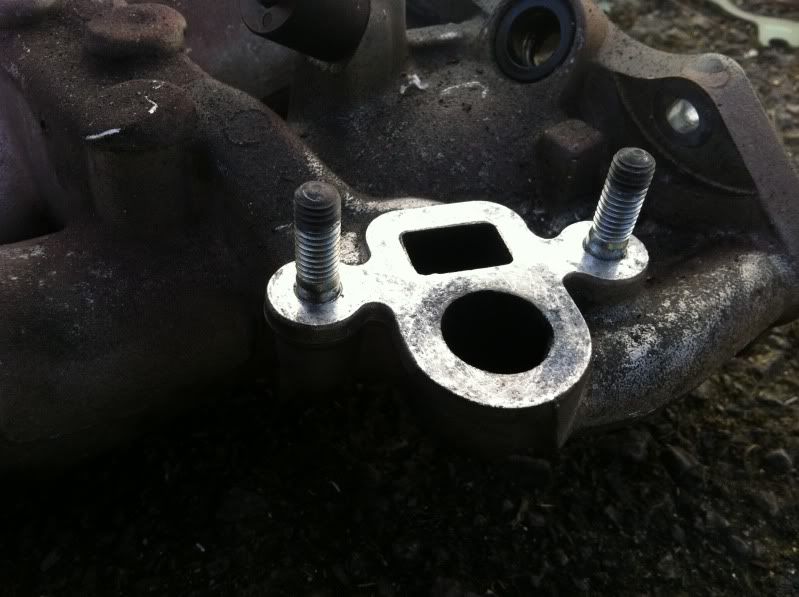
And I’ve had my EGR block off plate on for a while, but want to lose the studs and have some flatter bolts to clean it up, so removed these too:
Then it was time to sneak some parts into the house! Dum, dum, DUUUUM! Missus of course was fully behind me in this decision!
Then I unboxed some parts out of the garage which hadn’t seen the light of day for quite a while – the JRSC kit!
More on that next time folks!
Cheers,
Rob
-
bristol_bb4

- LotM Winner
- Posts: 3369
- Joined: Mon Oct 10, 2011 2:19 pm
- My Generation: 4G


-
4thgenphil

- Supporter 2016
- Posts: 6661
- Joined: Tue Aug 03, 2010 4:15 pm
- My Generation: 4G
- Location: filming two girls one cup 2
- Has thanked: 5 times
- Been thanked: 29 times