
Congratulations to vtecmec for winning May/June's Lude Of The Month, with his DIY Turbo BB1 build.
>>> Click Here For Profile <<<

>>> Click Here For Profile <<<
Supercharged Mugen Lude (03/06/14 Update!)
-
RattyMcClelland

- Moderator
- Posts: 9208
- Joined: Wed Aug 04, 2010 10:02 pm
- My Generation: 5G
- PSN GamerTag: RattyMcClelland
- Location: Leicestershire
- Been thanked: 203 times


-
nucleustylzlude

- Moderator
- Posts: 4013
- Joined: Wed Aug 11, 2010 11:46 pm
- My Generation: 4G
- Location: Bristol, UK!
- Been thanked: 7 times
- Contact:
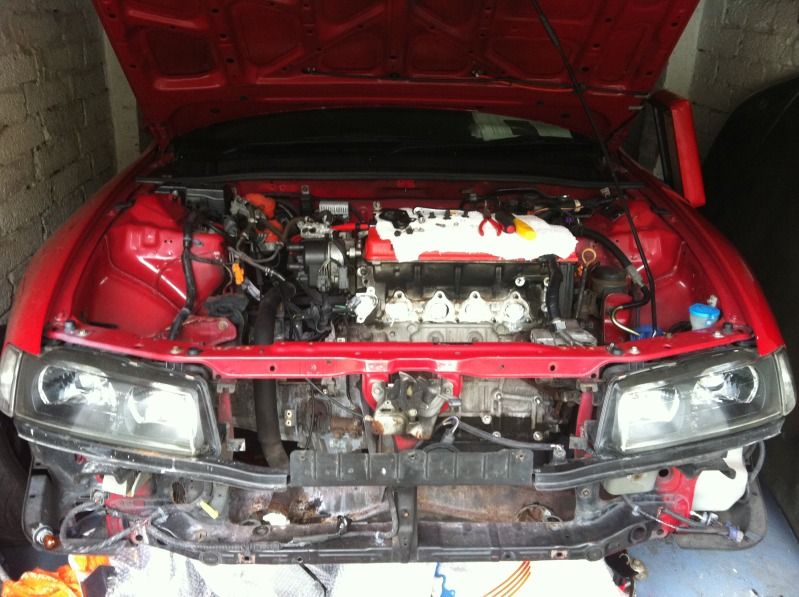
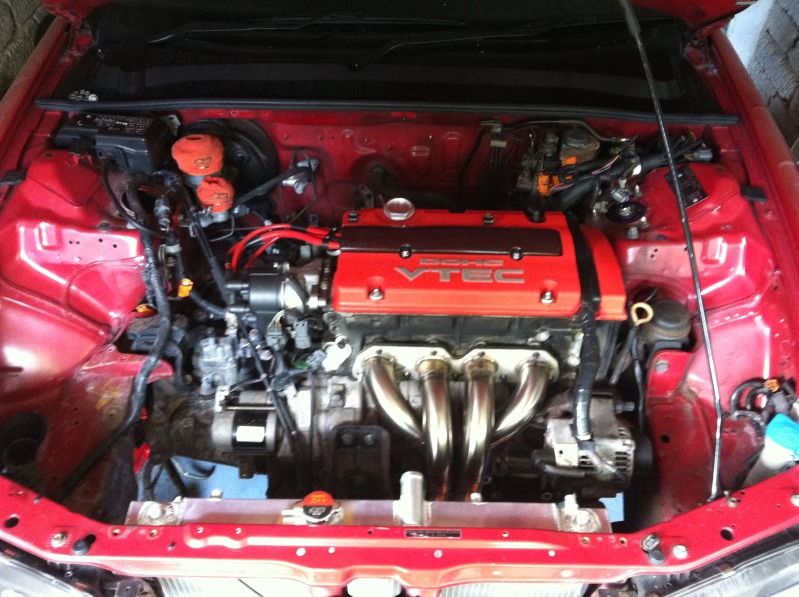
 BUILD PART 5) - Build (Cont'd) – More removals – Rad, PAS, F
Watch how the lack of pics is becoming more frequent! 
Radiator & Hoses Removal
A fairly simple one for anyone who needs to change a blown rad or a split hose. I’m replacing the lot, so out with the old!
First thing is to drain the coolant from the rad, little plastic tap at the bottom middle of the radiator. Just turn it enough that it starts to pour out of the small hole at the bottom, unscrew completely and it gushes out at a horrible angle and will go everywhere! Have a big enough container to catch it all – 4-5litres:
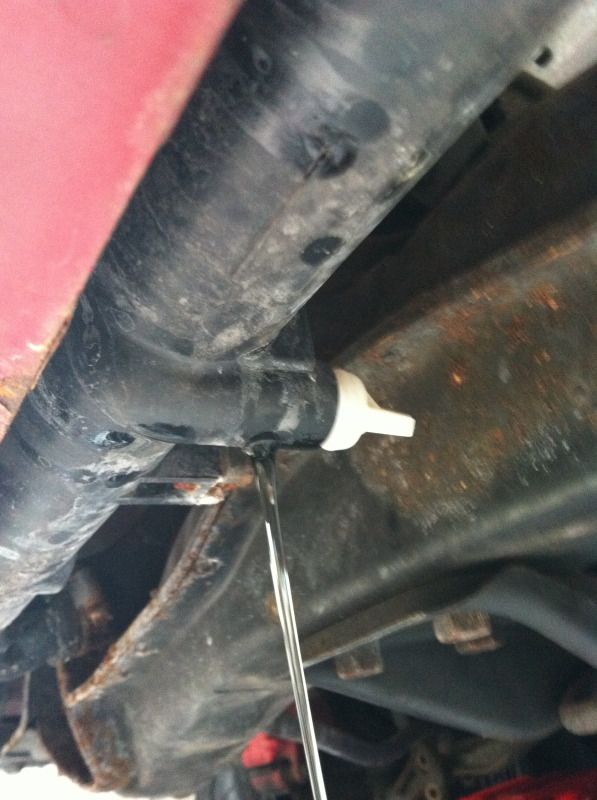

Also remove the rad cap to allow it to drain quicker. There is another drain on the block, but I havn’t bothered with that one for now – later for the water pump.
Next I removed the expansion header tank. This normally slots in on a bracket on the battery tray. Well that’s long gone on mine and was just dangling there. Undo the two clips and remove it and the hose:
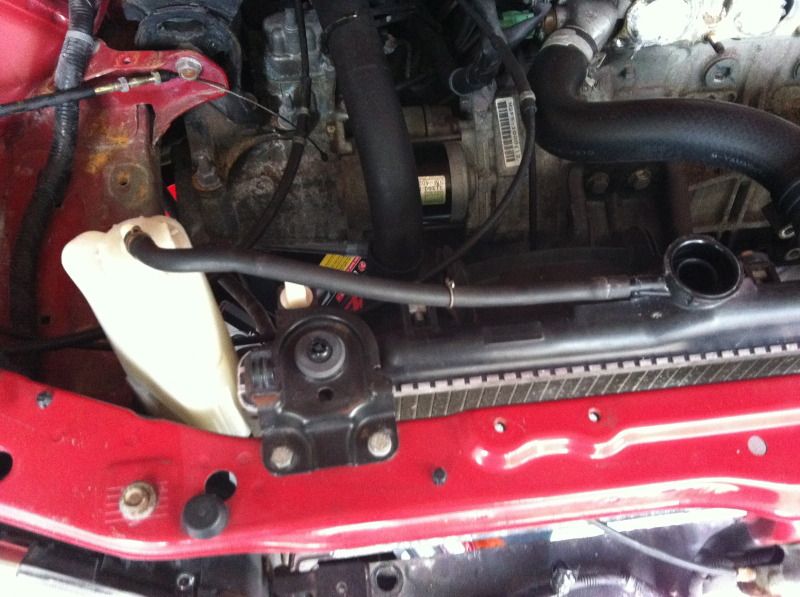
Next up undo the radiator hose clips and gently prise the hoses off the rad – have some cloths/rags to hand as they’ll be some more coolant to catch, especially the bottom one.
Next remove the two top rad mounts by undoing the 4 x 10mm head bolts. Now you can lift the radiator out, it just sits in two rubber seats on the lower part of the slam panel. Here’s the old:
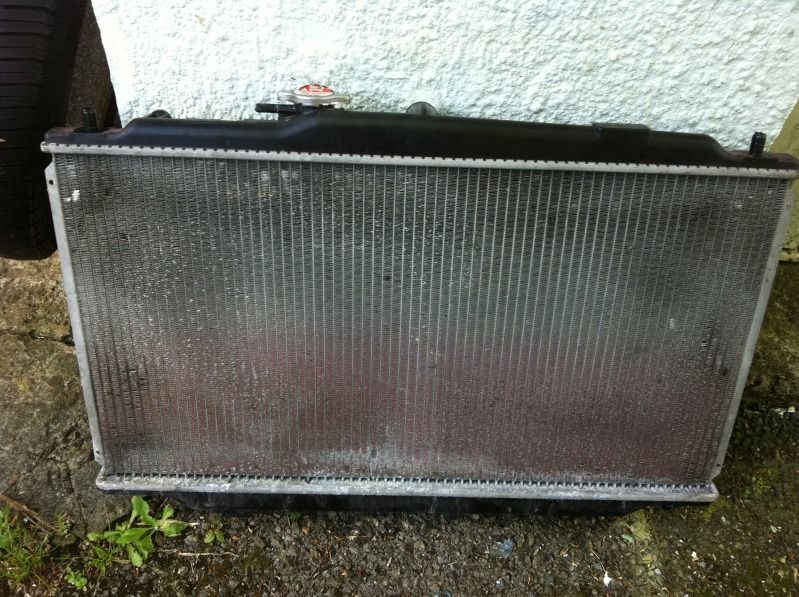
Apart from a little red overspray on it, it’s generally in good nick as I changed it not too long ago.
KAT (fweakyg): It’s here when you want it!
From here I removed the top hose and the return outlet on the engine, but left the lower hose for another day for some reason.
Starting to look pretty hanging isn’t it!
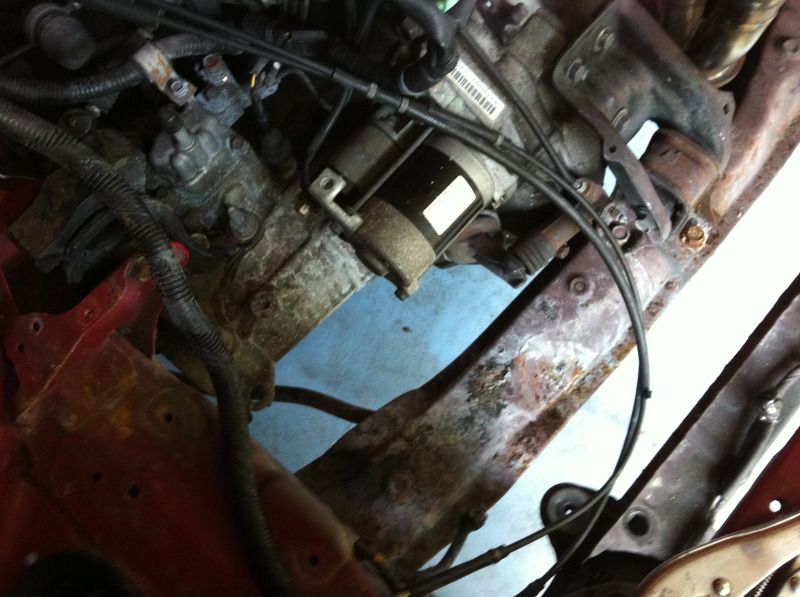
It also highlights how bad things can get following the use of the powder fire extinguisher, way back when I had my engine bay fire at Japshow. I cleaned all this area a few times, but it’s nasty stuff. The fire was the starter motor stuck and burnt out with the idle of the engine – so everything near including the gearbox, front sub frame/cross member, engine mount and drivers lower tow hook all look a little hanging:

I had ordered a bargain replacement sub frame from ebay, but it never arrived!
So looks like I’ll be cleaning this one up after I butcher it to get the manifold fitted.
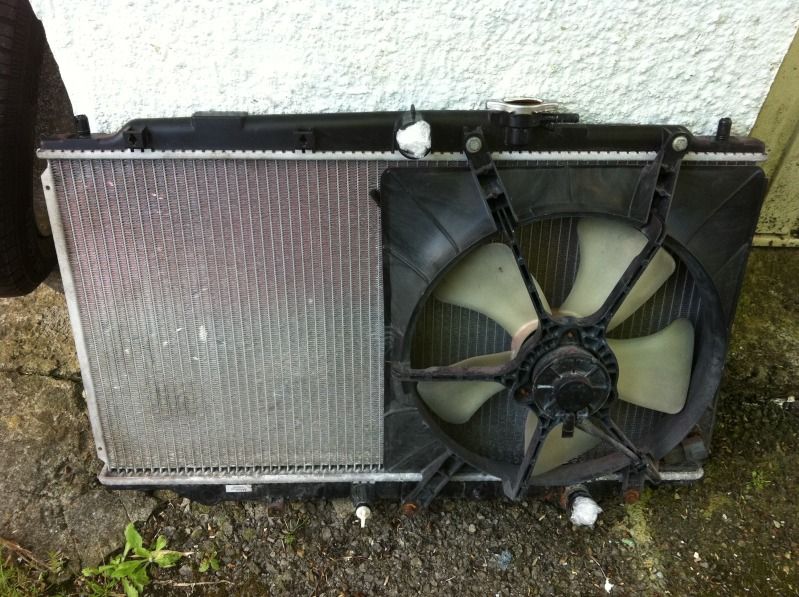
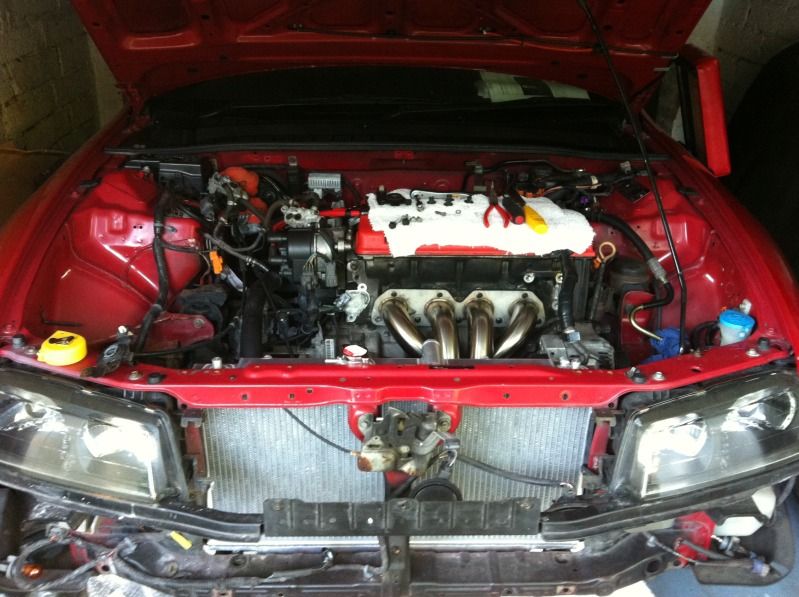
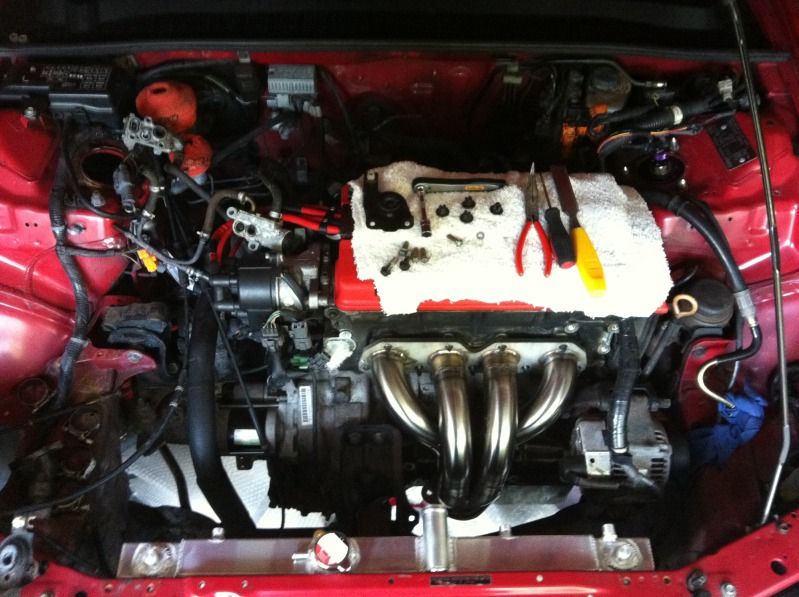
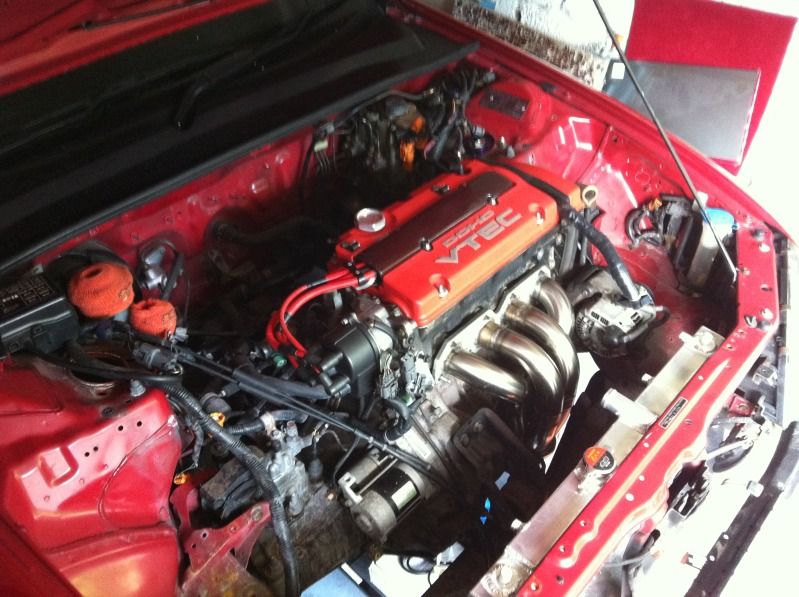
Lets throw some things on to glam it up a bit and see how the new ali rad sits with the new manifold in terms of clearance:
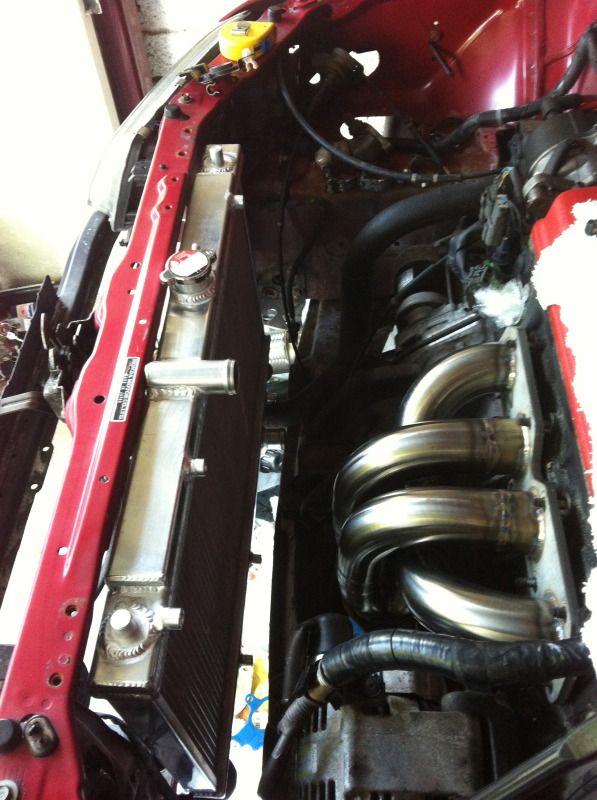
As you can see the rad I have is slightly smaller in height and width, but with a thicker core. As a result the lower mounts don’t work and so I’ll get a little inventive with that end. The tops are easy enough to make some custom rad mounts out of some ali bar, was going to anyway.
That’s about it on the rad front for now.
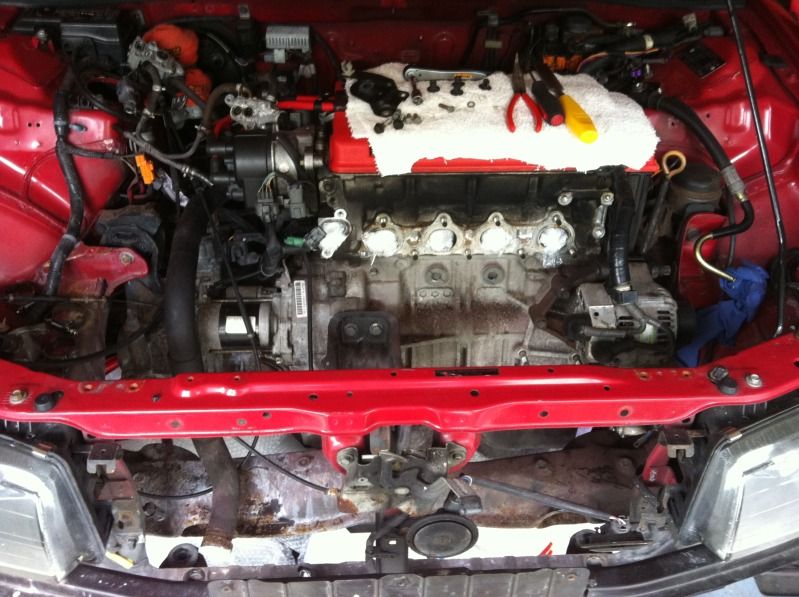
More…YES MORE! PAS parts removal
Up to this point I’ve removed everything from the front of the engine bay related to the PAS system, but the stubborn intake manifold was in the way to get to the more difficult lines – including the large high pressure line that comes off the top of the PAS pump.
Unfortunately, the lack of pictures taken at this point doesn’t really give much of a write up/how to.
Just a case of looking for yourself if you get to this point it’s straight forward enough, but the plastic clips that hold the pipes to the sub frame can be gits!
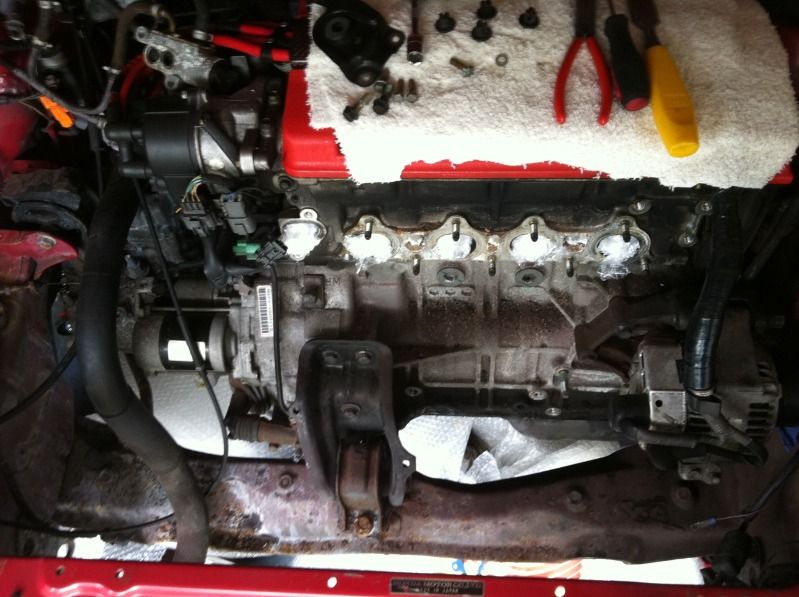
Here’s some fruits of my labour:
And the area tackled (you need to also get under the car):
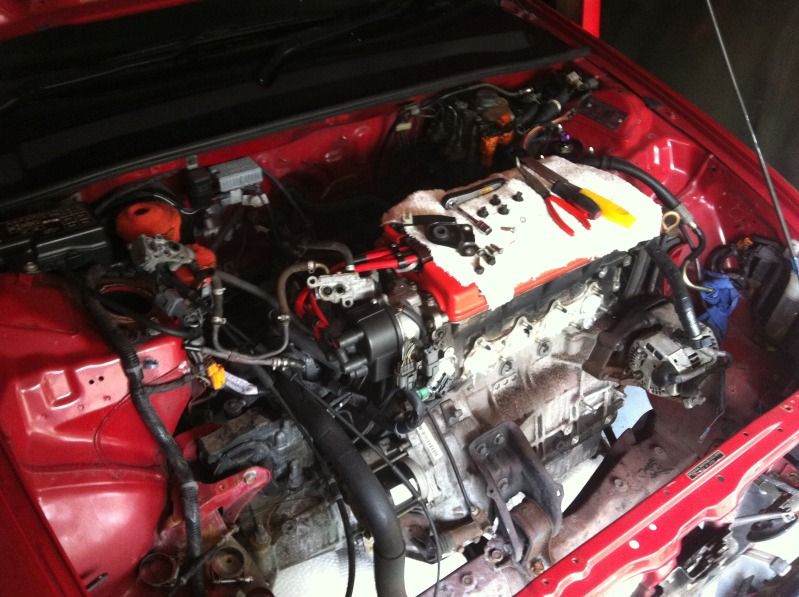
Only a couple of wires left on this side, the rocker cover earth which I need to relocate anyway with the location of the JRSC pulley mount. So off this comes:
The other wire is a long single cable which I sourced to a hybrid Autowatch/Honda siren alarm system. So I’ll cut and extend this wire and feed through the wing.
You can also see in the pic below, a number of wires and plugs from various things that once lived on that side of the engine bay – PAS, A/C, C/C, ABS sensor. To tidy it up a bit just pull all these through into the bumper/wing area:
I didn’t take an after pic, but you’ll see it later on in other pics.
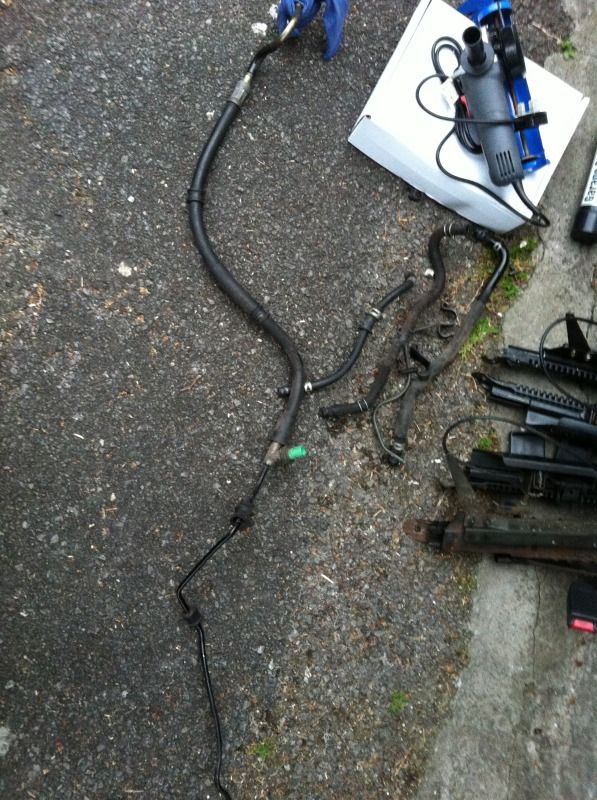
Once you have removed the four flare nuts and associated pipes on the steering rack, let the fluid drain – work the steering a little to get most out. Then you need to cut the four pipes to be able to add 2 rubber pipes to loop them up in two pairs. You need the 2 small pipes connected together, and then the two larger pipes together. Like so:
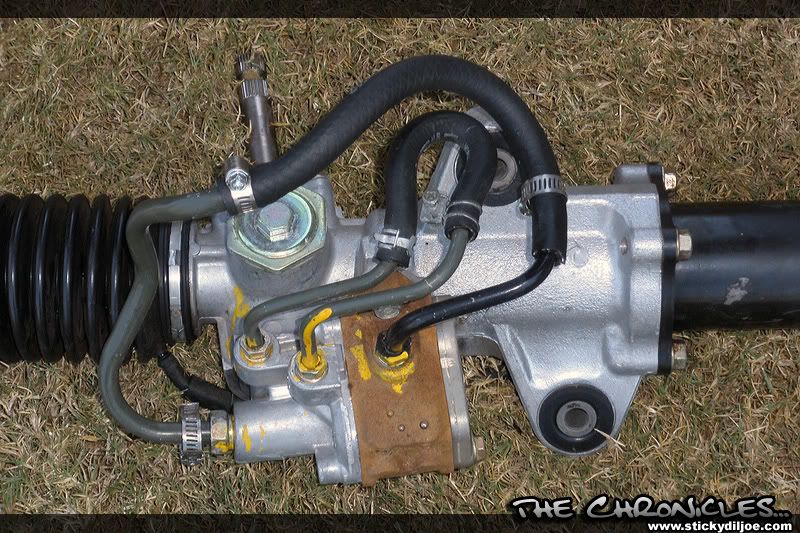
(Not mine of course!)
The largest pipe of the four had some surface corrosion, so I sanded it back a bit, treated it and sprayed it with some protective black paint. I’m about to reinstall them next time I’m in the garage so will take a pic and post it back here to complete the write up.
[red](Take and add pics of looped steering rack)[/red]
Then just reinstall the racks undertray cover, this also had some slight surface corrosion, so some more sanding and a lick of paint later. Again no pic.
Final item is the VSS lines that go to the steering rack – these need to be looped, but I’ll cover that later when I change my gearbox, just makes it easier to get to.
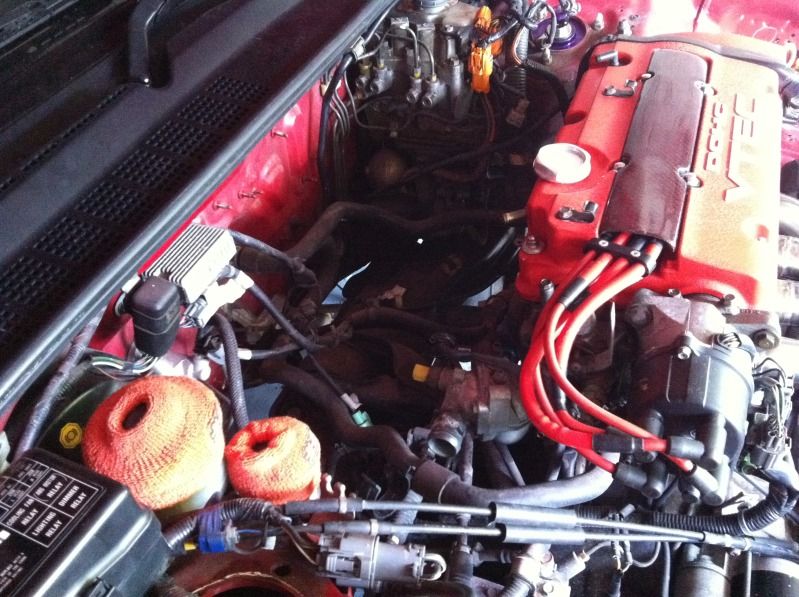
Fuel Parts & Miscellaneous Bits Removals
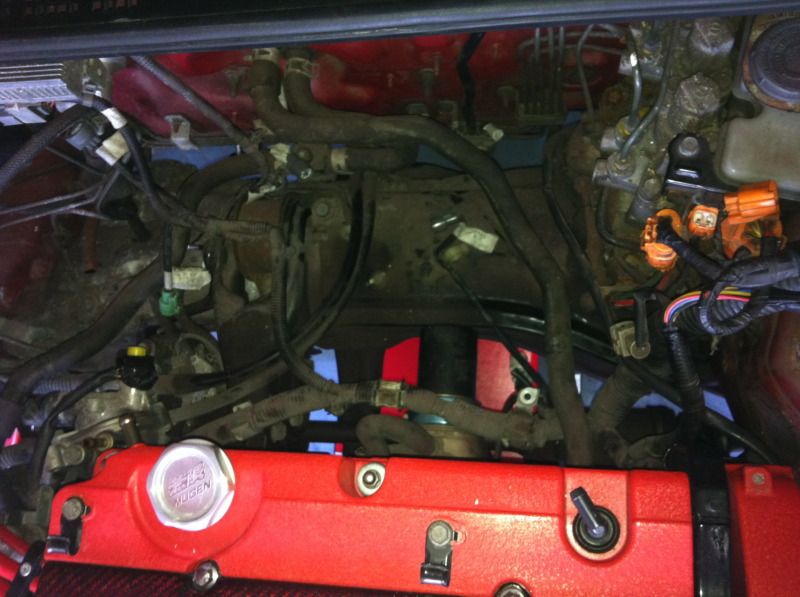
From here I wanted to tidy up the firewall a bit more before going onto the ABS removal.
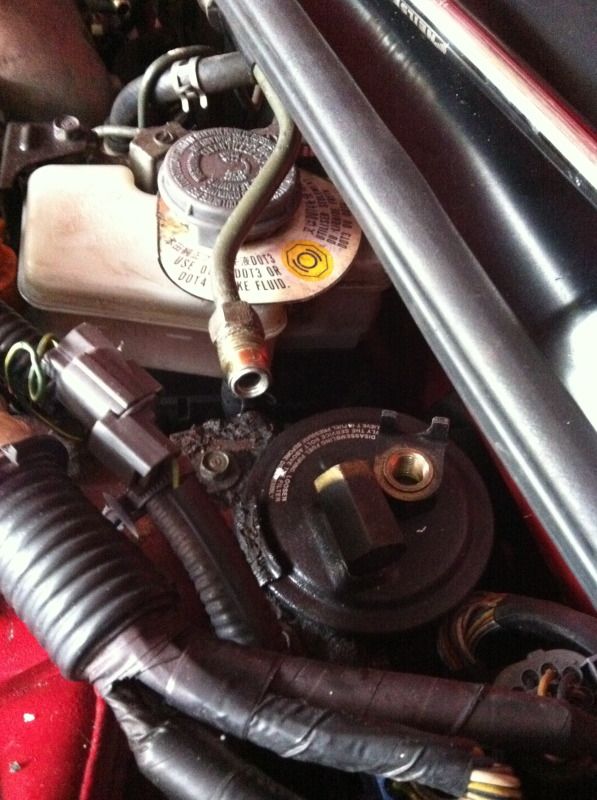
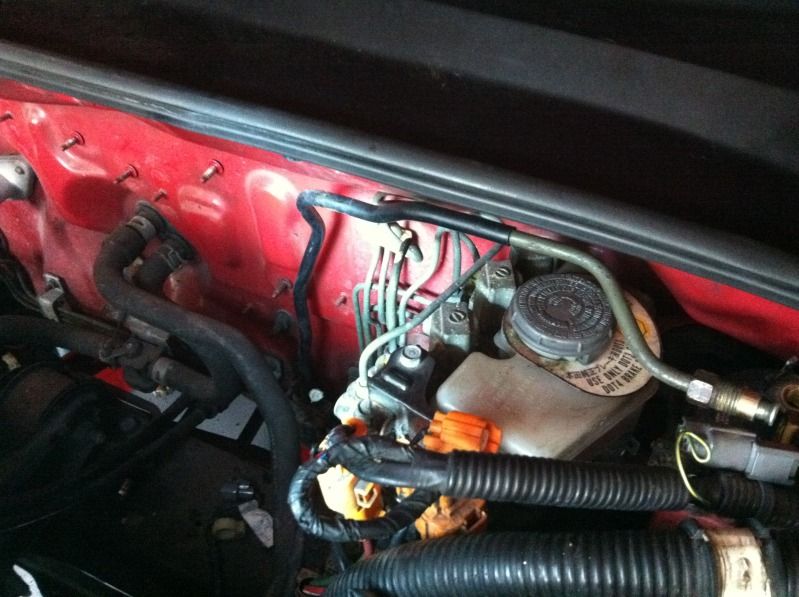
I started with these two items – the injector resistor box (silver finned box) and the wiper relay (small black box), which sit next to the brake/clutch master cylinders:
The injector resistor box as explained previously is being removed to run the larger saturated injectors. The plug and wiring for this comes from the passenger side main loom, so I removed this completely and will mount the loop plug made and secure it to the loom under the intake manifold.
The wiper relay was simply rerouted to live under the fusebox. I was debating on relocating the fusebox inside the car and rewiring like Nath has, but it’s too much effort right now with everything else to finish.
The finished look:
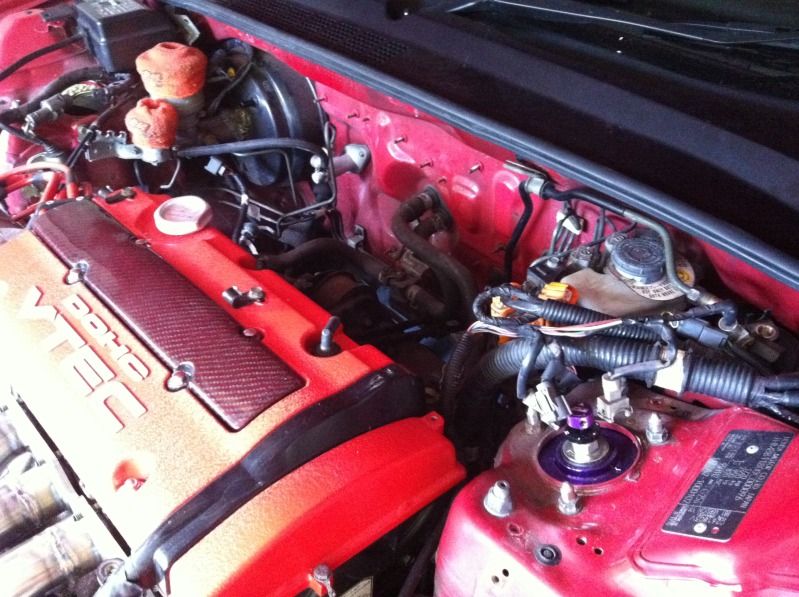
Not a lot left in there!
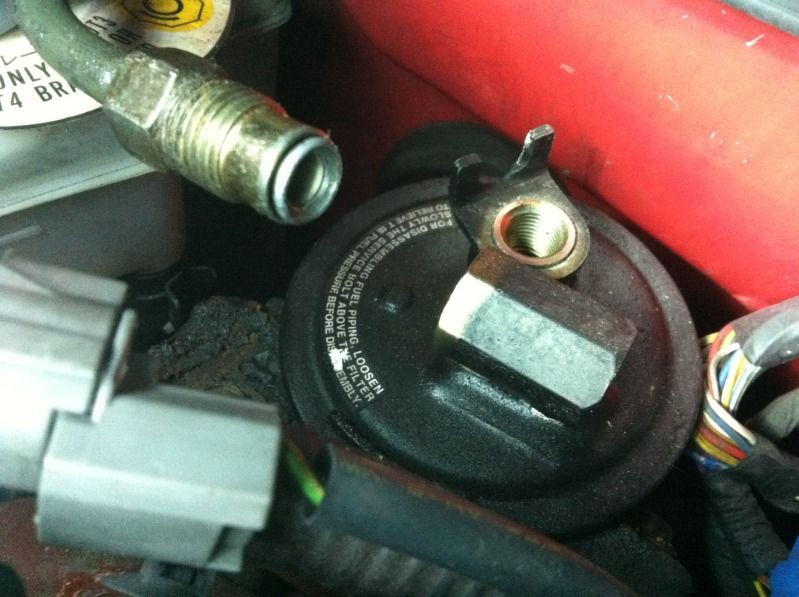
Next up was removing the fuel filter. I had removed the flexy rubber return line back to the hardline on the bottom middle of the firewall already. The supply line however is a hardline all the way up to a flare nut on the fuel filter – so this needs to be cut back for my new braided line and inline filter setup.
First things first, let’s remove the fuel filter. The supply line flare nut can be very stiff to remove which is why they have a hex shaped head to hold the filter while you undo. If you don’t the fuel filter will just move/bend on its mount.
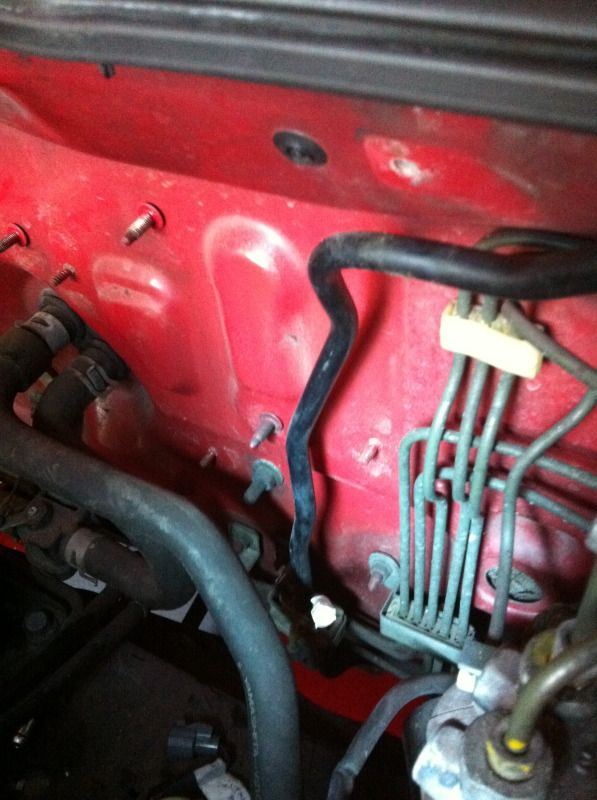
And removed:

And that’s about it for this update.
Cheers,
Rob
Radiator & Hoses Removal
A fairly simple one for anyone who needs to change a blown rad or a split hose. I’m replacing the lot, so out with the old!
First thing is to drain the coolant from the rad, little plastic tap at the bottom middle of the radiator. Just turn it enough that it starts to pour out of the small hole at the bottom, unscrew completely and it gushes out at a horrible angle and will go everywhere! Have a big enough container to catch it all – 4-5litres:
Also remove the rad cap to allow it to drain quicker. There is another drain on the block, but I havn’t bothered with that one for now – later for the water pump.
Next I removed the expansion header tank. This normally slots in on a bracket on the battery tray. Well that’s long gone on mine and was just dangling there. Undo the two clips and remove it and the hose:
Next up undo the radiator hose clips and gently prise the hoses off the rad – have some cloths/rags to hand as they’ll be some more coolant to catch, especially the bottom one.
Next remove the two top rad mounts by undoing the 4 x 10mm head bolts. Now you can lift the radiator out, it just sits in two rubber seats on the lower part of the slam panel. Here’s the old:
Apart from a little red overspray on it, it’s generally in good nick as I changed it not too long ago.
KAT (fweakyg): It’s here when you want it!
From here I removed the top hose and the return outlet on the engine, but left the lower hose for another day for some reason.
Starting to look pretty hanging isn’t it!
It also highlights how bad things can get following the use of the powder fire extinguisher, way back when I had my engine bay fire at Japshow. I cleaned all this area a few times, but it’s nasty stuff. The fire was the starter motor stuck and burnt out with the idle of the engine – so everything near including the gearbox, front sub frame/cross member, engine mount and drivers lower tow hook all look a little hanging:
I had ordered a bargain replacement sub frame from ebay, but it never arrived!
So looks like I’ll be cleaning this one up after I butcher it to get the manifold fitted.
Lets throw some things on to glam it up a bit and see how the new ali rad sits with the new manifold in terms of clearance:
As you can see the rad I have is slightly smaller in height and width, but with a thicker core. As a result the lower mounts don’t work and so I’ll get a little inventive with that end. The tops are easy enough to make some custom rad mounts out of some ali bar, was going to anyway.
That’s about it on the rad front for now.
More…YES MORE! PAS parts removal
Up to this point I’ve removed everything from the front of the engine bay related to the PAS system, but the stubborn intake manifold was in the way to get to the more difficult lines – including the large high pressure line that comes off the top of the PAS pump.
Unfortunately, the lack of pictures taken at this point doesn’t really give much of a write up/how to.
Just a case of looking for yourself if you get to this point it’s straight forward enough, but the plastic clips that hold the pipes to the sub frame can be gits!
Here’s some fruits of my labour:
And the area tackled (you need to also get under the car):
Only a couple of wires left on this side, the rocker cover earth which I need to relocate anyway with the location of the JRSC pulley mount. So off this comes:
The other wire is a long single cable which I sourced to a hybrid Autowatch/Honda siren alarm system. So I’ll cut and extend this wire and feed through the wing.
You can also see in the pic below, a number of wires and plugs from various things that once lived on that side of the engine bay – PAS, A/C, C/C, ABS sensor. To tidy it up a bit just pull all these through into the bumper/wing area:
I didn’t take an after pic, but you’ll see it later on in other pics.
Once you have removed the four flare nuts and associated pipes on the steering rack, let the fluid drain – work the steering a little to get most out. Then you need to cut the four pipes to be able to add 2 rubber pipes to loop them up in two pairs. You need the 2 small pipes connected together, and then the two larger pipes together. Like so:
(Not mine of course!)
The largest pipe of the four had some surface corrosion, so I sanded it back a bit, treated it and sprayed it with some protective black paint. I’m about to reinstall them next time I’m in the garage so will take a pic and post it back here to complete the write up.
[red](Take and add pics of looped steering rack)[/red]
Then just reinstall the racks undertray cover, this also had some slight surface corrosion, so some more sanding and a lick of paint later. Again no pic.
Final item is the VSS lines that go to the steering rack – these need to be looped, but I’ll cover that later when I change my gearbox, just makes it easier to get to.
Fuel Parts & Miscellaneous Bits Removals
From here I wanted to tidy up the firewall a bit more before going onto the ABS removal.
I started with these two items – the injector resistor box (silver finned box) and the wiper relay (small black box), which sit next to the brake/clutch master cylinders:
The injector resistor box as explained previously is being removed to run the larger saturated injectors. The plug and wiring for this comes from the passenger side main loom, so I removed this completely and will mount the loop plug made and secure it to the loom under the intake manifold.
The wiper relay was simply rerouted to live under the fusebox. I was debating on relocating the fusebox inside the car and rewiring like Nath has, but it’s too much effort right now with everything else to finish.
The finished look:
Not a lot left in there!
Next up was removing the fuel filter. I had removed the flexy rubber return line back to the hardline on the bottom middle of the firewall already. The supply line however is a hardline all the way up to a flare nut on the fuel filter – so this needs to be cut back for my new braided line and inline filter setup.
First things first, let’s remove the fuel filter. The supply line flare nut can be very stiff to remove which is why they have a hex shaped head to hold the filter while you undo. If you don’t the fuel filter will just move/bend on its mount.
And removed:
And that’s about it for this update.
Cheers,
Rob

-
NafemanNathan

- LotM Winner
- Posts: 20144
- Joined: Sun Aug 08, 2010 9:37 pm
- My Generation: 0G
- Location: Yeovil, Somerset
- Has thanked: 8 times
- Been thanked: 124 times

-
nucleustylzlude
- Moderator
- Posts: 4013
- Joined: Wed Aug 11, 2010 11:46 pm
- My Generation: 4G
- Location: Bristol, UK!
- Been thanked: 7 times
- Contact:
-
mercutio

- LotM Winner
- Posts: 14958
- Joined: Sun Aug 08, 2010 8:45 pm
- My Generation: 5G
- Location: Sunny Manchester
- Has thanked: 1 time
- Been thanked: 4 times
- Contact:
well get on with it then
bristol_bb4 wrote:ahhh a 5th gen, i love 5th gens
Dino wrote:I loves the 5th gen really.... just dont quote me on it...
4thgenphil wrote:Mines 4 1/4 unches mate, sorry
http://www.ludegeneration.co.uk/profile ... -t618.html

-
nucleustylzlude
- Moderator
- Posts: 4013
- Joined: Wed Aug 11, 2010 11:46 pm
- My Generation: 4G
- Location: Bristol, UK!
- Been thanked: 7 times
- Contact:
Re: Supercharged Mugen Lude (4/8/12 Update)
Cheers man. It looks even cleaner with the ABS now removed.
On the other hand it has highlighted how dirt engrained and scruffy generally the engine bay is. With the show season drawing to a close soon, I'm going all out with 'time on my hands' by painting the bay...with the engine in...by myself...
On the other hand it has highlighted how dirt engrained and scruffy generally the engine bay is. With the show season drawing to a close soon, I'm going all out with 'time on my hands' by painting the bay...with the engine in...by myself...
-
mercutio
- LotM Winner
- Posts: 14958
- Joined: Sun Aug 08, 2010 8:45 pm
- My Generation: 5G
- Location: Sunny Manchester
- Has thanked: 1 time
- Been thanked: 4 times
- Contact:
wouldnt it be easier getting it steam cleaned and tcut'd unless your going for another colour?
bristol_bb4 wrote:ahhh a 5th gen, i love 5th gens
Dino wrote:I loves the 5th gen really.... just dont quote me on it...
4thgenphil wrote:Mines 4 1/4 unches mate, sorry
http://www.ludegeneration.co.uk/profile ... -t618.html
-
nucleustylzlude
- Moderator
- Posts: 4013
- Joined: Wed Aug 11, 2010 11:46 pm
- My Generation: 4G
- Location: Bristol, UK!
- Been thanked: 7 times
- Contact:
Re: Supercharged Mugen Lude (4/8/12 Update)
Maybe, but the finish still won’t be great. There are a lot of marks and scratches here and there, some were me while removing all the parts to get it where it is today, also the strut brace has marked the paint and some of the seam sealer has been nudged and exposed a horrible creamy colour. Plus the removed battery tray area never has paint under it, just primer and the top part has a little surface rust from the battery. The back firewall is so engrained with dirt that it would be hard to revive that personally. In fact, while I was removing the ABS, you can’t help but spill a little fluid and when cleaning up bits, it would strip back some of the grime, but nowhere near enough.
The final nudge was speaking with my bodyshop buddy who walked me through it and said I could borrow his micro polisher (small thing for door jambs and small detailing. Said I could bring up a good finish if I put enough lacquer on. I’ve used this before with a little G3 compound to polish out some scrapes and marks, and it’s a godsend.
So that’s the plan! Will it take longer? Yep, but let’s face it, I’ve taken long enough, it’s something I need to do before installing things back into the bay, it’ll never be as clear as this. Plus the engine block and all little gubbins are getting painted, so it’s only going to accentuate the rest of the bay.
I will finish! When will always be questionable. Japfest? Japshow? JAE? Um…rolling into end of Summer soon…:?
It’s one of those projects, where you want to do everything all at once, rather than bit by bit. Only pain is I need to insure the damn thing October, otherwise I lose my no claims bonus as I’ve been running a company car for a while. I’m second driver on the Wife’s car, does that count?