Well that saves me a job

I was going to re-do the write up for PAS removal that I had before but Nathan has now covered that

So once you've done PAS Removal Stage 1 you can move onto PAS Removal Stage 2 if you really don't ever want to go back.
Here's the write up taken from my build thread
PAS Removal Stage 2 - Steering Rack Modification and more weight saving
In summary, ever since I first carried out the conversion I vowed I would never go back to having PAS on the Lude especially as a track car. Yes the low speed steering effort was quite high (this was reduced by running a decent amount of neg camber) and yes the mid corner loading might not be everyones cup of tea but the massive improvement in feedback and feel for grip levels more than compensated for the small vices.
Some suggested that the heavier steering would cause issues if the car was in a slide and you needed to apply opposite lock quickly but this proved to simply not be the case...if anything you could feel the slide starting earlier through steering weight change.
Anyway, years on and it's not that uncommon a modification to Preludes, Civics and Integras these days...I've carried out this mod many many times and I think only one person ever sort of regretted it...the rest just simply loved it.
Time for taking things to the next level then.
This was actually on my "to do" list long before I started with this full project but as with all good "to do" lists it never got done
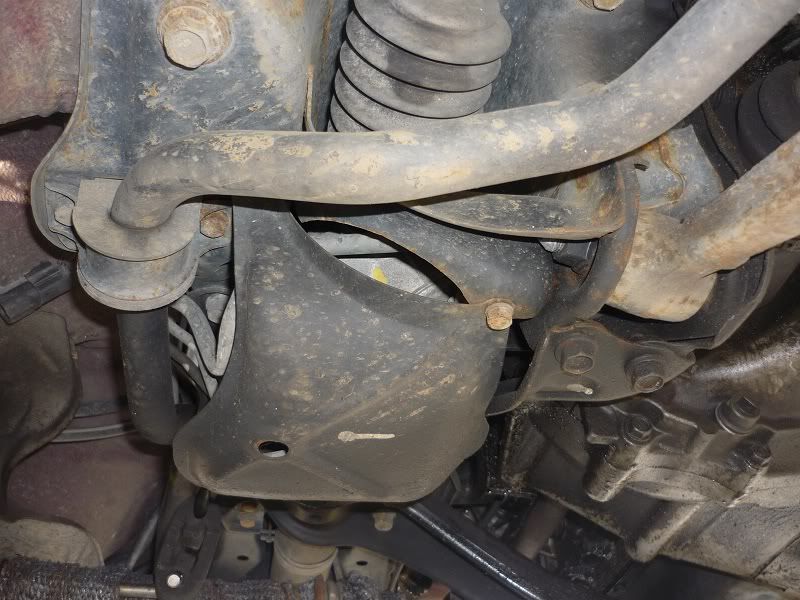
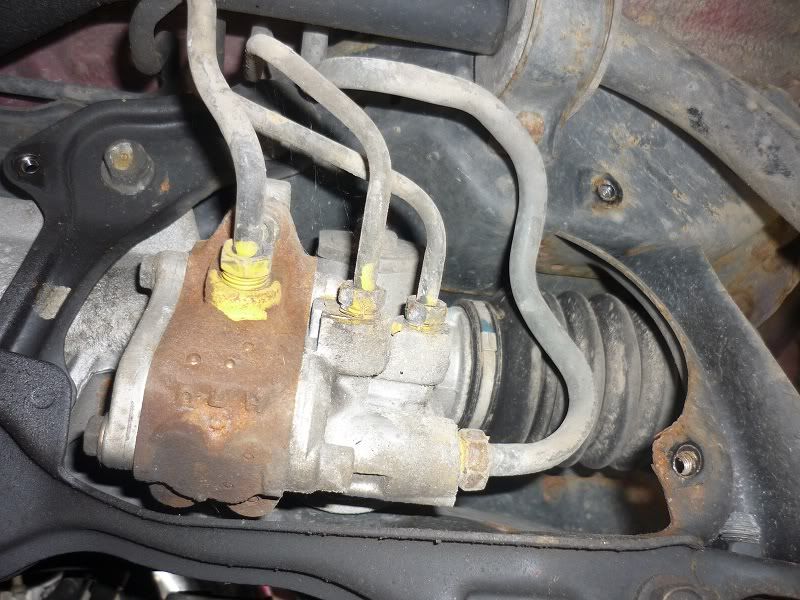
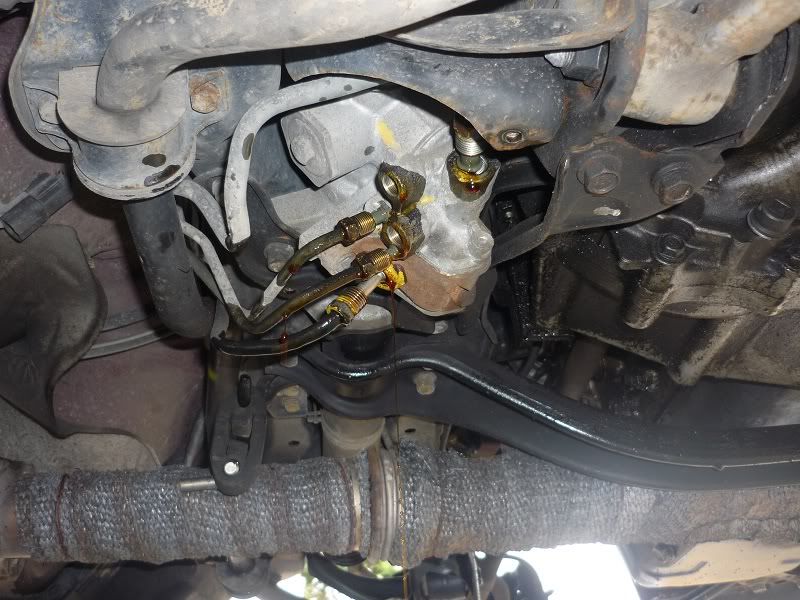
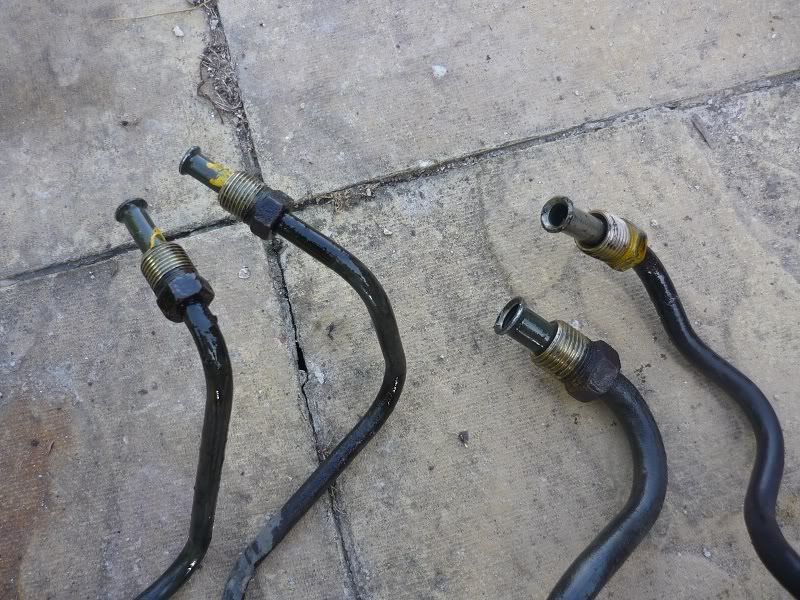
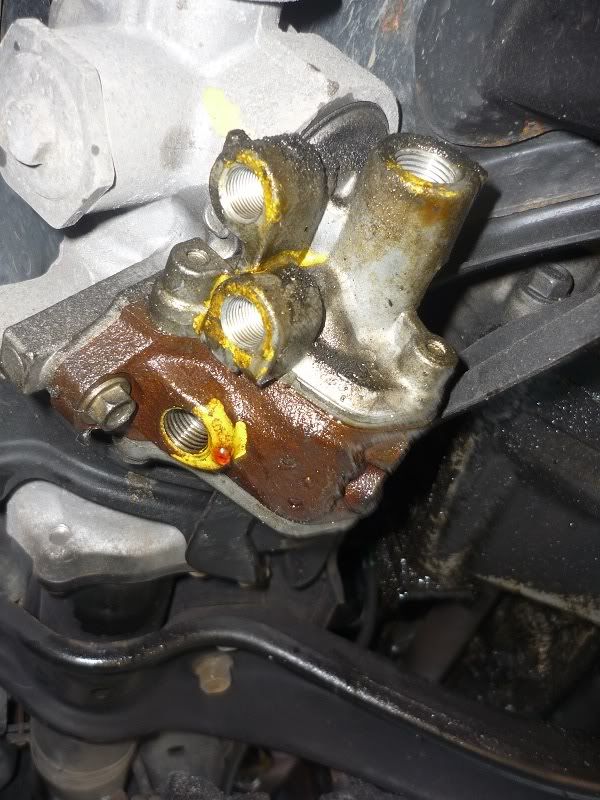
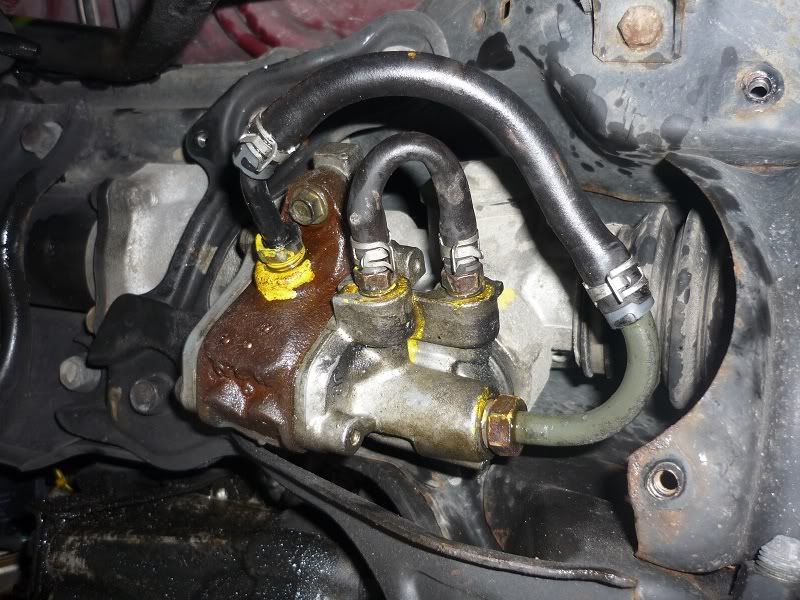
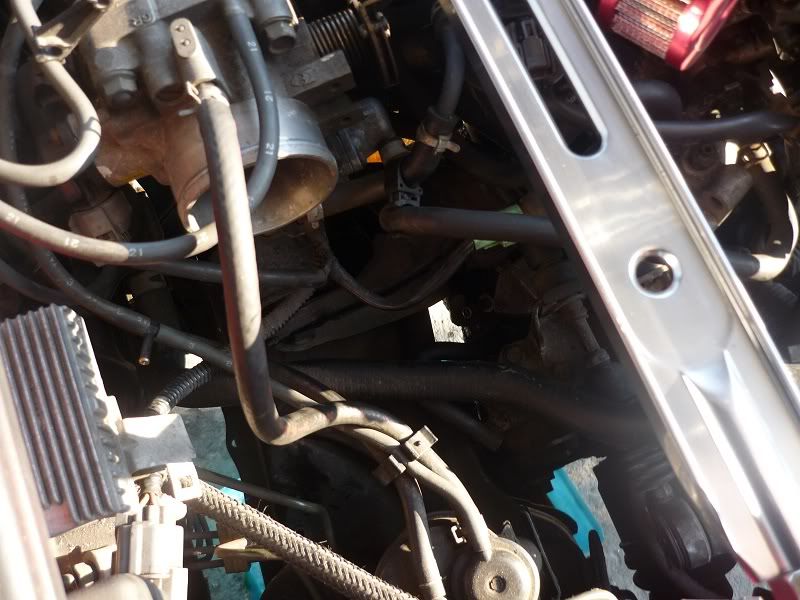
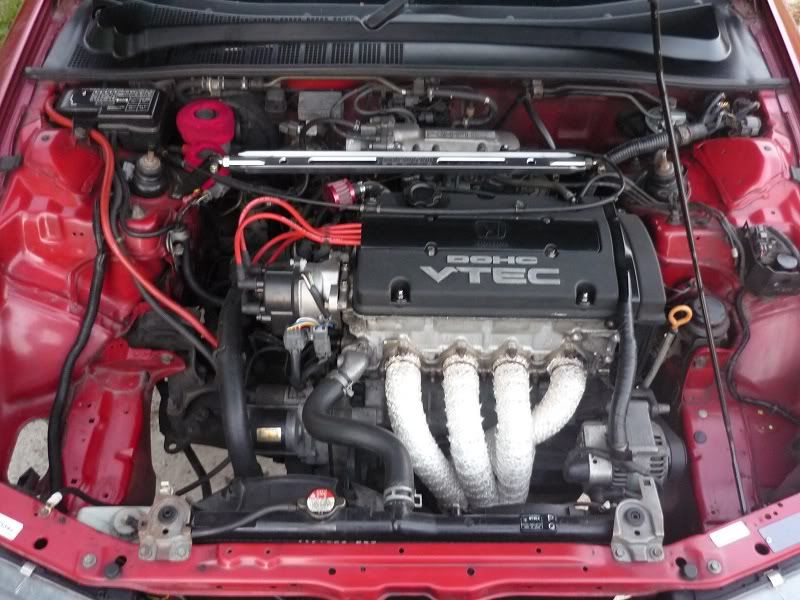
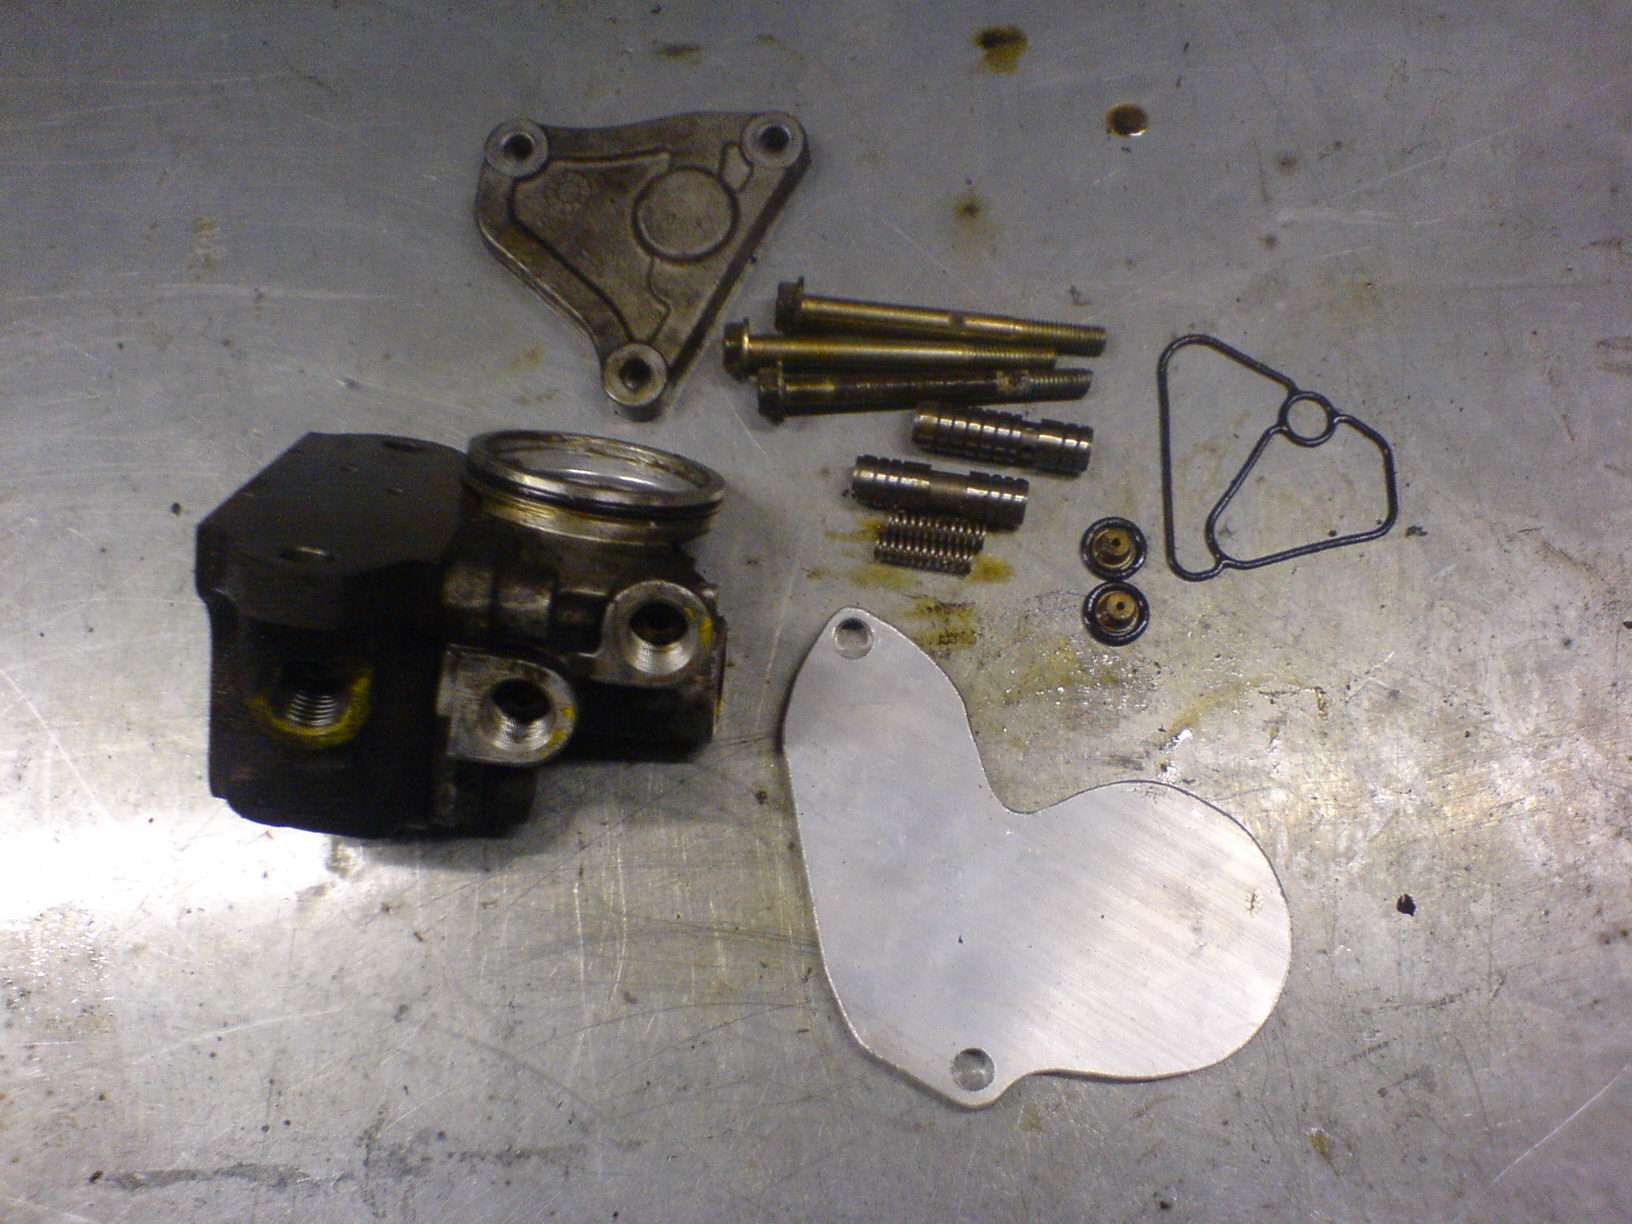
I was keen to see if I could improve the feel even further and also reduce the steering effort just a little. I also absolutely hated the big heavy ugly mess that was the looped PAS lines and the steering rack valve body as seen here

So there was only one thing for it.... set to work with a spare steering rack and modify it to remove the unwanted PAS gubbins and also look at a way of improving the feel / resistance. There would also be the added bonus of shedding some more weight...not that I'm at all obsessed of course

Below is a bit of a summary of the work done, the full explanation and more pics can be found in the guide should you wish to do something similar.
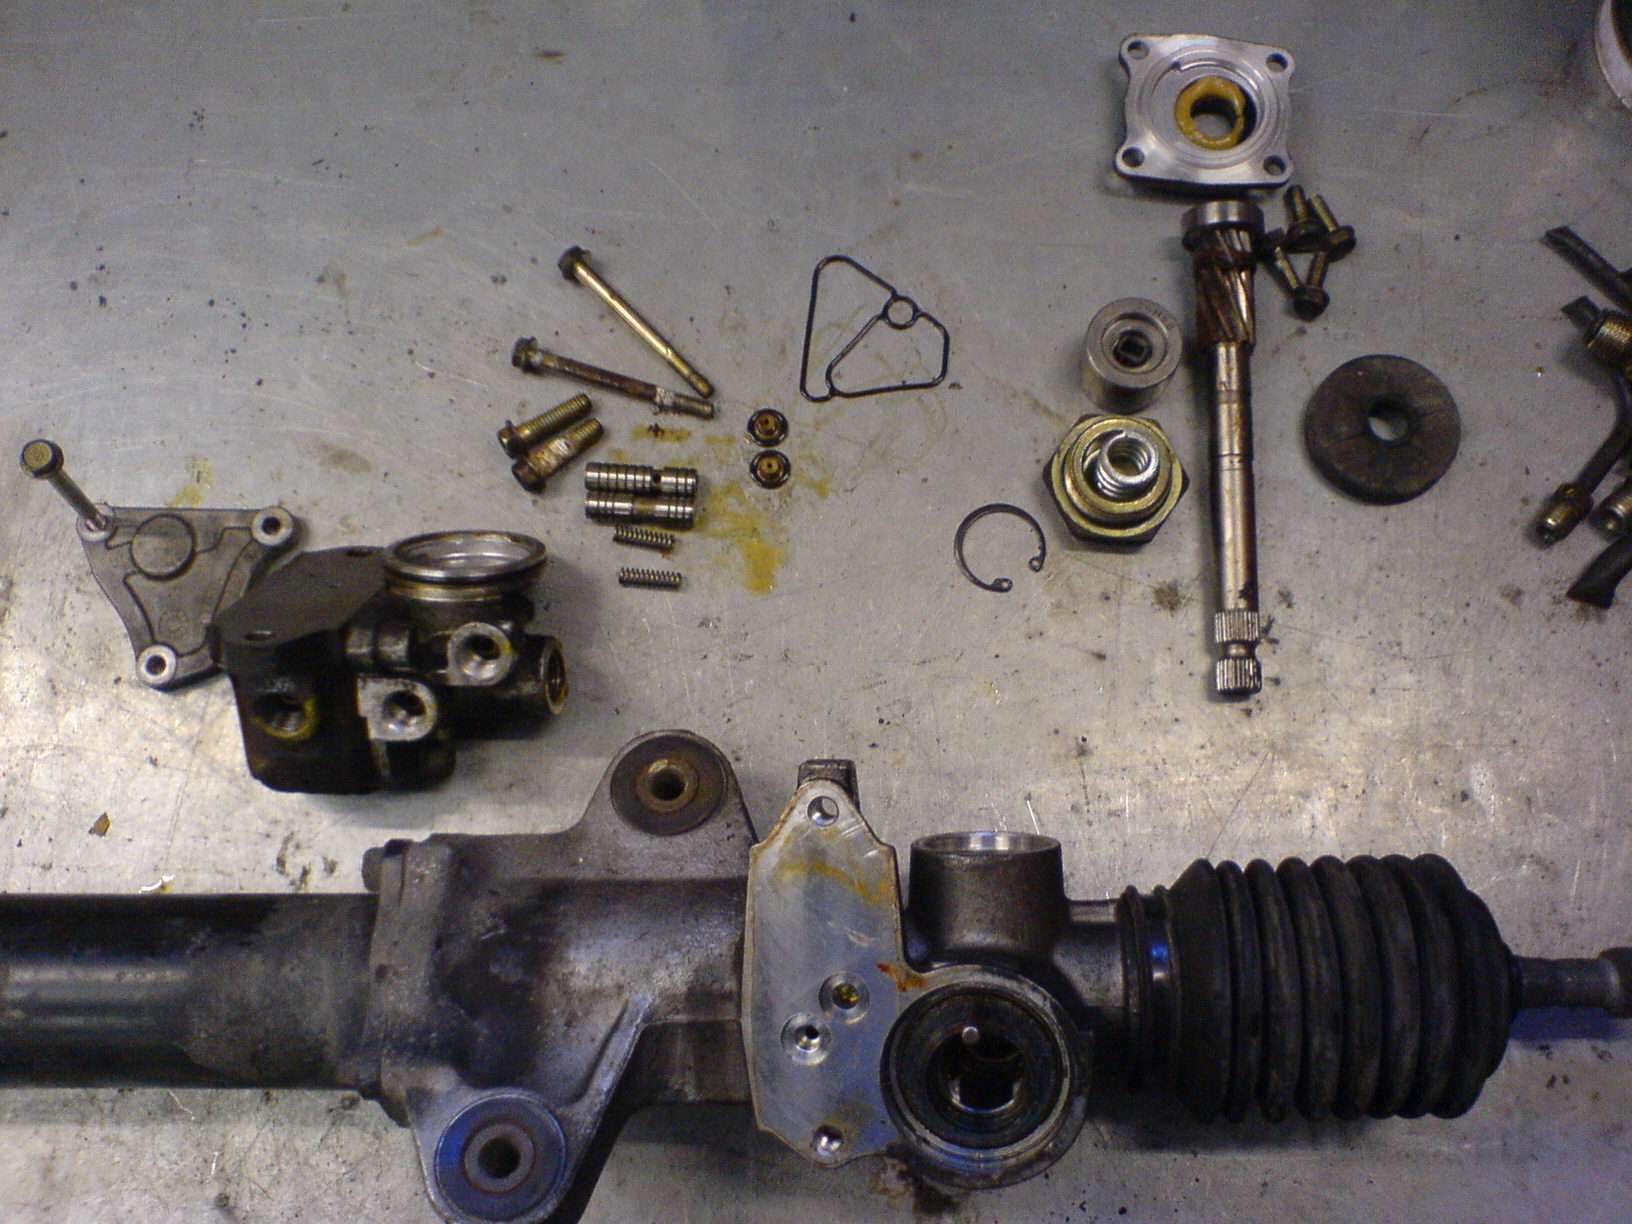
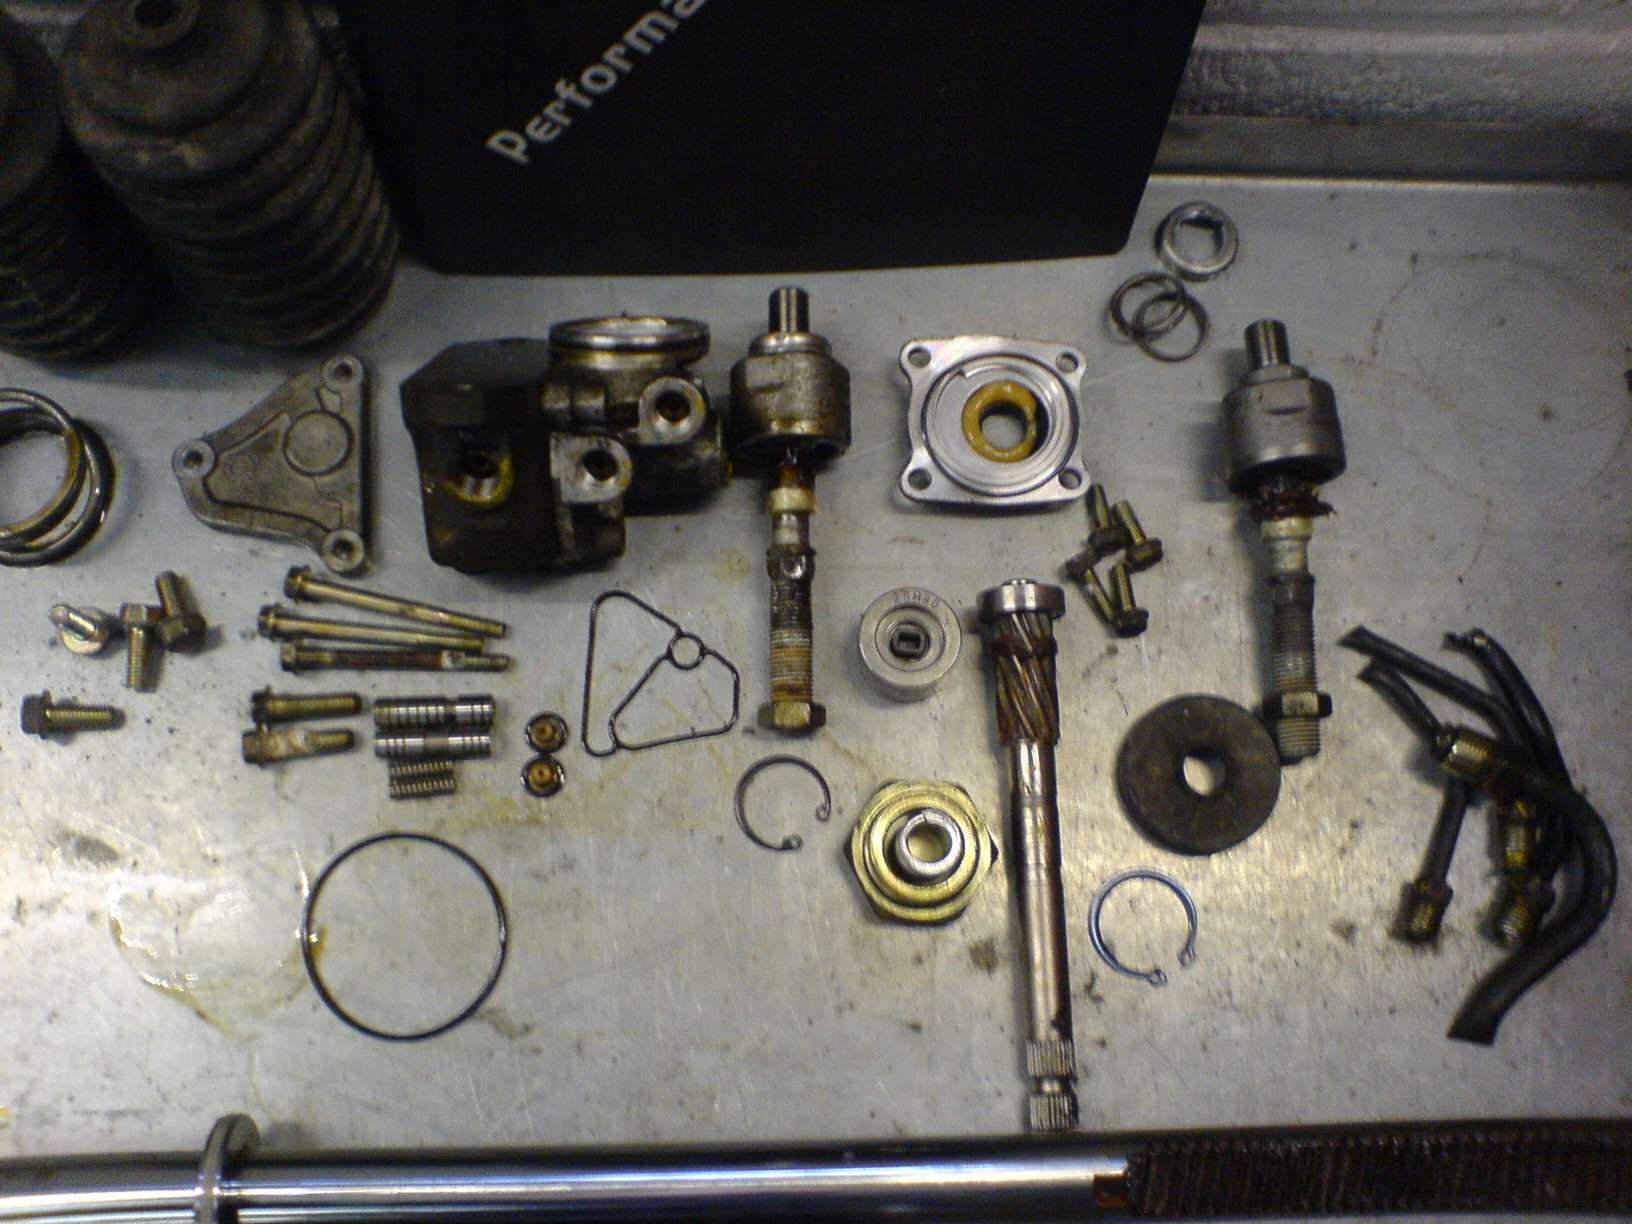
Just as Honda intended. Standard BB4 PAS rack
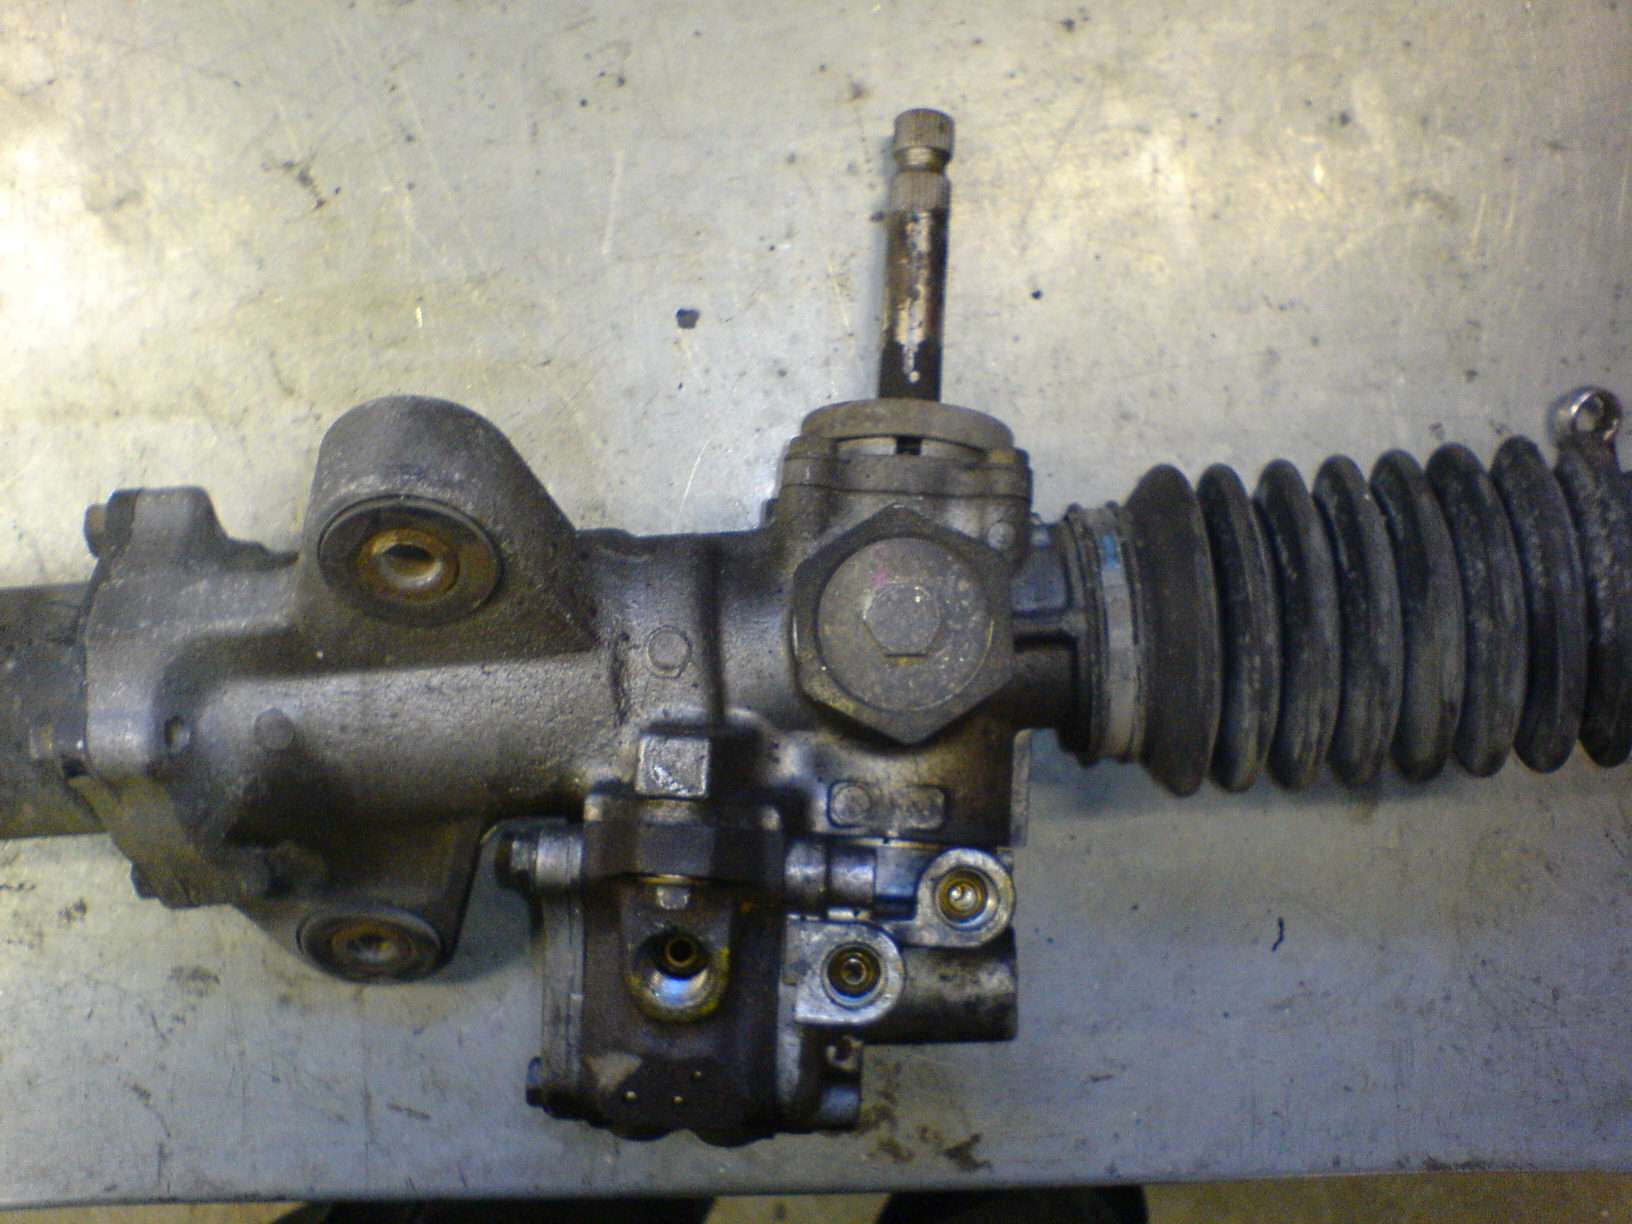
The next 3 pics show all the main steering rack components laid out to see. Be warned there are a couple of sprung parts and there will be residual oil inside.
If you are unsure how these items come apart you should be able to see clearly from the "rebuilding" pics. Alternatively I suggest you refer to the Honda workshop manual for guidance as I forgot to take pics when stripping it all down

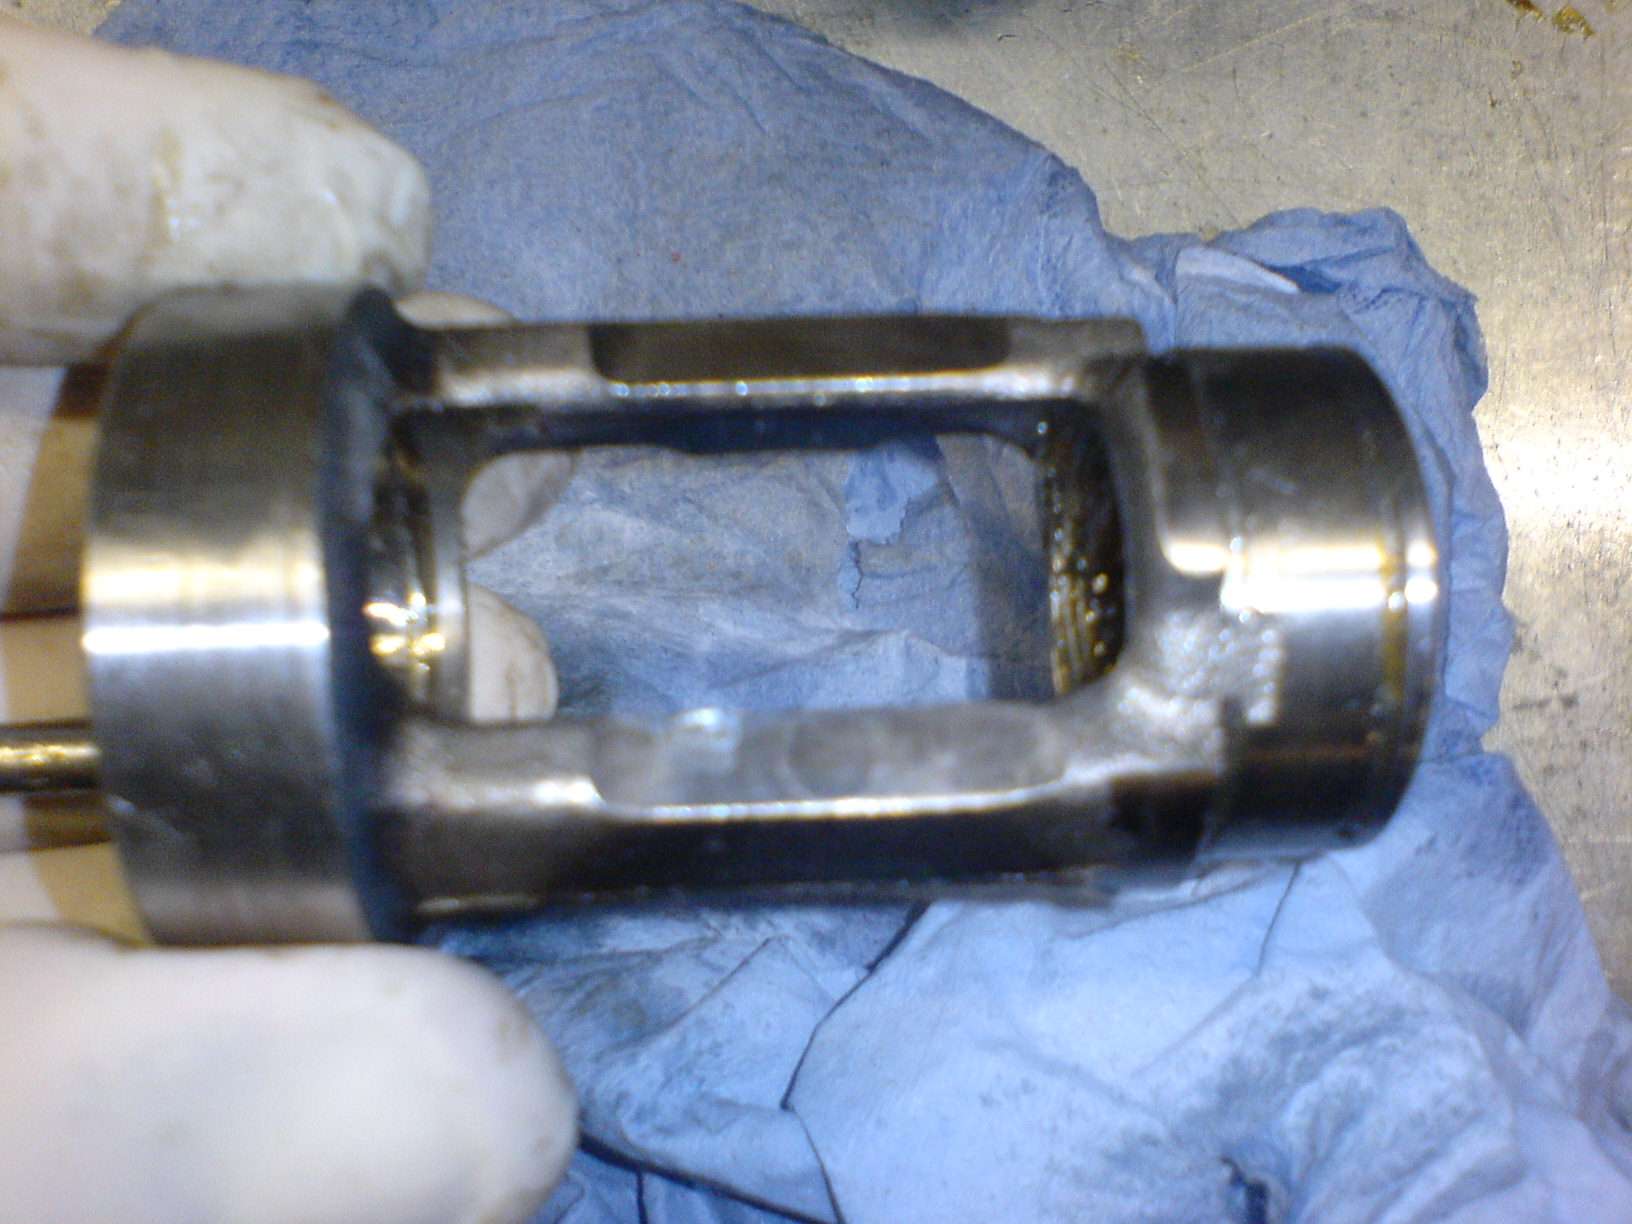
This is the centre of the steering rack itself. This is effectively a piston with hard wearing sealing ring. The pressurised fluid acts on either side of this to assist with the turn. The white band (sealing ring) creates a fluid tight seal in the piston tube. While we still want a "good fit" we don't need a fluid tight seal anymore so some careful filling around the sealing ring will help to reduce drag inside the rack once oiled/greased.

Here you can see that I have merged the two feed and return holes into one slot. This is so that each side of the piston can breathe into the other side when going from lock to lock. This would normally happen to the fluid under pressure through the 4 way valve body but that's gone now.

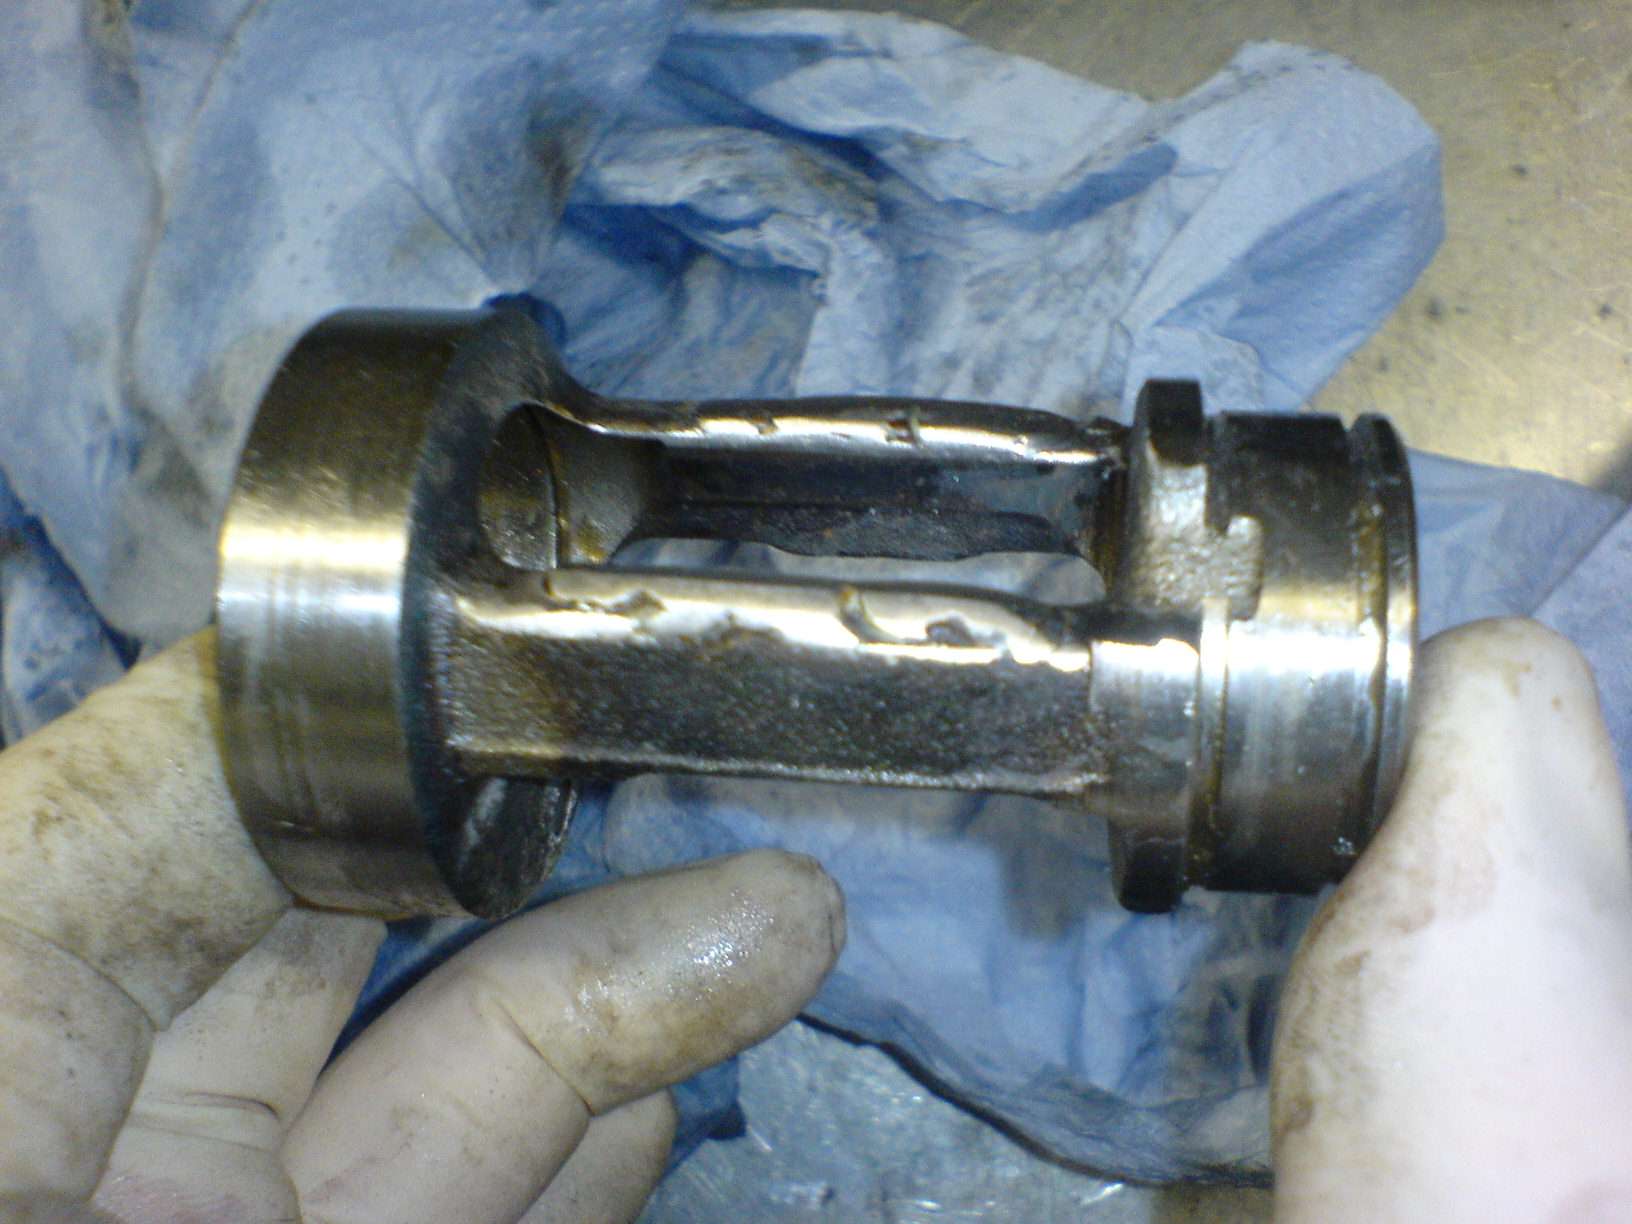
The steering rack "gearbox", rack, pinion, cylinder and sleeve were all then thoroughly cleaned ready for refitting.

Rack and piston seal greased well ready for refitting. The inside of the "gear housing" has also been well greased.

Rack installed back into gearbox housing and rack tube refitted.

Close up of the gear housing and the pinion holder bearing freshly greased. Note the two lugs in the bottom of the housing. These are stoppers for the pinion shaft holder which has a few degrees of movement to activate the 4 way valve pas fluid direction. This movement won't be acceptable as it will feel like slop in the steering thanks to no spring resistance.

The machined top edges of the pinion shaft holder. This machining allows the pinion to rotate a few degrees to left and right when fitted inside the gear housing. I want to eradicate this movement and also remove the just visible pin which is what used to operate the directional change in the 4 way valve

A good bead of weld was added to the machined faces and then gradually ground down until the pinion shaft holder was a tight fit in the gear housing against the lugs. Rotation eliminated.
The Pinion shaft holder was then greased and refitted into the "gearbox housing". This is then secured with a circlip.


Pinion gear and shaft thoroughly greased as well as the bearings inside the pinion shaft holder. These pics show the shaft on it's way in and then being secured in place with retaining circlip


More grease added to the gearbox assembly and pinion operation tested from lock to lock. Works a treat

Remainder of the gearbox components refitted such as the sprung adjustable rack guide, the pinion seal and pinion seal cover.
Tie rod (rack end) refitted and greased.
Grease added to end of rack and gaitor re-fitted


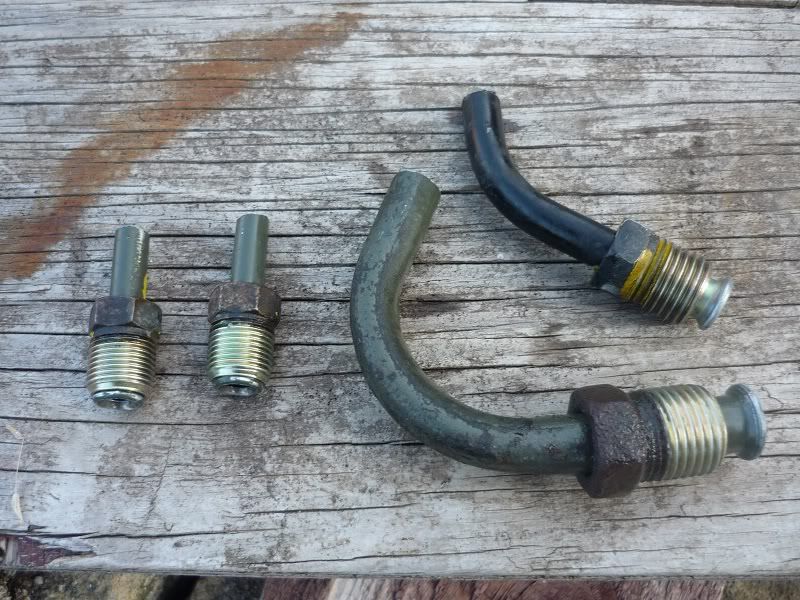
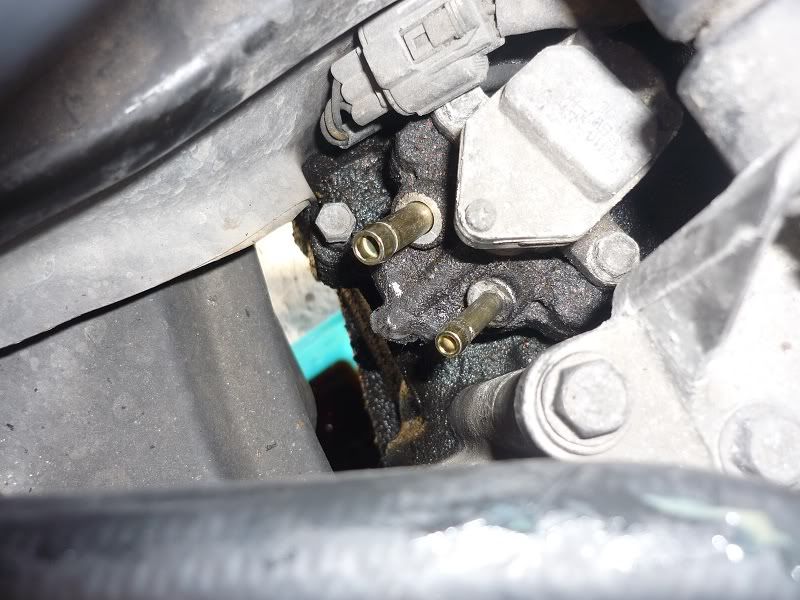
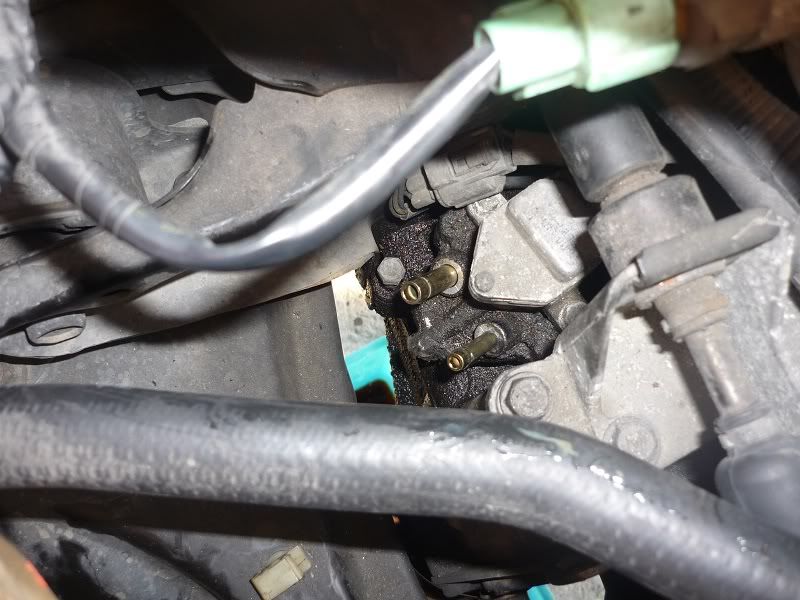
The weighty 4 way PAS valve and associated parts. These are effectively left over parts now
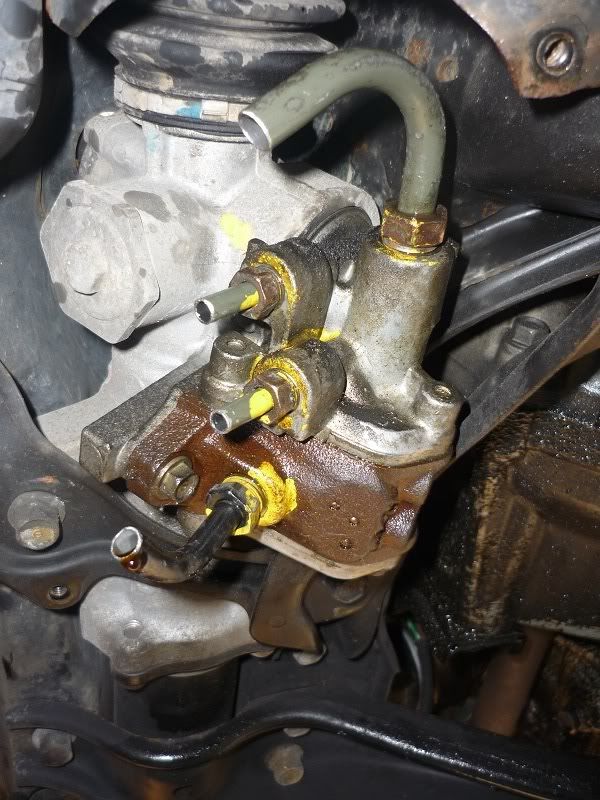
Note the fabricated ally plate that will be used to seal off the gearbox housing and valve orifices in place of the now redundant valve body
With a thin bead of sealant the finishing plate was then bolted into place. This will prevent both the grease seaping out and of course water/dirt getting in.

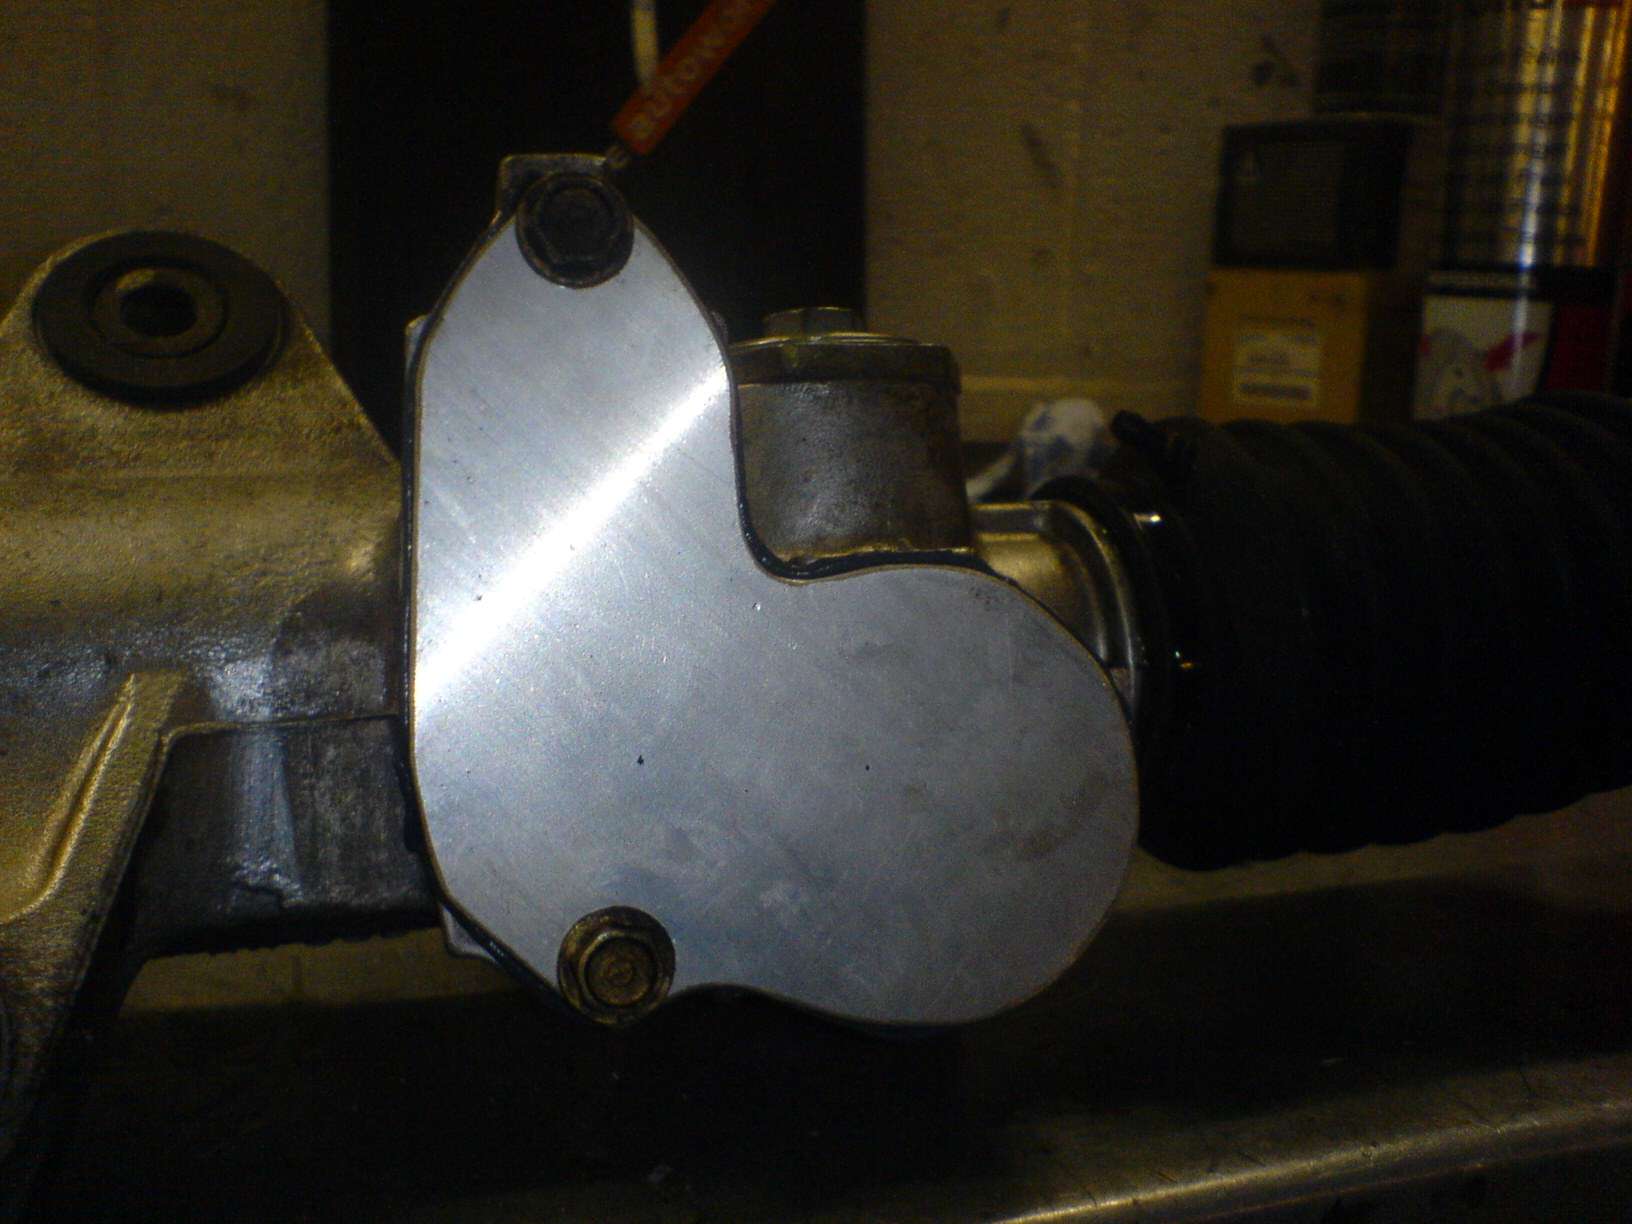
The finished lighter and more tidy looking non PAS steering rack. Just by working it lock to lock by hand on the pinion shaft I can already feel it's a definate improvement over the previous set up. Should feel noticable improvements once back in the car too and of course that's a bit more weight saved


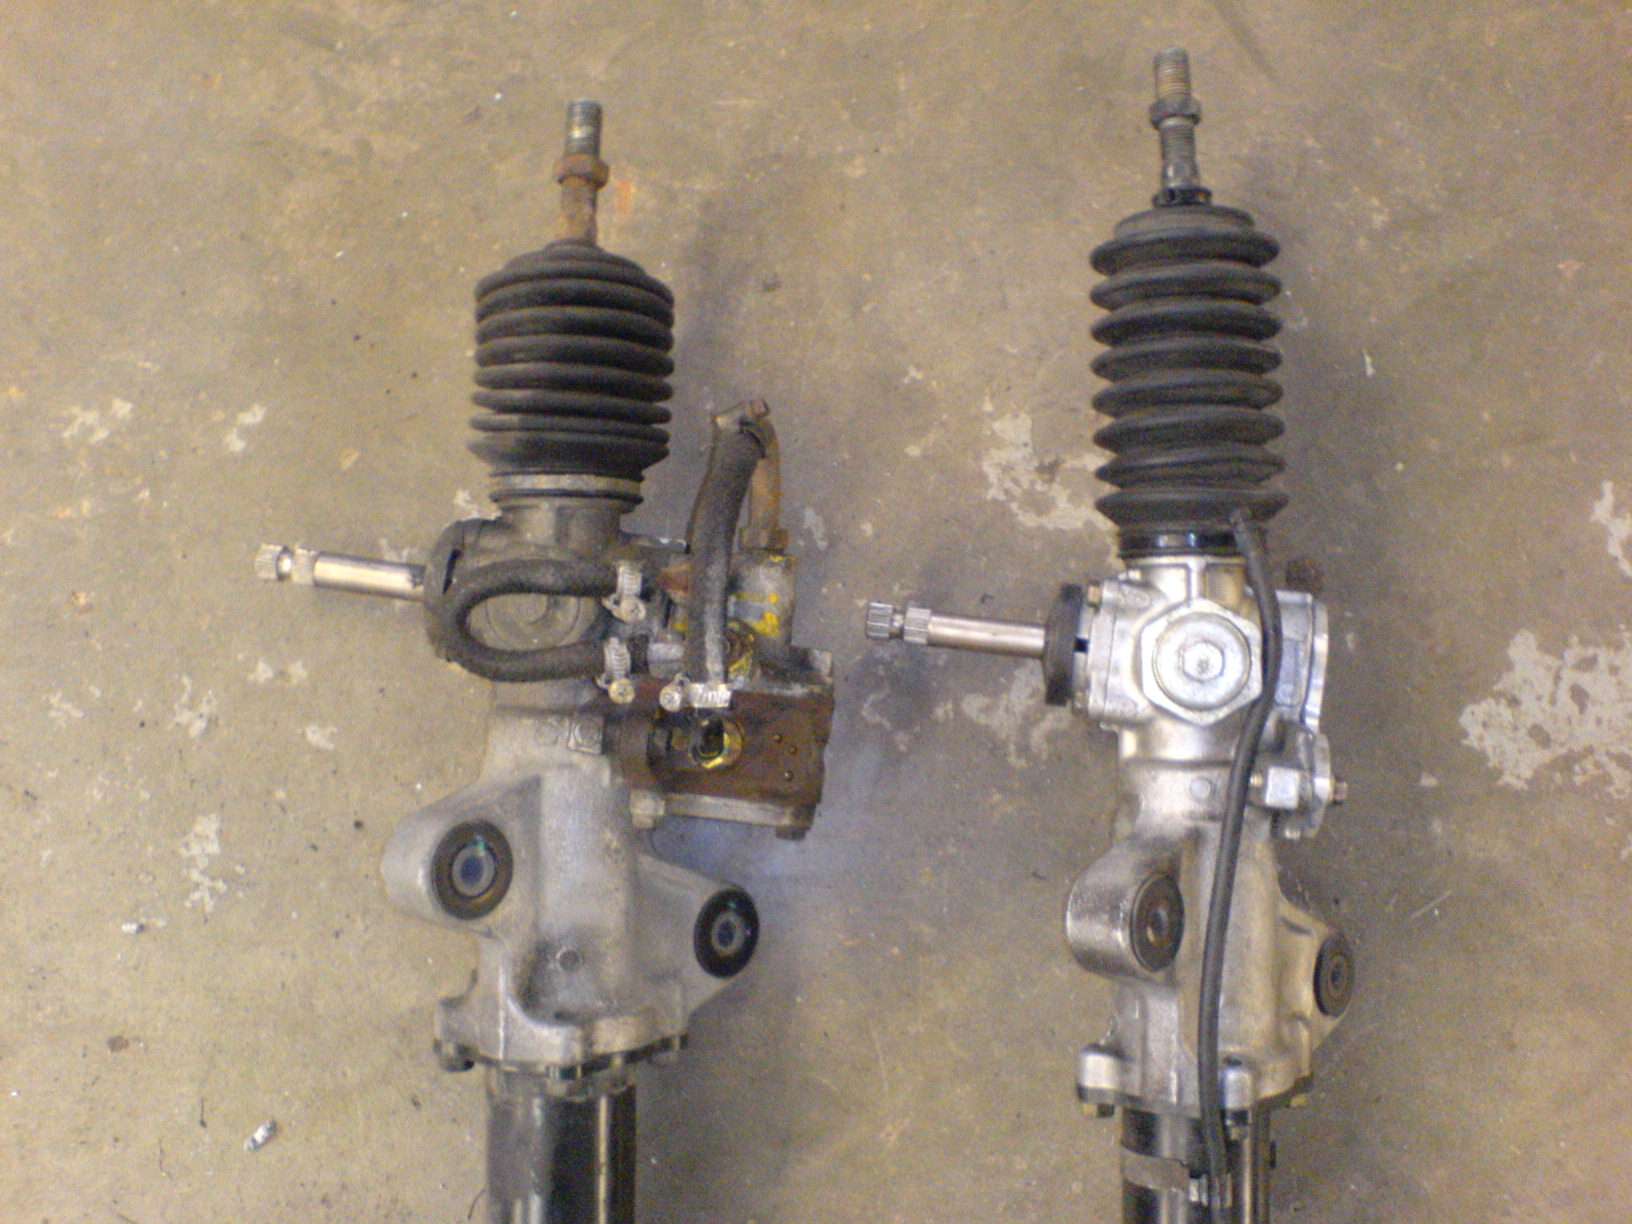
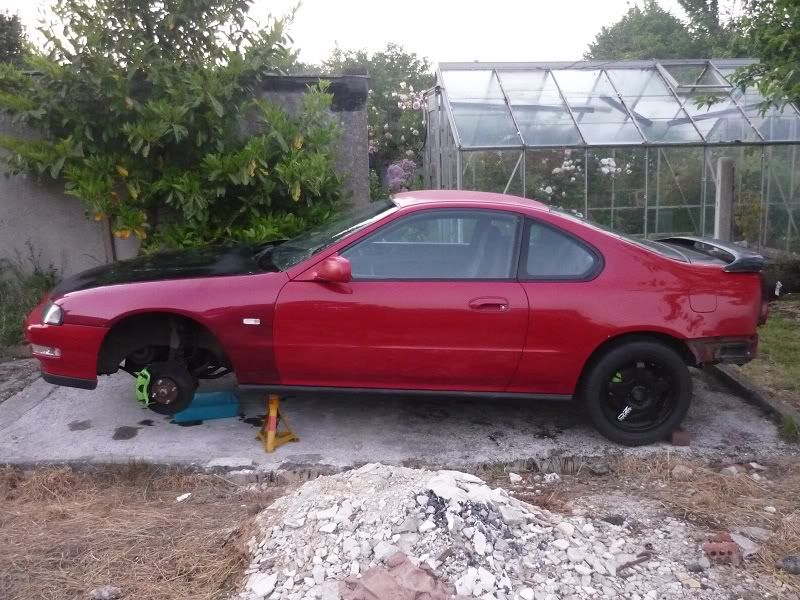
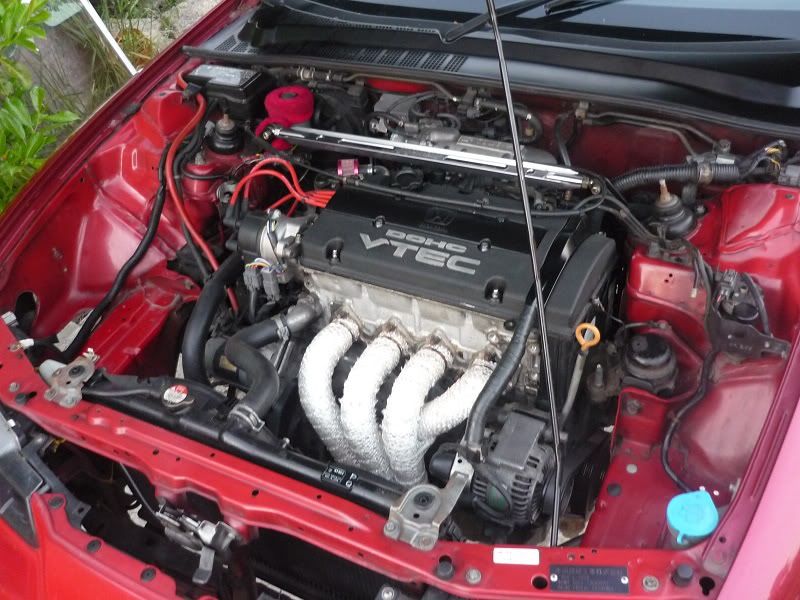
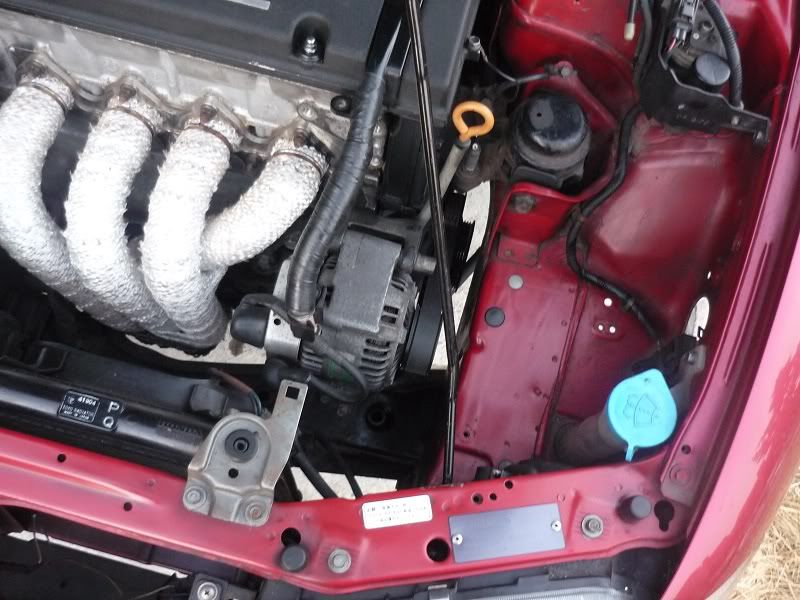
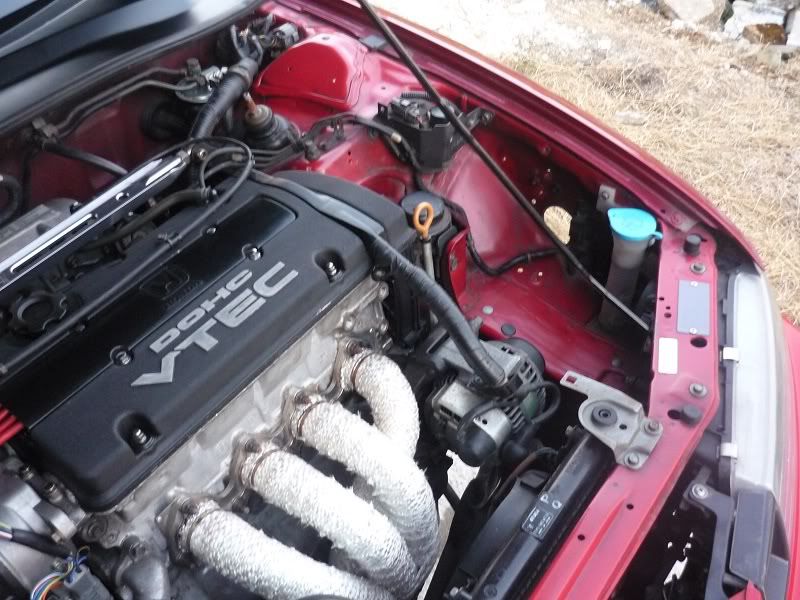
And finally a quick comparison of before and after on the car


As usual thanks for looking, any comments, feedback or questions welcomed

Rich