Congratulations to vtecmec for winning May/June's Lude Of The Month, with his DIY Turbo BB1 build.

>>> Click Here For Profile <<<

Image

Vtecmec's 4th Gen

Tell us all about your Lude, you know you want to ...
Post Reply
User avatar
Ferdie
LotM Winner
Posts: 562
Joined: Fri Feb 03, 2012 8:05 pm
My Generation: 4G
XBOX GamerTag: fieszefreddie
Location: The Netherlands
Been thanked: 1 time

Post by Ferdie » Tue Apr 10, 2012 6:52 pm

Heee

how do you get those out??

Image

User avatar
Donald
Supporter 2015
Posts: 9894
Joined: Sun Jun 12, 2011 10:17 pm
My Generation: 0G
Location: Earth 3.0
Been thanked: 7 times

Post by Donald » Tue Apr 10, 2012 7:25 pm

Was up til 1.30 last night reading this, amazing amount of work you've done! Big up sir.

User avatar
Vtecmec
LotM Winner
Posts: 5490
Joined: Fri Aug 06, 2010 5:43 pm
My Generation: 4G
XBOX GamerTag: vtecmec
Location: East Midlands
Has thanked: 149 times
Been thanked: 441 times

Re: Vtecmec's 4th Gen

Post by Vtecmec » Wed Apr 11, 2012 8:38 am

Thanks again guys.
Ferdie wrote:Heee

how do you get those out??
I made my own mini press with some steel box section and a 10ton jack, but you could just use a big hammer. The press adapter set made a world of difference.

Image

User avatar
Ferdie
LotM Winner
Posts: 562
Joined: Fri Feb 03, 2012 8:05 pm
My Generation: 4G
XBOX GamerTag: fieszefreddie
Location: The Netherlands
Been thanked: 1 time

Post by Ferdie » Sat Apr 14, 2012 11:30 am

Hee

thanks for tip!


keep up the work!

User avatar
NCCMUR
Posts: 600
Joined: Sun Jan 29, 2012 10:14 am
My Generation: 5G
XBOX GamerTag: NCCMUR
Location: Stirling,Scotland
Has thanked: 1 time

Post by NCCMUR » Wed Apr 18, 2012 7:01 pm

:shock: :shock:
just sat and read this entire thread....absolutely brilliant dedication 8-)

as someone wrote before ,others would prob have given up a long time ago.

attention to detail is superb,literally every nut,bolt and clip cleaned and painted

this is the kind of car that you should never sell after all the grafting

major reppage ;) 8-)
bristol_bb4 wrote: turn the volume up and get your happy time tissues ready :lol:
Kevin Bridges wrote: How did a didnae!!
Image
NCCMUR's 1997 VTI

User avatar
paul bristol uk
Moderator
Posts: 1896
Joined: Wed Aug 04, 2010 11:51 pm
My Generation: 4G
Location: In a world of my own

Post by paul bristol uk » Wed Apr 18, 2012 7:36 pm

Yes rep points from me. I have loved this from the start.Devotion and attention to detail don't come into it. A fantastic project!
I have kleptomania,
But when it gets bad,
I take something for it.

User avatar
Vtecmec
LotM Winner
Posts: 5490
Joined: Fri Aug 06, 2010 5:43 pm
My Generation: 4G
XBOX GamerTag: vtecmec
Location: East Midlands
Has thanked: 149 times
Been thanked: 441 times

Re: Vtecmec's 4th Gen

Post by Vtecmec » Wed Apr 18, 2012 7:56 pm

Cheers guys.
NCCMUR wrote:this is the kind of car that you should never sell after all the grafting
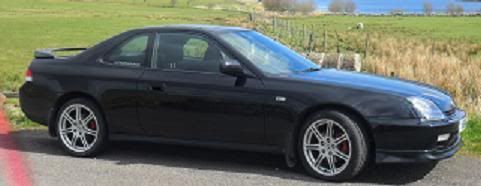
This will never be sold, I have had it written in my will that I am to be buried with it.

User avatar
Vtecmec
LotM Winner
Posts: 5490
Joined: Fri Aug 06, 2010 5:43 pm
My Generation: 4G
XBOX GamerTag: vtecmec
Location: East Midlands
Has thanked: 149 times
Been thanked: 441 times

Rear suspension paint, trailing arms and ball joints

Post by Vtecmec » Sun Apr 22, 2012 7:20 pm

Knowing I still needed to replace the rear steering rod ends, I went hunting for a cheaper alternative to Mr Honda wanting £70 odd per side! Fortunately I found Mk 1 Vectra front ends fit perfectly; and cheap at £8 each.

Image

Of course, I still had to paint them, that’s the last of the clips in the background too.

Image

The last few bits of the suspension have now been finished.

Here’s the knuckle almost complete.

Image

And the upper control arm just before paint….

Image

One of the trailing arms with the first coat of paint…

Image

Some more layers.

Image

Then on to fitting the new bushes, the trailing arms went in reasonably easy.

Image

I’ve gone with OEM inner arm bushes, they took quite a bit of force to fit.

Image

I’ve gone with poly for the other bushes in the arm, these can be popped in by hand, though I had to use washers and a bolt to pull the inner shafts through.

Image

And the ball joint going into the knuckle.

Image

Nicely sat, just needs a final layer of paint later.

Image
Last edited by Vtecmec on Tue Mar 19, 2013 10:32 pm, edited 1 time in total.

User avatar
NafemanNathan
LotM Winner
Posts: 20144
Joined: Sun Aug 08, 2010 9:37 pm
My Generation: 0G
Location: Yeovil, Somerset
Has thanked: 8 times
Been thanked: 124 times

Post by NafemanNathan » Sun Apr 22, 2012 8:27 pm

Excellent work as always bud. Looking forward to seeing the underside shot once it's all together ;-)

User avatar
Vtecmec
LotM Winner
Posts: 5490
Joined: Fri Aug 06, 2010 5:43 pm
My Generation: 4G
XBOX GamerTag: vtecmec
Location: East Midlands
Has thanked: 149 times
Been thanked: 441 times

Re: Vtecmec's 4th Gen

Post by Vtecmec » Sun Apr 22, 2012 9:52 pm

NafemanNathan wrote:Excellent work as always bud. Looking forward to seeing the underside shot once it's all together
You and me both! The before and after shots will be quite a difference.

Post Reply

Return to “Lude Profiles”