Congratulations to vtecmec for winning May/June's Lude Of The Month, with his DIY Turbo BB1 build.

>>> Click Here For Profile <<<

Image

Nathan's Road-Legal/Track BB4

Tell us all about your Lude, you know you want to ...
User avatar
NafemanNathan
LotM Winner
Posts: 20144
Joined: Sun Aug 08, 2010 9:37 pm
My Generation: 0G
Location: Yeovil, Somerset
Has thanked: 8 times
Been thanked: 124 times

(LB) The Cable Tuck Commences

Post by NafemanNathan » Tue Feb 07, 2012 11:33 am

Bit of an update, before this project completely runs away with me...

Having removed my PAS the other day and therefore a whole load of gumph from the engine bay, I thought why not take it a step further?...

So I started a cable tuck :D

This was how she looked when I first parked her up at the start of May...

Image

Image

Filthy for one!

Well she's now looking more like this...


Image

Image

Image

Image

:D

I'm still yet to tidy up the back left corner, and the fuel filter setup is due to change for the more appealing...

Image

and

Image

I've got my new induction setup to go in eventually and my half size ali rad to go in to, along with a few other pretty bits, but I'm pleased with the results so far :) It looks so much cleaner, it's easier to clean ;-) and everything is a lot more accessible.

I'll show you how much cable and plugs I've managed to do away with at the end ;-)
Last edited by NafemanNathan on Sun Feb 12, 2012 8:58 pm, edited 4 times in total.

User avatar
NafemanNathan
LotM Winner
Posts: 20144
Joined: Sun Aug 08, 2010 9:37 pm
My Generation: 0G
Location: Yeovil, Somerset
Has thanked: 8 times
Been thanked: 124 times

Re: PLEASE DO NOT POST IN THIS THREAD YET (Under Constructio

Post by NafemanNathan » Tue Feb 07, 2012 11:40 am

Crazy_C wrote:Mmmmm, that is looking real nice n tidy there dude, loving it :D Top work!
PipH22A wrote:looks good nath :) might give you some cash on the side to clear up my engine bay :D
Floydie wrote:Wow! Minimalist FTW 8-)
vanzep wrote:top notch mate thats so much better now the engine bay has been de-cluttered-really liking the lightweight approach.
lucas wrote:
Nathan wrote:Image

and

Image
where do these go :S

User avatar
NafemanNathan
LotM Winner
Posts: 20144
Joined: Sun Aug 08, 2010 9:37 pm
My Generation: 0G
Location: Yeovil, Somerset
Has thanked: 8 times
Been thanked: 124 times

Re: PLEASE DO NOT POST IN THIS THREAD YET (Under Constructio

Post by NafemanNathan » Tue Feb 07, 2012 11:41 am

Cheers guys :)

Lucas: The Sytec fuel filter will obviously replace the OEM filter, but I shall fix it to the bulkhead just to the right of the intake manifold which will allow me to rid the engine bay of yet more pipework :D This will then feed on to the FSE power boost valve which will replace my OEM fuel regulator and I'll probably mount this next to the Sytec filter.

User avatar
NafemanNathan
LotM Winner
Posts: 20144
Joined: Sun Aug 08, 2010 9:37 pm
My Generation: 0G
Location: Yeovil, Somerset
Has thanked: 8 times
Been thanked: 124 times

Re: PLEASE DO NOT POST IN THIS THREAD YET (Under Constructio

Post by NafemanNathan » Tue Feb 07, 2012 11:41 am

sirgaz wrote:Thats a hell of a lot of work you've done there. I'll be interested to hear how she feels with the power steering gone, planning on stripping mine down as a road/track car so anything that ditches weight will be going. Also now the ps and aircon have gone what belt are you using for the alternator?
Looking forward to the next instalment :D

User avatar
NafemanNathan
LotM Winner
Posts: 20144
Joined: Sun Aug 08, 2010 9:37 pm
My Generation: 0G
Location: Yeovil, Somerset
Has thanked: 8 times
Been thanked: 124 times

Re: PLEASE DO NOT POST IN THIS THREAD YET (Under Constructio

Post by NafemanNathan » Tue Feb 07, 2012 11:42 am

I believe I'm currently running a Gates Micro-V XF 6PK913 belt or similar :lol: It was a while ago that I removed the aircon to fit the smaller alternator belt, but I had to hunt it out for Rob again a little while ago. Basically the 6PK and 913 (being the length) is the important thing and I think that's right if my memory serves me well.

Though just today I have been reading up on the possibility of switching to a D-series alternator and dropping it down to the A/C mounting points. Innovative and EPS (Explicit Speed Performance) do brackets to fit either an H or a D series alternator to the A/C mounting, which are lighter than the OEM cast brackets for one, but also if I convert to a D series alternator, that to is lighter than an H one and obviously any weight lower down is better. I don't run a stereo in there anymore, so the slightly lesser ampage a D generates shouldn't be an issue.

User avatar
NafemanNathan
LotM Winner
Posts: 20144
Joined: Sun Aug 08, 2010 9:37 pm
My Generation: 0G
Location: Yeovil, Somerset
Has thanked: 8 times
Been thanked: 124 times

Re: PLEASE DO NOT POST IN THIS THREAD YET (Under Constructio

Post by NafemanNathan » Tue Feb 07, 2012 11:42 am

lucas wrote:ive been wanting to remvove my aircon for ages, im not that good with the mechanical parts, only bodywork, could you post a how to by anychance ?
wanting to remove my cruise control aswell

User avatar
NafemanNathan
LotM Winner
Posts: 20144
Joined: Sun Aug 08, 2010 9:37 pm
My Generation: 0G
Location: Yeovil, Somerset
Has thanked: 8 times
Been thanked: 124 times

Re: PLEASE DO NOT POST IN THIS THREAD YET (Under Constructio

Post by NafemanNathan » Tue Feb 07, 2012 11:43 am

By all means search back though my thread mate... It's in there somewhere :lol: It's quite brief with just a few guide lines and a couple of pictures but it is very easy to do. I've not touched on removing cruise control though... mine never had it ;-)

User avatar
NafemanNathan
LotM Winner
Posts: 20144
Joined: Sun Aug 08, 2010 9:37 pm
My Generation: 0G
Location: Yeovil, Somerset
Has thanked: 8 times
Been thanked: 124 times

Re: PLEASE DO NOT POST IN THIS THREAD YET (Under Constructio

Post by NafemanNathan » Tue Feb 07, 2012 11:43 am

Page 15 dude. Thought I'd be able to find it a bit quicker ;-) Bit more in depth than I remembered to :)

User avatar
NafemanNathan
LotM Winner
Posts: 20144
Joined: Sun Aug 08, 2010 9:37 pm
My Generation: 0G
Location: Yeovil, Somerset
Has thanked: 8 times
Been thanked: 124 times

(LB) More Cable Tuck

Post by NafemanNathan » Tue Feb 07, 2012 11:44 am

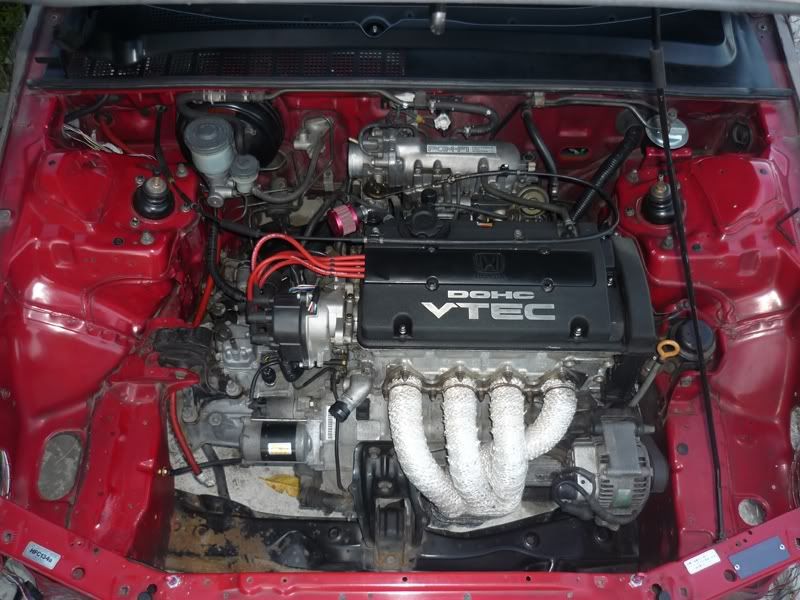
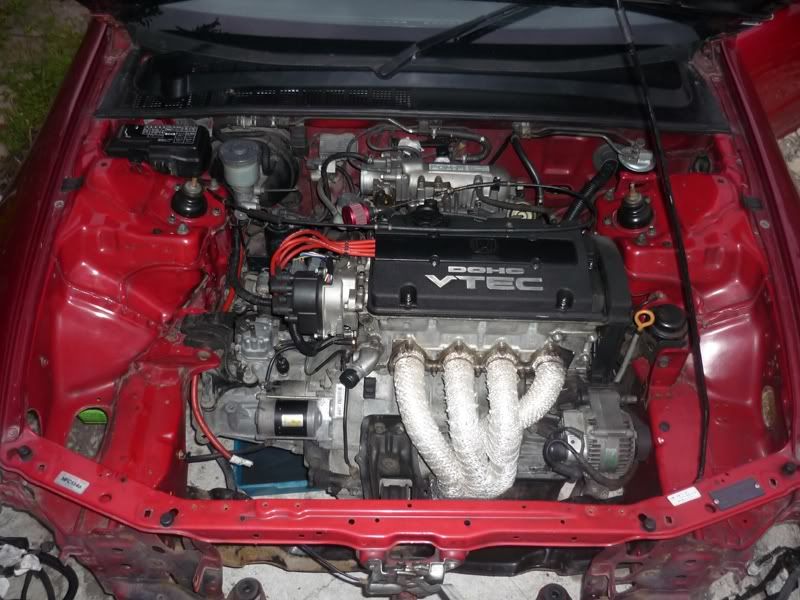
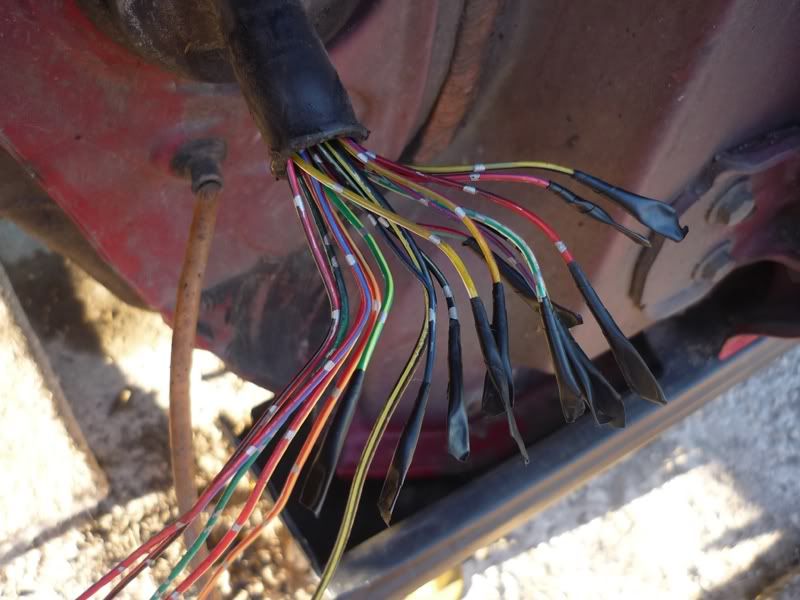
Didn't think you'd want to be bored with all the details, but I thought I'd show you some of the progress with the cable tuck. I've had two proper short sessions on the actual cabling so far. The first I worked into the darkness on the driver's side loom. I was toying with the idea of whether I should relocate the under-bonnet fuse box. I thought I don't need to... It's not untidy and it's just gonna cause more work if I do.


... So I removed it anyway :lol:

This was where is was. There are just a few cables posted back through and obviously these will be a lot tidier in time. I may even hide them up with the wiper mechanism also, then drop them back in further down the line, not sure yet...

Image

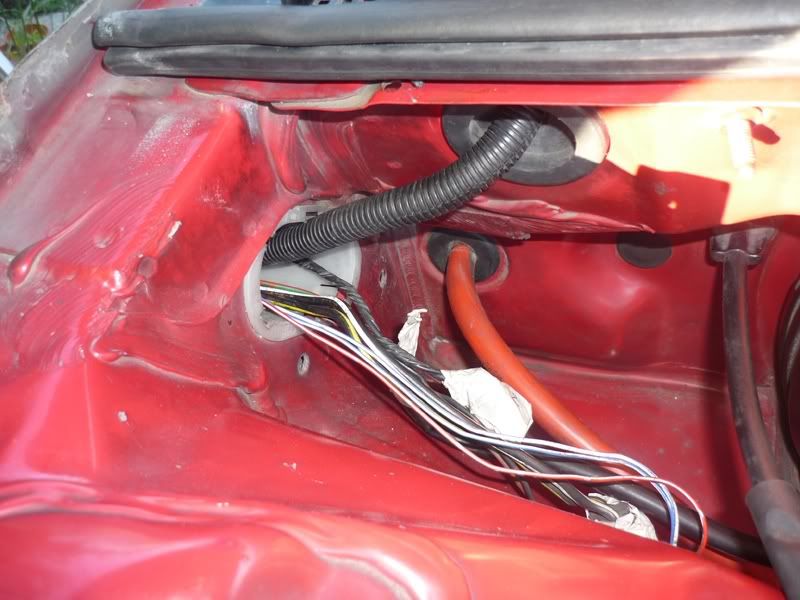
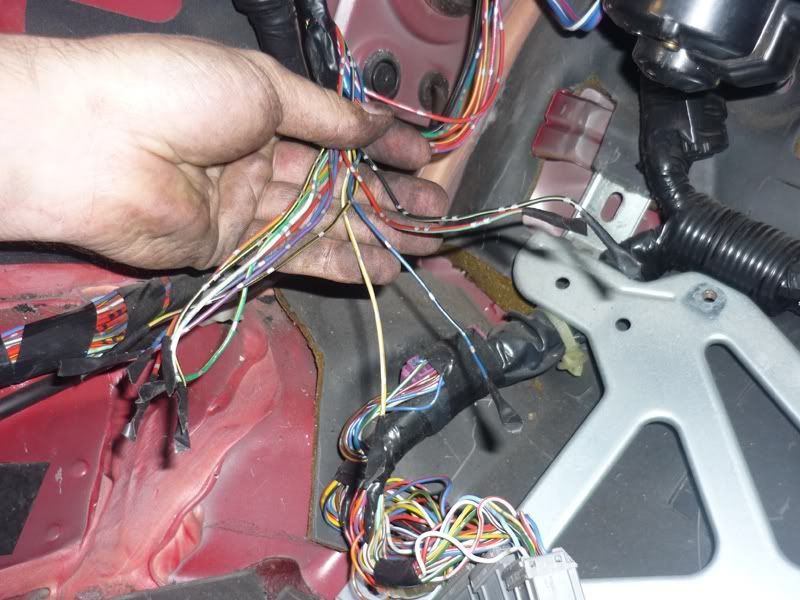
The cables reaching to the top of this picture are the ones featuring in the picture above. The rest are the rest of the loom and the fusebox cables threaded back into the cabin...

Image

... namely the drivers foot-well :lol: ...

Image

Image

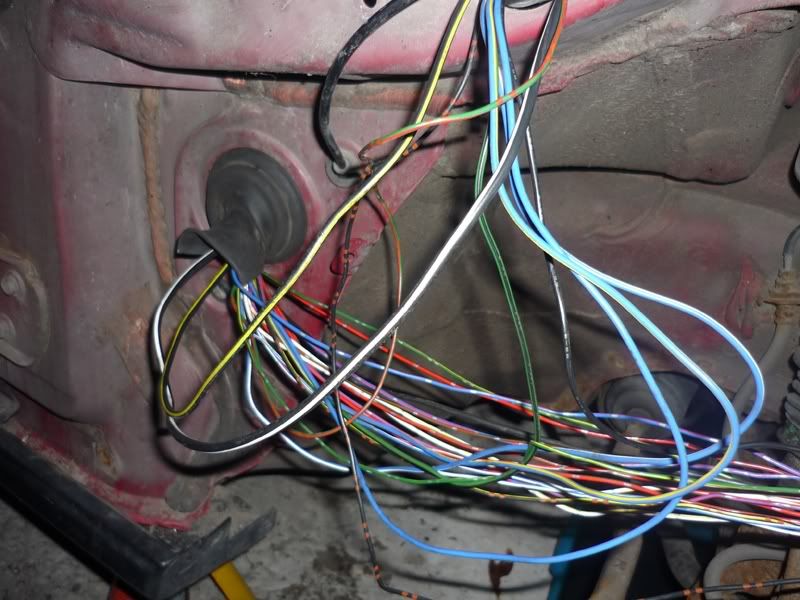
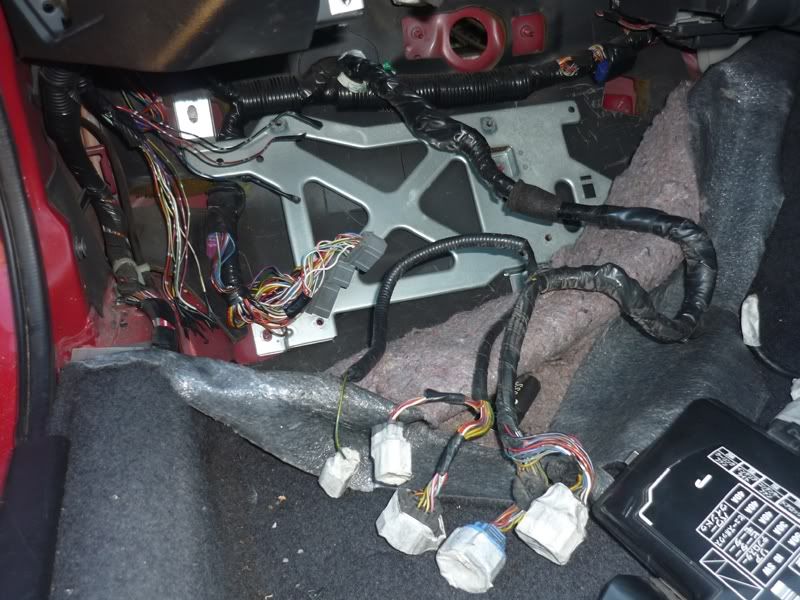
I need to remove the driver's seat to be able to invert myself and properly get under there to sort the mess and tangle out.

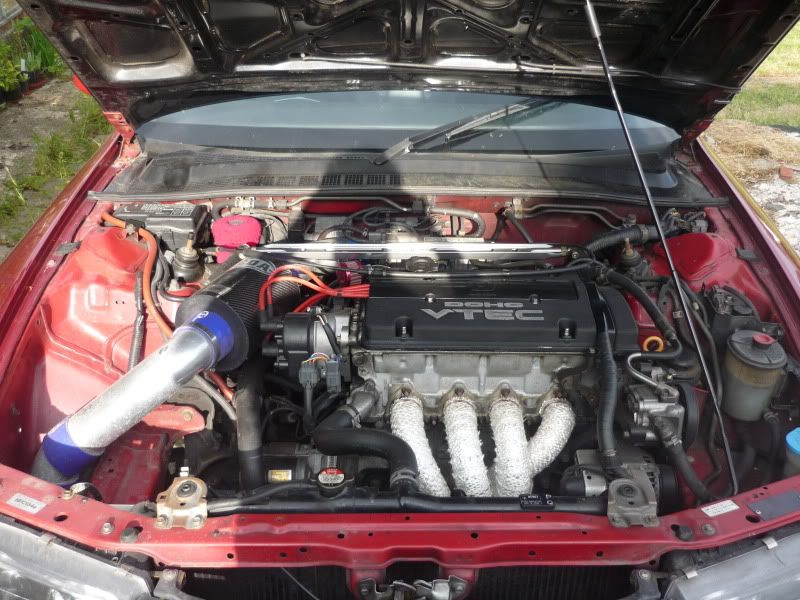
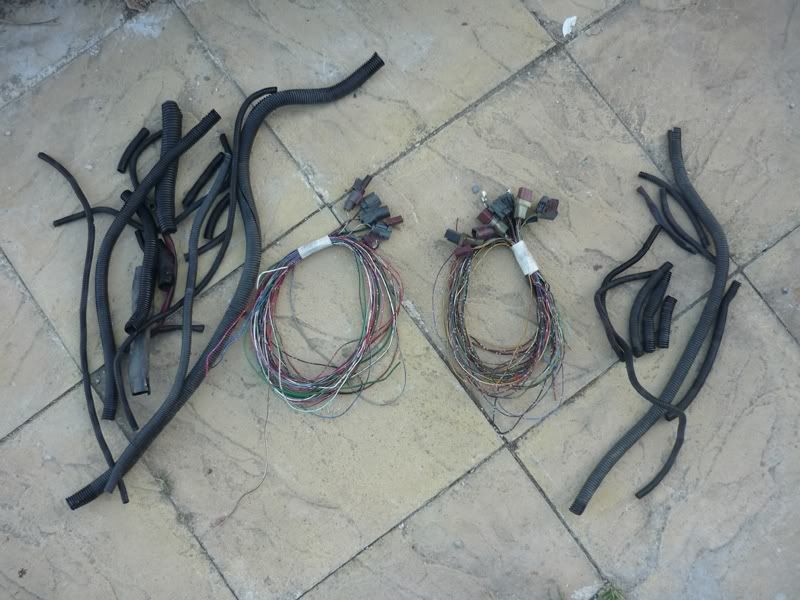
Then yesterday I sorted the passenger side loom. Now this I found rather satisfying. Look how many cables I was able to do away with! :D ...

Image

I was then able to simply pull them into the cabin to sort at a later date also...

Image

This is what the passenger's foot-well currently looks like...

Image

Note the masking-taped connectors normally found located in the top right hand corner of the engine bay (as you're stood looking at it).

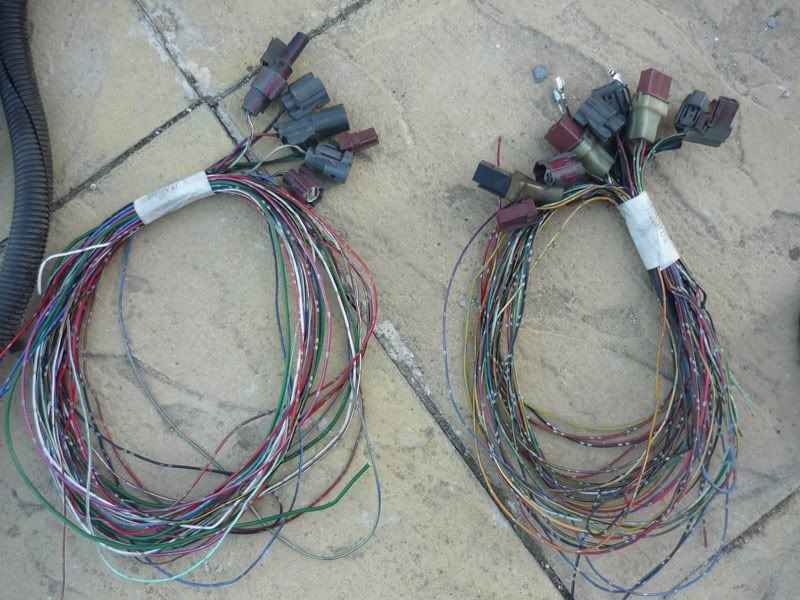
So to date I have removed this lot :) (Driver's side left, Passenger's side right) ...

Image

I've removed god knows how much gammy electrical tape also, but that went straight in the wheelie bin ;-)

Image

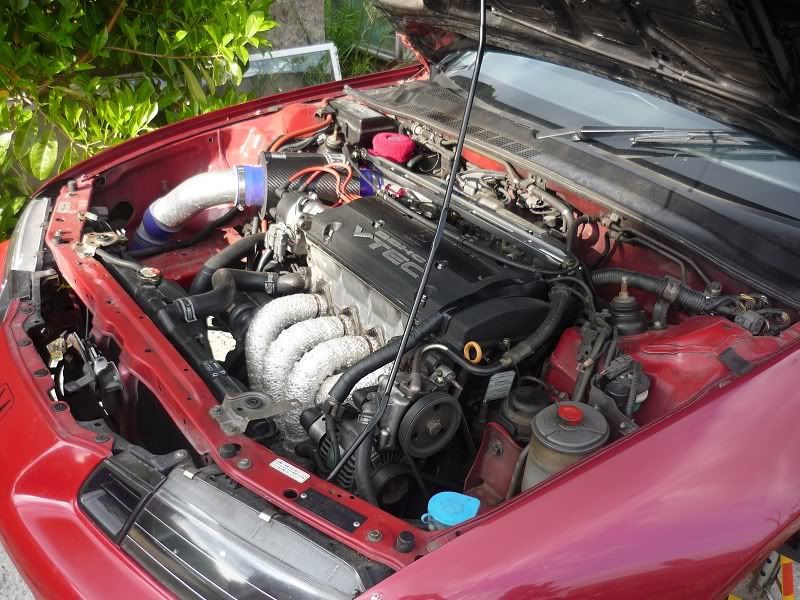
So with the removal of that lot and my carbon canister yesterday, she's now left looking like this...

Image

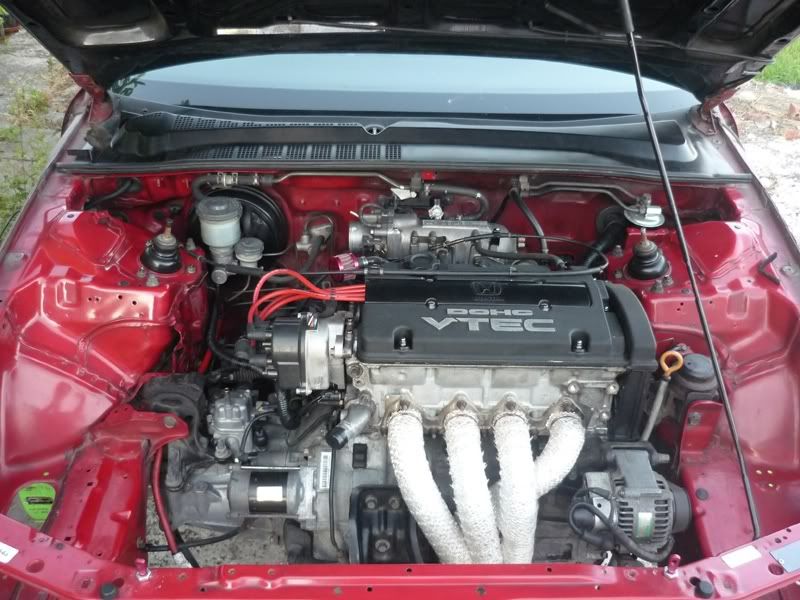
She's still looking a bit congested in my mind, but I'm yet to have sorted out the intake and fuel scenario yet, so continue to watch this space.

Image
Last edited by NafemanNathan on Tue Feb 07, 2012 2:07 pm, edited 1 time in total.

User avatar
NafemanNathan
LotM Winner
Posts: 20144
Joined: Sun Aug 08, 2010 9:37 pm
My Generation: 0G
Location: Yeovil, Somerset
Has thanked: 8 times
Been thanked: 124 times

Re: PLEASE DO NOT POST IN THIS THREAD YET (Under Constructio

Post by NafemanNathan » Tue Feb 07, 2012 11:46 am

nucleustylz lude wrote:Fair play bud. You getting way ahead of my own plans bud. Great minds think alike! ;o)

That engine bay is looking cleaner and cleaner the more you do. Notice the EGR bits are gone - you pre-emptying the P28 being installed when it's back on the road?

I trust all the redundant wiring and plugs you removed was for items you have removed such as aircon or optional things like fog lights? It looks a hell of alot. Worth holding onto all that wiring and connectors too. :wink:

So where are you going to mount the fuse box then? Popular place is the glove box. Or if you have an airbag like me you can access it with a blanking panel. :wink:

Great stuff as always and making me feel a little lazy! At least my home jobs are coming to and end and I can concentrate my efforts. :D

One last thing, can't be arsed to look it up, but what's this carbon cannister thing??? We talking EGR or something else?

Cheers,

Rob
Matt wrote:
nucleustylz lude wrote:One last thing, can't be arsed to look it up, but what's this carbon cannister thing??? We talking EGR or something else?

Cheers,

Rob
black cylinder that is down behind the gearbox near the drivers side suspension tower. Connects to the vac lines from the TB. Pain in the ass to connect the bottom hose back onto it if you pull it out accidentally 8-[:oops:. I can only assume its some sort of filter on the vac lines to stop any build up of oil.

Post Reply

Return to “Lude Profiles”