Congratulations to vtecmec for winning May/June's Lude Of The Month, with his DIY Turbo BB1 build.

>>> Click Here For Profile <<<

Image

Nathan's Road-Legal/Track BB4

Tell us all about your Lude, you know you want to ...
User avatar
NafemanNathan
LotM Winner
Posts: 20144
Joined: Sun Aug 08, 2010 9:37 pm
My Generation: 0G
Location: Yeovil, Somerset
Has thanked: 8 times
Been thanked: 124 times

Re: PLEASE DO NOT POST IN THIS THREAD YET (Under Constructio

Post by NafemanNathan » Tue Feb 07, 2012 3:54 pm

Merlin wrote:Same.

I got the new set from JDM-BB4 along with a load of other bits that im keeping under my hat for the moment.

Im not looking forward to trying to get the old bushes out!
Dino wrote:Hubba-hubba....
So whats the difference between the graphite impregnated and the red bushes?

User avatar
NafemanNathan
LotM Winner
Posts: 20144
Joined: Sun Aug 08, 2010 9:37 pm
My Generation: 0G
Location: Yeovil, Somerset
Has thanked: 8 times
Been thanked: 124 times

Re: PLEASE DO NOT POST IN THIS THREAD YET (Under Constructio

Post by NafemanNathan » Tue Feb 07, 2012 3:54 pm

I was toying with buying all of Neller's under body bits to get them powder coated as the hole job would be a lot easier that way, but money's tight at the moment and it sounds like the 2WS subframe and bit are likely to be sold anyway.

User avatar
NafemanNathan
LotM Winner
Posts: 20144
Joined: Sun Aug 08, 2010 9:37 pm
My Generation: 0G
Location: Yeovil, Somerset
Has thanked: 8 times
Been thanked: 124 times

Re: PLEASE DO NOT POST IN THIS THREAD YET (Under Constructio

Post by NafemanNathan » Tue Feb 07, 2012 3:54 pm

Dino wrote:Hubba-hubba....
So whats the difference between the graphite impregnated and the red bushes?
I think...

"Both are our Energy's HYPER-FLEX™ performance polyurethane formulations. Energy has impregnated selected black polyurethane components with graphite to add a lubrication property. Additionally, both Energy Suspension® red and black polyurethane components are engineered differently than OEM rubber components to be free a floating and non-binding design. This allows for the additional durometer (firmness) of the components, which adds to the performance improvement of the vehicle overall. Through its 25 years of design and formulation of polyurethane, Energy's polyurethane components are the best on the market today."

;-)

User avatar
NafemanNathan
LotM Winner
Posts: 20144
Joined: Sun Aug 08, 2010 9:37 pm
My Generation: 0G
Location: Yeovil, Somerset
Has thanked: 8 times
Been thanked: 124 times

Re: PLEASE DO NOT POST IN THIS THREAD YET (Under Constructio

Post by NafemanNathan » Tue Feb 07, 2012 3:54 pm

Nucleustylz lude wrote:Ooh nice buy bud, sorry I sneaked in on the last bargain! :P

I still need to get the rear trailing arms, but holding fire on the ARB bushes as I may upgrade later on and havn't even begun to look at sizes. Which did you get and are they for OEM size ARB's?

Still loving that harness bud. Got some Tessa tape on it's way! Ah!!! What have you made me do! :lol:

User avatar
NafemanNathan
LotM Winner
Posts: 20144
Joined: Sun Aug 08, 2010 9:37 pm
My Generation: 0G
Location: Yeovil, Somerset
Has thanked: 8 times
Been thanked: 124 times

Re: PLEASE DO NOT POST IN THIS THREAD YET (Under Constructio

Post by NafemanNathan » Tue Feb 07, 2012 3:55 pm

Yeah good boy Rob! :lol: No worries, I'd have done the same if I'd beaten you there lol.

I've gone for standard ARB's. I decided I need to stop spending money in order to get this thing finished lol. Things like uprated ARBs I can do any time after. Besides, I assumed the thinner OEM ARBs are lighter than the likes of Whitelines/Tanabe etc ;-) If mine snap then I can justify the additional weight :lol:

User avatar
NafemanNathan
LotM Winner
Posts: 20144
Joined: Sun Aug 08, 2010 9:37 pm
My Generation: 0G
Location: Yeovil, Somerset
Has thanked: 8 times
Been thanked: 124 times

Re: PLEASE DO NOT POST IN THIS THREAD YET (Under Constructio

Post by NafemanNathan » Tue Feb 07, 2012 3:56 pm

4thgenphil wrote:my tanabe arbs are the same thickness as standard ones, just solid, ie heavy :evil:

User avatar
NafemanNathan
LotM Winner
Posts: 20144
Joined: Sun Aug 08, 2010 9:37 pm
My Generation: 0G
Location: Yeovil, Somerset
Has thanked: 8 times
Been thanked: 124 times

(PUK) Custom Engine Harness Installed. Heater Box & Duct Rem

Post by NafemanNathan » Tue Feb 07, 2012 3:57 pm

I found another few hours on Saturday to have a bit of a tinker...

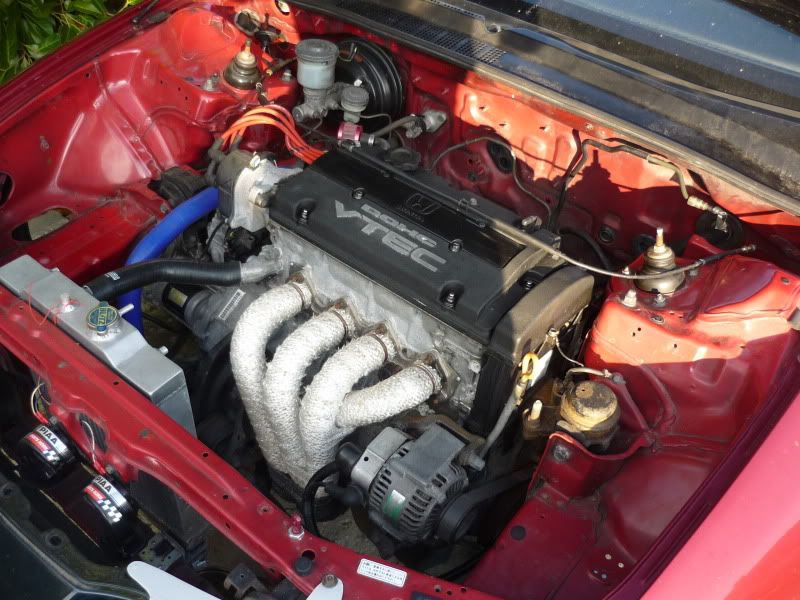
During the week I'd laid the engine harness in place, and although very happy with how it looks connected, I wasn't terribly convinced of its entry into the engine bay. Currently it looks like this...

Image

Image

I could get it looking better than how it looks at the moment, but being it's quite high and only just behind the shock tower (where nothing else will be going) it's too obvious and for all to see...

Image

So, considering I wanted to get rid of the heater pipes anyway, I thought this area could possibly lend itself to the harness entrance quite nicely...

Image

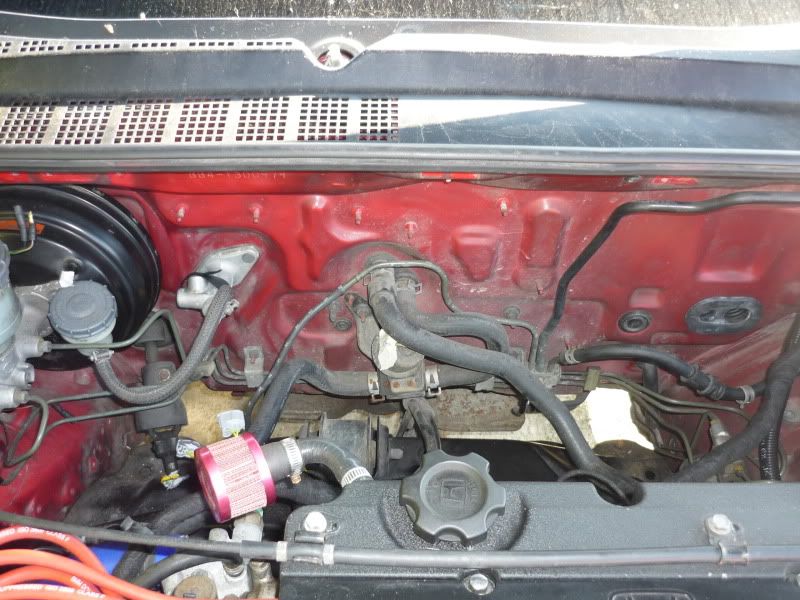
So I set forth removing the pipes and subsequently the heater unit from inside the car.

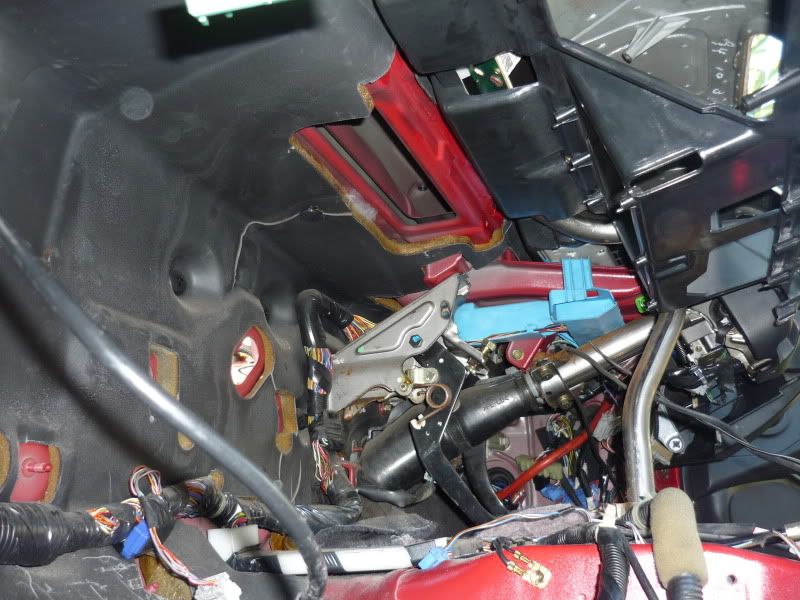
Removing the unit, once the fiddly-ass top screws were removed was quite straight forward, but did require the entire dash coming forward a good 6-8 inches...

Image

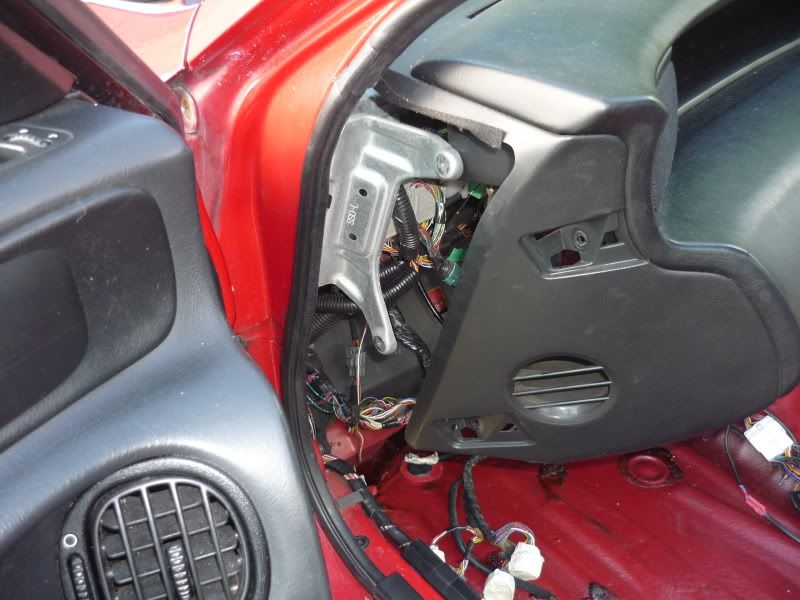
So then out it pops...

Image

Image

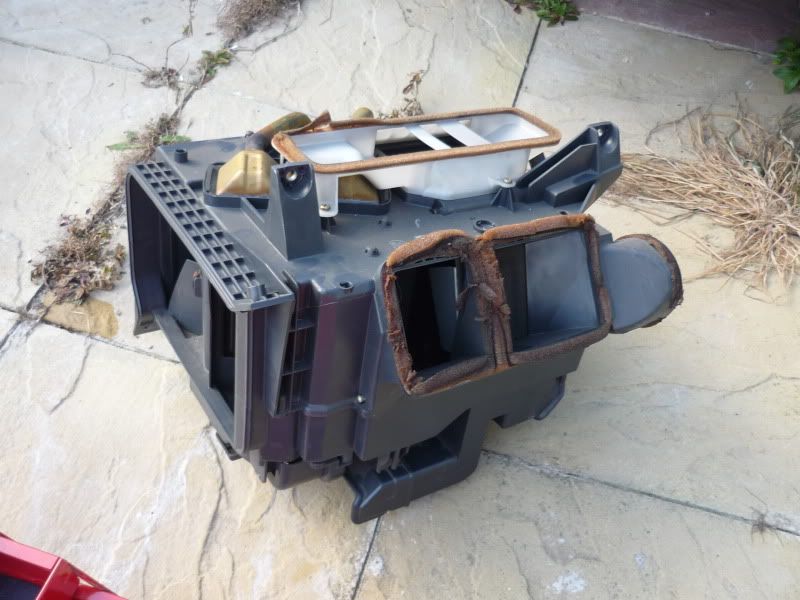
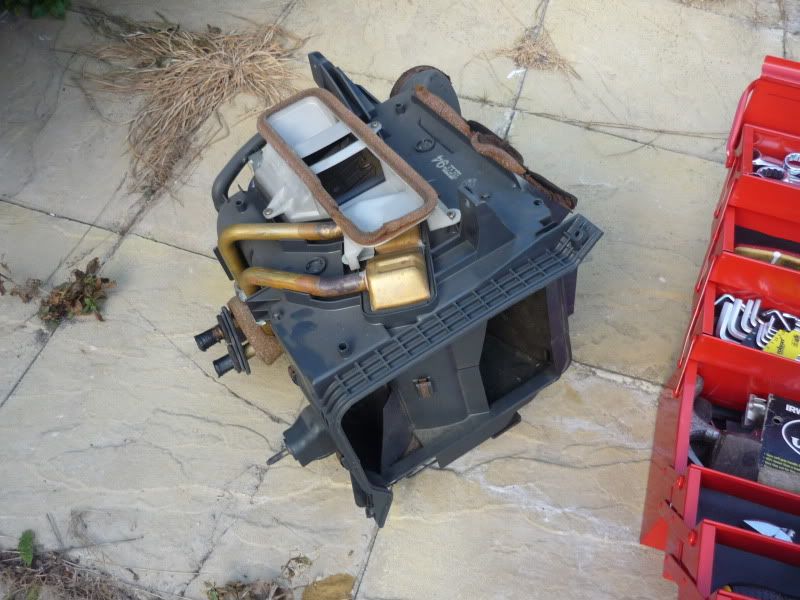
And shortly followed by all of its apparatus...

Image

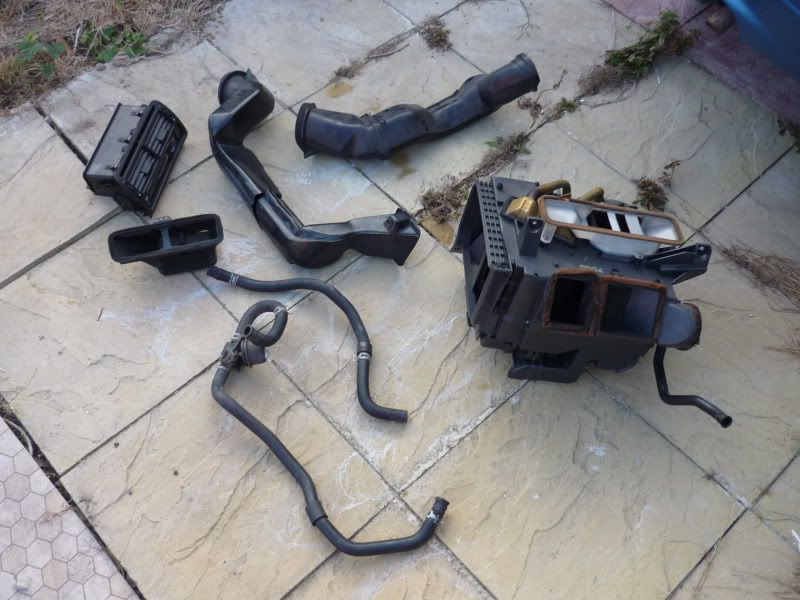
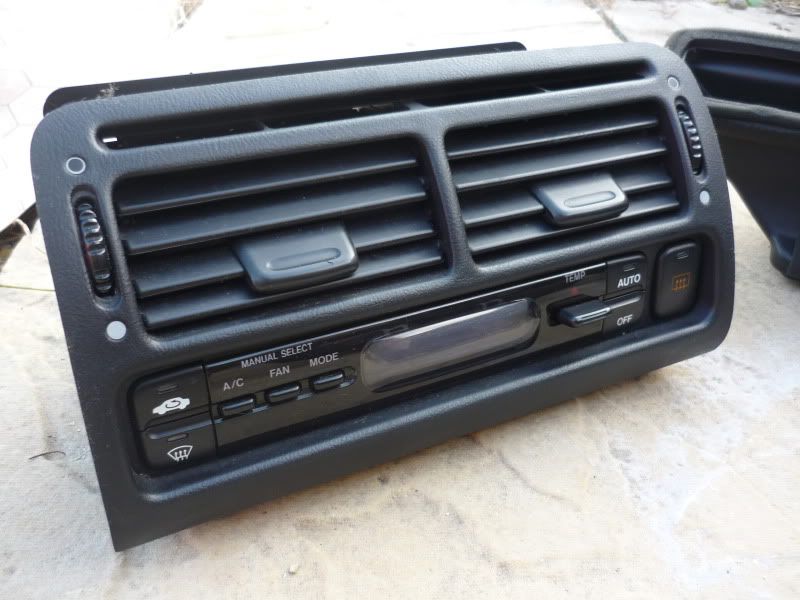
The controller unit and vents I will remove from the facia, as I plan to reuse the facia to mount my various switches...

Image

All removed and it's amazing how much it's opened up under there!...

Image

Image

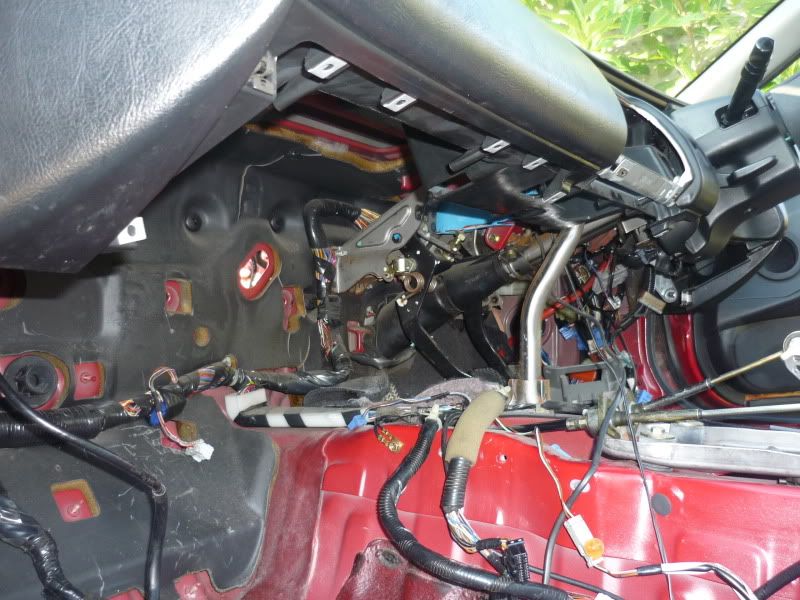
This is the connection point for the windscreen duct, which when ready I'll reconnect to with a much lighter setup...

Image

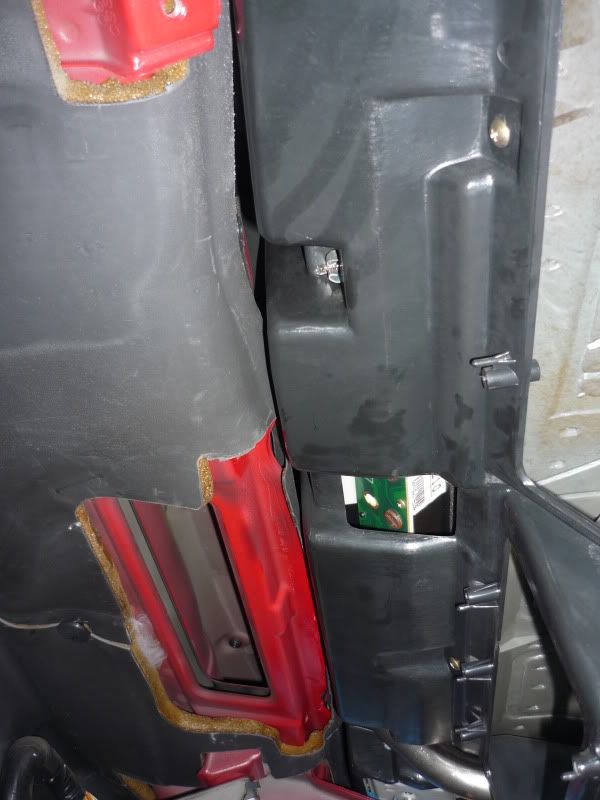
And now somewhere in this wide open space (undecided at the moment) I'll find a much more convenient location to pop my harness through...

Image

Image

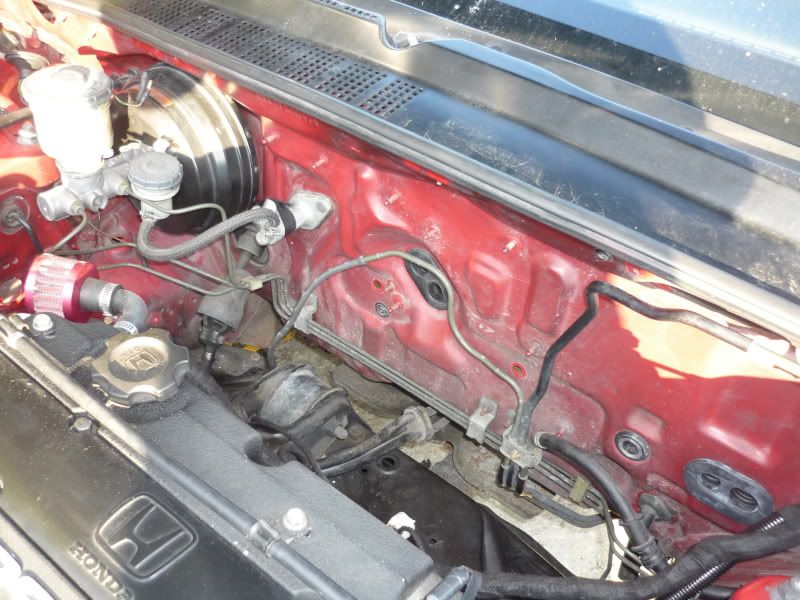
A very bad lighting shot (the sun was setting), but she's looking a lot cleaner for today's work :) ...

Image

Image

Image

User avatar
NafemanNathan
LotM Winner
Posts: 20144
Joined: Sun Aug 08, 2010 9:37 pm
My Generation: 0G
Location: Yeovil, Somerset
Has thanked: 8 times
Been thanked: 124 times

Re: PLEASE DO NOT POST IN THIS THREAD YET (Under Constructio

Post by NafemanNathan » Tue Feb 07, 2012 4:01 pm

Merlin wrote:Nice, loads of foam sound deadening on that fire wall.
Mart609 wrote:TIDY! 8)
Nucleustylz lude wrote:Nice work buddy, loving your updates!

Can't believe you took the plunge and dumped the heater, brave man. Be interested to see what alternative you can find to plumb into the hole for the windscreen. I'm picturing one of those large gas propane heaters zip tied to the firewall! Should do a fine job demisting that screen…and changing your paintwork to a charred black! :lol:

Is looking very clean though. You'll have to do a write up on that intake manifold tuck though. :P

By the time your finished with it, they'll be no engine, a hole in the floor plan and you'll be running it around flintstone style! :lol:

In all seriousness, great work as always bud. Best to get more work done now rather than when the weather turns real cold, with snow and the like! :shock:


Cheers,


Rob

User avatar
NafemanNathan
LotM Winner
Posts: 20144
Joined: Sun Aug 08, 2010 9:37 pm
My Generation: 0G
Location: Yeovil, Somerset
Has thanked: 8 times
Been thanked: 124 times

Re: PLEASE DO NOT POST IN THIS THREAD YET (Under Constructio

Post by NafemanNathan » Tue Feb 07, 2012 4:02 pm

Nucleustylz lude wrote:Nice work buddy, loving your updates!

Can't believe you took the plunge and dumped the heater, brave man. Be interested to see what alternative you can find to plumb into the hole for the windscreen. I'm picturing one of those large gas propane heaters zip tied to the firewall! Should do a fine job demisting that screen…and changing your paintwork to a charred black! :lol:

Is looking very clean though. You'll have to do a write up on that intake manifold tuck though. :P

By the time your finished with it, they'll be no engine, a hole in the floor plan and you'll be running it around flintstone style! :lol:

In all seriousness, great work as always bud. Best to get more work done now rather than when the weather turns real cold, with snow and the like! :shock:


Cheers,


Rob
Cheers Rob... And Mart and Merl :lol:

Don't worry Merl... that'll all be coming out to ;-)

@ Rob. I give off enough hot air as it is... I'm not worried ;-)

When you say a write-up on the intake manifold tuck... What do you mean? Having the harness coming out from under?...

User avatar
NafemanNathan
LotM Winner
Posts: 20144
Joined: Sun Aug 08, 2010 9:37 pm
My Generation: 0G
Location: Yeovil, Somerset
Has thanked: 8 times
Been thanked: 124 times

Re: PLEASE DO NOT POST IN THIS THREAD YET (Under Constructio

Post by NafemanNathan » Tue Feb 07, 2012 4:02 pm

nitin_s1 wrote:Wow! :shock:

Looks soo clean with all the bits removed from the engine! :twisted:

I think you should shave the holes and get your engine bay smooth.. 8) 8)

Post Reply

Return to “Lude Profiles”