
There wasn't any obvious part of it hanging down Pushki... It was in great condition, but still rubbing. And it's hardly detrimental to the car's OEMness as a whole
Congratulations to vtecmec for winning May/June's Lude Of The Month, with his DIY Turbo BB1 build.
>>> Click Here For Profile <<<

>>> Click Here For Profile <<<
Nathan's Daily Drive BB4
-
NafemanNathan

- LotM Winner
- Posts: 20144
- Joined: Sun Aug 08, 2010 9:37 pm
- My Generation: 0G
- Location: Yeovil, Somerset
- Has thanked: 8 times
- Been thanked: 124 times
Re: Nathan's Daily Drive BB4
They do indeed Grant  I can remember the brand of my boss, just know it's a decent cast jobby. And yeah there's no harm in removing the bonnet heat-shield. I've done it to all my past ludes with no issues, and lots of forum members do it. Ignore Pushki

There wasn't any obvious part of it hanging down Pushki... It was in great condition, but still rubbing. And it's hardly detrimental to the car's OEMness as a whole
There wasn't any obvious part of it hanging down Pushki... It was in great condition, but still rubbing. And it's hardly detrimental to the car's OEMness as a whole
Last edited by NafemanNathan on Thu Feb 09, 2012 10:15 pm, edited 1 time in total.


-
nucleustylzlude

- Moderator
- Posts: 4013
- Joined: Wed Aug 11, 2010 11:46 pm
- My Generation: 4G
- Location: Bristol, UK!
- Been thanked: 7 times
- Contact:
If you get that bolt off, you have the shiny one from mine bud, needs a little refresh but you can pick it up from Japfest for the pricely sum of £15 if ya like.NafemanNathan wrote: I also wanted to remove the exhaust-manifold heat-shield as well, so I could remove the rust and either polish it or paint it. The two top bolts were no issue to remove, but of course the bottom one is seized and I've had no joy removing it yet as the bolt has started rounding offI'll have to get my Dad's mole grippers on it
The hard graft has been done, either touch up with some elbow grease or rough up and paint. Took me a whole day with a bodyshop and air tools at my disposal. Let me know bud. Will have something shinier soon.
She's looking lovely though, it's moving into dangerous territory of the good looking one, it'll end up with the other being a hangin track car at this rate!

-
NafemanNathan
- LotM Winner
- Posts: 20144
- Joined: Sun Aug 08, 2010 9:37 pm
- My Generation: 0G
- Location: Yeovil, Somerset
- Has thanked: 8 times
- Been thanked: 124 times
 Re: Nathan's Daily Drive BB4
Yes Pushki, it's all rolled up neatly with all the fixings still I wouldn't dream of throwing it away ...
Cheers Rob, I may take you up on that offer
Nah she's staying OEM so she's not going to take up much more time She's got a very slight knocking noise coming from the rear, so it's either an easily solved shock knock (Which I'll try first) or the rear droplinks need replacing as well. Then there's the front lip that needs re-working, the OSR light cluster I want to swap as there's a slight blemish, and I want to take some wet and dry to the headlights as they're slightly cloudy. I'm sure there's a few other things as well, but not a great deal
Cheers Rob, I may take you up on that offer
Nah she's staying OEM so she's not going to take up much more time
-
NafemanNathan
- LotM Winner
- Posts: 20144
- Joined: Sun Aug 08, 2010 9:37 pm
- My Generation: 0G
- Location: Yeovil, Somerset
- Has thanked: 8 times
- Been thanked: 124 times
Richbrook R1 Steering Wheel Fitted
Just a quick update. I fitted my Richbrook R1 wheel today...
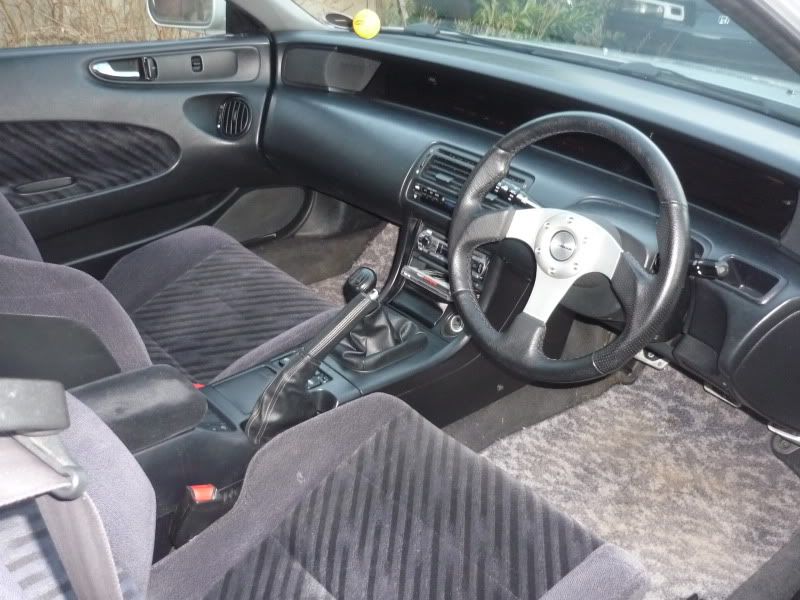
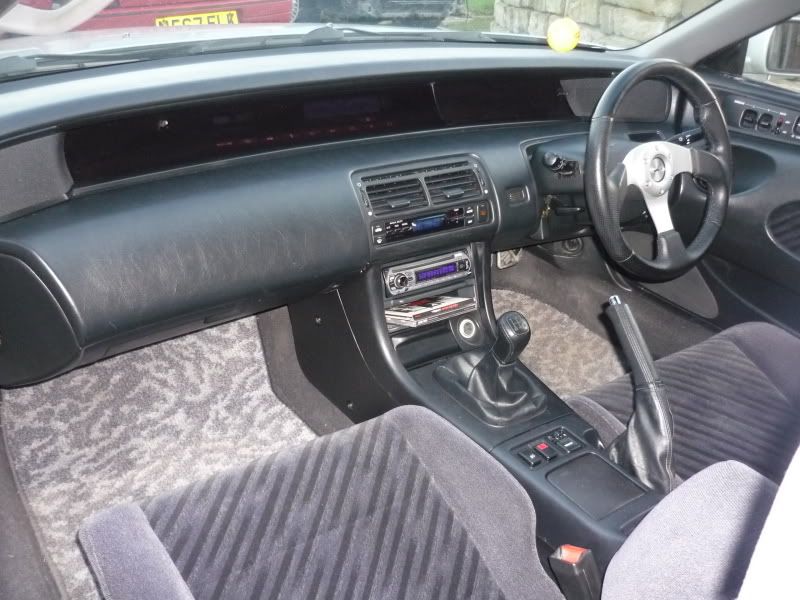
Now bar the gearstick and the colour of the bonnet, it feels pretty much like it used to sat inside my project lude
Now bar the gearstick and the colour of the bonnet, it feels pretty much like it used to sat inside my project lude
Last edited by NafemanNathan on Sun Feb 19, 2012 9:31 pm, edited 1 time in total.
-
NafemanNathan
- LotM Winner
- Posts: 20144
- Joined: Sun Aug 08, 2010 9:37 pm
- My Generation: 0G
- Location: Yeovil, Somerset
- Has thanked: 8 times
- Been thanked: 124 times

-
NafemanNathan
- LotM Winner
- Posts: 20144
- Joined: Sun Aug 08, 2010 9:37 pm
- My Generation: 0G
- Location: Yeovil, Somerset
- Has thanked: 8 times
- Been thanked: 124 times
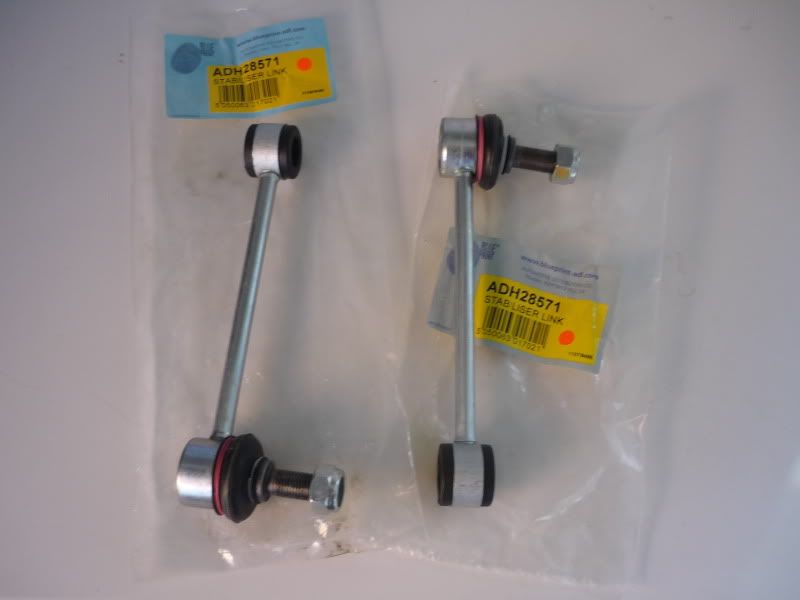
New Rear Drop Links Fitted
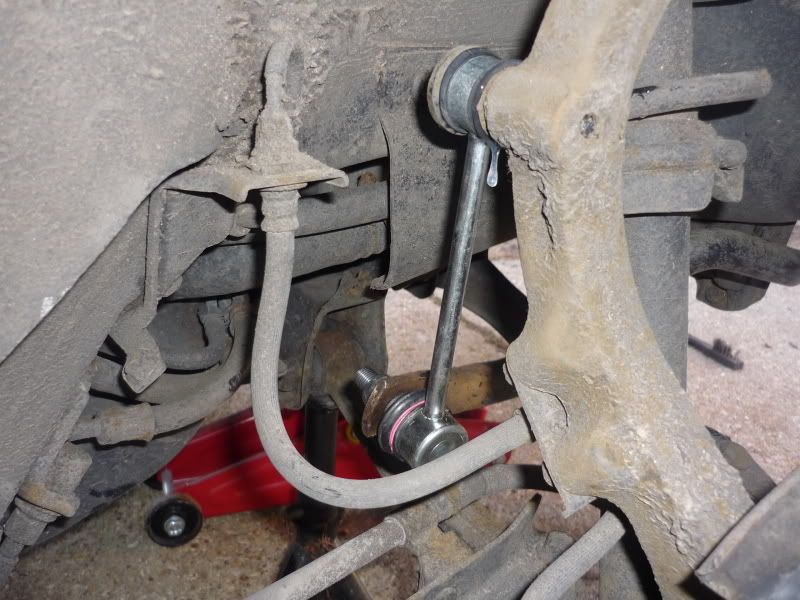
Got around to fitting the rear droplinks today. Managed to get some BluePrint ones through MotorFactors...
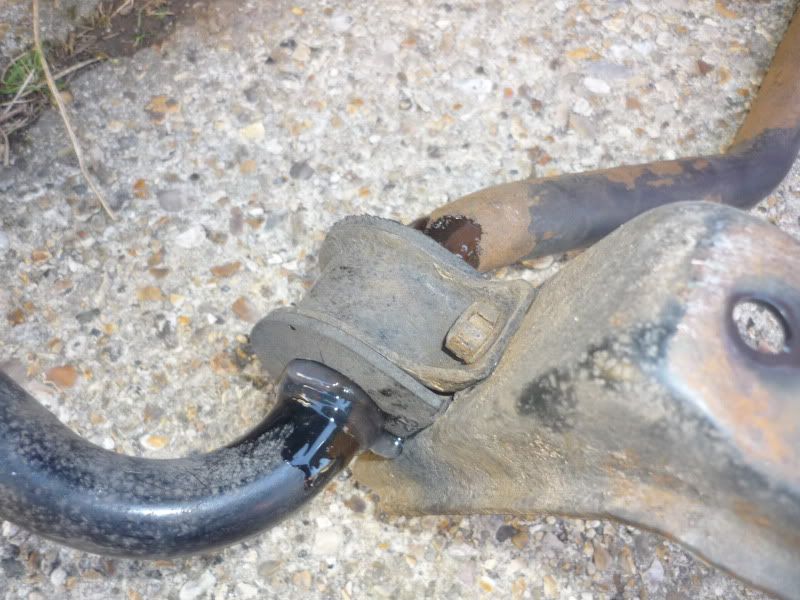
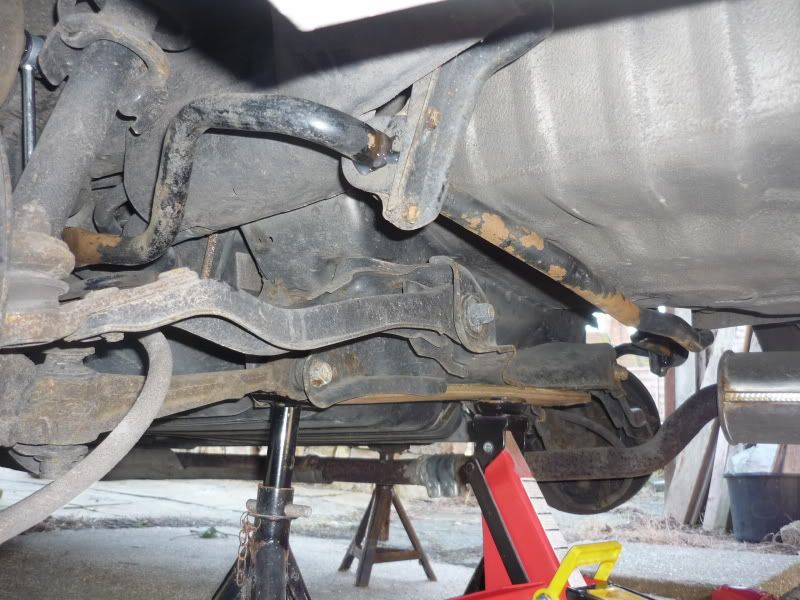
Again, as I'd had to do with the front droplinks, I dropped the ARB. But this time, being it was the rear, I was able to remove the ARB completely to get a good hold on it...
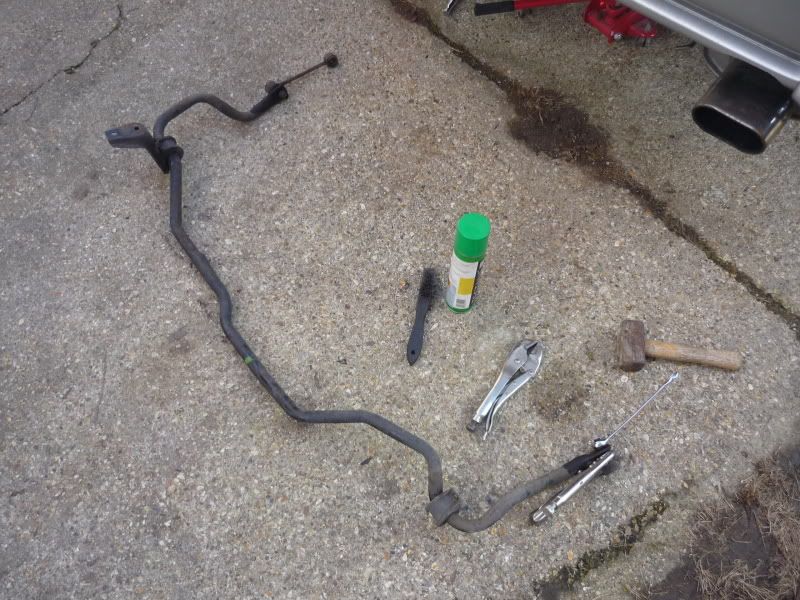
And yet again I find it crazy that you're supposed to prevent the ball joint from turning whilst you release the nut with a poxy 5.5mm allen key! For each one I've been able to use an allen key for the first couple of threads, but then before I'm even a quarter of the way through loosening them, the allen key slips and is no longer of any use... Ergo this set up...
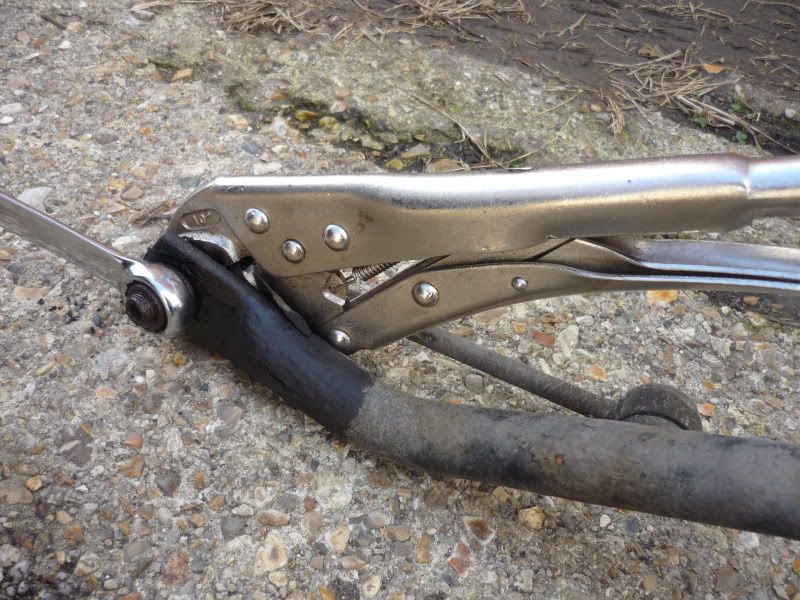
Even with a good 14-15 stone and copious amounts of muscle ( Phil ) I had absolutely no hope in removing the last nut. Even the mole grippers were slipping, so I had no other option but to use the hacksaw...

Once removed, I then removed the ARB bushes in order to regrease them. There was a good (bad) amount of flakey paint hanging off the ARB, so I took the opportunity to wire-brush it...
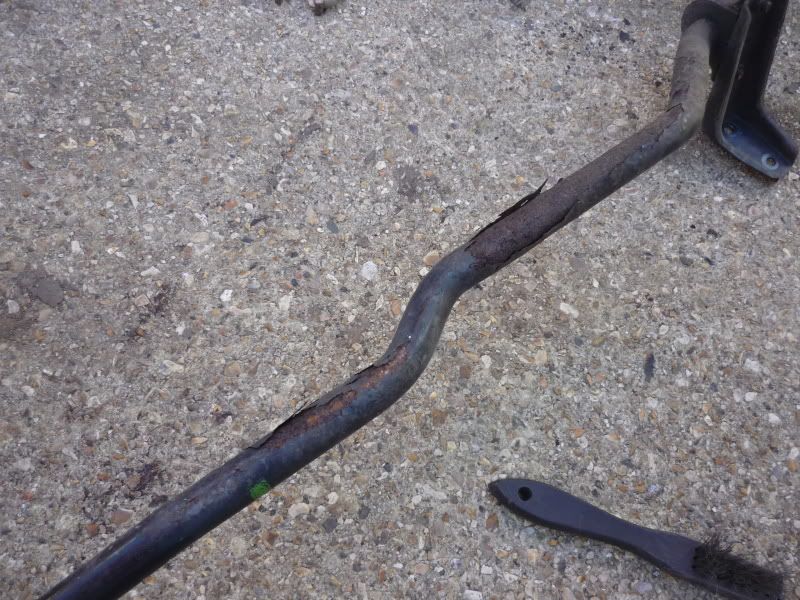
The areas under the bushes were particularly bad...
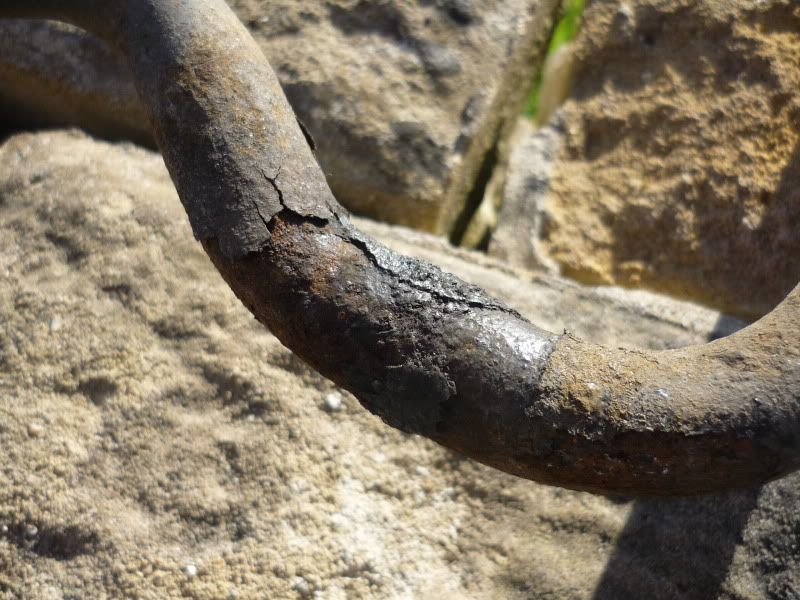
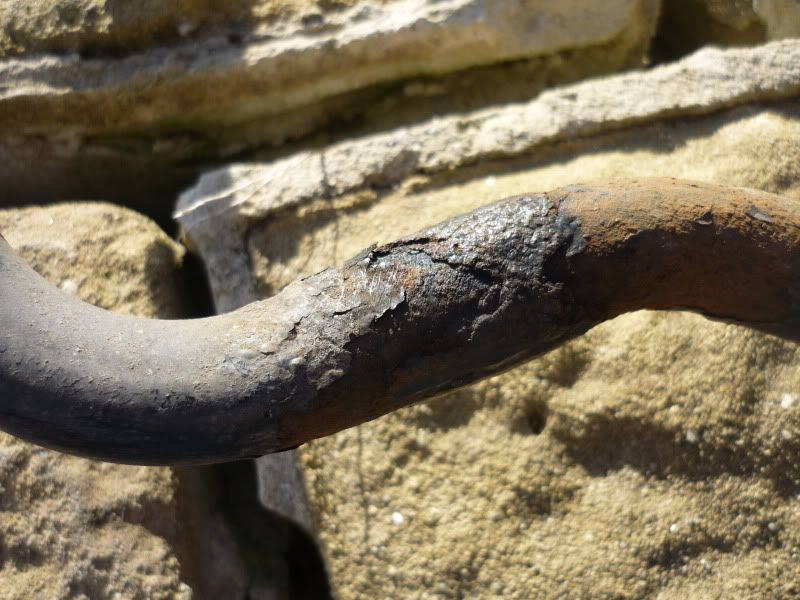
But I was able to simply knock off the corroded metal and regrease them before putting the bushes back...
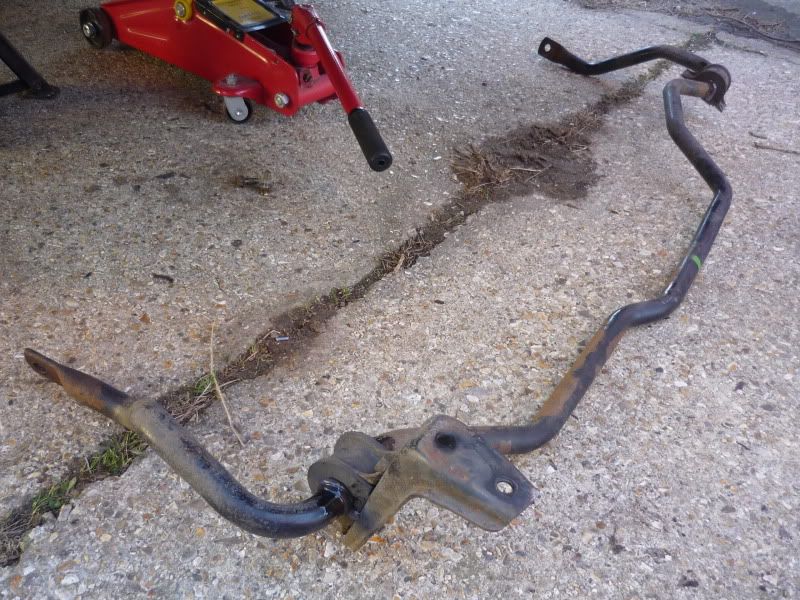
Obviously I would have been better off repainting the ARB and fitting new bushes, but I didn't really have time, so I'll simply add it to the list of things to do for now I'll probably remove the ARBs from the project lude to powder-coat, prepared for a simple quick swap next time. So anyway, back up it goes...
And new droplinks fitted ...
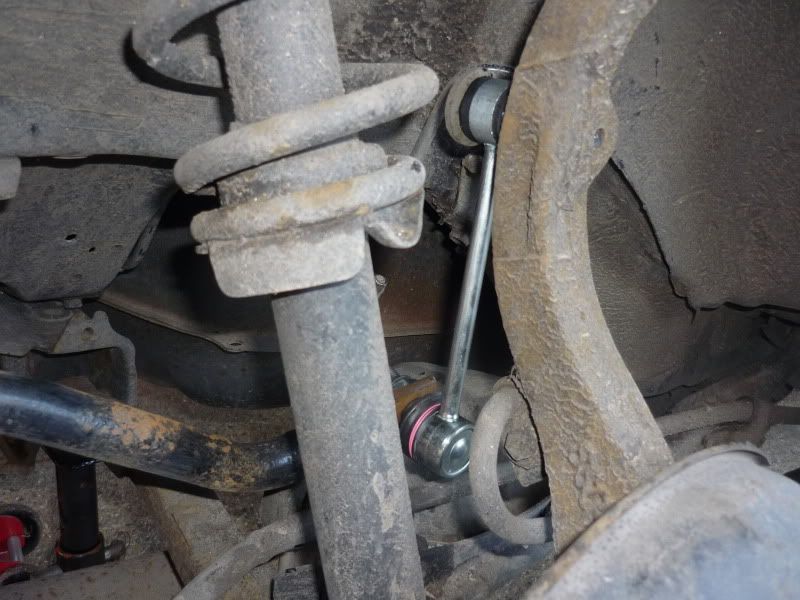
Looks like Nitin has been playing with that last one!
Now fingers crossed that'll get rid of the very subtle knocking noise I could hear coming from the rear. If it doesn't, then I think I've got a case of the old shock knock
Again, as I'd had to do with the front droplinks, I dropped the ARB. But this time, being it was the rear, I was able to remove the ARB completely to get a good hold on it...
And yet again I find it crazy that you're supposed to prevent the ball joint from turning whilst you release the nut with a poxy 5.5mm allen key! For each one I've been able to use an allen key for the first couple of threads, but then before I'm even a quarter of the way through loosening them, the allen key slips and is no longer of any use... Ergo this set up...
Even with a good 14-15 stone and copious amounts of muscle ( Phil
Once removed, I then removed the ARB bushes in order to regrease them. There was a good (bad) amount of flakey paint hanging off the ARB, so I took the opportunity to wire-brush it...
The areas under the bushes were particularly bad...
But I was able to simply knock off the corroded metal and regrease them before putting the bushes back...
Obviously I would have been better off repainting the ARB and fitting new bushes, but I didn't really have time, so I'll simply add it to the list of things to do for now
And new droplinks fitted
Looks like Nitin has been playing with that last one!
Now fingers crossed that'll get rid of the very subtle knocking noise I could hear coming from the rear. If it doesn't, then I think I've got a case of the old shock knock