Congratulations to vtecmec for winning May/June's Lude Of The Month, with his DIY Turbo BB1 build.

>>> Click Here For Profile <<<

Image

Shock Knock

Chassis/Brakes/Steering/Wheels discussion
User avatar
NCCMUR
Posts: 600
Joined: Sun Jan 29, 2012 10:14 am
My Generation: 5G
XBOX GamerTag: NCCMUR
Location: Stirling,Scotland
Has thanked: 1 time

Shock Knock

Post by NCCMUR » Tue Jun 05, 2012 4:24 pm

hi everyone

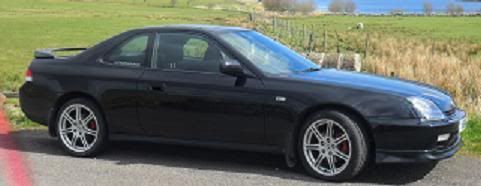
i'm pretty convinced the lude has a case of shock knock.

had her up on the ramp and ARB bushes are fine, droplinks fine,all other bushes are ok.

so my question is which part do i need to cure it ? No 13 or 7 or both maybe, i'm sure that i read somewhere the collar 14 was a part that needed replaced?

can anyone help?

cheers in advance

Image

*EDIT* yes i have read the temporary fix but id rather just get the bits required.

oh and can you change the rubber top mount without removing the full strut if this will fix it?
bristol_bb4 wrote: turn the volume up and get your happy time tissues ready :lol:
Kevin Bridges wrote: How did a didnae!!
Image
NCCMUR's 1997 VTI

User avatar
Supermarine Blues
Posts: 729
Joined: Sat May 19, 2012 3:20 pm
My Generation: 5G
Location: Double wishbones, Hertford
Been thanked: 4 times

Post by Supermarine Blues » Tue Jun 05, 2012 4:32 pm

You get some body washers, bore out the centre hole to ~10mm (IIRC) so they fit between 6 & 13 & around 14.

I used two per side, about five years ago. So it's not what I'd call temporary. It was also a Honda TSB recall job, IIRC.

User avatar
NCCMUR
Posts: 600
Joined: Sun Jan 29, 2012 10:14 am
My Generation: 5G
XBOX GamerTag: NCCMUR
Location: Stirling,Scotland
Has thanked: 1 time

Post by NCCMUR » Tue Jun 05, 2012 4:37 pm

iv got the washers bored out ready to go but as i said what part is actually done? (im guessing 13)they are only around £12 for a new one :P
bristol_bb4 wrote: turn the volume up and get your happy time tissues ready :lol:
Kevin Bridges wrote: How did a didnae!!
Image
NCCMUR's 1997 VTI

User avatar
Pushki
Supporter 2015
Posts: 2635
Joined: Sat Aug 07, 2010 9:21 pm
My Generation: 4G
PSN GamerTag: Luigi_Black
Location: Bluff Creek
Has thanked: 2 times
Been thanked: 10 times

Post by Pushki » Tue Jun 05, 2012 5:17 pm

Part No. 13 should fix the problem.
I think Part No. 14 will also help.

I replaced the rubber top mount (#13) and also cut a few millimetres off the collar (#14).
Been fine for the last couple of years.

Here's a picture of the old rubber compared to the new (second-hand) one.
Image

Before - Temp washer fix
Image

After - New rubber and shortened collar
Image
Image
ImageImageImage

User avatar
NafemanNathan
LotM Winner
Posts: 20144
Joined: Sun Aug 08, 2010 9:37 pm
My Generation: 0G
Location: Yeovil, Somerset
Has thanked: 8 times
Been thanked: 124 times

Post by NafemanNathan » Tue Jun 05, 2012 5:33 pm

It's general wear on both item 13s that means 13-7-13 as an assembly slides up and down item 14 causing the "shock knock", so yes replacing both item 13s should cure shock knock :)

User avatar
Pushki
Supporter 2015
Posts: 2635
Joined: Sat Aug 07, 2010 9:21 pm
My Generation: 4G
PSN GamerTag: Luigi_Black
Location: Bluff Creek
Has thanked: 2 times
Been thanked: 10 times

Post by Pushki » Tue Jun 05, 2012 5:52 pm

NafemanNathan wrote:so yes replacing both item 13s should cure shock knock
I only replaced the top one. :geek:
Image
ImageImageImage

User avatar
NafemanNathan
LotM Winner
Posts: 20144
Joined: Sun Aug 08, 2010 9:37 pm
My Generation: 0G
Location: Yeovil, Somerset
Has thanked: 8 times
Been thanked: 124 times

Post by NafemanNathan » Tue Jun 05, 2012 5:54 pm

Pushki wrote:
NafemanNathan wrote:so yes replacing both item 13s should cure shock knock
I only replaced the top one. :geek:
That's absolutely fine if only your top one was warn :ugeek:

User avatar
NCCMUR
Posts: 600
Joined: Sun Jan 29, 2012 10:14 am
My Generation: 5G
XBOX GamerTag: NCCMUR
Location: Stirling,Scotland
Has thanked: 1 time

Post by NCCMUR » Tue Jun 05, 2012 6:06 pm

thanks for the pics pushki exactly what i needed to see

two top rubbers on order tomorrow ;)
bristol_bb4 wrote: turn the volume up and get your happy time tissues ready :lol:
Kevin Bridges wrote: How did a didnae!!
Image
NCCMUR's 1997 VTI

Online
User avatar
Merlin
Moderator
Posts: 12393
Joined: Fri Aug 06, 2010 9:04 am
My Generation: 5G
PSN GamerTag: Merlinbadman
Location: Edinburgh
Has thanked: 68 times
Been thanked: 303 times

Post by Merlin » Tue Jun 05, 2012 8:32 pm

The fix is listed in the Wiki with a Pushki explanation as well :D

http://www.ludegeneration.co.uk/honda-p ... -t739.html
Image
BA8......... BB4......... BB8.........The JDM Muscle Bus

User avatar
NCCMUR
Posts: 600
Joined: Sun Jan 29, 2012 10:14 am
My Generation: 5G
XBOX GamerTag: NCCMUR
Location: Stirling,Scotland
Has thanked: 1 time

Post by NCCMUR » Sat Jun 09, 2012 2:22 pm

ok so i got 2 new top rubbers :D

stripped out rear trims and tried to loosen the bolt over centre shaft.......no chance absolutely solid , actually twisted an allen key trying to turn it :shock: after snapping my front shock doing this thought i'll just leave it.
now i'll have to remove the full thing and get the buzz gun on it.....bastards :twisted:
bristol_bb4 wrote: turn the volume up and get your happy time tissues ready :lol:
Kevin Bridges wrote: How did a didnae!!
Image
NCCMUR's 1997 VTI

Post Reply

Return to “Chassis / Brakes / Steering / Wheels”