Congratulations to vtecmec for winning May/June's Lude Of The Month, with his DIY Turbo BB1 build.

>>> Click Here For Profile <<<

Image

Nathan's Road-Legal/Track BB4

Tell us all about your Lude, you know you want to ...
User avatar
NafemanNathan
LotM Winner
Posts: 20144
Joined: Sun Aug 08, 2010 9:37 pm
My Generation: 0G
Location: Yeovil, Somerset
Has thanked: 8 times
Been thanked: 124 times

(PUK) New Trick Bits

Post by NafemanNathan » Tue Feb 07, 2012 2:20 pm

Well here's a slightly more fun update... A few little trick bits and a good bit of news... Potentially for anyone :wink:

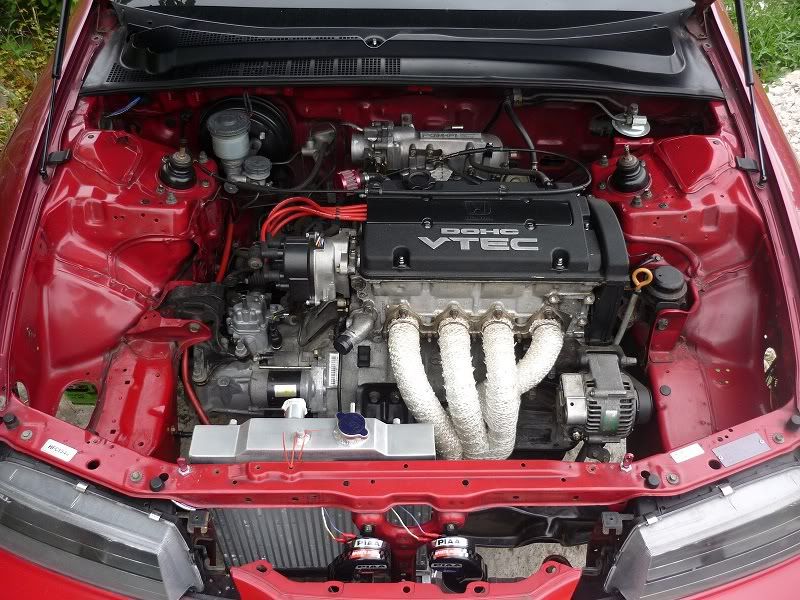
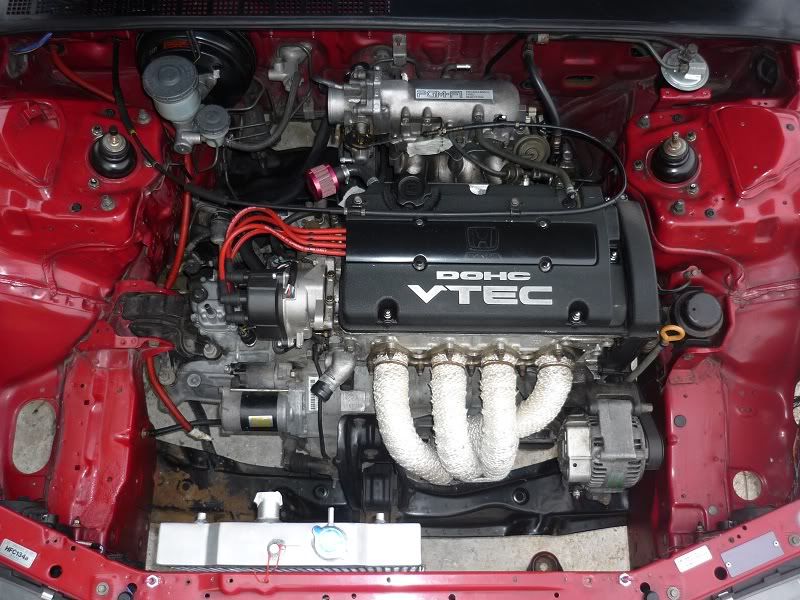
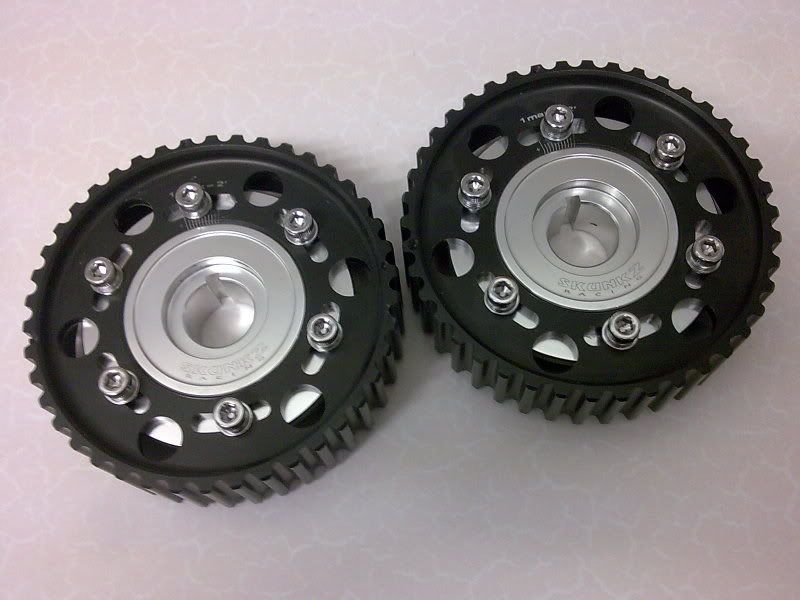
First of all, the Skunk2 gears I had fitted recently...

Image

I've not got a proper picture of them fitted yet as I want to get a new rocker cover and cut away appropriately first :wink:

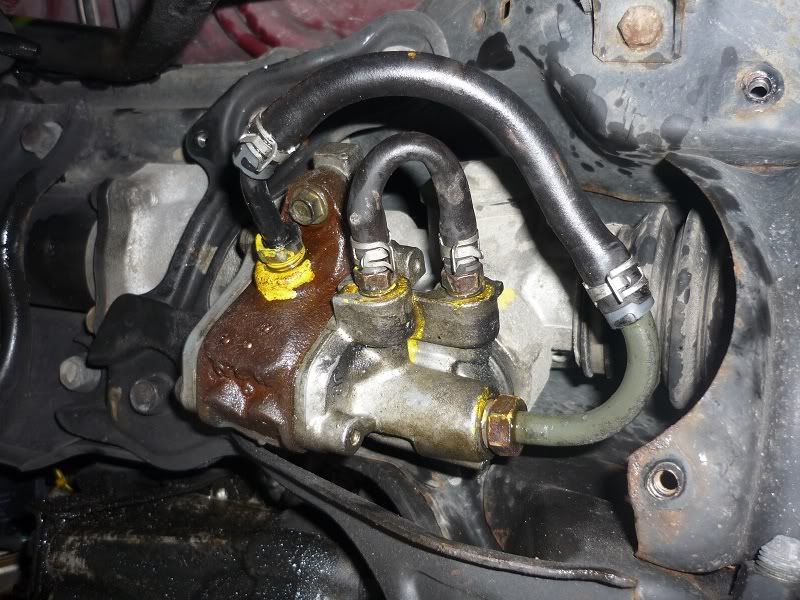
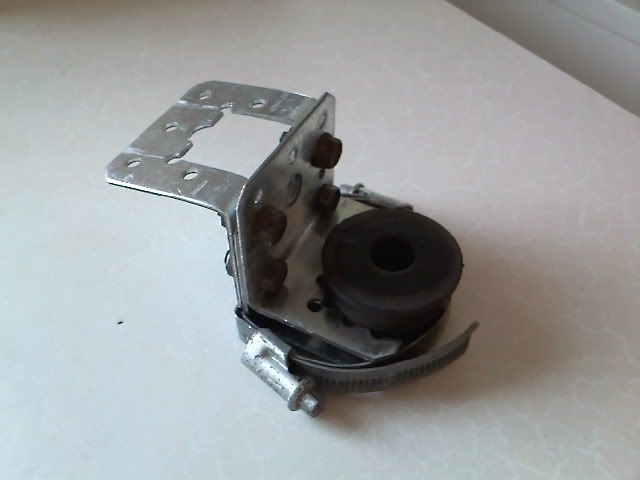
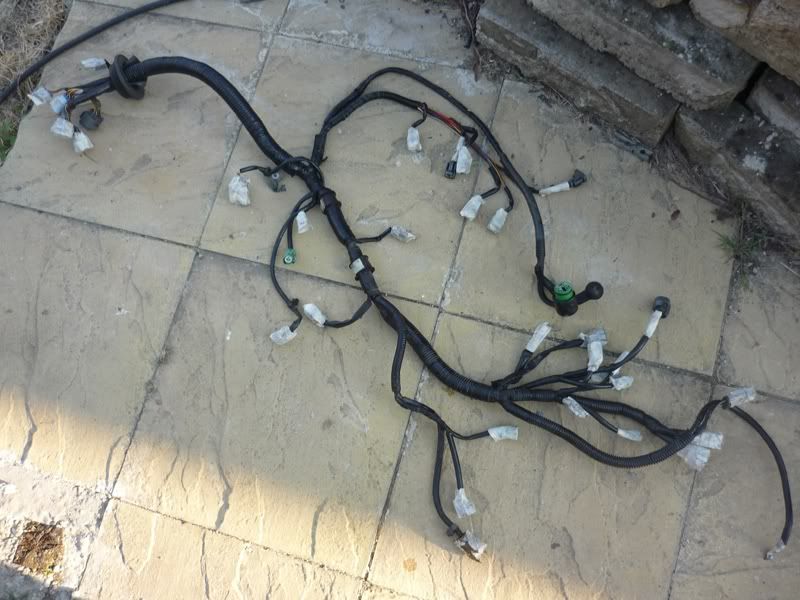
The "bargain" £150s worth of rubber and sheet metal I bought recently :lol: ...

Image

Then this arrived the other day, which was potentially the last part of my new induction set up...

Image

The plan was (being I need a new radiator), to go for a half-width radiator positioned central as possible, but allowing me to duct air from a straight line, from behind the bumper to where my filter currently sits (so basically the left side of OEM radiator) allowing as few bends as possible creating an efficient ram-air effect. In order to do this I've found the perfect "funnel"... from Tool Station 8) :lol: ...

Image

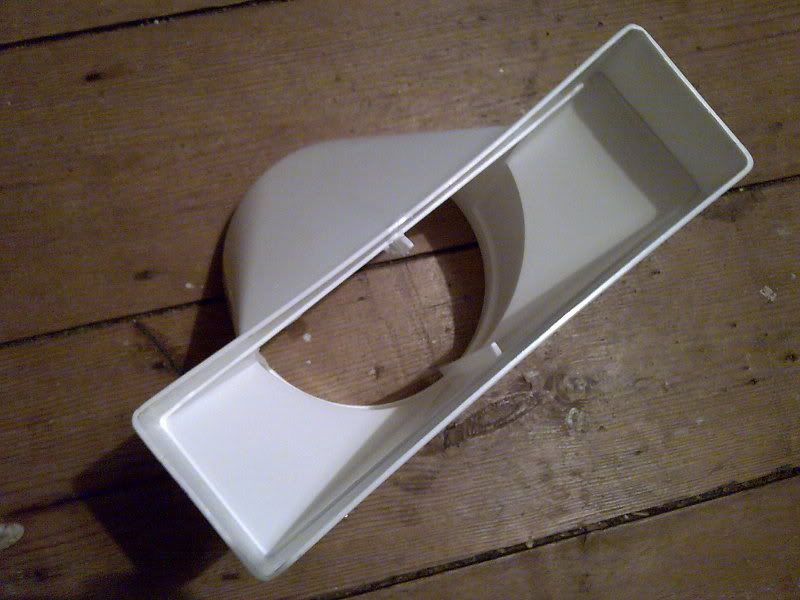
The rectangular intake is 204mm x 60mm and will fit perfectly in the upper grill of the front bumper. It then converts to a 5" diameter of which I will immediately adapt to 4" using this...

Image

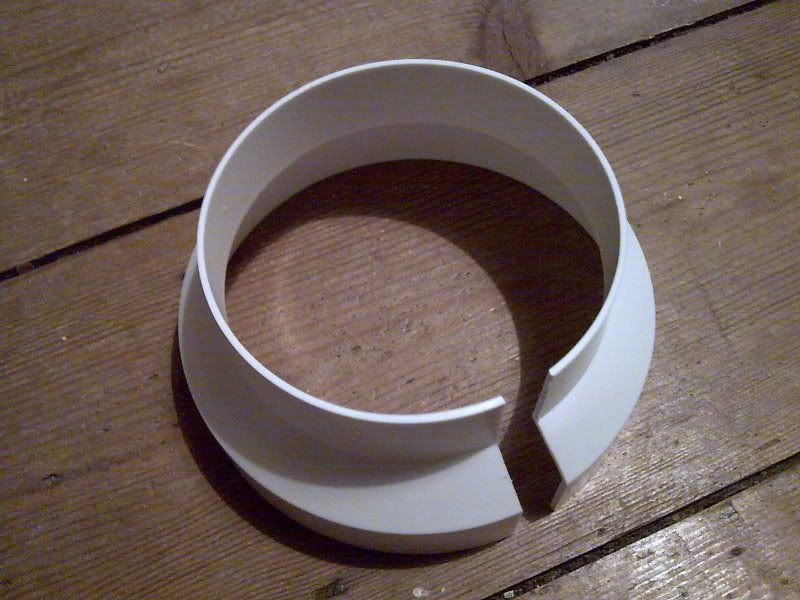
I had to cut a small section out in order to slot it in the "funnel". These two components will be painted black just so you know :wink:

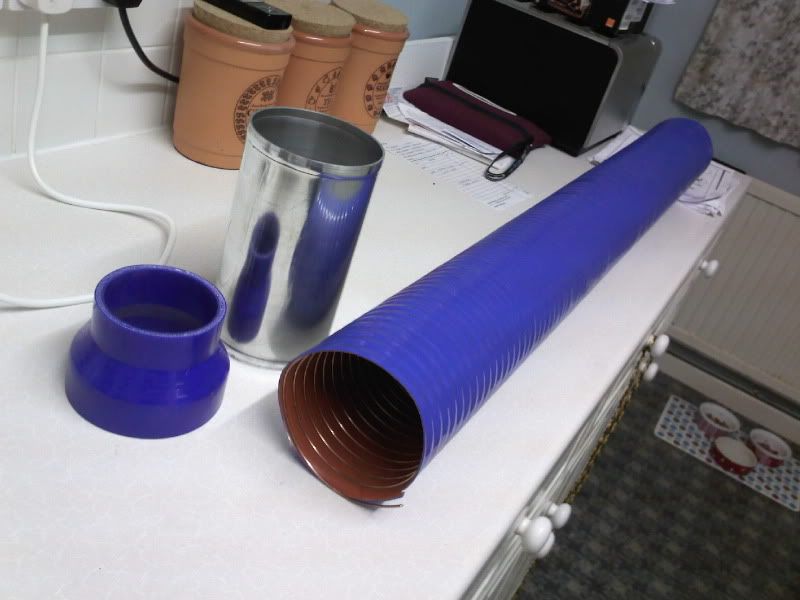
Then when the time comes I shall use this lot to duct the air. It consists of a 102mm aluminum joiner, a 102mm-76mm Silicone reducer and a 1 metre length of 102mm diameter Silicone Ducting. I now actually have a potential means to having 102mm ends made up for my BMC-CDA filter to replace the standard 85mm ones to, but I'll get to that later :wink: ...

Image

That lot will then connect to this bad boy :wink: ...

Image

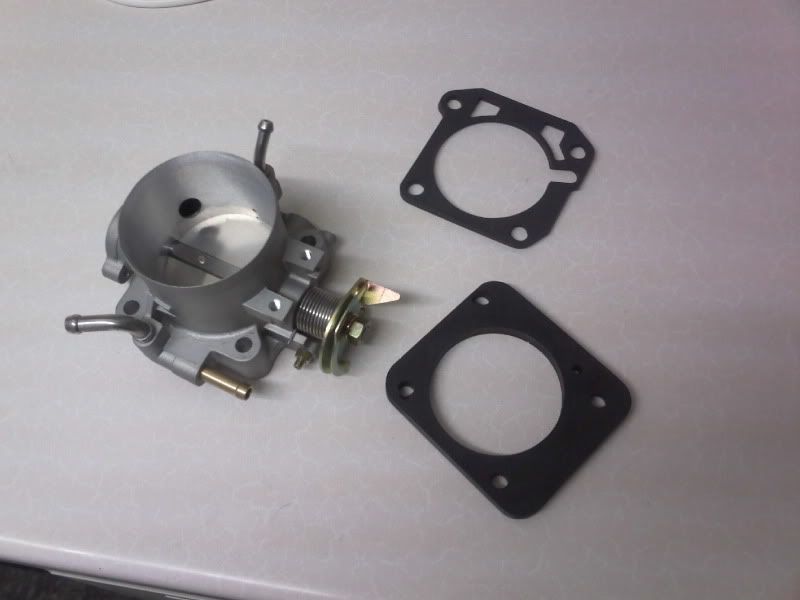
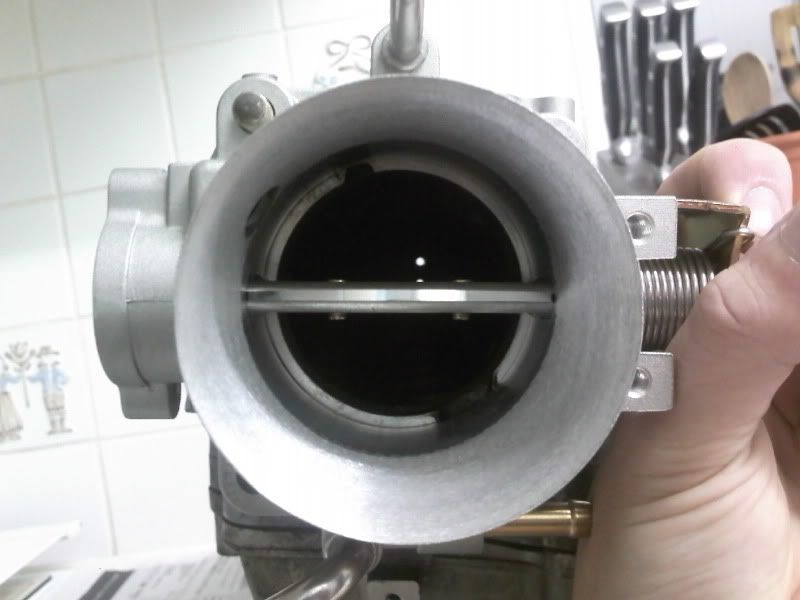
It's DH-Racing 74/68 throttle body I had shipped from the states.

It kind of speaks for itself, in that it measures 74mm across the mouth...

Image

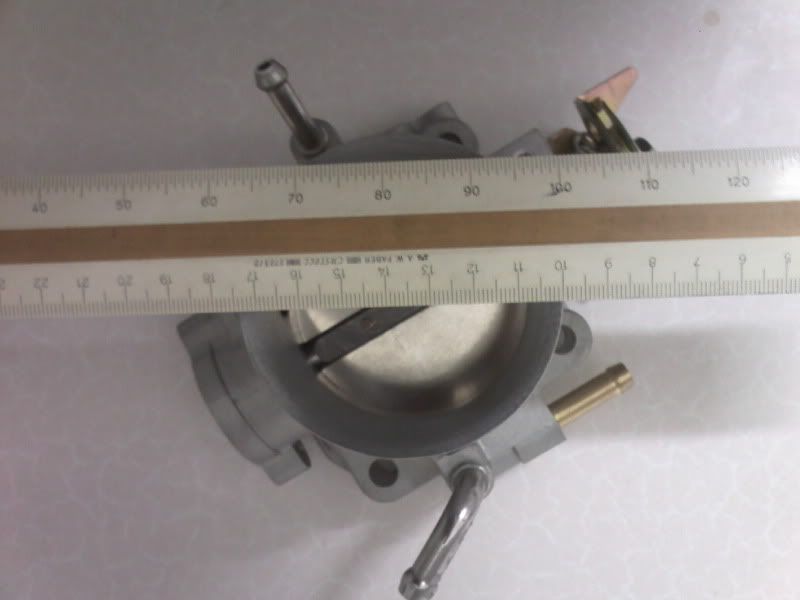
And tapers down to 68mm...

Image

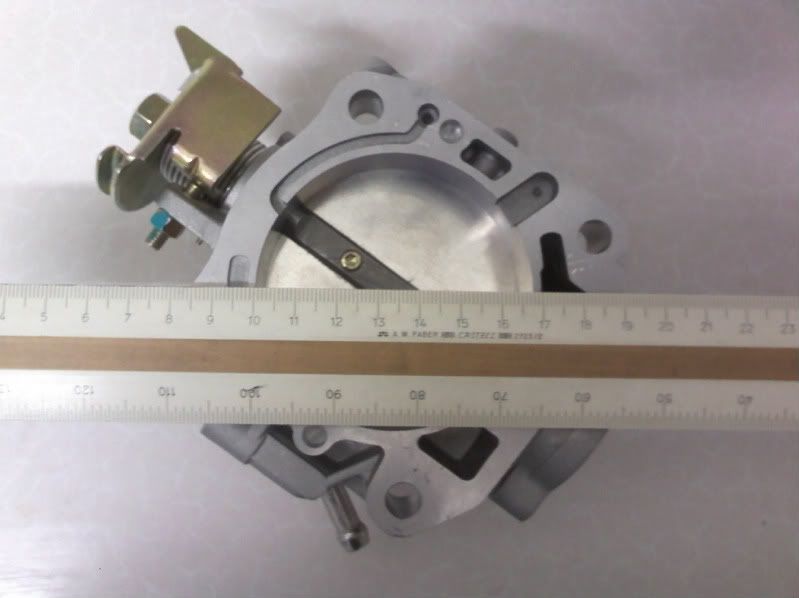
The idea is obviously that I'm trying to get more air into the intake manifold, and by "Ramming" air in a 5 inch diameter at one end and gradually compressing it down to just under 2 3/4 inches, the force in which it enters is also going to be greater as well.

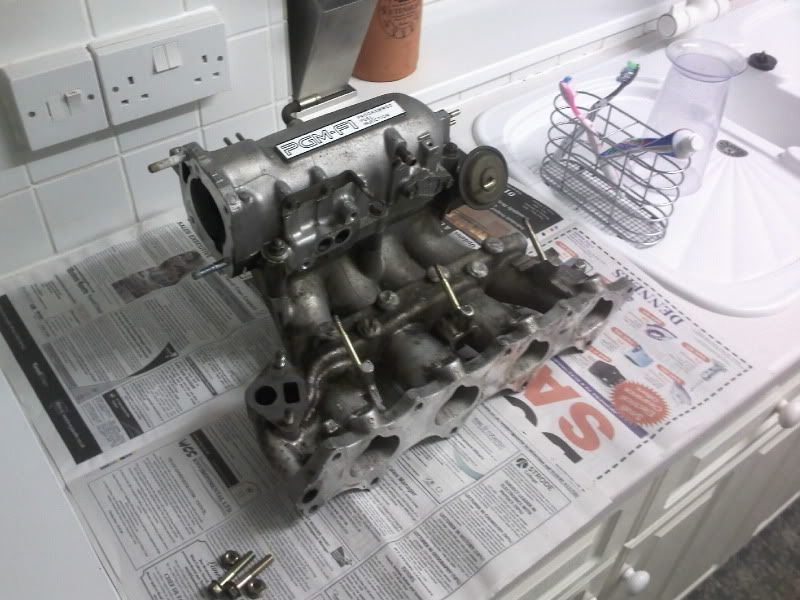
The reason I got a second the manifold is probably going to be quite obvious as well. I need to bore out the mouth in order to match the new throttle body...

Image

Fortunately for me I have a very good friend who is an EXCEPTIONAL machinist and willing to do the job for me :D

But not only that... I took the manifold over to show him on Saturday. He'd also invited his other machinist buddy over as well as we'd already been discussing a few potential projects :wink: My initial intention was to do as some others have already done and polish the inside of the intake manifold. You can see here how poor the casting is...

Image

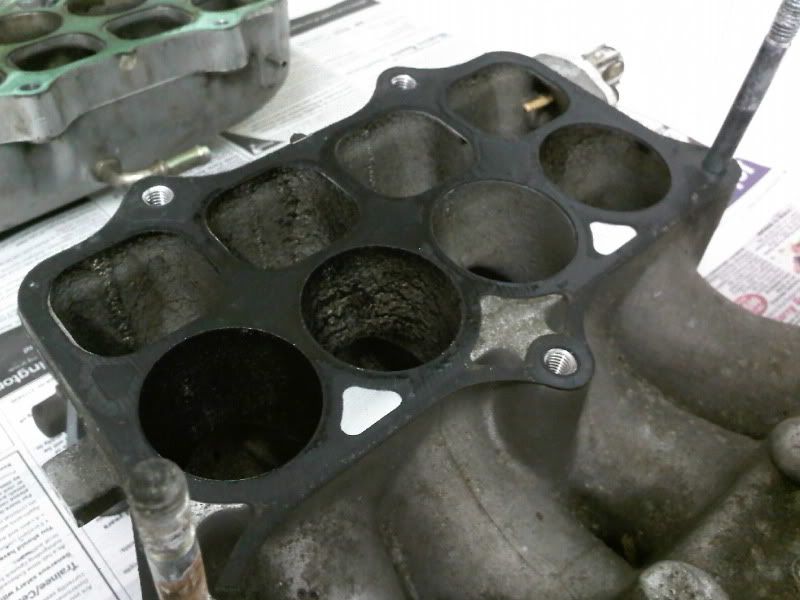
The black is obviously built up overtime, but it actually highlights exactly how rough the surface is :shock:

Anyway, you can also see how "lumpy-bumpy" the inside of the top portion of the intake is...

Image

Image

Ideally I'd like to fill-weld the recesses and then have everything polished allowing maximum air flow. In order to do this, the "webbing" of the top portion (The green in the next picture) would need to be cut away to give proper access. This would also mean some of the fixture points would need to be relocated. I would then be hoping to taper the webbing of the IABs to also help channel the air down. As many of you know the Skunk2 can cause a loss to lower end power due to the fact it has no IABs, so I have full intention to keep mine.

Image

Also, I intend to do away with the EGR valve. My buddy Dale could easily whip up a capping-off plate, but the internal exits which allow the exhaust gas back into the cold air passages are still going to cause a disruption to the air flow...

Image

Sooooooo... No sooner had I said my case... Without any hesitation whatsoever, both Dale and his pal "Vendi" (Apparently he has problems with vending machines :lol: ) Looked up from my napkin diagram and said... "Be easier to make one from scratch then?" :shock: ............ :D

So... looks like that's the plan now lads... My very own custom built intake manifold :D ... And what's going to be so great about it, is that Dale puts perfectionists to shame! :P He only feels something's worth doing if it out performs what's already out there (or be it at a lesser cost) and if he can make it look the dog's b*ll**ks 8) :lol:

Also, Dale and I had already talked about the manufacture of a few aftermarket trick bits to. Dale's in the process of furnishing a newly acquired workshop of which was intended for "hobby use" with the potential of making a little money on the side. Basically he's said that he wants to help transform my engine bay, and anything he makes for me (Being my car will be the guinea pig) will also be on offer for you guys to :D

I'll be putting a thread together for him nearer the time. So watch this space :wink:

And, back to the last couple of bits (Won't keep you much longer :wink: )... In ready and waiting I also have a nice and shiny AC Autotechnics 5/8" bore Fuel Rail, which will be accompanied by a power boost valve of some sort. I've not decided on whether to go FSE Power Boost valve, or a manually adjustable one of some sort yet...

Image

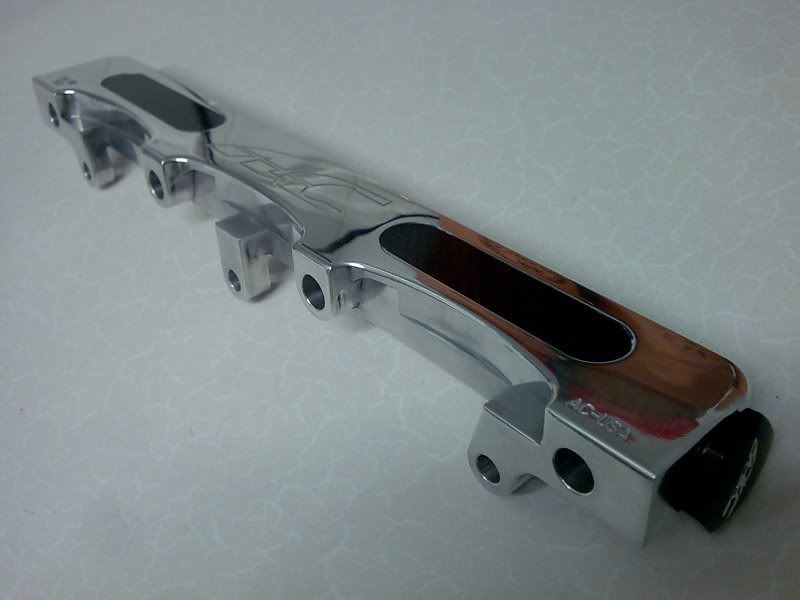
And an equally shiny catch tank to hopefully keep my new intake manifold clean :wink: ...

Image

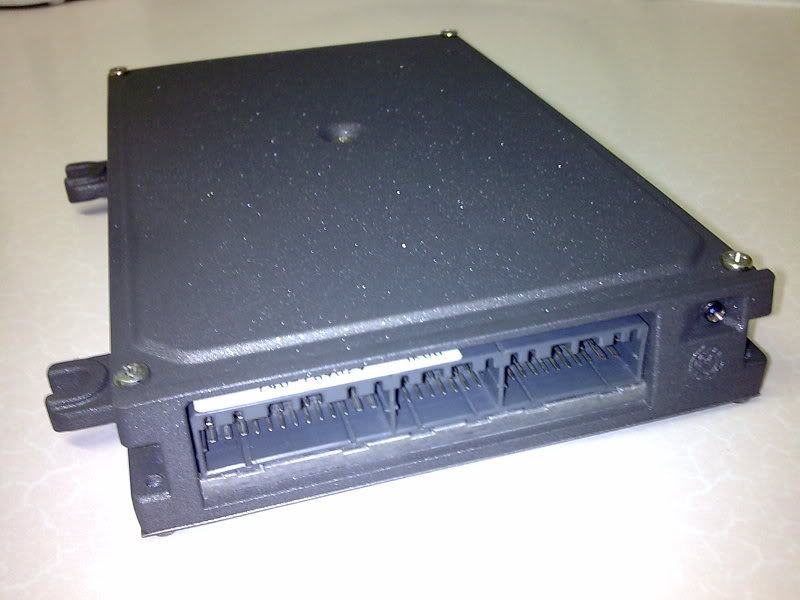
Then last, but far from least, to eventually tie everything together, as this would probably all be pointless without it... My sparkly, newly refurbished P28 ECU :wink: ...

Image

Image

There you go. And now back to work I go :)

User avatar
NafemanNathan
LotM Winner
Posts: 20144
Joined: Sun Aug 08, 2010 9:37 pm
My Generation: 0G
Location: Yeovil, Somerset
Has thanked: 8 times
Been thanked: 124 times

Re: PLEASE DO NOT POST IN THIS THREAD YET (Under Constructio

Post by NafemanNathan » Tue Feb 07, 2012 2:22 pm

Merlin wrote:Looking good!! I am particularly interested in your intake manifold. I cant wait so see how it pans out.
Mattblack_lude wrote:This will be very interesting, especially since you already have a current dyno figure to work from, so will be able to see the gains on paper aswell as the normal arse dyno :lol:

I will definately follow this with interest
Lude-Dude wrote:also have a spare mani,

was wanting to try this but was told not to unless you have access to a flow bench

but I would have thought smoothing the inner walls would be benefical

User avatar
NafemanNathan
LotM Winner
Posts: 20144
Joined: Sun Aug 08, 2010 9:37 pm
My Generation: 0G
Location: Yeovil, Somerset
Has thanked: 8 times
Been thanked: 124 times

Re: PLEASE DO NOT POST IN THIS THREAD YET (Under Constructio

Post by NafemanNathan » Tue Feb 07, 2012 2:22 pm

I haven't got access to a flow bench just yet, but I'm sure I can always find one once I've got a final mock up. There are a lot of do's and don't that I can think of for myself and I can instantly see a few issues with the OEM manifold. Being problem solving and testing is what I do for a living I'm hoping I can apply enough logic to pretty much get it bang on first time round, with maybe just a few tweaks here and there. The basic aim of an intake manifold is pretty simple (IAB's aside), but I'm hoping to try something a bit different :wink:

User avatar
NafemanNathan
LotM Winner
Posts: 20144
Joined: Sun Aug 08, 2010 9:37 pm
My Generation: 0G
Location: Yeovil, Somerset
Has thanked: 8 times
Been thanked: 124 times

Re: PLEASE DO NOT POST IN THIS THREAD YET (Under Constructio

Post by NafemanNathan » Tue Feb 07, 2012 2:23 pm

Lude-Dude wrote:good luck, will be keeping a eye on this

User avatar
NafemanNathan
LotM Winner
Posts: 20144
Joined: Sun Aug 08, 2010 9:37 pm
My Generation: 0G
Location: Yeovil, Somerset
Has thanked: 8 times
Been thanked: 124 times

(PUK) SORN, PAS Removal, Cable Tuck & Lots of Trick

Post by NafemanNathan » Tue Feb 07, 2012 2:26 pm

Apologies guys, I've completely neglected to keep this thread up to date. So here's a "brief" update... And then I promise to try and stay on top of it as hopefully things should start getting interesting ;-)

Basically back before May I decided I was fed up of my awful squeaky bushes which were obviously on their last legs, so I contacted Rich at PA for a quote of all new poly bushes... Everywhere! The quote hit me hard, so I made the decision to lay the Prelude up for a while and get a cheap run about to allow me to save up to pay Rich's mortgage for two months.

So come May, the lude's on 4 axle stands and I'm up thirty odd quid from refunded tax.

Image

I then thought I really should take full advantage of this situation. There's a lot of things I'd like my lude to be, and I've got a lot of kit to fit... I should make a start...

My track ready lightening commenced...

PS removed...

Image

Rear wiper removed... And replaced with bung from ebay. Oh no!... the size they quoted is the overall size of the bung... Not the size of the hole it's for! Think quick, it's going to rain soon!...


Image

Removed aerial...

Image

Lockable Aerocatches fitted My area isn't the safest area... I wanted more security...

Image

New rad positioned on awesome madmax stylee lower mount (obviously temporary ;-) )...

Image

8)

Image

Also removed the bonnet catch and pull and fitted PIAA ultralight (not that light) horns in its place.

Image

Fitted hood dampers, which make hell of a difference when working over the engine by the way...

Image

Which then leads me on to...

Image

The cable tuck so far ;-) ...

Image

Image

Image

Image

Cables removed so far...

Image

Main loom also removed to modify...

Image

I also managed to acquire myself a nice Wings West lip kit from a nice chap I believe some of you had the pleasure of meeting at Japfest :D ...

Image

A set of Spoon replica mirrors, which are practically a direct fit, and a tenth the weight of the OEM mirrors :) ...

Image

Also managed to get myself a nice conditioned ATR inlet mani...

Image

My custom manfold has obviously taken a back seat. It's designed, but my friend still hasn't got his workshop sorted yet. So, I'm currently in talks with Shaun at Rosko Racing about supplying me with a few of his brackets and adapters (The block off plates I will be able to get my friend to make). But Shaun is also able to supply me with Acura RDX 410cc injectors. Not really heard of any applications over here, but the injectors have a far superior spray to any other Honda specific injector on the market. They've be proven to increase by up to 4hp and a few pounds in torque just on their own, so fingers crossed with everything else I'm doing they should be a worthy upgrade.

But to cap everything off... I went and won a complete "Type-S" head on ebay the other day :D Yeay for me! \:D/

Hopefully, should be interesting ;-)

Anyway, that's pretty much me lude caught up to date. I will stay on top of it now :lol:

User avatar
NafemanNathan
LotM Winner
Posts: 20144
Joined: Sun Aug 08, 2010 9:37 pm
My Generation: 0G
Location: Yeovil, Somerset
Has thanked: 8 times
Been thanked: 124 times

Re: PLEASE DO NOT POST IN THIS THREAD YET (Under Constructio

Post by NafemanNathan » Tue Feb 07, 2012 2:30 pm

4thgenphil wrote:love the wire tuck and the battery relocation!!!
have a look at rosko racing, they modify atr manifolds so they fit on preludes, its a good guide as he give a step by step on how he does it :wink:
is the rad a civic one?
also you'll have to let me know what it feels like with no PS :wink:

you should do the poly bushing your self mate, far more satisfying :wink:

User avatar
NafemanNathan
LotM Winner
Posts: 20144
Joined: Sun Aug 08, 2010 9:37 pm
My Generation: 0G
Location: Yeovil, Somerset
Has thanked: 8 times
Been thanked: 124 times

Re: PLEASE DO NOT POST IN THIS THREAD YET (Under Constructio

Post by NafemanNathan » Tue Feb 07, 2012 2:31 pm

Yeah, already checked out Rosko's how-to ;-) I'll be getting one of his custom fuel rails as well (specifically designed to run the Acura RDX injectors with an ATR mani 8)

You're not the first person to tell me to do the bushes myself actually. Though I always thought it was something I'd be best off leaving to the professionals (or someone like Rich) at least I'd be able to refurb each component as I go... And it'd be cheaper.

I'll just have to see if I can be arsed once I've done everything else. I miss driving her already! :lol:

User avatar
NafemanNathan
LotM Winner
Posts: 20144
Joined: Sun Aug 08, 2010 9:37 pm
My Generation: 0G
Location: Yeovil, Somerset
Has thanked: 8 times
Been thanked: 124 times

Re: PLEASE DO NOT POST IN THIS THREAD YET (Under Constructio

Post by NafemanNathan » Tue Feb 07, 2012 2:31 pm

4thgenphil wrote:i was just about to post a link up to rosko :roll:
i did my poly bushing myself so it isnt that hard, just time comsuming (which is why it seems a lot for PA to do it) up to you though mate but it is well worth doing :wink:
i may have to drop by some time and have a look at your car next time i'm down visiting the rents if thats ok? i wanna see this wire tuck :shock:

User avatar
NafemanNathan
LotM Winner
Posts: 20144
Joined: Sun Aug 08, 2010 9:37 pm
My Generation: 0G
Location: Yeovil, Somerset
Has thanked: 8 times
Been thanked: 124 times

Re: PLEASE DO NOT POST IN THIS THREAD YET (Under Constructio

Post by NafemanNathan » Tue Feb 07, 2012 2:31 pm

Sure mate! Come on down :D Always happy to meet a fellow luder... And mother always makes sure I have a constant supply of tea bags and biscuits ;-) :lol: Where do your folks live?

I may have to have a line down under her to think and check out what the whole job actually entails. I know I'd prefer to be able to say I've done it myself. And like I said, I could even get the lower arms/wishbones etc powder coated then 8)

User avatar
NafemanNathan
LotM Winner
Posts: 20144
Joined: Sun Aug 08, 2010 9:37 pm
My Generation: 0G
Location: Yeovil, Somerset
Has thanked: 8 times
Been thanked: 124 times

Re: PLEASE DO NOT POST IN THIS THREAD YET (Under Constructio

Post by NafemanNathan » Tue Feb 07, 2012 2:32 pm

nitin_s1 wrote:Wire tuck is awesome! Shave the holes and it will look even better.

PS removed. :( (Its so hard to turn the car) :oops:

Post Reply

Return to “Lude Profiles”