
Congratulations to vtecmec for winning May/June's Lude Of The Month, with his DIY Turbo BB1 build.
>>> Click Here For Profile <<<

>>> Click Here For Profile <<<
Nathan's Road-Legal/Track BB4
-
NafemanNathan

- LotM Winner
- Posts: 20144
- Joined: Sun Aug 08, 2010 9:37 pm
- My Generation: 0G
- Location: Yeovil, Somerset
- Has thanked: 8 times
- Been thanked: 124 times

-
NafemanNathan
- LotM Winner
- Posts: 20144
- Joined: Sun Aug 08, 2010 9:37 pm
- My Generation: 0G
- Location: Yeovil, Somerset
- Has thanked: 8 times
- Been thanked: 124 times
(PUK) Cable Tuck Cont'd. ATR Manifold Modification
Just a mid way update on a couple of things really.
Firstly, the wire tuck. Decided with the long evenings at the minute that I could spare a few hours now and again to crack on with the tuck, before I completely forget what I'm doing. To make things easier and more accessible I decided to remove the rest of the centre console frame...
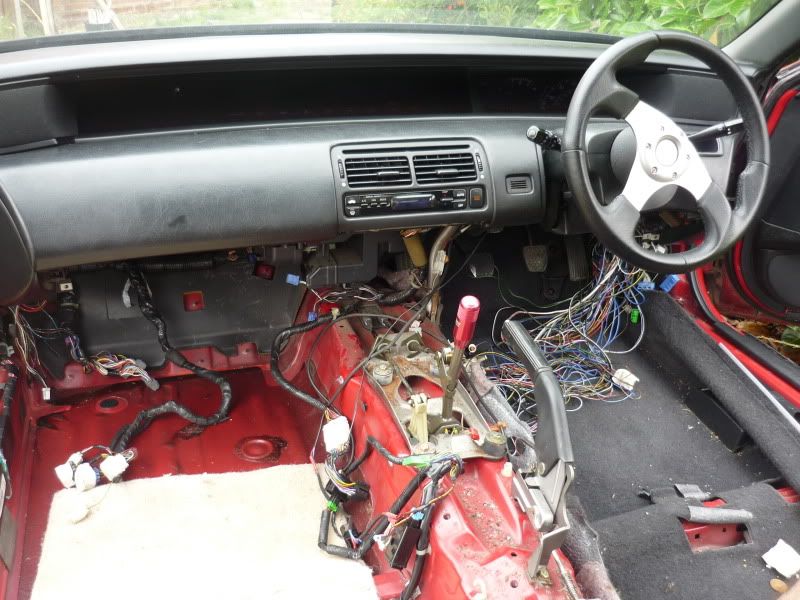
I was going to remove this anyway as it's potentially where I'll be relocating the engine fusebox to (should it not stretch to the passenger foot well. Also it's less weight of course You can see how much more accessible everything is, and it also lets in more light which helps
  ...
...
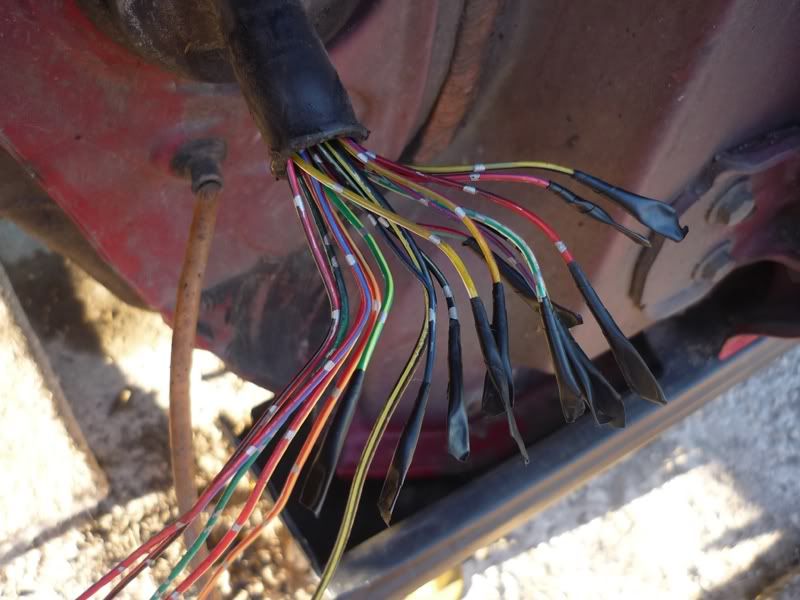
After removing the framework, the rest of the day's task was to untangle this lot...

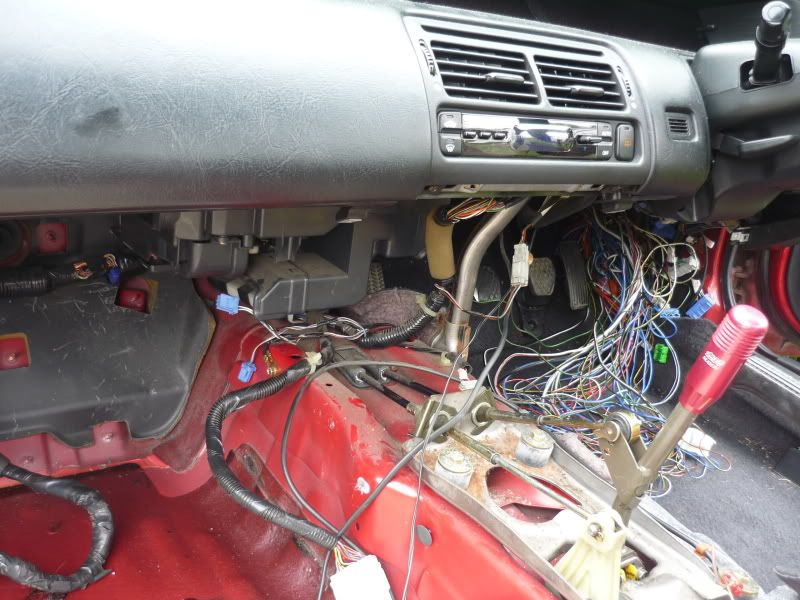
I started off by removing the drivers footwell fusebox in order to free up a bit more slack and it was also an obstacle. Now I could see exactly where my new relocated wires come into the cabin...
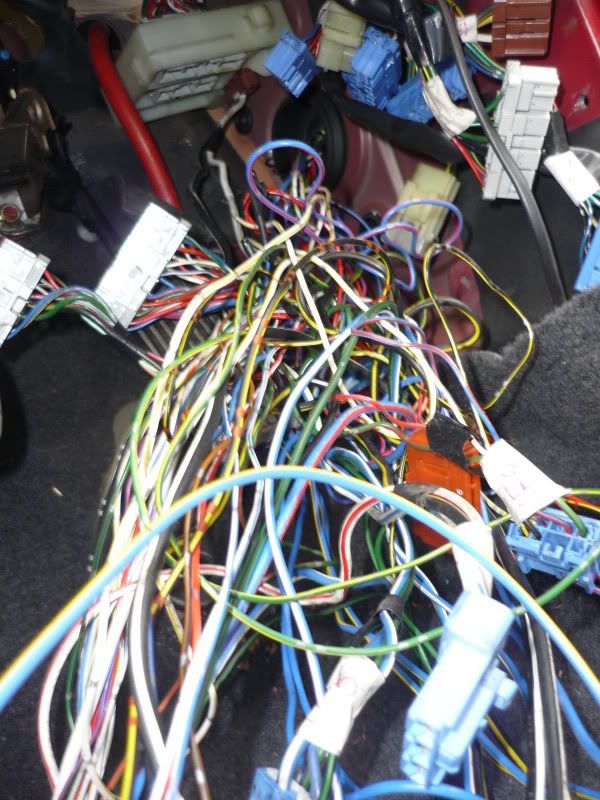
Pulling it apart, this was what I had to contend with...
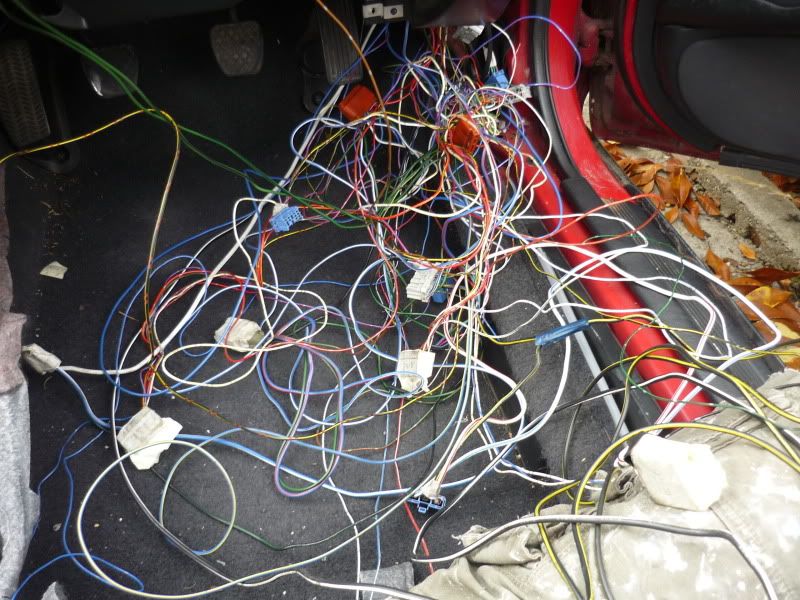
3 hours later I had this
 ...
...
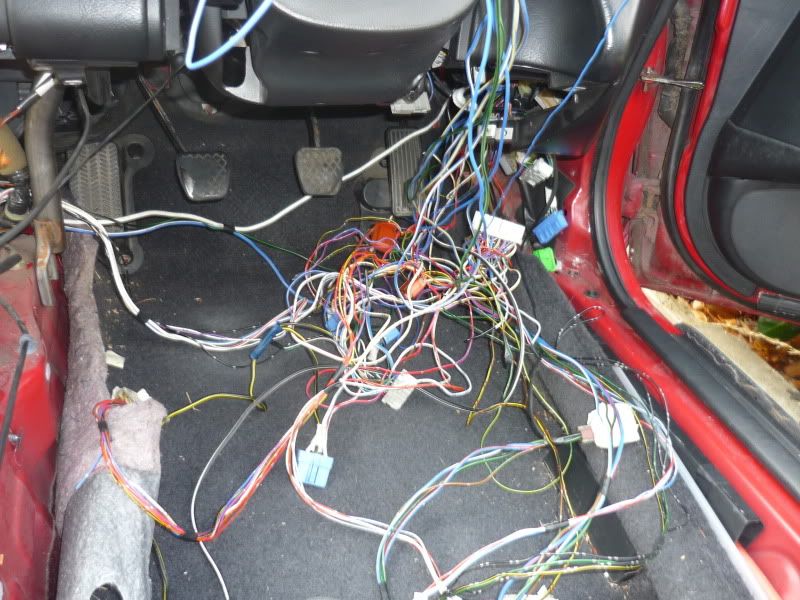
This is no good for my ACD I can tell you [smilie=hate-shocked.gif] Being so many connectors string to other connectors, branching off to other connectors, there's no possible way to completely untangle it... Unless I start disconnecting the connectors :-k
Anyway, that's as far as I got on Saturday, but shall hopefully continue during the week.
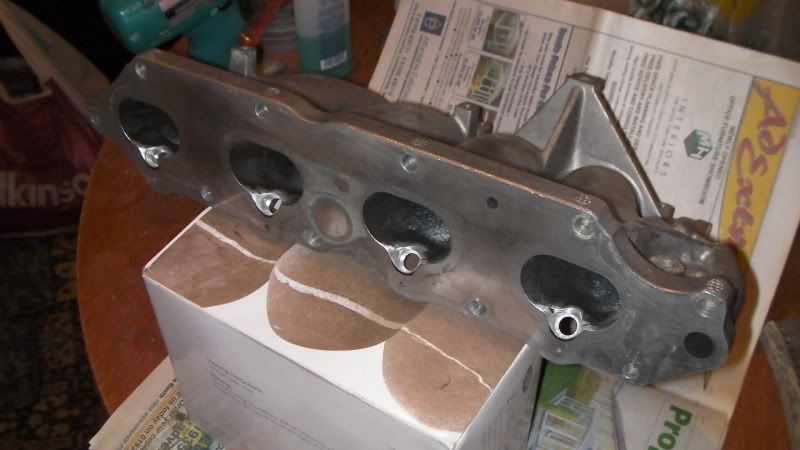
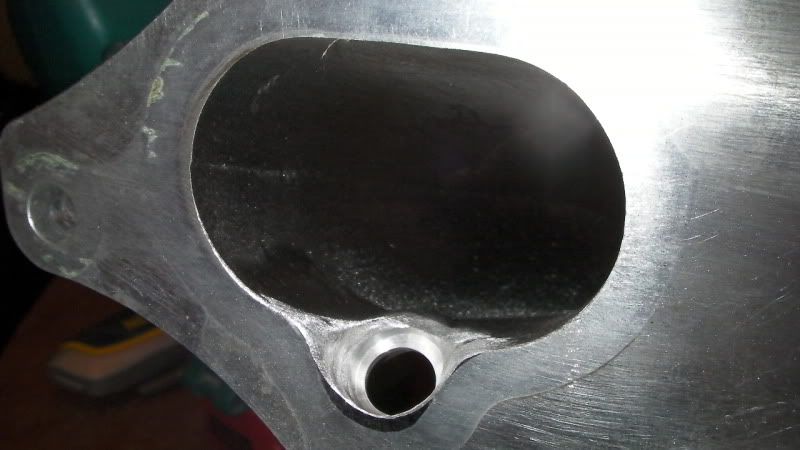
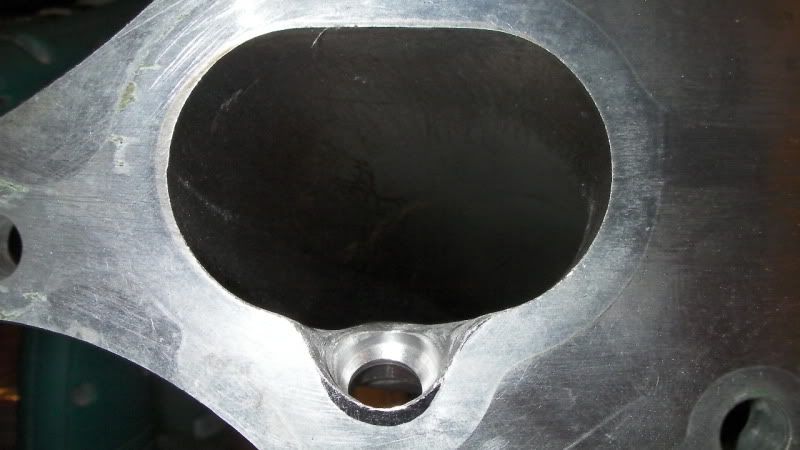
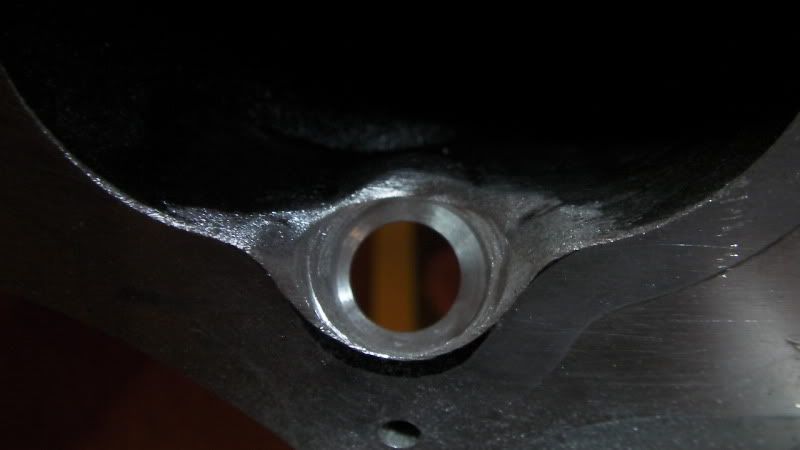
Next up is the inlet manifold which I was tinkering with a while back. Due to my new-fangle injectors being shorter than standards I had to machine away a good amount of material to allow the spray to miss the side walls of the ports. Fortunately I had a countersink bit lying around (my dad's garage) which lent itself perfectly for the job. I then blended in the rest by hand using some grinding stones I bought from ebay...

The job is better and more even than the pictures let on ...
I've also designed the various blanking plates I need (for the EGR ports, EGR valve and IACV) and had them laser cut out of 8mm thick aluminium, to then hand over to my machinist buddy who's going to prettify them by hand. I've forgotten to take some pictures up until now, but I'll get some before and after shots to show the progress.
Next up is the valve cover I picked up at Japfest. Basically I intend to do a couple breathing mods to it and cut out the cam gear area. Possibly may do a few other funky things to it before I give it a new lease of life as well.
Here's how it was...

Then after a good wire scrubbing...

Then after a good paint removering (Which is amazing stuff!)...

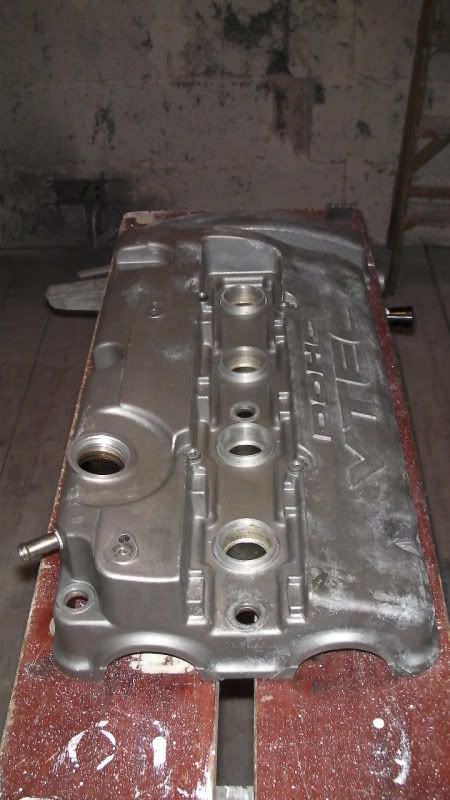
And then I removed the baffle plate...

I've just won a 115 piece tap and die set on ebay as well, which shall come in handy for both this and the inlet manifold. Including metric, imperial and SAE (AN-) tap sizes.
And then just a brief update on the Brembo caliper conversion. Figuring the standard disc diameter is perfect for the calipers within a 16" rim...
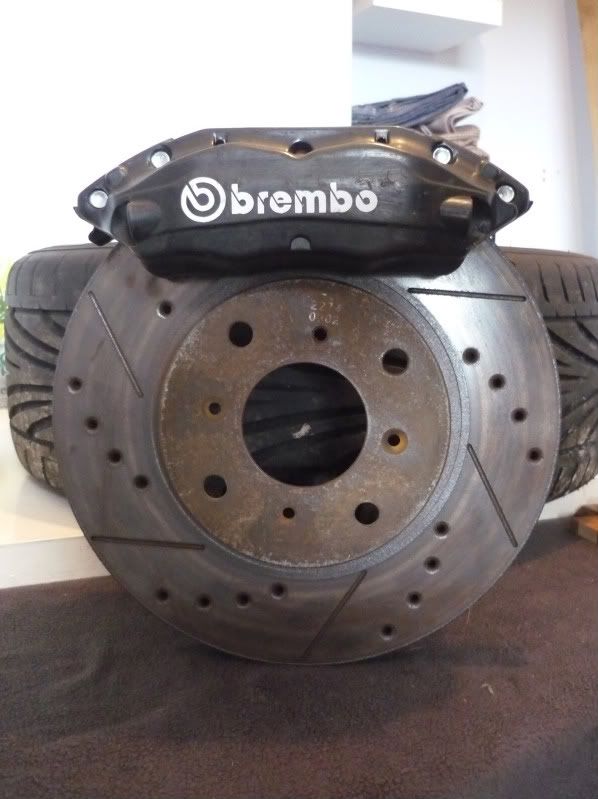
and the thickness can just about be got away with...

I did figure the offset of the discs isn't quite so great. You can't see it that well, but there are actually 4 6.5mm spacers between the rim and the disc in order to give enough clearance between the rim and the caliper...
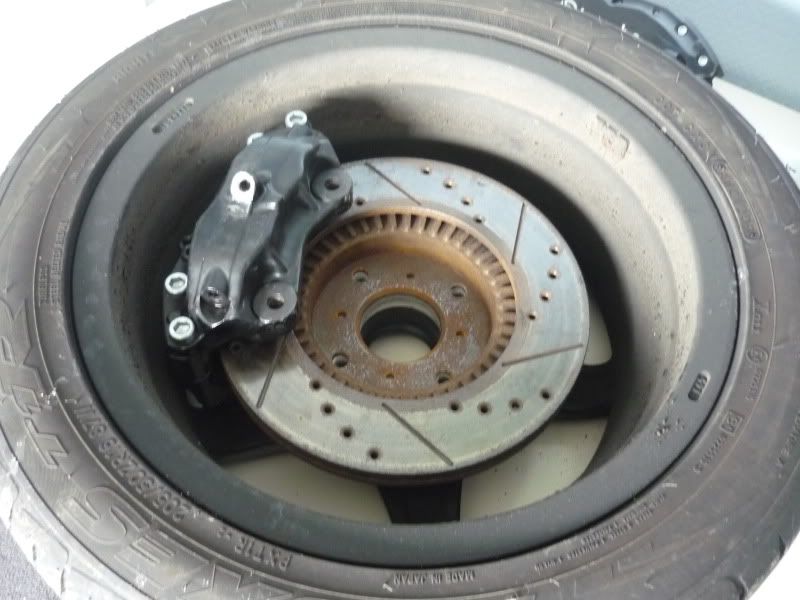
So I've actually decided not to waste any time on it and put the caliper conversion on the shelf until I'm properly rolling again
Firstly, the wire tuck. Decided with the long evenings at the minute that I could spare a few hours now and again to crack on with the tuck, before I completely forget what I'm doing. To make things easier and more accessible I decided to remove the rest of the centre console frame...
I was going to remove this anyway as it's potentially where I'll be relocating the engine fusebox to (should it not stretch to the passenger foot well. Also it's less weight of course
After removing the framework, the rest of the day's task was to untangle this lot...
I started off by removing the drivers footwell fusebox in order to free up a bit more slack and it was also an obstacle. Now I could see exactly where my new relocated wires come into the cabin...
Pulling it apart, this was what I had to contend with...
3 hours later I had this
This is no good for my ACD I can tell you [smilie=hate-shocked.gif] Being so many connectors string to other connectors, branching off to other connectors, there's no possible way to completely untangle it... Unless I start disconnecting the connectors :-k
Anyway, that's as far as I got on Saturday, but shall hopefully continue during the week.
Next up is the inlet manifold which I was tinkering with a while back. Due to my new-fangle injectors being shorter than standards I had to machine away a good amount of material to allow the spray to miss the side walls of the ports. Fortunately I had a countersink bit lying around (my dad's garage) which lent itself perfectly for the job. I then blended in the rest by hand using some grinding stones I bought from ebay...
The job is better and more even than the pictures let on
I've also designed the various blanking plates I need (for the EGR ports, EGR valve and IACV) and had them laser cut out of 8mm thick aluminium, to then hand over to my machinist buddy who's going to prettify them by hand. I've forgotten to take some pictures up until now, but I'll get some before and after shots to show the progress.
Next up is the valve cover I picked up at Japfest. Basically I intend to do a couple breathing mods to it and cut out the cam gear area. Possibly may do a few other funky things to it before I give it a new lease of life as well.
Here's how it was...
Then after a good wire scrubbing...
Then after a good paint removering (Which is amazing stuff!)...
And then I removed the baffle plate...
I've just won a 115 piece tap and die set on ebay as well, which shall come in handy for both this and the inlet manifold. Including metric, imperial and SAE (AN-) tap sizes.
And then just a brief update on the Brembo caliper conversion. Figuring the standard disc diameter is perfect for the calipers within a 16" rim...
and the thickness can just about be got away with...
I did figure the offset of the discs isn't quite so great. You can't see it that well, but there are actually 4 6.5mm spacers between the rim and the disc in order to give enough clearance between the rim and the caliper...
So I've actually decided not to waste any time on it and put the caliper conversion on the shelf until I'm properly rolling again
-
NafemanNathan
- LotM Winner
- Posts: 20144
- Joined: Sun Aug 08, 2010 9:37 pm
- My Generation: 0G
- Location: Yeovil, Somerset
- Has thanked: 8 times
- Been thanked: 124 times
Re: PLEASE DO NOT POST IN THIS THREAD YET (Under Constructio
4thgenphil wrote:just a thought on the disc's have you thought about nsx ones? they are wider but the same diameter
knob.
also can i have yoour front splitter? if not what it is?
love you xxx
Mart609 wrote:good luck on the wire tuck
-
NafemanNathan
- LotM Winner
- Posts: 20144
- Joined: Sun Aug 08, 2010 9:37 pm
- My Generation: 0G
- Location: Yeovil, Somerset
- Has thanked: 8 times
- Been thanked: 124 times
Re: PLEASE DO NOT POST IN THIS THREAD YET (Under Constructio
Not spent any time researching discs yet. Just taken on board the few that you and I think Rob have suggested, but other than that I've got a Brembo spread sheet with all their range and dimensions to help when I do get to it.4thgenphil wrote:just a thought on the disc's have you thought about nsx ones? they are wider but the same diameter
knob.
also can i have yoour front splitter? if not what it is?
love you xxx
It's Wings West bud... And no, I'm afraid you canny have it
Cheers MartMart609 wrote:good luck on the wire tuck
-
NafemanNathan
- LotM Winner
- Posts: 20144
- Joined: Sun Aug 08, 2010 9:37 pm
- My Generation: 0G
- Location: Yeovil, Somerset
- Has thanked: 8 times
- Been thanked: 124 times
Re: PLEASE DO NOT POST IN THIS THREAD YET (Under Constructio
Merlin wrote:I want to see you fit those calipers as I want to copy you
4thgenphil wrote:cheerts for the name mate, gices me something to hunt for now
-
NafemanNathan
- LotM Winner
- Posts: 20144
- Joined: Sun Aug 08, 2010 9:37 pm
- My Generation: 0G
- Location: Yeovil, Somerset
- Has thanked: 8 times
- Been thanked: 124 times
Re: PLEASE DO NOT POST IN THIS THREAD YET (Under Constructio
Good luck for the hunt Phil... I was ridiculously lucky (Of course)
EDIT: And PS Phil... Are you pissed?!
-
NafemanNathan
- LotM Winner
- Posts: 20144
- Joined: Sun Aug 08, 2010 9:37 pm
- My Generation: 0G
- Location: Yeovil, Somerset
- Has thanked: 8 times
- Been thanked: 124 times
Re: PLEASE DO NOT POST IN THIS THREAD YET (Under Constructio
Nucleustylz lude wrote:Nice one Nathan, a decent wire tuck is time consuming, but you're making good progress. Hard to see in the mess of wires, but you're getting there. Be interesting to see how far the fusebox will reach to with the existing wires/connectors. Not considered, cutting and extending any then? Also are you removing any wiring you don't necessarily need? Looking at wiring diagrams and the mass of wires for optional items and accessory things I've removed would soon add up.
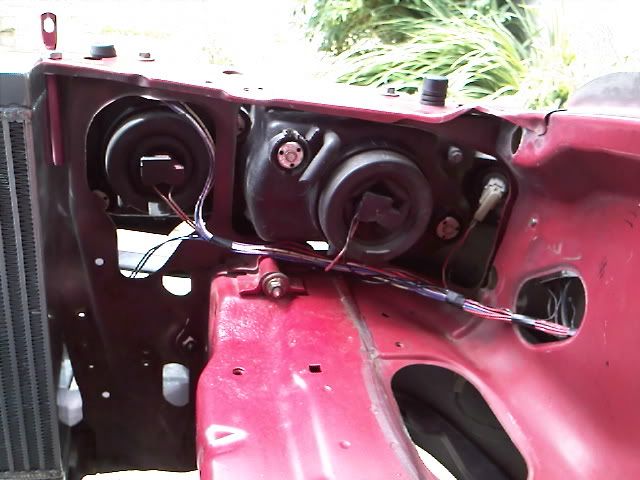
One last thing, did you extend the wires on the drivers side shock tower that route to the headlights? They go into the wing, but is there enough slack for this?
The rest is looking good, great work on the manifold injector area, looks well done.
The brakes clearance is a pain. The big brakes I have have clearance issues with my new wheels, but easily resolved with some small spacers, not like yours!
I thought the design of those wheels would allow alot of clearance too?
-
NafemanNathan
- LotM Winner
- Posts: 20144
- Joined: Sun Aug 08, 2010 9:37 pm
- My Generation: 0G
- Location: Yeovil, Somerset
- Has thanked: 8 times
- Been thanked: 124 times
(PUK) Engine Brackets Removed So Far
Cheers Rob. If I can help it, I don't want to extend any cables (I haven't needed to yet), partly because I don't want to tempt any circuitry issues, but also so I can says I didn't have to
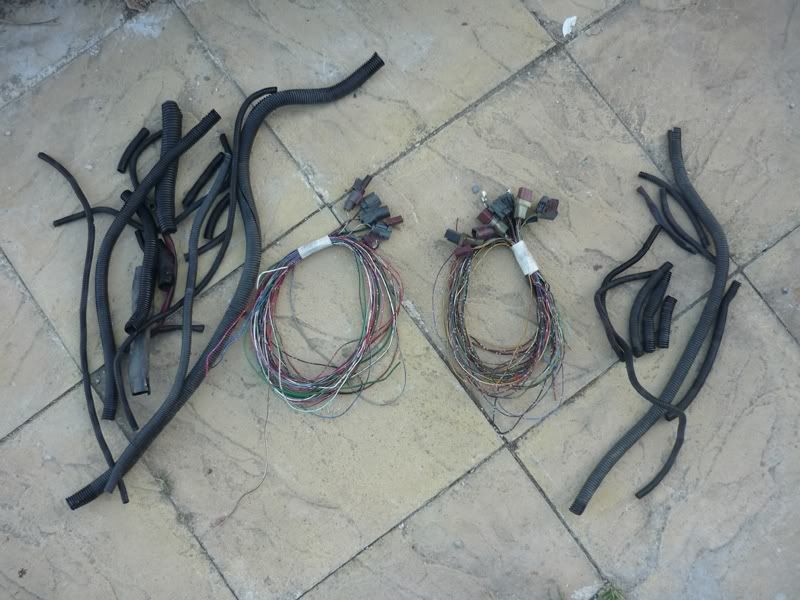
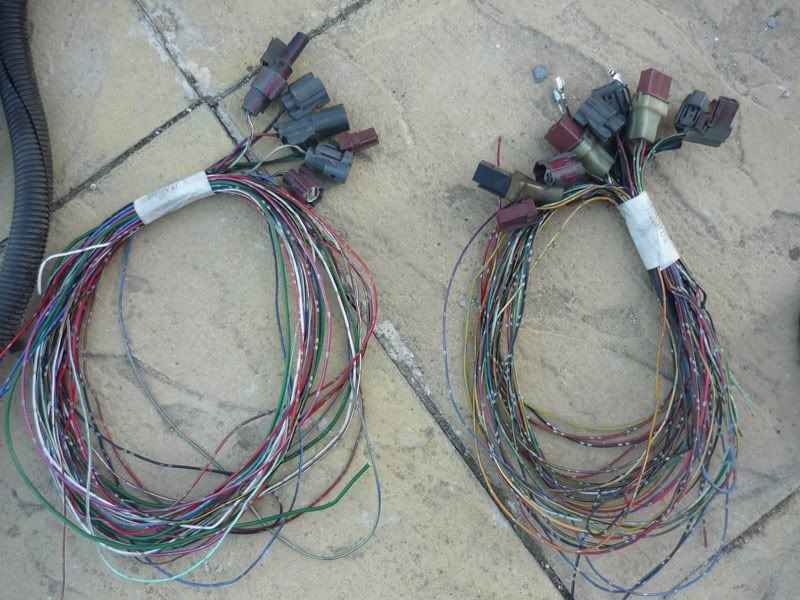
Yeah, it was a long while ago I post it up (page 2), but here's what I've removed so far from the extras I either never had or now don't have ...
Think you've commented on making sure I keep these just in case in the past actually
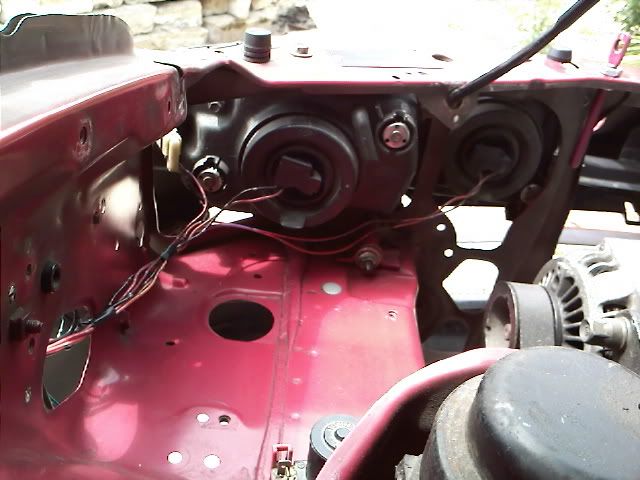
And nope, not needed to extend the light harness either. Crap pictures and obviously I'm not finished, but this is what the light harness is looking like under the arches so far...


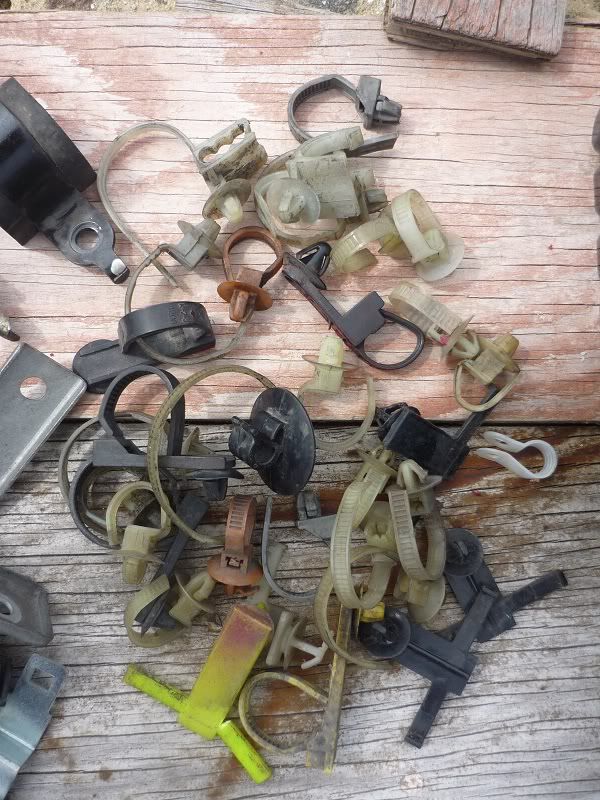
Just found these pictures to Rob... Thought they might get you off These are the "unnecessaries" I had removed from the bay when I first started the tuck ...
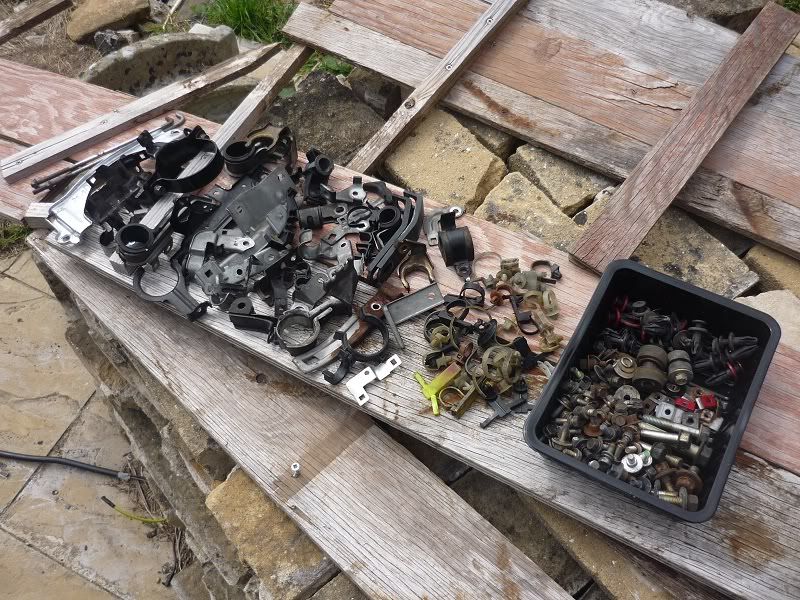


Good huh?
Yeah, it was a long while ago I post it up (page 2), but here's what I've removed so far from the extras I either never had or now don't have
Think you've commented on making sure I keep these just in case in the past actually
And nope, not needed to extend the light harness either. Crap pictures and obviously I'm not finished, but this is what the light harness is looking like under the arches so far...
Just found these pictures to Rob... Thought they might get you off
Good huh?
-
NafemanNathan
- LotM Winner
- Posts: 20144
- Joined: Sun Aug 08, 2010 9:37 pm
- My Generation: 0G
- Location: Yeovil, Somerset
- Has thanked: 8 times
- Been thanked: 124 times
Re: PLEASE DO NOT POST IN THIS THREAD YET (Under Constructio
Lude-Dude wrote:interesting may try this one day, must save weight too looking at the pics
Nucleustylz lude wrote:Doh!
Can't see the pics in work!
When I get home later, I feel some right click and save happening!
Cheers Nathan.
-
NafemanNathan
- LotM Winner
- Posts: 20144
- Joined: Sun Aug 08, 2010 9:37 pm
- My Generation: 0G
- Location: Yeovil, Somerset
- Has thanked: 8 times
- Been thanked: 124 times