So I've been working on the car to get it ready for its winter hibernation, there are a few niggles with the car that I wanted to get resolved so when spring springs I can just get on with driving it.
Top of the list was the wheel alignment. Now on the day of the fire I had been to get this done relatively local to me, though this was the second time they'd had a go at it and it still was not right.
Looking at the hunter printout that was provided showed that whilst all the numbers were green and showing ok, the rear wheels were only just within spec and effectively set pretty much straight ahead, whereas really it needs about 2 degrees of toe in to keep the car stable. Also the car pulled to the left slightly and the steering wheel was not centered when driving. Just shows that even with the right tools, a lack of application can get things wrong.
As ever, I decided that this was now best done by myself. So I went out and bought a laser alignment system and set to it. I also bought a camber alignment kit to get that right too.
The front camber was off on the n/s by about a degree from the o/s, probably a by product of lowering the car, I've checked everything and nothing is bent.
So I slotted the upper wishbone a little to bring the camber into where the o/s sits.

Measuring camber:

That sorted that but adjusting that moved the toe of that side out slightly.

A few spins of a spanner later and we were back in business at the front.

So on to the rear.

The gauge shows a shade of toe, and as the car was pulling to the left slightly, to correct this I tweaked the rear right in slightly (the rear wheels steer the car), bringing the car back to zero and hopefully correcting the steering. To confirm this I used the camber kit and a laser pointer to check the rear thrust relative to the front.

Spot on. Car drives perfectly straight.
Now it was just a matter of adjusting each side at the rear by 1 degree, which with these gauges was easy peasy.
A test drive confirmed the car travelling in a straight line still and now feeling much better on the road.

I made a little surround for the EDFC control unit, so it sits quite nicely in the old ashtray slot. I also tweaked the colour to better match the OEM dash.

The interior colours seem pretty well coordinated now:

Keeping things in the interior, the handbrake button has looked tatty since I've owned the car, with the chrome peeking off, so I bought a brand new OEM one and fitted it. Old and new:

Sweet.
Let's not stop there, the fuel pressure regulator was showing odd pressures sometimes, I'd saved it from the fire but I don't think it came out 100%, so I fitted a new one of a slightly different design and took the opportunity to tidy the pipework up a little, the FPR is now mounted to the chassis rather than the intake, which I think will do it well in the long run:

Speaking of the fire, as exciting as driving at 60 mph with flames spitting out of the bonnet was, I'm really wanting to avoid a repeat performance.
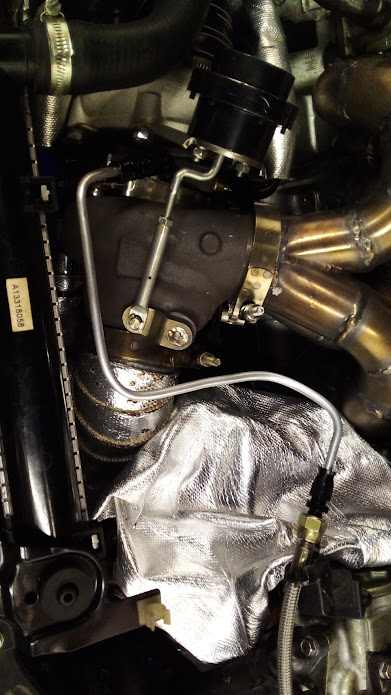
As the fire seemed to have been caused by the flexible oil feed pipe melting due to getting too hot as it was in the turbo's 'area of influence', I decided to fit a hard line for the closest parts. This is a test and we'll see how it goes, but I much prefer this to flexible lines wrapped in blankets.

Also, because I have no life really, I decided I did not like the rocker cover and went and painted it red and finished it with a matt lacquer:

Next job on the list is to make some robust heatshields for the alternator, aircon and power steering (similar to the OEM but larger) so I can lose the blanket solution I have in place currently.


