Congratulations to vtecmec for winning May/June's Lude Of The Month, with his DIY Turbo BB1 build.

>>> Click Here For Profile <<<

Image

wurlycorner's UKDM 4th gen

Tell us all about your Lude, you know you want to ...
User avatar
wurlycorner
Ye are glad to be dead, RIGHT?
Posts: 21493
Joined: Sat May 19, 2012 3:33 pm
My Generation: 4G
Location: Chelmsford, Essex
Has thanked: 2481 times
Been thanked: 306 times

Re: wurlycorner's UKDM 4th gen

Post by wurlycorner » Fri Mar 08, 2013 6:18 pm

(Originally posted 8th April 2012)


So Friday, before the MOT, I also started putting more of the interior back in.

Image

Image

Big wow, huh?! :lol:

It's another step closer though...

Slapped the back seats back in the next morning then off for MOT (passed, of course!) :wink:
Last edited by wurlycorner on Fri Mar 08, 2013 6:18 pm, edited 1 time in total.

User avatar
wurlycorner
Ye are glad to be dead, RIGHT?
Posts: 21493
Joined: Sat May 19, 2012 3:33 pm
My Generation: 4G
Location: Chelmsford, Essex
Has thanked: 2481 times
Been thanked: 306 times

Re: wurlycorner's UKDM 4th gen

Post by wurlycorner » Fri Mar 08, 2013 6:18 pm

(Originally posted 22nd July 2012)


Blimey! Sunshine today and didn't have a JDM to straighten, so the UKDM got some more attention!

The wiper linkage cover had always bugged me (one corner had a crack in it) and I'd had a replacement for ages, so set about swapping that today and refurbing the wiper arms.

As always though, once I took bits off I found extra work to do...

Grubby of course, but also a little bit of the dreaded oxide. Fortunately only surface rust, but we don't want any of that!

Image

Image

Image

Image

Nice collection of tree bits over this side by the drain hole!

Image

Cleaned up

Image

Image

Image

Image

Yes, it is just surface rust and all those holes are meant to be there!

Spray over with Dinitrol Cavity Wax (I know lots of people on here swear by Dinax but similarly, I love Dinitrol and it's also been a Practical Classic Best Buy)

Image

Image

Image

Let that dry, then top coat with Dinitrol Underbody to fully seal all the seams

Image

Image

Image

Image

So that'll be the end of all that rust stuff! :D

Neatness not up to Pushki's effort in the same area (I didn't have the patience today) but it'll do the same job.

Also found what's been bugging the hell out of me for 4 years... :D

Image

And all back together again.

Image

User avatar
wurlycorner
Ye are glad to be dead, RIGHT?
Posts: 21493
Joined: Sat May 19, 2012 3:33 pm
My Generation: 4G
Location: Chelmsford, Essex
Has thanked: 2481 times
Been thanked: 306 times

Re: wurlycorner's UKDM 4th gen

Post by wurlycorner » Fri Mar 08, 2013 6:20 pm

(Originally posted 22nd July 2012)


So distraction aside, back to what I set out to do today in the first place!

Off and ready for the emery pad

Image

Rubbed down ready for priming

Image

Primed

Image

Sprayed up baking in the sun

Image

That's better! :D

Image

Image

Halford's Satin black - refreshing wiper arms up and down the country...

User avatar
wurlycorner
Ye are glad to be dead, RIGHT?
Posts: 21493
Joined: Sat May 19, 2012 3:33 pm
My Generation: 4G
Location: Chelmsford, Essex
Has thanked: 2481 times
Been thanked: 306 times

Re: wurlycorner's UKDM 4th gen

Post by wurlycorner » Fri Mar 08, 2013 6:20 pm

(Originally posted 26th August 2012)


So got round to putting more of this one back togther this week.

Sunroof trim went in during the week and today I set about getting the rear pass quarter sorted (and some other mods... See later)

I'd already drenched the inside of the arches with Dinitrol as soon as I picked it up from the paint shop, but decided I could get some more in there today :lol:

Image

Image

Image

Some of you might have noticed the CLD tile in one of those pics...

Yep, I've been fitting some dampening tiles to the body panels as I go. Courtesy of http://www.sounddeadenershowdown.com/cgi-bin/index.cgi

Image

User avatar
wurlycorner
Ye are glad to be dead, RIGHT?
Posts: 21493
Joined: Sat May 19, 2012 3:33 pm
My Generation: 4G
Location: Chelmsford, Essex
Has thanked: 2481 times
Been thanked: 306 times

Re: wurlycorner's UKDM 4th gen

Post by wurlycorner » Fri Mar 08, 2013 6:21 pm

(Originally posted 26th August 2012)


So to the mods...

Well here's a clue to one of them that's in progress

Image

User avatar
wurlycorner
Ye are glad to be dead, RIGHT?
Posts: 21493
Joined: Sat May 19, 2012 3:33 pm
My Generation: 4G
Location: Chelmsford, Essex
Has thanked: 2481 times
Been thanked: 306 times

Re: wurlycorner's UKDM 4th gen

Post by wurlycorner » Fri Mar 08, 2013 6:21 pm

(Originally posted 26th August 2012)


So carrying on with the mods

Managed to pick up a complete pass door loom from a 4th gen with folding mirrors and puddle lights (both mods I'm doing). Here they are lined up side-side to compare

Image

Bottom is original one, top is the one with the extra bits (very top left is puddle light, sort of centre left is the extra relay for the folding mirrors, rest is exactly the same - note the extra plug on the other end though...

Happily, it looks like all the original gubbins is on the same plug as the original (see here) so it's plug and play. The extra stuff is on an additional plug (which of course I don't have the other half for on the car, so I'll have to frig that bit)

Image

Decided I'd uprate the speaker cabling while I've got it out - previous install used quality oxygen free RCA cabling from the head unit back to the amp in the boot, fairly decent oxygen free cabling back to the crossovers in the front (behind the head unit) and then the lazy sods had just picked up the crappy bell wire from there into the doors Grrr...

Image

So now have some fairly decent oxygen free cabling run inside the original loom that I'll take right back directly to the crossovers, no plug in between (yes, I like to do things properly!)

Image

Image

(Also left the original wiring in place)

User avatar
wurlycorner
Ye are glad to be dead, RIGHT?
Posts: 21493
Joined: Sat May 19, 2012 3:33 pm
My Generation: 4G
Location: Chelmsford, Essex
Has thanked: 2481 times
Been thanked: 306 times

Re: wurlycorner's UKDM 4th gen

Post by wurlycorner » Fri Mar 08, 2013 6:23 pm

There has been quite a bit of work since then.

When I can be arsed, I'll actually update these well out of date threads on here and PUK!!!

User avatar
SpacePilotJohnLee
Posts: 104
Joined: Fri Oct 19, 2012 12:00 pm
My Generation: 4G
Location: Nottingham

Post by SpacePilotJohnLee » Fri Mar 08, 2013 6:50 pm

Look forward to seeing the recent stuff, the respray looks amazing!! It's good that you've got pics of all the stages too.

How does that Dinitrol compare to Waxoyl, is it a similar product?

User avatar
wurlycorner
Ye are glad to be dead, RIGHT?
Posts: 21493
Joined: Sat May 19, 2012 3:33 pm
My Generation: 4G
Location: Chelmsford, Essex
Has thanked: 2481 times
Been thanked: 306 times

Re: wurlycorner's UKDM 4th gen

Post by wurlycorner » Fri Mar 08, 2013 7:13 pm

Ok, seems I can be arsed to do some of the write-up now (re-edited 20:38 after I found some extra photo's)
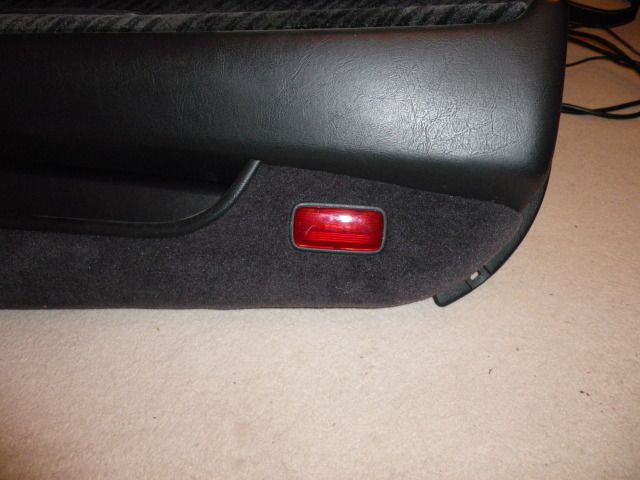
All this work was done prior to JAE last year, so I could get the interior back in for the show!!!


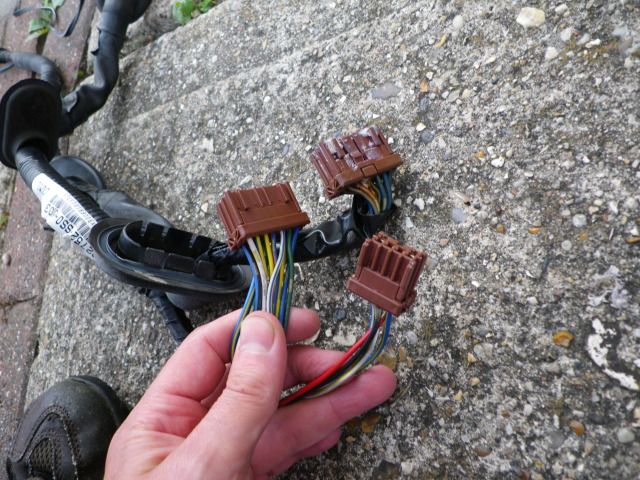
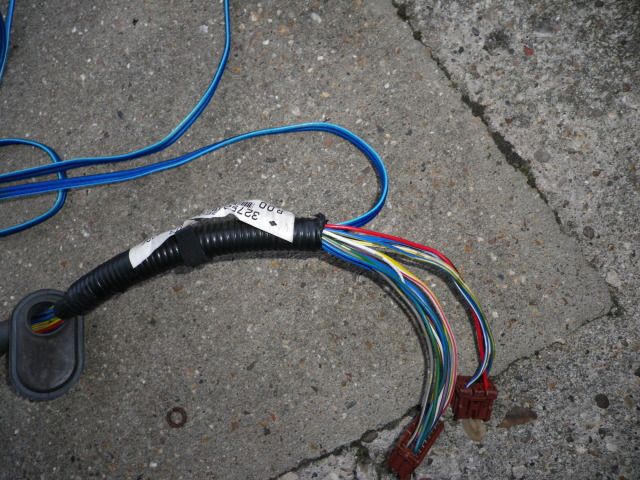
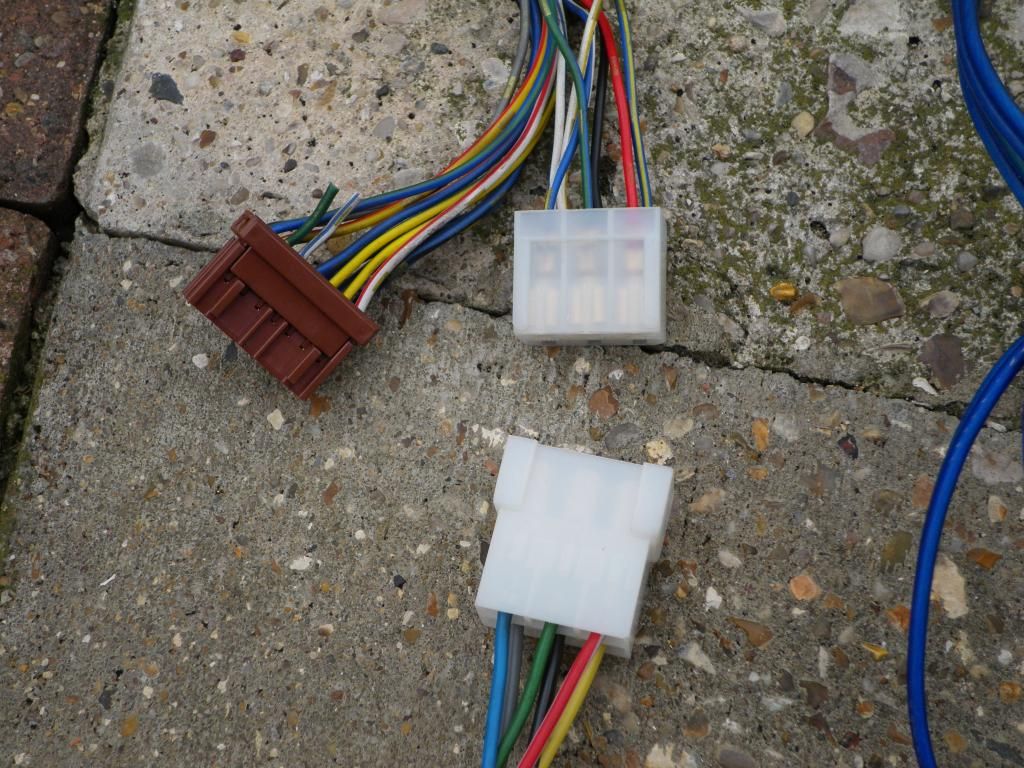
In the pic above I said it was plug and play for the passenger side door, with all the additional wiring running off an additional connector. That isn't 100% true. Pin out on the original non folding mirror/puddle light loom plug is exactly the same as on the 'with' folding mirror/puddle light loom main plug, BUT there are actually an extra 2 wires in the main connector as well.

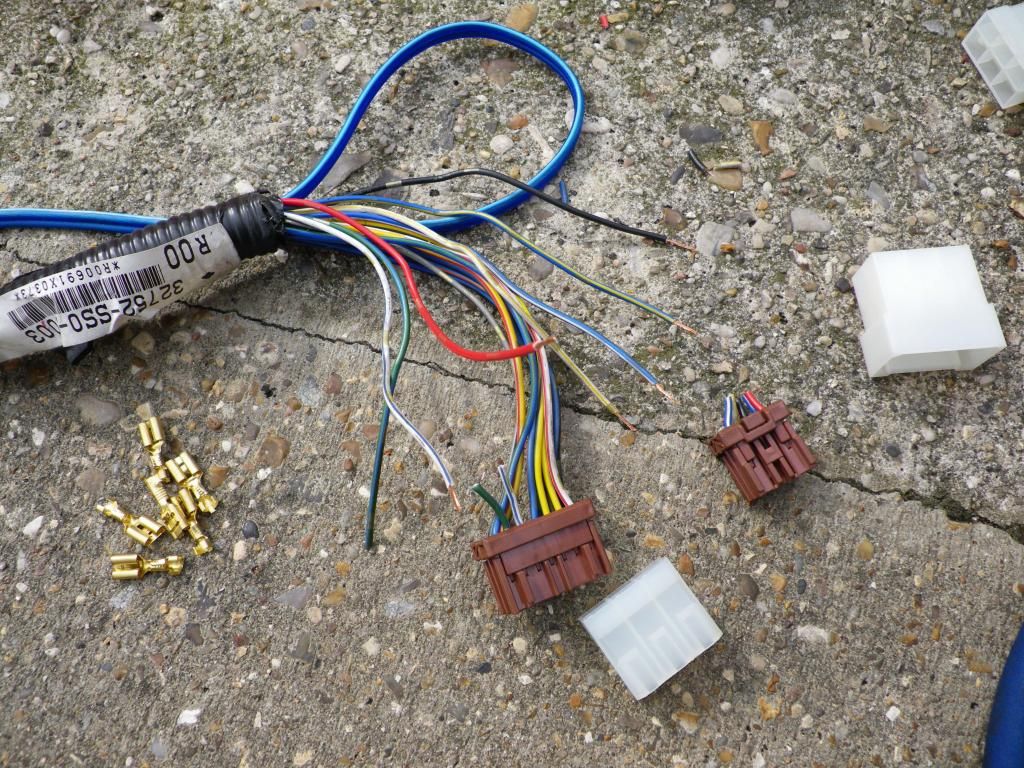
These are shown here - original loom plug on the left, corresponding new loom plug in the middle with the 2 additional wires separated (and the extra plug in the new loom on the far right)

Image

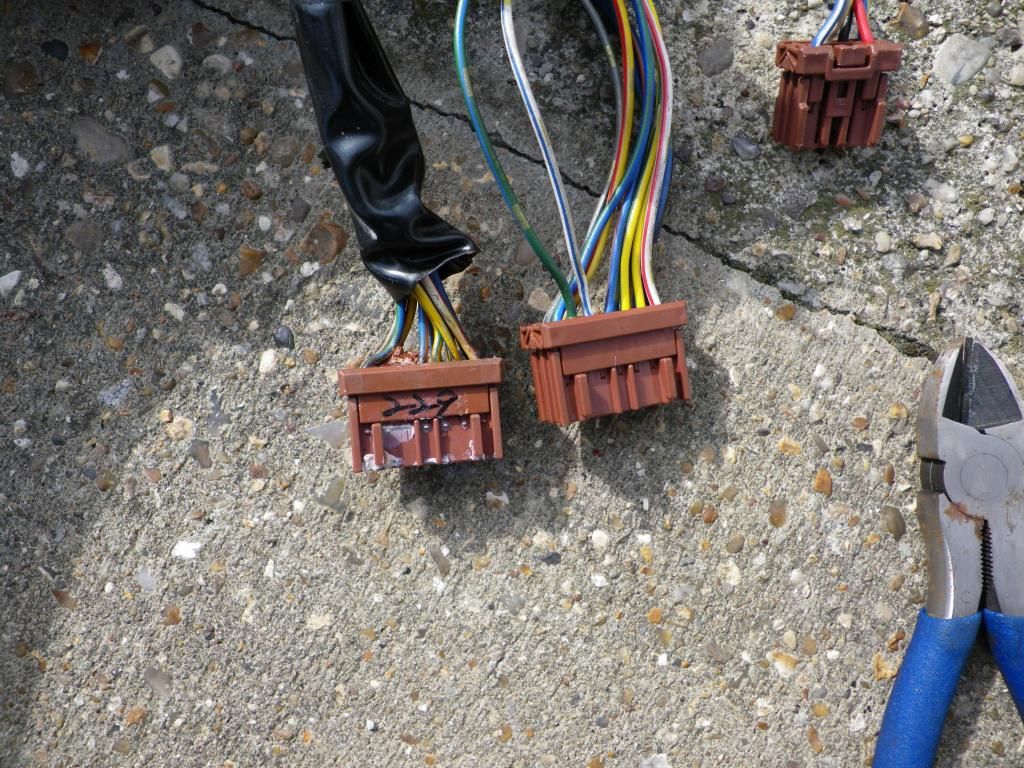
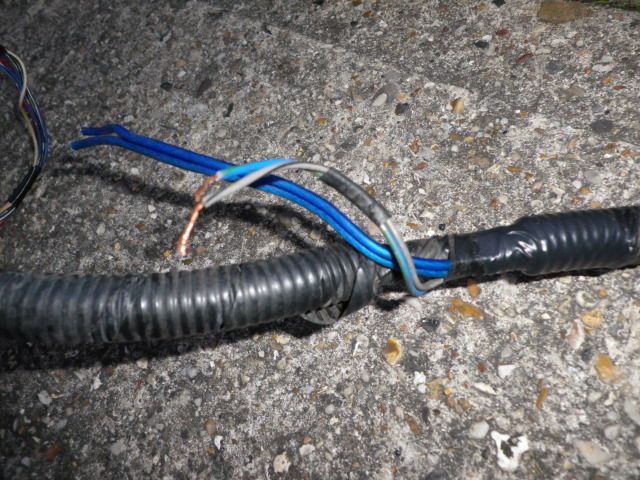
So the green/blue and white/blue wires have to come out of that connector (that's why you can see side cutters in the same pic, standing ready...)

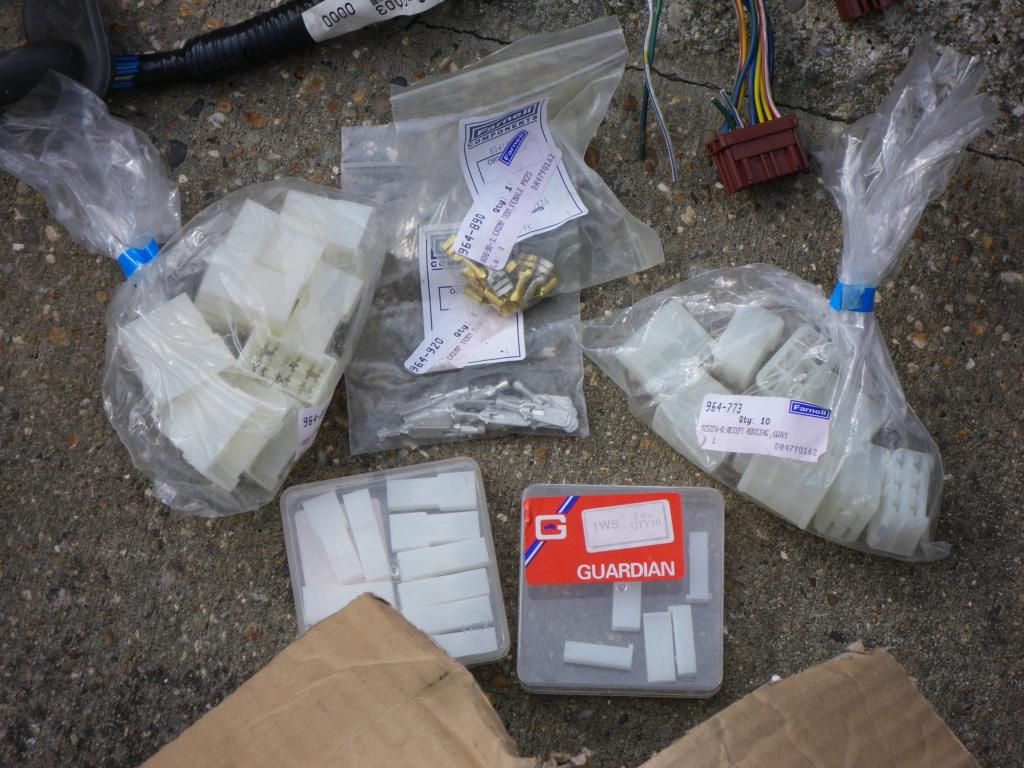
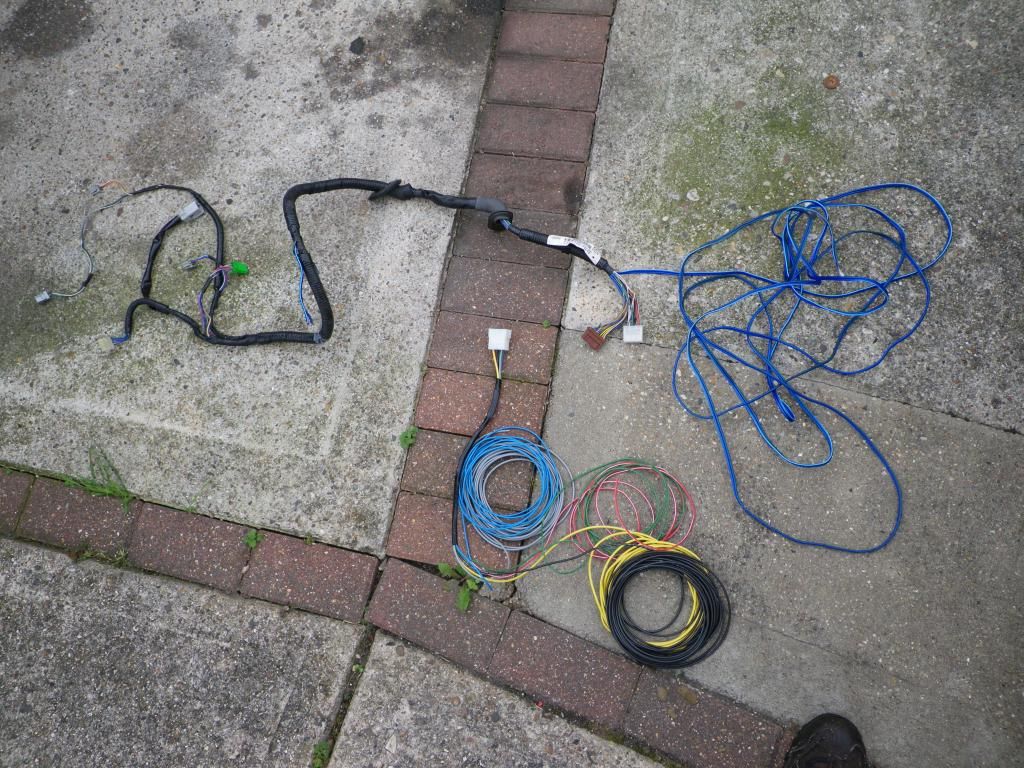
Wires cut and this little lot will come in handy...

Image

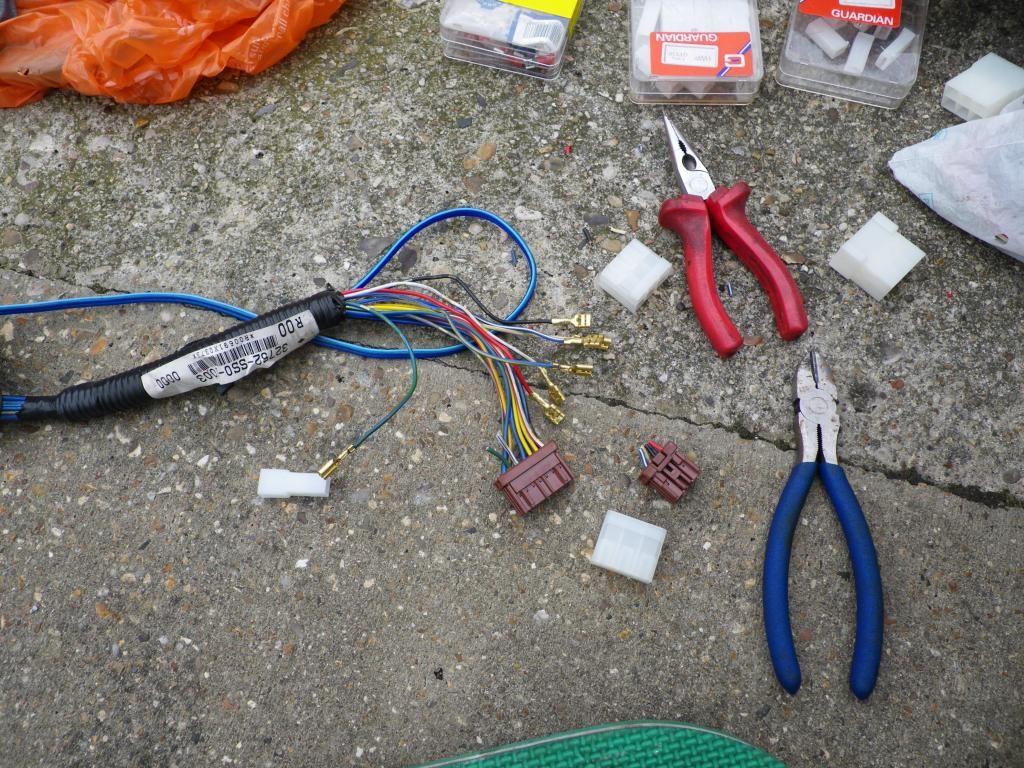
So I said I like to do things properly, and I so. That means no crappy scotch-loks, chocolate blocks or anything like that and I like to use all original plugs wherever possible. The 'in dash' loom for the extra plug to connect to isn't there of course though and I didn't have one from a donor car, so I was going to have chop that extra plug off and make that bit up myself.

No going back now!

Image

All terminals fitted, ready for their new housing...

Image

And fitted! (I had 7 wires to fit and only 6 pin plugs, so one wire had to go on its lonesome)

Image

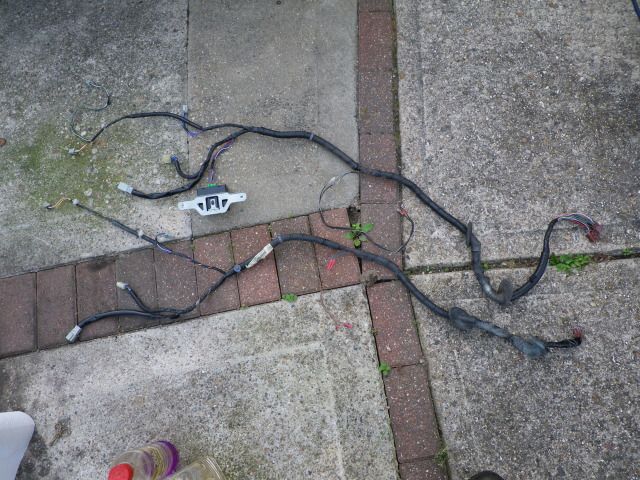
And now to make up the additional loom that runs across the dash to the drivers side;

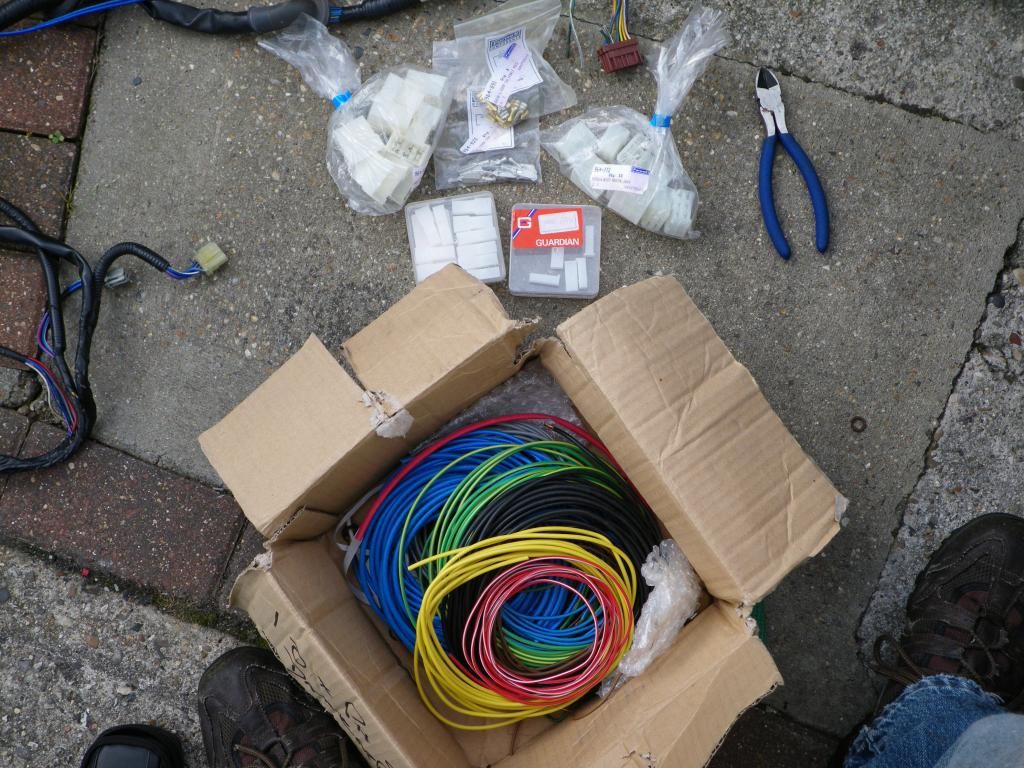
Nice big box of multi-coloured cabling obtained from a previous workplace some years ago... ;)

Image

Door loom and end of the new loom lined up ready - analy tried to match wiring colours as much as possible, of course... :roll: :ugeek:

Image

So after loom-wrapping again, that was the passenger side loom all finished and back in the door and dash.

Image

Inside the passenger footwell with the connectors back through (remaining original connector reconnected and one of the new ones dangling free - the other single connector is hiding from the camera somewhere). Both are waiting for the new cross-dash loom to be fitted so they have a friend to connect with.

Image

New loom installed and run behind the centre console, new connector sits nice and snug in place like it was always meant to be there :D
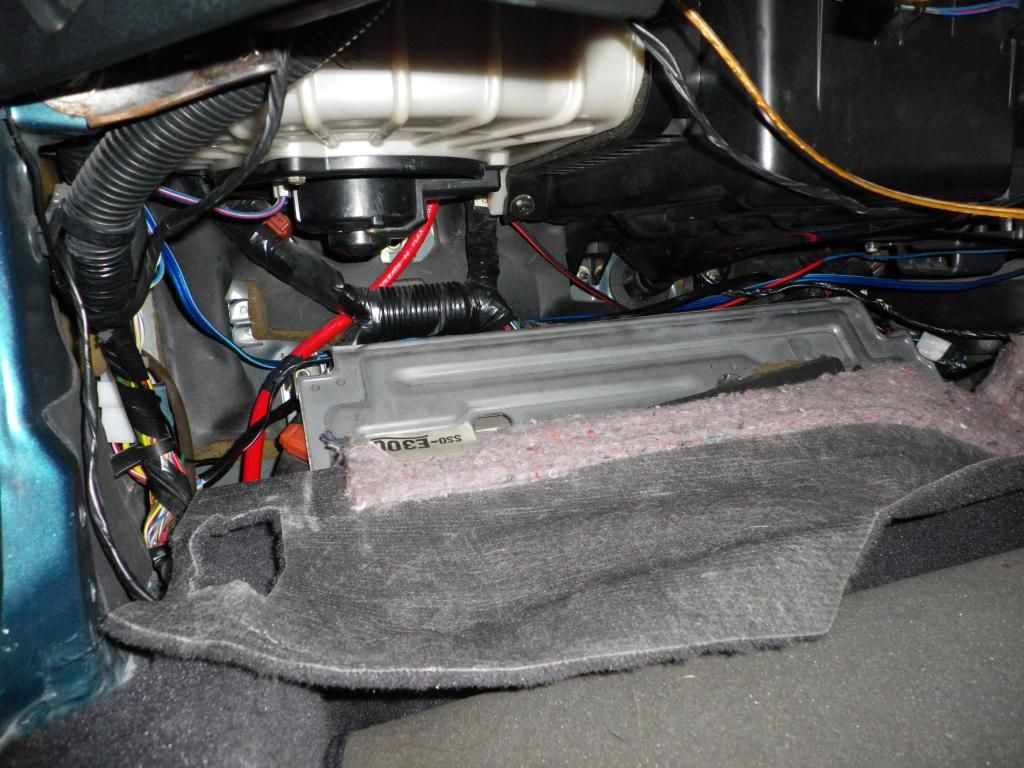
The speaker cabling runs directly across to the crossover tucked behind the middle of the dash (no extra connector at the 'A' pillar like the rest of the loom)

Image

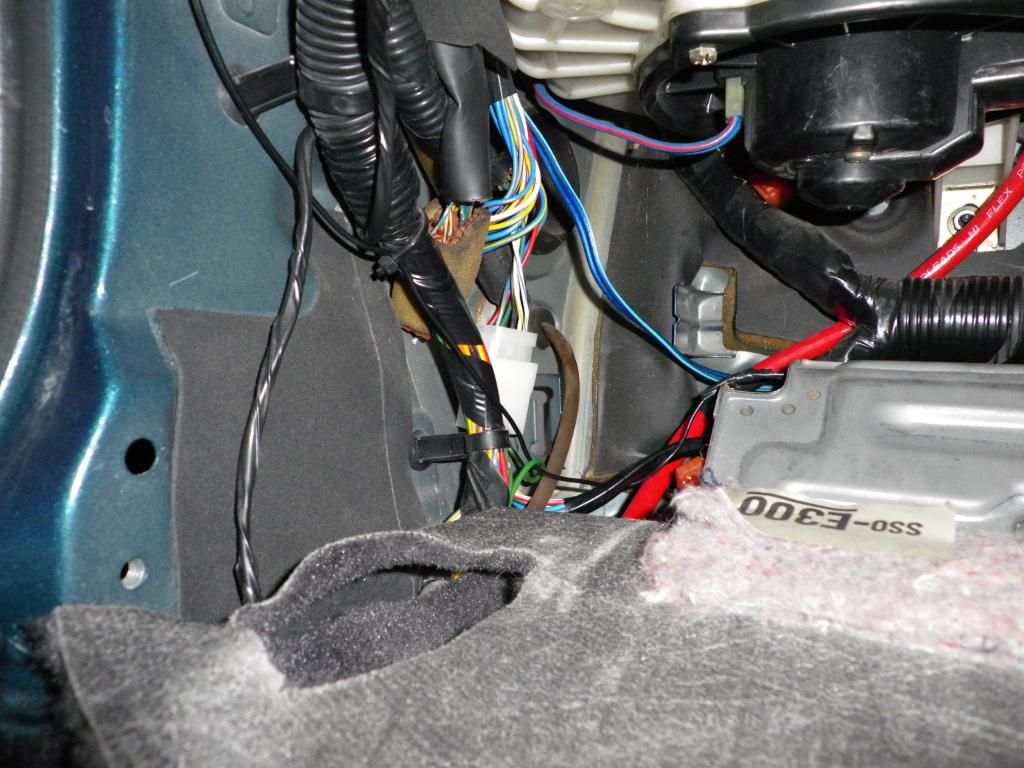
Another view showing some of the cable run - the eagle eyed will spot some other extra wires that aren't original either. Heavy duty power cable for the amp in the boot, wiring for the alarm/imobiliser and oxygen free wiring from the cross overs to the the tweeters (none of which is my install but I've done my best to tidy up the CRAP mess that the 'professional' installers had made of it).

Image

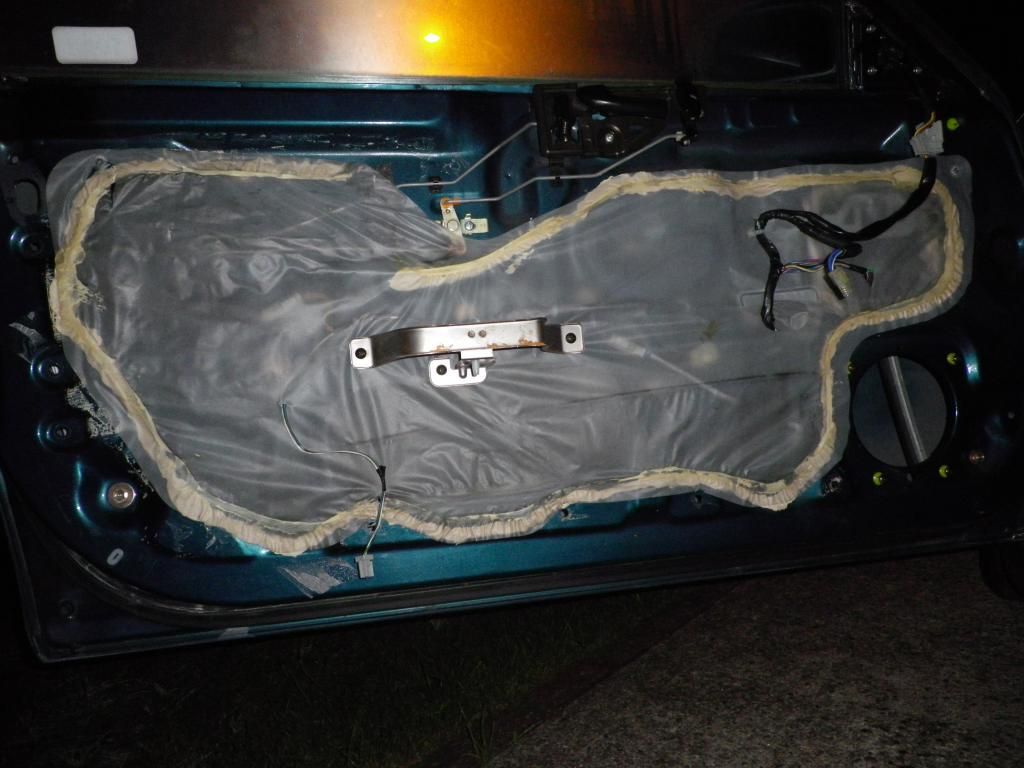
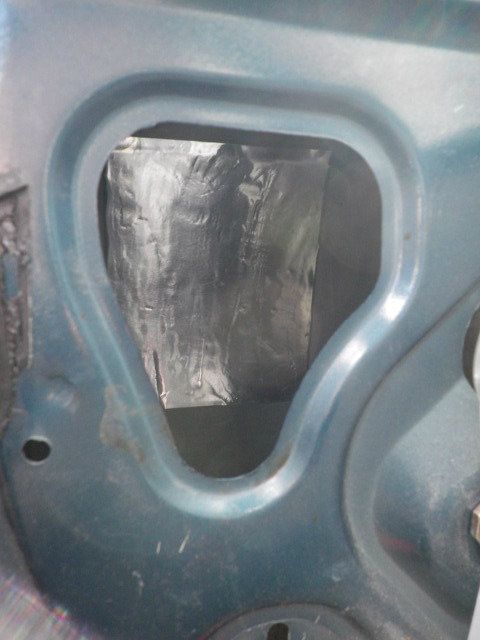
Weather skin on and that's the passenger side finished ready for the interior to refit.

Image
Last edited by wurlycorner on Mon Mar 11, 2013 3:39 pm, edited 5 times in total.

User avatar
wurlycorner
Ye are glad to be dead, RIGHT?
Posts: 21493
Joined: Sat May 19, 2012 3:33 pm
My Generation: 4G
Location: Chelmsford, Essex
Has thanked: 2481 times
Been thanked: 306 times

Re: wurlycorner's UKDM 4th gen

Post by wurlycorner » Fri Mar 08, 2013 7:19 pm

SpacePilotJohnLee wrote:Look forward to seeing the recent stuff, the respray looks amazing!! It's good that you've got pics of all the stages too.

How does that Dinitrol compare to Waxoyl, is it a similar product?
Thanks. A few areas of the respray do need re-doing now tbh - the paint's settled in a few bits. So much work had to be done to the bodywork that it's not surprising though.
I'd have been putting the car in to get that done after the next Mimms meet if I hadn't just lost my job, so it'll have to wait now. :(

Yeah Dinitrol is like Waxoyl but much better. The cavity wax properly runs into the seams, it's brilliant. The Dinitrol underseal is absolutely excellent. It covers so well and is so fast drying, it's great! Lots of people on here swear by Dynax, I swear by Dinitrol (both have been Practical Classic best buys so there's probably nothing much to choose between them tbh).

Post Reply

Return to “Lude Profiles”