
Congratulations to vtecmec for winning May/June's Lude Of The Month, with his DIY Turbo BB1 build.
>>> Click Here For Profile <<<

>>> Click Here For Profile <<<
Josh's BB4
-
jjmartin349571
- Supporter 2016
- Posts: 3344
- Joined: Fri Feb 10, 2012 12:41 am
- My Generation: 4G
- XBOX GamerTag: jjm349571
- Location: Newhaven, East Sussex
- Contact:
Re: Josh's BB4
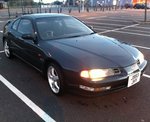
It's one of these things:

That pole on the passenger side corner of the bumper. It's basically a parking aid from before parking sensors became commonplace. Afaik they were only available on JDM cars.
Pretty useless in all honesty bar being a novelty.
I still bought one though
That pole on the passenger side corner of the bumper. It's basically a parking aid from before parking sensors became commonplace. Afaik they were only available on JDM cars.
Pretty useless in all honesty bar being a novelty.
I still bought one though
-
wurlycorner

- Ye are glad to be dead, RIGHT?
- Posts: 21493
- Joined: Sat May 19, 2012 3:33 pm
- My Generation: 4G
- Location: Chelmsford, Essex
- Has thanked: 2481 times
- Been thanked: 306 times

-
Drax

- Moderator
- Posts: 6342
- Joined: Wed Dec 22, 2010 4:05 pm
- My Generation: 4G
- Location: Wrexham, North Wales
- Has thanked: 24 times
- Been thanked: 431 times
jjmartin349571 wrote:Parking pole is in a cupboard in my workshopDrax wrote:parking pole switch with no parking pole?
2.2 JDM DOHC SI-VTEC LSD TCS 4WS ABS BB1 MANUAL 1992

FOR PAUL
FOR PAUL
-
jjmartin349571
- Supporter 2016
- Posts: 3344
- Joined: Fri Feb 10, 2012 12:41 am
- My Generation: 4G
- XBOX GamerTag: jjm349571
- Location: Newhaven, East Sussex
- Contact:
-
jjmartin349571
- Supporter 2016
- Posts: 3344
- Joined: Fri Feb 10, 2012 12:41 am
- My Generation: 4G
- XBOX GamerTag: jjm349571
- Location: Newhaven, East Sussex
- Contact:
Re: Josh's BB4
Is that the only reason the indicator units have to be removedDrax wrote:Write comments
I thought they were obscuring the bumper fixings so didn't bother investigating any further
-
wurlycorner
- Ye are glad to be dead, RIGHT?
- Posts: 21493
- Joined: Sat May 19, 2012 3:33 pm
- My Generation: 4G
- Location: Chelmsford, Essex
- Has thanked: 2481 times
- Been thanked: 306 times
-
jjmartin349571
- Supporter 2016
- Posts: 3344
- Joined: Fri Feb 10, 2012 12:41 am
- My Generation: 4G
- XBOX GamerTag: jjm349571
- Location: Newhaven, East Sussex
- Contact:
Re: Josh's BB4
I set about sorting out the sunroof panel this morning. First job was to whip the 5th gen brackets out to use as a template. I bolted them on top of the 4th gen brackets using 4 holes that were aligned:

You can see that 2 of the holes are a bit out. I used a drill bit the size of the hole initially to make a mark on to the 4th gen bracket, I then used a small bit to make a pilot hole at this point:

Then it was just a case of going up through the drill bit sizes to make the final holes:


And the finished article:

Lovely stuff. Fitted them back into the car (no pics as it's a simple case of 8 screws in plain sight), cut 2 tabs off the glass panel and here's the finished article:


The eagle eyed among you will note that it still stands proud slightly. I think the only way to get a perfect fit will be to drop the headliner and place some washers between the mounts for the entire mechanism and the roof. If I'm going to that extent I'll probably just modify the 5th gen mechanism I have though. This will be fine in the meantime though
With the information RE the bumper provided in the posts above under my belt I decided to stop being a fanny and remove my front bumper. It was my offside indicator that wouldn't come out and typically the offside bumper bar mounts are the most difficult to access - a canister (which I think is the receiver dryer?? ) is in the way of one bolt. Managed to use a wobbly extension to get it out, at the cost of some knuckle skin.
With the bumper off I was able to start fitting some parts I had stashed away. First up was yellow fogs:


The old ones were an absolute muffin to remove. I snapped so many drill bits All done now, just need to get some new screws so that it's not so traumatic should I need to remove them again in the near future.
I also started fitting this:

I kind of had to work out how it mounted, I think that the way I have it now is correct. The profile of the bracket makes it seem that it should fit the bumper bar in this place, and it locates the pole in a location that makes sense.
I was hoping that my bumper would have a guide mark inside to aid me with drilling a hole, it doesn't I'm going to grab some acrylic from work tomorrow and I reckon that by taking a reference from two holes in the bumper bar and then marking the tip of the bumper pole in relation to them, I should be able to line it up with the corresponding holes on the bumper and then clamp it and drill it. It seems so easy in my head but I bet this turns in to a ball ache
Another job I've put off for a long time is the turning/junction lights. They don't work because some spanner previously cut one wire on each side There was enough spare wire on the plug one side for me to save it, on the other it was clipped flush with the bulb plug so I had to cut the whole plug off and replace it with tiny spade terminals. The control unit is there along with the bulbs, so hopefully it should all work once I refit the bumper.
I also removed the rounded screw from my indicator. That was a bloody horrible job, even with the bumper off and the bumper bar removed. Still, it's done now
Hopefully finish getting the front end back together this week, can't wait to have those bits sorted as I've wanted them on the car for ages
Next on the list was sorting out my wheels. I currently have a mix of 2 sets on my car - 2 OEM Accord alloys on the front, and two BK Racing alloys on the back which looks really pikey I had a mix as I had 2 bald tyres in each set and made the best of what I had to get through MOT. The plan was to get 2 tyres for the Accord alloys and run them as they looked alright on the car, but then I had a bit of a result on eBay. A cheeky low bid I put in won me a second hand set of alloys, which I've just got back from collecting this evening:

Not sure how they'll look but I'm hoping the car should look better for having them on definitely couldn't complain for the price and it's solved my tyres/pikey image problem quite nicely.
Really pleased with how the car is coming along, if I do say so myself Feels good to finally be making progress.

You can see that 2 of the holes are a bit out. I used a drill bit the size of the hole initially to make a mark on to the 4th gen bracket, I then used a small bit to make a pilot hole at this point:

Then it was just a case of going up through the drill bit sizes to make the final holes:


And the finished article:

Lovely stuff. Fitted them back into the car (no pics as it's a simple case of 8 screws in plain sight), cut 2 tabs off the glass panel and here's the finished article:


The eagle eyed among you will note that it still stands proud slightly. I think the only way to get a perfect fit will be to drop the headliner and place some washers between the mounts for the entire mechanism and the roof. If I'm going to that extent I'll probably just modify the 5th gen mechanism I have though. This will be fine in the meantime though
With the information RE the bumper provided in the posts above under my belt I decided to stop being a fanny and remove my front bumper. It was my offside indicator that wouldn't come out and typically the offside bumper bar mounts are the most difficult to access - a canister (which I think is the receiver dryer??
With the bumper off I was able to start fitting some parts I had stashed away. First up was yellow fogs:


The old ones were an absolute muffin to remove. I snapped so many drill bits
I also started fitting this:

I kind of had to work out how it mounted, I think that the way I have it now is correct. The profile of the bracket makes it seem that it should fit the bumper bar in this place, and it locates the pole in a location that makes sense.
I was hoping that my bumper would have a guide mark inside to aid me with drilling a hole, it doesn't
Another job I've put off for a long time is the turning/junction lights. They don't work because some spanner previously cut one wire on each side
I also removed the rounded screw from my indicator. That was a bloody horrible job, even with the bumper off and the bumper bar removed. Still, it's done now
Hopefully finish getting the front end back together this week, can't wait to have those bits sorted as I've wanted them on the car for ages
Next on the list was sorting out my wheels. I currently have a mix of 2 sets on my car - 2 OEM Accord alloys on the front, and two BK Racing alloys on the back which looks really pikey

Not sure how they'll look but I'm hoping the car should look better for having them on
Really pleased with how the car is coming along, if I do say so myself