

Good work mate
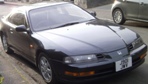
Congratulations to vtecmec for winning May/June's Lude Of The Month, with his DIY Turbo BB1 build.
>>> Click Here For Profile <<<

>>> Click Here For Profile <<<
Vtecmec's 4th Gen

-
Vtecmec

- LotM Winner
- Posts: 5508
- Joined: Fri Aug 06, 2010 5:43 pm
- My Generation: 4G
- XBOX GamerTag: vtecmec
- Location: East Midlands
- Has thanked: 154 times
- Been thanked: 443 times
Re: Vtecmec's 4th Gen
Yes Donald, and agreed it'll do as a temporary though.Donald wrote:So I presume it was you that got that thermostat on eBay?
Nice update as always but I'm sorry, this is borderline unacceptable:
I've not decided yet, probably occasional.duckface wrote:daily or more of an occasional paramour once complete?
Thanks for the comments guys, a good update coming soon.......
-
Vtecmec
- LotM Winner
- Posts: 5508
- Joined: Fri Aug 06, 2010 5:43 pm
- My Generation: 4G
- XBOX GamerTag: vtecmec
- Location: East Midlands
- Has thanked: 154 times
- Been thanked: 443 times
Gearbox, front susp, shafts, vtec spool, ps pump, timing bel
I finished off the starter motor.

Then tidied up and polyfilled the gearbox mount.

Now I have a mount, I’ve managed to fit the gearbox that I tarted up some 18 months ago, quite the challenge with only one pair of hands. I also tidied up all the wiring that sits above it.


Then on with the o/s driveshaft and suspension.


Now I had swapped the CV boot on all the driveshafts after I had derusted and painted them, but I tried to cut a corner with the half shaft and planned to just paint it and leave alone. Once together it looks like this.

But as I was just about to put it all back together I noticed a fair amount of play in the half shaft bearing, so had no option than to go around corner fully.
Pulling it all apart.

Half shaft apart.

And the half shaft back together.

I derusted the front engine mount.

I then painted it, rebonded any rubber that had separated from the frame, slapped some more sikaflex in there and then pushed some inserts in, it’s pretty solid. No pics as my son had nicked my camera batteries for the wii.
This is now sat waiting for the front crossmember to derust.
I refurbished the vtec spool and solenoid valve.


The front of the block was looking a bit crap as last time I painted it I had used high temp paint which has not lasted, so I removed all that and redid with engine enamel.

Then on with the alternator.

Doing this showed up the power steering pump, so……..


Now, as the head has been off the cambelt and associated needed refitting…..

Balance shaft locking pin in place.

And cambelt on with new balance shaft belt.

Here’s how it stands currently, needing valve timing fluids and possibly a repaint of the rocker cover.

Then tidied up and polyfilled the gearbox mount.
Now I have a mount, I’ve managed to fit the gearbox that I tarted up some 18 months ago, quite the challenge with only one pair of hands. I also tidied up all the wiring that sits above it.
Then on with the o/s driveshaft and suspension.
Now I had swapped the CV boot on all the driveshafts after I had derusted and painted them, but I tried to cut a corner with the half shaft and planned to just paint it and leave alone. Once together it looks like this.
But as I was just about to put it all back together I noticed a fair amount of play in the half shaft bearing, so had no option than to go around corner fully.
Pulling it all apart.
Half shaft apart.
And the half shaft back together.
I derusted the front engine mount.
I then painted it, rebonded any rubber that had separated from the frame, slapped some more sikaflex in there and then pushed some inserts in, it’s pretty solid. No pics as my son had nicked my camera batteries for the wii.
This is now sat waiting for the front crossmember to derust.
I refurbished the vtec spool and solenoid valve.
The front of the block was looking a bit crap as last time I painted it I had used high temp paint which has not lasted, so I removed all that and redid with engine enamel.
Then on with the alternator.
Doing this showed up the power steering pump, so……..
Now, as the head has been off the cambelt and associated needed refitting…..
Balance shaft locking pin in place.
And cambelt on with new balance shaft belt.
Here’s how it stands currently, needing valve timing fluids and possibly a repaint of the rocker cover.
Last edited by Vtecmec on Tue Jul 15, 2014 10:26 pm, edited 1 time in total.

-
wurlycorner

- Ye are glad to be dead, RIGHT?
- Posts: 21511
- Joined: Sat May 19, 2012 3:33 pm
- My Generation: 4G
- Location: Chelmsford, Essex
- Has thanked: 2507 times
- Been thanked: 317 times
-
Vtecmec
- LotM Winner
- Posts: 5508
- Joined: Fri Aug 06, 2010 5:43 pm
- My Generation: 4G
- XBOX GamerTag: vtecmec
- Location: East Midlands
- Has thanked: 154 times
- Been thanked: 443 times
Re: Vtecmec's 4th Gen
I wrapped the wiring in new conduit, not quite finished yet, but almost.....the paint is last on the list. It'll be in for its MOT in 2 weeks all being well, then 4 wheel alignment at my local Honda dealer.
-
wurlycorner
- Ye are glad to be dead, RIGHT?
- Posts: 21511
- Joined: Sat May 19, 2012 3:33 pm
- My Generation: 4G
- Location: Chelmsford, Essex
- Has thanked: 2507 times
- Been thanked: 317 times
-
vanzep
- Supporter 2016
- Posts: 7174
- Joined: Sun Jan 29, 2012 6:38 pm
- My Generation: 4G
- Location: Edinburgh
- Has thanked: 314 times
- Been thanked: 521 times
Loads of really good work there  Hard graft and many hours...
The repainted alternator and power steering pump make a real improvement
The repainted alternator and power steering pump make a real improvement
1996-2000 1993 EG9 Blue Civic 1.6 Vti - Traded in against the BB4
2000-2019 1994 2WS BB4 Milano Red JDM Prelude Si VTEC LSD
2015 on > 1991 4WS BB1 Phantom Pearl Grey JDM Prelude Si VTEC LSD
2021 ON > 1998 2WS BB6 White Pearl JDM Prelude Si VTEC
2000-2019 1994 2WS BB4 Milano Red JDM Prelude Si VTEC LSD
2015 on > 1991 4WS BB1 Phantom Pearl Grey JDM Prelude Si VTEC LSD
2021 ON > 1998 2WS BB6 White Pearl JDM Prelude Si VTEC
