Congratulations to vtecmec for winning May/June's Lude Of The Month, with his DIY Turbo BB1 build.

>>> Click Here For Profile <<<

Image

My 1999 Honda Prelude 2.2vti BB8 5th Gen Project - Page 7

Tell us all about your Lude, you know you want to ...
User avatar
prelude_h22
Posts: 758
Joined: Tue Jul 24, 2012 6:35 pm
My Generation: 5G
Has thanked: 8 times
Been thanked: 22 times

Remove and Replace Alarm System & Summer Photo Shoot

Post by prelude_h22 » Wed Aug 19, 2015 9:38 pm

Hi all,
Just thought I would update you guys on the small activities that have occurred on the Prelude.

Date: 18-04-15
Remove and Replace Alarm System

Since owning the car it has had a Ge-tronic GT auto alarm system installed on it. Actually looking back on the cars hand book, the alarm was installed in the first year it was manufactured.

Just recently over the past month the alarms key fob has been playing up. It fails to unlock the cars central locking when pressed. Several attempts have been made in sourcing a new key fob but with Ge tronics no longer trading it would be near in impossible to get a new one.

Having owned the Prelude for 5 years I thought the existing alarm did pretty well however it was time to get it replaced with something more reliable.

I researched for the best alarms and most reliable and value for money was the Toad AI606 alarm system.
I made a few enquiries and found a recommended installer.
Task was to to remove the old alarm, supply and fit a toad AI606 with CAT 1 certificate.

The removal and installation was a success and all completed within 4 hours. Excellent quality of work, when looking up into the driver’s foot well you could hardly tell an alarm system was installed.

Ge-tronic Tired Keyfob

Image


Standard Toad AI606 Kit

Image


Old System Removed & Toad system being fitted

Image


New Key fobs mated to their keys

Image


Parts Purchased
Supplier: R&D Electrics (Car Alarm Specialists)(Rakesh Khambhaita)
Part: Car Alarm System
Part Number: Toad AI606 Car Alarm System


Date: 10-05-15
Spring/Summer Photo Shoot

Haven’t had the chance to use the car much this year although several track days are planned. A Wales road trip was cancelled due to unforeseen circumstances which was a disappointment.

I quiet industrial estate gave us some opportunities to take some photos

Image


Image


Image


Image


Image


Image


Image


Some images of my Brothers EG Civic Coupe


Image


Image


Image


Future plans
Brake Fluid Flush
More Track Days


Maybe’s
Change hands free kit
Limited Slip Differential
Mfactory 4.64 Final Drive Gear
Repaint front bumper
(due to stone chips and someone slightly scraping the front bumper)
Last edited by prelude_h22 on Wed Aug 19, 2015 9:45 pm, edited 1 time in total.

User avatar
prelude_h22
Posts: 758
Joined: Tue Jul 24, 2012 6:35 pm
My Generation: 5G
Has thanked: 8 times
Been thanked: 22 times

Mfactory 4.64 FD/ LSD Upgrade, HandsFree Upgrade & Track Day

Post by prelude_h22 » Wed Aug 19, 2015 9:43 pm

Hi all,

Just an update on probably the last big mod/upgrade that I will perform on the prelude.

I thought long and hard about it, mainly due to the cost and the urge of owning an S2000. I have owned the Prelude for over 5 years and it was mainly intended for a weekend toy and a fun track day car, the car has been brilliant within the 5 years I have had it and very little has gone wrong with it. I have done several track days and the car really needed a limited slip differential, with all that in mind I decided to go ahead with a modification that I have wanted to do for a long time. A final drive and limited slip differential upgrade.

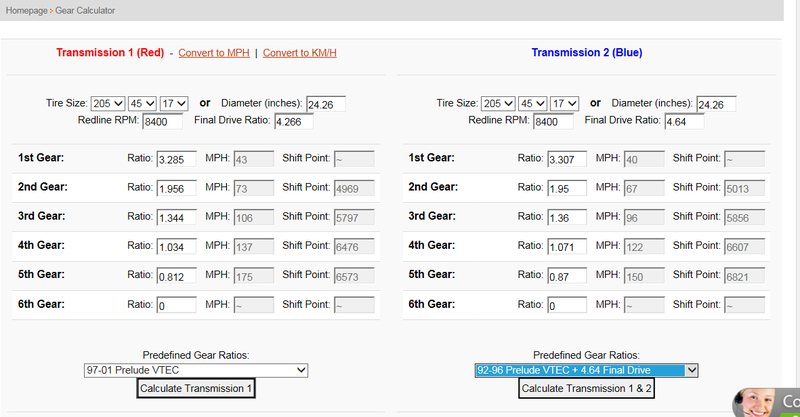
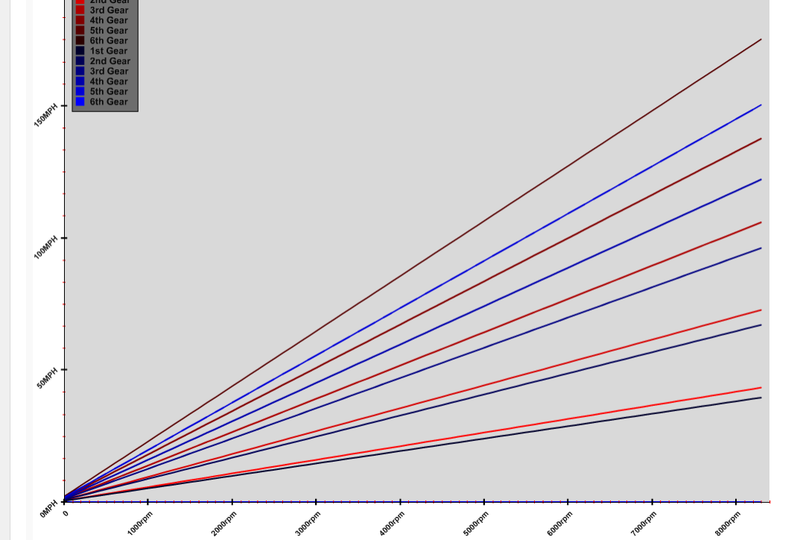
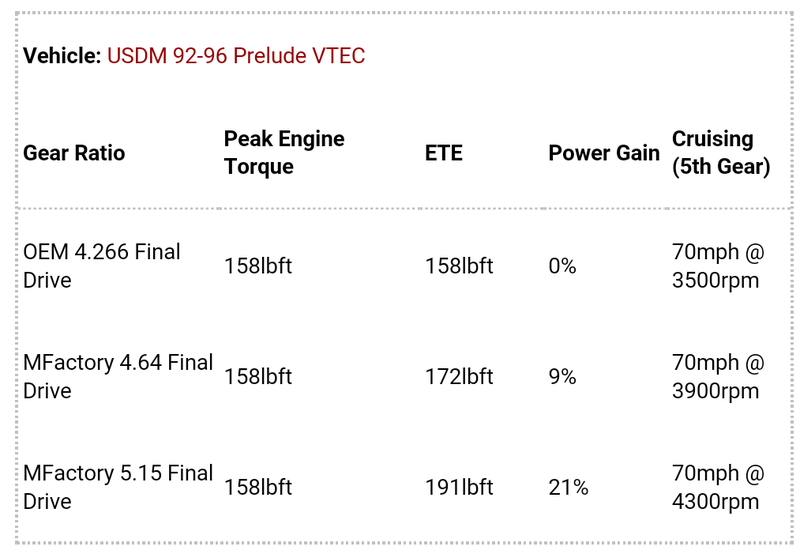
Here are some gear ratio numbers and benefits from the mfactory gear calculator website

Image

Image

Image

After some initial enquiries the best person to perform this work had to be Rich at Performance Autoworks

The parts I required are:
Mfactory H22 Helical Diff (LSD)
Mfactory H22 Final Drive 4.64 (FD)

Genuine Honda Diff Bearings
Honda Part Number: 91005PG2004
Honda Part Number: 91006PX5008

Oil Seals
Honda Part Number: 91205-PX5005
Honda Part Number : 91206-PX5005

Torco RTF Transmission Fluid 2L


Date: 27-07-15
Remove Gearbox and fit Mfactory LSD and FD

On the Saturday the 27th June 2015 I dropped the car with Rich at Performance Autoworks, Rich started the work on the following Monday and was completed by the Wednesday.

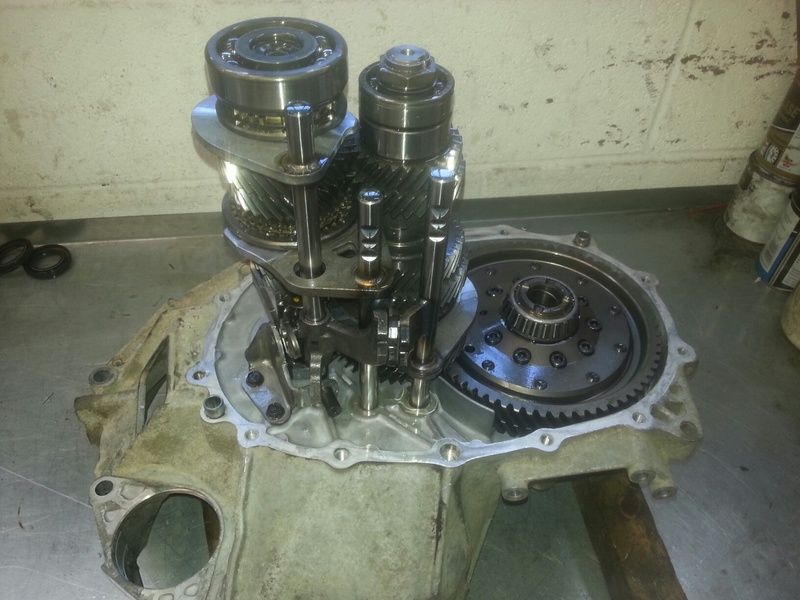
The gearbox and all components were removed with ease; Rich reported that the gearbox was in splendid condition and a pleasure to work on.

Many thanks to Rich for taking photos during the process

Photo descriptions written by Rich at Performance Autoworks


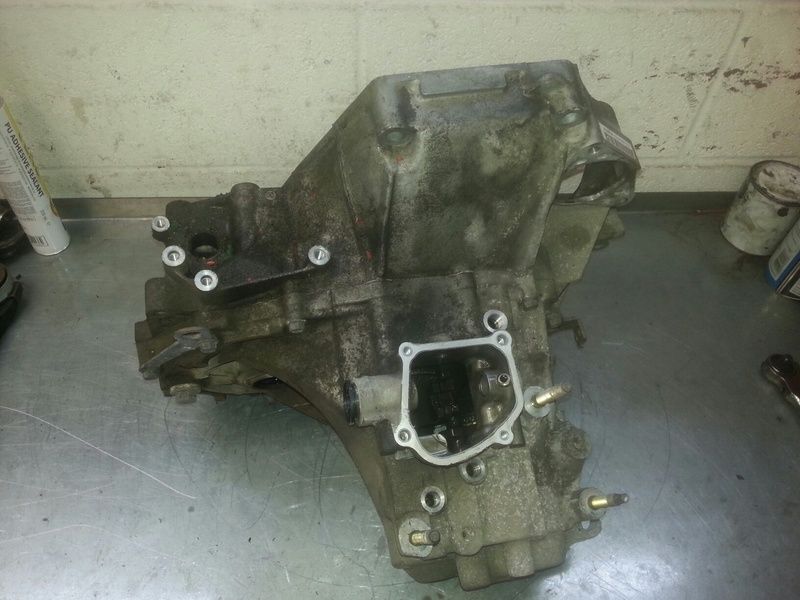
001.jpg - Gearbox before opening up (note the selector housing already removed)

Image

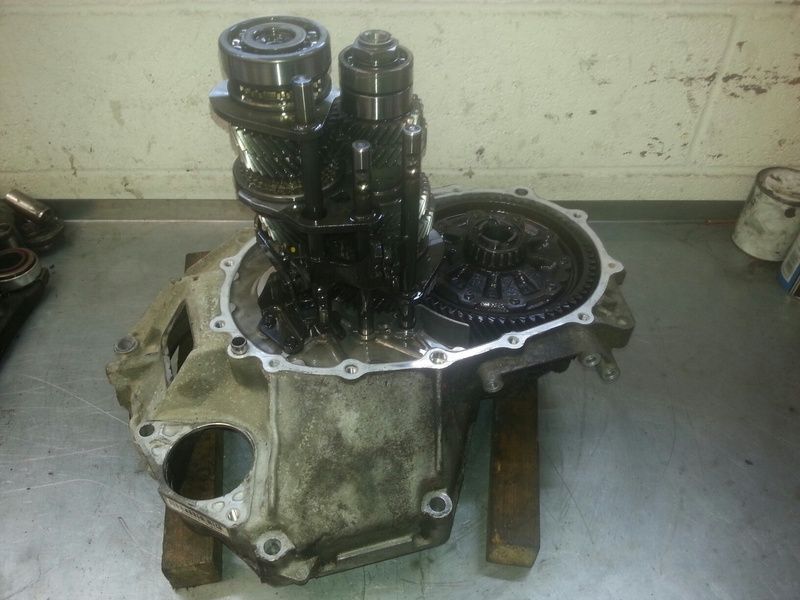
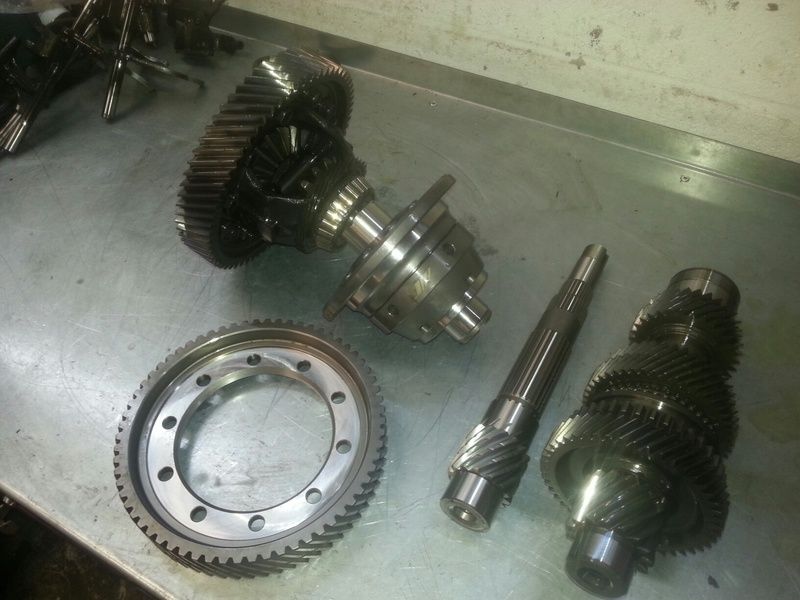
002.jpg - Main shaft and countershaft gear clusters, selectors and stock diff

Image

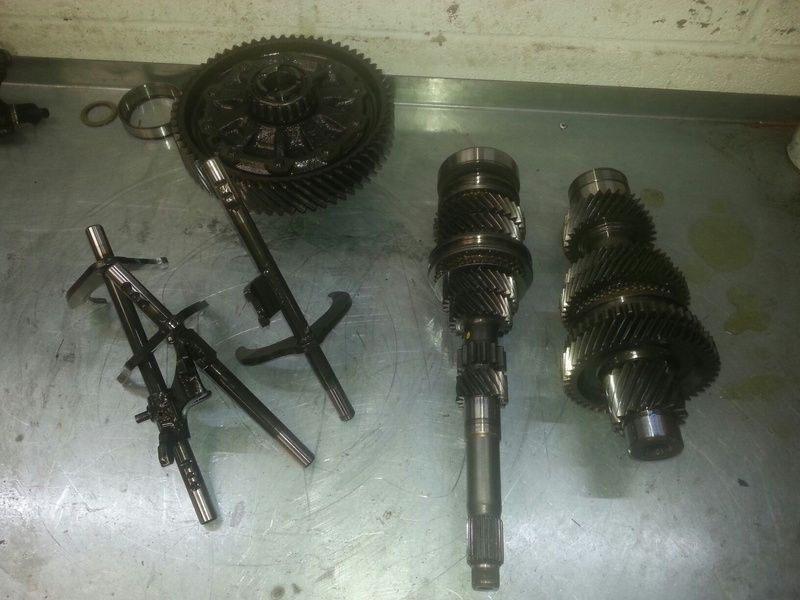
003.jpg - As above but all removed from the gearbox (the right hand cluster is on the countershaft which is also the FD pinion)

Image

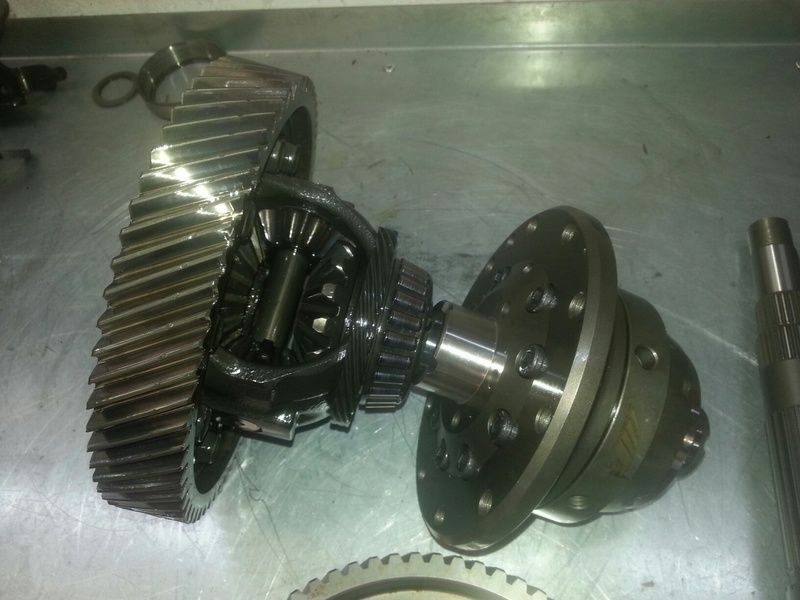
004.jpg - OEM open diff vs M-Factory helical LSD

Image

005.jpg - FD gear, pinion and diff comparisons

Image

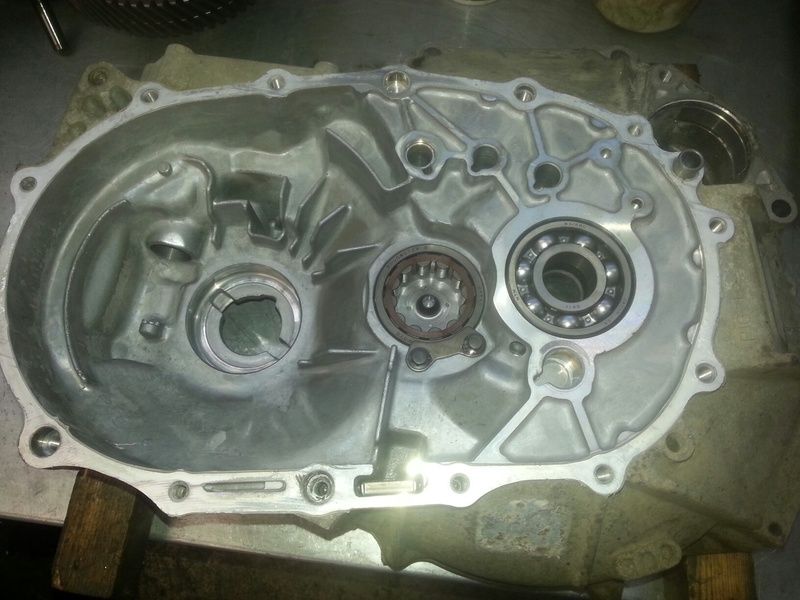
006.jpg - Gearbox casing after hot tank clean with diff bearings and seals removed

Image

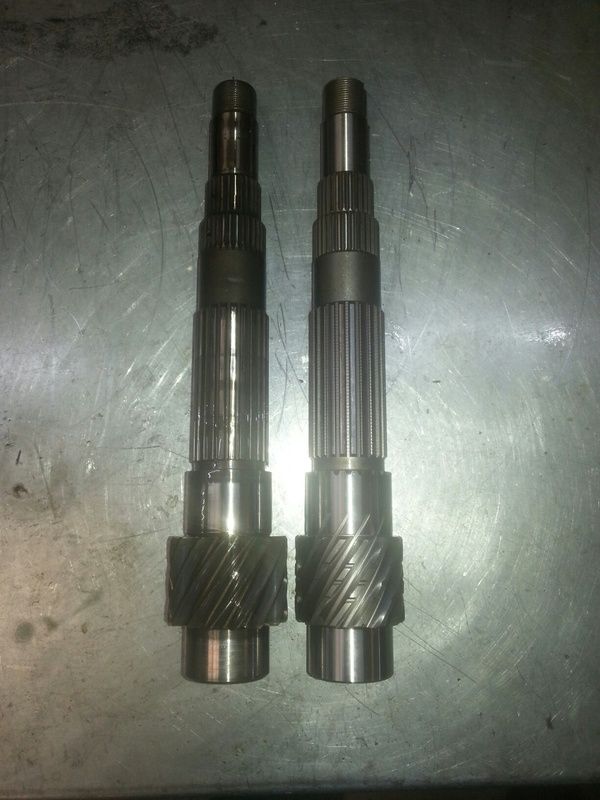
007.jpg - OEM vs M-Factory countershafts

Image

008.jpg - Diff and FD parts fitted and ready to have the gear case bolted back up for good.

Image

The car was picked up on the Saturday 4th July, superb fit and finish. The car drives beautifully.

So how does the modification feel?

After driving around several back roads locally; the LSD totally transforms the car. Initially when you accelerate, the power is instantly transferred to the wheels. There is very little wheel spin and the car is pretty stable. When cornering it feels like it wants to pull you around the corner. The final drive is an added bonus; I find the biggest difference is that it is easier for the engine to stay in the vtec sweet spot. Theres an instant feeling of a little more torque or pulling power and the car does noticeably accelerate faster. The large 17” wheels and the heavy weight of the prelude don’t help but I have to say it is pretty quick for a stock H22 engine.

Its definitely a lot more fun now, the prelude seems to have come alive..

The car revs higher as expected, cruising at 70mph its around 4k rpm, it is still amazingly quiet too at that rpm. I haven’t experienced the consumption of a full tank of fuel for daily driving but I have definately noticed that the car drinks the fuel faster when pushing the car.

I am looking to do a few more track days this year so it would be a great opportunity to fully exploit the modifications, the LSD will definitely come into its own on a track.

Incredibly pleased indeed, and very happy with the way the car feels and performs

Big Thanks to Rich at Performance Autoworks

Thanks for reading


Future plans
Brake Fluid Flush
More track days

Maybe’s
Change hands free kit
Re-Spray front bumper
(due to stone chips and someone slightly scraping the front bumper)


Date: 19-07-15
Parrot Ck3000 Bluetooth Handsfree Installation

One of the low priority tasks that needing resolving on the Prelude was to rectify the hands free Bluetooth issue. Currently the existing Pioneer BTB200 Bluetooth adapter does not automatically connect to my phone upon engine start, this can be very annoying and not very safe. Especially when a call is received and the phone is not connected to the system. I now had the time to finally resolve this issue.

The issue came around when after a few phone upgrades the system failed to automatically connect to the phone when the ignition is switched on, this is probably due to the later android OS phone system updates. Unfortunately the Pioneer BTB200 unit is unable to have its firmware updated so it is unable to work with newer phones.

The quickest and cheapest solution to this issue was to change the Bluetooth hands free system, the system I choose was the popular Parrot CK3000. Easy to use, install and reasonably priced.

No other additional ISO SOT leads were required. The Prelude only required the CK3000 parrot system for installation.

Parts purchased
-Supplier: Amazon
-Parrot hands free Kit
-CK3000 model


The Kit
Image

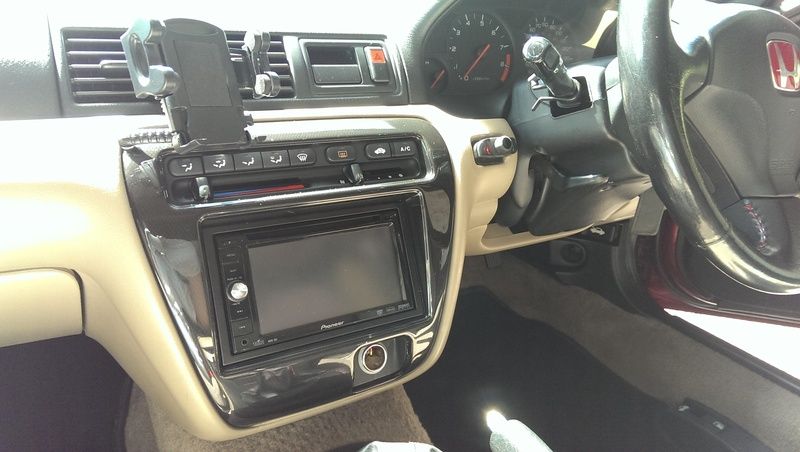
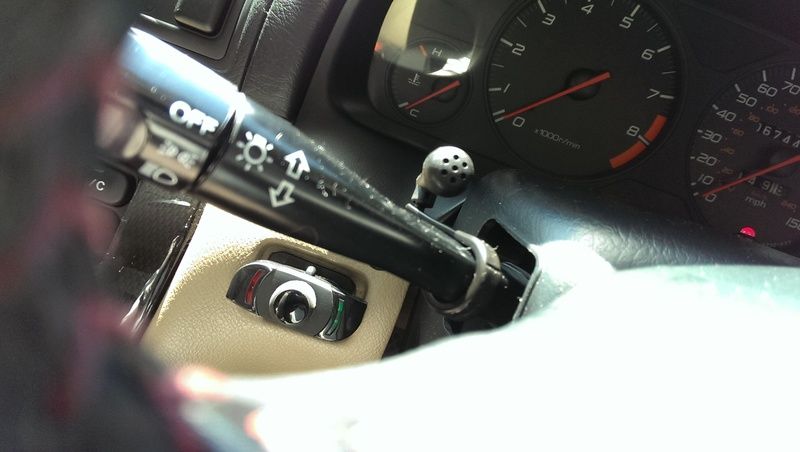
The first task was to decide where to mount the small remote. The pioneer system didn’t need a separate remote, as the display of the AVIC D3 double din unit was used. The perfect location in which required little re-work for mounting was the small recess to the left of the steering wheel – currently blanked of on UK cars. This would be the climate control sensor location I think for the JDM cars.

A small hole was drilled to allow the connector of the remote to pass through and the supplied plastic mount plate was attached to it to provide some height to clear the recessed section of the position.

The microphone would install in the same location as the existing pioneer microphone and using the supplied indicator stalk clip holder. The steering wheel cowling was removed and the microphone wiring was fed through for a neater install.

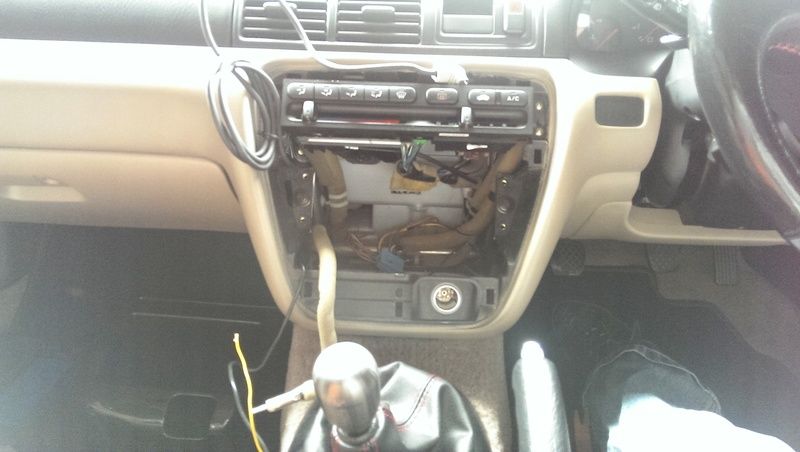
Once these items were installed the main head unit could be removed. It has been a while since I installed the Pioneer AVIC D3 unit (2010) and the plastic surround fascia was a little tough to remove due to not wanting to break it or damage any clips. It finally came off with some tugging and the double din unit was easily removed via four screws.

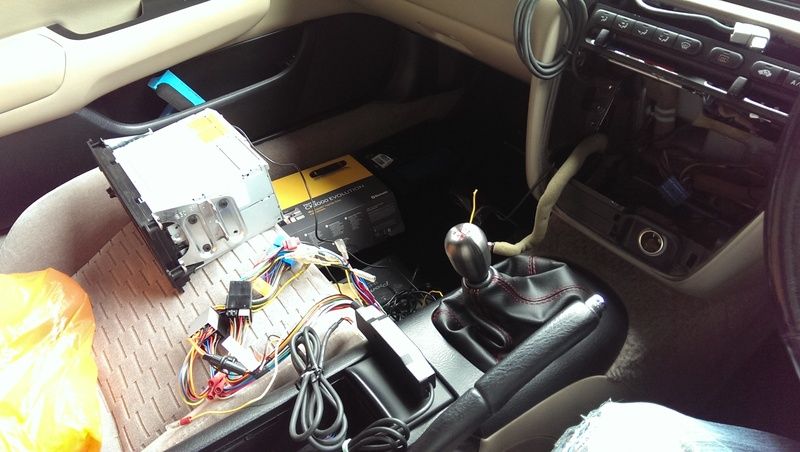
All its existing wiring was disconnected and the parrot systems harness connected, all wiring was plug and play with the exception of the mute wire. This consisted of a yellow wire exiting from a small black box (part of the parrot system) and which was connected to the yellow/black mute wire on the rear of the pioneer unit loom harness.

Once all that was completed the system was tested and confirmed working.

The trickiest part of the install was to tuck all the wiring behind the head unit, it was actually quite surprising how much wiring there is to make the parrot system work. There is a lot of space within that area of the prelude but it did take some organising to get all of it to comfortably fit.

A full test confirmed the unit operating well and muting all speakers when a call is made and received. One gripe with the unit is that a voice tag has to be recorded for each contact. That contact had to be sent one at a time from the phone to the system. So it does take some time to setup.

All previous components removed
Image

All components connected and tested before installation
Image


Installation finished
Image

Image

Thanks for reading


Date: 01-08-15
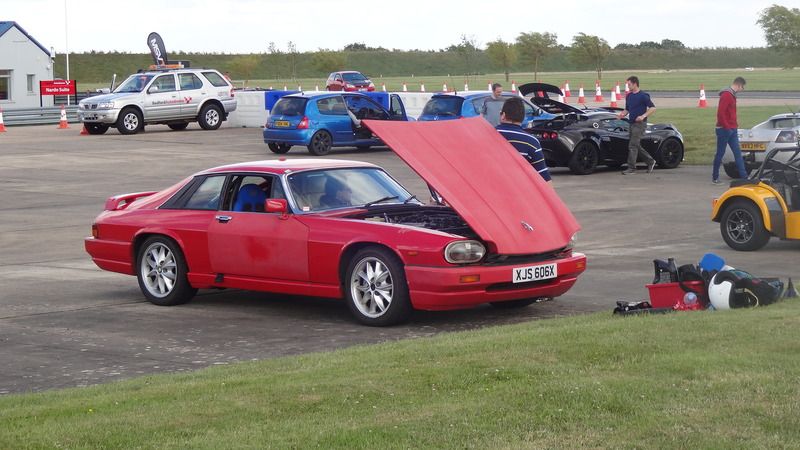
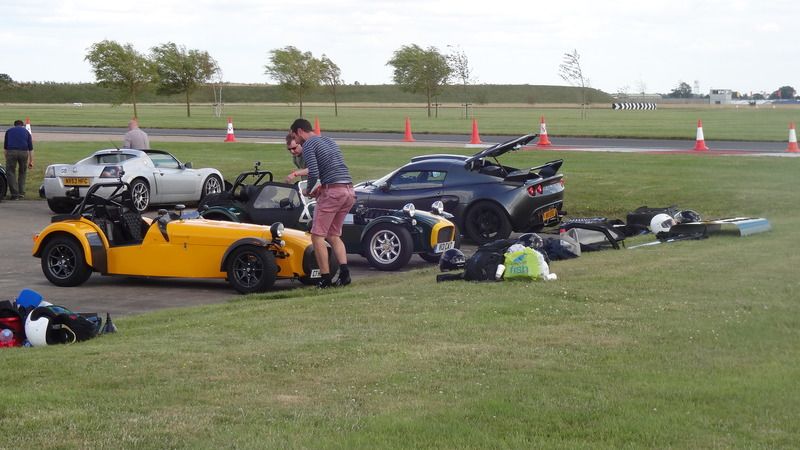
Track Day Bedford SEN Circuit

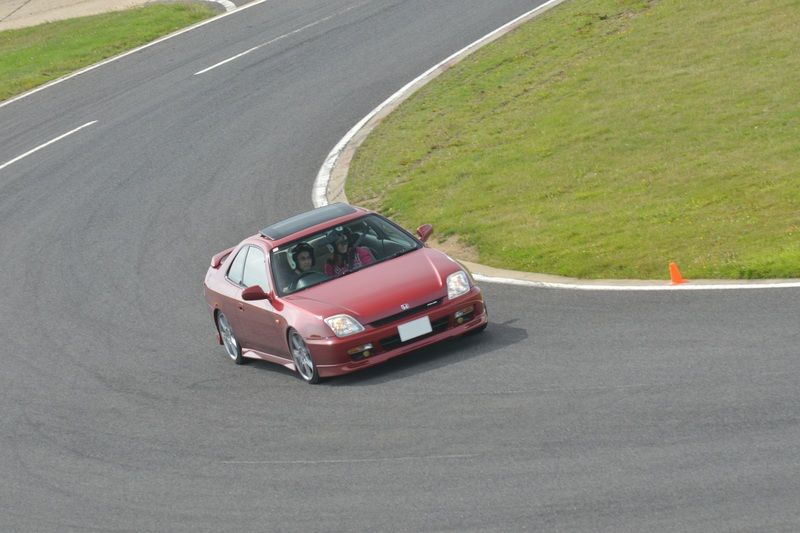
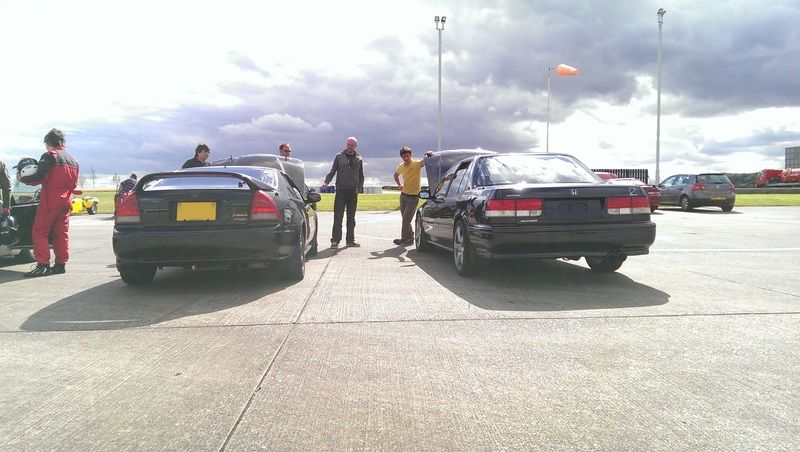
To utilize the FD and LSD upgrades I decided to do another Bedford SEN track day. This took place on the 1st August 2015.

It was a great day and the car performed brilliantly. The FD and LSD upgrades providing the car with that extra bit of performance


Some pics of the day

Image

Image

Image

Image

Image

Image

Image

Image

Image

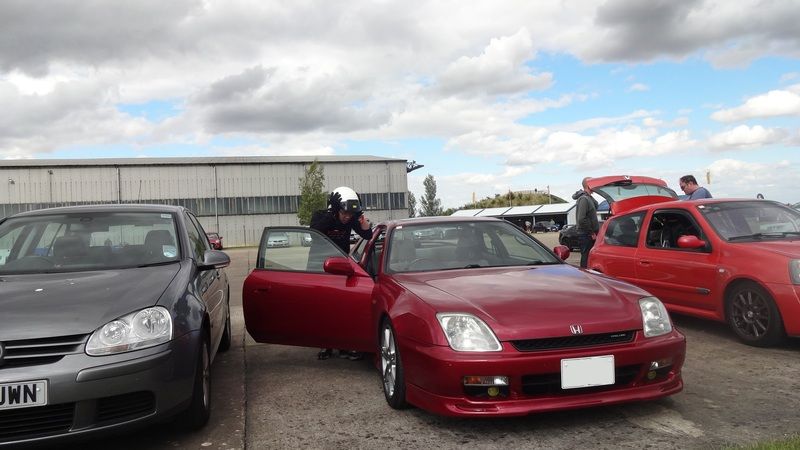
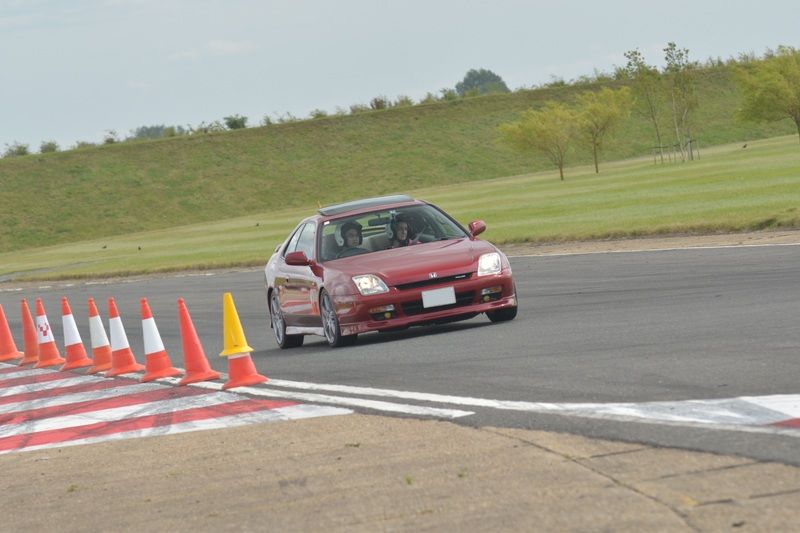
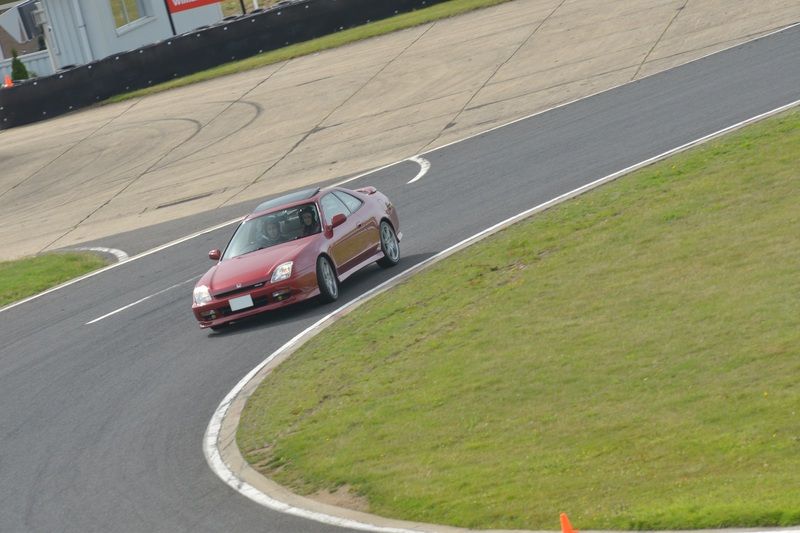
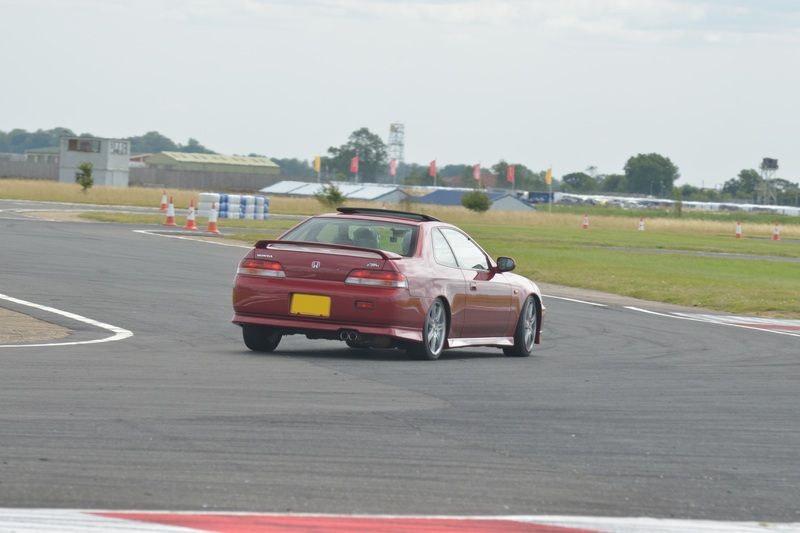
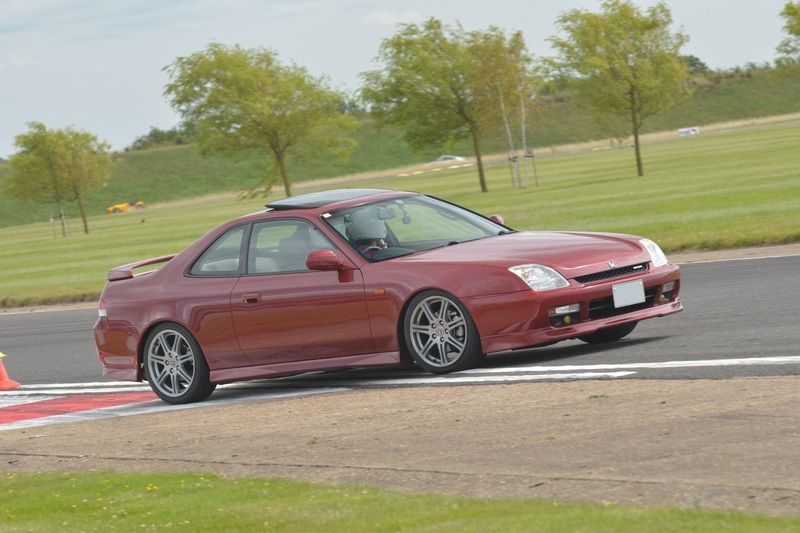
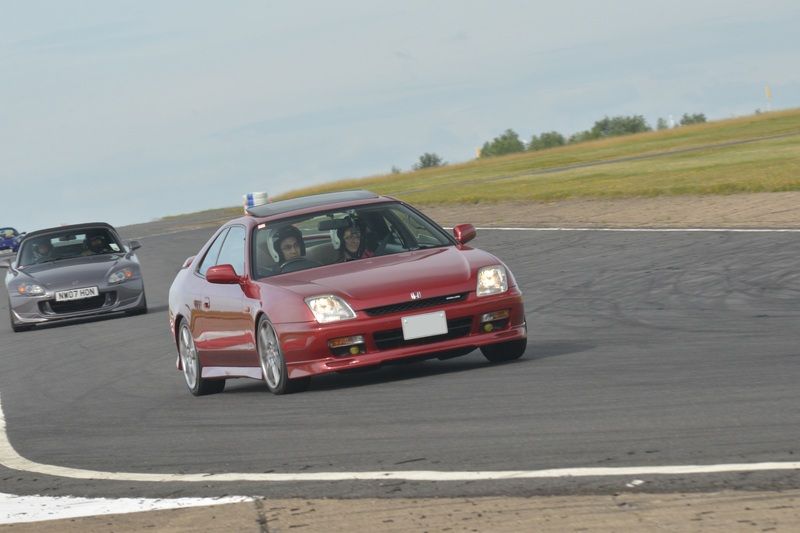
Quick pics of the day

Image

Image

Image

Image

Image

Image

Thanks for reading guys

Future plans
Snetterton Track Day
Brake fluid Flush
Possibly a pair for front Stop-tech grooved brake discs to aid better braking for track days

Maybe’s
Re-Spray front bumper
(due to stone chips and someone slightly scraping the front bumper)

User avatar
RattyMcClelland
Moderator
Posts: 9195
Joined: Wed Aug 04, 2010 10:02 pm
My Generation: 5G
PSN GamerTag: RattyMcClelland
Location: Leicestershire
Been thanked: 183 times

Post by RattyMcClelland » Wed Aug 19, 2015 9:57 pm

Good stuff.

One thing to note are those gear ratios. Those pictures arnt the m2p4 ratios. Gear ratios on this box are one of the closest anyway.

Also a shorter final drive has no effect on gear ratios. Just the final drive ratio. So it will rev the same and change gear the same and drop revs the same but the speed at which you do that will be lower.

Mine is with Rich now. Very excited.
Image

User avatar
nitin_s1
Posts: 10463
Joined: Tue Aug 03, 2010 1:09 pm
My Generation: 5G
PSN GamerTag: N171N
Location: London
Has thanked: 136 times
Been thanked: 116 times
Contact:

Post by nitin_s1 » Wed Aug 19, 2015 10:34 pm

Love your car and really nice mods now.

All you need to make it complete is some recaros or a Type-S seats :twisted:

User avatar
Rudelude
Posts: 994
Joined: Thu Apr 17, 2014 10:44 pm
My Generation: 5G
Location: New York

Post by Rudelude » Thu Aug 20, 2015 1:56 am

Some red recaro's hmhhhhhhh
1997 Type S, Pearl White
Rust Free & Mugen Goodness

User avatar
mercutio
LotM Winner
Posts: 14958
Joined: Sun Aug 08, 2010 8:45 pm
My Generation: 5G
Location: Sunny Manchester
Has thanked: 1 time
Been thanked: 3 times
Contact:

Post by mercutio » Thu Aug 20, 2015 7:54 am

what ratty said :lol: except mine isn't with paw :lol:
bristol_bb4 wrote:ahhh a 5th gen, i love 5th gens :D :lol:
Dino wrote:I loves the 5th gen really.... just dont quote me on it... ;)
4thgenphil wrote:Mines 4 1/4 unches mate, sorry

http://www.ludegeneration.co.uk/profile ... -t618.html

User avatar
wurlycorner
Ye are glad to be dead, RIGHT?
Posts: 21224
Joined: Sat May 19, 2012 3:33 pm
My Generation: 4G
Location: Chelmsford, Essex
Has thanked: 1968 times
Been thanked: 240 times

Post by wurlycorner » Thu Aug 20, 2015 5:15 pm

Great pics and write ups, thanks for sharing. The pics of the gearbox rebuild are brilliant, it's good that Rich did that for you.

Car looks in awesome condition as always. Personally not a fan of how the parrot stalk thingy looks sticking out of the dash, but I expect it's good functionality-wise for you.

User avatar
prelude_h22
Posts: 758
Joined: Tue Jul 24, 2012 6:35 pm
My Generation: 5G
Has thanked: 8 times
Been thanked: 22 times

Re: My 1999 Honda Prelude 2.2vti BB8 5th Gen Project - Page

Post by prelude_h22 » Thu Aug 20, 2015 5:40 pm

One thing to note are those gear ratios. Those pictures arnt the m2p4 ratios. Gear ratios on this box are one of the closest anyway.

Also a shorter final drive has no effect on gear ratios. Just the final drive ratio. So it will rev the same and change gear the same and drop revs the same but the speed at which you do that will be lower.
Cheers Ratty, there's actually alot of science behind gearboxes. lol. Duly noted.
All you need to make it complete is some recaros or a Type-S seats :twisted:
Cheers nitin, yeah i do wonder about getting a set of recaros. My brother has the DC2 ones in his car and they do hold you in. Maybe one day ill get a set.

Thanks wurlycorner, Rich would be the only person that would have done it otherwise I wouldn't have had the work done. There was no way i would have trusted anyone else nor would be a job that i would attempt myself in my current situation.

Yeah, i am not keen either on the parrot system. But the inbuilt pioneer bluetooth unit just didn't work. Was absolutely gutted and probably why it took so long to for me to sort a solution out lol.

Thanks for the comments guys.

User avatar
prelude_h22
Posts: 758
Joined: Tue Jul 24, 2012 6:35 pm
My Generation: 5G
Has thanked: 8 times
Been thanked: 22 times

Officially Sold 11th June 2016

Post by prelude_h22 » Thu Jun 16, 2016 11:14 pm

Hi All,

Just wanted to update this thread for the very last time.

I had to sell my prelude for personal reasons, it was a very hard decision to make but there was no other way i could keep it.

I posted it up for sale on a Wednesday morning on the 8th June 2016.
I had a viewing on the Thursday 9th June 2016 where a deposit secured the sale.
The car was picked up on Saturday 11th June 2016.

Was really sad to see it go and I would probably regret it.

The car was reverted back to standard as much as possible with only the EP3 alloy wheels, motegi kit, gearbox mods and stainless steel brake lines remaining.

The for sale advert was here
http://www.ludegener...2a8-t18951.html


The final Pic and last wash of my Prelude before it was sold :)

Image

Thank you to this brilliant forum and everyone's help through the 6 years and 2 months I have owned her.

Hope this thread has and will continue to inspire people for the future.

This is Prelude_h22 signing off.

Thanks for looking :)

*Will still be sticking around :)

Post Reply

Return to “Lude Profiles”