
Congratulations to vtecmec for winning May/June's Lude Of The Month, with his DIY Turbo BB1 build.
>>> Click Here For Profile <<<

>>> Click Here For Profile <<<
'96 Xantia Activa - back to the future!

-
wurlycorner

- Ye are glad to be dead, RIGHT?
- Posts: 21511
- Joined: Sat May 19, 2012 3:33 pm
- My Generation: 4G
- Location: Chelmsford, Essex
- Has thanked: 2507 times
- Been thanked: 317 times
 Re: '96 Xantia Activa - nearly there with the ignition probl
Continuity checking it is a bit of a PITA, 'cause of the type of plugs - you need a safety pin to shove in the holes and put the meter onto them.
--
Iain.
Iain.
Super Secret 1G (not really super secret!)
-
wurlycorner
- Ye are glad to be dead, RIGHT?
- Posts: 21511
- Joined: Sat May 19, 2012 3:33 pm
- My Generation: 4G
- Location: Chelmsford, Essex
- Has thanked: 2507 times
- Been thanked: 317 times
Re: '96 Xantia Activa - nearly there with the ignition probl
Went out to fit the knock sensor today, in the rain (dedication  )
)
Access doesn't look too difficult, because it's on the front of the engine and you can get your hands to the sensor and see it without stripping anything down, but getting a tool to it is a bit of a PITA, as it turns out. It's a 13mm bolt.
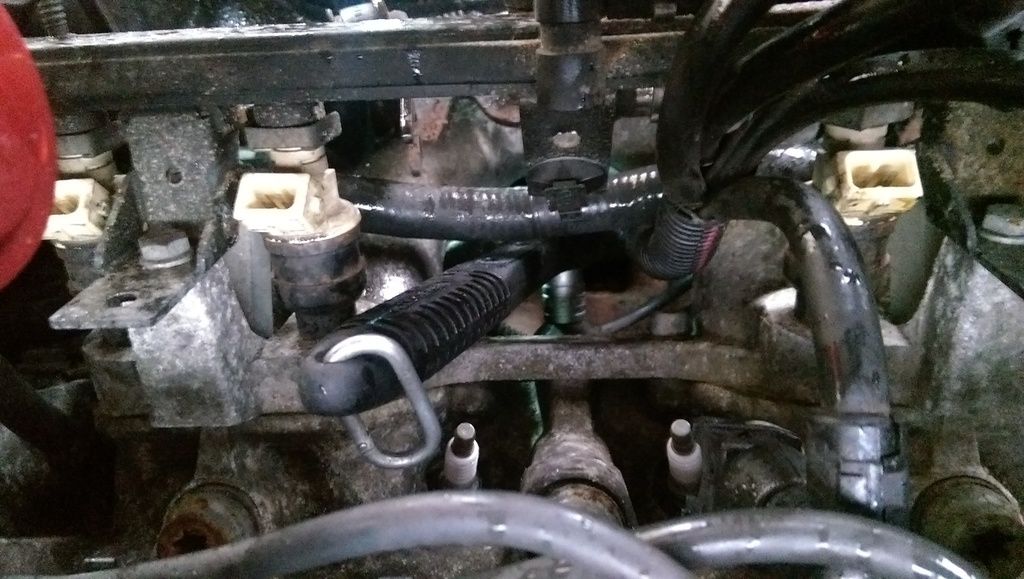
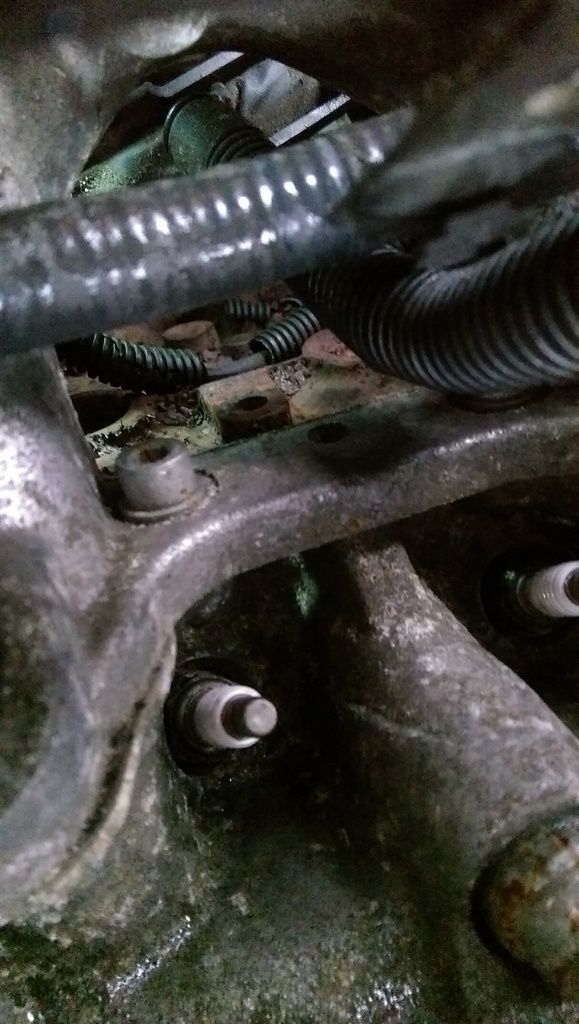
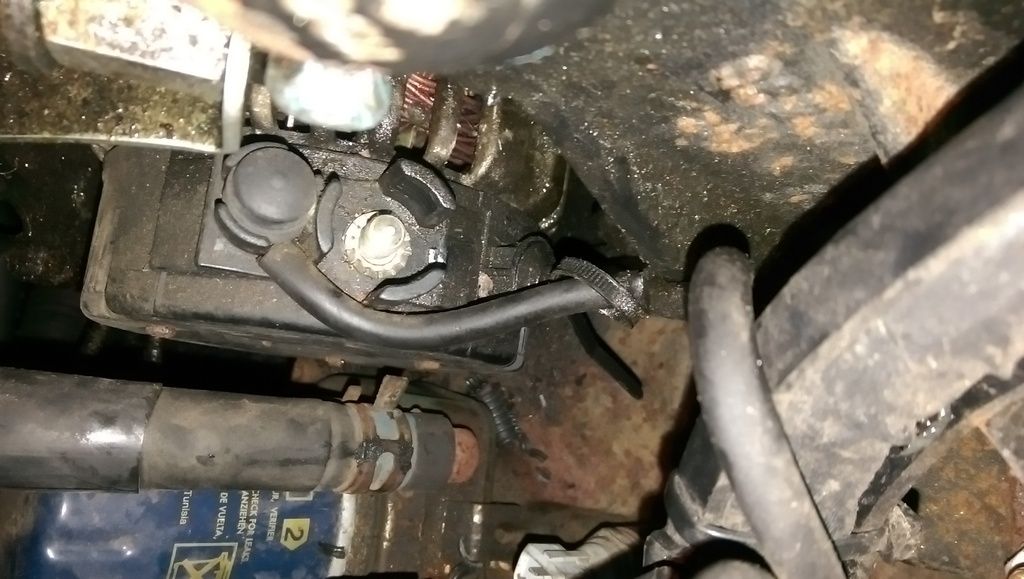
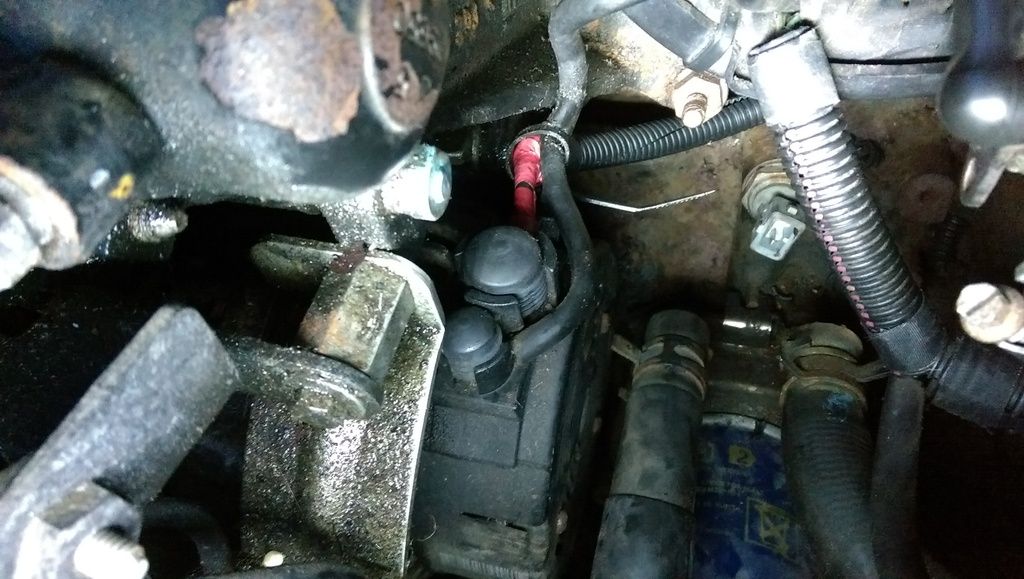
I eventually settled on moving the HT leads for the middle 2 plugs out of the way and unclipping the injection loom, removing associated clips and moving it to one side, then I could get a small socket set down to it, from behind the fuel rail;
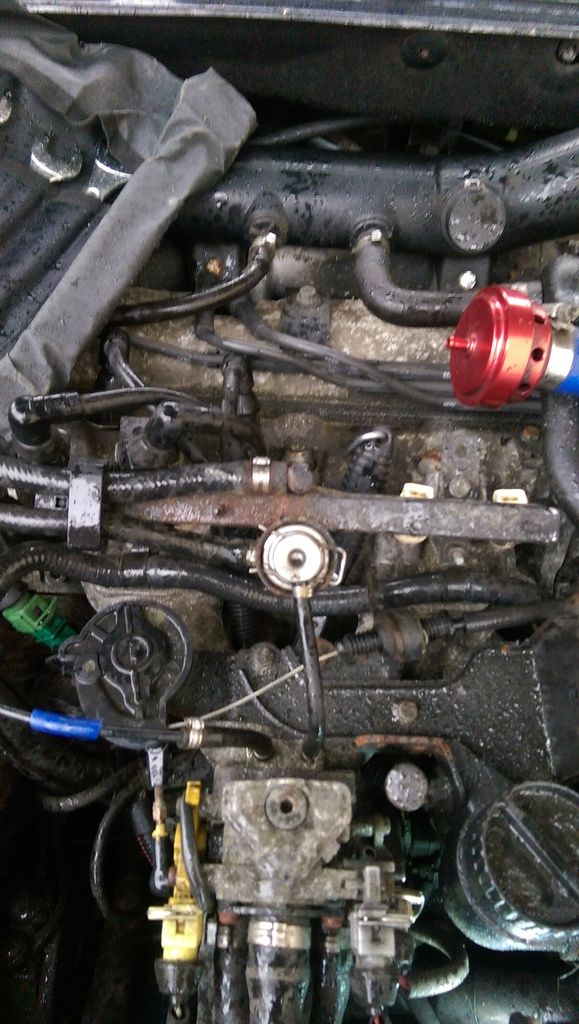
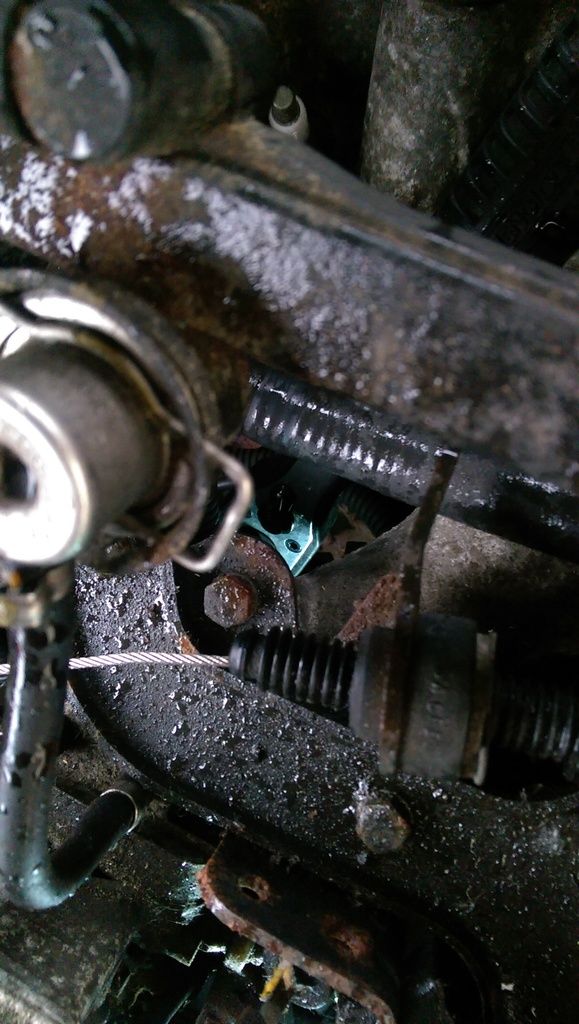
(that's the head of the ratchet in place on the bolt, lit up)
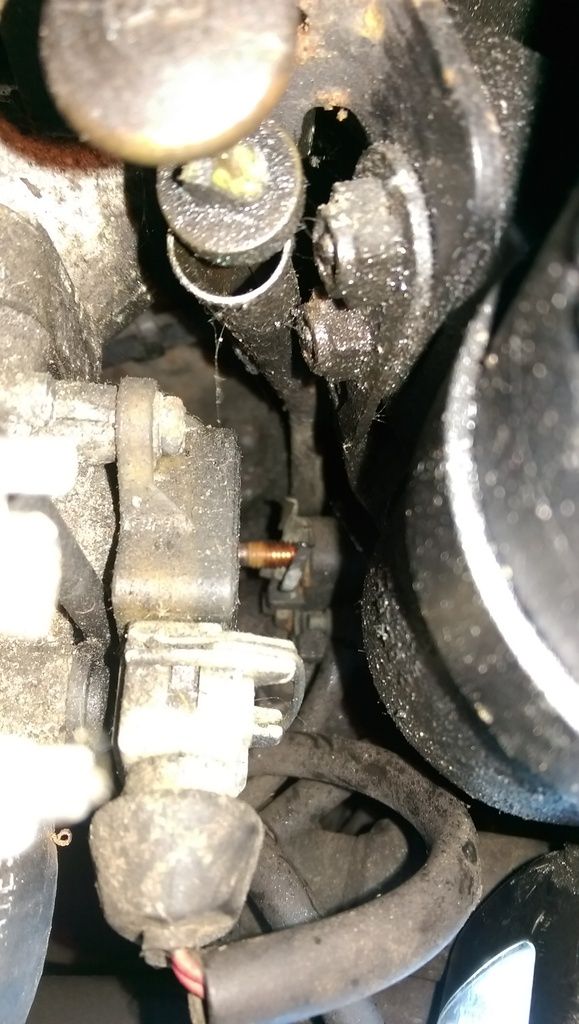
And looking down from the top of the engine, towards the front of the car;
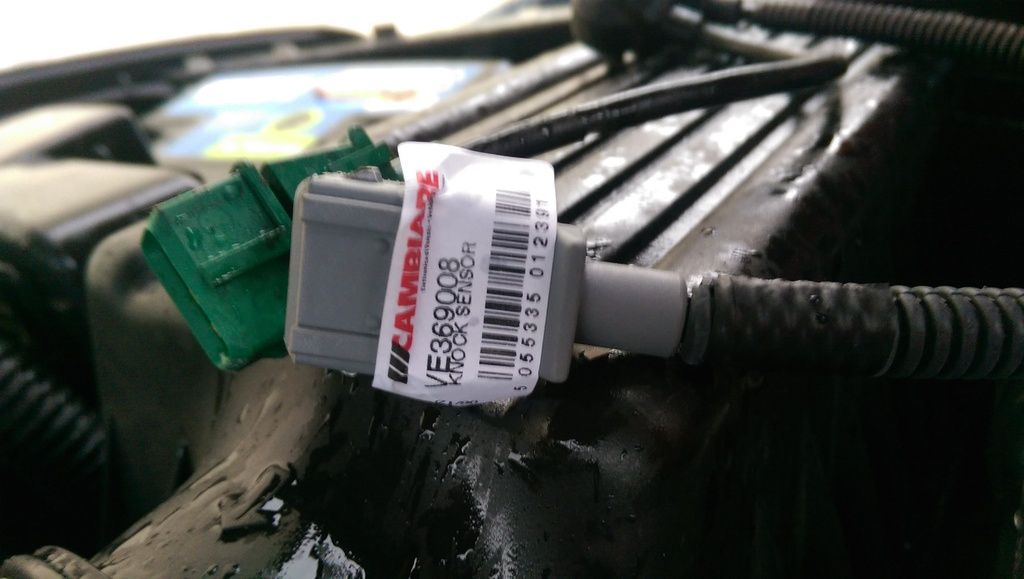
Old sensor (right) and new sensor (left);
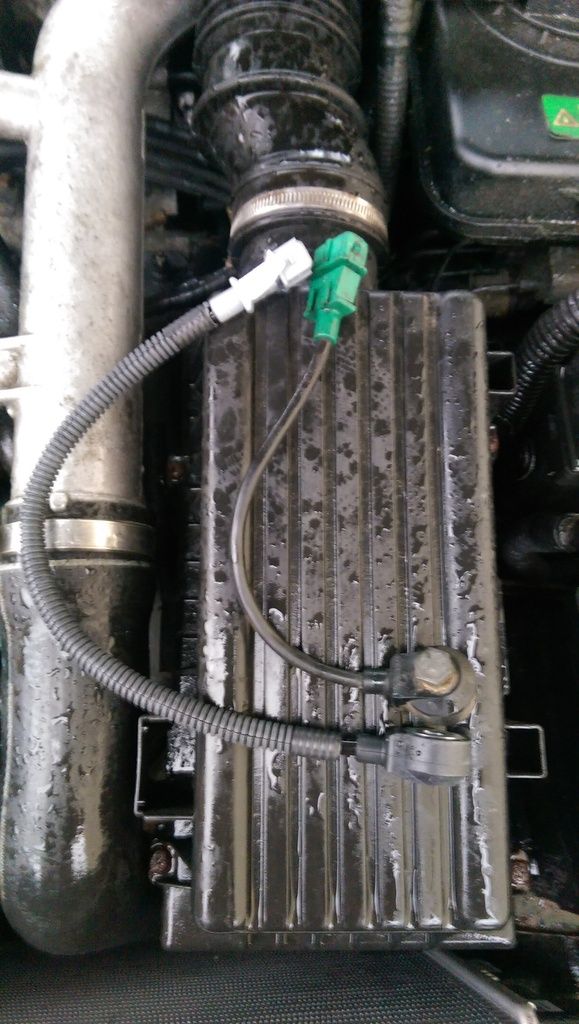
The eagle eyed (not really!) of you will notice that the new sensor has a longer cable on it. That's a paint, because it might prove a bit difficult to lose the extra without it snagging on something, but we'll see...
After market part number;
So, just a few minutes work left and then to fire it up, all fixed and bask in the joy of a smoothly revving engine, right?

Well, having removed the sensor I could see a loom running across the front of the engine, touching the front of the block. Thought it best to check the condition of the back of the loom, in case it had chaffed... Pulled it forward and the conduit had hardly chaffed at all, definitely not a concern, but...
The flexi conduit was absolutely brittle as and crumbled away when touched.


Looks to be the positive lead to the starter and/or alternator, so definitely no-way I could leave it like that! Unfortunately I didn't have any split flexi conduit the right size and the smallest stuff the DIY places open today stock, is 20mm, which is way too big, so that's the for the day.
So glad I stood out in the rain to do that
Never mind, it's another step closer
Access doesn't look too difficult, because it's on the front of the engine and you can get your hands to the sensor and see it without stripping anything down, but getting a tool to it is a bit of a PITA, as it turns out. It's a 13mm bolt.
I eventually settled on moving the HT leads for the middle 2 plugs out of the way and unclipping the injection loom, removing associated clips and moving it to one side, then I could get a small socket set down to it, from behind the fuel rail;
(that's the head of the ratchet in place on the bolt, lit up)
And looking down from the top of the engine, towards the front of the car;
Old sensor (right) and new sensor (left);
The eagle eyed (not really!) of you will notice that the new sensor has a longer cable on it. That's a paint, because it might prove a bit difficult to lose the extra without it snagging on something, but we'll see...
After market part number;
So, just a few minutes work left and then to fire it up, all fixed and bask in the joy of a smoothly revving engine, right?
Well, having removed the sensor I could see a loom running across the front of the engine, touching the front of the block. Thought it best to check the condition of the back of the loom, in case it had chaffed... Pulled it forward and the conduit had hardly chaffed at all, definitely not a concern, but...
The flexi conduit was absolutely brittle as and crumbled away when touched.
Looks to be the positive lead to the starter and/or alternator, so definitely no-way I could leave it like that! Unfortunately I didn't have any split flexi conduit the right size and the smallest stuff the DIY places open today stock, is 20mm, which is way too big, so that's the for the day.
So glad I stood out in the rain to do that
Never mind, it's another step closer
--
Iain.
Iain.
Super Secret 1G (not really super secret!)
-
wurlycorner
- Ye are glad to be dead, RIGHT?
- Posts: 21511
- Joined: Sat May 19, 2012 3:33 pm
- My Generation: 4G
- Location: Chelmsford, Essex
- Has thanked: 2507 times
- Been thanked: 317 times
Re: '96 Xantia Activa - back to drokking thing...
Right, so last weekend, as well as the C5, I also did some stuff on the Xantia.
Unpicked that wire with the knackered copex covering. It was indeed as thought, direct positive feed to the alternator or starter motor... In fact, it was both!
Runs in one length back over the gearbox to the main positive loom;
I got the old copex off and the new copex on, without opening the cable clip sat on top of the box (bound to have broken if I tried).
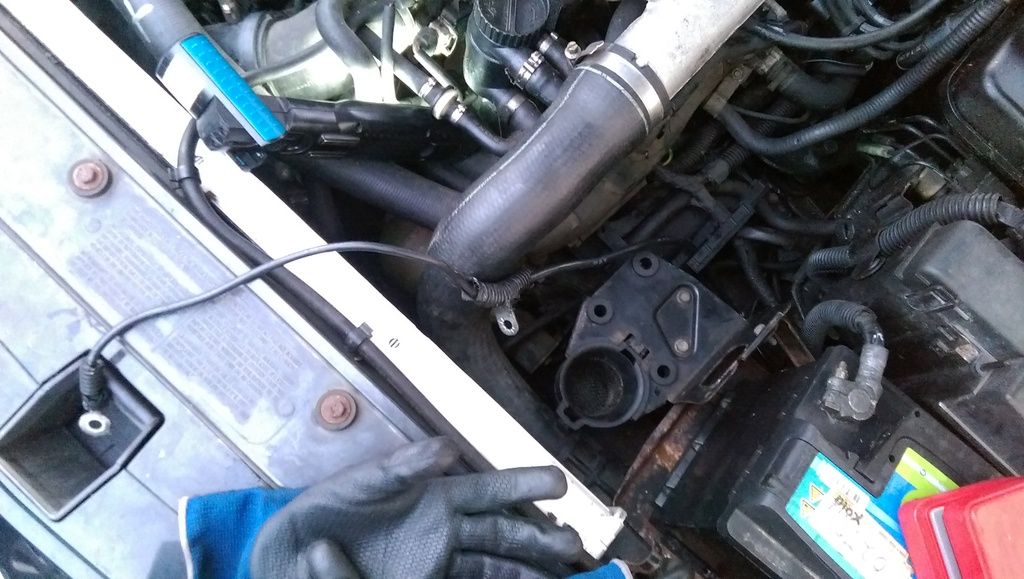
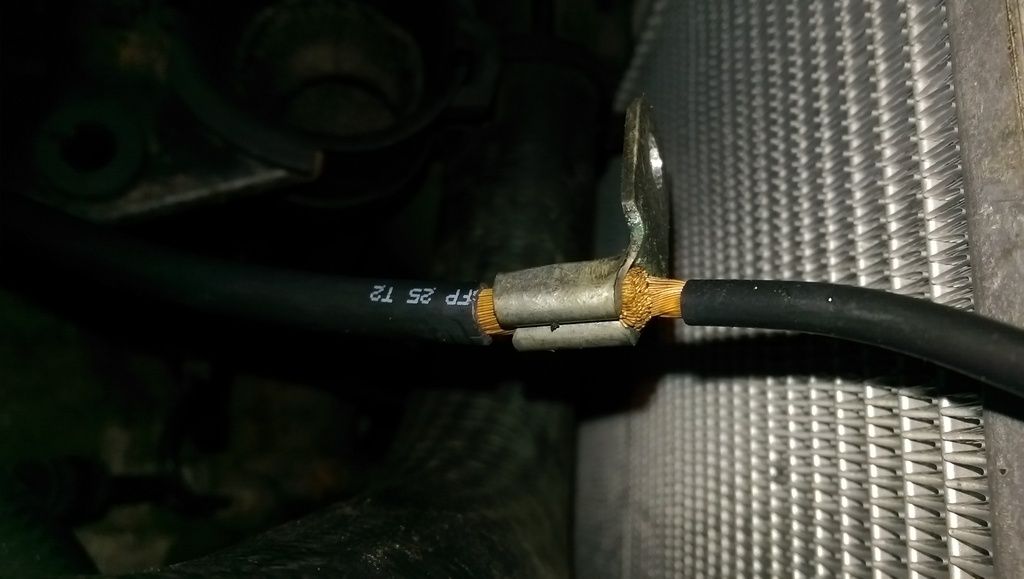
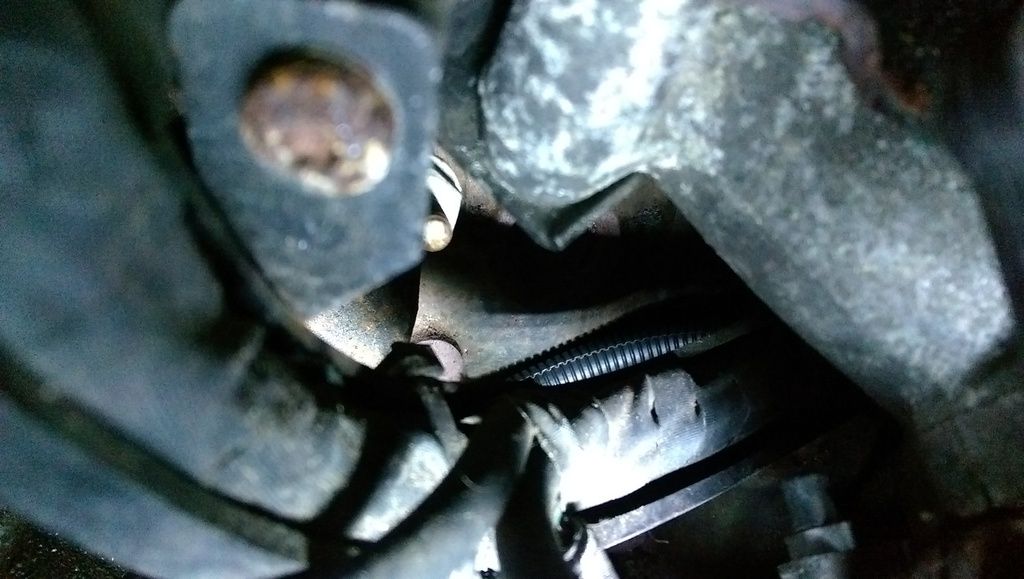
I found another fire waiting to happen on this loom, at the other end - the insulation around the crimp at the alternator had gone brittle and broken up. It was rubbing on the chassis of the alternator (see the small shiny area to the right of the bolt in this pic!) but fortunately still had a piece of insulation in between for now;
Starter motor terminal is a bit of a PITA to get at;
This is the terminal that goes onto it, half way along the loom. Pretty gash IMO tbh, but normal for modern cars

All wrapped up and back in place. Don't you just love these short days, working in the dark...
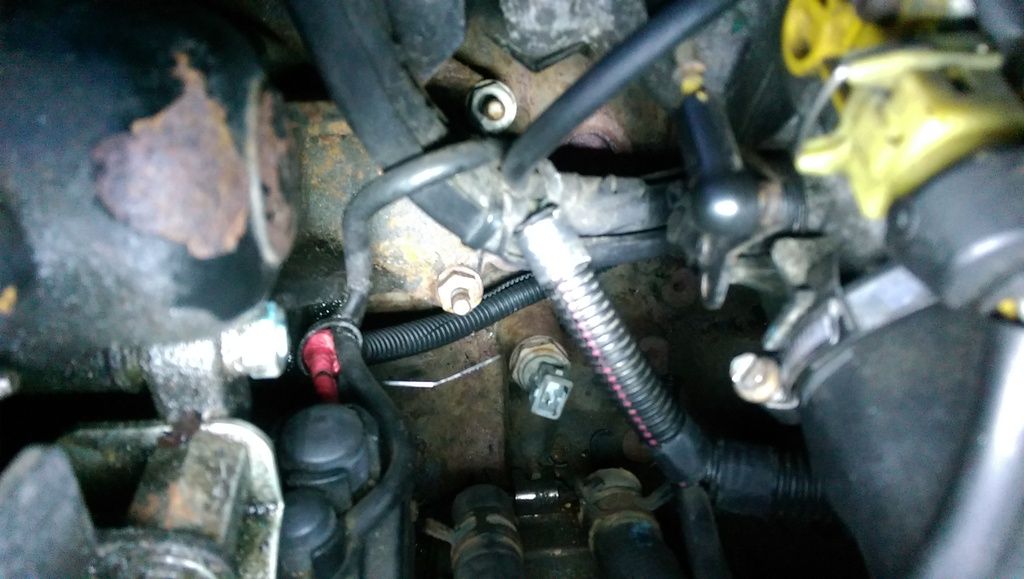
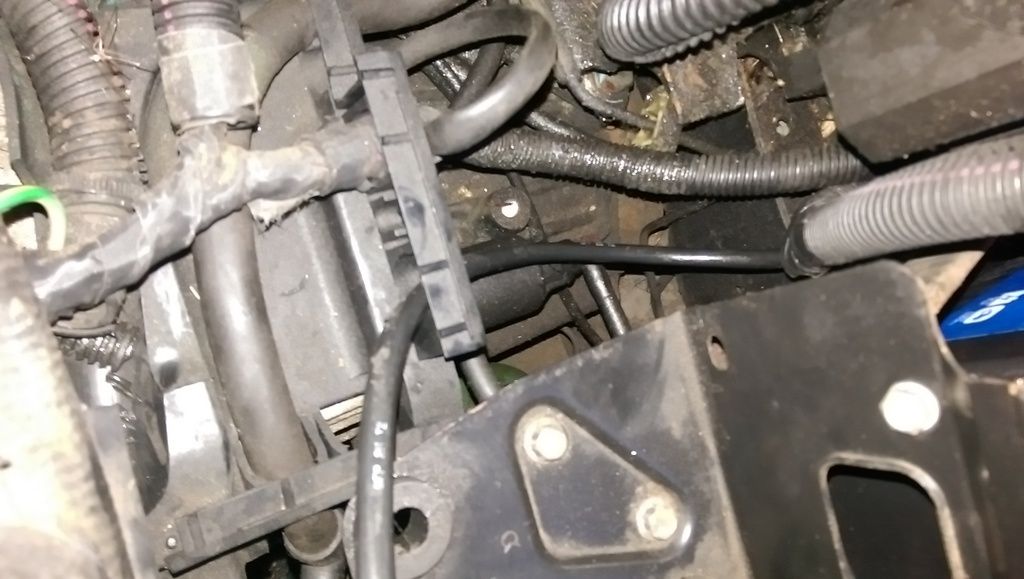
I was able to slip the alternator end crimp terminal out and back through the loom tie there, without having to cut it off;
And a shot of the area that had started it all in the first place - much better now
Finished off re-assembling everything and ran the car up.
Definitely runs better. Still not 100% sure it's right, but the thing hasn't had a proper run to clear it out for about 5 years, so we'll see what happens when that day comes!!!
Annoyingly the new knock sensor plug doesn't have the moulding slots needed to attach it to the loom clip I'll need to find some decent neat way of doing it - just lashing a cable tie round it will annoy me intensely.
So now... Onto another ABS sensor and then finally back to where I was about a year ago, when it just needed a CV joint gaitor and setting up the suspension.
Progress!
Unpicked that wire with the knackered copex covering. It was indeed as thought, direct positive feed to the alternator or starter motor... In fact, it was both!
Runs in one length back over the gearbox to the main positive loom;
I got the old copex off and the new copex on, without opening the cable clip sat on top of the box (bound to have broken if I tried).
I found another fire waiting to happen on this loom, at the other end - the insulation around the crimp at the alternator had gone brittle and broken up. It was rubbing on the chassis of the alternator (see the small shiny area to the right of the bolt in this pic!) but fortunately still had a piece of insulation in between for now;
Starter motor terminal is a bit of a PITA to get at;
This is the terminal that goes onto it, half way along the loom. Pretty gash IMO tbh, but normal for modern cars
All wrapped up and back in place. Don't you just love these short days, working in the dark...
I was able to slip the alternator end crimp terminal out and back through the loom tie there, without having to cut it off;
And a shot of the area that had started it all in the first place - much better now
Finished off re-assembling everything and ran the car up.
Definitely runs better. Still not 100% sure it's right, but the thing hasn't had a proper run to clear it out for about 5 years, so we'll see what happens when that day comes!!!
Annoyingly the new knock sensor plug doesn't have the moulding slots needed to attach it to the loom clip
So now... Onto another ABS sensor and then finally back to where I was about a year ago, when it just needed a CV joint gaitor and setting up the suspension.
Progress!
--
Iain.
Iain.
Super Secret 1G (not really super secret!)