
Congratulations to vtecmec for winning May/June's Lude Of The Month, with his DIY Turbo BB1 build.
>>> Click Here For Profile <<<

>>> Click Here For Profile <<<
Confused's Long-Term Anglia Project
-
Confused

- Posts: 749
- Joined: Fri Jan 27, 2012 11:44 am
- My Generation: 4G
- Location: Notts / Essex
- Has thanked: 3 times
- Been thanked: 11 times
- Contact:
Re: Confused's Long-Term Anglia Project
If it's at the national meet, I imagine I'll be giving a few passenger rides 

-
Confused
- Posts: 749
- Joined: Fri Jan 27, 2012 11:44 am
- My Generation: 4G
- Location: Notts / Essex
- Has thanked: 3 times
- Been thanked: 11 times
- Contact:
Securing stuff
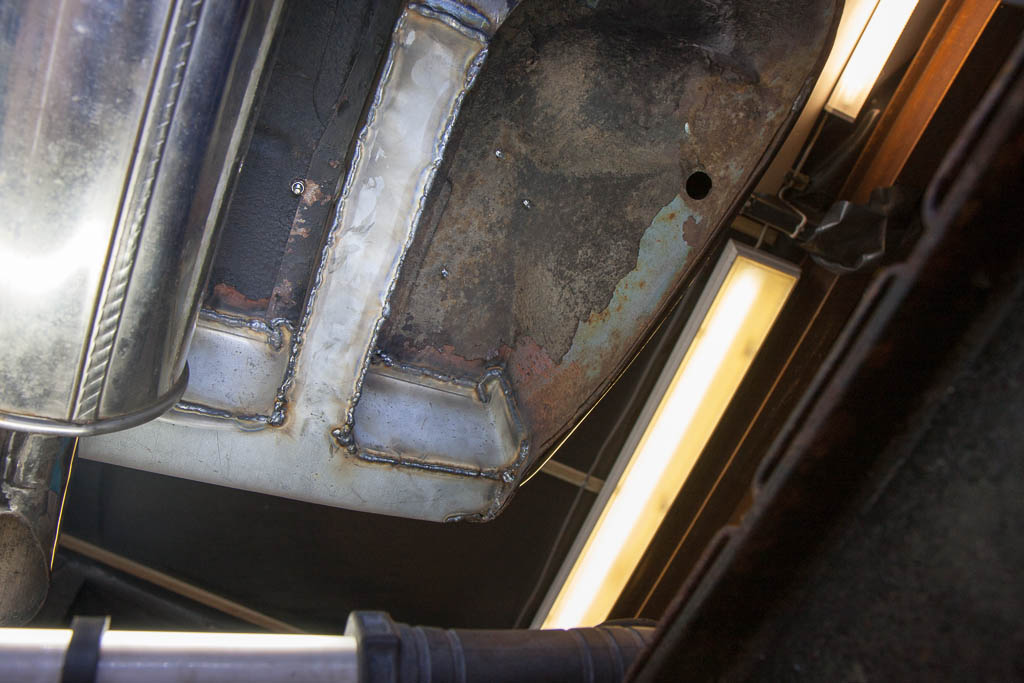
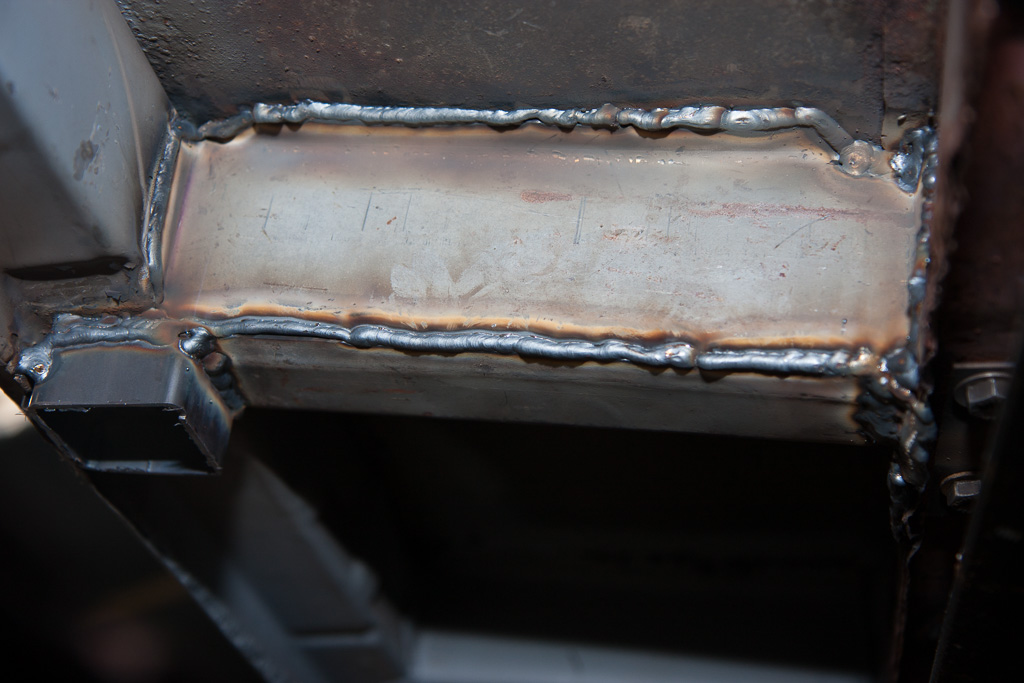
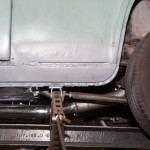
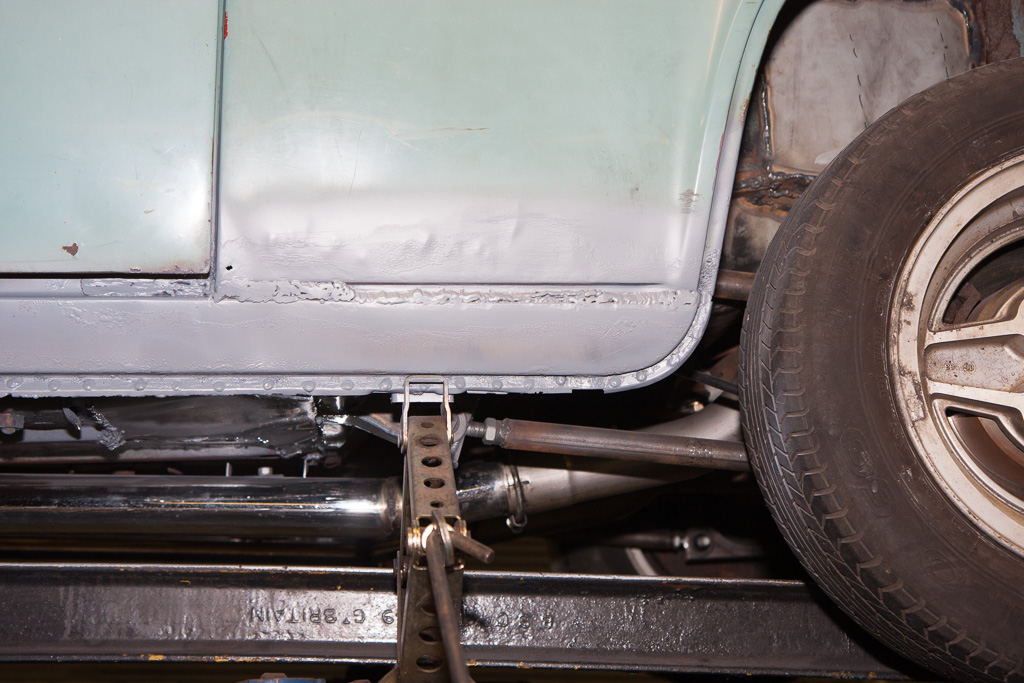
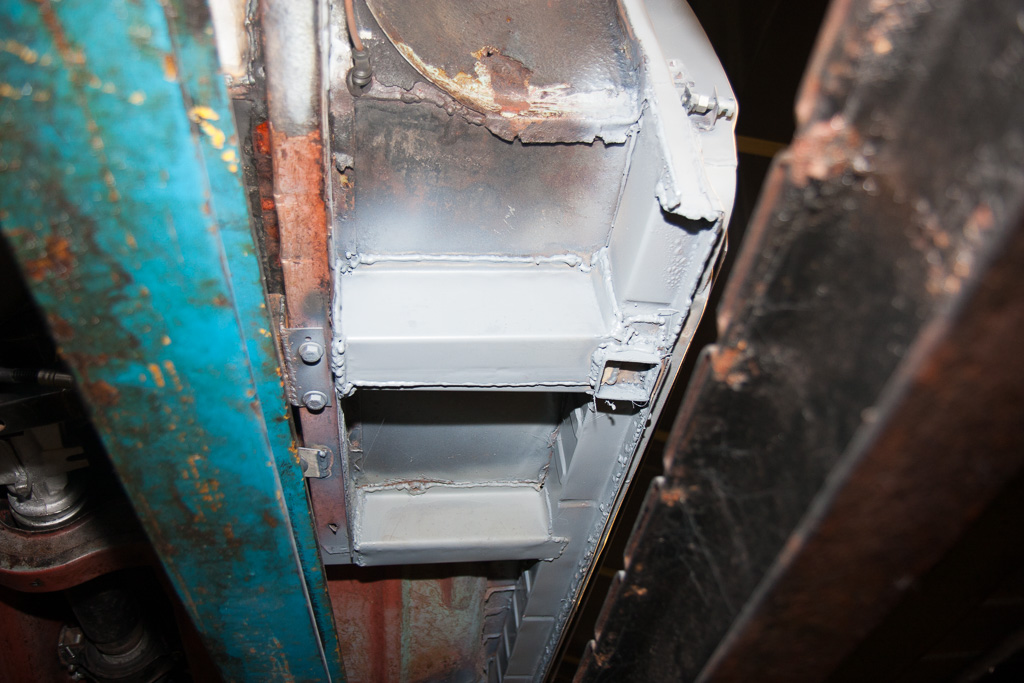
First task was to remove the final bit of the chassis where it had started to go rotten - the rear cross member.
This involved cutting out the existing metal, and we decided to graft in a 50x50x3mm box section - which will be way stronger than the original box section. I may well add a jacking point/towing eye to this in the future. This was grafted onto the existing chassis legs (which are no longer load bearing due to the changes in suspension), and brought round to meet up with the original rear panel.


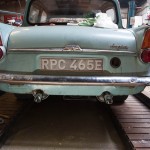
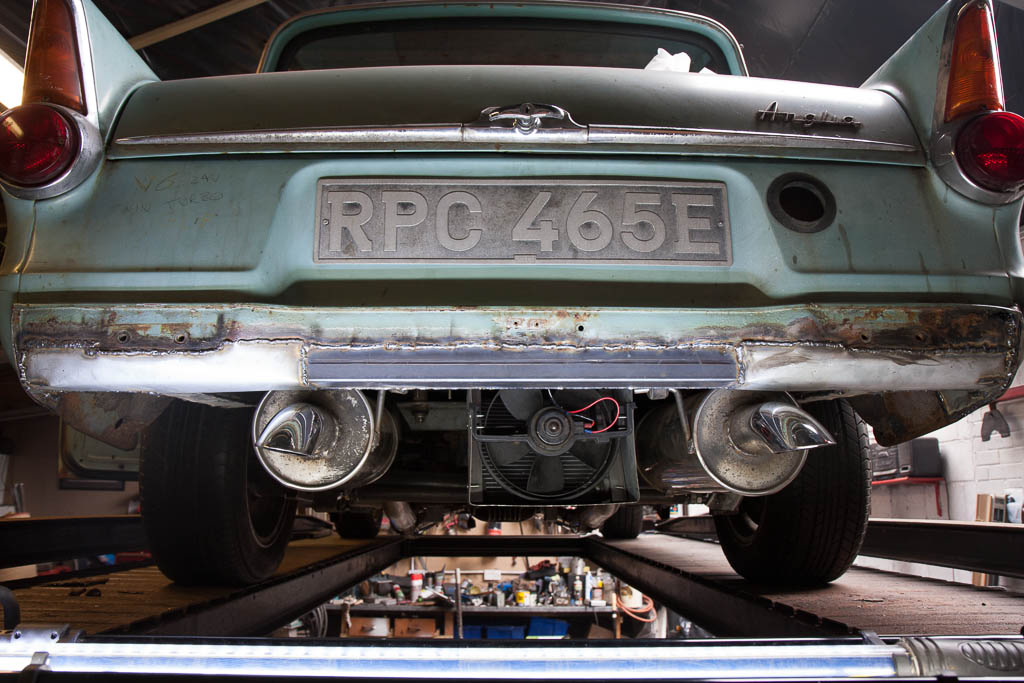
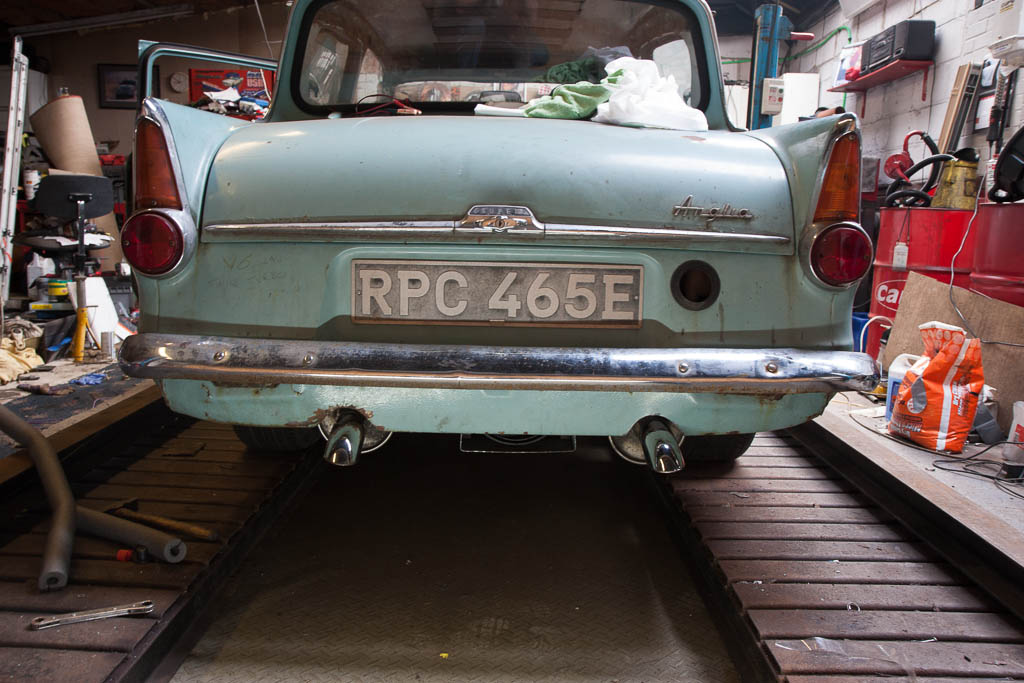
With the rear valance back in place - no visual differences from the rear.
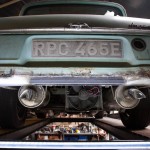
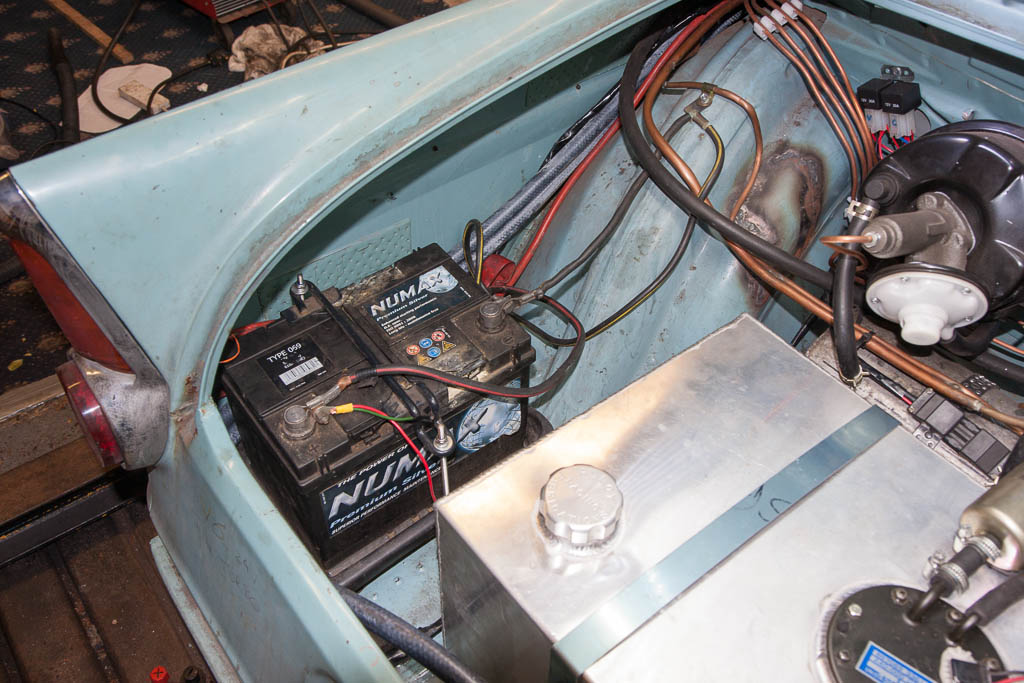
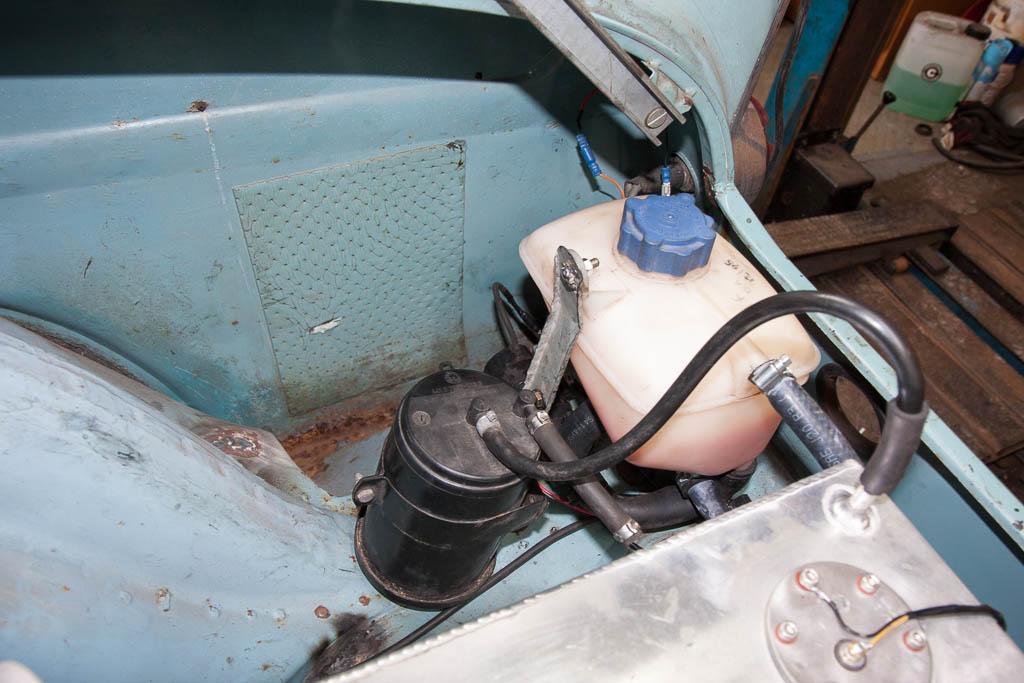
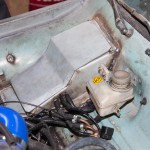
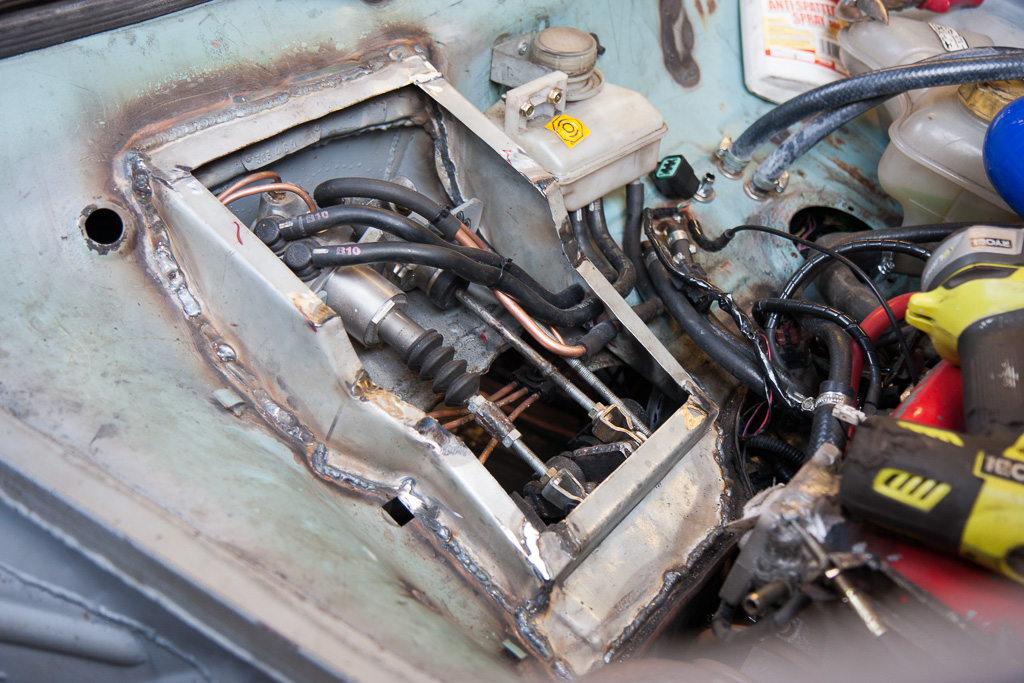
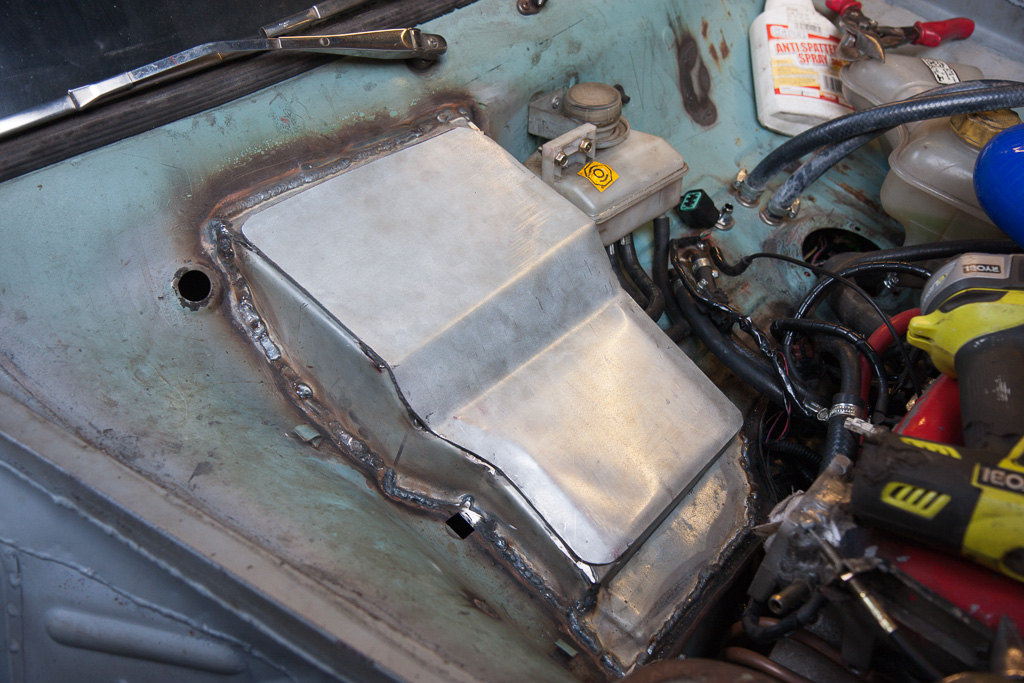
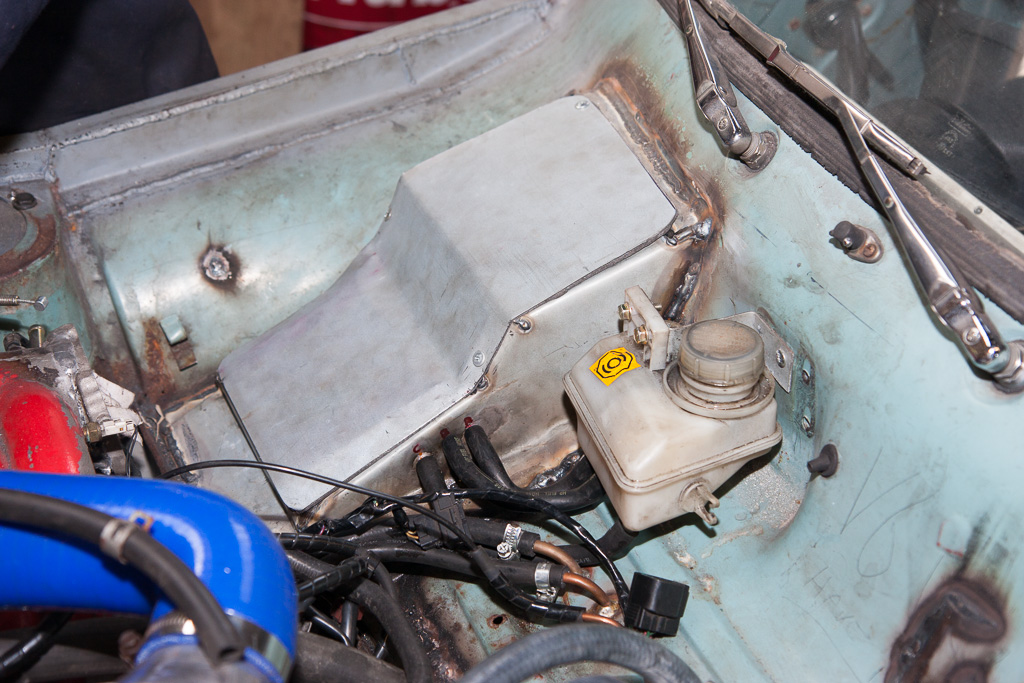
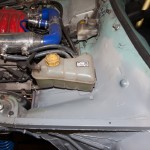
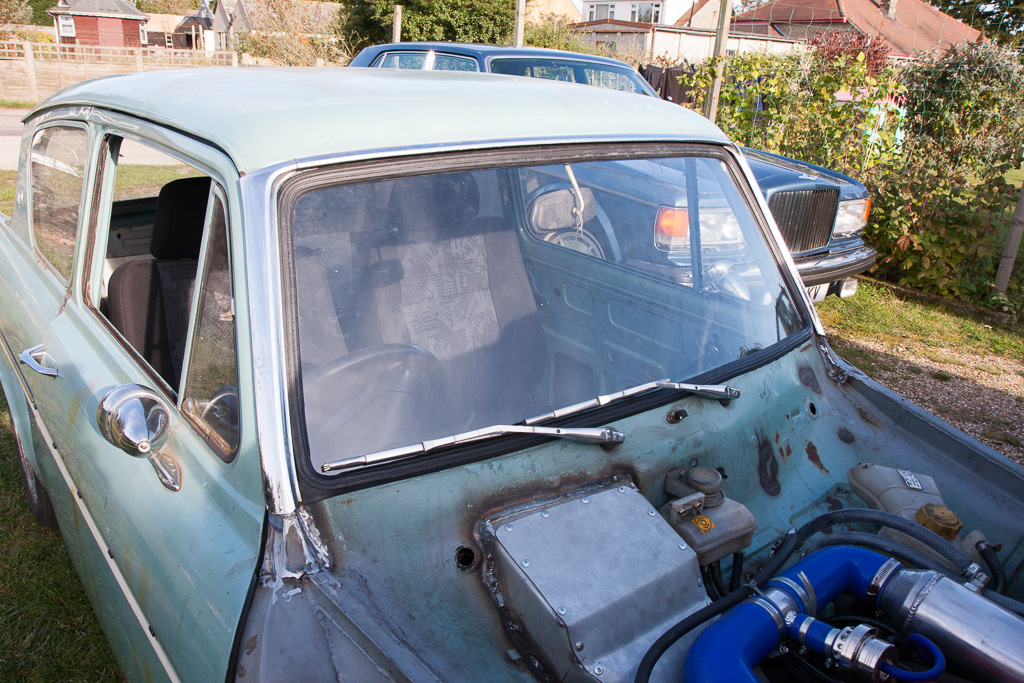
Moving forwards, the items that live in the boot are secured down - the battery is tied down, the straps for the fuel tank are secured to the floor, the vacuum tank for the servos is secured (you can just see a shiny strap in the first photo) and the charge cooler pump/reservoir are secured, as is the charcoal canister which prevents petrol fumes from being smelt via the tank breather.
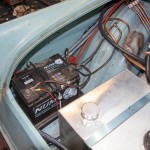
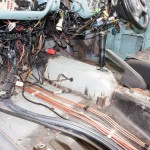
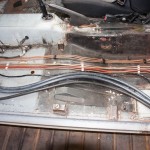
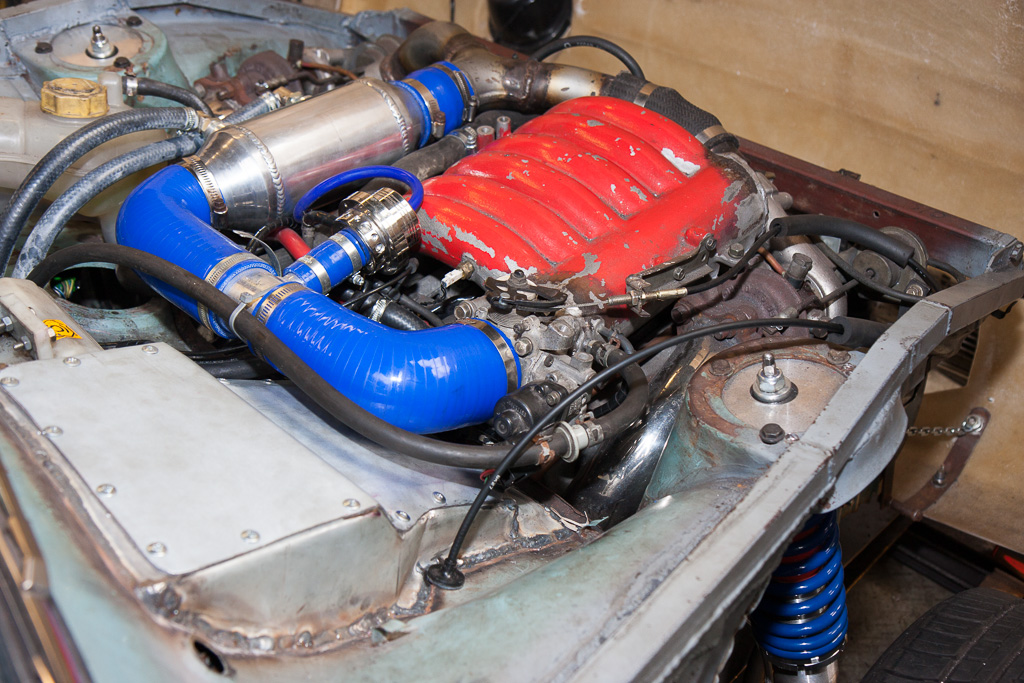
Moving forward again, and into the car this time. A new transmission tunnel top was fabricated and welded into place, to cover the 200SX gearbox. Additionally, all the fuel and brake pipes, as well as the main battery cable which run through the car were secured into place. The chargecooler pipes and vacuum pipe for the vacuum tank still need to be secured in their final positions once I get some suitable clips of the correct size for them.
This involved cutting out the existing metal, and we decided to graft in a 50x50x3mm box section - which will be way stronger than the original box section. I may well add a jacking point/towing eye to this in the future. This was grafted onto the existing chassis legs (which are no longer load bearing due to the changes in suspension), and brought round to meet up with the original rear panel.
With the rear valance back in place - no visual differences from the rear.
Moving forwards, the items that live in the boot are secured down - the battery is tied down, the straps for the fuel tank are secured to the floor, the vacuum tank for the servos is secured (you can just see a shiny strap in the first photo) and the charge cooler pump/reservoir are secured, as is the charcoal canister which prevents petrol fumes from being smelt via the tank breather.
Moving forward again, and into the car this time. A new transmission tunnel top was fabricated and welded into place, to cover the 200SX gearbox. Additionally, all the fuel and brake pipes, as well as the main battery cable which run through the car were secured into place. The chargecooler pipes and vacuum pipe for the vacuum tank still need to be secured in their final positions once I get some suitable clips of the correct size for them.
-
Confused
- Posts: 749
- Joined: Fri Jan 27, 2012 11:44 am
- My Generation: 4G
- Location: Notts / Essex
- Has thanked: 3 times
- Been thanked: 11 times
- Contact:
Ace Update
So, I've concluded that I suck at taking photos and keeping this updated!
I've had a couple of trips to my dad's since the last update, and have failed to take any photos!
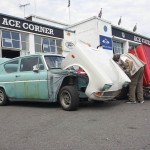
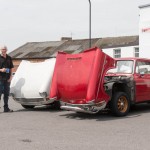
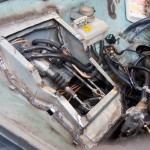
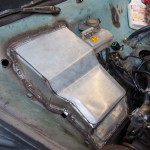
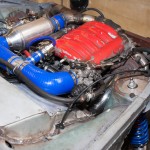
The first trip involved removing the engine/gearbox, and sorting out a couple of small oil leaks, which came from the lack of gaskets on the turbo oil return pipes. Whilst the engine was out, a new sump pan was also fitted, to replace the corroded one that was on there.
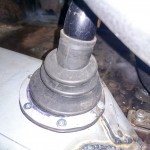
A little more tidying was done of fuel/vacuum pipes coming through the bulkhead, these now are plugged in on either side of the bulkhead to a small length of copper pipe which is soldered to the bulkhead. Quick to remove the pipes from inside or outside, and a water-tight way to get through the bulkhead.
Also, whilst the engine was out, the area we had cut away from the bulkhead to facilitate the water manifold and radiator hoses was looked at and mostly replaced, and we now have just a small removable panel to make and fit.
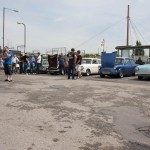
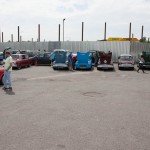
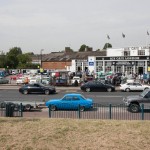
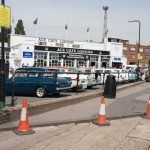
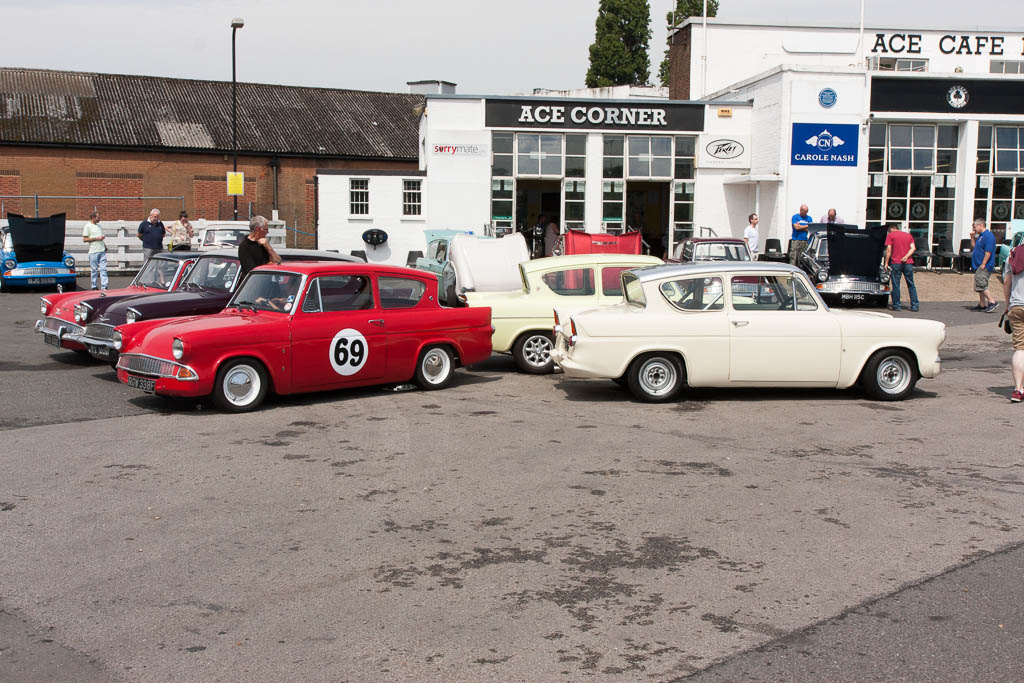
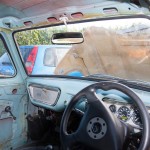
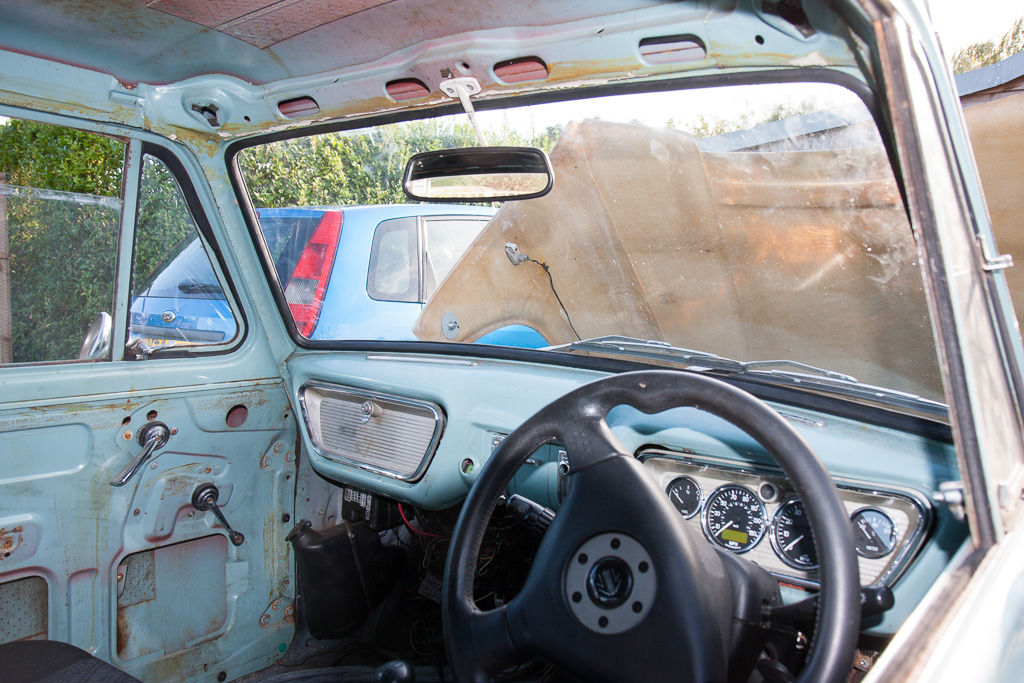
The second trip was more eventful, as we decided to take a day off from working on the car, to go and show it off at the annual Anglias At The Ace meet, organised by 105speed. The Friday evening was spent tidying up to make it somewhat "presentable" - it had a wipe down with a damp sponge and dried off with a towel, the passenger seat was re-fitted, the remaining cables under the dash were tidied with a few cable ties, and I even screwed in the glove box lid and ashtray/heater control panel!
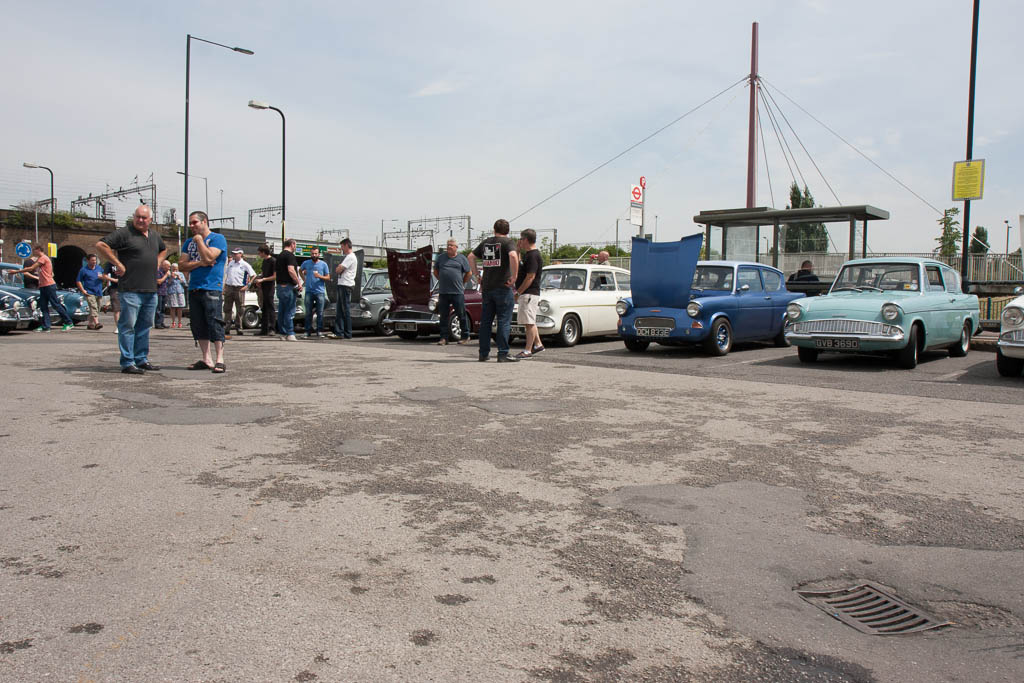
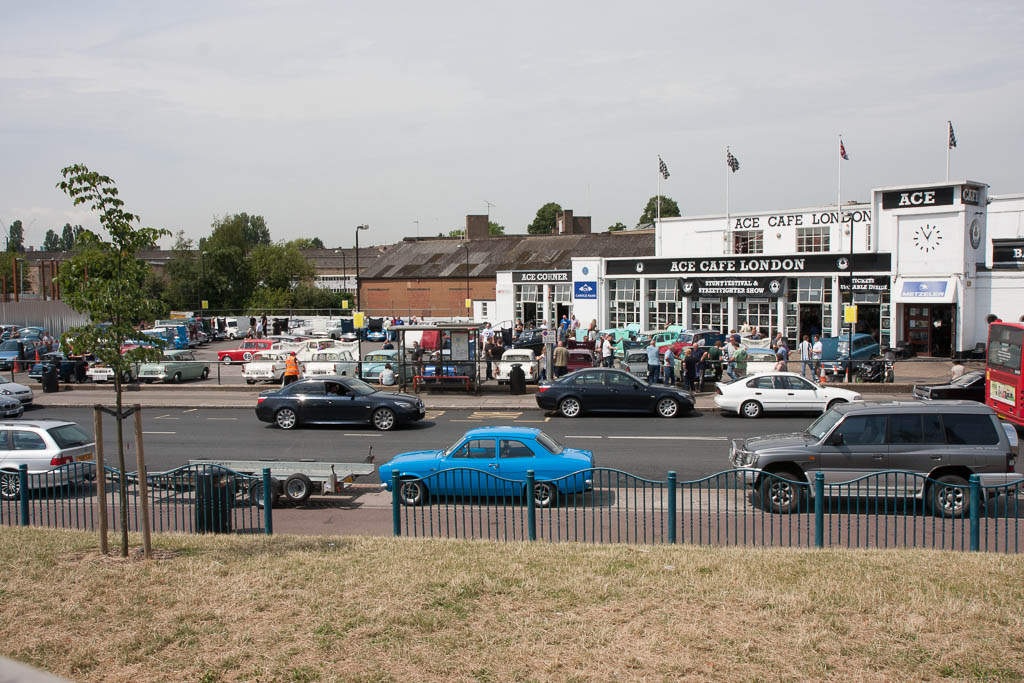
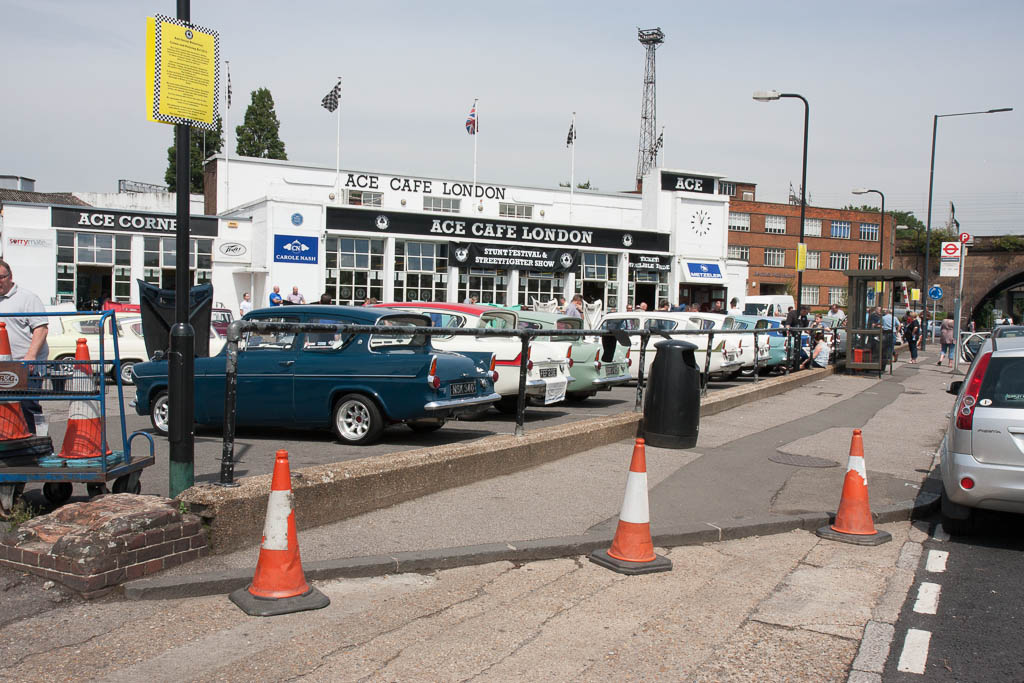
Saturday morning, we loaded up onto the trailer, and headed off for the Ace Cafe, my dad towing my Anglia, and me driving his, and arrived to a mostly empty car park, being about the 8th Anglia to arrive. We unloaded the trailer, and parked up, and awaited the rest of the arrivals.
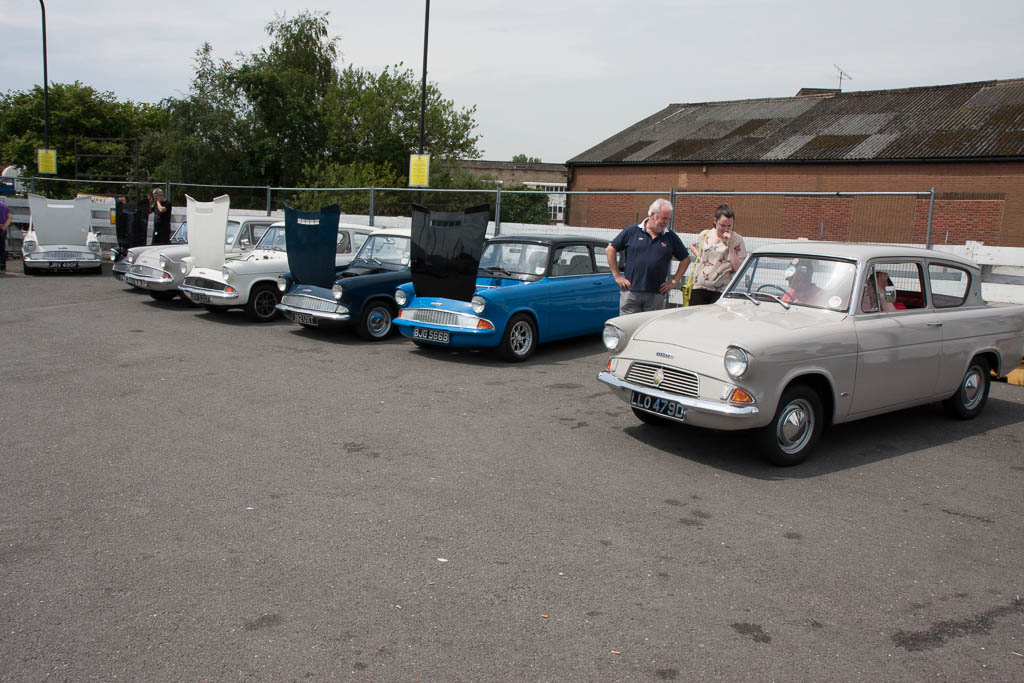
The day didn't disappoint, with 54 Anglias all together, and I had a great opportunity to speak to many people about the car.


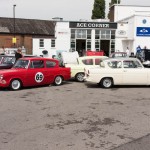
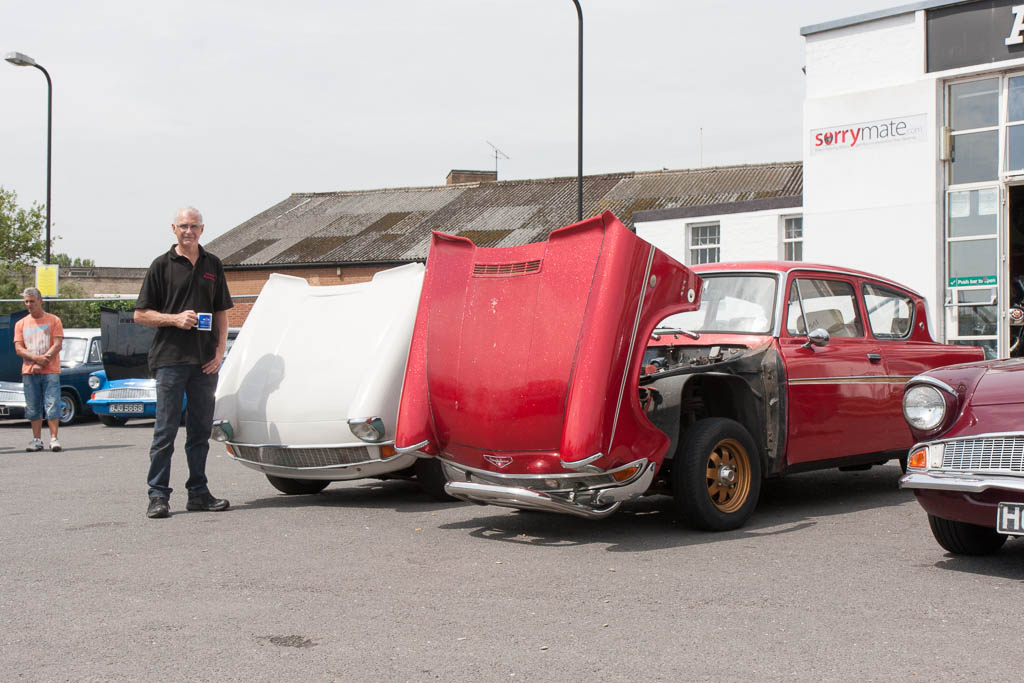
And our two cars, including my dad posing with his cup of coffee!
On our way back, we had a radiator blow out on the Shogun, which left us stranded at the side of the A406 for over 8 hours awaiting a truck to be provided that could recover the Shogun + trailer back home! So, that was quite a bad end to an otherwise great day!
I hope that normal service will resume next update, and I'll try to take some more photos!
I've had a couple of trips to my dad's since the last update, and have failed to take any photos!
The first trip involved removing the engine/gearbox, and sorting out a couple of small oil leaks, which came from the lack of gaskets on the turbo oil return pipes. Whilst the engine was out, a new sump pan was also fitted, to replace the corroded one that was on there.
A little more tidying was done of fuel/vacuum pipes coming through the bulkhead, these now are plugged in on either side of the bulkhead to a small length of copper pipe which is soldered to the bulkhead. Quick to remove the pipes from inside or outside, and a water-tight way to get through the bulkhead.
Also, whilst the engine was out, the area we had cut away from the bulkhead to facilitate the water manifold and radiator hoses was looked at and mostly replaced, and we now have just a small removable panel to make and fit.
The second trip was more eventful, as we decided to take a day off from working on the car, to go and show it off at the annual Anglias At The Ace meet, organised by 105speed. The Friday evening was spent tidying up to make it somewhat "presentable" - it had a wipe down with a damp sponge and dried off with a towel, the passenger seat was re-fitted, the remaining cables under the dash were tidied with a few cable ties, and I even screwed in the glove box lid and ashtray/heater control panel!
Saturday morning, we loaded up onto the trailer, and headed off for the Ace Cafe, my dad towing my Anglia, and me driving his, and arrived to a mostly empty car park, being about the 8th Anglia to arrive. We unloaded the trailer, and parked up, and awaited the rest of the arrivals.
The day didn't disappoint, with 54 Anglias all together, and I had a great opportunity to speak to many people about the car.


And our two cars, including my dad posing with his cup of coffee!

On our way back, we had a radiator blow out on the Shogun, which left us stranded at the side of the A406 for over 8 hours awaiting a truck to be provided that could recover the Shogun + trailer back home! So, that was quite a bad end to an otherwise great day!
I hope that normal service will resume next update, and I'll try to take some more photos!
-
honda-hardy

- Club Cartographer
- Posts: 6268
- Joined: Sat Jan 28, 2012 7:35 pm
- My Generation: 5G
- Location: chippenham
- Been thanked: 1 time

-
Confused
- Posts: 749
- Joined: Fri Jan 27, 2012 11:44 am
- My Generation: 4G
- Location: Notts / Essex
- Has thanked: 3 times
- Been thanked: 11 times
- Contact:
Brakes, Suspension & Steering
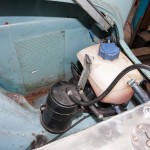
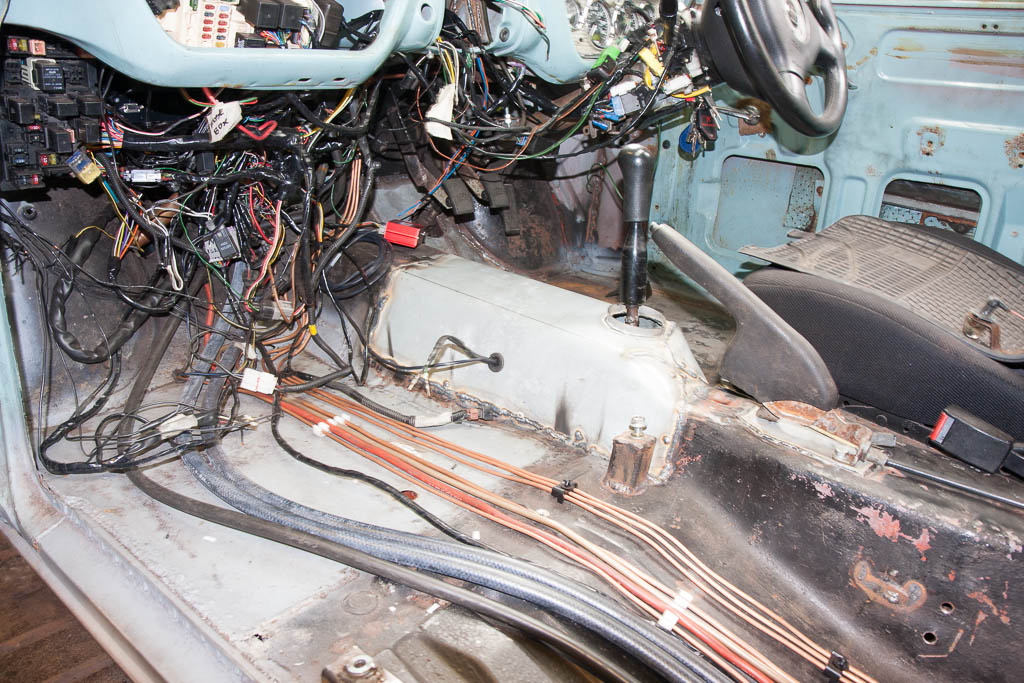
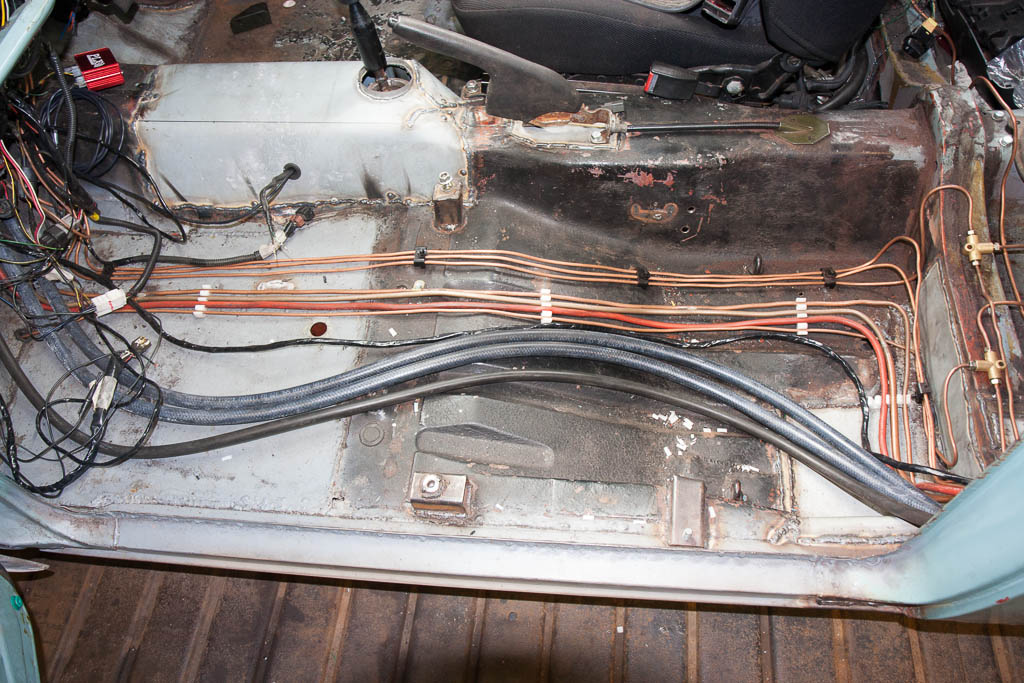
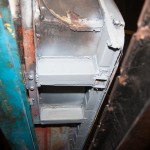
The first task tackled this time was to cover the pedals & master cylinders, to both make it water-tight, as well as add some strength back to the bulkhead where a little metal had been removed.
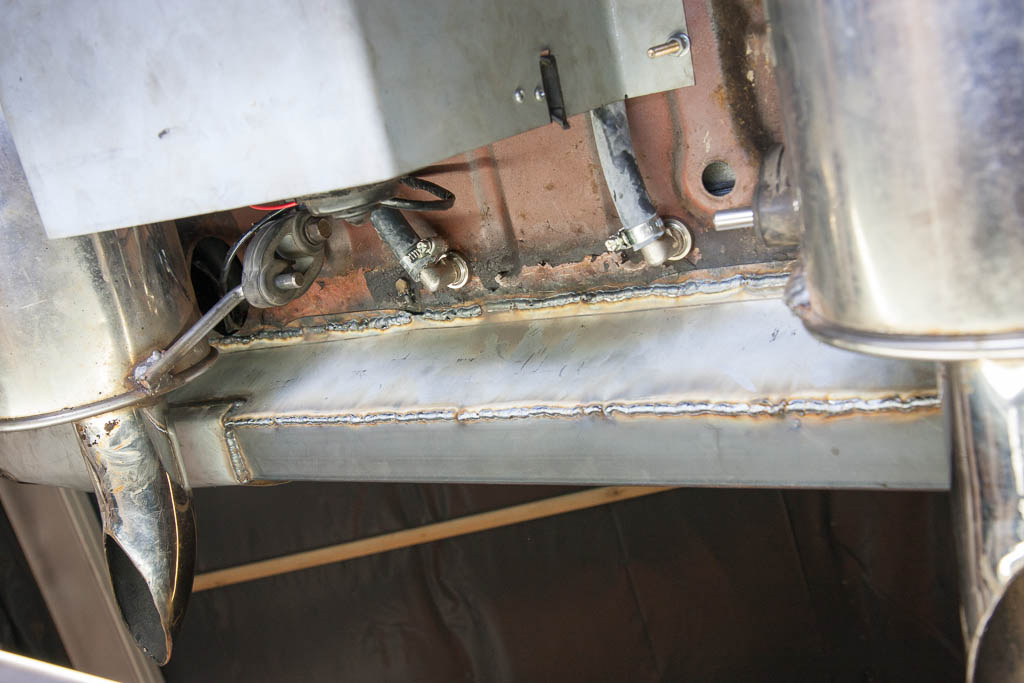
Therefore, a box was made up, with a removable lid to aid access, which covers this area. The clutch pipe was also re-routed inside the car, along with the brake pipes, moving it from its previous route which went down the bulkhead right next to the exhaust.
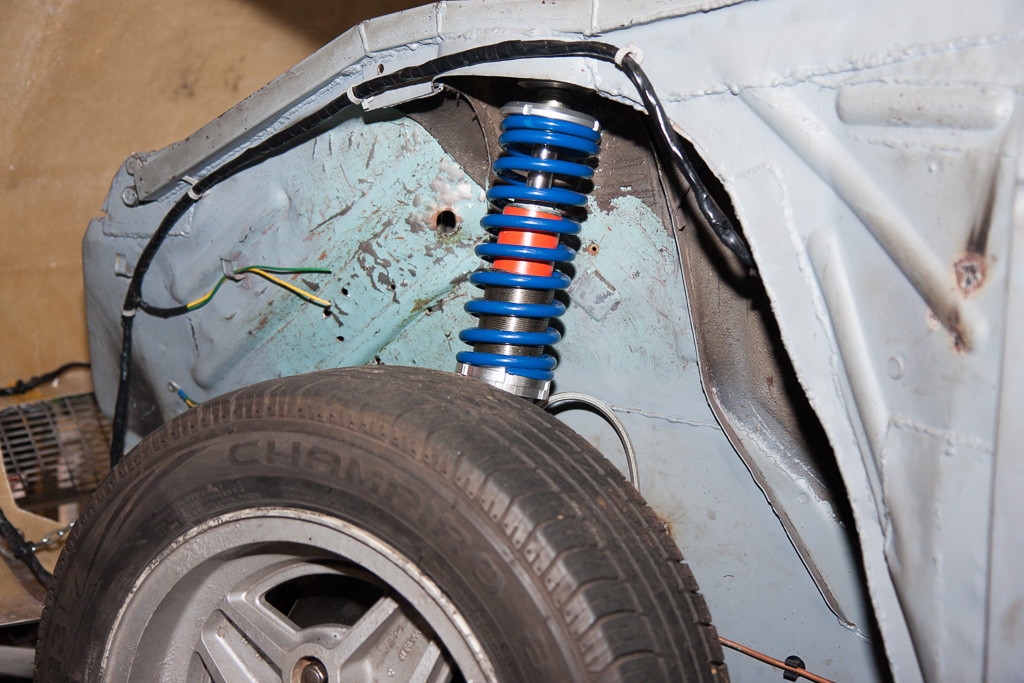
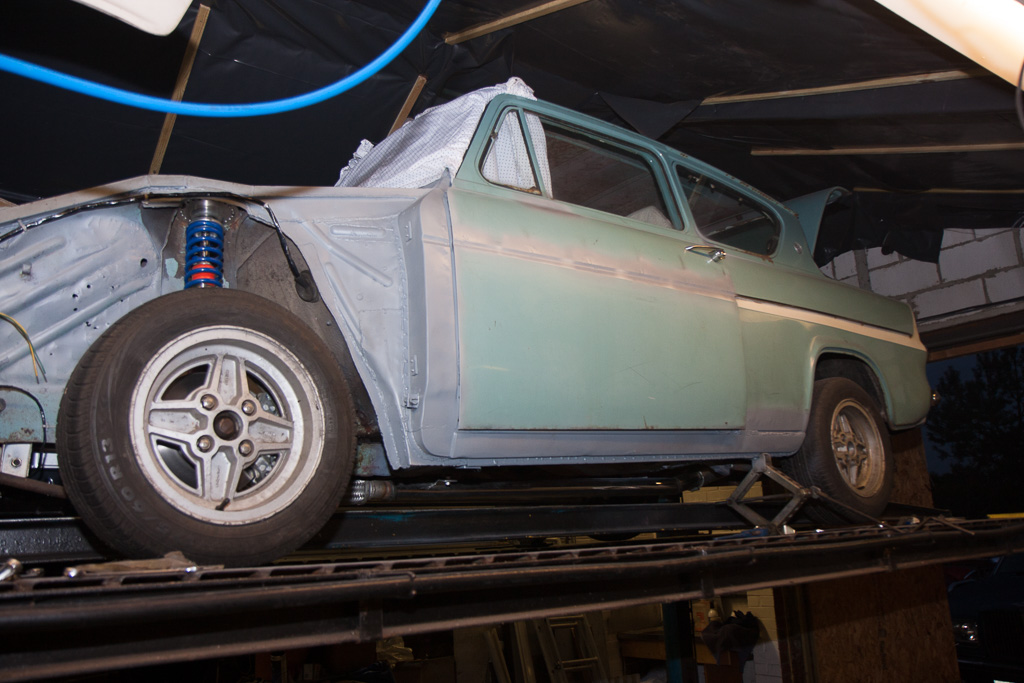
Next up was to fit a new set of front shocks & springs, which are now fully adjustable for ride height and damping rate.
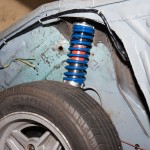
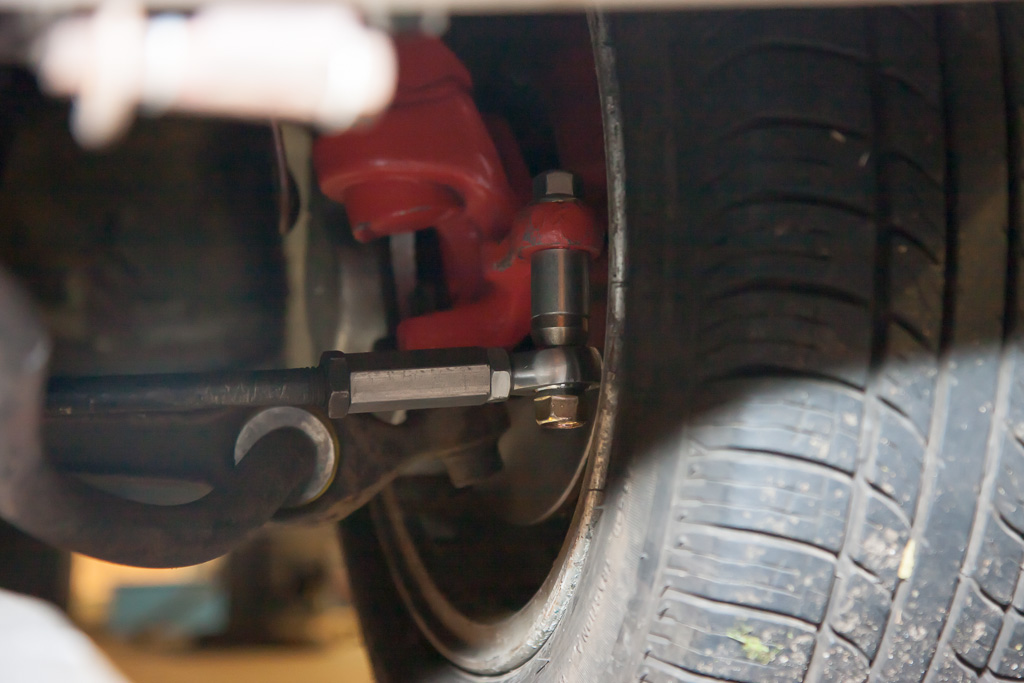
When lowering the steering rack to allow the engine to fit in place, the steering geometry was modified from standard, by lowering the rack, "bump steer" was introduced - this is where the wheel as it moves up/down, also rotates as though it is being steered.
In order to overcome the bump steer that was introduced by the need to move the steering rack, it was necessary to move the mounting of the track rod end downwards, to match the downwards move of the steering rack.
This is accomplished by use of a long high tensile suspension bolt, suitable spacers, a rose joint and a length of hexagonal bar, with the correct threads tapped.

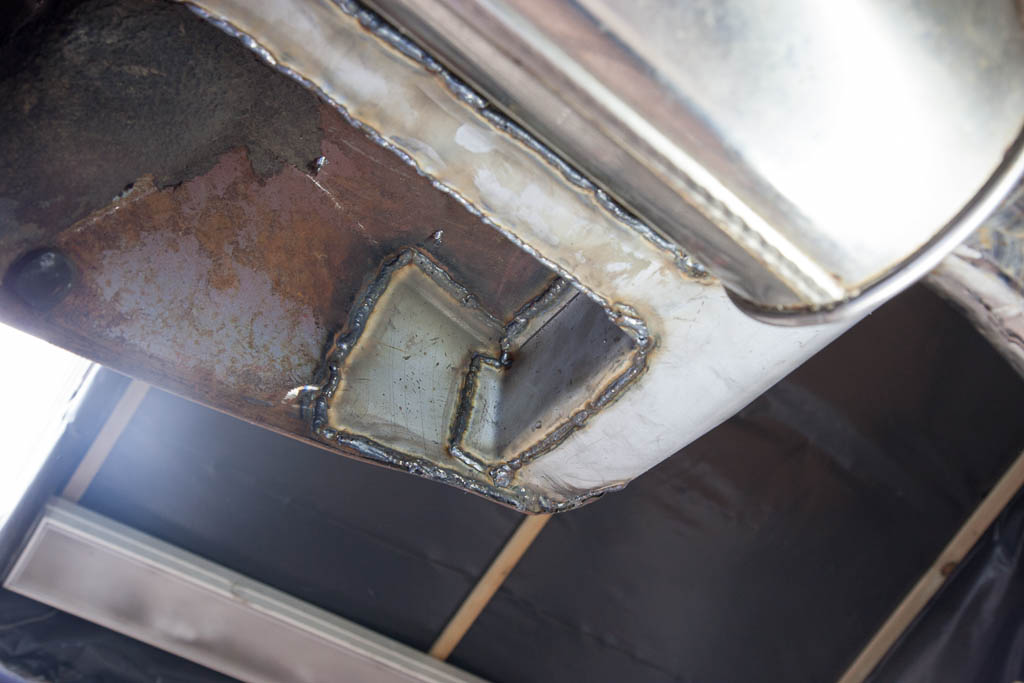
Moving underneath the car, the remaining chassis outrigger/jacking point was replaced - not with capabilities for the standard jack, but instead utilising some box section, which will give a perfect location for a more commonly available scissor jack, like is found with more modern cars.
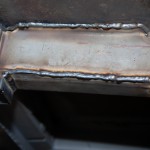
Additionally, the rear end of the driver's side sills were finished, which mostly concludes the remaining structural welding that was required underneath.
Therefore, a box was made up, with a removable lid to aid access, which covers this area. The clutch pipe was also re-routed inside the car, along with the brake pipes, moving it from its previous route which went down the bulkhead right next to the exhaust.
Next up was to fit a new set of front shocks & springs, which are now fully adjustable for ride height and damping rate.
When lowering the steering rack to allow the engine to fit in place, the steering geometry was modified from standard, by lowering the rack, "bump steer" was introduced - this is where the wheel as it moves up/down, also rotates as though it is being steered.
In order to overcome the bump steer that was introduced by the need to move the steering rack, it was necessary to move the mounting of the track rod end downwards, to match the downwards move of the steering rack.
This is accomplished by use of a long high tensile suspension bolt, suitable spacers, a rose joint and a length of hexagonal bar, with the correct threads tapped.
Moving underneath the car, the remaining chassis outrigger/jacking point was replaced - not with capabilities for the standard jack, but instead utilising some box section, which will give a perfect location for a more commonly available scissor jack, like is found with more modern cars.
Additionally, the rear end of the driver's side sills were finished, which mostly concludes the remaining structural welding that was required underneath.
-
Confused
- Posts: 749
- Joined: Fri Jan 27, 2012 11:44 am
- My Generation: 4G
- Location: Notts / Essex
- Has thanked: 3 times
- Been thanked: 11 times
- Contact:
Great news everyone!
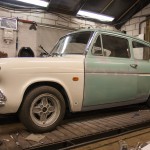
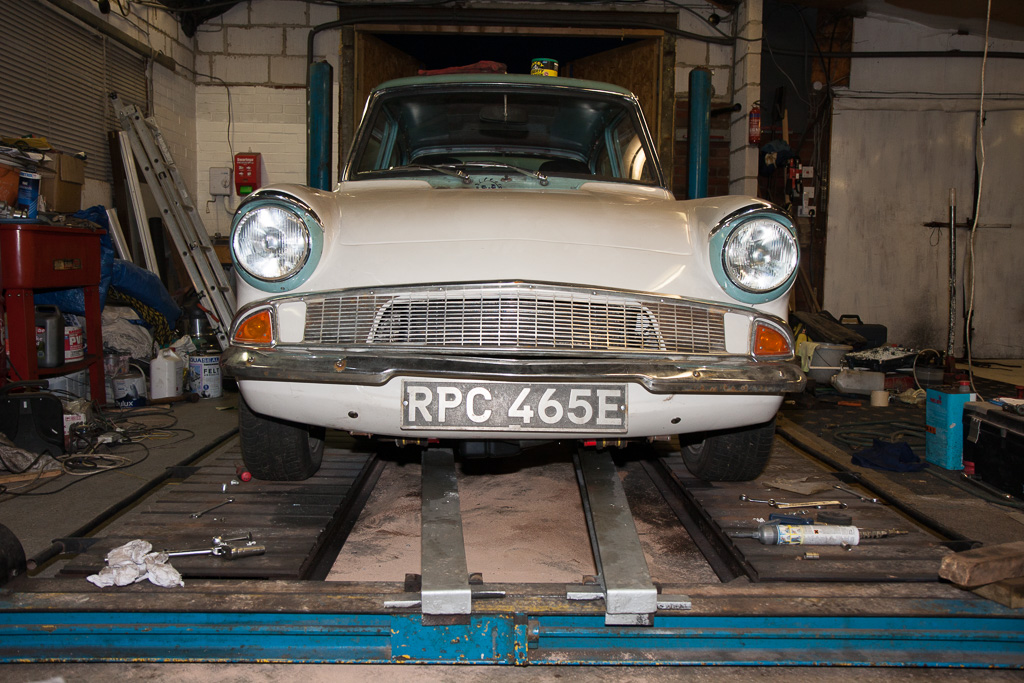
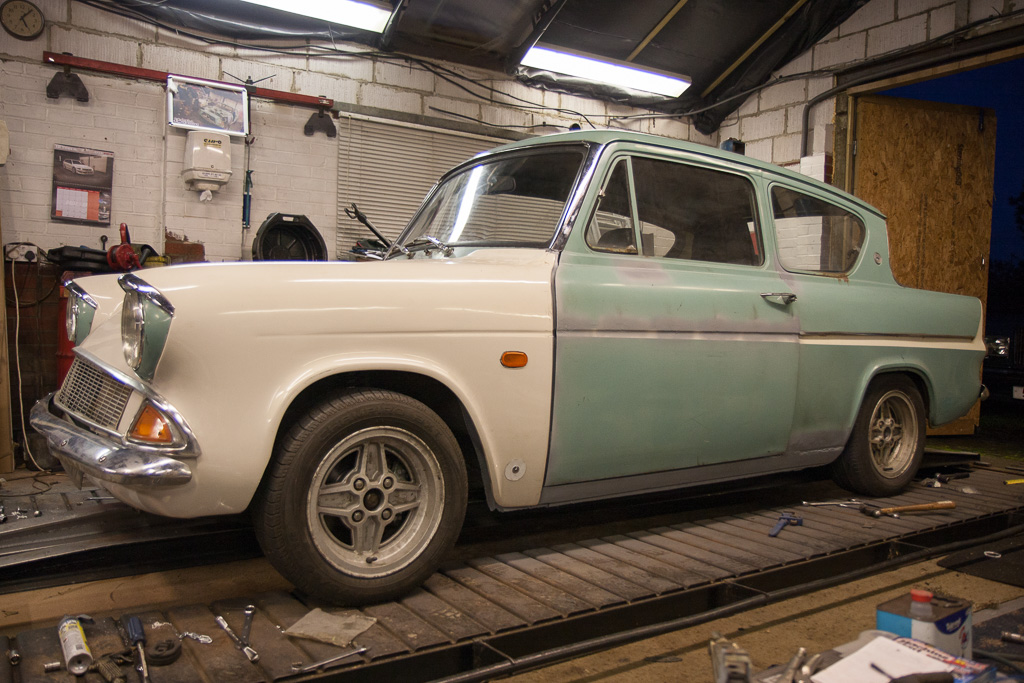
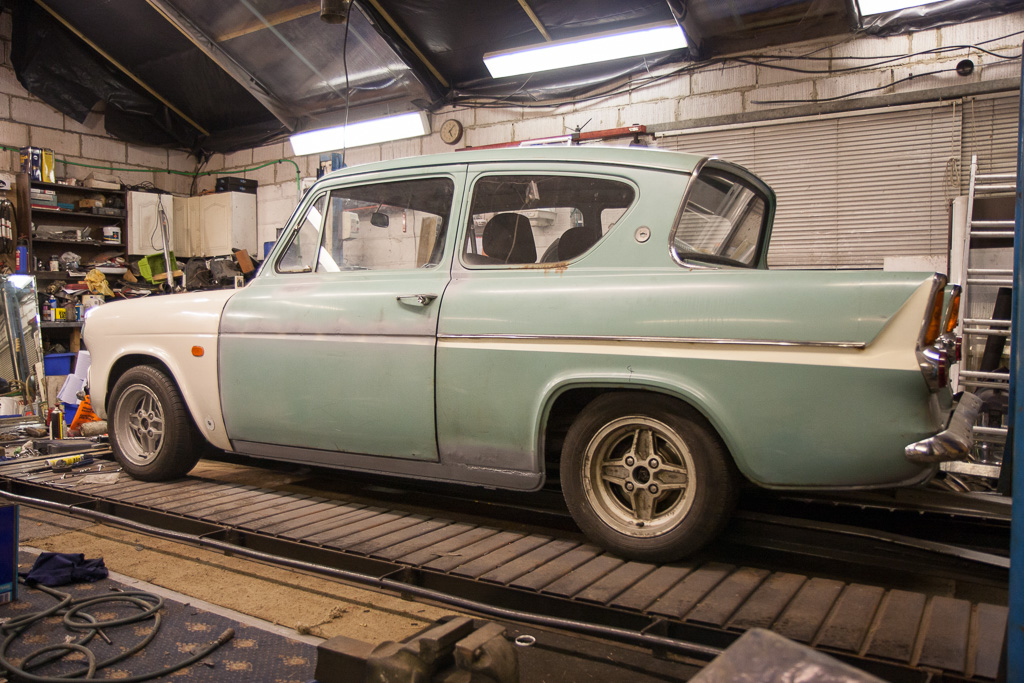
Great news everyone! The Dacia Sandero won't be on the Ford Anglia 105E Owners Club stand in hall 18 at the Lancaster Insurance Classic Motor Show at the NEC on 14-16th November!
But, my car will be!!
A few weeks ago I took a call from the club's events organisers, looking for a modified vehicle to show off on the stand, and have asked me to take mine.
So, amongst other things that need doing, we have been tidying up some things to get it into a transportable and "presentable" state.
This involves such tasks as...
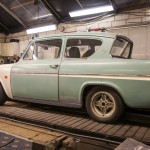
Fitting of a new windscreen rubber:
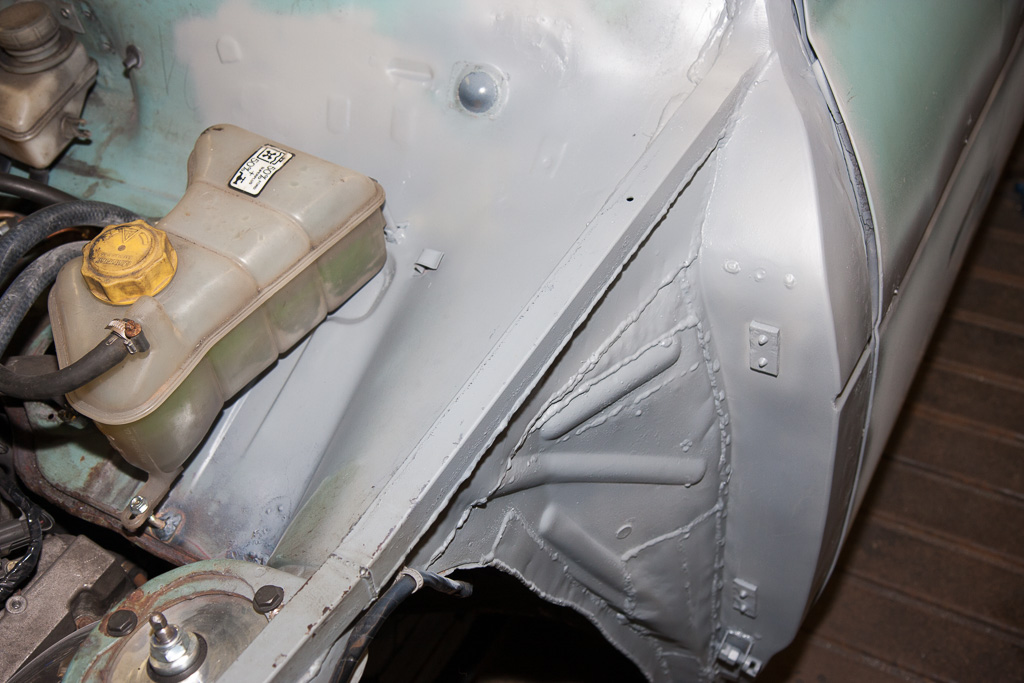
Some quick & unpolished grinding back of rough welds, filling of holes in the doors, and temporary rust protection of exposed metal with zinc primer:
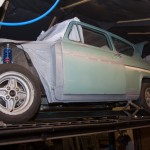
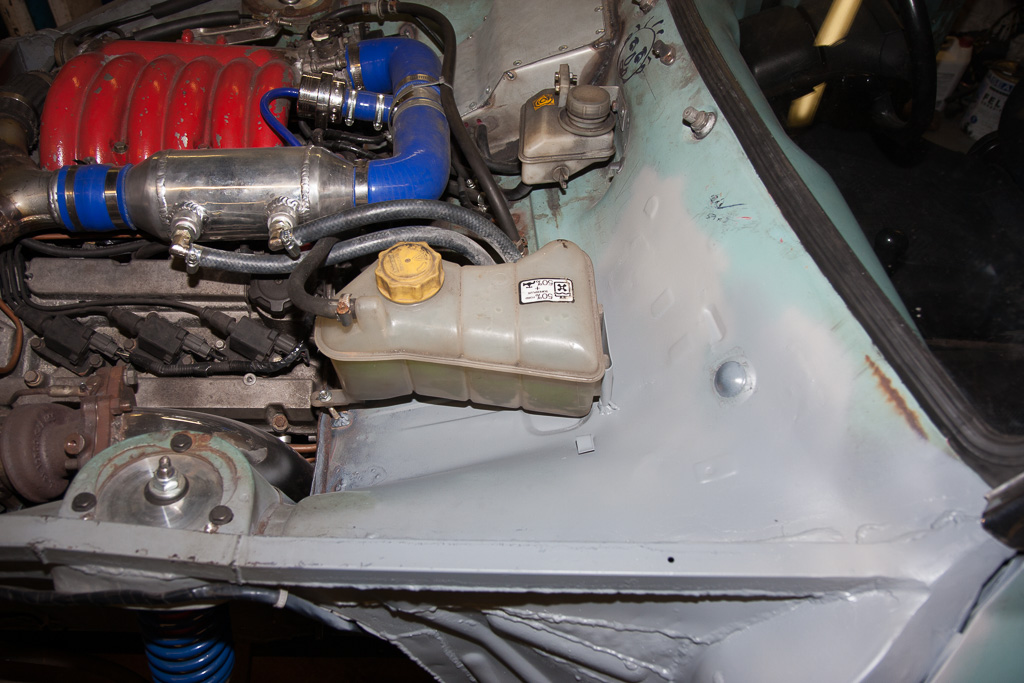
Making up a bracket to hold the coolant expansion tank (and more zinc primer):

Fitting of the front bumper, and number plate:
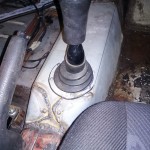
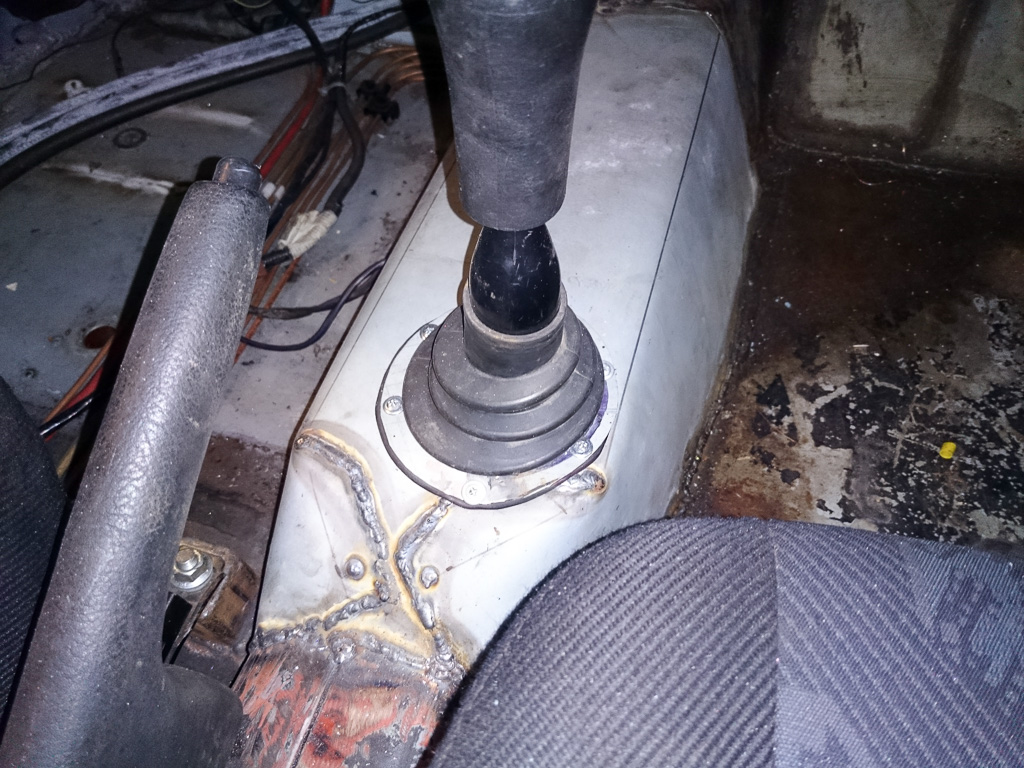
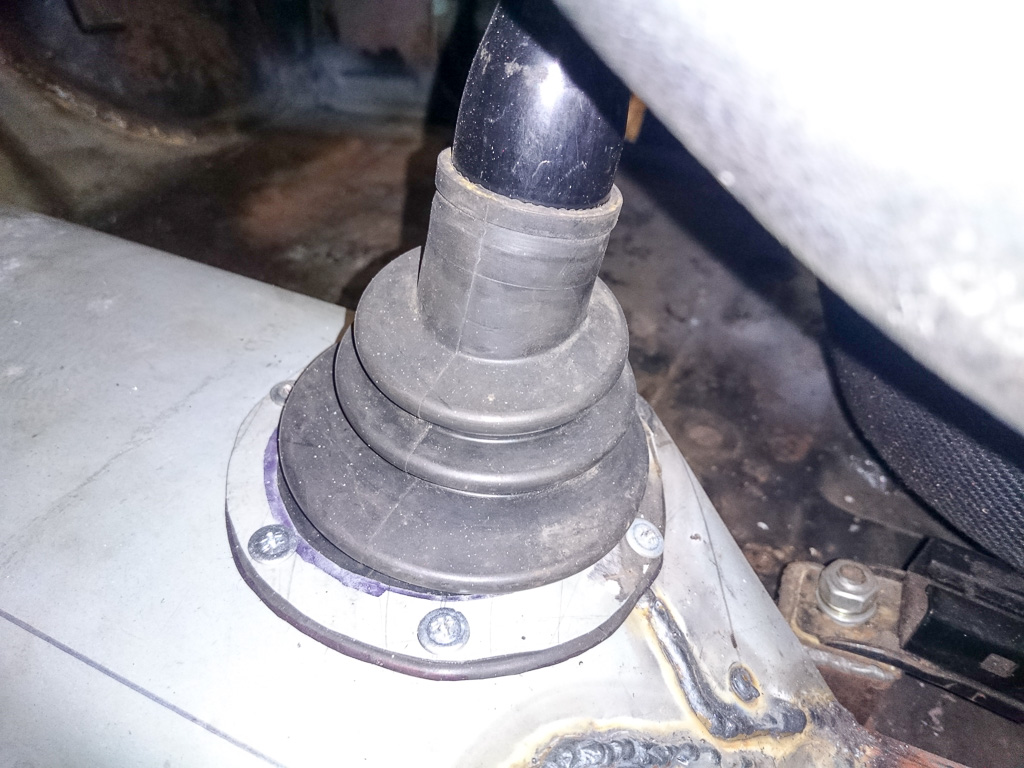
Fitting a gear lever gaiter:
So, it's basically ready to be driven onto the trailer, unloaded and parked up on the stand. So, if you're visiting the show, come along to hall 18 and take a look in person!
But, my car will be!!
A few weeks ago I took a call from the club's events organisers, looking for a modified vehicle to show off on the stand, and have asked me to take mine.
So, amongst other things that need doing, we have been tidying up some things to get it into a transportable and "presentable" state.
This involves such tasks as...
Fitting of a new windscreen rubber:
Some quick & unpolished grinding back of rough welds, filling of holes in the doors, and temporary rust protection of exposed metal with zinc primer:
Making up a bracket to hold the coolant expansion tank (and more zinc primer):
Fitting of the front bumper, and number plate:

Fitting a gear lever gaiter:
So, it's basically ready to be driven onto the trailer, unloaded and parked up on the stand. So, if you're visiting the show, come along to hall 18 and take a look in person!
-
mercutio

- LotM Winner
- Posts: 14958
- Joined: Sun Aug 08, 2010 8:45 pm
- My Generation: 5G
- Location: Sunny Manchester
- Has thanked: 1 time
- Been thanked: 4 times
- Contact:
Great news buddy will you be dressing like a teddy boy like the other Anglia owners 
bristol_bb4 wrote:ahhh a 5th gen, i love 5th gens
Dino wrote:I loves the 5th gen really.... just dont quote me on it...
4thgenphil wrote:Mines 4 1/4 unches mate, sorry
http://www.ludegeneration.co.uk/profile ... -t618.html
-
wurlycorner

- Ye are glad to be dead, RIGHT?
- Posts: 21511
- Joined: Sat May 19, 2012 3:33 pm
- My Generation: 4G
- Location: Chelmsford, Essex
- Has thanked: 2507 times
- Been thanked: 317 times
-
Confused
- Posts: 749
- Joined: Fri Jan 27, 2012 11:44 am
- My Generation: 4G
- Location: Notts / Essex
- Has thanked: 3 times
- Been thanked: 11 times
- Contact:
Re: Confused's Long-Term Anglia Project
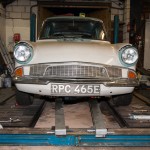
Not sure how you've missed the ramp - it's in most of the photos in one way or another!
-
mercutio
- LotM Winner
- Posts: 14958
- Joined: Sun Aug 08, 2010 8:45 pm
- My Generation: 5G
- Location: Sunny Manchester
- Has thanked: 1 time
- Been thanked: 4 times
- Contact:
you and your dad really do deserve so much praise for this not only have you kept an old classic alive but given it real attitude
well done
well done
bristol_bb4 wrote:ahhh a 5th gen, i love 5th gens
Dino wrote:I loves the 5th gen really.... just dont quote me on it...
4thgenphil wrote:Mines 4 1/4 unches mate, sorry
http://www.ludegeneration.co.uk/profile ... -t618.html