Congratulations to vtecmec for winning May/June's Lude Of The Month, with his DIY Turbo BB1 build.
>>> Click Here For Profile <<<

>>> Click Here For Profile <<<
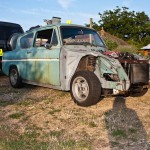
Confused's Long-Term Anglia Project
-
rob quilter

- Supporter 2014
- Posts: 5331
- Joined: Mon Aug 09, 2010 1:40 pm
- My Generation: 5G
- PSN GamerTag: robquilter
- Location: Derby
Great to see it moving, top work.

PERFORMANCE PARTS FOR JAPANESE CARS - http://WWW.TOKYOSQUAD.COM
FOLLOW US ON FACEBOOK - http://WWW.FACEBOOK.COM/TOKYOSQUAD
FOLLOW US ON FACEBOOK - http://WWW.FACEBOOK.COM/TOKYOSQUAD

-
wurlycorner

- Ye are glad to be dead, RIGHT?
- Posts: 21511
- Joined: Sat May 19, 2012 3:33 pm
- My Generation: 4G
- Location: Chelmsford, Essex
- Has thanked: 2507 times
- Been thanked: 317 times
-
Confused

- Posts: 749
- Joined: Fri Jan 27, 2012 11:44 am
- My Generation: 4G
- Location: Notts / Essex
- Has thanked: 3 times
- Been thanked: 11 times
- Contact:
Re: Confused's Long-Term Anglia Project
Definitely not this year!Gayno wrote:Great progress G, I know we'd discussed your prop/driveshaft predicament, but good to see you've tackled it yourself! Great to see it moving also, will it be at JAE?!

-
Confused
- Posts: 749
- Joined: Fri Jan 27, 2012 11:44 am
- My Generation: 4G
- Location: Notts / Essex
- Has thanked: 3 times
- Been thanked: 11 times
- Contact:
Keep cool and wire on
Now that the car can drive again, my dad has been able to move it around when he needs access to his workshop. However, doing so means starting the engine from cold each time, and something hasn't been quite right with it, it's not been wanting to fire up first time. Once it's going, and it's got a little warmth, it will restart fine - but it's also been running exceptionally rich, dumping in lots and lots of fuel.
Something didn't seem quite right, so it was time to don the diagnostic hat, and see what didn't look right.
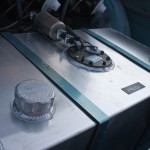
The VR4's ECU has a diagnostic connector, physically similar to OBD (On-Board Diagnostics), but uses Mitsubishi's own communication protocol. Luckily, someone has figured this out, and for just $25, you can purchase EvoScan, which allows you to read data from the engine ECU. A small price to pay for the awesome features you get. You have probably seen a shot of this running on the laptop in a previous video, along with the MAP-CAL software for the MAP-ECU unit.
Taking a look at all of the various sensors you can read, I noticed a couple of things were odd. Firstly, the TPS (Throttle Position Sensor) value was a little off - with the throttle fully closed, the value should read approximately 11.5-12.5%, and with the throttle fully open, around 96%. With the throttle closed, this was reading around 15%.
Adjusting this is quite a simple process, thankfully. Firstly, place a 0.65mm feeler gauge between the stop and the butterfly wheel to partially open the throttle. Then, remove the connector plug, loosen the two bolts holding the TPS sensor, and rotate the sensor until the point where you lose connectivity between the bottom two pins - these are the pins for the Idle Position Switch - when there's continuity between the two, the throttle is fully closed.
With this adjusted, the TPS reading in EvoScan was a more healthy 12.2%
I also noticed that the Coolant Temperature Sensor was reading -59 degrees C. I know it's been a cold June, but not quite that cold!
Checking the sensor, we found no continuity between the sensor ground and the relevant sensor ground pin on the ECU. Tracing back the wiring, it seems we'd omitted the ground wire - if that's our only wiring issue so far with the amount we've removed and chopped, then I'm not too displeased!
All the other sensors looked OK, no readings that jumped out as being wildly inaccurate.
The last thing to look at was on the MAP-ECU. On this, you also specify the throttle position values for fully closed and fully open - as I'd adjusted the throttle position sensor, I had to resample the values for the MAP-ECU configuration.
With all of this checked, we tried to fire up the engine - it now bursts into life on the first turn of the key, and seems to be running slightly less rich than it was - it now knows that the coolant is at the correct temperature, so isn't applying quite such a high cold start enrichment (it adds more fuel when cold)
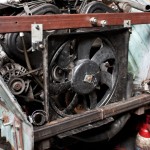
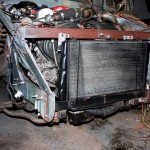
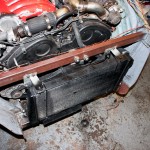
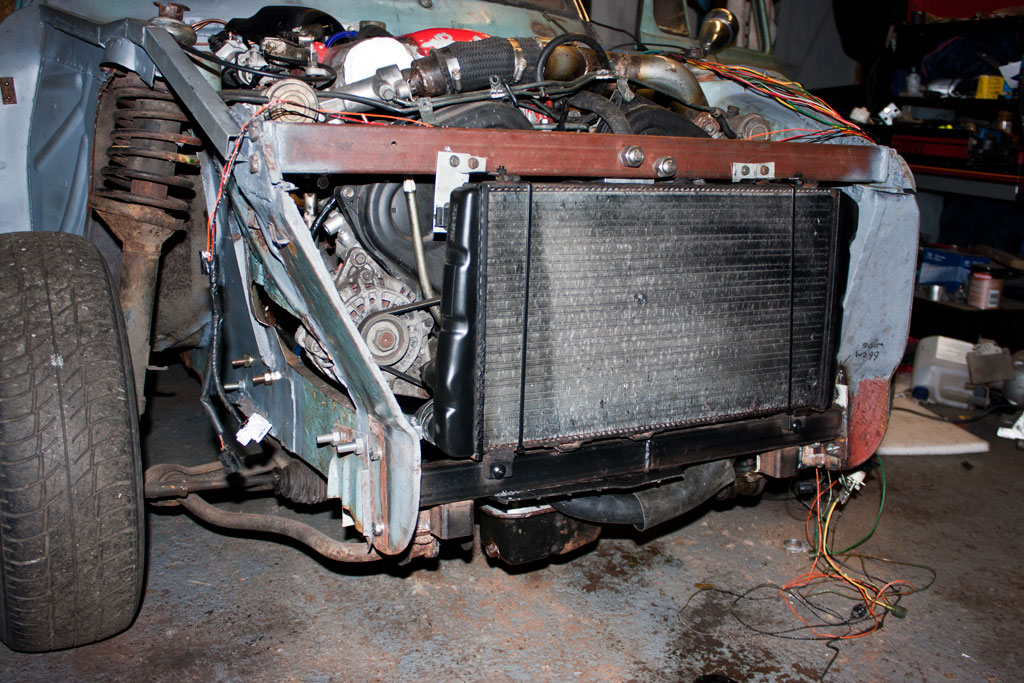
With it starting and running nicely now, we decided to revisit the cooling system - the Mini radiator was always only a temporary solution until we had found something more suitable, which I now have.
After removing the temporary radiator and fan, I attached a more suitable fan to the car, as well as mounting a radiator that will fit in the space available - this is from a Skoda Felicia - and is within 1cm of the dimensions we scribbled on the bulkhead a few months ago. It will be replaced with a new radiator in time - whether it's a replacement OEM one to the same spec, or whether it's a higher performance custom-made job - well, I'll see how it fares with this standard one whenever it's on the road.
I HATE WIRING.
There, I said it. There's so much excess wiring from the VR4 that I'm not needing in this car, and because everything's in different places, and the car is smaller, there's lots of wiring to do. It's a daunting process, and it's not often I feel like doing it.
However, it needs doing, so I decided to tackle it.
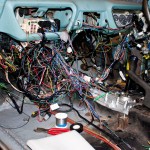
I started off by trying to undo the spaghetti tin of wiring that I had draped over the passenger footwell, to try to make some kind of sense of it.
This was a process that took a good couple of hours, just taping together wires that run parallel for more than 6 inches to see what goes where. And when I was done with that, I'd not removed any wiring, it wasn't the final product, but it at least gave us a chance of seeing what goes where and what subsequently doesn't need to be there.
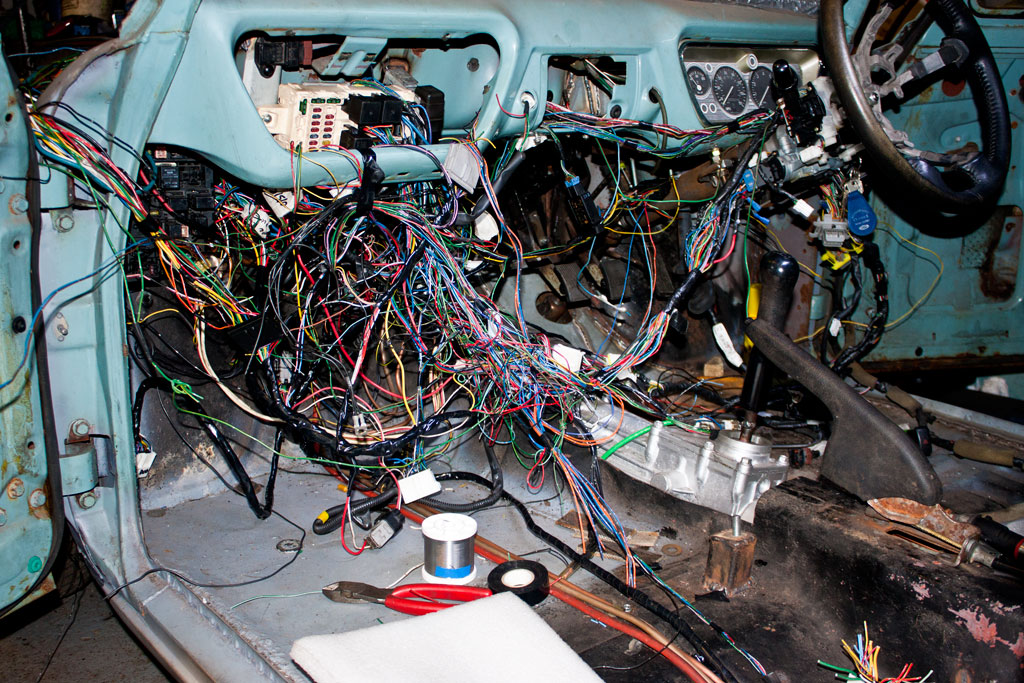
Then came the task of tracing a wire, cutting it, re-routing it, and joining it back together. Repeat this hundreds of times for a different coloured wire, over and over, for hours on end, with only a few brief breaks for a cup of coffee and a biscuit...
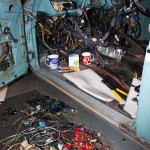
It still looks a bit of a mess, but wiring is a task where you need to do 95% of it before it looks like you've actually done anything with it.
On the plus side, the passenger floorpan is now mostly clear of wires, there are a number of bits which are properly loomed up and neat, and there's a large pile of wires and connectors which have been removed, the only real evidence of actually having done anything...
Something didn't seem quite right, so it was time to don the diagnostic hat, and see what didn't look right.
The VR4's ECU has a diagnostic connector, physically similar to OBD (On-Board Diagnostics), but uses Mitsubishi's own communication protocol. Luckily, someone has figured this out, and for just $25, you can purchase EvoScan, which allows you to read data from the engine ECU. A small price to pay for the awesome features you get. You have probably seen a shot of this running on the laptop in a previous video, along with the MAP-CAL software for the MAP-ECU unit.
Taking a look at all of the various sensors you can read, I noticed a couple of things were odd. Firstly, the TPS (Throttle Position Sensor) value was a little off - with the throttle fully closed, the value should read approximately 11.5-12.5%, and with the throttle fully open, around 96%. With the throttle closed, this was reading around 15%.
Adjusting this is quite a simple process, thankfully. Firstly, place a 0.65mm feeler gauge between the stop and the butterfly wheel to partially open the throttle. Then, remove the connector plug, loosen the two bolts holding the TPS sensor, and rotate the sensor until the point where you lose connectivity between the bottom two pins - these are the pins for the Idle Position Switch - when there's continuity between the two, the throttle is fully closed.
With this adjusted, the TPS reading in EvoScan was a more healthy 12.2%
I also noticed that the Coolant Temperature Sensor was reading -59 degrees C. I know it's been a cold June, but not quite that cold!
Checking the sensor, we found no continuity between the sensor ground and the relevant sensor ground pin on the ECU. Tracing back the wiring, it seems we'd omitted the ground wire - if that's our only wiring issue so far with the amount we've removed and chopped, then I'm not too displeased!
All the other sensors looked OK, no readings that jumped out as being wildly inaccurate.
The last thing to look at was on the MAP-ECU. On this, you also specify the throttle position values for fully closed and fully open - as I'd adjusted the throttle position sensor, I had to resample the values for the MAP-ECU configuration.
With all of this checked, we tried to fire up the engine - it now bursts into life on the first turn of the key, and seems to be running slightly less rich than it was - it now knows that the coolant is at the correct temperature, so isn't applying quite such a high cold start enrichment (it adds more fuel when cold)
With it starting and running nicely now, we decided to revisit the cooling system - the Mini radiator was always only a temporary solution until we had found something more suitable, which I now have.
After removing the temporary radiator and fan, I attached a more suitable fan to the car, as well as mounting a radiator that will fit in the space available - this is from a Skoda Felicia - and is within 1cm of the dimensions we scribbled on the bulkhead a few months ago. It will be replaced with a new radiator in time - whether it's a replacement OEM one to the same spec, or whether it's a higher performance custom-made job - well, I'll see how it fares with this standard one whenever it's on the road.


I HATE WIRING.
There, I said it. There's so much excess wiring from the VR4 that I'm not needing in this car, and because everything's in different places, and the car is smaller, there's lots of wiring to do. It's a daunting process, and it's not often I feel like doing it.
However, it needs doing, so I decided to tackle it.
I started off by trying to undo the spaghetti tin of wiring that I had draped over the passenger footwell, to try to make some kind of sense of it.
This was a process that took a good couple of hours, just taping together wires that run parallel for more than 6 inches to see what goes where. And when I was done with that, I'd not removed any wiring, it wasn't the final product, but it at least gave us a chance of seeing what goes where and what subsequently doesn't need to be there.
Then came the task of tracing a wire, cutting it, re-routing it, and joining it back together. Repeat this hundreds of times for a different coloured wire, over and over, for hours on end, with only a few brief breaks for a cup of coffee and a biscuit...

It still looks a bit of a mess, but wiring is a task where you need to do 95% of it before it looks like you've actually done anything with it.
On the plus side, the passenger floorpan is now mostly clear of wires, there are a number of bits which are properly loomed up and neat, and there's a large pile of wires and connectors which have been removed, the only real evidence of actually having done anything...
-
wurlycorner
- Ye are glad to be dead, RIGHT?
- Posts: 21511
- Joined: Sat May 19, 2012 3:33 pm
- My Generation: 4G
- Location: Chelmsford, Essex
- Has thanked: 2507 times
- Been thanked: 317 times
-
Confused
- Posts: 749
- Joined: Fri Jan 27, 2012 11:44 am
- My Generation: 4G
- Location: Notts / Essex
- Has thanked: 3 times
- Been thanked: 11 times
- Contact:
The credit card gets a hammering
This is by far the most expensive update I've put up throughout the history of this project!
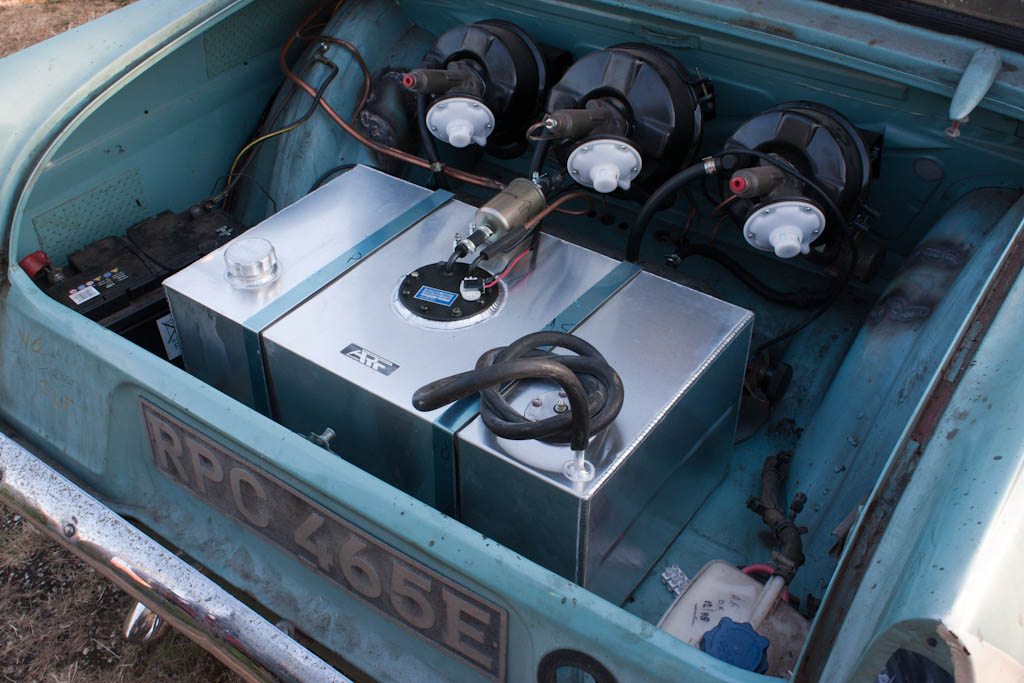
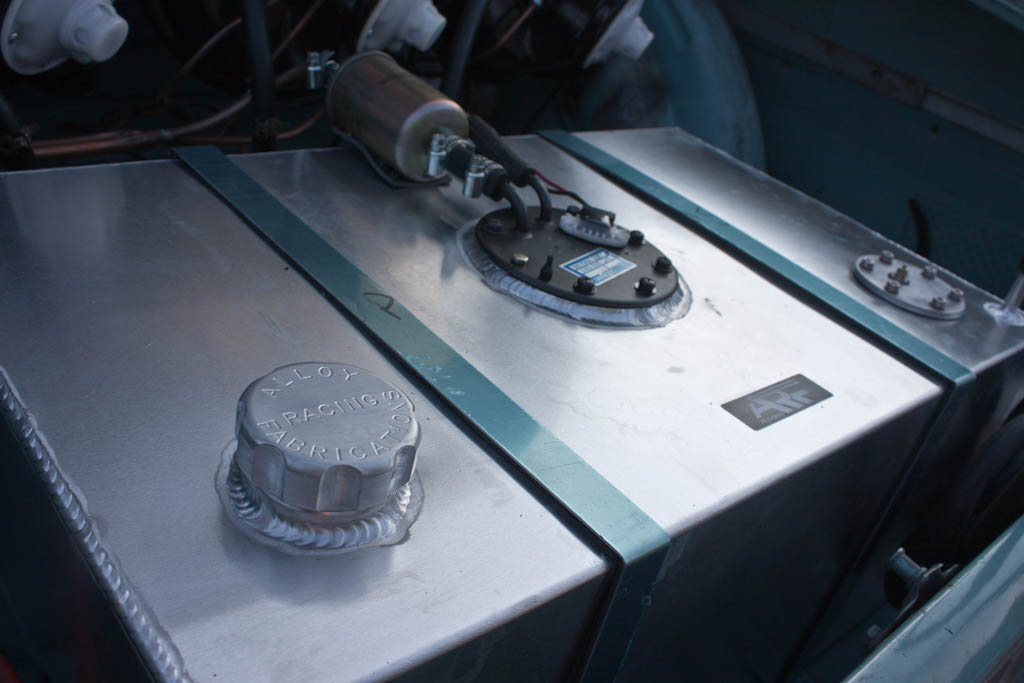
The first item on the credit card statement is a proper fuel tank. With the changes to the axle and the dual exhausts, the standard fuel tank was removed a while back. Additionally, I had a couple of brand new in-tank fuel pumps, so it seemed silly to not utilise them. Plus, with the car starting and running now, it seemed a sensible time to replace the bucket, and we can now keep it fuelled up so it's easier for my dad to move it around should he need to.
I contacted Alloy Racing Fabrications who were able to make me a nice shiny alloy tank to my exact specifications.
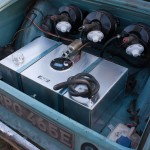
The pump housing is the same as was used in the bucket, but the pump itself has been replaced with an uprated ProDrive pump as fitted to the ProDrive Imprezas - will definitely supply plenty of fuel to the engine.
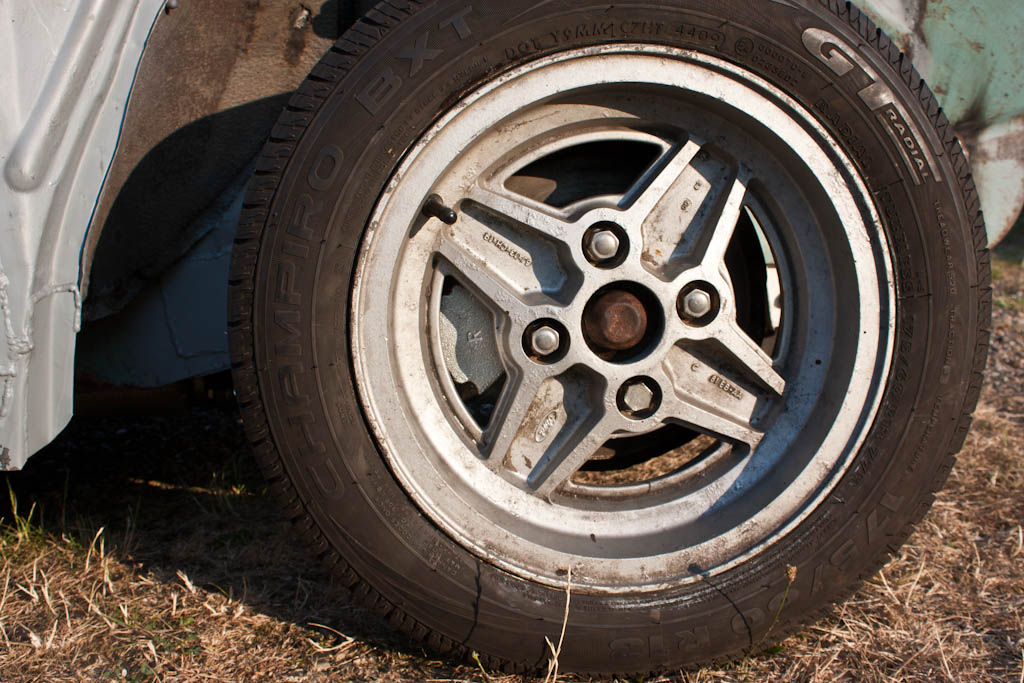
The next line on my credit card bill is for brakes - a new set of M16 calipers to bolt up to the Escort front struts. We also got hold of a couple more 13" tyres and fitted them to the remaining 4-spoke alloys, so it's now got a full set of matching wheels.

The VR4 engine usually has an air-air intercooler to cool the compressed air coming from the turbos before it goes into the intake. This is placed at the front of the car and the ambient air moving over surface of the intercooler cools down the warmer air passing over the internals of the intercooler.
Whilst I had never planned to fit an intercooler due to space constraints, I decided on instead fitting an air-water chargecooler.
The chargecooler works with a similar process to the standard engine cooling - a liquid coolant is pumped through the chargecooler, and then passes through a radiator, which removes the heat from the water.
A chargecooler allows fitment in a tighter space than an air-air intercooler, and doesn't require the lengths of large-diameter air pipework between the turbo and the inlet. All it requires is a couple of much smaller diameter coolant pipes.
There are a number of styles of chargecoolers available, but I decided on a barrel-style, which will sit in the current inlet tract, replacing the pipe running across the top of the engine directly after the Y piece.
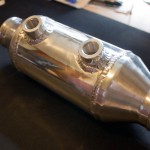
Air passes through the large openings in each end, and water passes through the two smaller openings on the side.
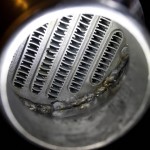
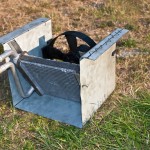
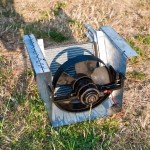
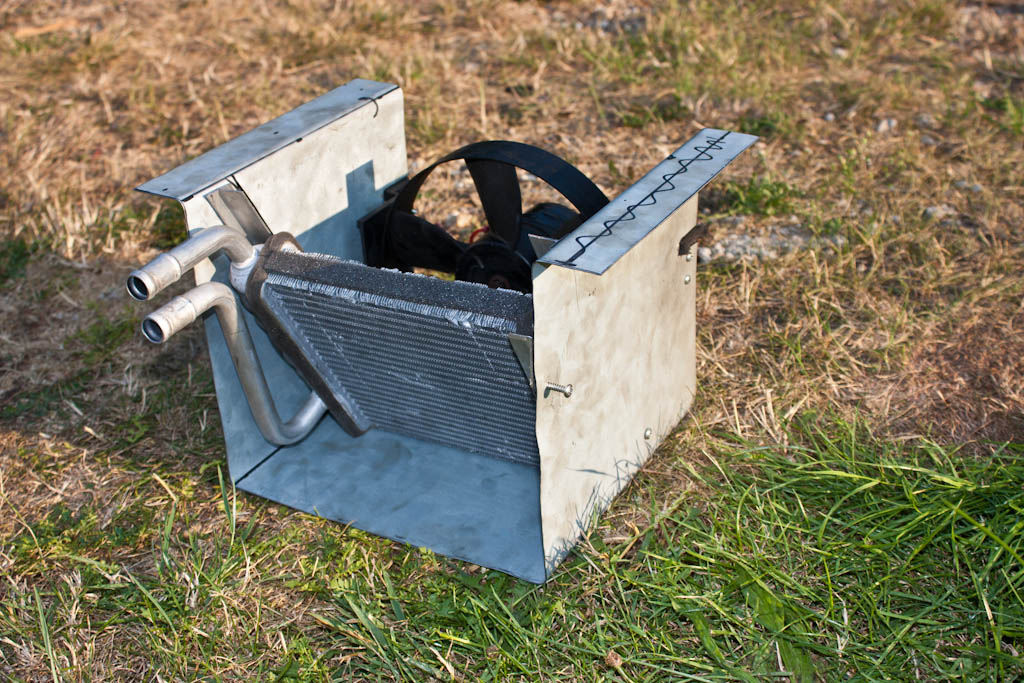
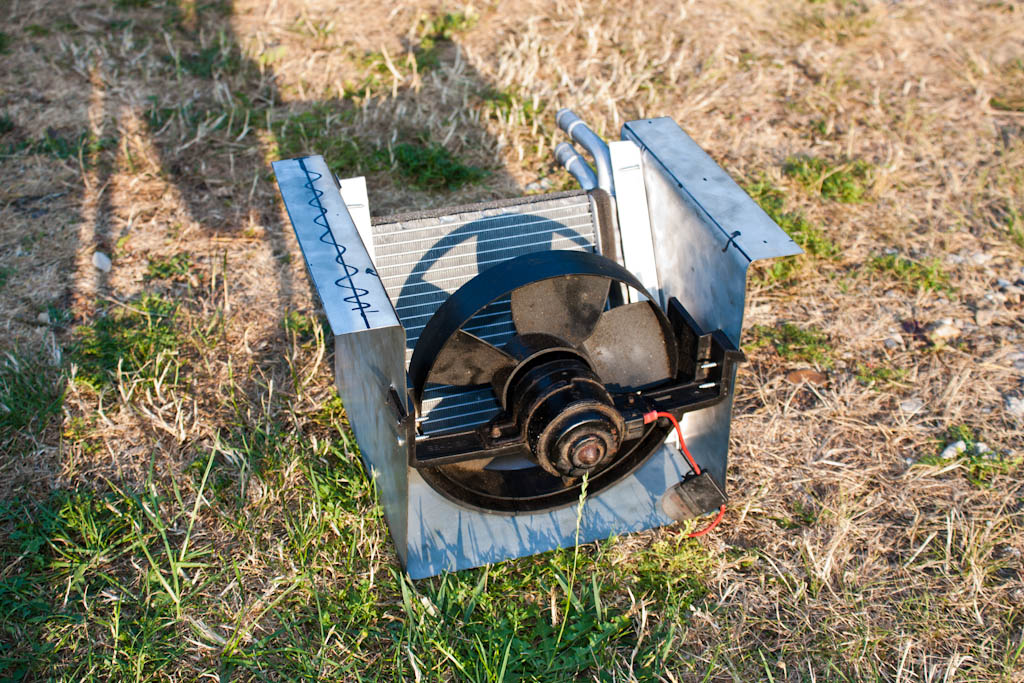
With space tight at the front, and not wishing to dump the heat from the chargecooler in front of the engine coolant radiator, I have decided to mount the other part of the chargecooler at the back of the car. Utilising a heater matrix element, I have begun to make up a box which will sit under the car, in the position of the existing fuel tank, between the two exhausts. This will primarily work by just forcing air through the core, but a fan is also added to aid cooling when at low speeds or when stationary, which will activate based on the temperature of the coolant within the chargecooler system, completely independent to the engine coolant system.
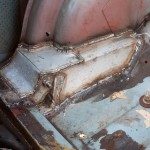
Finally, the trailing arm mount on the driver's side for the rear suspension was fully boxed in and tied into the chassis. We will repeat this for the passenger side.
And finally, just because... another quick video:
[youtube]cuoNcFmT0Is[/youtube]
The first item on the credit card statement is a proper fuel tank. With the changes to the axle and the dual exhausts, the standard fuel tank was removed a while back. Additionally, I had a couple of brand new in-tank fuel pumps, so it seemed silly to not utilise them. Plus, with the car starting and running now, it seemed a sensible time to replace the bucket, and we can now keep it fuelled up so it's easier for my dad to move it around should he need to.
I contacted Alloy Racing Fabrications who were able to make me a nice shiny alloy tank to my exact specifications.
The pump housing is the same as was used in the bucket, but the pump itself has been replaced with an uprated ProDrive pump as fitted to the ProDrive Imprezas - will definitely supply plenty of fuel to the engine.
The next line on my credit card bill is for brakes - a new set of M16 calipers to bolt up to the Escort front struts. We also got hold of a couple more 13" tyres and fitted them to the remaining 4-spoke alloys, so it's now got a full set of matching wheels.
The VR4 engine usually has an air-air intercooler to cool the compressed air coming from the turbos before it goes into the intake. This is placed at the front of the car and the ambient air moving over surface of the intercooler cools down the warmer air passing over the internals of the intercooler.
Whilst I had never planned to fit an intercooler due to space constraints, I decided on instead fitting an air-water chargecooler.
The chargecooler works with a similar process to the standard engine cooling - a liquid coolant is pumped through the chargecooler, and then passes through a radiator, which removes the heat from the water.
A chargecooler allows fitment in a tighter space than an air-air intercooler, and doesn't require the lengths of large-diameter air pipework between the turbo and the inlet. All it requires is a couple of much smaller diameter coolant pipes.
There are a number of styles of chargecoolers available, but I decided on a barrel-style, which will sit in the current inlet tract, replacing the pipe running across the top of the engine directly after the Y piece.
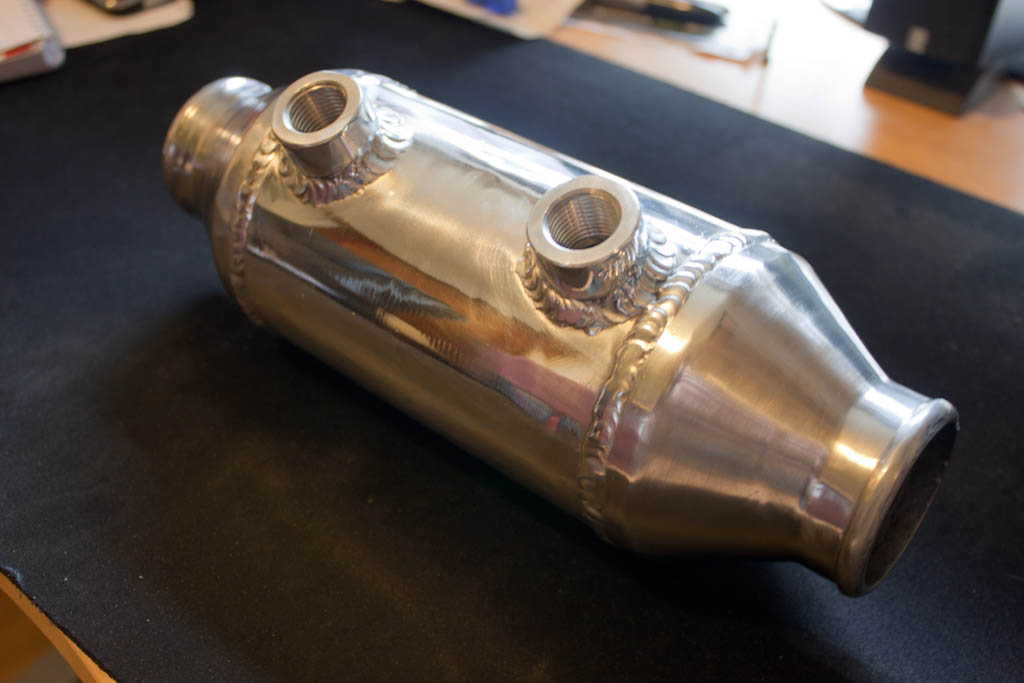
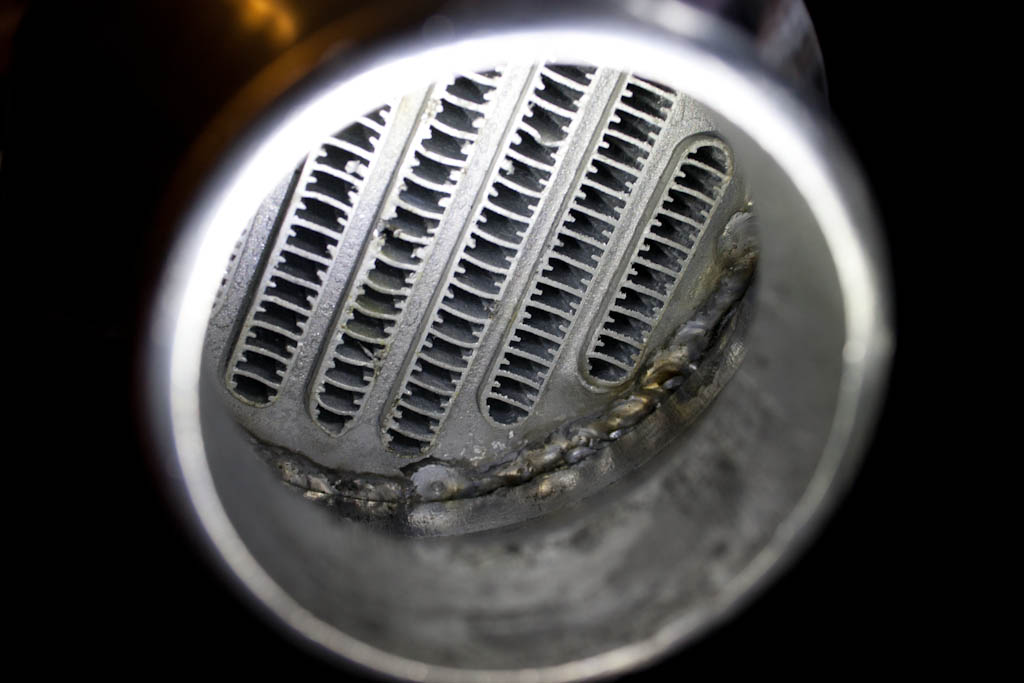
Air passes through the large openings in each end, and water passes through the two smaller openings on the side.
With space tight at the front, and not wishing to dump the heat from the chargecooler in front of the engine coolant radiator, I have decided to mount the other part of the chargecooler at the back of the car. Utilising a heater matrix element, I have begun to make up a box which will sit under the car, in the position of the existing fuel tank, between the two exhausts. This will primarily work by just forcing air through the core, but a fan is also added to aid cooling when at low speeds or when stationary, which will activate based on the temperature of the coolant within the chargecooler system, completely independent to the engine coolant system.
Finally, the trailing arm mount on the driver's side for the rear suspension was fully boxed in and tied into the chassis. We will repeat this for the passenger side.

And finally, just because... another quick video:
[youtube]cuoNcFmT0Is[/youtube]
-
mercutio

- LotM Winner
- Posts: 14958
- Joined: Sun Aug 08, 2010 8:45 pm
- My Generation: 5G
- Location: Sunny Manchester
- Has thanked: 1 time
- Been thanked: 4 times
- Contact:
sounds very quiet gonna be a real sleeper 
bristol_bb4 wrote:ahhh a 5th gen, i love 5th gens
Dino wrote:I loves the 5th gen really.... just dont quote me on it...
4thgenphil wrote:Mines 4 1/4 unches mate, sorry
http://www.ludegeneration.co.uk/profile ... -t618.html
-
Confused
- Posts: 749
- Joined: Fri Jan 27, 2012 11:44 am
- My Generation: 4G
- Location: Notts / Essex
- Has thanked: 3 times
- Been thanked: 11 times
- Contact:
Re: Confused's Long-Term Anglia Project
Yeah it's fairly quiet when it's sat outside just idling away - but gets quite loud when you open it up