
Congratulations to vtecmec for winning May/June's Lude Of The Month, with his DIY Turbo BB1 build.
>>> Click Here For Profile <<<

>>> Click Here For Profile <<<
Front bumper
-
kris_aka_edu

- Posts: 1106
- Joined: Fri Oct 12, 2012 4:25 pm
- My Generation: 4G
- XBOX GamerTag: chris aka edu
- Location: Biggleswade, Bedfordshire
Front bumper
How do I take off the front bumper? I've got most of it off but I can't get to the three plastic screws under the drivers side light. Impossible to get to them. Have I got to take the light out first? I can't seem to take that off either! 
Honda Prelude 92' 2.2 JDm
http://www.ludegeneration.co.uk/profile ... t7514.html
http://www.ludegeneration.co.uk/site-fe ... t8014.html

http://www.ludegeneration.co.uk/profile ... t7514.html
http://www.ludegeneration.co.uk/site-fe ... t8014.html
-
Merlin

- Moderator
- Posts: 12397
- Joined: Fri Aug 06, 2010 9:04 am
- My Generation: 5G
- PSN GamerTag: Merlinbadman
- Location: Edinburgh
- Has thanked: 71 times
- Been thanked: 306 times
You are going the wrong way about it. I did the same when I first tried to get it off.
First take off the grille and nostrils. Then you have to take the indicators out. There are 4 big nuts behind the indicators that hold the front bumper bar on, plus two beneath the headlights in the engine bay. When the bumper bar is loose the whole lot comes off in a one-er.
If you need a diagram it is the 4th gen service manual (page 20-60) in the Wiki-Lude that shows all the bolt locations.
Also best of luck in getting the indicator screws out if you haven't had them out before.
Alternatively you can get access to the bumper bar bolts from underneath the car. But if you have never (or recently) taken the undertray off you can for get about that as IMO rusted undertray bolts are even worse than rusted indicator screws.

-
wurlycorner

- Ye are glad to be dead, RIGHT?
- Posts: 21511
- Joined: Sat May 19, 2012 3:33 pm
- My Generation: 4G
- Location: Chelmsford, Essex
- Has thanked: 2507 times
- Been thanked: 317 times

-
Giomani

- Posts: 144
- Joined: Sun Apr 01, 2012 6:30 pm
- My Generation: 5G
- Location: Cornwall
- Has thanked: 1 time
- Been thanked: 2 times
Re: Front bumper
I had to drill my indicator screws out as the were rusted through but all new screws, plastic holders, bumper clips etc were cheap from Lings so I replaced loads of the niggly bits with new.
BB3 UKDM 2.0i (The Beauty)
BB8 UKDM 2.2vti (The Beast)
-
kris_aka_edu
- Posts: 1106
- Joined: Fri Oct 12, 2012 4:25 pm
- My Generation: 4G
- XBOX GamerTag: chris aka edu
- Location: Biggleswade, Bedfordshire
Oh my god! What a pain in the backside that was! Started at 2 this afternoon thinking it was going to be a quick job, and its now midnight I've only just finished! All I wanted to do was put the euro lip on the front! Can't imagine what the side skirts and rear is going to be like! Well after it all its done, the very very hard way. I wish I read all the comments earlier to help me out but time wasn't on my hands. I made a right hash of it all! I've managed to put the bumper back on, all bar the 3 screws either side under the lights because I couldn't put them back on so there is just a small gap on the under side of each light, apart from that it all seems to be ok (ish).
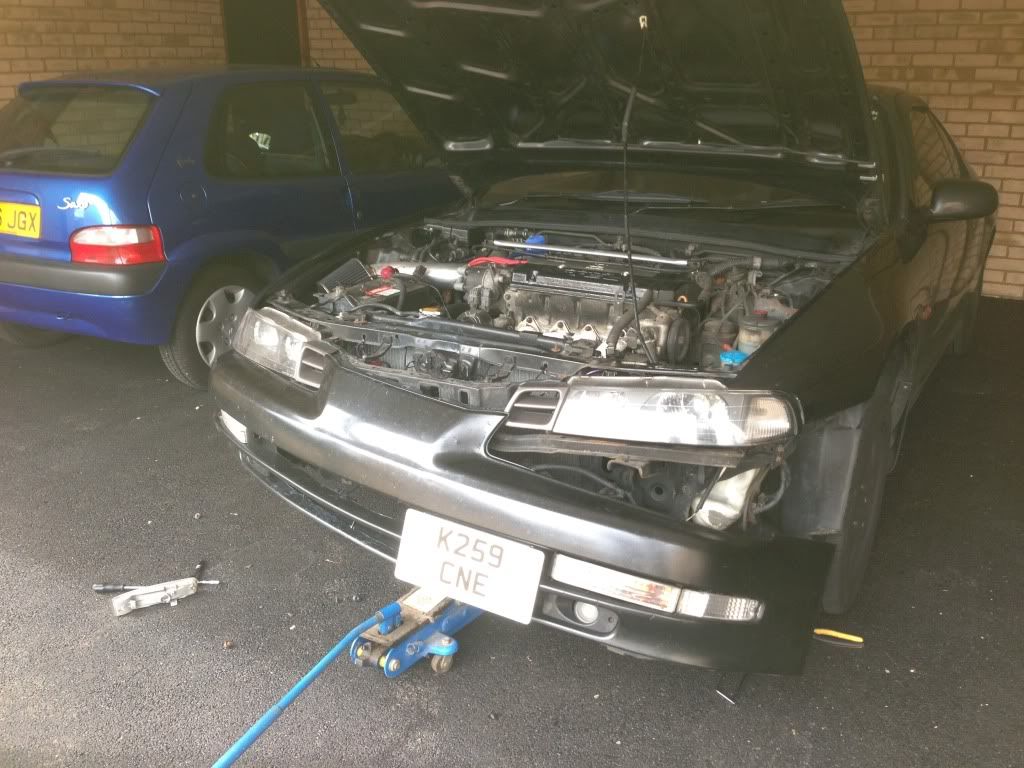
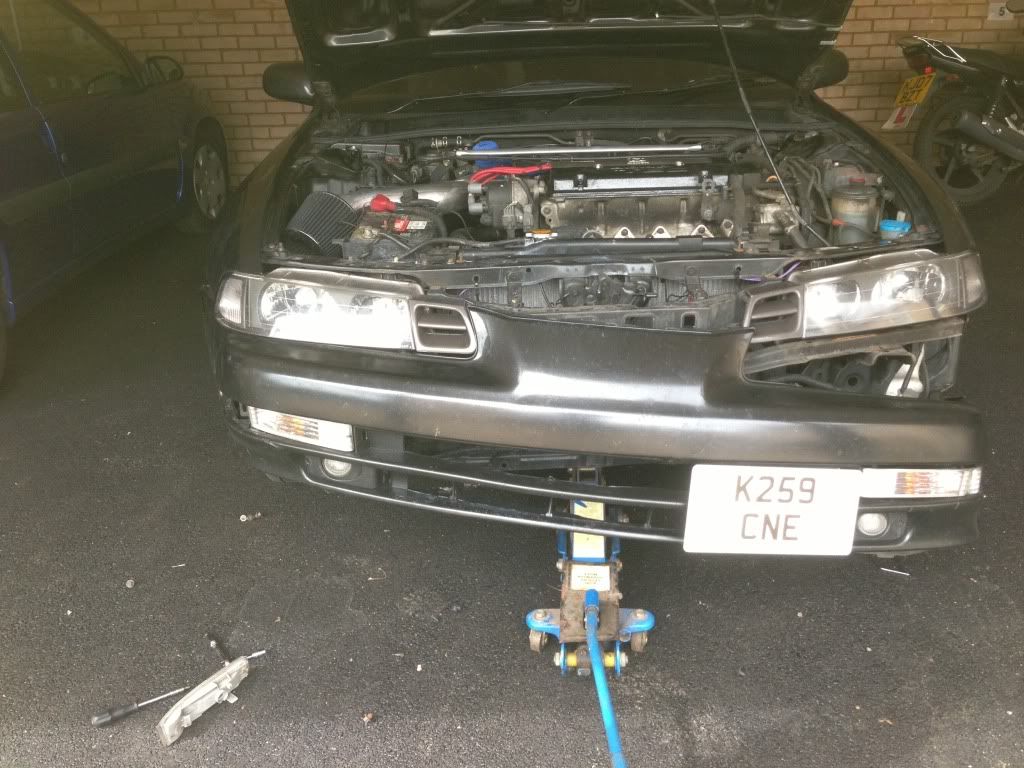
Didnt take many pictures because I was doing it all by myself for the first time, never attempted it before, when i painted the front bumper to debadge it and relocate the number plate I did it on the car. I still need to paint the lip but took a picture of it on. Ill be painting it while its on the car definately it's not coming off again!!
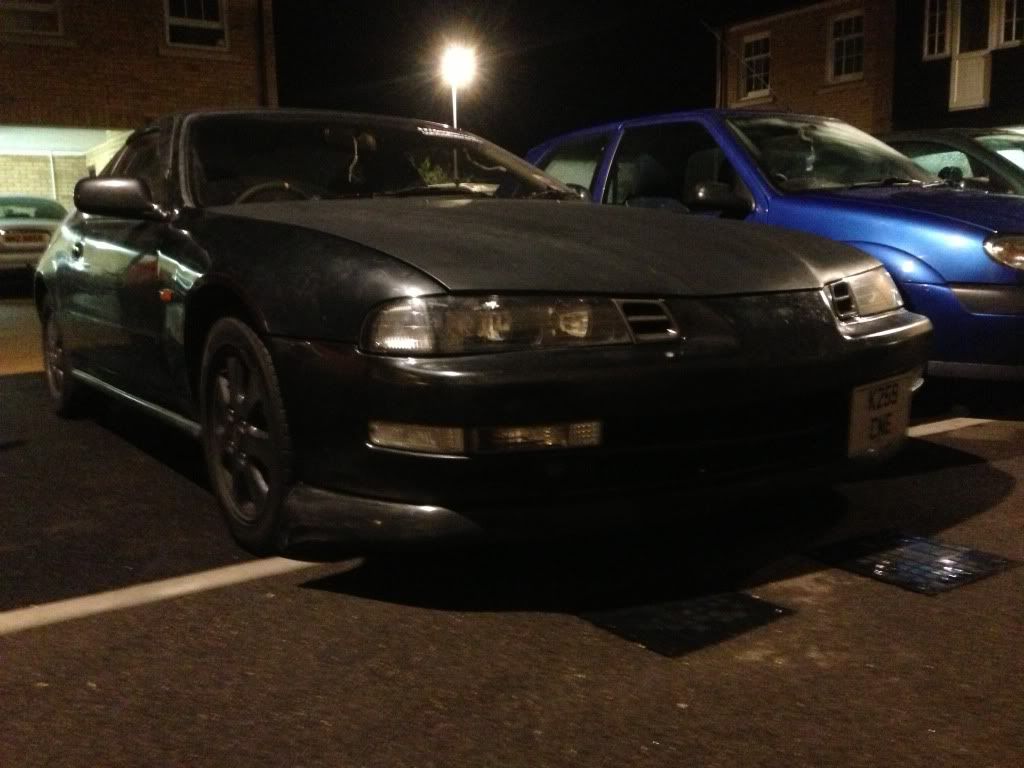
Bad picture quality as it's dark but from looking at it I'm really impressed with my really hard work!
Appreciate all the comments guys.
Didnt take many pictures because I was doing it all by myself for the first time, never attempted it before, when i painted the front bumper to debadge it and relocate the number plate I did it on the car. I still need to paint the lip but took a picture of it on. Ill be painting it while its on the car definately it's not coming off again!!
Bad picture quality as it's dark but from looking at it I'm really impressed with my really hard work!
Appreciate all the comments guys.
Honda Prelude 92' 2.2 JDm
http://www.ludegeneration.co.uk/profile ... t7514.html
http://www.ludegeneration.co.uk/site-fe ... t8014.html
http://www.ludegeneration.co.uk/profile ... t7514.html
http://www.ludegeneration.co.uk/site-fe ... t8014.html
-
wurlycorner
- Ye are glad to be dead, RIGHT?
- Posts: 21511
- Joined: Sat May 19, 2012 3:33 pm
- My Generation: 4G
- Location: Chelmsford, Essex
- Has thanked: 2507 times
- Been thanked: 317 times

-
mercutio

- LotM Winner
- Posts: 14958
- Joined: Sun Aug 08, 2010 8:45 pm
- My Generation: 5G
- Location: Sunny Manchester
- Has thanked: 1 time
- Been thanked: 4 times
- Contact:
bristol_bb4 wrote:ahhh a 5th gen, i love 5th gens
Dino wrote:I loves the 5th gen really.... just dont quote me on it...
4thgenphil wrote:Mines 4 1/4 unches mate, sorry
http://www.ludegeneration.co.uk/profile ... -t618.html
-
indigolemon

- The Chaos Engine
- Posts: 6682
- Joined: Wed Jun 30, 2010 1:45 pm
- My Generation: 4G
- PSN GamerTag: M149YSL
- Location: Kelty, Fife
- Has thanked: 24 times
- Been thanked: 71 times
- Contact:
For future reference:
Side skirts:
1 - Remove all plastic clips from underneath, stubby philips screwdriver is useful here.
2 - Remove front mudflap (if fitted), and all screws underneath it.
3 - Go to the rear wheel arch, and tap the sideskirt forward - it'll then come off.
Rear Bumper:
1 - Remove the boot floor for access, then remove the rear trim (behind lights, below level of boot).
2 - Locate the four bumper bar nuts (10mm). One under each light, two recessed in holes under the boot opening.
3 - Remove rear mudflap, (if fitted) and all screws underneath.
4 - Remove bolt running up from bumper into rear arch (right where the bumper meets the arch).
5 - Remove aforementioned bumper bar bolts, and them pull bumper off. Be aware of cabling if foglight is fitted.
'On two occasions I have been asked, 'Pray, Mr. Babbage, if you put into the machine wrong figures, will the right answers come out?' I am not able rightly to apprehend the kind of confusion of ideas that could provoke such a question.' - Charles Babbage
-
kris_aka_edu
- Posts: 1106
- Joined: Fri Oct 12, 2012 4:25 pm
- My Generation: 4G
- XBOX GamerTag: chris aka edu
- Location: Biggleswade, Bedfordshire
Thanks guys, and @wurlycorner how could it be on upside down? I just put it on with the holes that where there! Lol.  Ill take another picture and put it on shortly.
Honda Prelude 92' 2.2 JDm
http://www.ludegeneration.co.uk/profile ... t7514.html
http://www.ludegeneration.co.uk/site-fe ... t8014.html
http://www.ludegeneration.co.uk/profile ... t7514.html
http://www.ludegeneration.co.uk/site-fe ... t8014.html