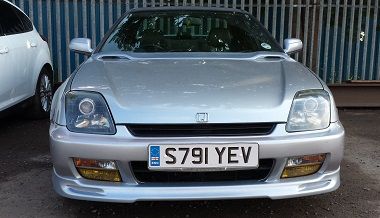
Congratulations to vtecmec for winning May/June's Lude Of The Month, with his DIY Turbo BB1 build.

>>> Click Here For Profile <<<

Image

5th Gen Morimoto mini retrofits

To clarify - that's In Car Entertainment - not frozen water
Post Reply
User avatar
andypont
Posts: 1039
Joined: Sun Aug 12, 2012 10:55 am
My Generation: 5G
Location: Nottingham
Has thanked: 2 times

5th Gen Morimoto mini retrofits

Post by andypont » Sun Feb 02, 2014 1:07 am

I've finally got around to putting some HID projectors into my spare OEM headlights.
I spoke to a couple of people on US forums who were willing to do a retrofit for me, but it didn't seem cost effective due to them having to get some new pattern lights (rather than ship my spares over) and have shipping costs on top of the price of the projectors and labour cost for doing the work.

I decided that I was going to have a go myself - I had the headlights and a HID kit so what could possibly go wrong?! ;)
However, with not being brave I opted for the most basic of retrofits and order some RHD mini H1 bi-xenon projectors from a company in the USA. For those that don't know the minis (as the name would suggest) are a small projector that fits, almost entirely inside the headlight body. Rather than a big square hole to be cut into the reflector all it needs is a 24mm (I think) round hole as there is a male thread on the projector for mounting.

Image

The back of the reflector body also has to be ground flat.
Image

I was thinking about spraying the headlight trim black to give a different look to the lights, but hadn't really considered painting the reflectors until I got the lights apart. One of them was pristine, but the other had quite a bit of the chrome finish off the dip beam reflector.
As this is no longer reflecting anything I decided to mask out the main beam reflector and spray everything else.

Image

The almost finished result.
Image
Image
I like the look of them, and hope that's still the case when I get them back on the car.

I just need to seal the lights back up after fitting, and wiring up the bulbs, to make sure I have the projectors set horizontally.
With these being bi-xenon units they have a solenoid in that operates a flap for dip mean. The bulb stays lit whenever the lights are on but the flap blocks anything above a set level to prevent glare. On main beam the flap is down to allow all light through into the projector. I am going to keep my existing halogen main beam too, so will simply tap into it's feed to operate the solenoid.
I'll keep you posted on performance of the lights once I get them fitted - Fingers crossed for a dry weather Sunday!
Andy Pont
Image

User avatar
wurlycorner
Ye are glad to be dead, RIGHT?
Posts: 21493
Joined: Sat May 19, 2012 3:33 pm
My Generation: 4G
Location: Chelmsford, Essex
Has thanked: 2481 times
Been thanked: 306 times

Post by wurlycorner » Sun Feb 02, 2014 10:42 am

Woah, fantastic, interested to see how this goes...

User avatar
RattyMcClelland
Moderator
Posts: 9208
Joined: Wed Aug 04, 2010 10:02 pm
My Generation: 5G
PSN GamerTag: RattyMcClelland
Location: Leicestershire
Been thanked: 203 times

Post by RattyMcClelland » Sun Feb 02, 2014 10:55 am

Sweet. Mine are bi xenon. The high beam positive and negative plug into the solenoid.
My oem high beam are now gone.
The bottom reflector bowl is now just forthe sidelights only.
Image

User avatar
andypont
Posts: 1039
Joined: Sun Aug 12, 2012 10:55 am
My Generation: 5G
Location: Nottingham
Has thanked: 2 times

Post by andypont » Sun Feb 02, 2014 11:57 am

I don't blame you for not using the bottom reflector. That's the easiest way of getting the alignment right.
I'm hoping that once the dip beam is set correctly the original main is still in the right area to add something to the light output of the projector.
Andy Pont
Image

User avatar
Kawa
Posts: 3405
Joined: Sun Jun 20, 2010 5:58 pm
My Generation: 4G
XBOX GamerTag: kawa222
Location: Nottingham
Contact:

Post by Kawa » Sun Feb 02, 2014 12:21 pm

Looking good 8-)

User avatar
rob quilter
Supporter 2014
Posts: 5331
Joined: Mon Aug 09, 2010 1:40 pm
My Generation: 5G
PSN GamerTag: robquilter
Location: Derby

Post by rob quilter » Sun Feb 02, 2014 1:48 pm

Nice work!

8-)
PERFORMANCE PARTS FOR JAPANESE CARS - http://WWW.TOKYOSQUAD.COM

FOLLOW US ON FACEBOOK - http://WWW.FACEBOOK.COM/TOKYOSQUAD

User avatar
nitin_s1
Posts: 10499
Joined: Tue Aug 03, 2010 1:09 pm
My Generation: 5G
PSN GamerTag: N171N
Location: London
Has thanked: 147 times
Been thanked: 135 times
Contact:

Post by nitin_s1 » Sun Feb 02, 2014 1:55 pm

Great work. :twisted:

User avatar
mercutio
LotM Winner
Posts: 14958
Joined: Sun Aug 08, 2010 8:45 pm
My Generation: 5G
Location: Sunny Manchester
Has thanked: 1 time
Been thanked: 4 times
Contact:

Post by mercutio » Sun Feb 02, 2014 2:43 pm

looking good buddy
bristol_bb4 wrote:ahhh a 5th gen, i love 5th gens :D :lol:
Dino wrote:I loves the 5th gen really.... just dont quote me on it... ;)
4thgenphil wrote:Mines 4 1/4 unches mate, sorry

http://www.ludegeneration.co.uk/profile ... -t618.html

User avatar
andypont
Posts: 1039
Joined: Sun Aug 12, 2012 10:55 am
My Generation: 5G
Location: Nottingham
Has thanked: 2 times

Post by andypont » Sun Feb 02, 2014 4:44 pm

I got them fitted today, but photos will have to wait. I don't want you all to see how filthy my car is right now! :lol:
Andy Pont
Image

User avatar
Merlin
Moderator
Posts: 12393
Joined: Fri Aug 06, 2010 9:04 am
My Generation: 5G
PSN GamerTag: Merlinbadman
Location: Edinburgh
Has thanked: 68 times
Been thanked: 303 times

Post by Merlin » Sun Feb 02, 2014 8:11 pm

They look great.
Image
BA8......... BB4......... BB8.........The JDM Muscle Bus

Post Reply

Return to “Electrical / Lights / ICE”