
Yea i heard that too, was going to go with evo but they took days to get back so went for qsd instead.
Mines nearly done just need to do lil bits on a saturday and its ready to go against the k boys lol.
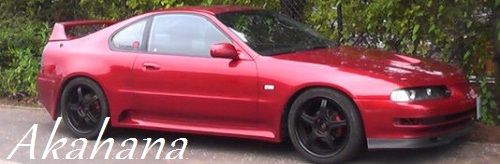
Congratulations to vtecmec for winning May/June's Lude Of The Month, with his DIY Turbo BB1 build.
>>> Click Here For Profile <<<

>>> Click Here For Profile <<<
EK9 Type-H
Re: EK9 Type-H
I've actually had the opposite experience, Evo have been really good, explaining a few things, even emailing me pictures of a couple of cars they had I the workshop to resolve a couple of issues. QSD on the other hand took a couple of emails and several weeks before they got back to me...EG_H22 wrote:Yea i heard that too, was going to go with evo but they took days to get back so went for qsd instead.
Mines nearly done just need to do lil bits on a saturday and its ready to go against the k boys lol.
Good luck with your project
Re: EK9 Type-H
So, once I'd picked up the H2B and started to look over it I decided there were a few things I wasnt happy with (this is how it looked shortly after I got it onto the engine stand - excuse the block of wood cam cover  was just there to help hold down the plastic covering while I sorted out the cam cover) :

So you might be able to see from the picture the manual tensioner conversion setup didnt look to be the best, plus I wanted to change the cam belt anyway so decided to switch back to the auto tensioner idler pulley and use the Kaizen speed manual conversion - so ordered one of them
Also what was described as 'accord type r crank shaft pulley' - might have been, but was badly chipped and at some point had had the outer accessory pulley machined off. Not knowing who had done this or if they had balanced the pulley I ordered a replacement as well
some time later a box of goodies arrived...

meanwhile got busy sorting out the cam cover:

brake master cylinder and servo (purple hose not staying was just there ready for bleeding purposes):

engine looking a bit better:

So you might be able to see from the picture the manual tensioner conversion setup didnt look to be the best, plus I wanted to change the cam belt anyway so decided to switch back to the auto tensioner idler pulley and use the Kaizen speed manual conversion - so ordered one of them
Also what was described as 'accord type r crank shaft pulley' - might have been, but was badly chipped and at some point had had the outer accessory pulley machined off. Not knowing who had done this or if they had balanced the pulley I ordered a replacement as well
some time later a box of goodies arrived...
meanwhile got busy sorting out the cam cover:
brake master cylinder and servo (purple hose not staying was just there ready for bleeding purposes):
engine looking a bit better:

Re: EK9 Type-H
Swapshop racing in the states www.swapshopracing.com/lucas wrote:looking good
where did you get the crank pulley?
Re: EK9 Type-H
Small update today.
A couple of shots of the engine mounts going in, also got the S2000 clutch master cylinder installed but dont seem to have a picture of that....


Also couldnt face putting ugly wiring back in my nicely painted engine bay, so got to work redoing a lot of it, rerouting it and hiding it away not a massive fan of the completely 'tucked and smoothed' look and wanted to keep it functional and accessable ready to resolve any issues. Not massivly exciting to look at so just a couple of pics...
Work in progress.

Air conditioning completely removed - decided to mount fuse box in the space left (remaining gaps in picture will be sealed up using polymorph once any wiring issues resolved). This puts the fusebox directly behing the glovebox making it easy to get to but still hidden away and means I dont loose space in the glovebox

A couple of shots of the engine mounts going in, also got the S2000 clutch master cylinder installed but dont seem to have a picture of that....
Also couldnt face putting ugly wiring back in my nicely painted engine bay, so got to work redoing a lot of it, rerouting it and hiding it away not a massive fan of the completely 'tucked and smoothed' look and wanted to keep it functional and accessable ready to resolve any issues. Not massivly exciting to look at so just a couple of pics...
Work in progress.
Air conditioning completely removed - decided to mount fuse box in the space left (remaining gaps in picture will be sealed up using polymorph once any wiring issues resolved). This puts the fusebox directly behing the glovebox making it easy to get to but still hidden away and means I dont loose space in the glovebox
EK9 Type-H - gearbox
The Evolution H2B kit originally used a rectangular clutch slave cylinder spacer in conjunction with an extended clutch fork, this arrangement has been known to occasionally cause problems and the clutch fork/slave cylinder rubber boot no longer fits with it in place. My H2B kit had this early arrangement so I decided to upgrade to the revised version Evolution now supply that uses the stock fork and a revised wedge shaped spacer…
New spacer, new clutch fork and I replaced the clutch slave for a new one too just for good measure:


S80 4.4 final drive with LSD (Integra Type R gearbox) ready to go:

New spacer, new clutch fork and I replaced the clutch slave for a new one too just for good measure:
S80 4.4 final drive with LSD (Integra Type R gearbox) ready to go:
Re: EK9 Type-H
Ok, big day…but actually went really smoothly, biggest challenge was not messing up the fresh paint in the engine bay (tried to ‘borrow’ duvets from home but apparently this is not appropriate Behaviour  )
)
Big engine, little hole


Gearbox in from underneath and pretty much on

And…………In! (excuse the standard civic headlight – was just being used to work out routes and lengths needed for wiring, have a set of genuine EK9 headlights to go on)


Big engine, little hole
Gearbox in from underneath and pretty much on
And…………In! (excuse the standard civic headlight – was just being used to work out routes and lengths needed for wiring, have a set of genuine EK9 headlights to go on)
-
wurlycorner

- Ye are glad to be dead, RIGHT?
- Posts: 21511
- Joined: Sat May 19, 2012 3:33 pm
- My Generation: 4G
- Location: Chelmsford, Essex
- Has thanked: 2507 times
- Been thanked: 317 times