
Congratulations to vtecmec for winning May/June's Lude Of The Month, with his DIY Turbo BB1 build.
>>> Click Here For Profile <<<

>>> Click Here For Profile <<<
Corner lights.
-
4thgenphil

- Supporter 2016
- Posts: 6661
- Joined: Tue Aug 03, 2010 4:15 pm
- My Generation: 4G
- Location: filming two girls one cup 2
- Has thanked: 5 times
- Been thanked: 29 times
-
vanzep
- Supporter 2016
- Posts: 7174
- Joined: Sun Jan 29, 2012 6:38 pm
- My Generation: 4G
- Location: Edinburgh
- Has thanked: 314 times
- Been thanked: 520 times
pic here - courtesy of prelude power forum 
http://www.preludepower.com/forums/show ... p?t=345116
and plenty info in this thread here
http://www.ludegeneration.co.uk/electri ... g%20lights
wurly might be able to help or @aardvark64 might have wiring diagram..
http://www.preludepower.com/forums/show ... p?t=345116
and plenty info in this thread here
http://www.ludegeneration.co.uk/electri ... g%20lights
wurly might be able to help or @aardvark64 might have wiring diagram..
1996-2000 1993 EG9 Blue Civic 1.6 Vti - Traded in against the BB4
2000-2019 1994 2WS BB4 Milano Red JDM Prelude Si VTEC LSD
2015 on > 1991 4WS BB1 Phantom Pearl Grey JDM Prelude Si VTEC LSD
2021 ON > 1998 2WS BB6 White Pearl JDM Prelude Si VTEC
2000-2019 1994 2WS BB4 Milano Red JDM Prelude Si VTEC LSD
2015 on > 1991 4WS BB1 Phantom Pearl Grey JDM Prelude Si VTEC LSD
2021 ON > 1998 2WS BB6 White Pearl JDM Prelude Si VTEC
-
wurlycorner

- Ye are glad to be dead, RIGHT?
- Posts: 21511
- Joined: Sat May 19, 2012 3:33 pm
- My Generation: 4G
- Location: Chelmsford, Essex
- Has thanked: 2507 times
- Been thanked: 317 times
Got loads of pics of the full set up and how it fits to the car etc. I can get those put up over the weekend.
Don't have a wiring diagram per-se though. never looked to see if the wiring diagram is in the service manual tbf... might be? Cause stuff like dsp is!
In summary, it takes a feed from the sidelights on the drivers side (to know when it's 'dark') a pass-through feed from indicators (both sides, to know when and which direction you are turning in) and a permanent live feed from the air con rad fans circuit on the passenger side, via an extra relay (to feed the actual turn lights and the control unit).
There is a control unit sat in the middle of the car, in front of the rad.
All the Oem stuff is plug and play into the standard looms on the car.
Don't have a wiring diagram per-se though.
In summary, it takes a feed from the sidelights on the drivers side (to know when it's 'dark') a pass-through feed from indicators (both sides, to know when and which direction you are turning in) and a permanent live feed from the air con rad fans circuit on the passenger side, via an extra relay (to feed the actual turn lights and the control unit).
There is a control unit sat in the middle of the car, in front of the rad.
All the Oem stuff is plug and play into the standard looms on the car.
--
Iain.
Iain.
Super Secret 1G (not really super secret!)
-
newkid
- Supporter 2016
- Posts: 2665
- Joined: Thu Feb 23, 2012 8:28 pm
- My Generation: 4G
- PSN GamerTag: spaz_ma_taz
- Location: Edinburgh
- Has thanked: 13 times
- Been thanked: 50 times
Cool. Think it's missing the wiring from the brown plug that goes up to the relay from the pics I've seen on thread @vanzep put up. It's on the BA8 I got my mate. The main loom and the big control box is there.wurlycorner wrote:Got loads of pics of the full set up and how it fits to the car etc. I can get those put up over the weekend.
Don't have a wiring diagram though.
-
wurlycorner
- Ye are glad to be dead, RIGHT?
- Posts: 21511
- Joined: Sat May 19, 2012 3:33 pm
- My Generation: 4G
- Location: Chelmsford, Essex
- Has thanked: 2507 times
- Been thanked: 317 times
Right @newkid pics galore...
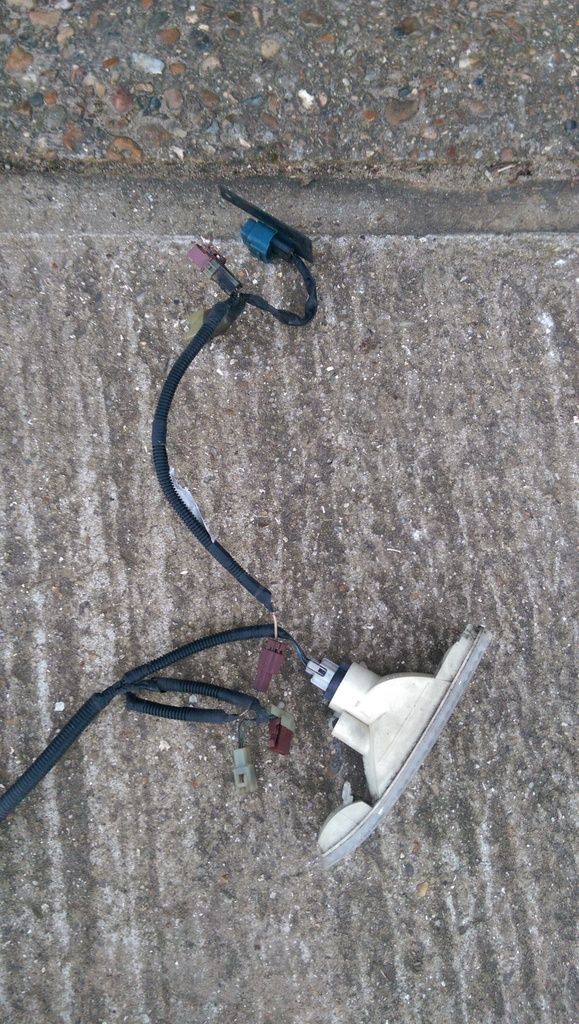
This is the full complete set up;
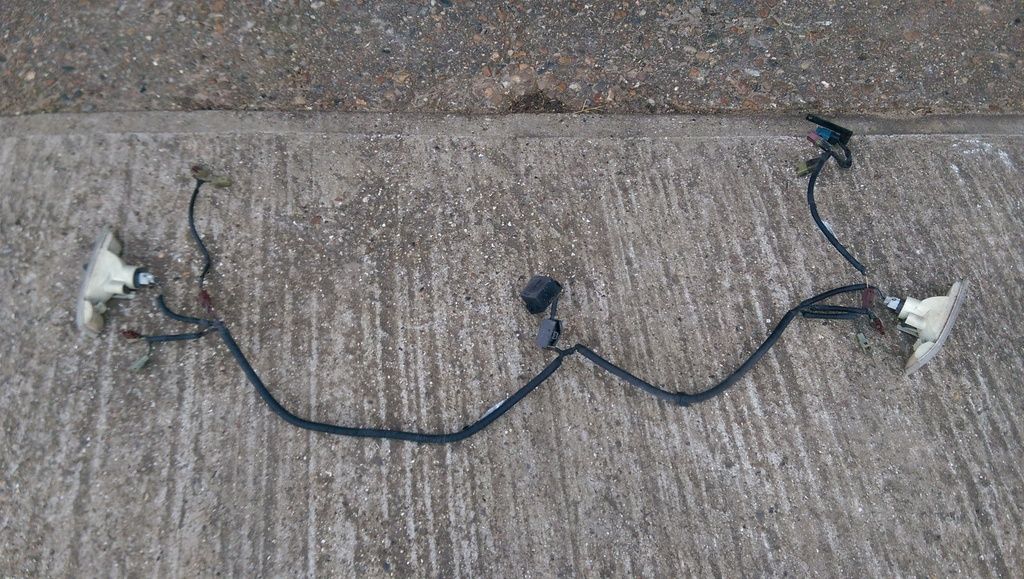
All plug 'n play.
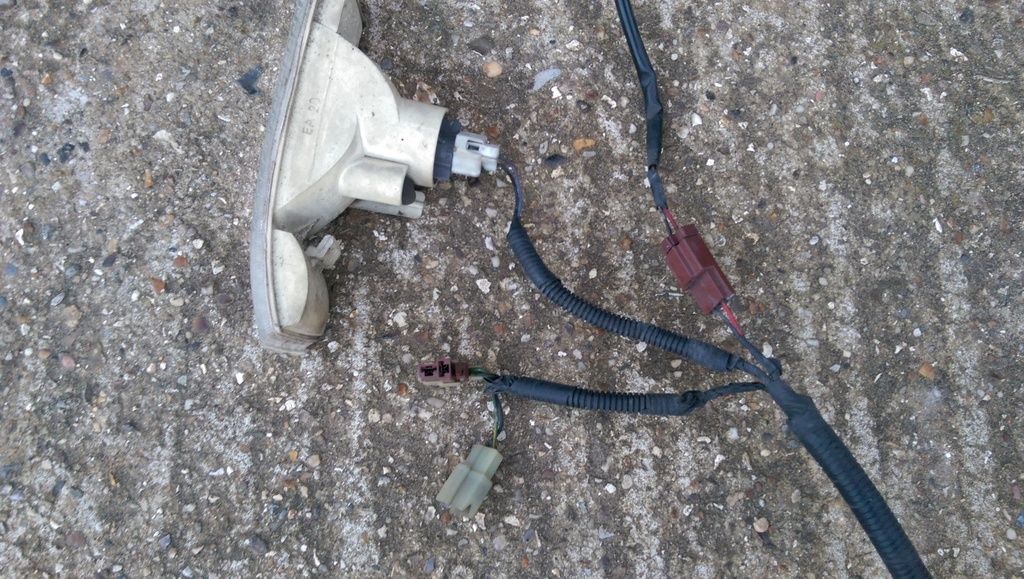
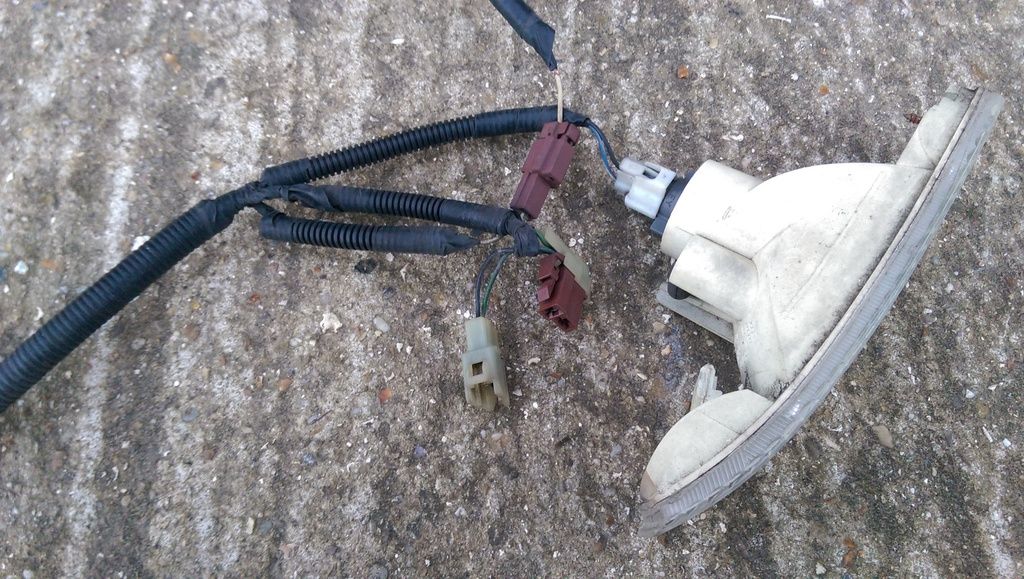
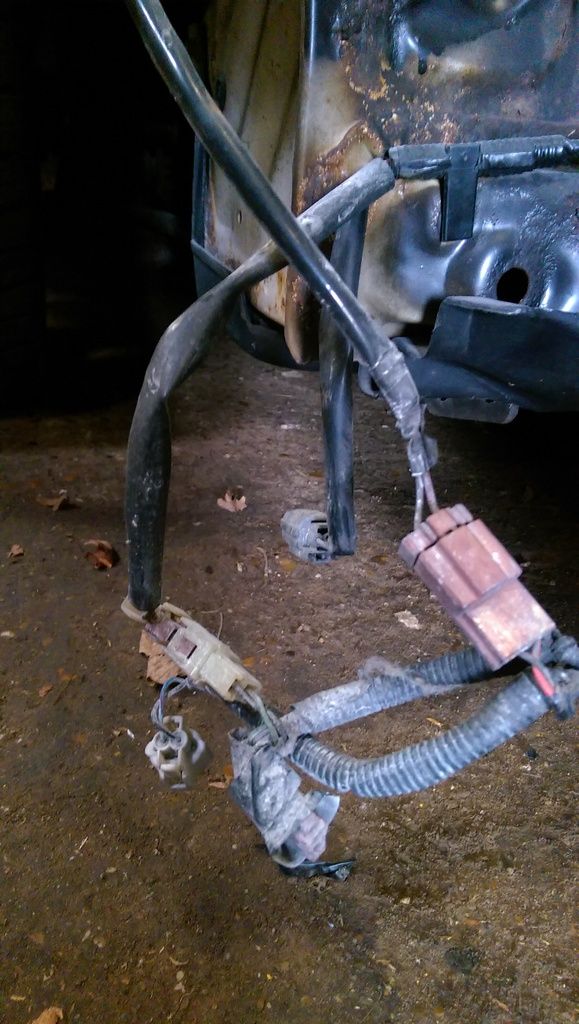
Close up of drivers side gubbins;
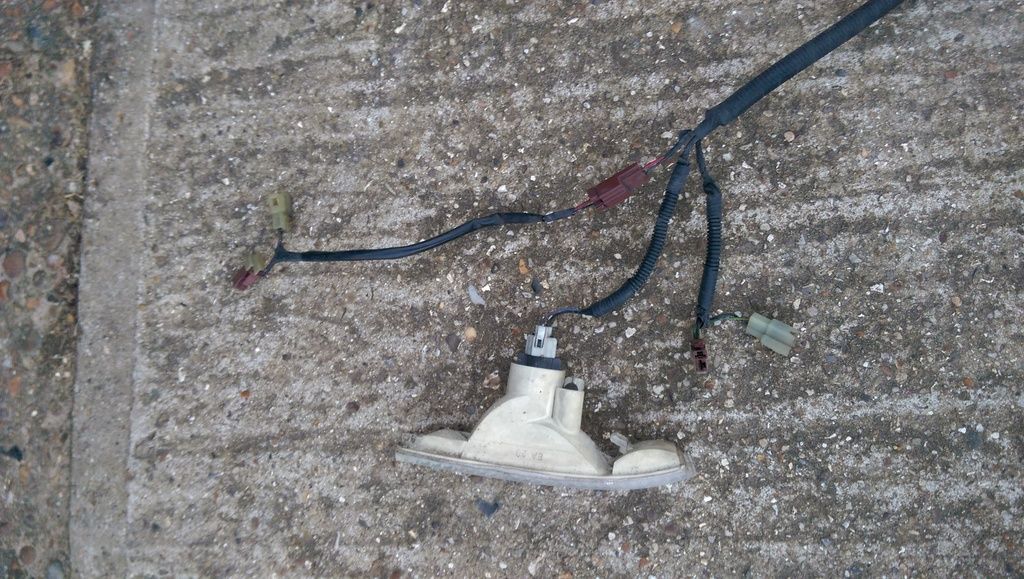
Loop-through connection to sidelight;
Loop-through connection to indicator and connector to corner light;
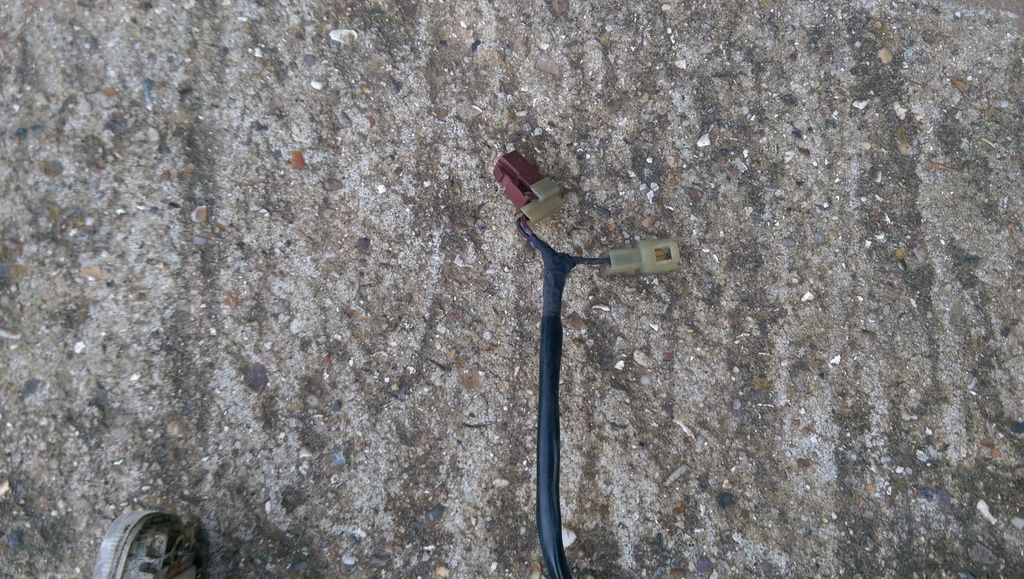
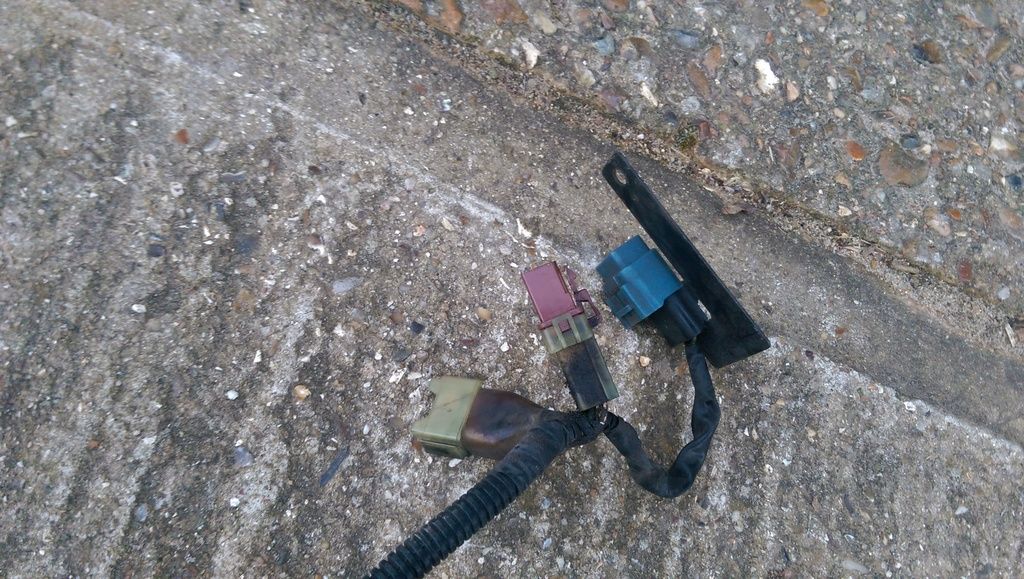
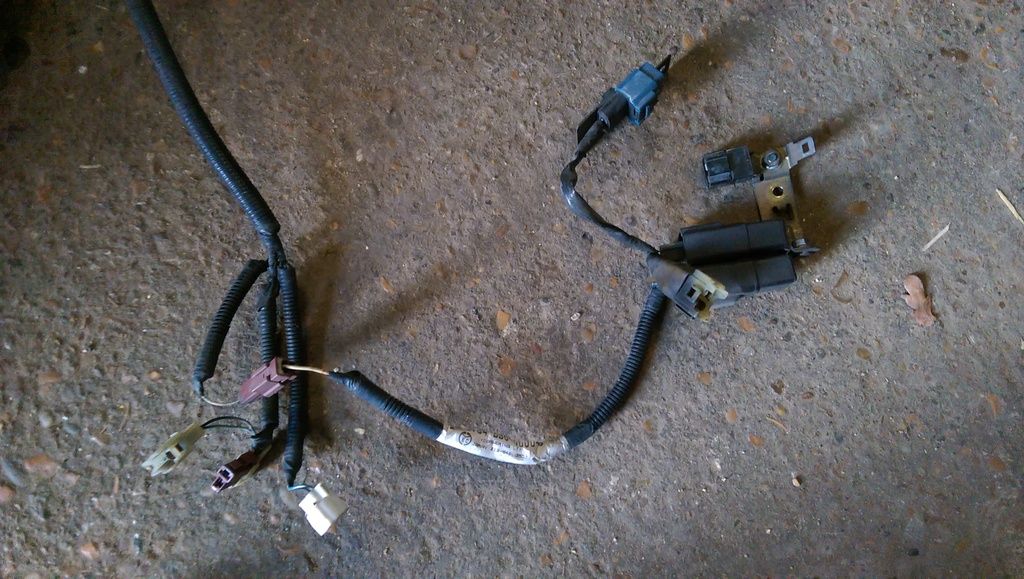
Close ups of passenger side gubbins;
Loop-through connection to indicator and connector to corner light;
Loop-through connection to a/c compressor/fan relays (1 plug and 1 socket white/brown) plus an extra relay or fuse (not sure which, not investigated, the blue thing)
This is the connections all in place, on the drivers side;
Up close, top connections;
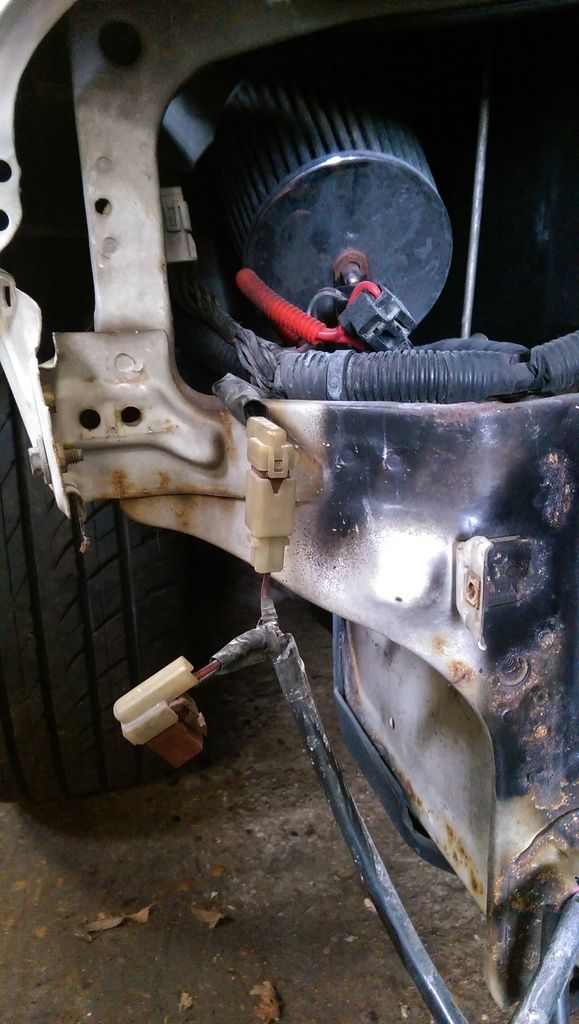
At the top, the loom is plugged into the standard loom sidelight plug and you can see there is a loop-through plug that connects onto the sidelight instead.
Up closer, bottom connections;
At the bottom, you can see it is plugged into the standard loom indicator plug (brown plug into clear connector) with the loop-through plug that then connects to the indicator instead (that's the brown plug at the bottom, wrapped in black insulating tape for some reason).
The other white plug bottom LHS is the connector to the corner light itself. (Grey plug centre-background is the foglight plug)
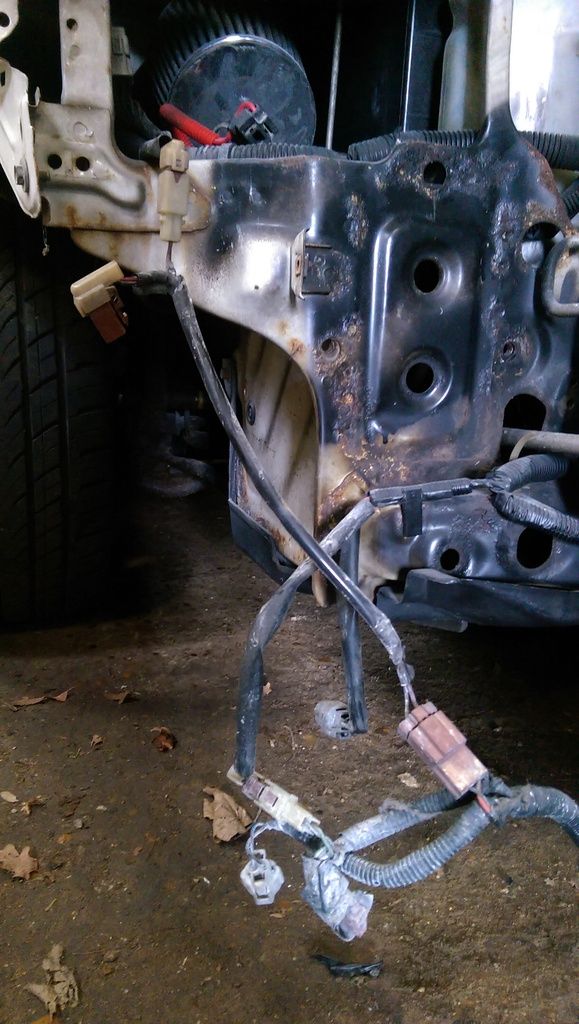
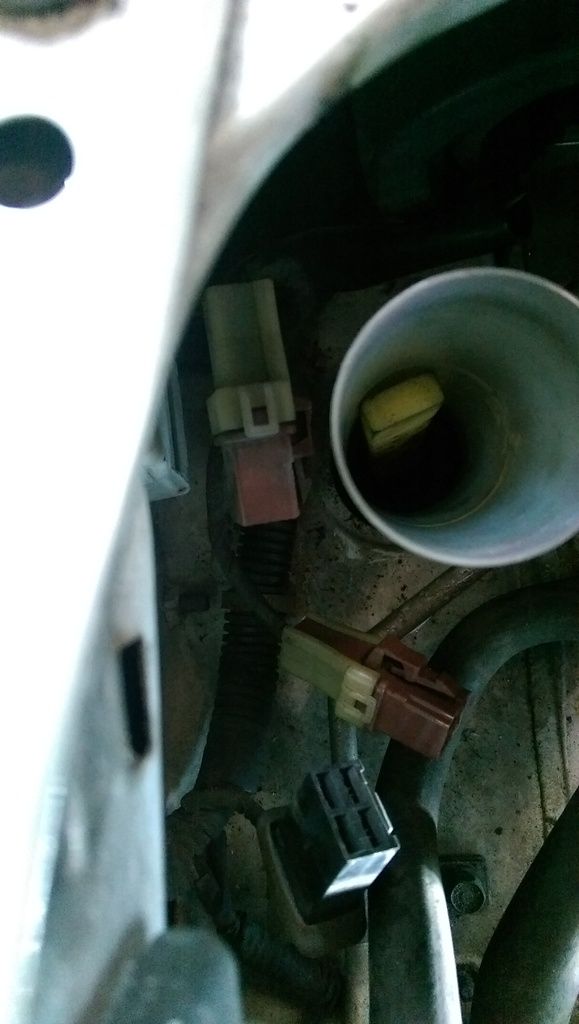
Passenger side (not come out too clearly, sorry );
);
Top brown plug (loose) is the sidelight plug. This is left as normal on passenger side.
The loom you can see directly behind that disappearing off to the side chassis rail, is the corner light wiring, that connects to the A/C fan/compressor relays (for power)
This is the full complete set up;
All plug 'n play.
Close up of drivers side gubbins;
Loop-through connection to sidelight;
Loop-through connection to indicator and connector to corner light;
Close ups of passenger side gubbins;
Loop-through connection to indicator and connector to corner light;
Loop-through connection to a/c compressor/fan relays (1 plug and 1 socket white/brown) plus an extra relay or fuse (not sure which, not investigated, the blue thing)
This is the connections all in place, on the drivers side;
Up close, top connections;
At the top, the loom is plugged into the standard loom sidelight plug and you can see there is a loop-through plug that connects onto the sidelight instead.
Up closer, bottom connections;
At the bottom, you can see it is plugged into the standard loom indicator plug (brown plug into clear connector) with the loop-through plug that then connects to the indicator instead (that's the brown plug at the bottom, wrapped in black insulating tape for some reason).
The other white plug bottom LHS is the connector to the corner light itself. (Grey plug centre-background is the foglight plug)
Passenger side (not come out too clearly, sorry
Top brown plug (loose) is the sidelight plug. This is left as normal on passenger side.
The loom you can see directly behind that disappearing off to the side chassis rail, is the corner light wiring, that connects to the A/C fan/compressor relays (for power)
--
Iain.
Iain.
Super Secret 1G (not really super secret!)
-
wurlycorner
- Ye are glad to be dead, RIGHT?
- Posts: 21511
- Joined: Sat May 19, 2012 3:33 pm
- My Generation: 4G
- Location: Chelmsford, Essex
- Has thanked: 2507 times
- Been thanked: 317 times
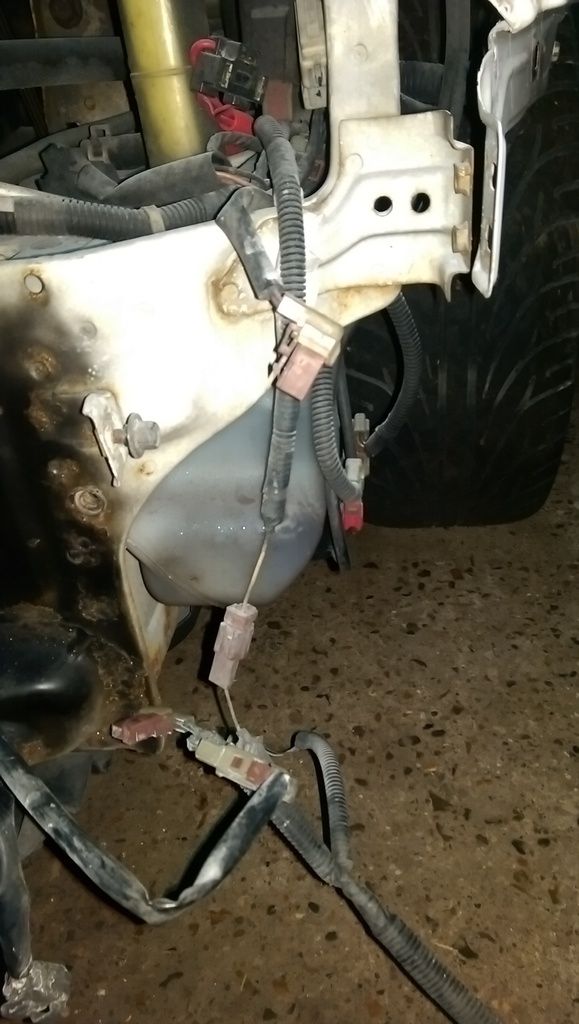
This is how the connectors work on the passenger side, into the car;
More close up;

The 2 black relays and the diode are the standard a/c relays on the car (I've unbolted, disconnected from the main car loom and removed them here, but still plugged into the corner light loom). The blue thing is the extra bit that comes on the corner light loom.
This is all the corner light loom in place on the car under where the black relays sit, but with the black relays unbolted and removed out of the way;
This area is a right pain in the arse to work in. No space and no slack in the looms.
I removed the top part of the windscreen washer bottle filler pipe, to help.
More close up;
The 2 black relays and the diode are the standard a/c relays on the car (I've unbolted, disconnected from the main car loom and removed them here, but still plugged into the corner light loom). The blue thing is the extra bit that comes on the corner light loom.
This is all the corner light loom in place on the car under where the black relays sit, but with the black relays unbolted and removed out of the way;
This area is a right pain in the arse to work in. No space and no slack in the looms.
I removed the top part of the windscreen washer bottle filler pipe, to help.
--
Iain.
Iain.
Super Secret 1G (not really super secret!)
-
wurlycorner
- Ye are glad to be dead, RIGHT?
- Posts: 21511
- Joined: Sat May 19, 2012 3:33 pm
- My Generation: 4G
- Location: Chelmsford, Essex
- Has thanked: 2507 times
- Been thanked: 317 times