
Dear All,
Further to an ignoramous scuffing my rear bumper.
My local bodywork guy has sorted the paintwork out to perfection.
However, I've noticed the bump has also dropped the rear bumper a fraction of an inch. It's only noticeable on left/right side profile, however, I'd like to refit it to ensure it fits as original. (It's not lose).
Can anyone please advise how I remove and refit it please?
Many thanks,
David
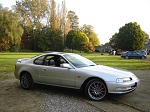
Congratulations to vtecmec for winning May/June's Lude Of The Month, with his DIY Turbo BB1 build.
>>> Click Here For Profile <<<

>>> Click Here For Profile <<<
Refitting 4th gen rear bumper


-
wurlycorner

- Ye are glad to be dead, RIGHT?
- Posts: 21496
- Joined: Sat May 19, 2012 3:33 pm
- My Generation: 4G
- Location: Chelmsford, Essex
- Has thanked: 2484 times
- Been thanked: 307 times
-
NafemanNathan

- LotM Winner
- Posts: 20144
- Joined: Sun Aug 08, 2010 9:37 pm
- My Generation: 0G
- Location: Yeovil, Somerset
- Has thanked: 8 times
- Been thanked: 124 times
It'll most likely be the bumper bar that's bent (This is what the bumper attaches to/hangs off of). To remove it there are (If my memory serves me right) 4 nuts, all accessible once you've removed the boot lining across that face. You'll need a 10mm socket on an extension as there's a hole in the inner skin to reach through. Make sure you don't loose the nuts in between the two skins.
You'll also need to remove the screws from around the arch (Where the mudguards would go), and there's also a screw about an inch and a half in from top corner (screwing vertically up into the rear quarter). Remove these and pull the sides of the rear bumper out to unclip.
The bumper is secured to the bumper bar by a number of push fasteners along the top edge (The centre ones are visible when the boot is open. The rest are hidden under the lights. Once you've undone all the fixings I mentioned in the first two paragraphs this whole bumper/bumper bar assembly will pull out in one piece. Be weiry of foglight wires pulling if you have one though. You may need to disconnect this prior to removal or in some cases during.
Once removed you can seperate the bumper from the bumper bar. To do this unscrew the push fixings with a cross-head screwdriver. You can unscrew them the majority of the way and then pull the screw to pull both bits out.
Once you've seperated the two items, refit the bumper bar to the car on it's own. Do all the nuts back up securely and you'll be able to see where the bar is sagging. You then need to physically bend the bar back to shape. You'll want a uniform distance running between the bumper bar and the underside of the lights. Not too close thought as you obviously need to slide the bumper back in.
Once you think you've manipulated it enough, try the bumper back on (without any fixings), just by sliding it into place. Be weiry of the sides of the bumper scratching on the paintwork though. Clip these sides into place as well though. You might need to get down level with the clip just to understand what you're clipping it into, sometimes you can slide the bumper over the clip. Once clipped in stand back to check out your realignment. It'll be a trial and error affair, so remove and amend if necessary.
Once happy, it's a reversal of removal, although I'd do the bumper bar nuts up securely before fitting the wheel arch screws back. The vertical screws into the rear quarter should be the last fixings to do up.
Last edited by NafemanNathan on Mon May 18, 2015 10:52 am, edited 1 time in total.

-
NafemanNathan
- LotM Winner
- Posts: 20144
- Joined: Sun Aug 08, 2010 9:37 pm
- My Generation: 0G
- Location: Yeovil, Somerset
- Has thanked: 8 times
- Been thanked: 124 times
-
vanzep
- Supporter 2016
- Posts: 7142
- Joined: Sun Jan 29, 2012 6:38 pm
- My Generation: 4G
- Location: Edinburgh
- Has thanked: 305 times
- Been thanked: 505 times
Im sure i have heard of a fix where you simply stick on some foam to the bumper bar on the area where it has dropped - this should take up some or all of the gap at one side.
Reason for suggesting this is i have a spare bumper bar and have tried reshaping it off the car and its not an easy part to bend as it is a relatively thin pressed steel part and prone to twisting etc
Reason for suggesting this is i have a spare bumper bar and have tried reshaping it off the car and its not an easy part to bend as it is a relatively thin pressed steel part and prone to twisting etc
1996-2000 1993 EG9 Blue Civic 1.6 Vti - Traded in against the BB4
2000-2019 1994 2WS BB4 Milano Red JDM Prelude Si VTEC LSD
2015 on > 1991 4WS BB1 Phantom Pearl Grey JDM Prelude Si VTEC LSD
2021 ON > 1998 2WS BB6 White Pearl JDM Prelude Si VTEC
2000-2019 1994 2WS BB4 Milano Red JDM Prelude Si VTEC LSD
2015 on > 1991 4WS BB1 Phantom Pearl Grey JDM Prelude Si VTEC LSD
2021 ON > 1998 2WS BB6 White Pearl JDM Prelude Si VTEC
-
NafemanNathan
- LotM Winner
- Posts: 20144
- Joined: Sun Aug 08, 2010 9:37 pm
- My Generation: 0G
- Location: Yeovil, Somerset
- Has thanked: 8 times
- Been thanked: 124 times